
I nearly tossed an old butcher block I had been using as a catchall, because it always made the island look messy. One rainy afternoon I swapped everything for a single shallow tray, a small herb pot, and one ceramic pitcher, and the island finally read like an intentional surface instead of a junk landing. That small rescue is what made me stop overbuying and start editing.
If you want kitchen island styling that works for rentals and family life, this list is for you. These ideas are practical, mostly low-cost, and rated beginner to intermediate for time and skill. Expect pieces you can swap seasonally, easy protective finishes, and layouts that leave at least 12 inches of clear prep space on either side for actual cooking. I tested most of these across three rentals and one awkward tiny-kitchen renovation, so what follows balances looks with real use.
1. Curated Tray Vignette For Everyday Use
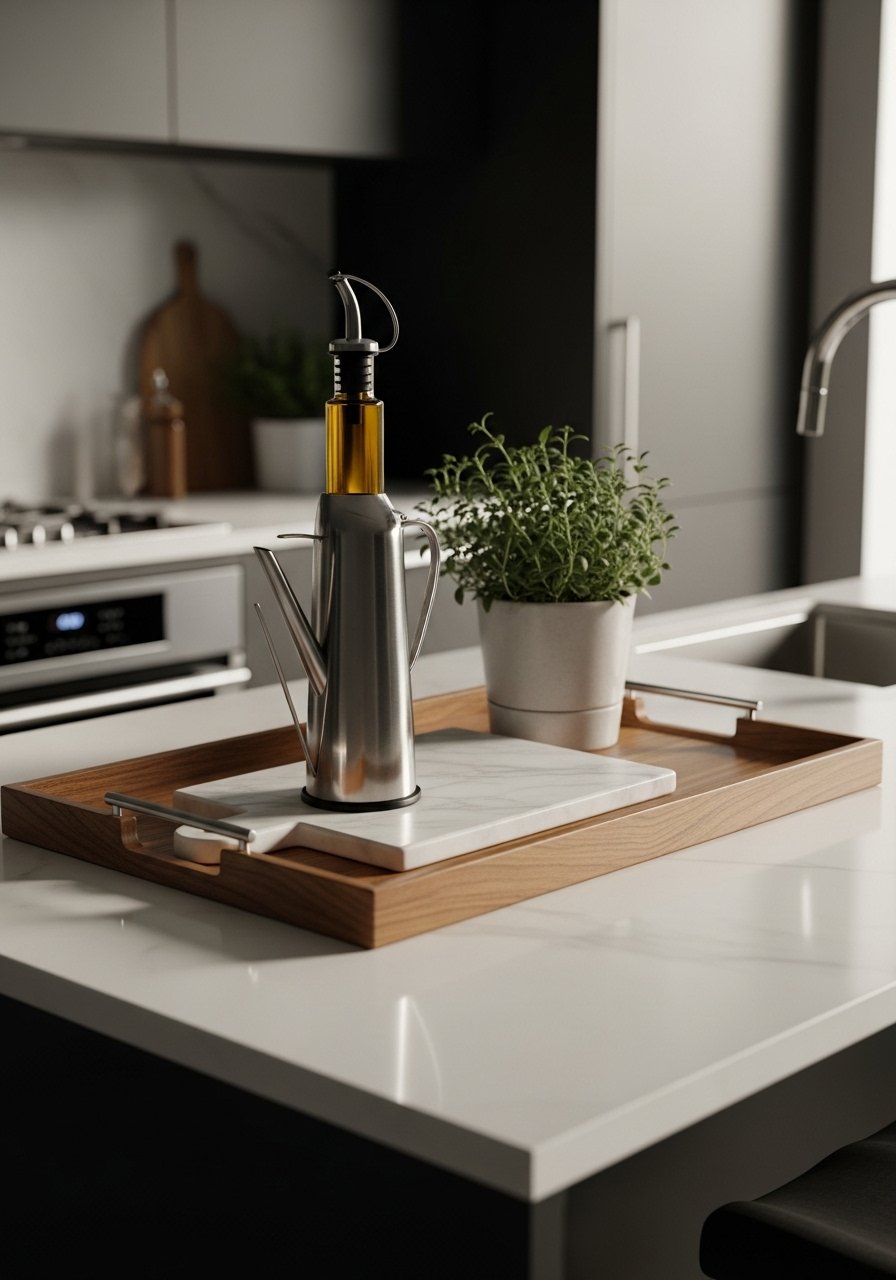
A shallow tray organizes the island so it feels intentional instead of piled. Visually it works because trays create a single plane, and functionally it corrals oils, fruit, or salt so crumbs stay contained. Aim for a tray no wider than two thirds of your island depth, and leave 12 inches of usable counter on either side for prep. Try a wood serving tray with a marble cutting board for contrast. This is renter-friendly, and it takes five minutes to swap when you need a clear workspace. In photos the tray often looks staged with too many props, so in reality pick three items only: an anchor, a green, and a utility.
Mistake to Avoid: Piling the tray with more than three items, which looks cluttered and defeats the containment purpose.
2. Low Centerpiece That Lets Conversation Flow
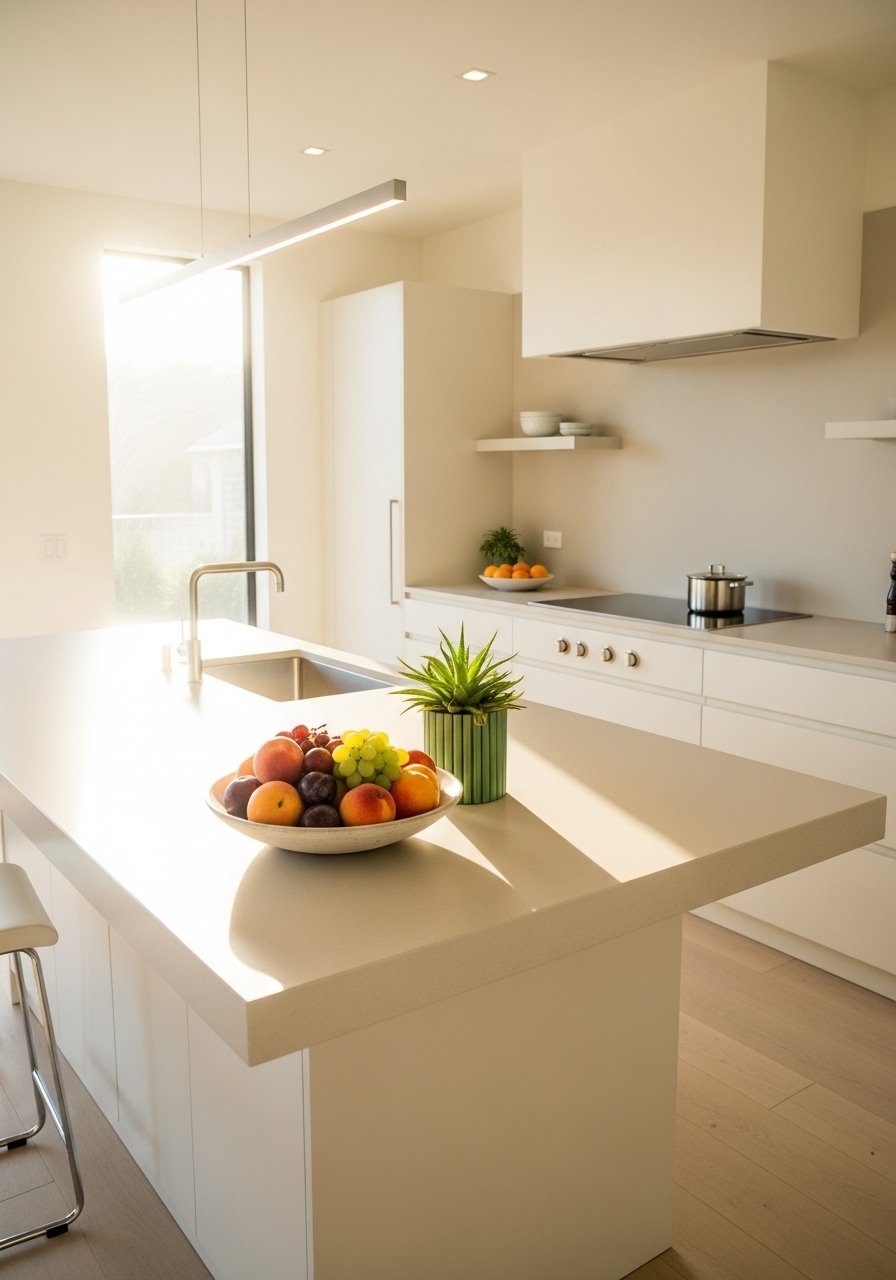
Tall vases block sightlines and turn the island into a dinner-table barrier. Keep centerpieces under 12 inches in height so people can see each other across the counter. Use a ceramic fruit bowl or a shallow planter and rotate one accent each season. Composition-wise, follow a 2:1 ratio for grouping, for example two small tumblers and one anchor bowl. This idea is quick, inexpensive, and great for households that use the island for both meals and homework. Photo styling will often add more greenery than necessary, but a single living herb pot is enough to make the space feel alive.
Mistake to Avoid: Choosing a tall floral arrangement that blocks sightlines and interrupts island use.
3. Scaled Pendant Cluster Instead of One Oversized Lamp
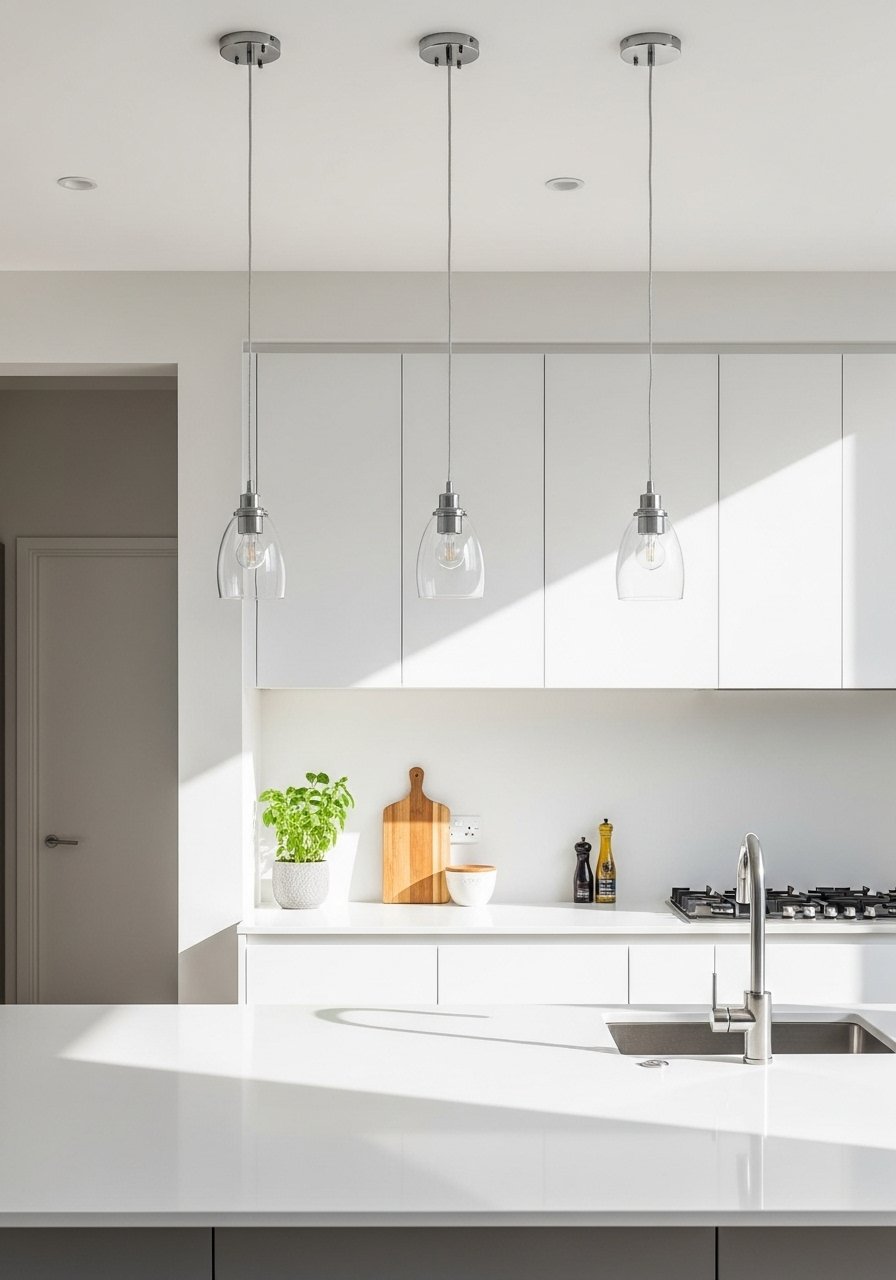
Lighting makes the island feel finished, but scale matters. For a 7-foot island try three pendants hung 30 to 34 inches above the countertop and spaced about 24 inches apart. That spacing keeps illumination even and avoids the one-heavy look. If you rent, choose plug-in pendant kits or shorter pendants with a canopy that hides excess cord. I like pairing a simple glass pendant light with a low-profile dimmer so the island works from bright prep to soft dining. Photos often push drama with huge fixtures, but in real life you want sightlines and hand clearance when passing platters.
Mistake to Avoid: Hanging a heavy single pendant too low, which obstructs view and makes the island feel top-heavy.
4. Open Storage Baskets For a Lived-In Look That Holds Up
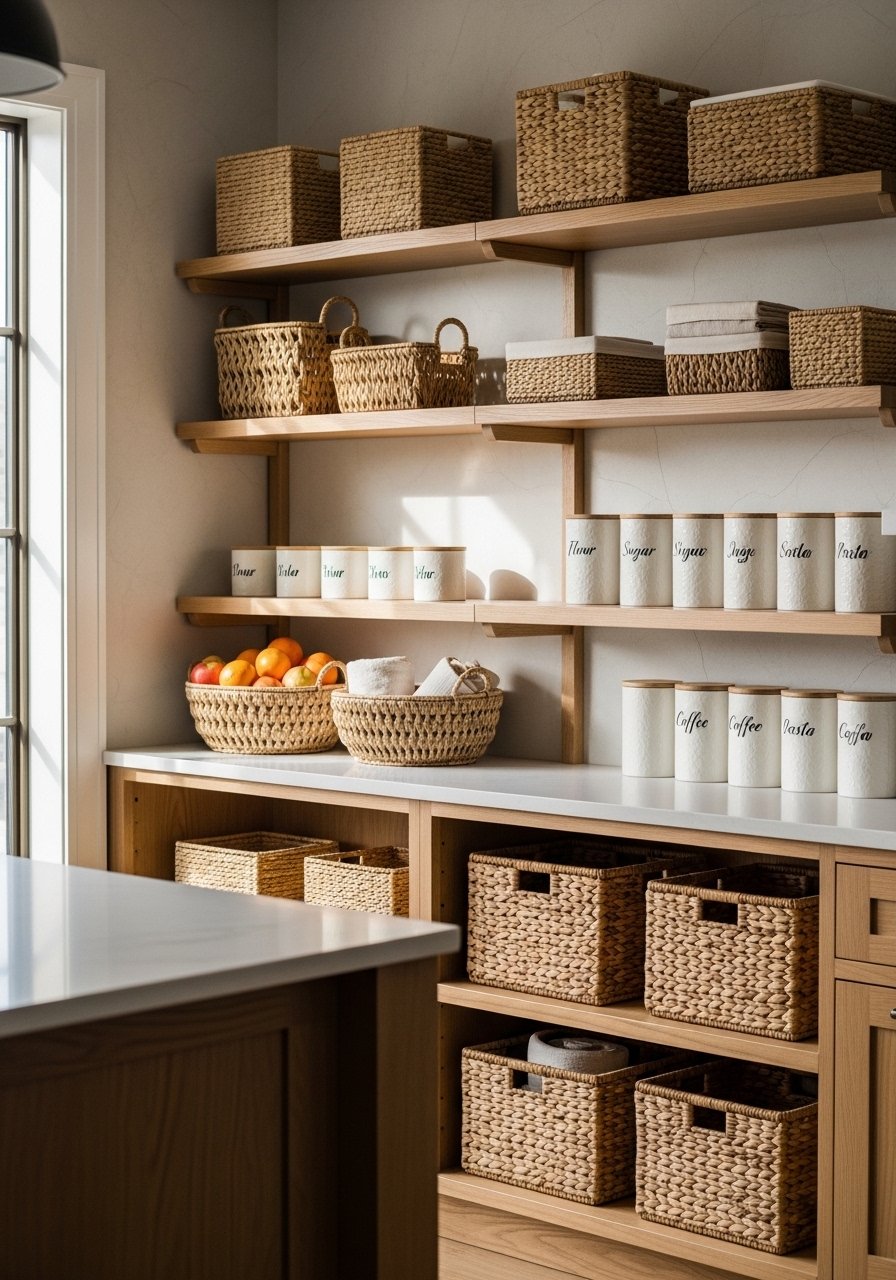
Open shelving beside or under an island brings function and texture. Use two to three matching woven baskets for napkins, placemats, and kid gear, and one set of clear canisters for frequently used staples. Keep shelf depth to about 12 inches for reachability. A woven storage basket plus clear canisters keeps things neat and quick to access. This works in small spaces because it avoids deep cabinets that swallow items. Competitors often skip maintenance tips, so remember to rotate linens monthly and wipe canisters weekly to avoid crumbs.
Mistake to Avoid: Using mismatched baskets of different styles, which reads visually chaotic.
5. Hidden Charging Caddy For Everyday Tech
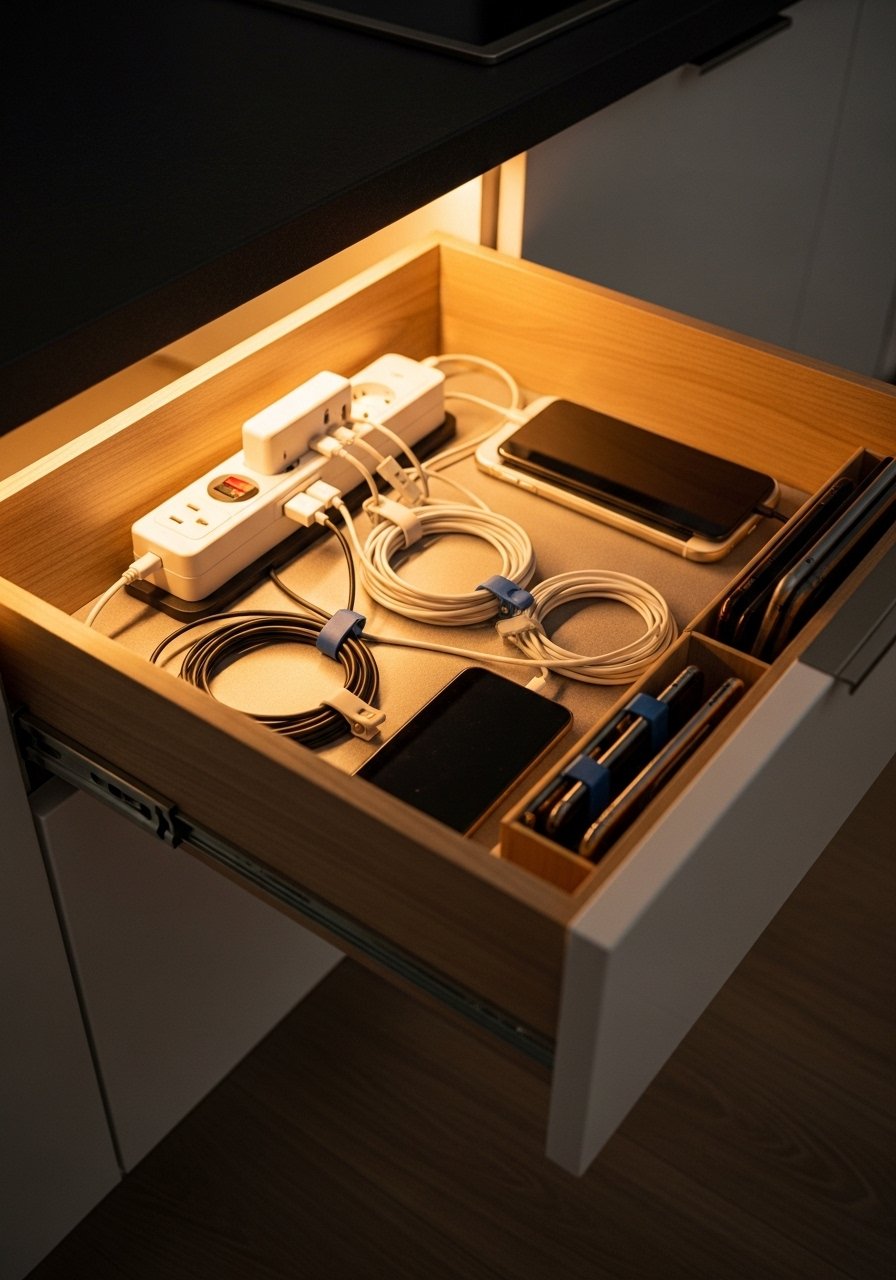
If your island doubles as a landing zone, add a shallow drawer organizer with a grommet and a small power strip. Keep the charging surface at the back of the drawer and route one hidden cord to the outlet. A compact cable organizer box and a slim power strip stop daily cord spill, and they are renter-friendly when installed with removable adhesive. Note the depth rule: use drawers at least 4 inches deep to avoid crushing plugs. Many styling pieces ignore tech, but this small addition is what makes the island usable without becoming an eyesore.
Mistake to Avoid: Leaving chargers coiled on the counter where they attract junk and collect crumbs.
6. Mix Stools By Material To Add Intentional Texture
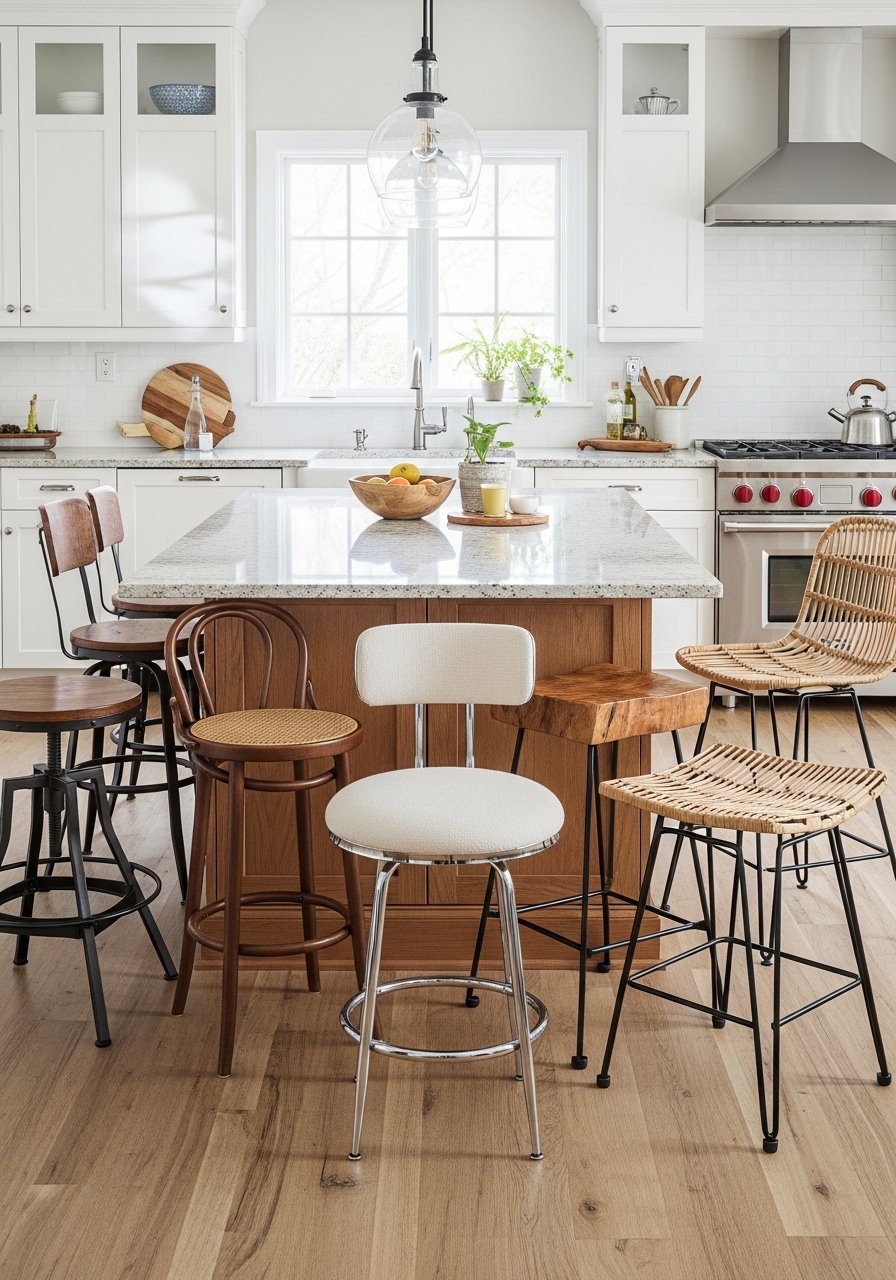
Stools set the island tone. Mix two stools of one material with a contrasting anchor piece at the end for balance. For a 36-inch island counter, choose 24- to 26-inch seat heights and leave 9 to 12 inches between seats for elbow room. A metal industrial stool paired with an upholstered counter stool reads curated rather than mismatched. Budget alternatives include thrifted seats reupholstered with removable covers. Photos often show perfectly spaced stools; in real life measure before you buy to avoid crowding.
Mistake to Avoid: Buying stools that are too wide or too tall for the island, which makes seating uncomfortable.
7. Protective Surfaces And Washable Runners For Real Life
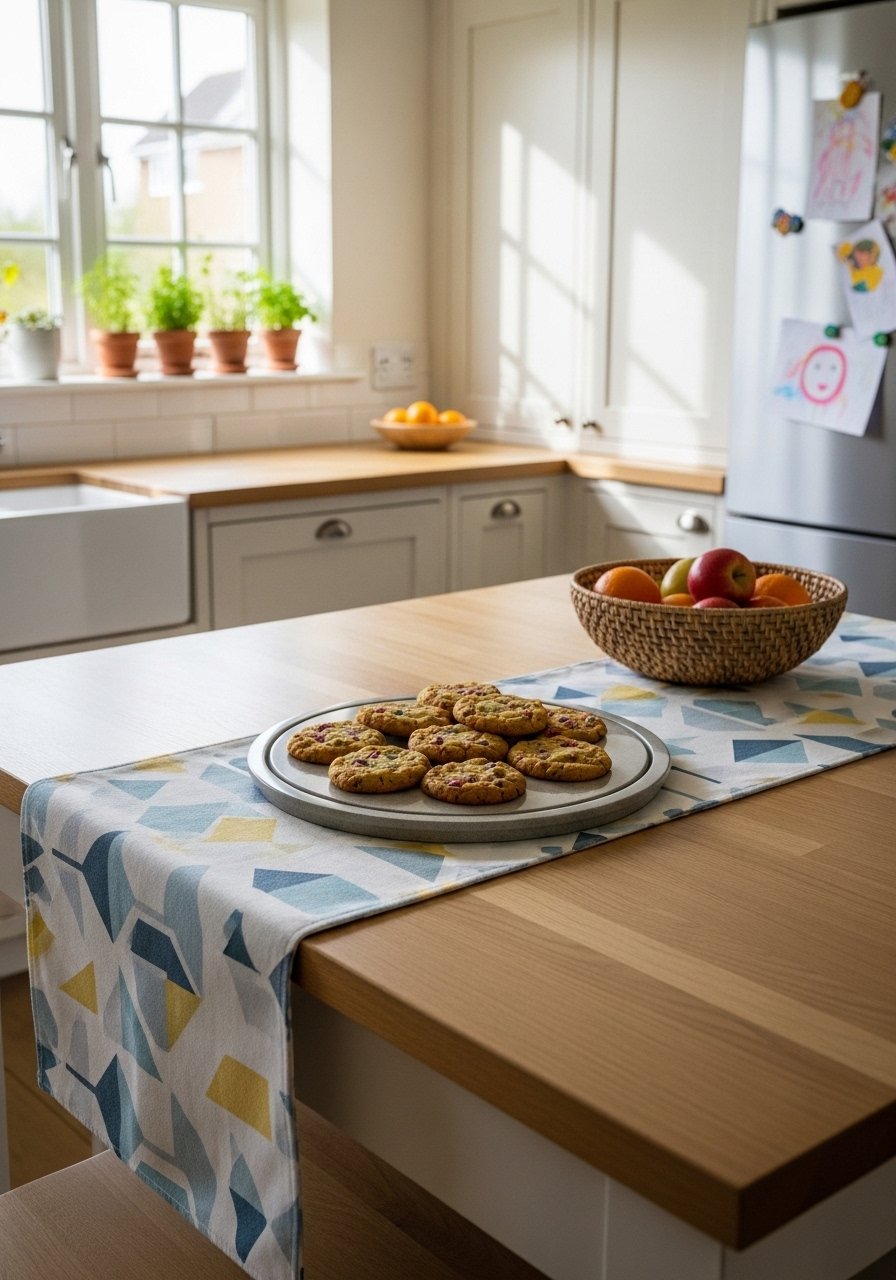
If your island sees cooking, homework, and crafts, choose surfaces that tolerate use. A washable runner keeps the island warm without trapping stains; aim for one that is machine washable and has a short pile for crumbs to fall through. A washable kitchen runner plus a matte stoneware serving platter protects the countertop and reads intentional. For wood islands, maintain an oil finish twice a year and keep a small dish for wet utensils to avoid permanent rings. Many styling guides forget wear and care, but these choices keep the island practical and pretty.
Mistake to Avoid: Using delicate linens that stain easily and are impossible to launder after daily use.
If any of these ideas have you ready to shop, here are the essentials I keep grabbing.
Kitchen Island Styling Kit
Textiles & Soft Goods:
- washable kitchen runner (~$25-50). Easy to toss in the wash after crafts or meals.
- velvet pillow covers (~$12 each). Use on nearby seating to tie island colors to the room.
Trays & Serving:
- wood serving tray (~$20-40). Keeps oils and condiments contained.
- matte stoneware serving platter (~$30-50). Dishwasher safe and sturdy.
Organization & Tech:
- woven storage basket (~$18-35). For placemats and kids’ supplies.
- cable organizer box (~$15-30). Keeps chargers hidden and neat.
Island Styling Habits I Keep
Rotate one anchor item seasonally. Swap a ceramic bowl for pumpkins in fall or citrus in winter. Changing one big piece makes the whole surface feel new without a full refresh.
Grab a microfiber dish towel and keep it folded in the tray. It stops water rings faster than a decorative linen and is cheap to replace.
Keep a small under-cabinet LED strip on a dimmer for task and mood light. Warm 2700K LEDs read more inviting than bright white and make food look better for evening meals.
Most people line up five small things on the island. Instead, use one oversized floor cushion or a single large bowl as the anchor, then add one or two small accents. It grounds the look without clutter.
If you have kids or pets, keep a spill-proof silicone placemat in the tray for snack time. It protects surfaces and makes cleanup one quick swipe.
