
I kept painting a high-shine pink and wondering why it looked flat in photos, until a weekend of practice taught me that almond shape, opacity, and finish all have to work together. One small technique change made my manicure look like an intentional set instead of a rushed at-home job, and now I plan color and finish before I pick a shade.
These ideas are for people who like feminine but wearable nails, on a budget or willing to get a salon fill. Expect mostly simple steps, a few pro tools if you want longer wear, and options for natural nails, gels, and acrylics. A tech who works at a salon downtown showed me small curing tweaks that save time and prevent ghost lines, so I leaned on those practical fixes throughout the list.
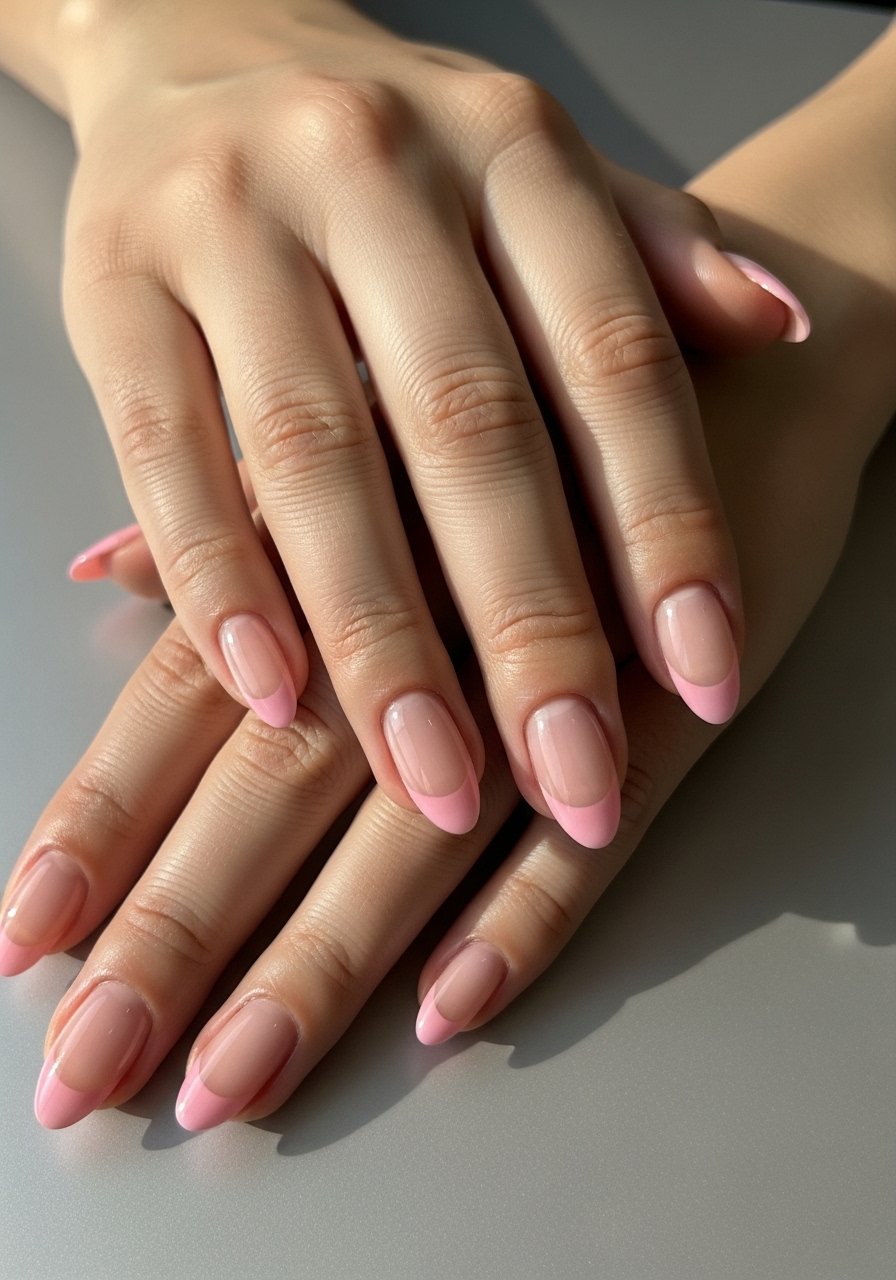
1. Classic Sheer Pink With Gloss
Style/Vibe: Classic Sheer
Best For: Long natural or gel overlays / everyday wear
Skill: Beginner
Two thin coats of a pearl-pink polish give that salon-sheen without feeling heavy. Use a ridge-filling base coat first, then apply two thin layers, each wiped with a lint-free wipe and alcohol when using gel, curing 30 seconds under an LED lamp between layers. I like pairing a pearl-pink gel, try pearl-pink gel polish for photos that keep depth. Finish with a high-gloss top coat like fast-dry top coat to lock shine.
Mistake to Avoid: Applying one thick coat and expecting it to self-level.
2. Matte Blush Almond With Accent Dot
Style/Vibe: Modern Matte
Best For: Medium nails / low-maintenance events
Skill: Beginner
Matte finishes read cleaner on almond shapes, because light softens the tip. Apply two thin coats of a matte blush polish, then add a single glossy dot using a small dotting tool and a tiny drop of clear top coat for contrast. For tools use a dual-ended dotting tool like nail dotting tool set. The dot keeps the look intentional, and matte means fewer visible chips when you type or wash dishes.
Mistake to Avoid: Rubbing matte top coat before it fully cures, which dulls unevenly.
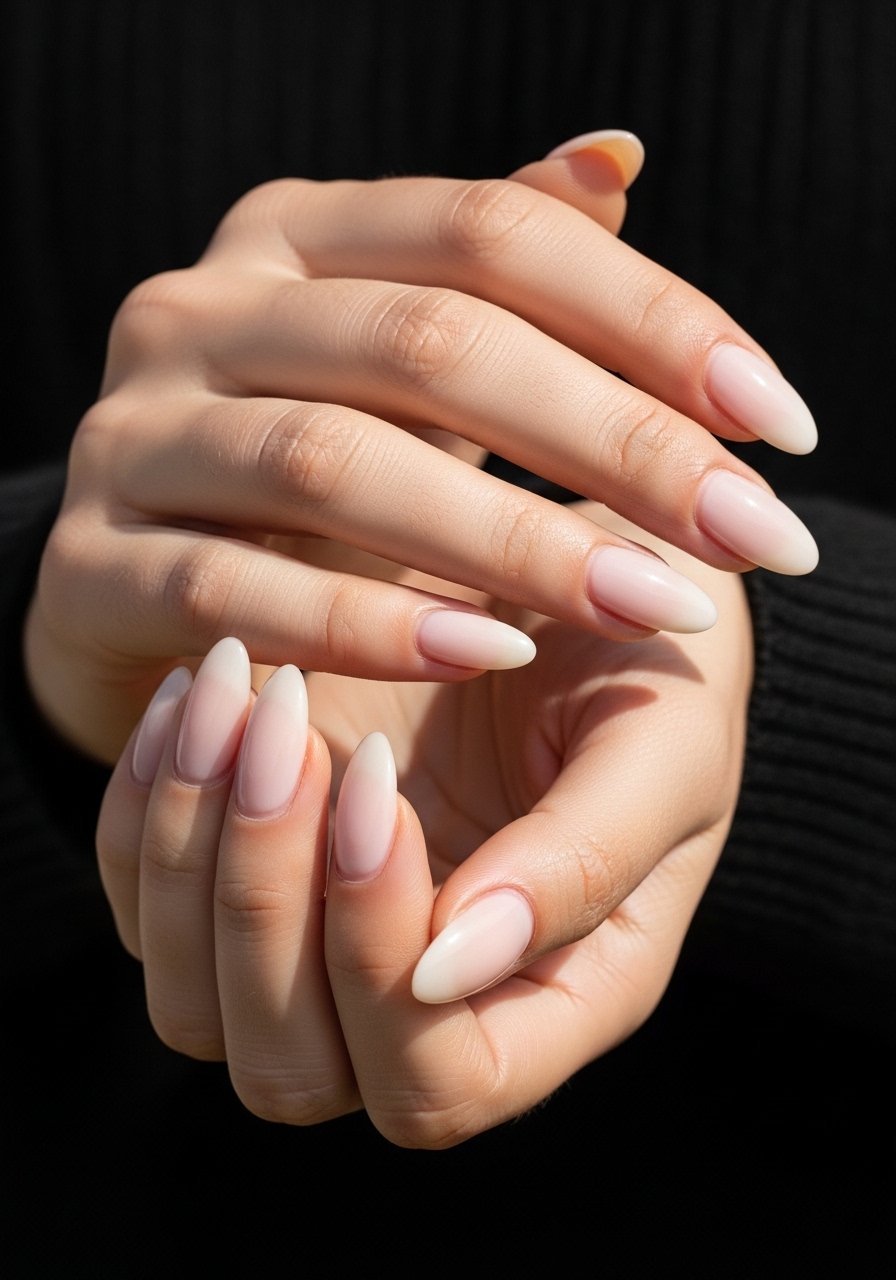
3. Baby Boomer Pink Ombre Almond
Style/Vibe: Soft Gradient
Best For: Short to medium nails / formal occasions
Skill: Intermediate
The key is a soft fade from milky white at the tip to warm pink at the cuticle. Sponge the color in very light taps using a makeup sponge, two passes, then clean the edges. For gels, cure each light pass for 20 to 30 seconds so opacity builds without texture. I reach for a flexible gel like sheer-pink builder gel for control. It photographs as a clean French with softer edges.
Mistake to Avoid: Over-blending and losing the almond silhouette.
4. Glossy Hot Pink Almond With Gold Foil
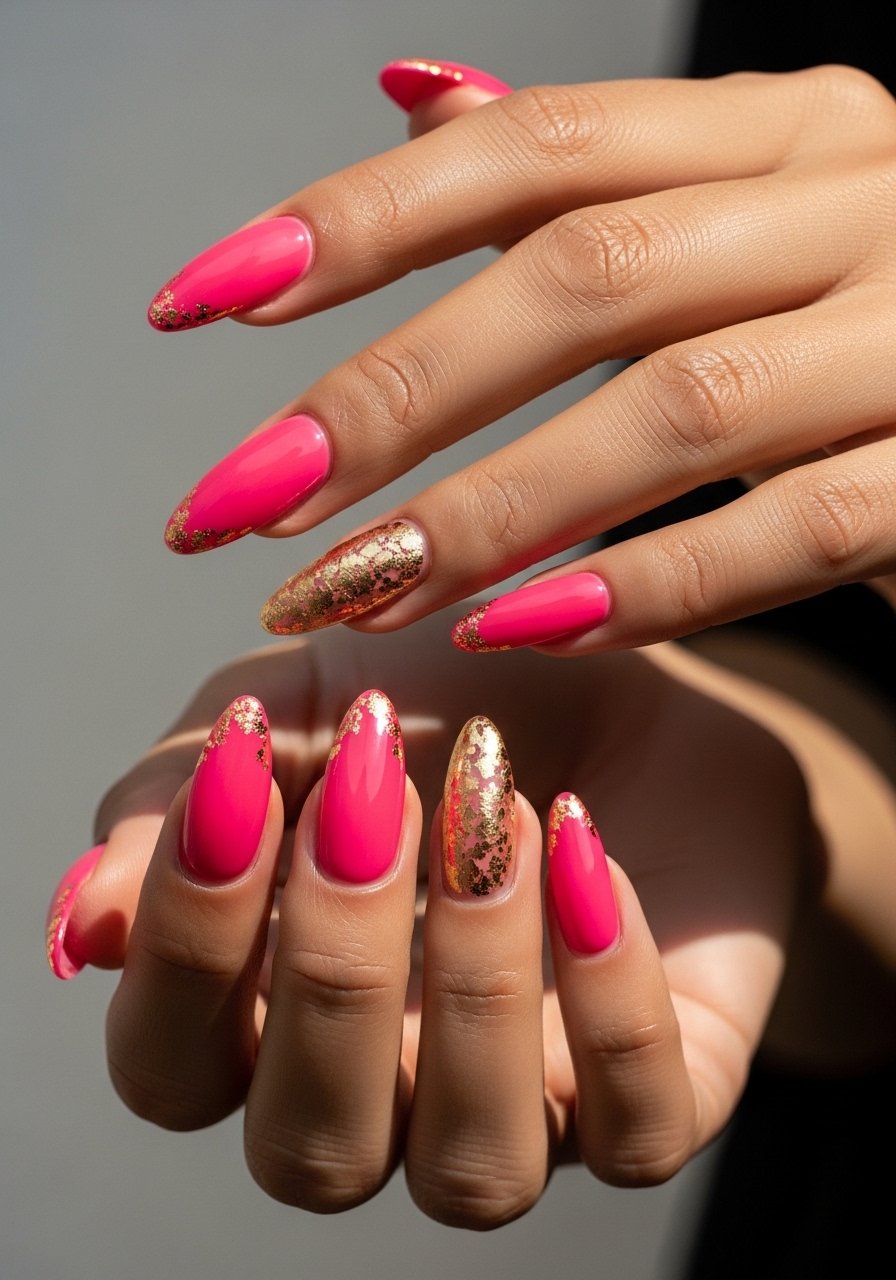
Style/Vibe: Statement Gloss
Best For: Long nails / nights out
Skill: Intermediate
A saturated hot pink pops on almond tips without feeling heavy if you keep foil placement minimal. Paint two thin coats of a pigmented gel color, press tiny foil fragments onto tacky gel, then seal with a thick glossy top coat cured 60 seconds under LED. I use nail foil flakes paired with peel-and-place foil adhesive. The foil reflects light and keeps the almond profile visible even in flash photography.
Mistake to Avoid: Smearing foil across the surface instead of placing small, deliberate pieces.
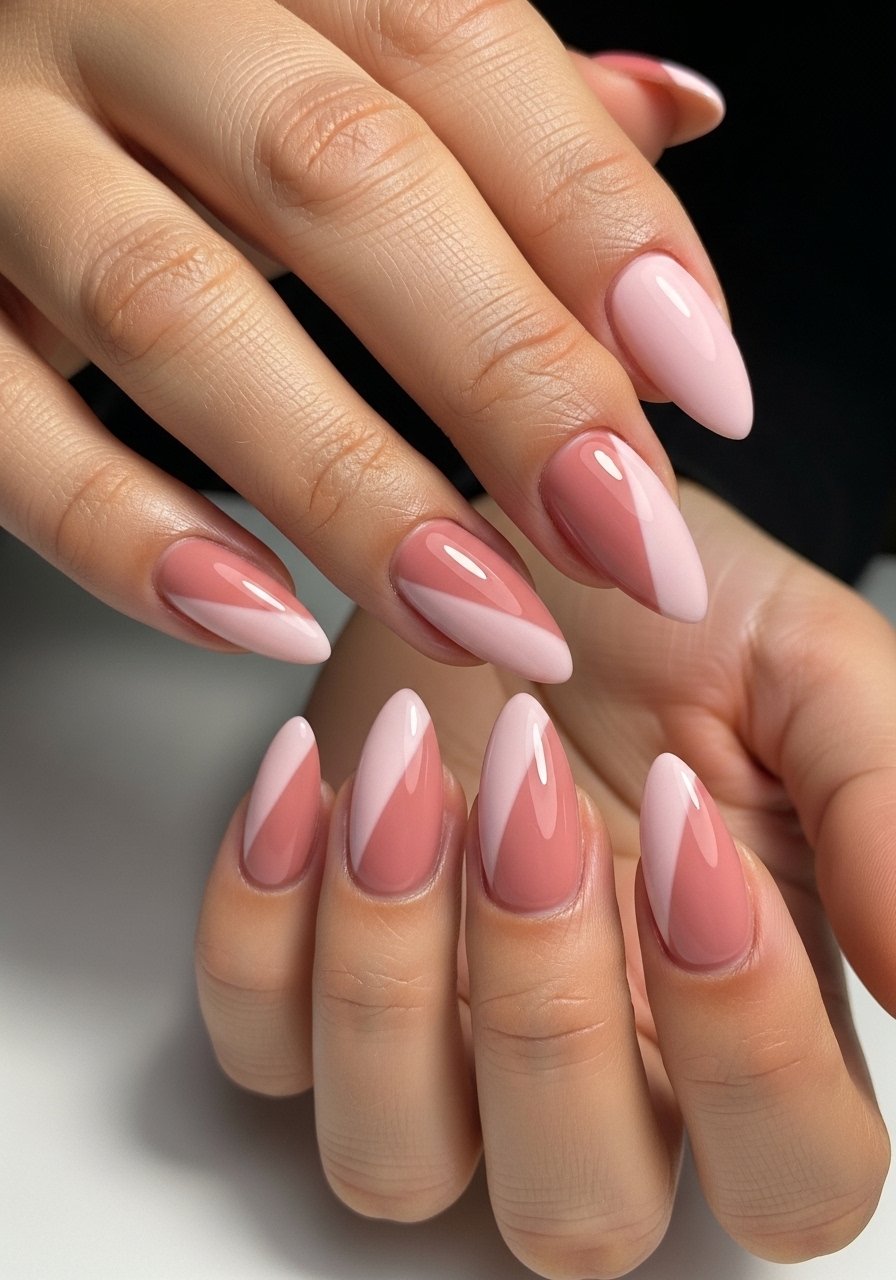
5. Sheer Pink With Negative-Space Crescent
Style/Vibe: Airy Modern
Best For: Short to medium nails / work-friendly looks
Skill: Beginner
Negative space at the cuticle gives a manicure breathing room. Paint sheer pink, then carefully use a small round sticker as a guide to keep the crescent clean, or freehand with a tiny brush. Use nail vinyl circles for repeatable shapes. The omission of color near the cuticle keeps your hands looking longer and the almond shape appears lifted.
Mistake to Avoid: Stretching the crescent too far up the nail and shortening the visual length.
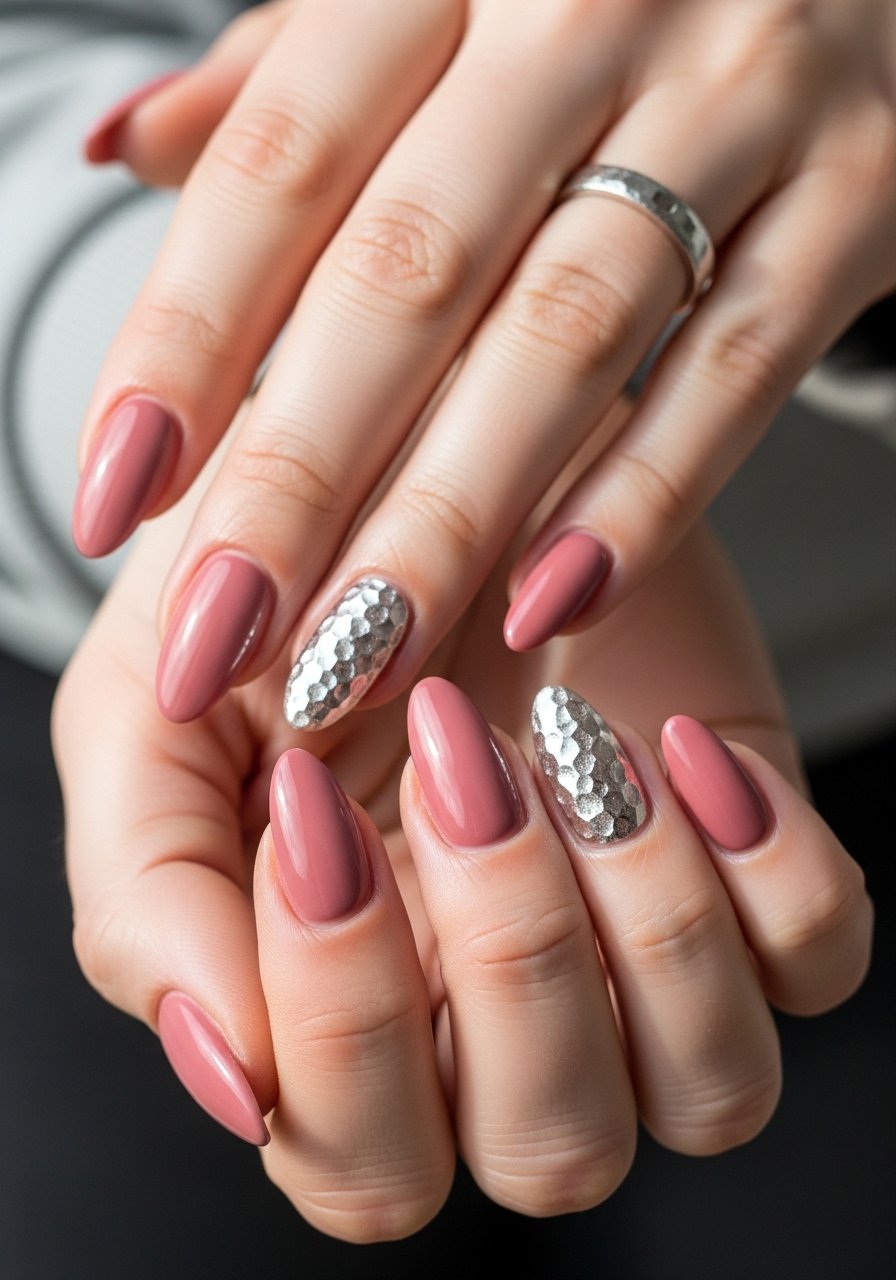
6. Blush Chrome Almond Accent
Style/Vibe: Subtle Metallic
Best For: Short nails / trend-forward minimalists
Skill: Intermediate
A single chrome accent modernizes a classic pink set. Apply your base color in two thin coats, then on the accent nail buff to remove shine and rub chrome powder in with a sponge applicator. Seal carefully with a non-wipe top coat. Try rose-chrome powder and a compact lamp for 30 seconds cures. This gives dimension without overt glitter.
Mistake to Avoid: Applying chrome powder over a thick base coat so it slips and feels uneven.
7. Gradient Glitter Tip Almond

Style/Vibe: Sparkle Gradient
Best For: Long nails / special events
Skill: Intermediate
Concentrate fine glitter at the free edge and feather it down about a third of the nail. Use a small flat brush to place loose glitter into a clear top coat, then seal. A little goes a long way, so start light. I use microglitter mix for fine sparkle that photographs like soft snow. Seal with two thin passes of top coat, curing each for 30 seconds.
Mistake to Avoid: Dumping glitter onto a wet surface and trapping clumps.
If you want to shop the core tools that appear across these looks, here are the products I actually turn to.
Pink Almond Mani Essentials
- Polish & Color: pearl-pink gel polish (~$12-20). Reliable opacity without streaks.
- Top Coats: fast-dry top coat (~$8-15). Use for glossy seals.
- Matte Finish: matte top coat (~$7-12). Keeps edges looking soft.
- Tools: nail dotting tool set (~$6-10). For tiny accents and dots.
- Nail Art: rose-chrome-powder-nail (~$8-14). For metallic accents.
- Adhesives & Guides: nail-vinyl-circles (~$5-9). For clean crescents and negative space.
- Cuticle Care: cuticle-oil-pen (~$6-12). Keeps pink tones fresh.
- Curing Lamp: led-nail-lamp (~$20-45). Short cures reduce ghost lines.
- Glitter & Foil: microglitter-nail (~$7-15). For delicate sparkle.
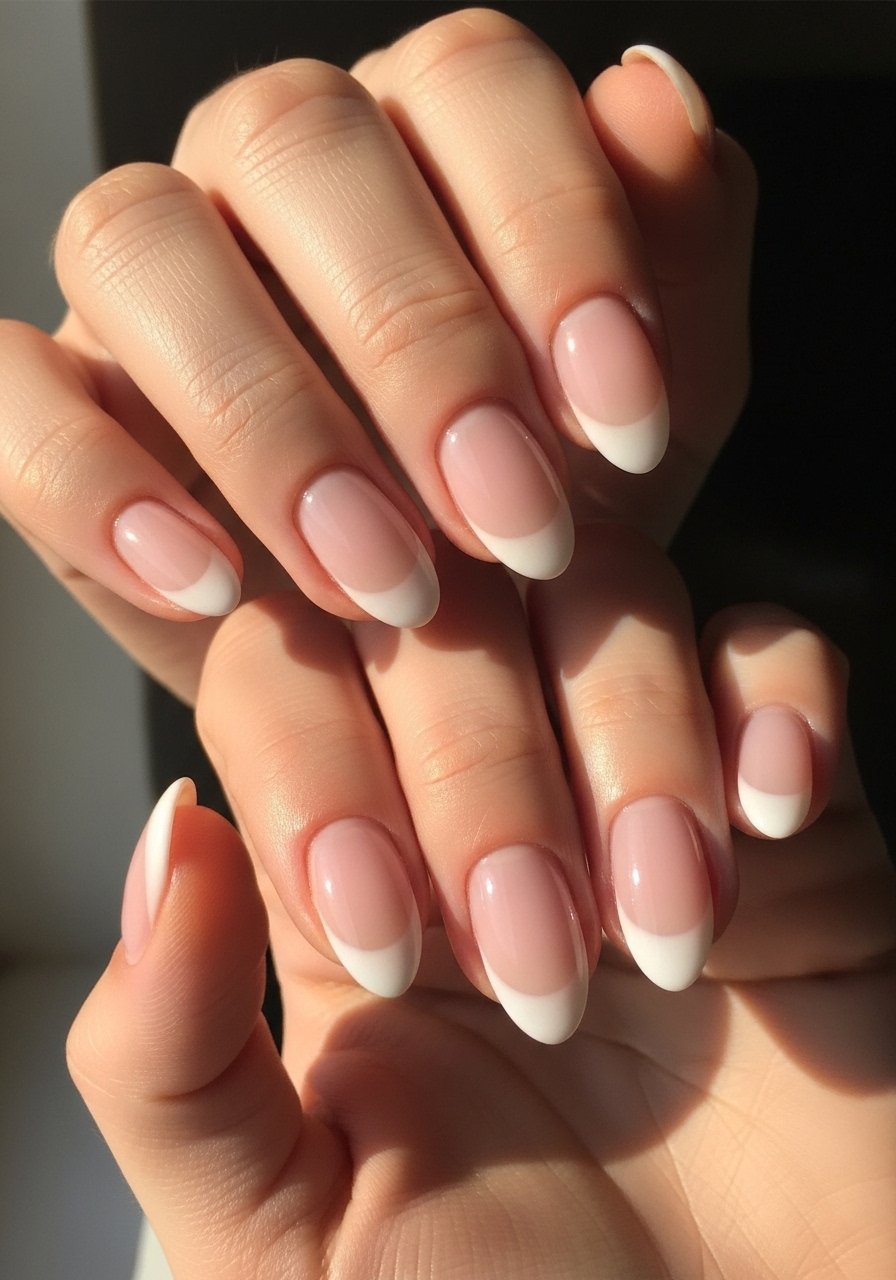
8. Subtle French Pink Almond With Thin Tip
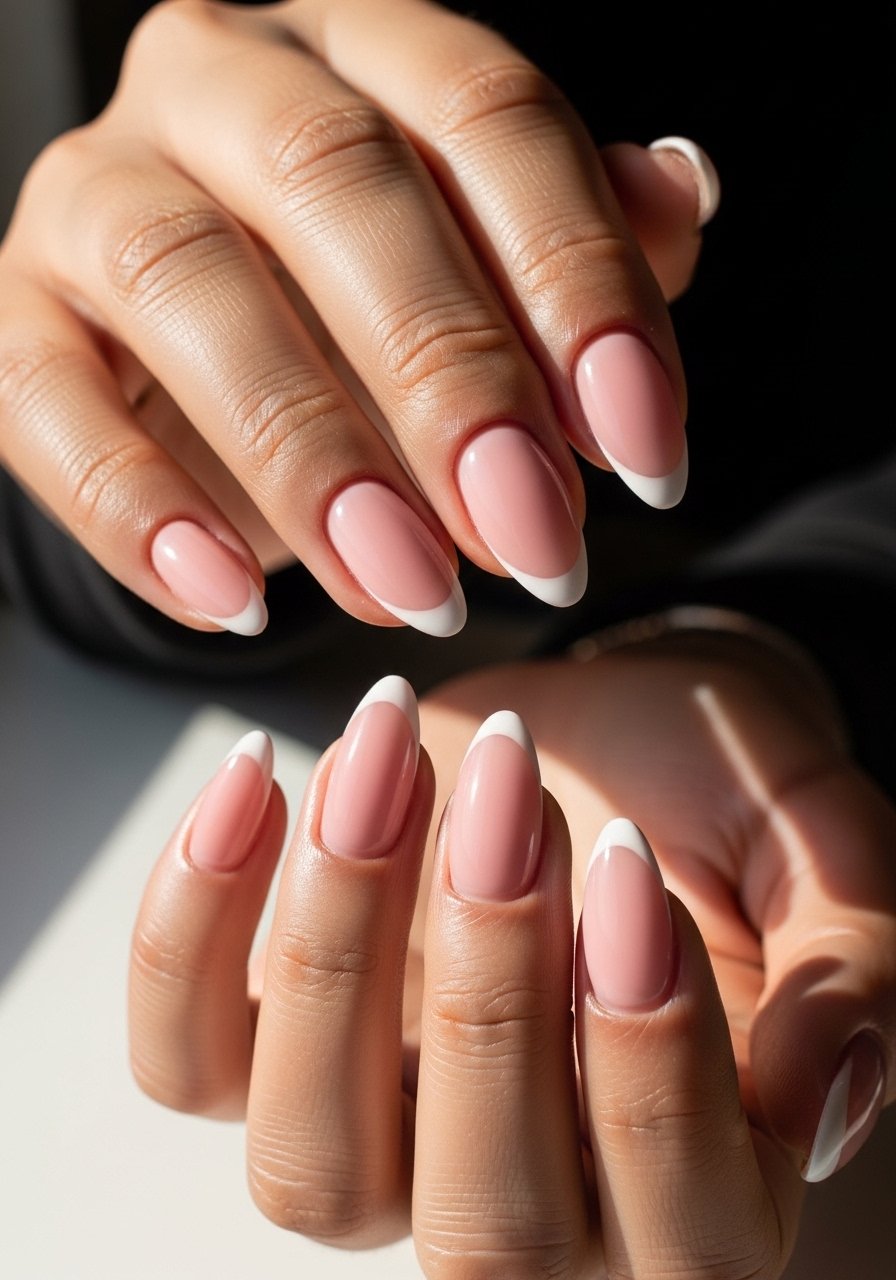
Style/Vibe: Delicate French
Best For: Medium nails / interviews and photos
Skill: Beginner
A thin white smile line keeps the look elegant without being literal French. Use a fine brush to paint a narrow tip, roughly one millimeter wide, on a soft blush base. Try fine-stripe nail brush for control. Because the line is narrow, porcelain photos stay crisp and the almond shape keeps the hand looking tapered.
Mistake to Avoid: Making the white tip too thick, which shortens the nail visually.
9. Jelly Pink Almond With Encapsulated Flower
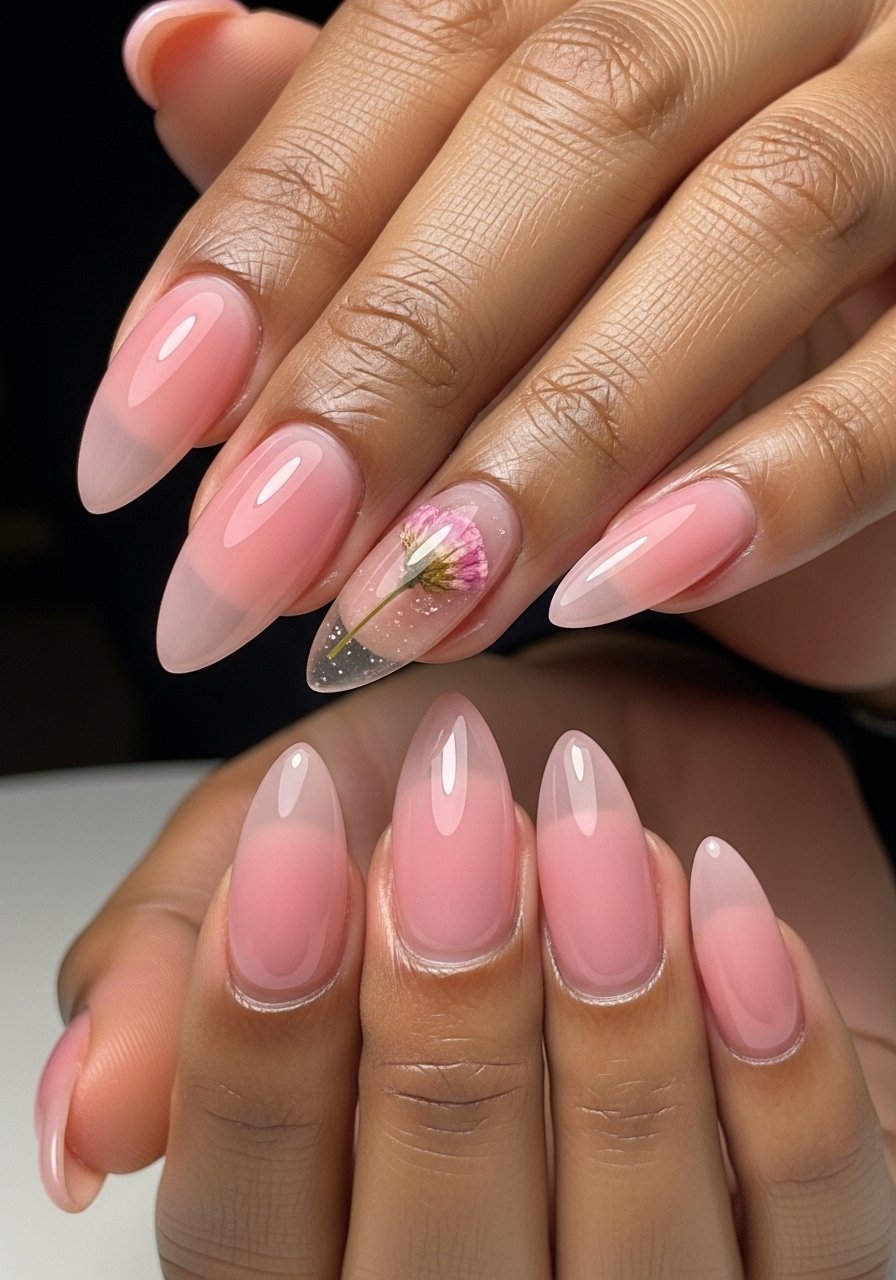
Style/Vibe: Modern Jelly
Best For: Long nails / creative mani lovers
Skill: Advanced
Jelly pink finishes have depth when layered. Place a tiny dried flower on a thin clear builder-gel base, then encapsulate with a second layer and finish with a glossy top coat. Use small dried florals and tweezers, like mini dried flowers for nails. Cure each thin layer to avoid trapped bubbles. The result is a soft floating-in-water look.
Mistake to Avoid: Encapsulating without pressing out trapped air, which creates tiny bubbles.
10. Pastel Pink Almond With White Line Art

Style/Vibe: Artistic Minimal
Best For: Short nails / weekend galleries
Skill: Intermediate
Thin white line art reads crisp on a pastel pink. Use a brush with a steady hand or a nail art pen and keep the lines continuous rather than many stops so they flow with the almond curve. I like nail art fine liner pen for precision. Seal with a glossy coat for contrast or matte for a quiet look.
Mistake to Avoid: Starting lines with shaky strokes instead of a steady anchor point.
11. Soft Dusty Rose With Textured Accent
Style/Vibe: Tactile Softness
Best For: Medium nails / tactile interest seekers
Skill: Intermediate
Texture can read as upscale when confined to one nail. Use a textured top coat or microbead application on an accent nail only, then seal carefully. A tiny amount of texture keeps every other nail smooth and wearable. Try textured-top-coat-nail for a raised finish you can control. It feels interesting without catching on fabrics.
Mistake to Avoid: Texturing every nail and losing the almond silhouette.
12. Two-Tone Pink Almond With Diagonal Cut
Style/Vibe: Graphic Two-Tone
Best For: Long nails / fashion-forward outfits
Skill: Intermediate
A diagonal color split is bold but not loud when both tones are pink. Tape a straight diagonal, paint the first color, remove tape, let cure, then paint the second. Clean the line with a tiny brush. Use nail-striping-tape for crisp edges. This shape emphasizes the almond tip and elongates the nail visually.
Mistake to Avoid: Peeling tape up too quickly and dragging wet polish.
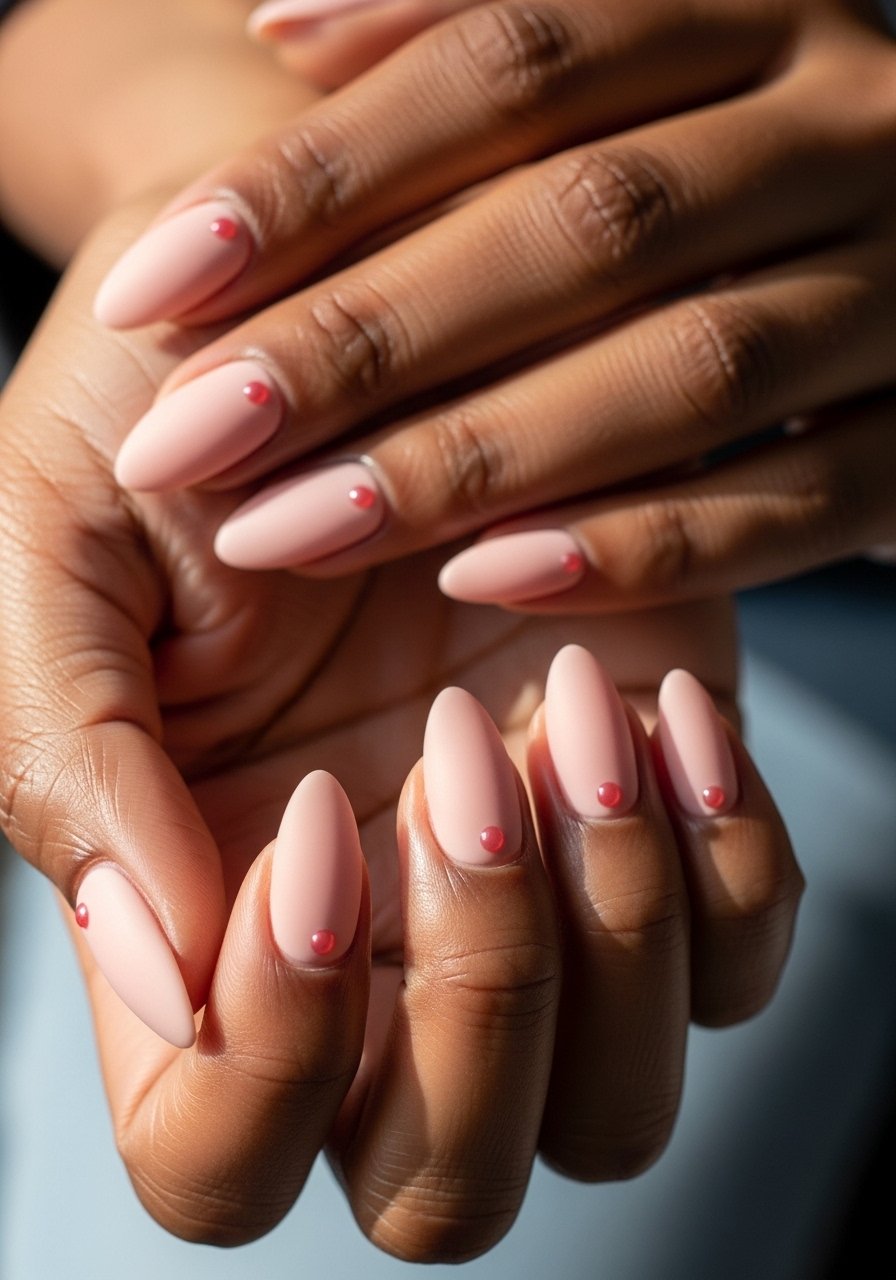
13. Soft Pink With Tiny Gem Cluster
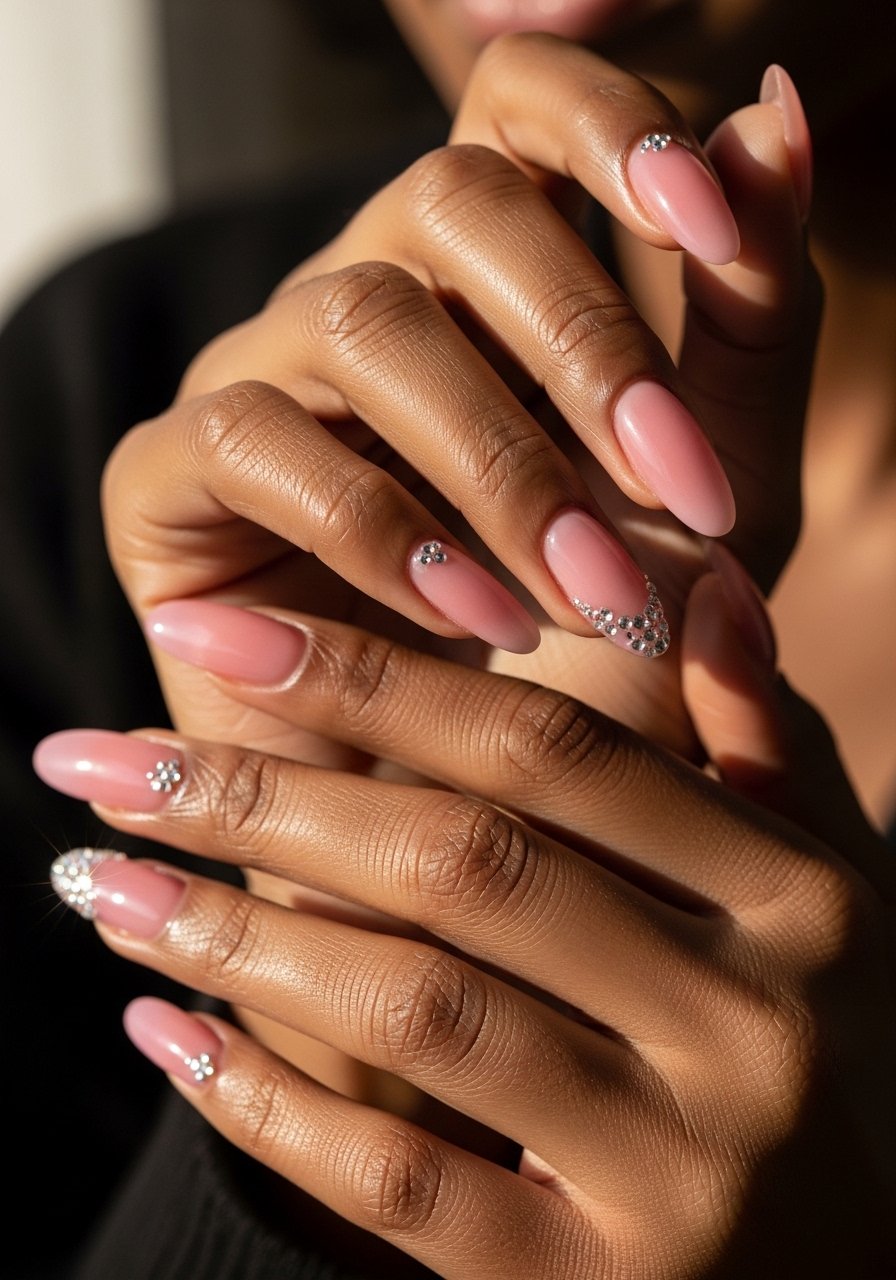
Style/Vibe: Subtle Sparkle
Best For: Medium nails / weddings or photos
Skill: Intermediate
A small gem cluster at the cuticle makes the set feel curated. Use jewelry-grade micro gems affixed with a dab of clear gel, then cure and seal with top coat around the stones only. Try micro nail gems. Keep the cluster small and centered so the almond shape remains the star.
Mistake to Avoid: Gluing oversized gems that lift quickly.
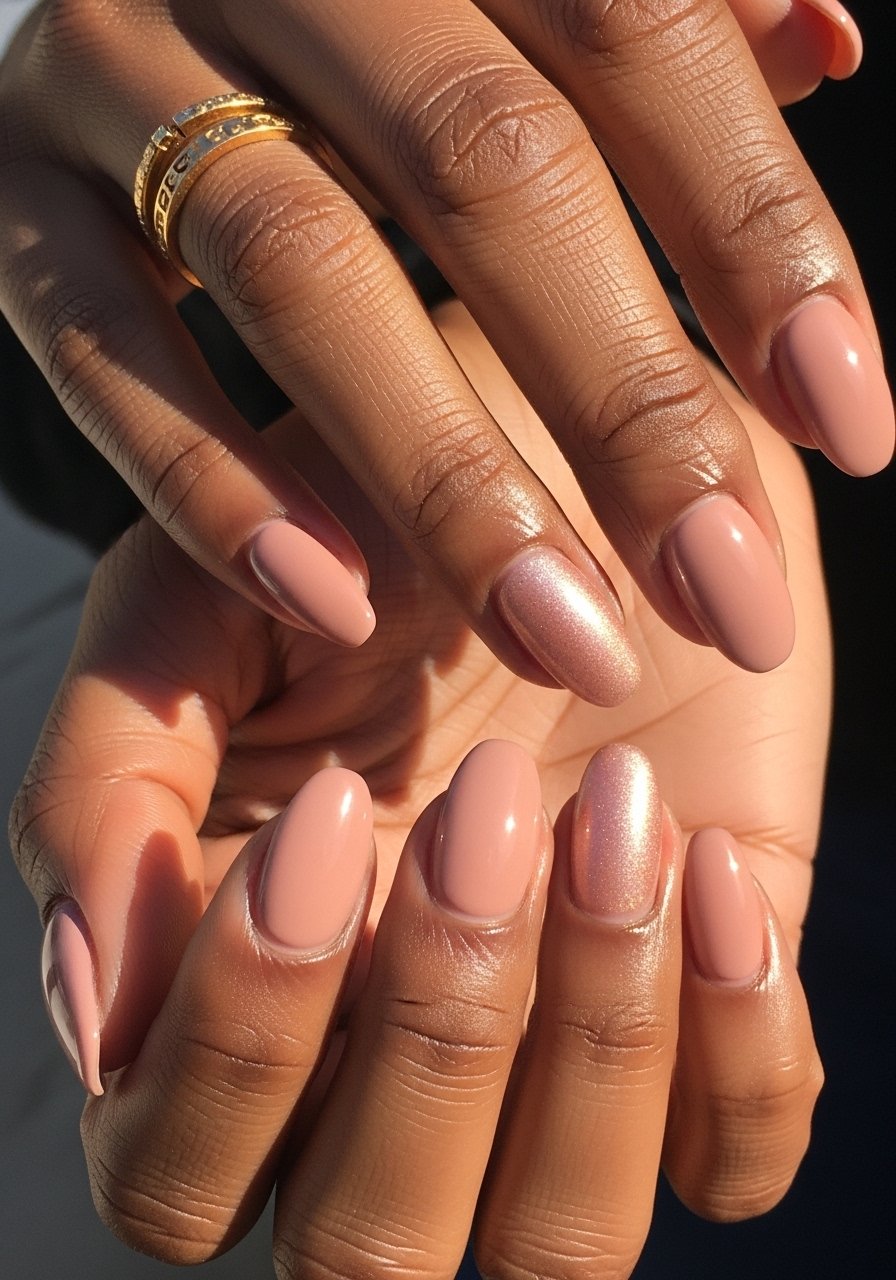
14. Warm Pink Almond With Shimmery Sheen
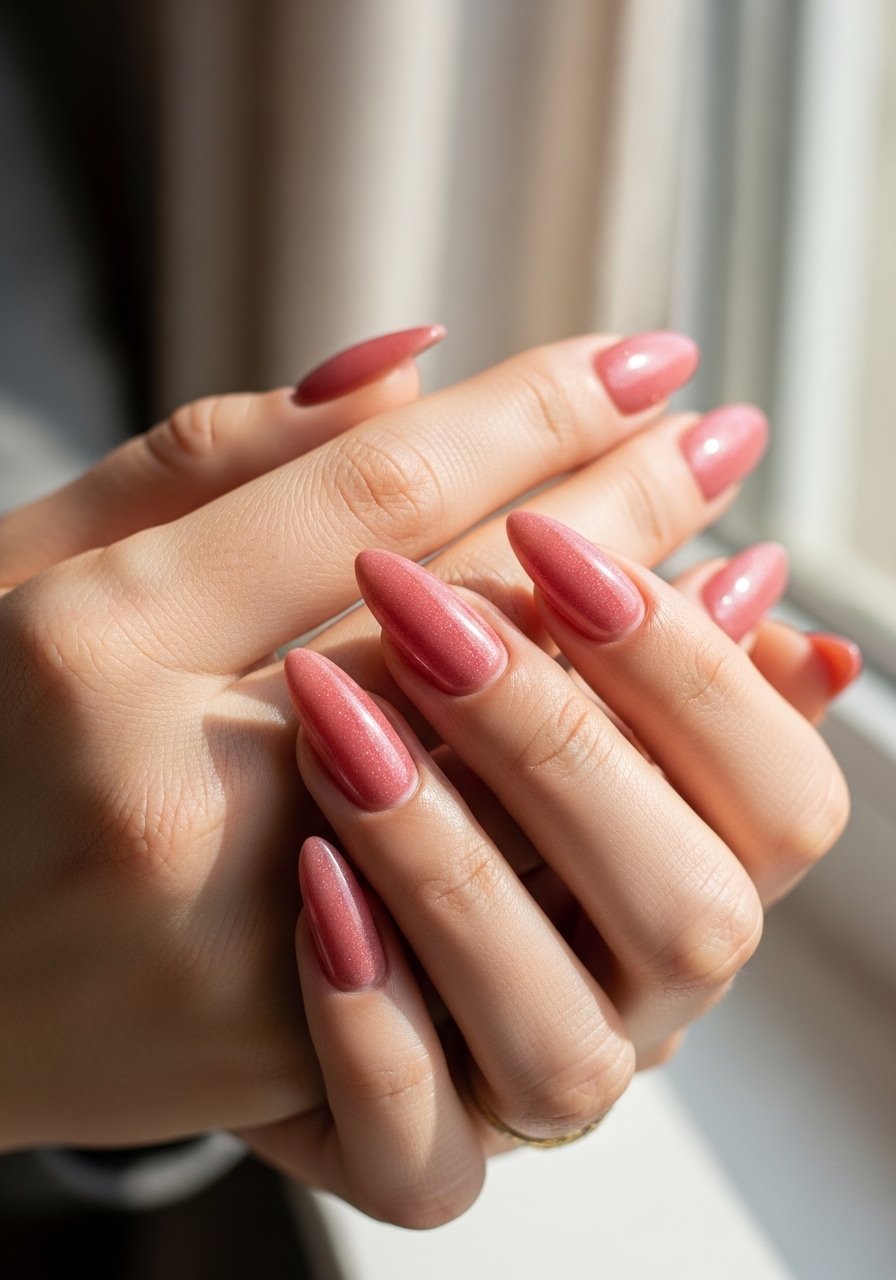
Style/Vibe: Warm Sheen
Best For: Long nails / daytime glamour
Skill: Beginner
A baked shimmer polish gives a faint metallic sheen that catches light but stays soft. Apply two thin coats, then seal with glossy top coat. Use a baked-powder polish like baked-shimmer-polish for even distribution. The warmth pairs well with gold jewelry and keeps palms from appearing washed out in photos.
Mistake to Avoid: Applying shimmer over a textured base which creates patchy reflection.
15. Short Almond Pink With Accent Negative Space Stripe
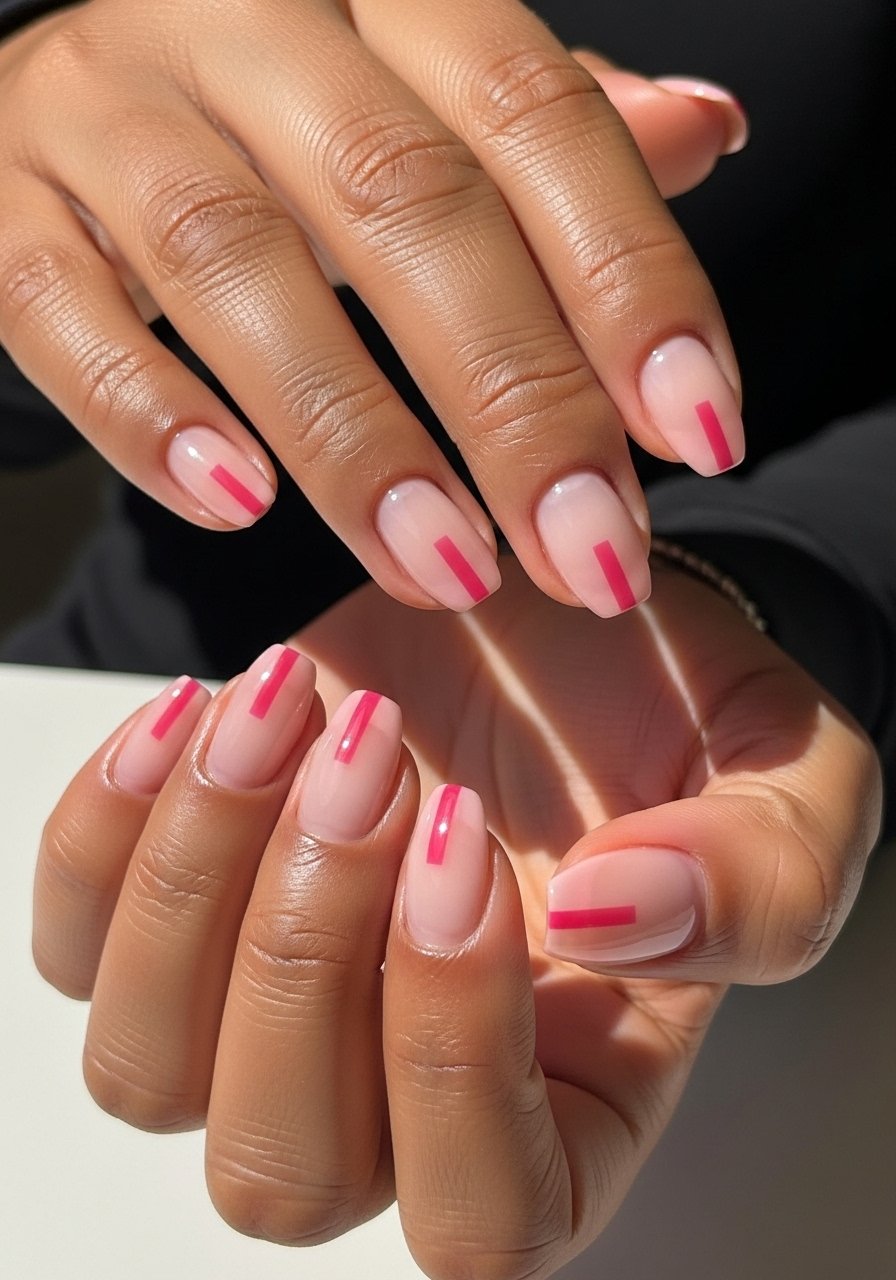
Style/Vibe: Clean Graphic
Best For: Short nails / everyday chic
Skill: Beginner
Vertical negative-space stripes draw the eye upward and make short nails seem longer. Use a skinny striping brush and paint a translucent pink on either side of the stripe. For at-home ease use thin-striping-brush-nail. This is quick, low-cost, and looks intentional even after a few chips.
Mistake to Avoid: Making the stripe too wide so it shortens the nail visually.
Almond Pink Mani Habits
Thin coats beat one thick coat every time. Three thin layers of a quick-dry top coat look smoother and last longer than one gloopy layer.
Grab cuticle-oil-pen. Daily oiling keeps the pink base looking fresh and prevents lifting, especially around negative-space designs.
If you are using gel, cure each thin color layer for 30 to 60 seconds under an led-nail-lamp to prevent ghost lines and uneven gloss.
Most people file too aggressively at the sides. Use a gentle 180-grit file and shape with light strokes, then refine the curve with a buffer and fine-grit nail file for a smooth almond silhouette.
Start with a clean base. Wipe your nail plate with alcohol or a nail prep wipe before any application. I keep lint-free-nail-wipes in my kit and they save minutes on cleanup.
