
I kept asking artists to shrink the spider so it would fit under a bracelet, and every time the result read like a postage stamp, not a piece. The moment it clicked was when one artist sketched the spider slightly larger and angled, so it read from the front even when my arm relaxed. That small change made the design read like it belonged to my forearm, not my wristwatch.
If you want forearm designs that read well from multiple angles and survive sleeves and sun, these nine ideas cover easy-to-book pieces through the single-session experiments I tried across five shops I have visited, with notes on pain, time, and what to avoid.
1. Fine-Line Single-Form Spider
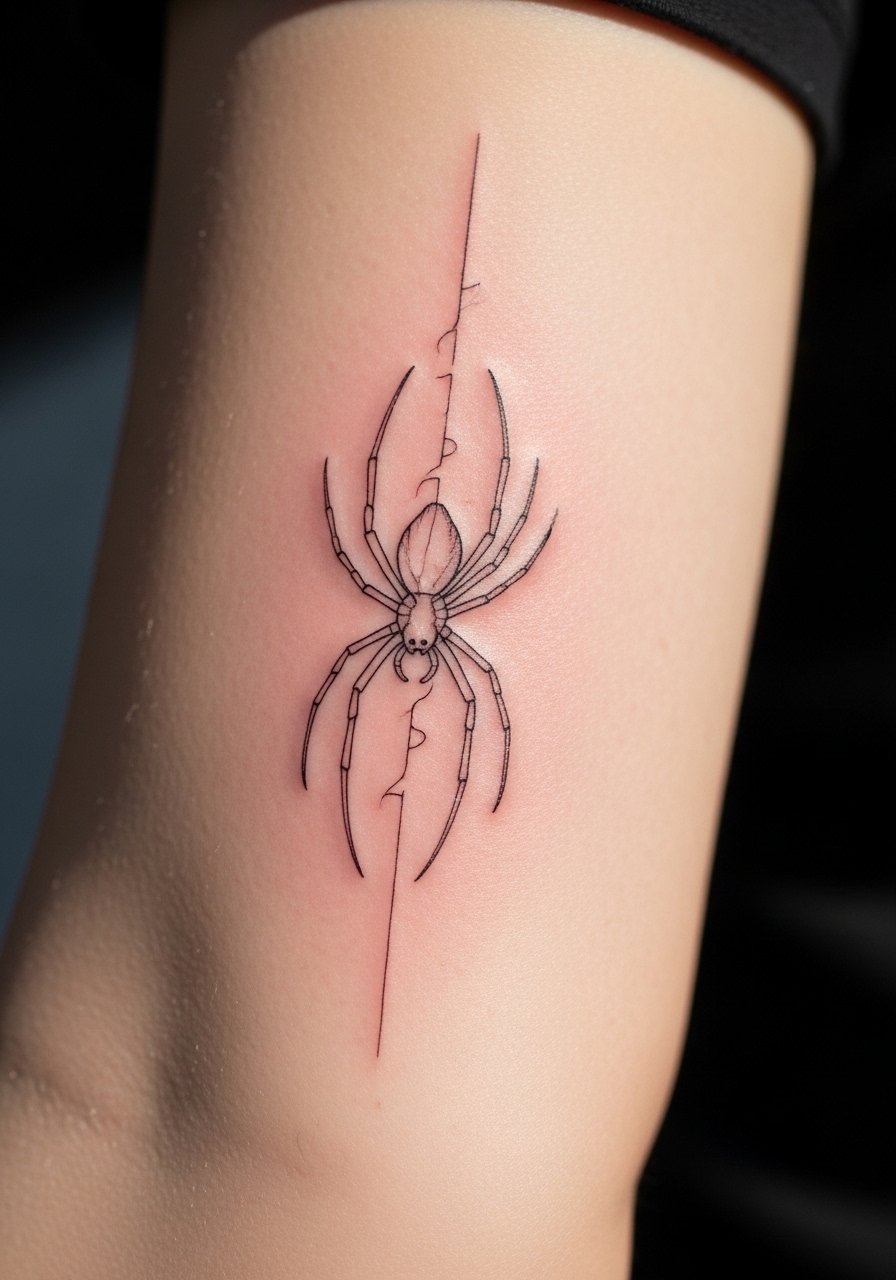
The appeal here is a single continuous line forming the spider, with 0.9 to 1.2 millimeter line weight so the legs stay crisp but do not bleed into one another over time. It reads clean and elegant from across a table, great for someone who wants a subtle look but still visible. This style works well for a medium skill artist and usually fits into a 30 to 60 minute session. Pair it with a fragrance-free healing balm after the first 48 hours, and expect touchups if you tan heavily. I got mine after three short sessions and the thin line needed a tiny fill on session two.
Style/Technique: Fine line
Pain Level: 3/10
Session Time: 30 to 60 minutes
Best For: Work-visible forearm, minimalists, first-timers
Mistake to Avoid: Asking for lines thinner than 0.8 millimeter makes them vanish into healed skin.
2. Blackwork Geometric Spider
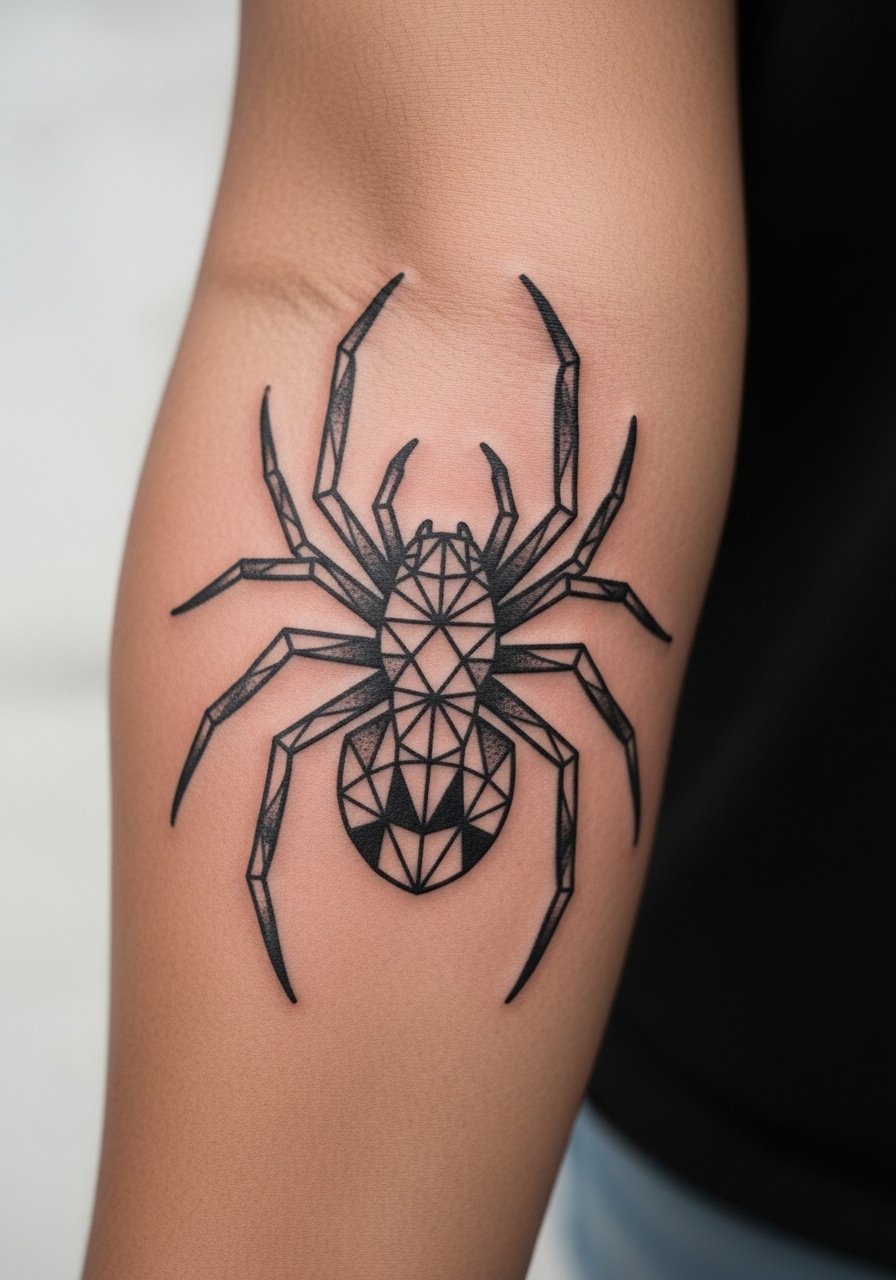
This uses bold shapes and solid fills to make a spider that reads at a distance, with solid black legs balanced against a triangular thorax. It creates a grounded, graphic look and is forgiving for lower-contrast skin tones because the solid fields age predictably. Expect a single 1.5 to 2 hour session for a 3 to 4 inch piece. I paired this with a simple aftercare ointment during healing, and it held up through sun exposure better than a micro-line piece I had nearby. It suits someone wanting a bold, coverable shape that still reads as intentional art.
Style/Technique: Blackwork
Pain Level: 5/10
Session Time: 1 to 2 hours
Best For: People wanting bold forearm art, coverable in sleeves
Mistake to Avoid: Filling in thin negative spaces makes the design lose its geometric balance.
3. Realistic Spider With Soft Shadow
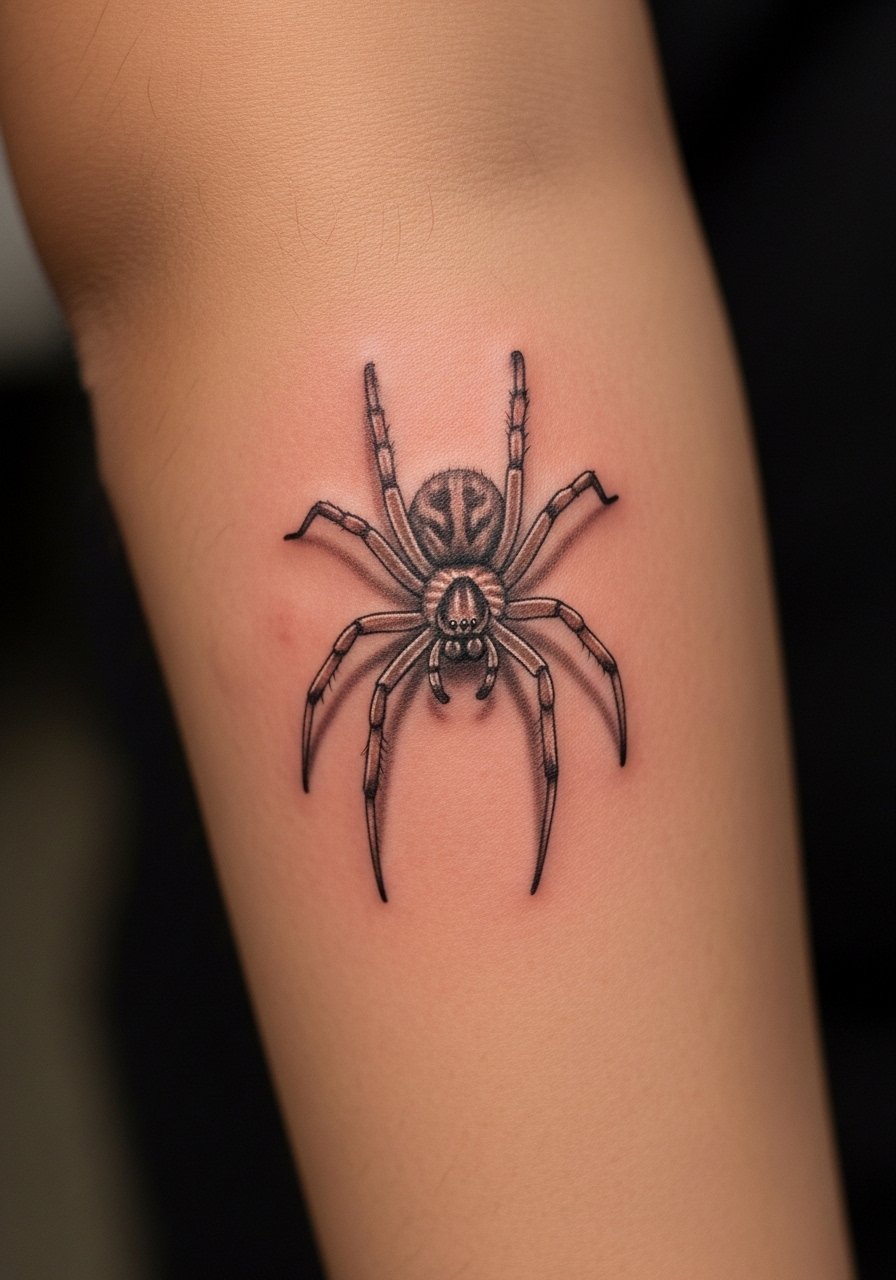
A small realistic spider with a soft cast shadow creates motion as the forearm turns. The trick is a 60 to 70 percent opacity for shadow layers, not a blocky black, which keeps the spider grounded without looking pasted on. This reads like an object sitting on the skin and suits someone comfortable with a slightly higher pain tolerance because of shading density. I had this done across three sessions to let pigment settle between passes. Pair it with a silicone-sheet cover while sleeping the first week to protect raised areas.
Style/Technique: Realism with soft shading
Pain Level: 6/10
Session Time: 1.5 to 3 hours (may split)
Best For: Forearm centerpieces, those who want lifelike detail
Mistake to Avoid: Asking for a fully black shadow turns the piece flat and glued-on.
4. Tiny Spider With Script Web Accent
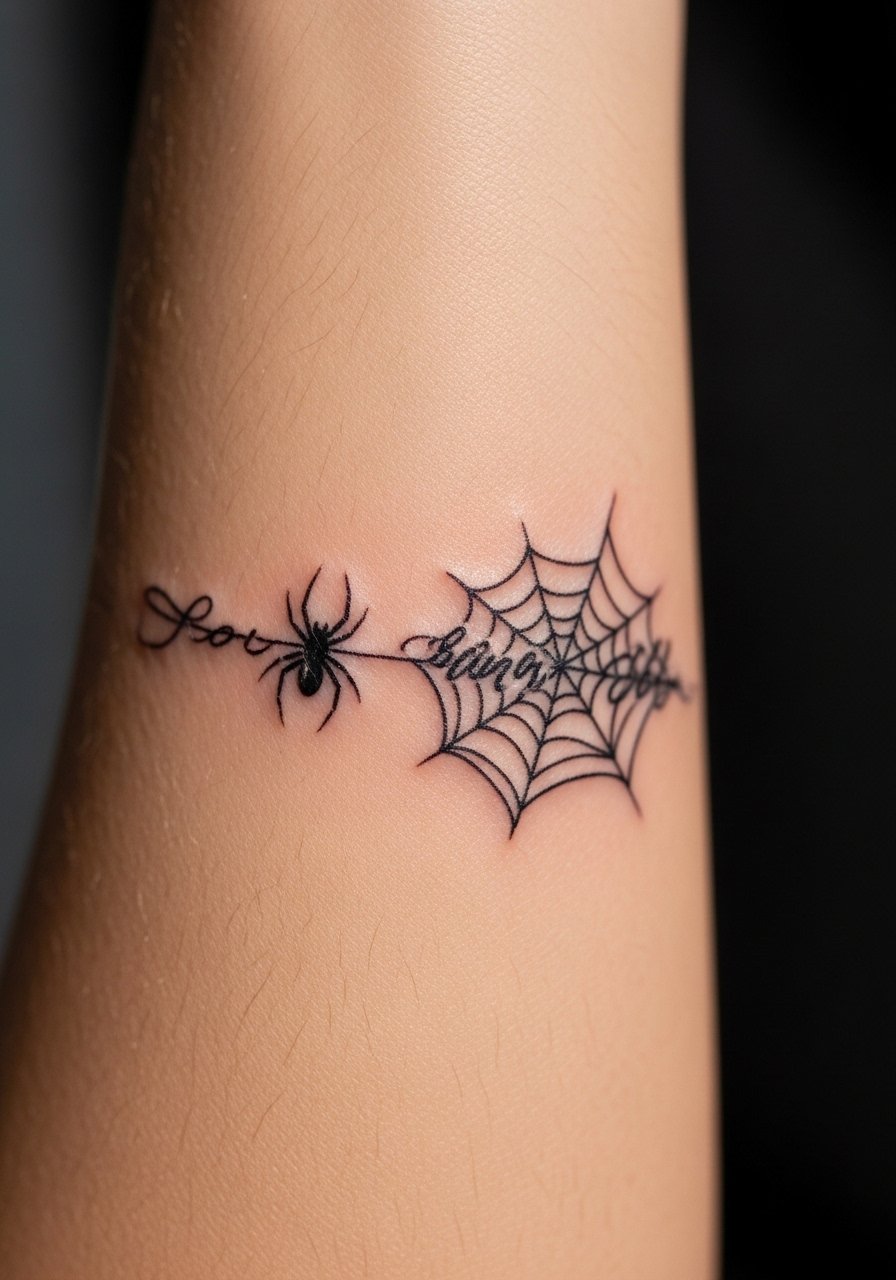
The tiny spider sits next to a single cursive web line that echoes handwriting. Use 1 millimeter for the spider and 0.6 to 0.8 millimeter for the script web so the contrast reads intentionally. This offers a sweet, narrative feel for someone who wants an intimate piece that still photographs well. It is quick to book, often a single 30 to 45 minute session, and works on short forearms because the script adds length visually. I layered a third thin pass only after two weeks to sharpen the script.
Style/Technique: Miniature with script accent
Pain Level: 2/10
Session Time: 30 to 45 minutes
Best For: Subtle forearm placements, people who prefer small-scale pieces
Mistake to Avoid: Telling the artist to "make it tiny tiny" so the script loses legibility when healed.
5. Neo-Traditional Color Spider
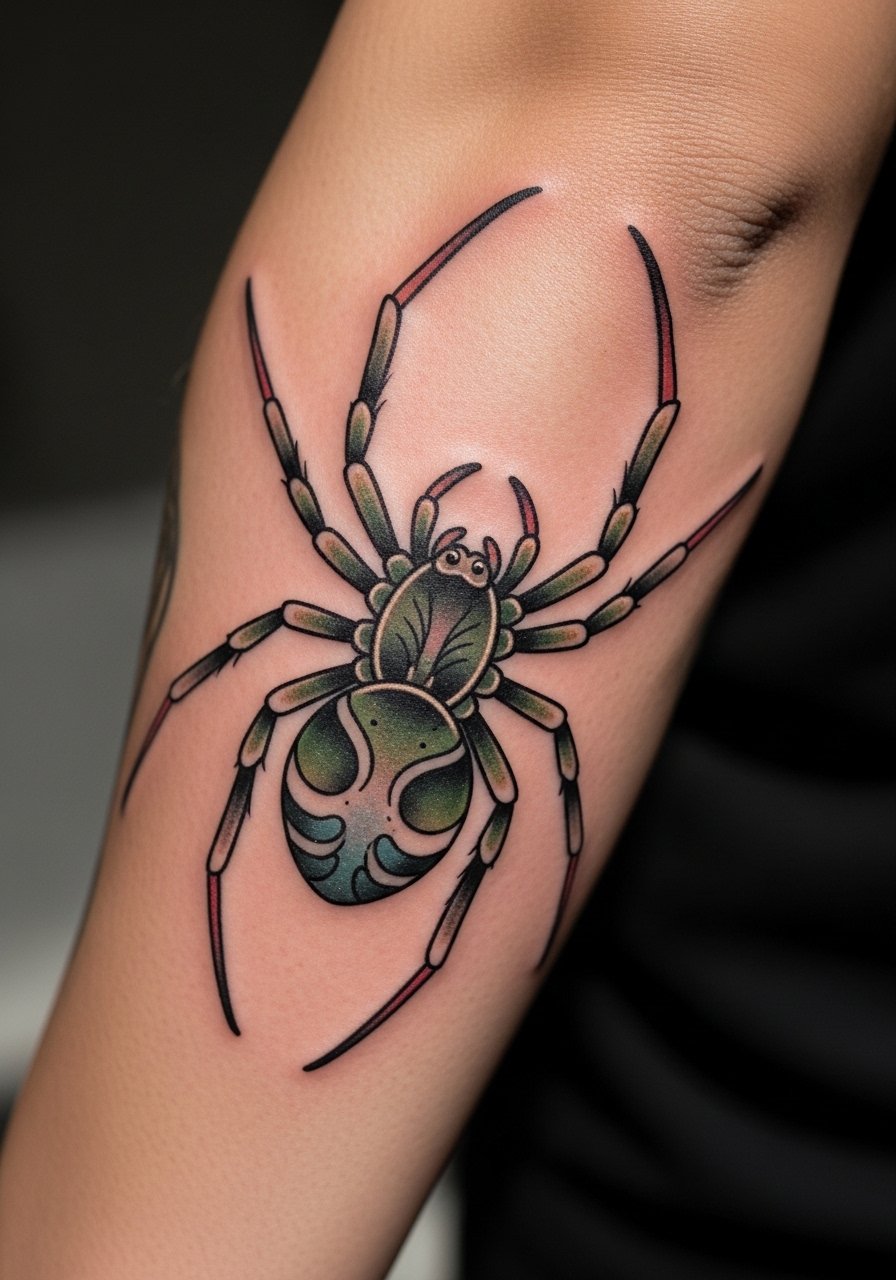
Color changes everything with a spider. Neo-traditional uses saturated but slightly muted pigments, like deep rusts and forest greens, with solid black outlines around 1.2 millimeters to keep color from feathering. The result feels vintage and tactile, a statement that still reads clearly in photos. This is a 2 to 3 hour session for a mid-sized forearm piece and fits someone comfortable with color maintenance like periodic touch-ups. I swapped bright vermilion for a rust tone after testing how it faded on summer skin, it aged more naturally.
Style/Technique: Neo-traditional color
Pain Level: 5/10
Session Time: 2 to 3 hours
Best For: People who want color and longevity, visible forearm art
Mistake to Avoid: Choosing neon shades that sun-bleach quickly without planning for touchups.
6. Micro Dotwork Spider

Dotwork creates texture without heavy lines, building the spider from thousands of tiny dots placed 1 to 2 millimeters apart for subtle gradients. The result reads like a textured illustration, and it is forgiving when photographed because the texture masks small shifts in pigment. Dotwork can take 2 to 4 hours for a larger piece, sometimes split into two sittings, and it suits someone who wants an artistic, less literal approach. I noticed it looks softer as it heals, so expect the initial contrast to mellow.
Style/Technique: Dotwork stippling
Pain Level: 4/10
Session Time: 1.5 to 3 hours
Best For: People who want illustrated texture, photo-friendly pieces
Mistake to Avoid: Compressing dots too close together, which makes shading look muddy after healing.
7. Spider Wrapped With Florals
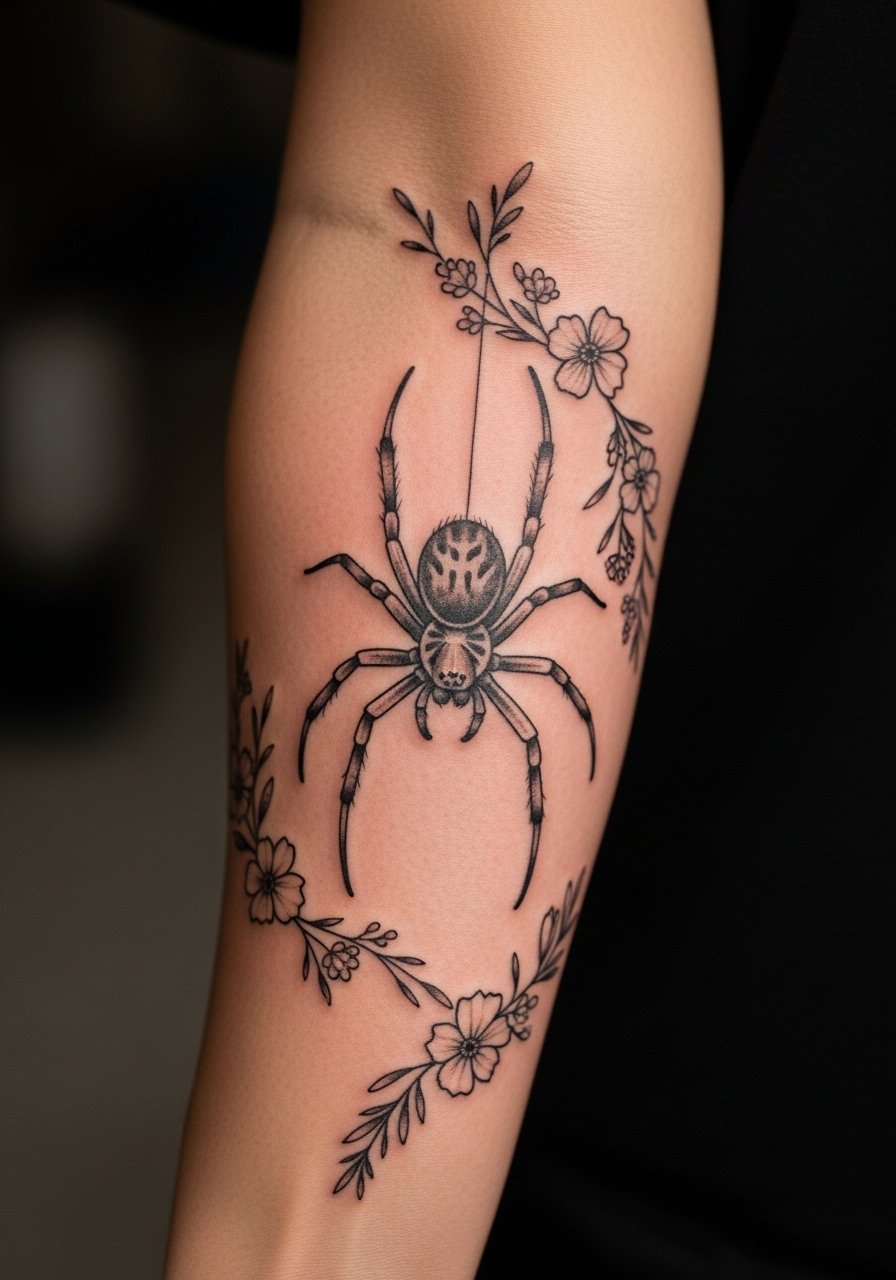
A spider wrapped by florals reads softer and ages better because the floral elements give the eye places to rest. Use a 40 to 60 degree rotation so the spider faces slightly outward when the arm hangs, otherwise it can read upside down from the wearer. This design works well for multi-session bookings since florals let you build density gradually. I combined shading and single-needle highlights across two sessions and found that the florals hide small touchups later.
Style/Technique: Mixed realism and ornamental
Pain Level: 5/10
Session Time: 1.5 to 3 hours split possible
Best For: Decorative forearm pieces, those who want gentler subject matter
Mistake to Avoid: Asking for equal scale between spider and flowers, which makes the spider disappear.
If any of these have you saving designs, here are the actual things I used and kept for forearm tattoos.
Forearm Tattoo Kit Picks
Aftercare:
- fragrance-free healing balm (~$8-18), a balm I used the first five days.
- silicone tattoo sheets (~$10-20), to protect raised ink at night.
Prep & Protection:
- single-blade disposable razor (~$6-12), for gentle pre-tattoo shaving.
- nitrile gloves (~$12-25), good practice if you handle your own aftercare.
Artist Aids:
- tattoo transfer paper (~$8-20), handy if you design at home for consultation.
- sunblock stick (~$10-18), for healed ink protection.
Comfort:
- disposable arm rest cover (~$6-12), makes short sessions more hygienic.
8. Scientific Illustration Etching Spider
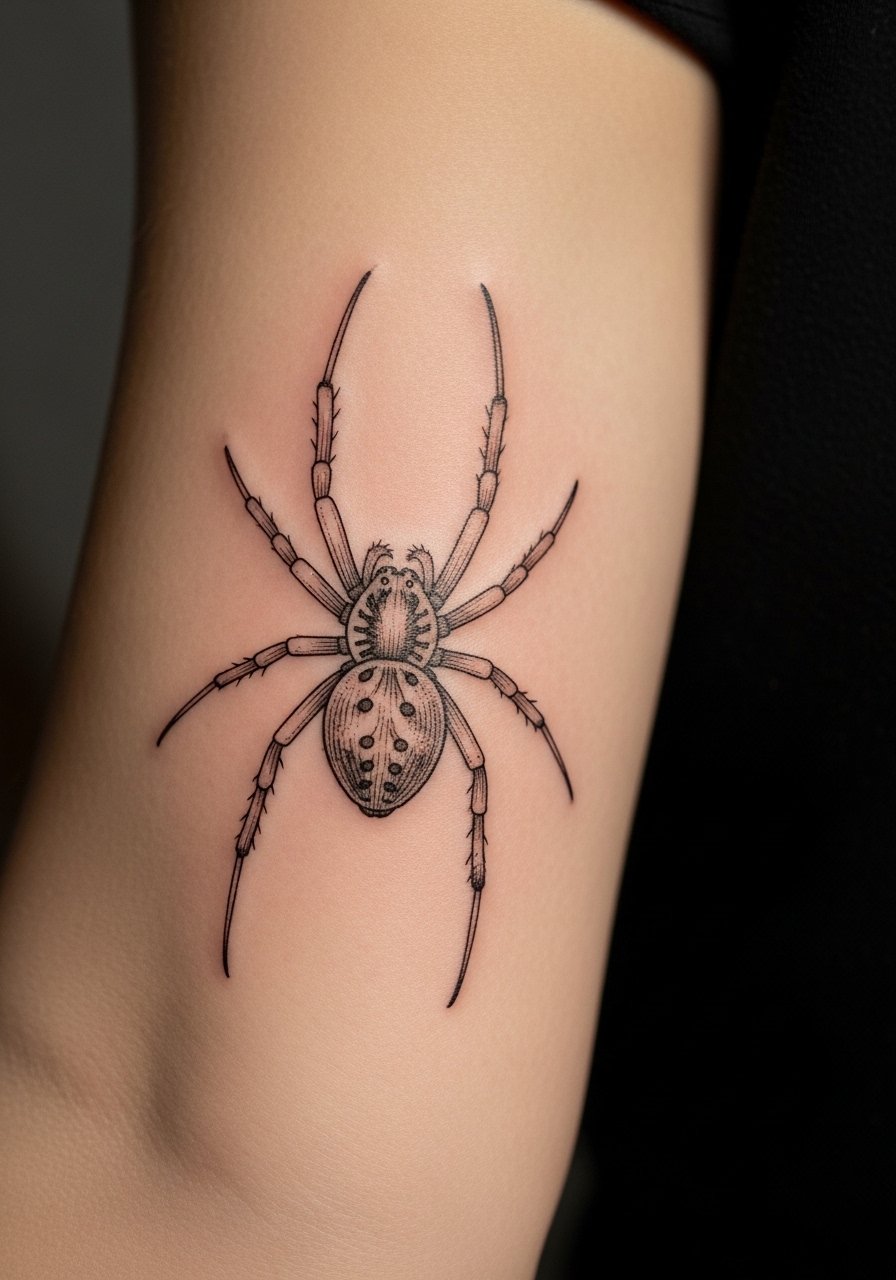
Etching or scientific illustration style uses cross-hatching to create form, usually in a 1 to 1.5 inch vertical layout so the hatching reads cleanly. The visual result is like an old plate illustration, very readable on camera and interesting up close. It tends to be a medium-difficulty piece and often sits in a 1.5 to 2.5 hour window. I had mine placed slightly off-center so the hatching follows muscle lines, which made shading feel more organic as it healed.
Style/Technique: Etching/cross-hatch
Pain Level: 5/10
Session Time: 1 to 2.5 hours
Best For: People who want illustrative forearm work, art students and collectors
Mistake to Avoid: Requesting tiny cross-hatching that clumps when healed instead of readable texture.
9. Solid Silhouette Cover-Up Spider

If you need to cover outdated ink or blemishes, a solid silhouette spider can be surprisingly effective. Use a bold, balanced body and legs with 2 millimeter outlines and solid packing so the old pigment does not show through. This is a practical solution for someone who wants work-friendly coverage or an immediate visual reset. It is usually a one to two hour session depending on how much cover-up is required. I scheduled a follow-up at eight weeks to check for any seep-through spots.
Style/Technique: Solid silhouette cover-up
Pain Level: 5/10
Session Time: 1 to 2 hours
Best For: Cover-ups, those needing bold readable shapes
Mistake to Avoid: Trying a tiny silhouette over dark old ink, which often still reads patchy.
Forearm Tattoo Aftercare Habits
Keep the first 48 hours clean and bare. Gently wash with a mild, unscented soap and let air dry. Then apply a thin layer of fragrance-free healing balm twice daily for seven days.
Wrap slept-on areas with a silicone sheet for the first week to reduce scabbing and sticking, I used silicone tattoo sheets and noticed less raised scab tissue.
If you need to shave the area before a session, use a fresh single-blade disposable razor with light strokes, shave the day of the appointment and not hours before.
Avoid heavy sun for at least six weeks after tattooing, then protect healed ink with a sunscreen stick when you expect prolonged exposure.
Book a touchup slot at eight to twelve weeks if your artist recommends it, that window lets pigment settle and shows where tiny fills will help longevity.
