
I kept ruining a mirror chrome by using thick gel and impatient curing, and every time the gold dulled into a cloudy film right before I left the salon. After a week of scraping, redoing, and getting strange looks from my tech, I learned to treat chrome like jewelry, not polish. The right thin layers, the right press, and a tiny applicator made the difference.
These looks are all acrylic, mostly salon-level results you can book or try at home if you have beginner to intermediate skill. Most designs are achievable in one to two hours with budget-friendly tools. A tech who works at a salon downtown showed me the exact order I needed to stop erasing my chrome, so where I mention technique it comes from hands-on correction. Expect a little practice, inexpensive powders, and some patience with thin layers.
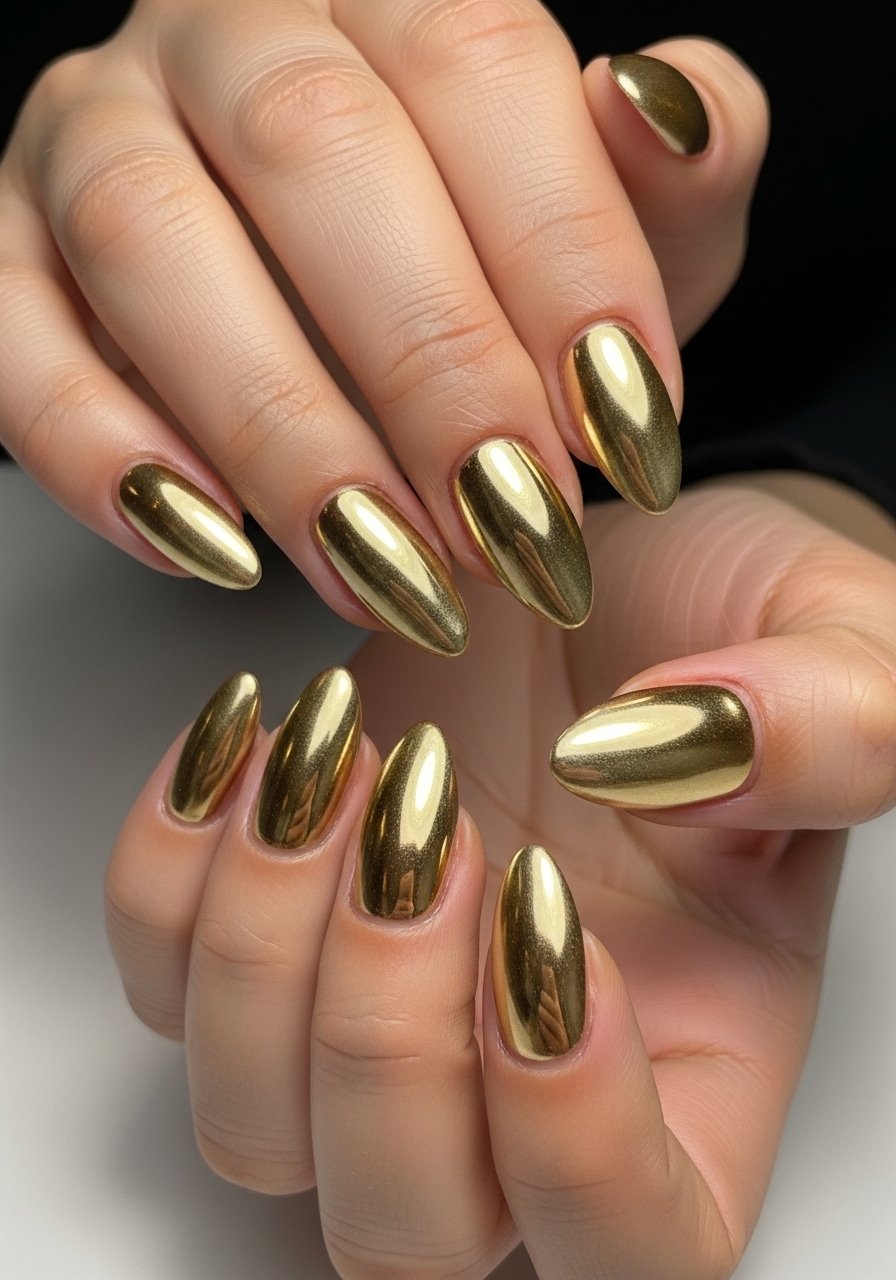
1. Mirror Gold Almond With Sculpted Apex
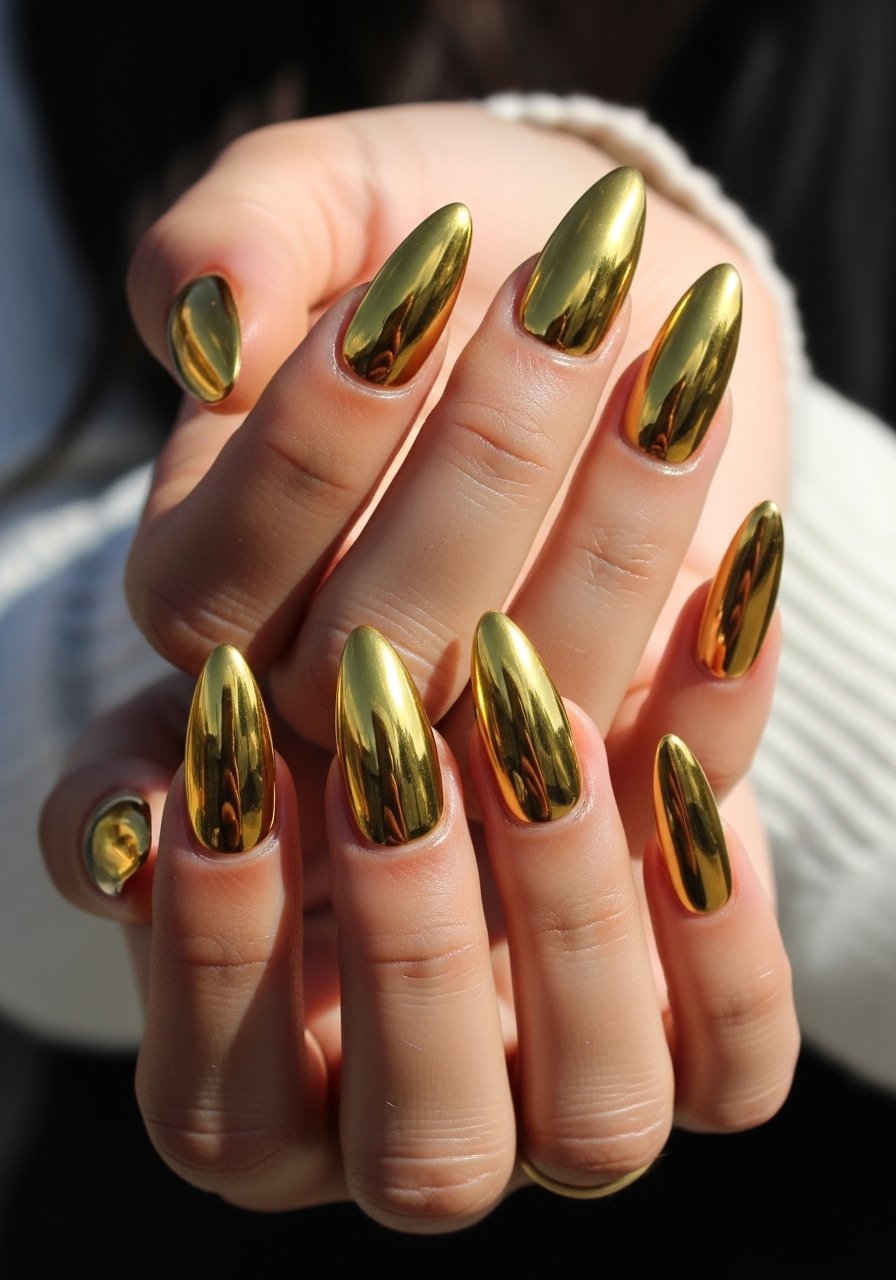
Style/Vibe: Sculpted mirror gold
Best For: Long almond nails, nights out
Skill: Intermediate
Sculpted apex gives the chrome something to catch against, so the reflection reads like metal instead of flattened foil. After sculpting two tiny acrylic beads, file to a soft apex and lightly buff with 180 grit before sealing a thin gel base. Press gold chrome powder with a sponge tip for 10 to 15 seconds of pressure so the pigment bonds evenly. Cure each thin gel layer for 60 seconds under LED, then glossy top coat cured twice to lock the shine. This reads luxe without being fragile.
Mistake to Avoid: Rubbing the chrome on before the gel layer is fully cured, which drags pigment and causes streaks.
2. Short Square Chrome With Negative Space
Style/Vibe: Modern short chrome
Best For: Short nails, office wear
Skill: Beginner
Negative space keeps chrome wearable for short nails by breaking up the mirror finish and making growth less obvious. Paint a sheer nude acrylic base, mask off crescent areas with thin striping tape, then apply a no-wipe gel base just inside the masked zone. Buff chrome into that area with a rubber-tipped applicator and peel the tape for crisp lines. The result feels deliberate and calm, great for low-maintenance wear. Try nude acrylic color that matches your skin tone to avoid a floating-tip look.
Mistake to Avoid: Using wide tape that lifts cured product, causing the chrome area to chip at the edges.
3. Long Coffin Chrome With Foil Flake
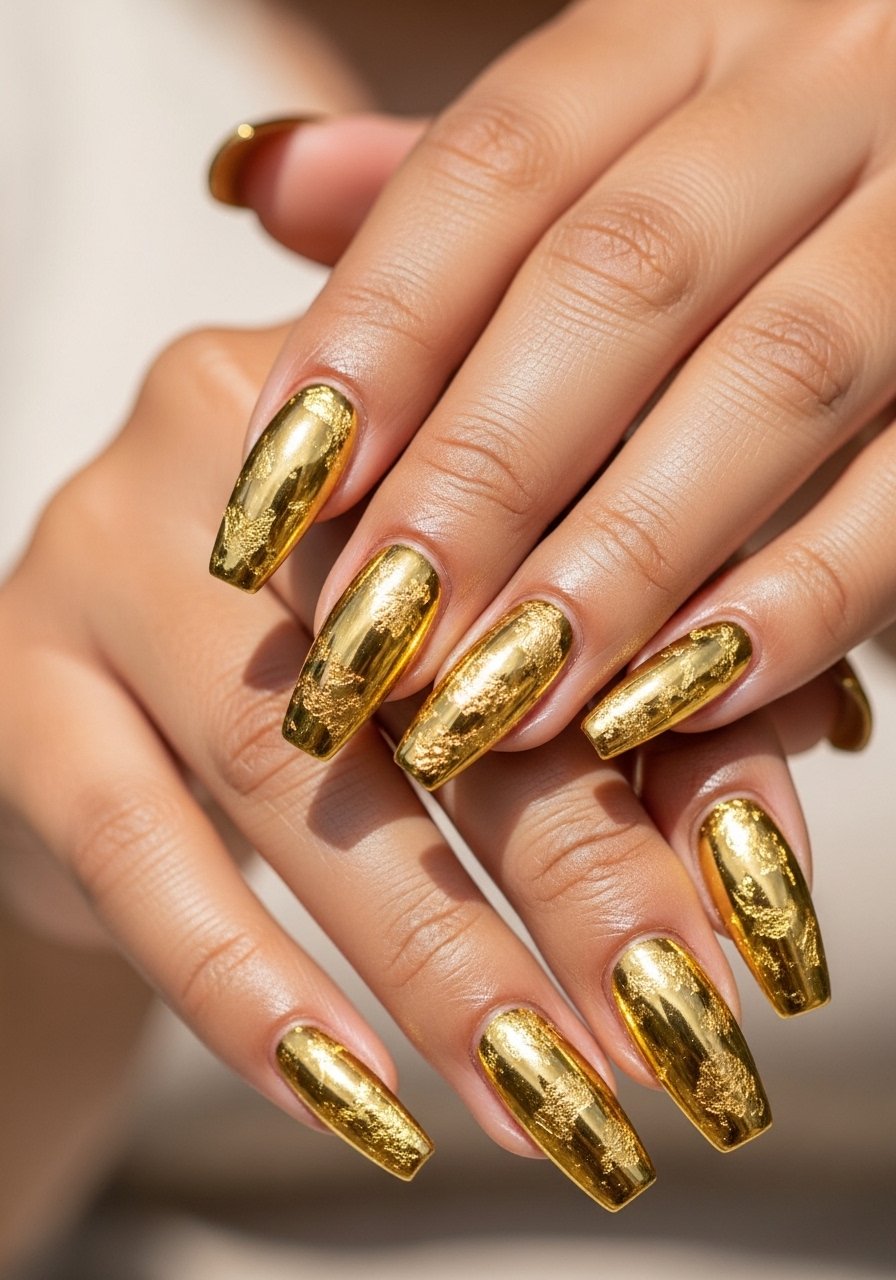
Style/Vibe: Textured mirror luxe
Best For: Statement length, special events
Skill: Intermediate
Foil flakes under chrome add depth, so the mirror has flecks instead of a flat surface. After one thin acrylic layer, press tiny pieces of gold foil into the tacky layer, seal with a thin builder gel, cure 60 seconds, then buff chrome powder gently on top. The flakes peek through at different angles and make the chrome read dimensional in photos. Use gold nail foil applied with tweezers for control. Budget tip, buy larger sheets and cut to size for multiple sets.
Mistake to Avoid: Applying foil to a fully cured surface, which prevents adhesion and causes lifting.
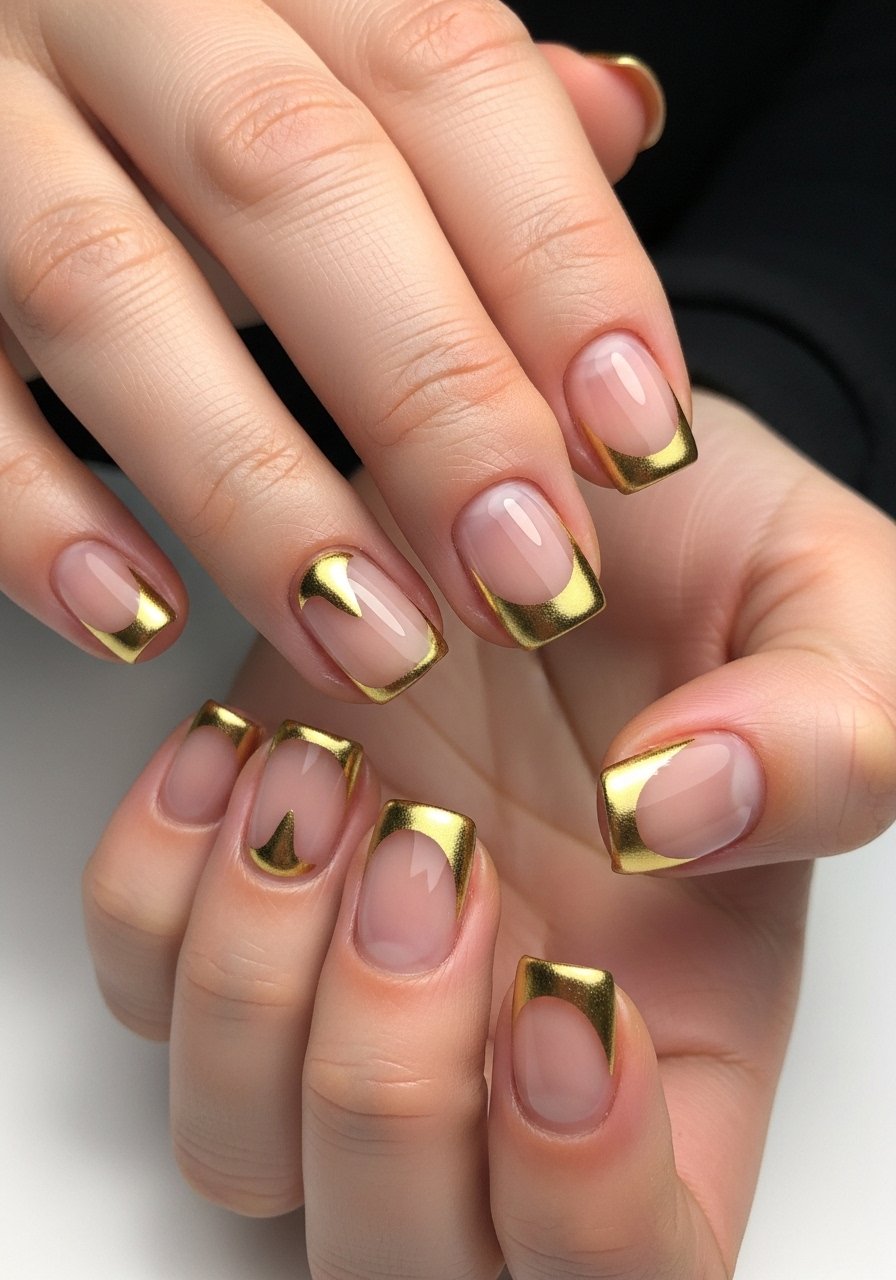
4. French Chrome Tip On Medium Oval

Style/Vibe: Modern chrome French
Best For: Medium oval nails, daytime events
Skill: Beginner
A clean chrome tip reads fresh without being over-the-top. Paint a sheer acrylic base, then use a thin brush to lay down a primer line where the chrome will sit. Apply a no-wipe gel top on the tip area only, cure for 30 seconds, and press chrome with a silicone applicator. The contrast between soft base and mirror tip keeps the mani wearable. For tidy edges, keep a tiny angled brush and isopropyl alcohol wipe handy for clearing residue before sealing.
Mistake to Avoid: Trying to chrome the entire nail when the base is still wet, causing pigment migration.
5. Matte Chrome Accent Nail
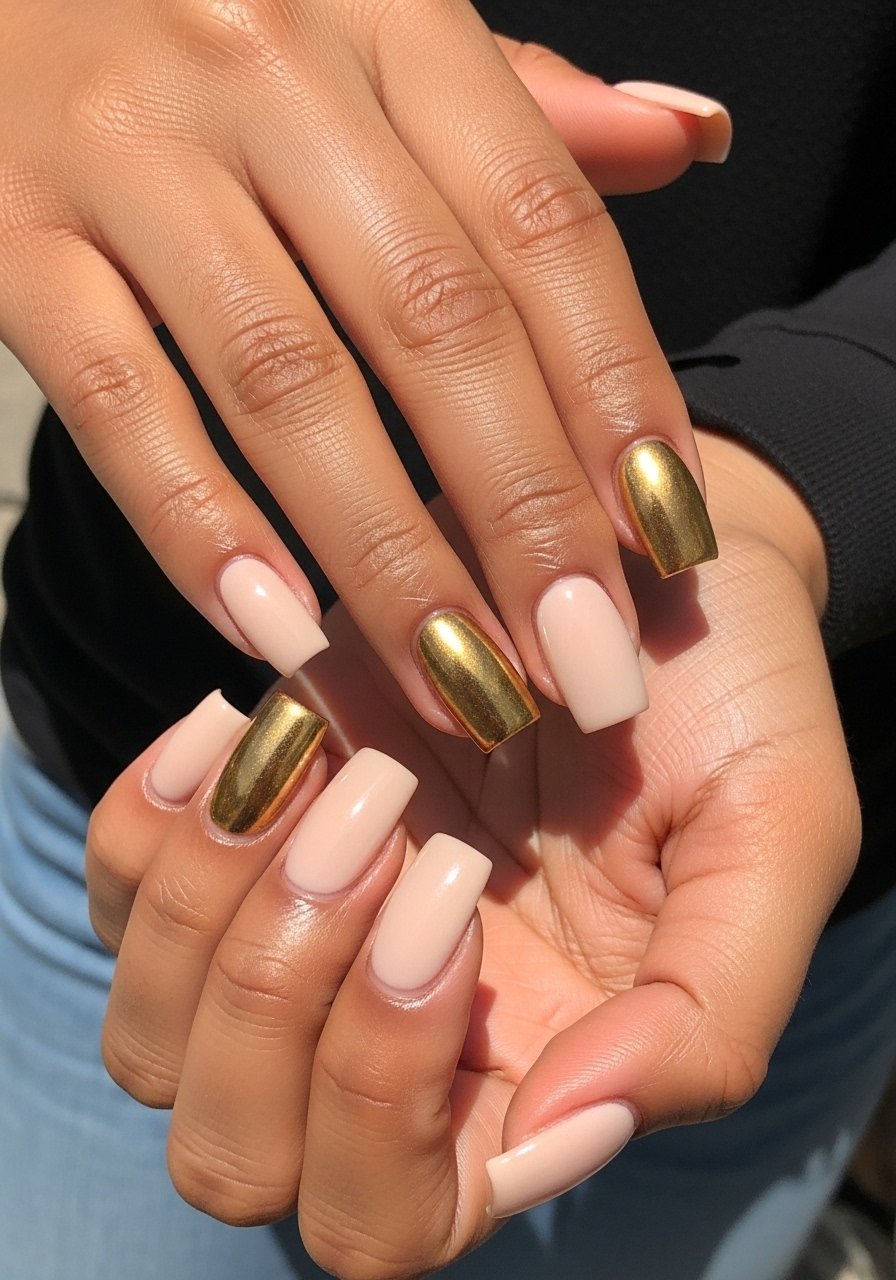
Style/Vibe: Subtle chrome accent
Best For: Mixed finishes, work to weekend
Skill: Beginner
Matte chrome looks modern and less showy while keeping that metallic feeling. Apply chrome as usual and cure a glossy top coat. Then lightly buff with 400 grit to dull if you want a satin look or use a matte top coat over the chrome and cure per directions. A matte finish softens reflections and hides tiny scratches. Pair with a matte top coat for consistent results across acrylic nails.
Mistake to Avoid: Using a matte top coat that reacts with chrome pigment and turns it patchy instead of uniformly matte.
6. Gradient Chrome Over Nude Base
Style/Vibe: Subtle ombre chrome
Best For: Medium length nails, brunch looks
Skill: Intermediate
A gradient softens chrome for daytime. Start with a nude acrylic base, apply a thin clear gel where you want the fade, then dab chrome powder from the free edge inward with a flat sponge. Build pigment in layers, curing each thin coat 30 to 60 seconds, until you have a seamless fade. The transition feels polished and less like jewelry. I like a 70/30 ratio of free-edge pigment to cuticle pigment while building the fade for balance.
Mistake to Avoid: Loading the sponge with too much powder at once, creating harsh banding instead of a smooth fade.
7. Chunky Chrome With 3D Studs
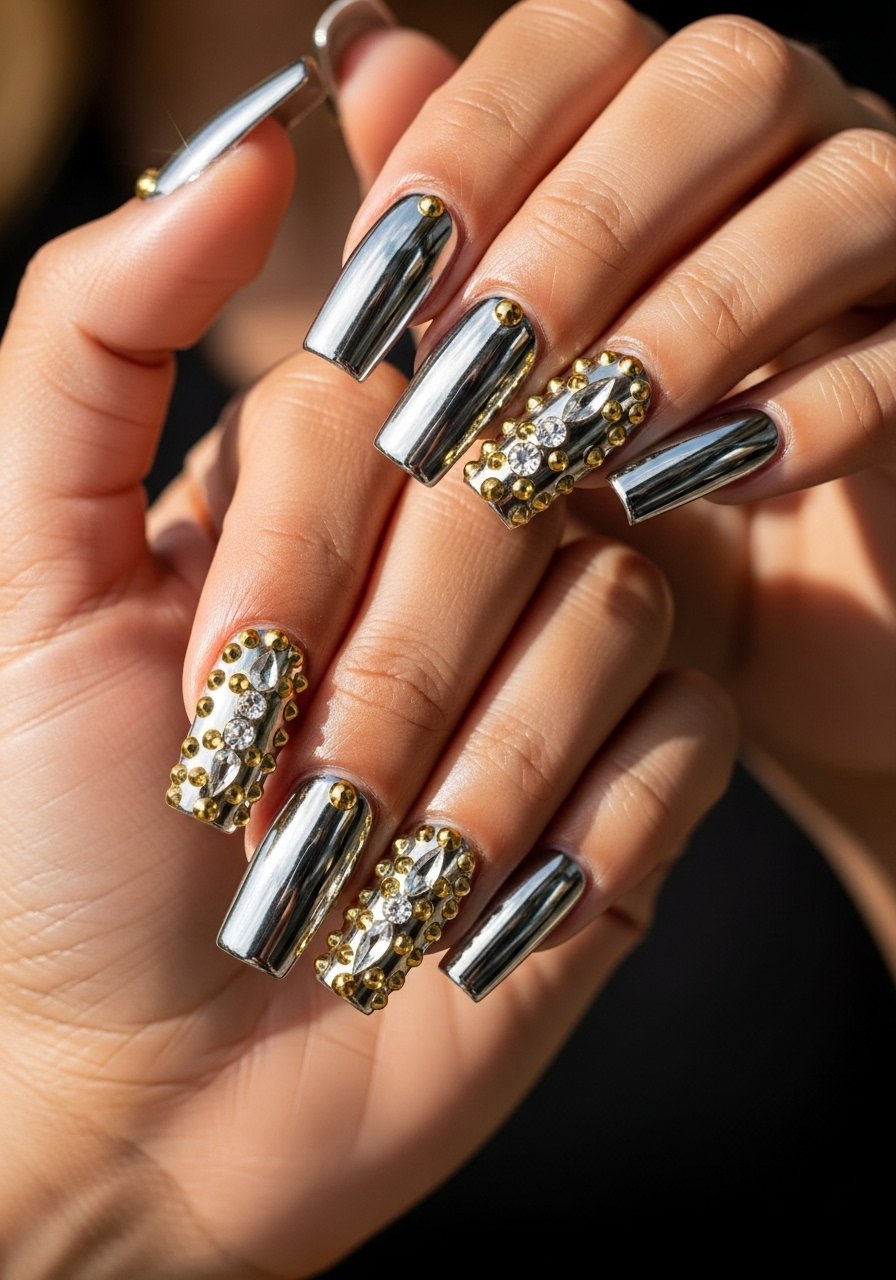
Style/Vibe: Bold accented chrome
Best For: Nights out, statement sets
Skill: Advanced
Texture plus mirror makes chrome feel intentional and editorial. Place studs on one or two accent nails into wet builder gel, cure, then chrome the surrounding areas. The interplay of reflective metal and faceted stones reads high-fashion. Use medium-viscosity gel to seat hardware securely and a dab of resin as extra glue for rhinestones. I reach for nail stud kits with mixed sizes so placement feels custom.
Mistake to Avoid: Skimping on the gel layer under hardware, which lets studs catch and pop off quickly.
If any of these looks have you tempted, here are the products I actually reach for when recreating chrome acrylics.
Gold Chrome Mani Essentials
Prep & Base:
- Cuticle pusher (~$6-12). A sharp pusher makes clean negative space easier.
- Nail buffer block (~$4-8). Use 180 grit for shaping, 240 for smoothing.
Chrome & Seal:
- Gold chrome powder (~$8-15). Small jar lasts many sets.
- No-wipe gel base (~$12-22). Keeps chrome clean and even.
- Glossy gel top coat (~$10-18). Cure twice for longevity.
- Matte top coat (~$8-15). For satin accents.
- LED nail lamp (~$25-50). Consistent curing beats guesswork.
8. Reverse Chrome Half-Moon

Style/Vibe: Cuticle chrome crescent
Best For: Short nails, subtle glam
Skill: Beginner
Reverse chrome brings attention to the nail bed rather than the tip, which is flattering on short nails. Use a thin round guide near the cuticle as a mask, apply a no-wipe gel inside the crescent, cure, and press chrome. Finish the rest of the nail in a sheer matte or gloss to contrast. The effect looks deliberate and elongates the finger visually. For tiny crisp crescents, try rubber-tipped dotting tools to position pigment precisely.
Mistake to Avoid: Lining the crescent too close to the cuticle, which can snag and peel during wear.
9. Twisted Chrome Stripe on Short Nails
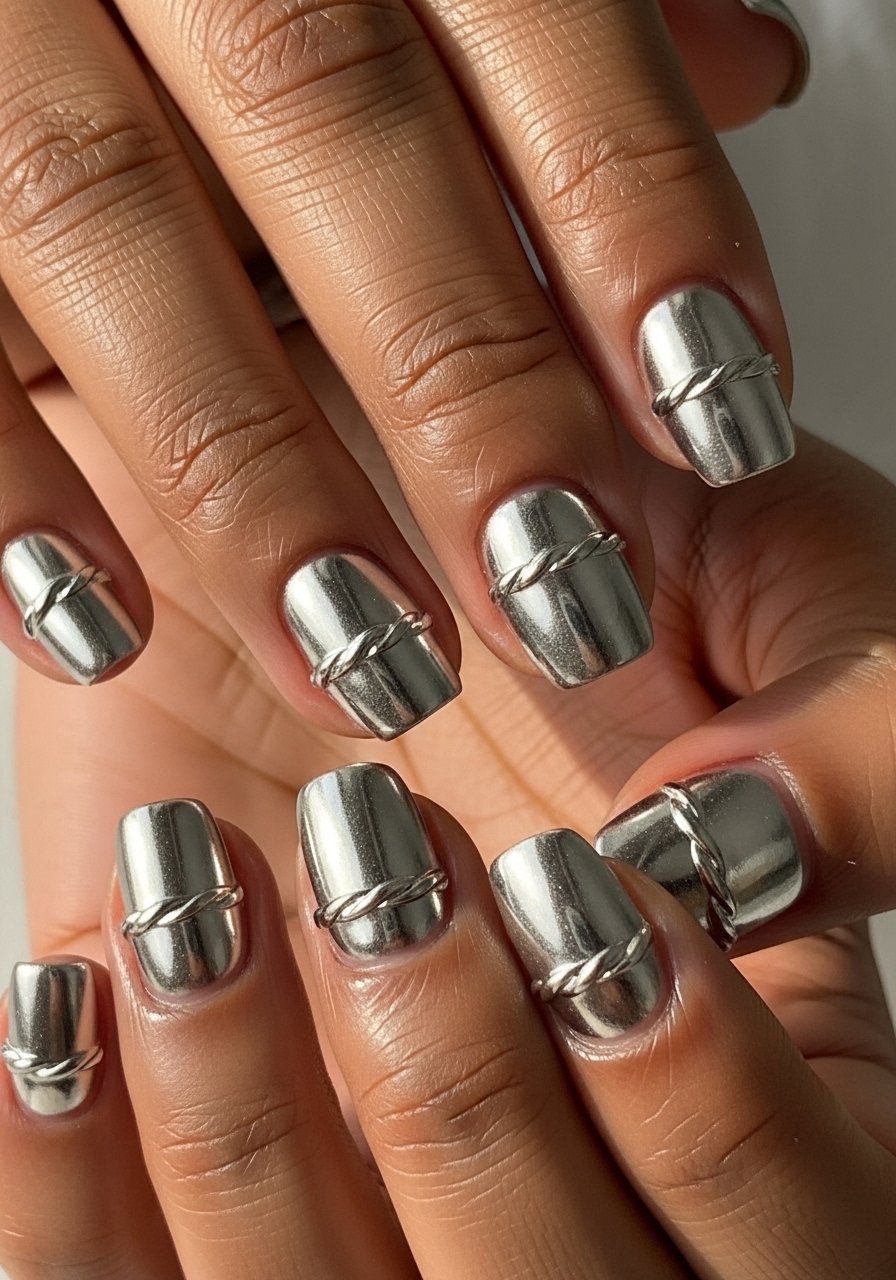
Style/Vibe: Minimalist chrome stripe
Best For: Short to medium nails, everyday wear
Skill: Beginner
A single twisted stripe is surprisingly modern and fast. Paint a neutral base, use a striping brush to lay down a thin line of gel where the chrome will live, cure briefly, and press chrome. Twist the striping brush slightly while the gel is tacky to create a spiral effect before pressing. It reads refined and small-scale, which is perfect when you do not want full chrome. Keep striping brushes in your kit for these micro-details.
Mistake to Avoid: Trying to freehand a stripe without a steady rest for your hand, causing wobbly lines.
10. Mirror Chrome With Stiletto Edge
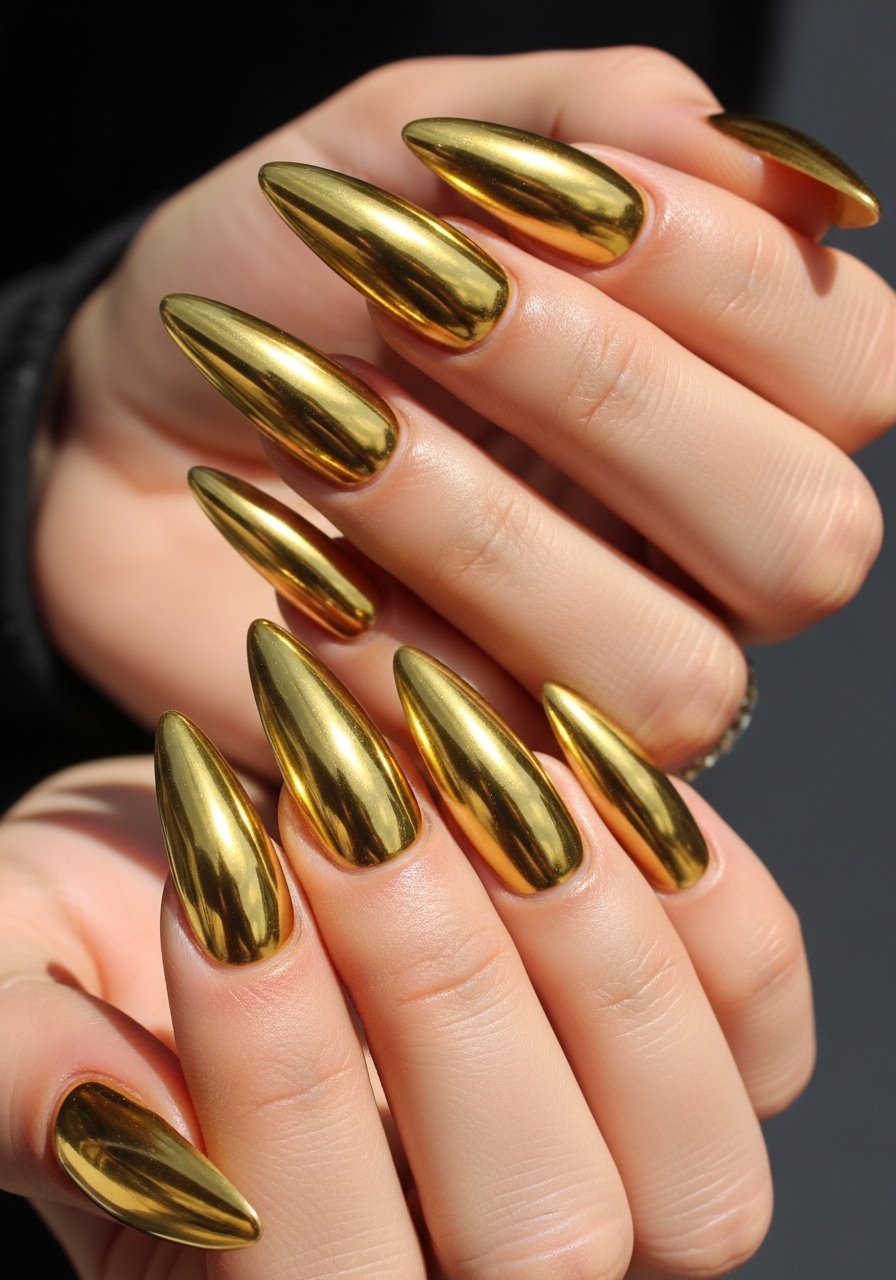
Style/Vibe: High-drama mirror stiletto
Best For: Editorial sets, long-term wearers
Skill: Advanced
Stiletto edges reflect light dramatically. Sculpt the apex and free edge carefully so the chrome catches on the planes you create. Thin, even beads of acrylic reduce filing time and prevent heat spikes. After chrome application, file the edge with 240 grit and buff gently for a seamless transition, then top coat and cure. For stability, add a thin builder gel under the free edge before finishing. Use stiletto nail forms for repeatable shaping.
Mistake to Avoid: Overfiling the free edge after chrome, which can dull the mirror finish.
11. Soft Gold Chrome For Dark Skin Tones
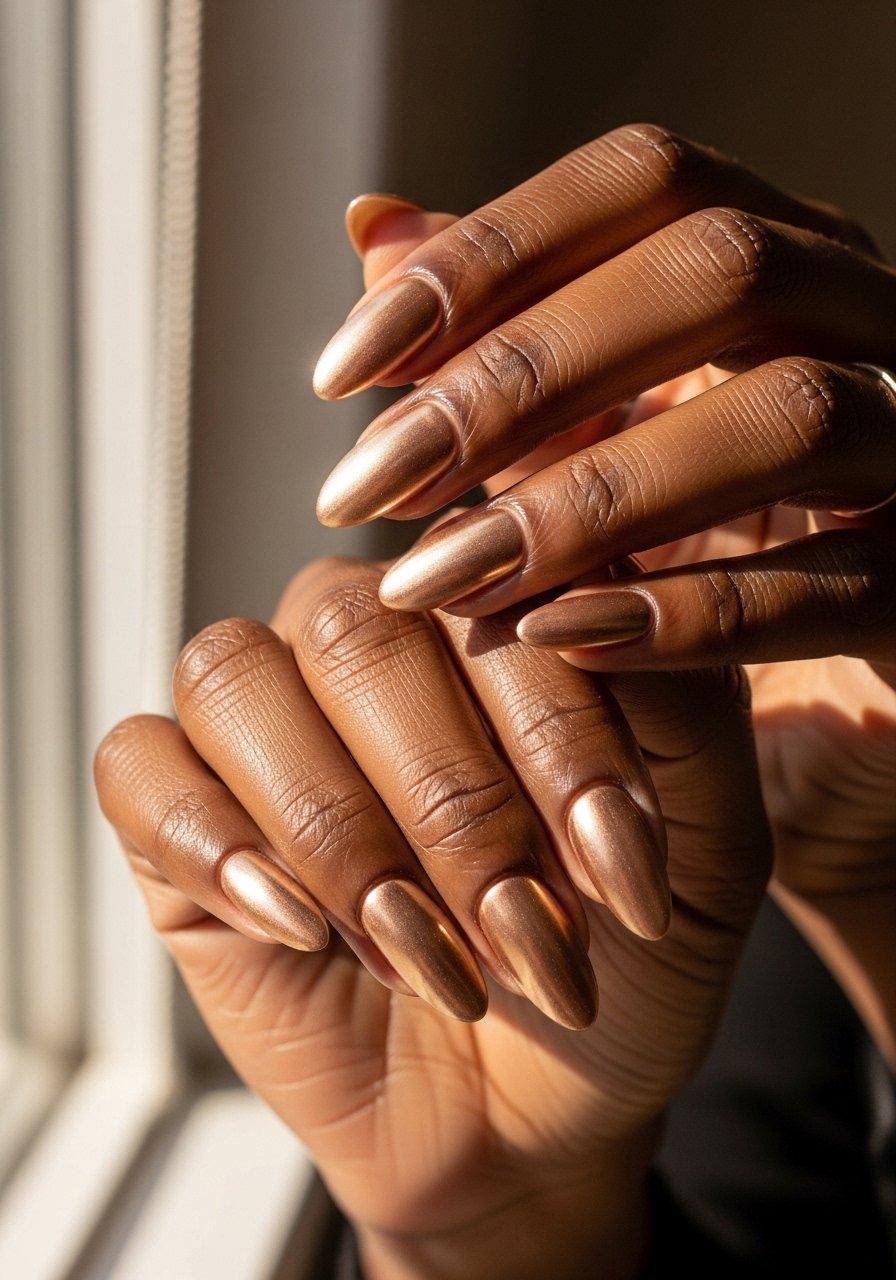
Style/Vibe: Warm gold chrome
Best For: Medium nails, natural complement
Skill: Beginner
Chrome can read cold or harsh against deeper skin if the pigment leans silver. Opt for a warmer gold chrome and a slightly deeper nude base to harmonize. Press the powder with a soft brush to mute the brightest highlights and use a top coat with warm undertones. A tech at the salon downtown suggested a touch of amber-tinted builder for balance, and it works, especially in photos. Try a warm gold chrome powder and test under natural light before sealing.
Mistake to Avoid: Picking a chrome that is too pale, which can create a washed-out halo against darker skin.
Chrome Mani Shortcuts
Thin coats beat one thick coat every time. Three thin layers of a no-wipe gel base look smoother and last longer than one gloopy layer. Grab no-wipe gel base and build slowly.
Press chrome with a soft sponge or silicone tip, not fingertips. A small silicone applicator costs little and stops fingerprint oils from dulling the finish.
Curre each gel layer fully. For LED lamps, cure 45 to 60 seconds per thin layer. A cheap lamp is fine if it holds steady timing. Try LED nail lamp models with 60-second presets.
Start with a no-wipe base for crisp chrome. Most people skip this and the chrome flakes within days. A quality base like no-wipe gel base saves time on touch-ups.
Remove chrome gently by soaking, not scraping. Use acetone soak wraps and let acrylic lift naturally to avoid thinning the natural nail.
