
The first sleeve I saved for months looked like a patchwork of small florals, none of them breathing with the arm. I kept covering pictures, sketching over mistakes, and the moment it clicked was when my artist traced a single rose to follow the bicep curve and everything else fell into place. That change made the negative space sensible and the whole arm read as one composition instead of a bulletin board.
If you want something that reads clean in photos and everyday life, these ideas are practical, mostly coverable at work when needed, and suitable for budget and high-end sessions alike, across five shops I have visited.
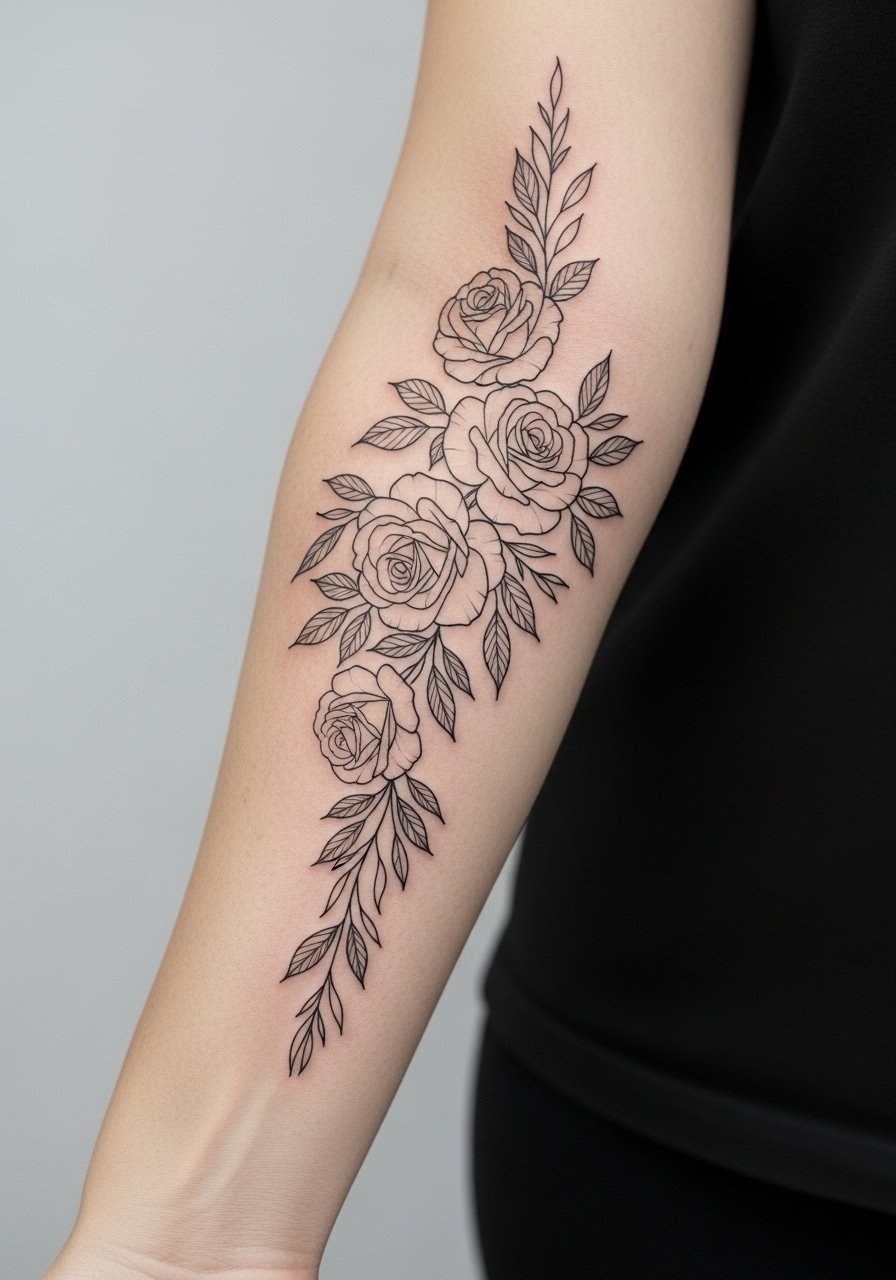
1. Fine-Line Rose Cascade
Style/Technique: Fine-line botanical
Pain Level: 5/10
Session Time: 2 to 4 hours
Best For: Visible forearm, slender to average builds
This classic uses thin 3RL-style lines and small dot shading to let roses stack without filling the whole arm. Visually it reads delicate, which keeps it wearable for formal settings while still bold in photos. It suits someone who wants a mostly healed look quickly and pairs well with small gray-wash fills. Bring a reference photo and ask the artist for 0.5 to 1 mm gaps between petals so the negative space ages better. I use a black ink set for reference studies at home and a disposable razor for pre-session prep.
Mistake to Avoid: Asking for every petal filled in will make the piece read heavy and lose arm flow.
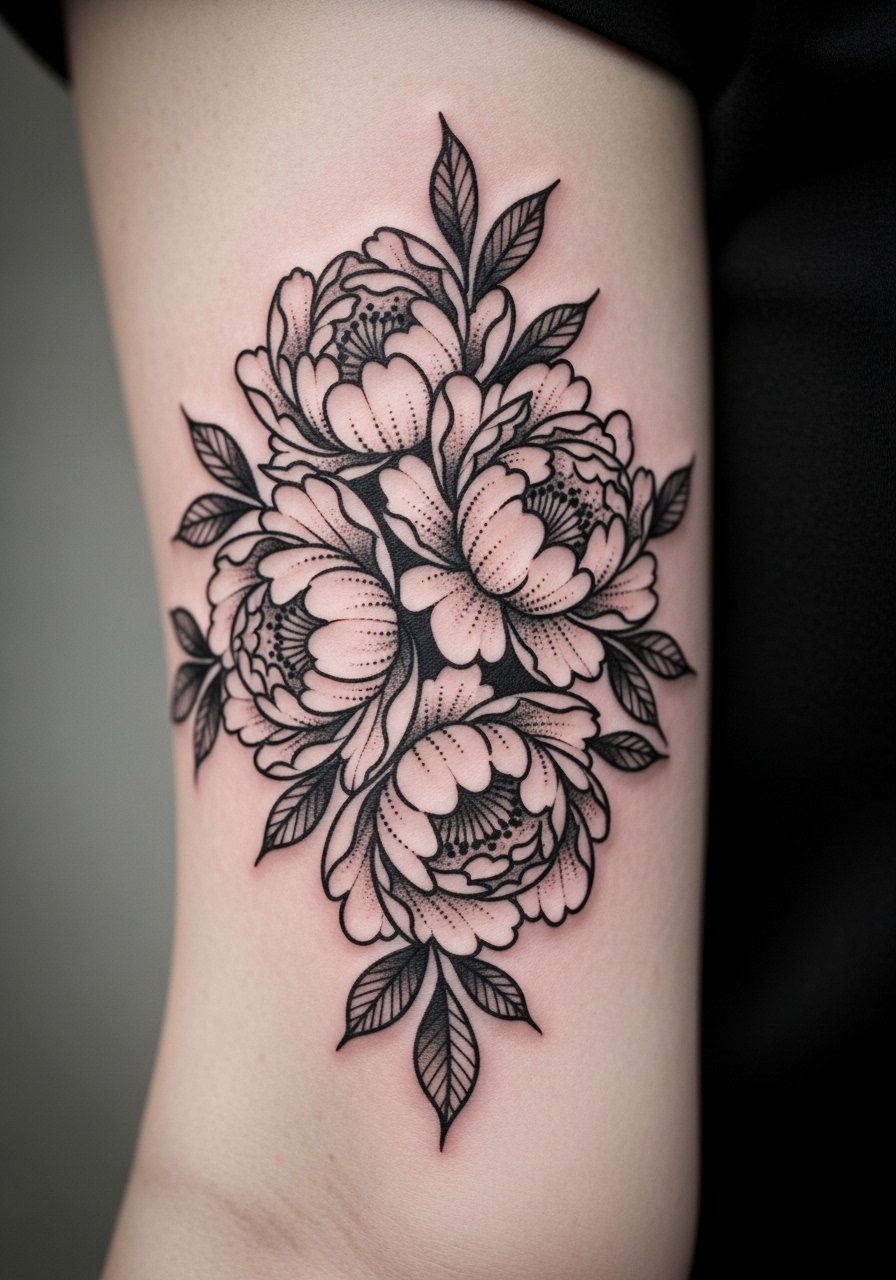
2. Blackwork Peony Cluster
Style/Technique: Blackwork solid-fill
Pain Level: 7/10
Session Time: 3 to 6 hours
Best For: People who want bold coverage, sleeves that hide well under sleeves
Blackwork peonies use heavy black shapes and contrasts between skin and pigment to create dramatic silhouettes. The result is graphic and lasts well because solid blacks age steadily. This works if you like statement sleeves and want something that photographs with stark contrast. Budget-wise, expect more shading time so plan for a longer session or two. Bring an artist reference for negative-space petal edges and consider a professional stencil transfer paper to lock in placement.
Mistake to Avoid: Filling tiny areas with solid black will make touch-ups necessary sooner.
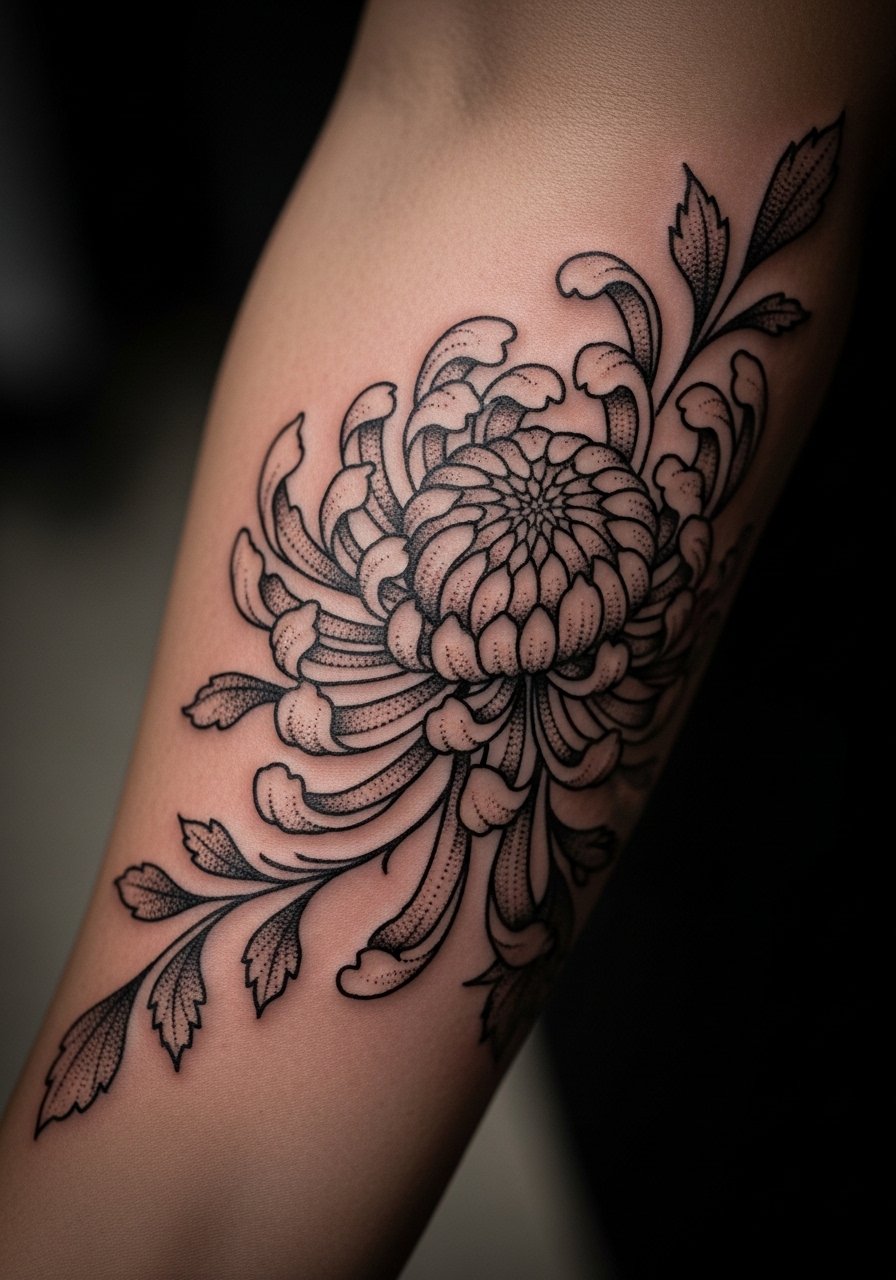
3. Dotwork Chrysanthemum Sleeve
Style/Technique: Stippling and dotwork
Pain Level: 4/10
Session Time: 2 to 5 hours
Best For: Fine-detail lovers, medium to long sleeves
Stippling creates gradients using clustered dots rather than smooth shading. A chrysanthemum rendered this way feels textured and vintage without needing thick black fills. The look gives a tactile feeling and sits nicely on arms with subtle muscle tone because the dot density can follow contours. For aftercare, a thin gray wash helps the dots read from a distance. I keep a small gray-wash ink set on hand to show artists tonal references.
Mistake to Avoid: Requesting dense dots too close together will blur as the skin ages.
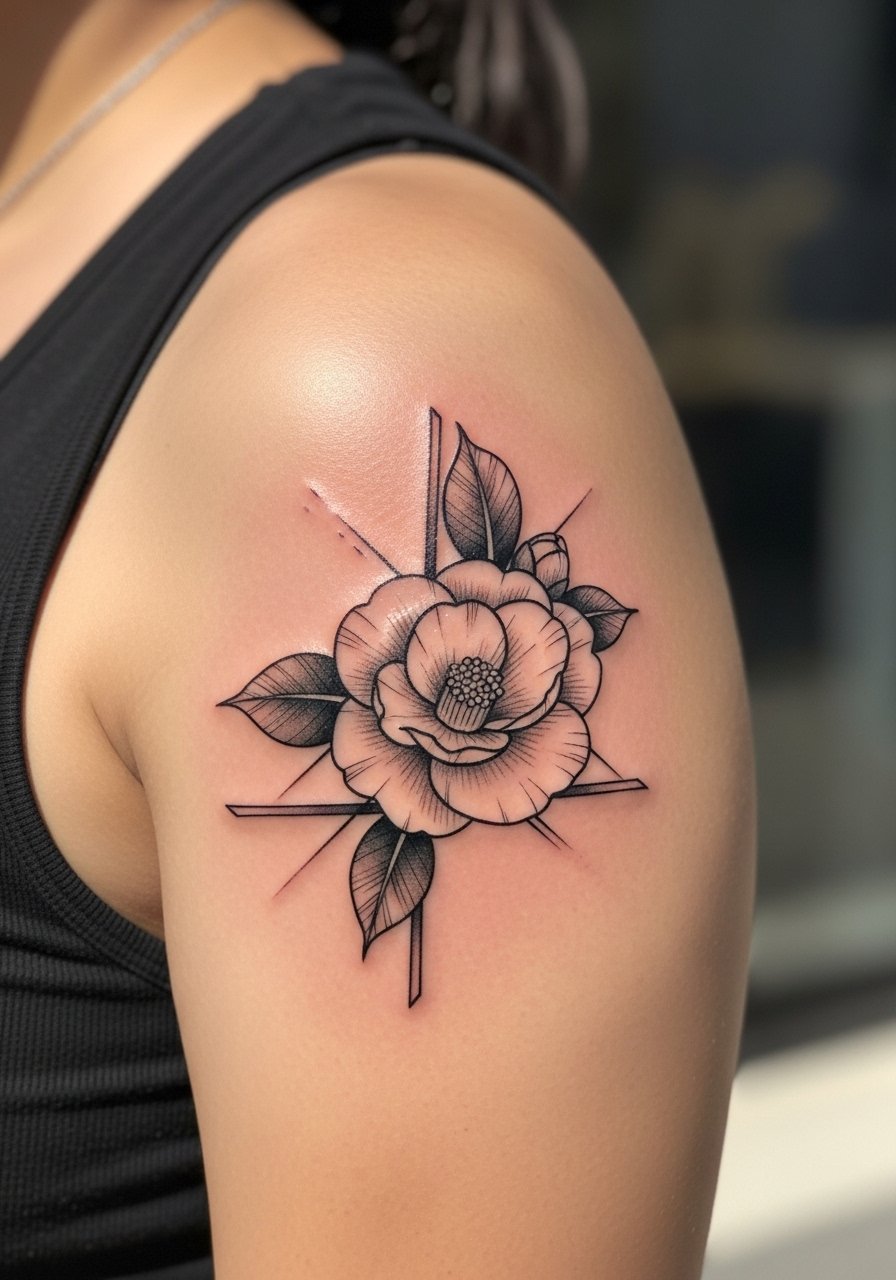
4. Japanese-Influenced Camellia With Wind Bars
Style/Technique: Traditional Japanese linework with modern shading
Pain Level: 6/10
Session Time: 3 to 5 hours
Best For: Those who want a cover-friendly sleeve, people who like bold motifs
This borrows compositional rules from Japanese work, using curved wind bars and bold camellia forms to guide the eye. Be mindful of cultural sensitivity and discuss motifs with your artist, especially if the design references a tradition you do not have personal ties to. The piece works well as a statement shoulder cap that can extend into a sleeve. Ask for crisp outlines and ask the artist to reserve skin breaks around joints for movement. I brought a reference sketchbook and a fine-point marker set to map flow.
Mistake to Avoid: Copying traditional symbols without asking about their meaning or placement.
5. Single-Stem To Full Sleeve Transition
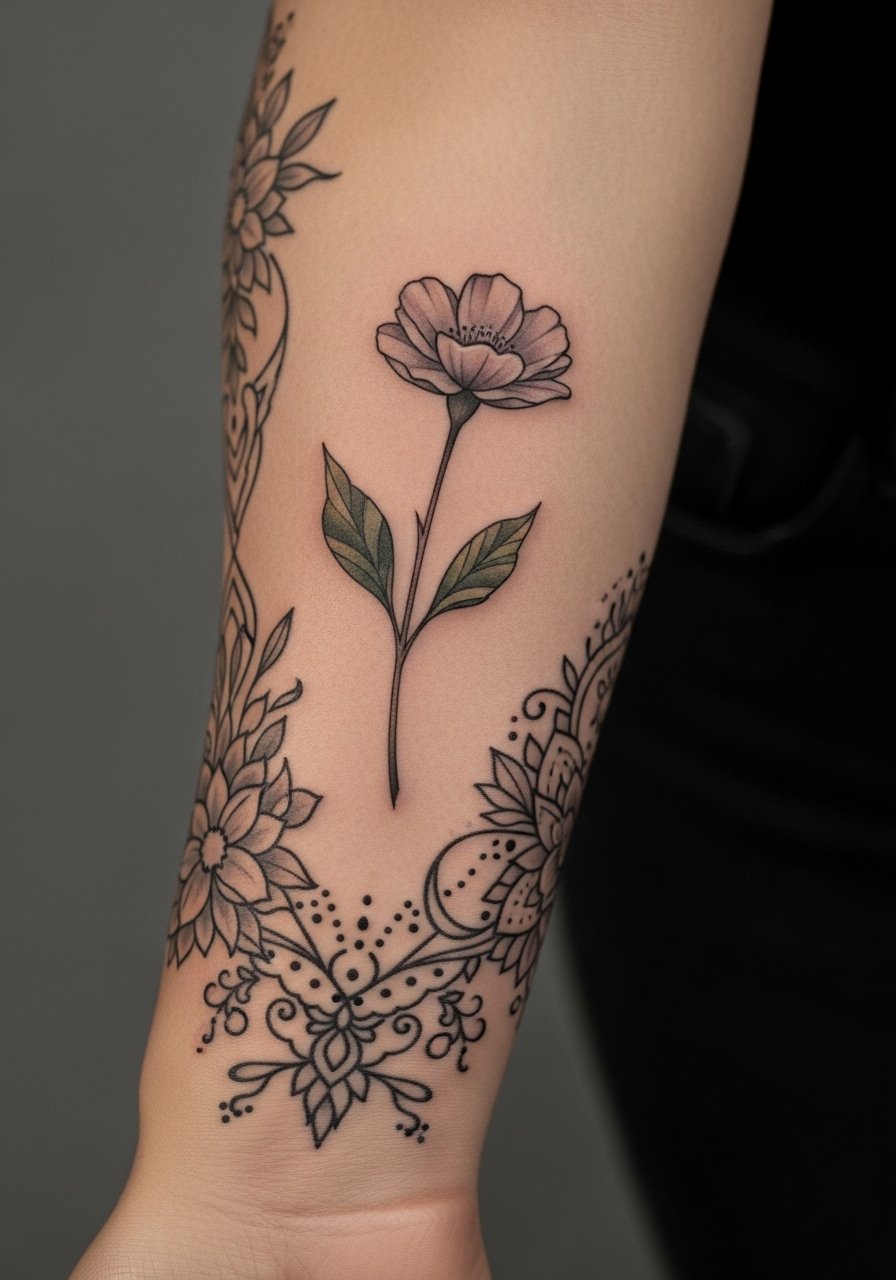
Style/Technique: Gradual composition build
Pain Level: 5/10
Session Time: 2 to 6 hours over multiple sittings
Best For: First-timers building toward a full sleeve
Starting with a single stem and expanding to a sleeve over sessions keeps commitment low and the overall flow intentional. The difference is in how the artist connects stems and leaves, keeping about 1.5 to 2 cm of negative space as breathing room so future additions sit well. This is budget-friendly since you can stage sessions. For home prep I use a cleaning foam to mimic the studio rinse feeling and bring the same reference images each visit.
Mistake to Avoid: Rushing into a full sleeve in one session without a planned anchor piece.
6. Negative-Space Lily Band
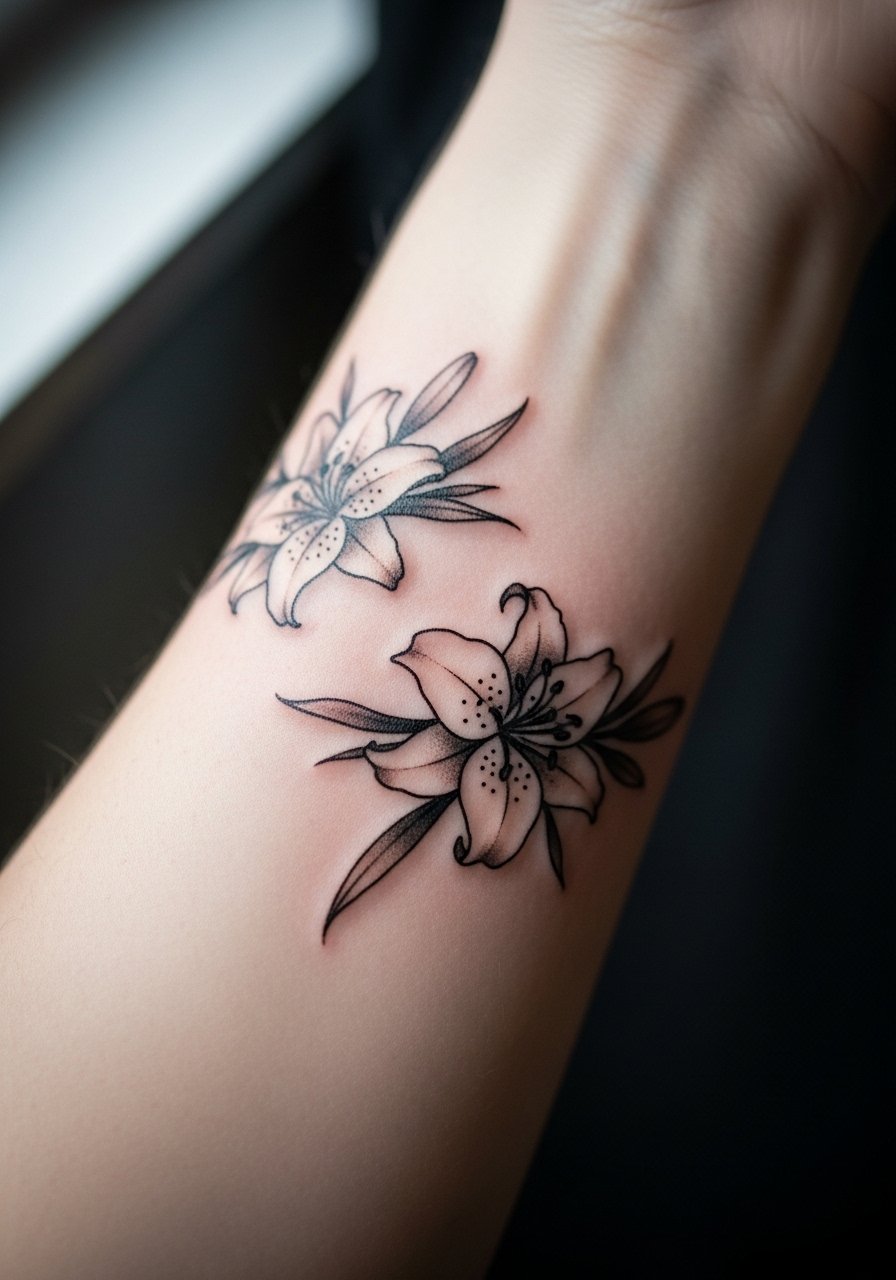
Style/Technique: Negative-space technique with bold outlines
Pain Level: 4/10
Session Time: 1.5 to 3 hours
Best For: People who want coverable, work-friendly sleeves
A lily band uses skin as the midtone so petals read by outline and surrounding black. The effect is clean and wearable, and it photographs with depth without heavy shading. This is a lower-cost option because it relies on precise linework more than long shading passes. Ask your artist for crisp 1 mm outer lines and soft inner breaks. I recommend bringing an aftercare ointment you plan to use, so the artist can sign off on compatibility.
Mistake to Avoid: Requesting too-thin outlines that will fade quickly without touch-ups.
7. Botanical Realism Magnolia Wrap
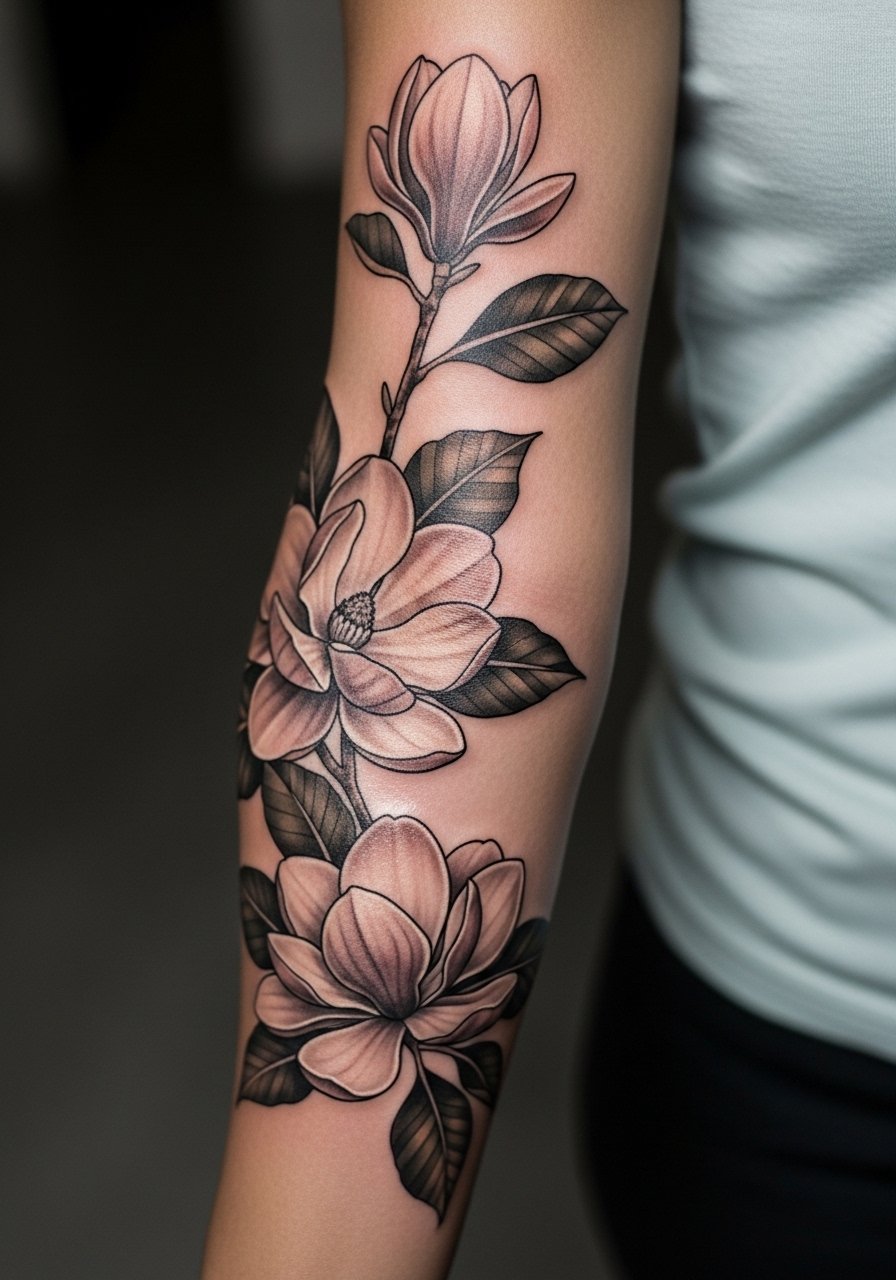
Style/Technique: Realist shading with fine gray wash
Pain Level: 6/10
Session Time: 3 to 6 hours
Best For: Photogenic sleeves, people who want a lifelike look
Realist magnolias rely on subtle gray-wash transitions and small-line highlights to mimic petals. The feeling is calm and organic, and it ages gently if the shading is layered in thin passes. This style benefits from a talk with the artist about how much contrast you want, since heavier contrast will read more graphic. I bring a printed photo and point to the 2 to 3 petals I want as anchors. A portable cold pack wrap helps manage swelling after longer sessions.
Mistake to Avoid: Asking for maximum contrast everywhere, which flattens realism over time.
If any of these items caught your eye, here are the supplies I actually bring or recommend before a session.
Flower Sleeve Supply Picks
Studio Prep:
- sterile disposable razor (~$6-12). For clean skin before stencil.
- tattoo-stencil-transfer-paper (~$10-18). Makes placement consistent.
Aftercare:
- tattoo-aftercare-ointment (~$8-15). My go-to for the first week.
- unscented-fragrance-free-hydrating-lotion (~$6-12). For long-term moisturizing.
- antibacterial-hand-wash-foam (~$5-10). Gentle studio-think cleanser.
Comfort & Recovery:
- instant-cold-pack-wrap (~$6-14). For swelling after long sessions.
- soft-compression-sleeve (~$12-20). Helps reduce swelling without rubbing the tattoo.
- numbing-cream-topical (~$15-30). Use only if your artist approves.
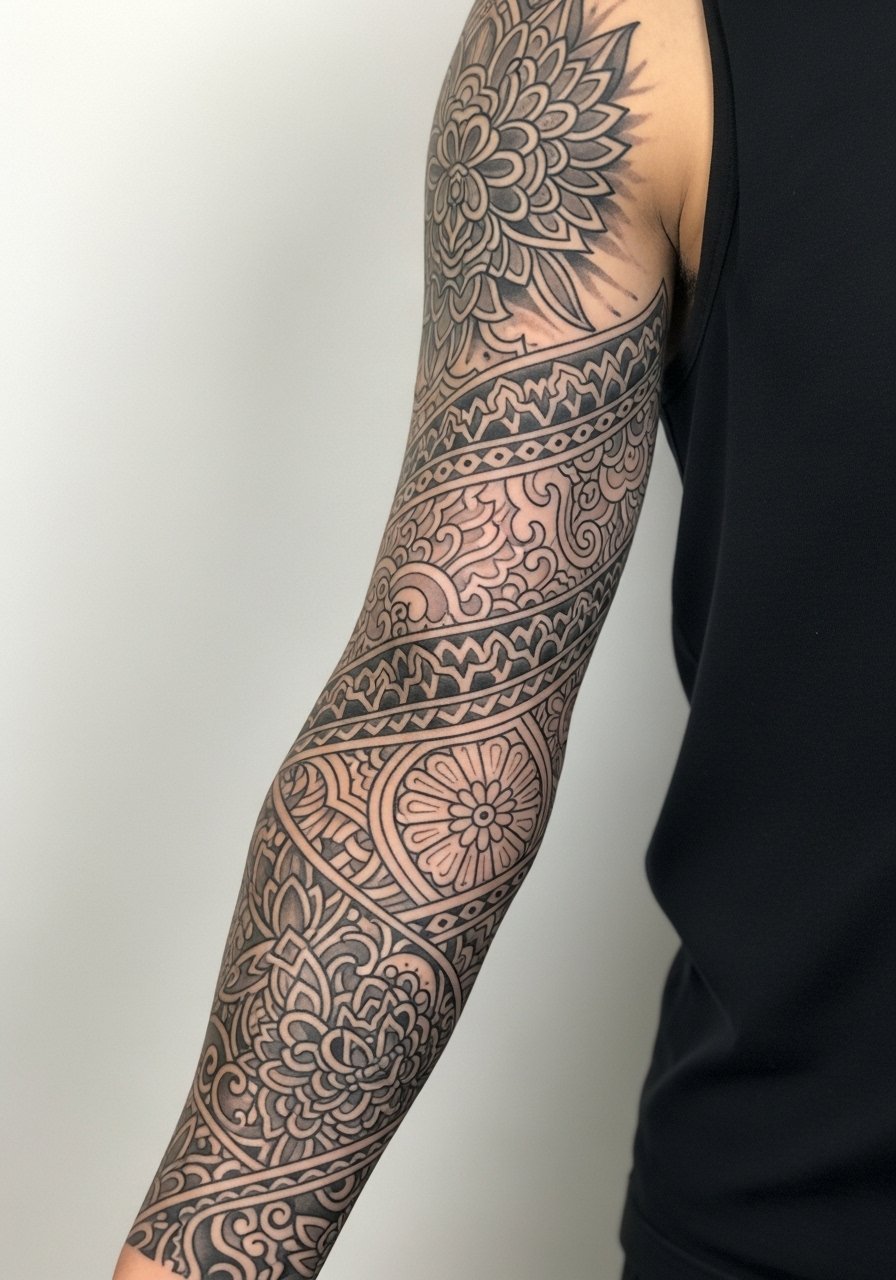
8. Geometric Mandala With Florals
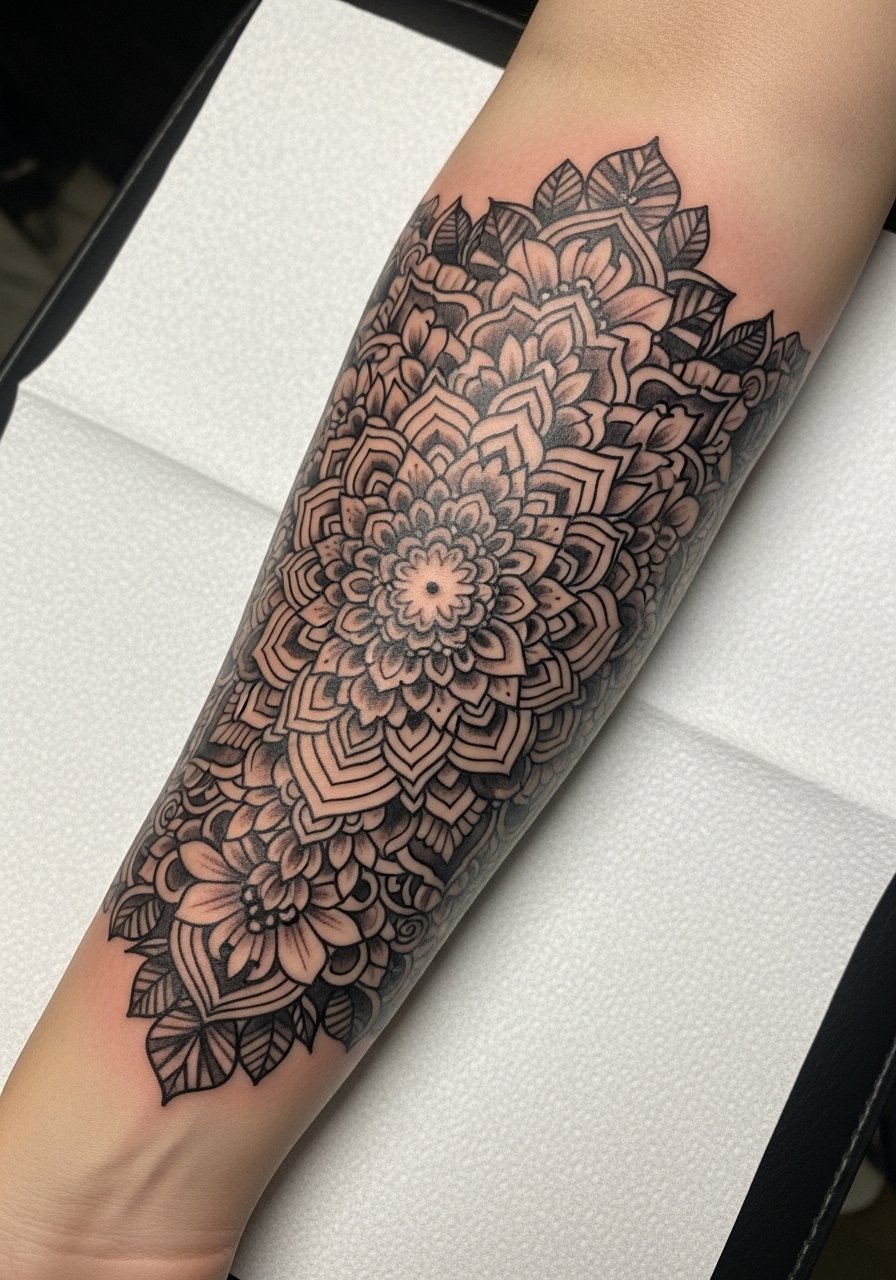
Style/Technique: Geometric dotwork and line symmetry
Pain Level: 5/10
Session Time: 2 to 5 hours
Best For: People who like balance, sleeves that pair with watches or bracelets
Combining mandala symmetry with floral elements gives structure to random stems and petals. The trick is matching radial spacing to the arm circumference so the motif does not warp when the arm turns. Ask the artist to mock the mandala at full scale and test rotation. A metric tape measure helps you and the artist check wrap dimensions.
Mistake to Avoid: Letting the mandala sit off-center, which becomes obvious in motion.
9. Minimalist Wildflower Trail

Style/Technique: Minimal line and tiny dot accents
Pain Level: 3/10
Session Time: 1 to 2 hours
Best For: First-time inkers, someone wanting subtle sleeve beginnings
A trail of tiny wildflowers can start modest and expand later. It reads modern and relaxed and is quick to do, so it fits a tighter budget and lower pain tolerance. The feeling is breezy and wearable with short sleeves. For touch-ups I keep a small touch-up kit on hand to show artists color and line expectations for future sessions.
Mistake to Avoid: Crowding tiny blooms too close together, which makes them merge over time.
10. Victorian Lace Floral Sleeve
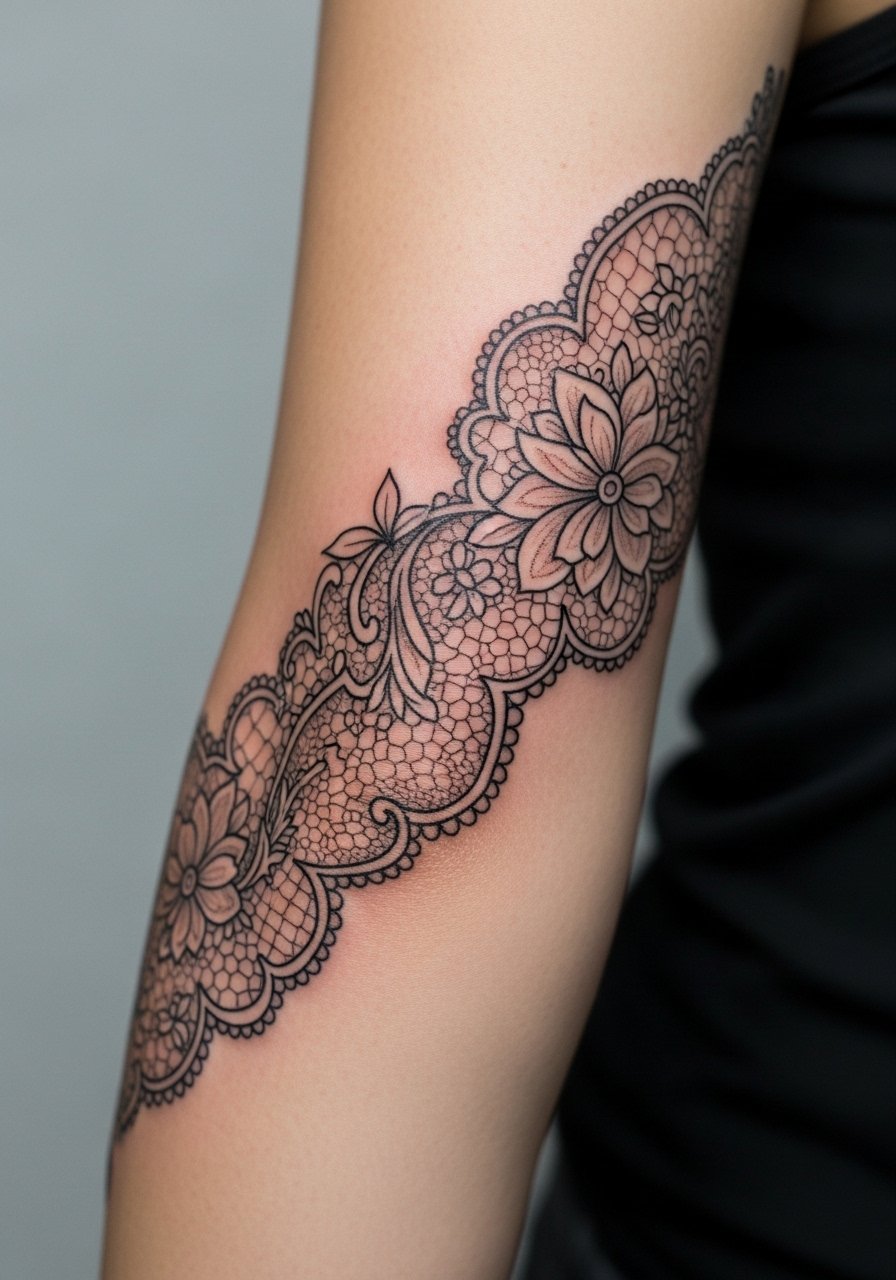
Style/Technique: Ornamental lace lines with floral fills
Pain Level: 5/10
Session Time: 3 to 5 hours
Best For: People who like heirloom aesthetics, sleeves that peek from formal wear
This style borrows lace motifs and filigree to give florals a vintage frame. The result feels dressy and pairs well with short sleeves that let glimpses show. It is detail-heavy so plan for a patient artist who likes fine linework. I suggest bringing fabric or dress photos for reference and a fine-line pen set to sketch ideas with your artist.
Mistake to Avoid: Asking for lace detail smaller than the artist recommends for your skin type.
11. Thorn Sleeve With Roses And Script
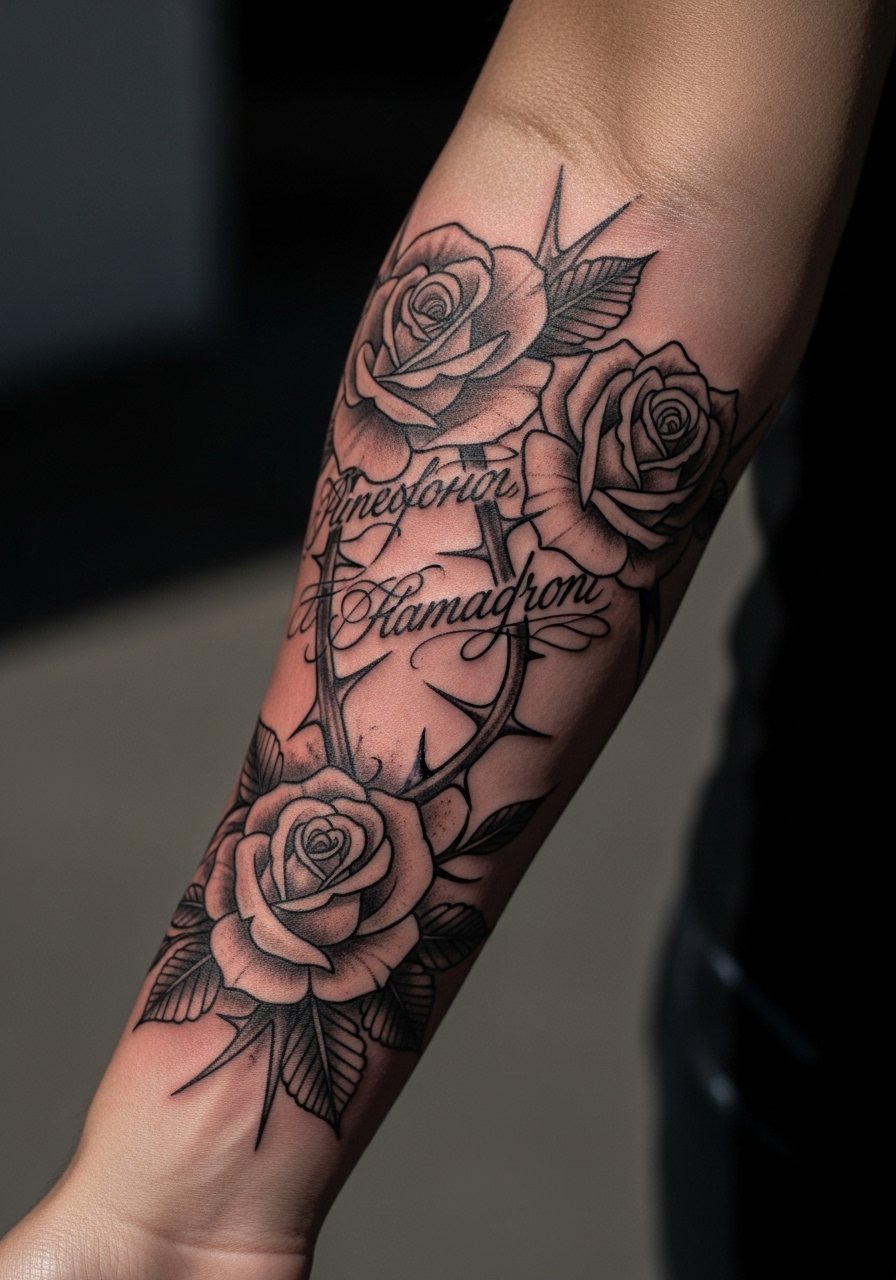
Style/Technique: Contrast of thorns, roses, and lettering
Pain Level: 6/10
Session Time: 2 to 4 hours
Best For: People who want edge plus sentiment, coverable designs
Thorns add edge and movement to a floral sleeve and play well with script. The key is spacing letters so they never sit on top of thorn tips. This combo feels personal and cinematic. Bring the exact wording and font sample so the artist can scale letters to the petal shapes. I usually test lettering size with a temporary tattoo transfer sheet before committing.
Mistake to Avoid: Choosing tiny script size that becomes illegible after healing.
12. Grayscale Hibiscus With Leaf Veins
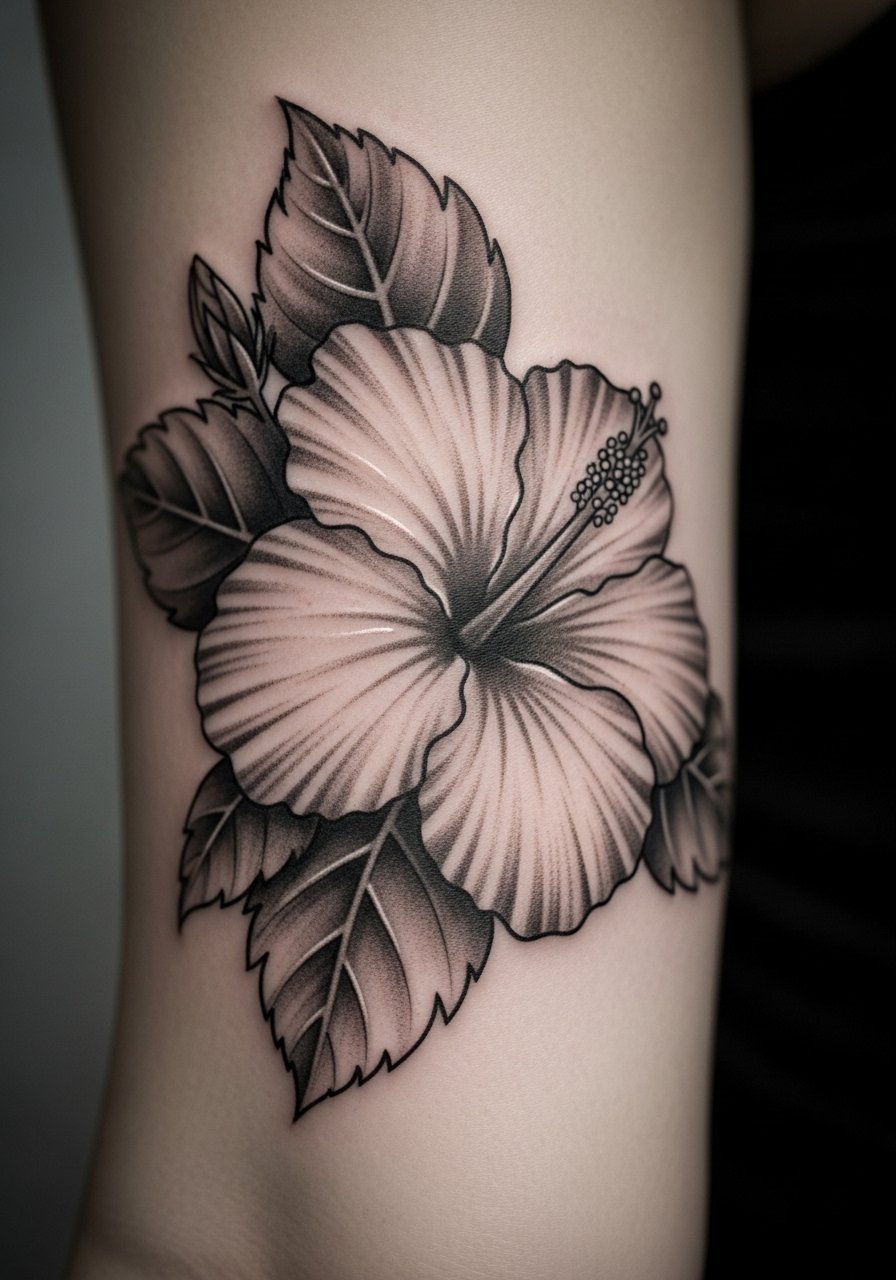
Style/Technique: Gray-wash realism with crisp vein detail
Pain Level: 5/10
Session Time: 2 to 4 hours
Best For: Tropical motifs, sleeves that flow to the shoulder
Hibiscus petals with sharp leaf veins give motion and depth without heavy black fills. The veins are drawn as thin 0.5 mm lines and shaded with washes that keep contrast soft. This approach photographs with delicate mood and holds up because the veins become the long-term structure. I bring a photo printout to show exact vein patterns and a small LED mirror to check placement angles.
Mistake to Avoid: Overdoing petal highlights that flatten when they fade.
13. Flow-To-Shoulder Seamless Wrap
Style/Technique: Full-arm continuity with anchor pieces
Pain Level: 6/10
Session Time: 4 to 8 hours over multiple sittings
Best For: People committed to a full sleeve, visual continuity seekers
This is about composition more than any single bloom. Anchor pieces at the shoulder, elbow, and wrist let the artist weave stems so the eye travels smoothly. The result feels intentional and lived-in, and it makes covering or extending simpler. For planning I map anchors with a washable skin-safe marker and bring layered reference photos. After three years of using the same aftercare routine I can tell which anchor placements age best.
Mistake to Avoid: Letting small, disconnected pieces accumulate without an anchor plan.
Black-and-White Sleeve Aftercare
Thin ointment layers work best. Apply a thin layer of tattoo aftercare ointment twice a day for the first three to five days, then switch to unscented lotion.
Give fresh tattoos shade and airflow. Keep the area out of direct sun as it heals and use a wide-brim hat when outdoors to protect new ink.
Skip heavy scrubs while healing. Gentle rinsing with lukewarm water and an antibacterial-foam-hand-soap keeps scabs clean without pulling ink.
Plan touch-ups after full healing. Wait at least eight weeks, and bring your original piece photos when scheduling a follow-up session with the artist.
