
I pinned a dozen autumn nail photos and kept trying to copy the tiny leaf veins. The pins showed salon-perfect lines and glassy shine, but my first try bled, then pooled, then chipped by day three. I stopped chasing the exact picture and learned which small technique swaps actually read as fall in real life, and which steps are unnecessary for a cozy, wearable mani.
These ideas are for DIYers and salon clients who want autumn vibes without a big time or budget commitment. Expect mostly beginner to intermediate techniques, short to medium wear time unless you opt for gel, and a mix of quick 15-minute looks and one-hour salon-friendly options. I note cure times, brush sizes, and the one product I reach for most when I want a mani that holds up through sweaters and hot cider.
1. Matte Pumpkin Ombre
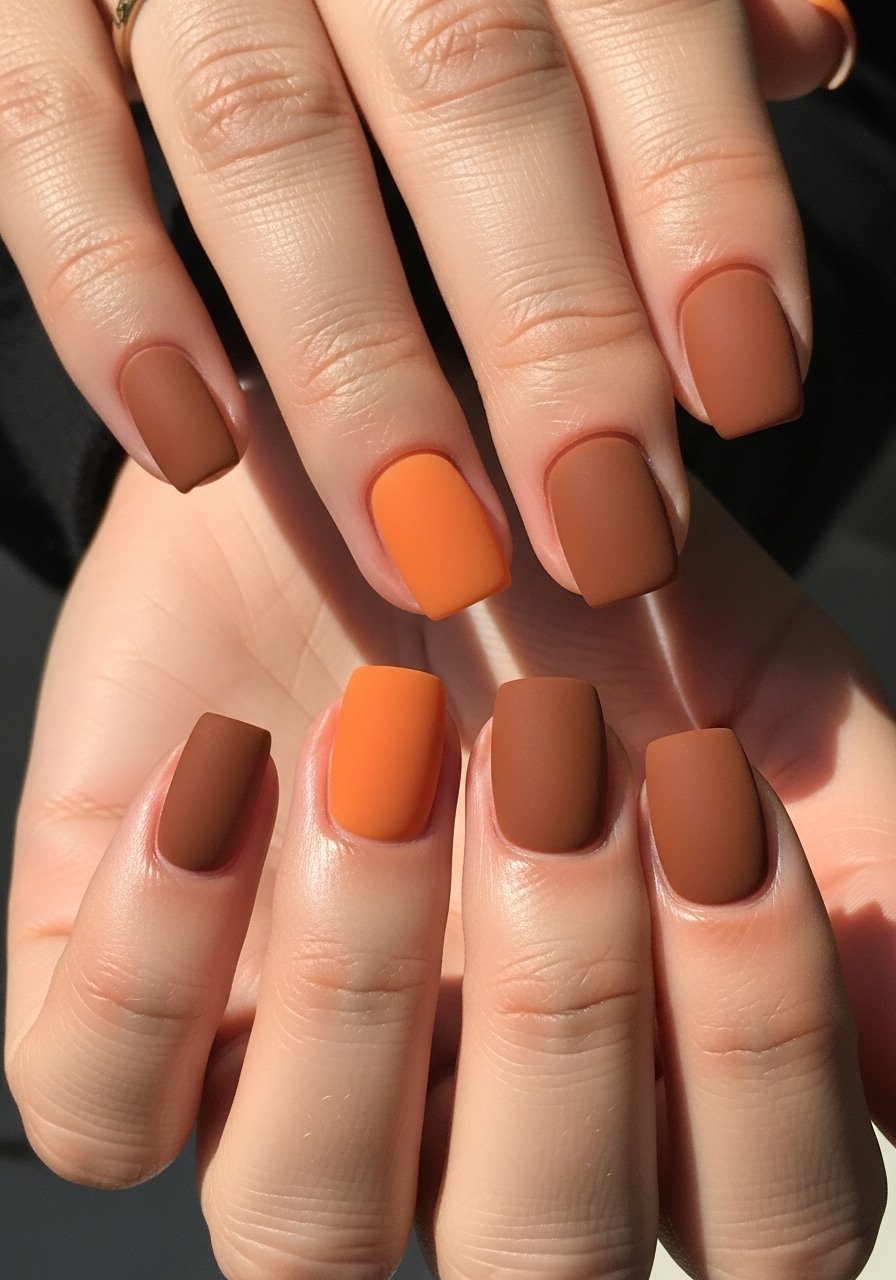
Style/Vibe: Warm gradient, cozy
Best For: Short to medium nails / everyday fall
Skill: Beginner
A soft ombre reads autumn right away, and a matte top coat turns glossy orange into a suede-like finish. Use two thin coats of your base shade, then a second color at the free edge and tap-blend with a small makeup sponge in 3 light presses for a feathered edge. Finish with a matte top coat. Try the matte top coat for a no-fuss finish and a drugstore orange like warm orange creme polish.
Mistake to Avoid: Rubbing the sponge in long strokes. Press and lift to avoid patchy gradients.
2. See-Through Amber Jelly
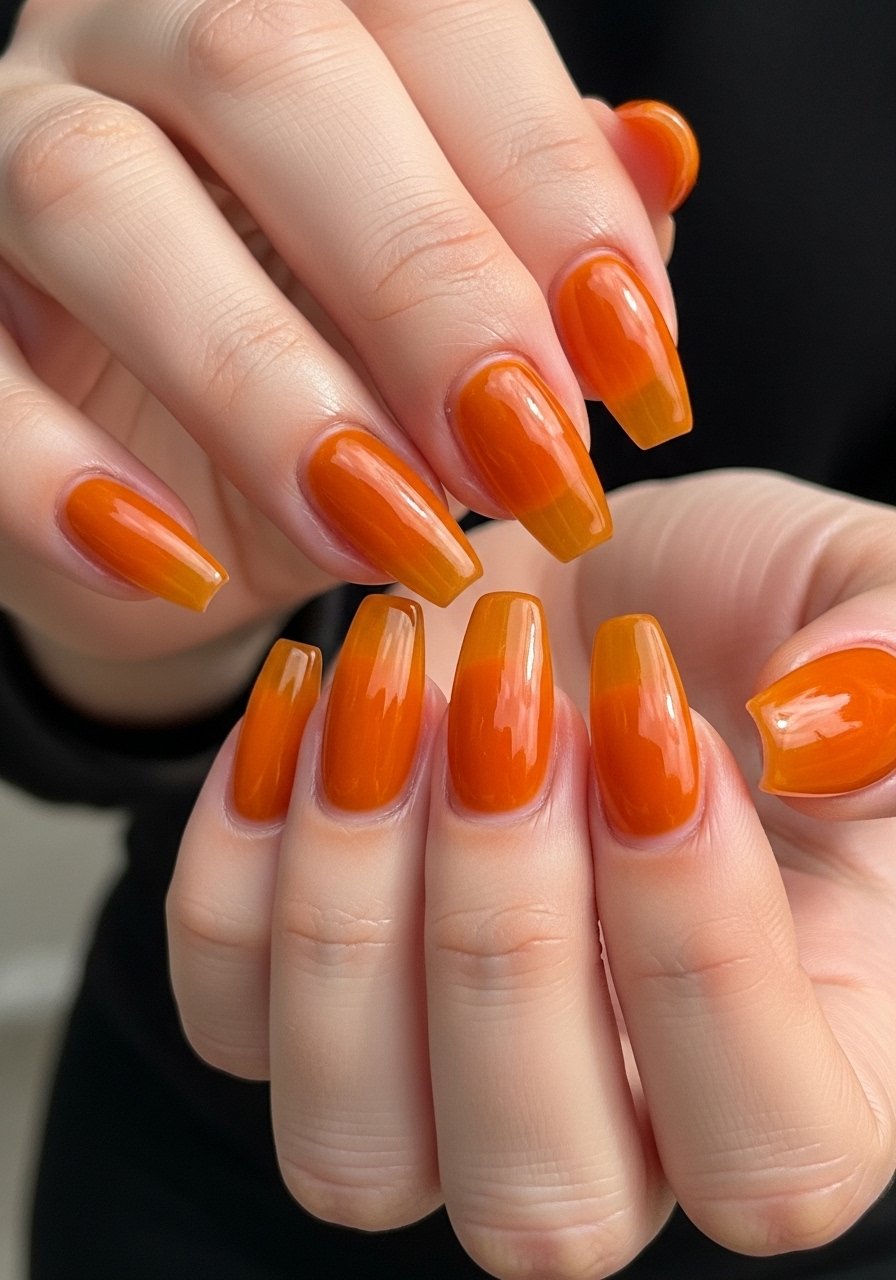
Style/Vibe: Sheer, glassy
Best For: Medium to long nails / evening or brunch
Skill: Intermediate
The jelly look is thin, luminous, and forgiving on imperfect nail beds. Mix one part clear jelly base to two parts semi-sheer amber polish on a mixing pad for a translucent depth that still shows nail lines. Two thin coats cured for 60 seconds each if using gel will give that jelly glow. I like layering a hint of amber gel polish over a clear builder for structure.
Mistake to Avoid: Flooding the cuticle. Leave a 1 mm gap so the edges do not lift.
3. Negative-Space Leaf Tips
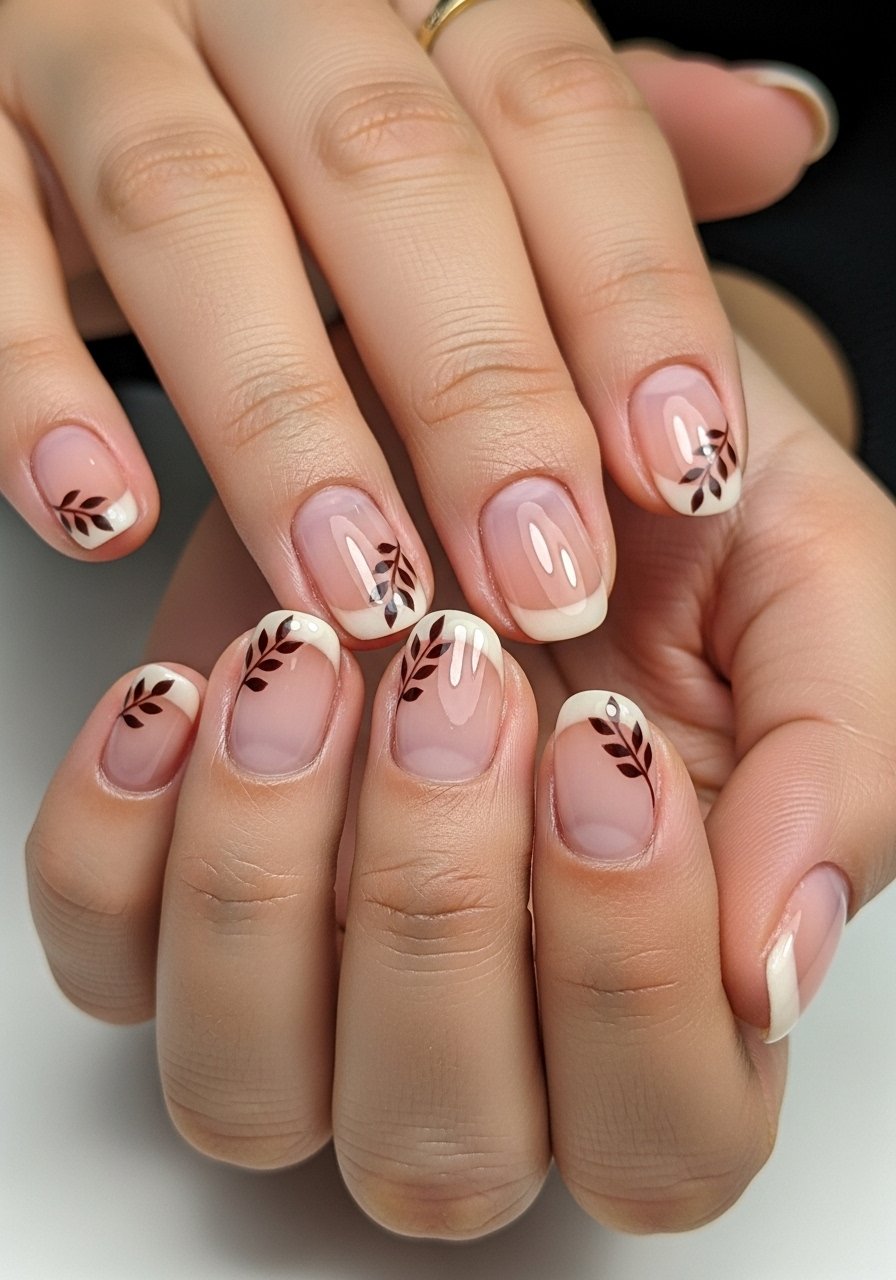
Style/Vibe: Minimal, botanical
Best For: Short nails / low-maintenance chic
Skill: Beginner
Negative space keeps the design modern and low-effort. Paint a sheer nude base, then use a 1.5 mm striping brush to paint leaf outlines only on the tips, leaving the inner nail bare. The visual trick is about 70 percent outline and 30 percent filled area so the fingers look longer. Try a steady brush like the nail art striping brush.
Mistake to Avoid: Filling in the whole leaf. The look depends on that empty space.
4. Copper Flakie Layering
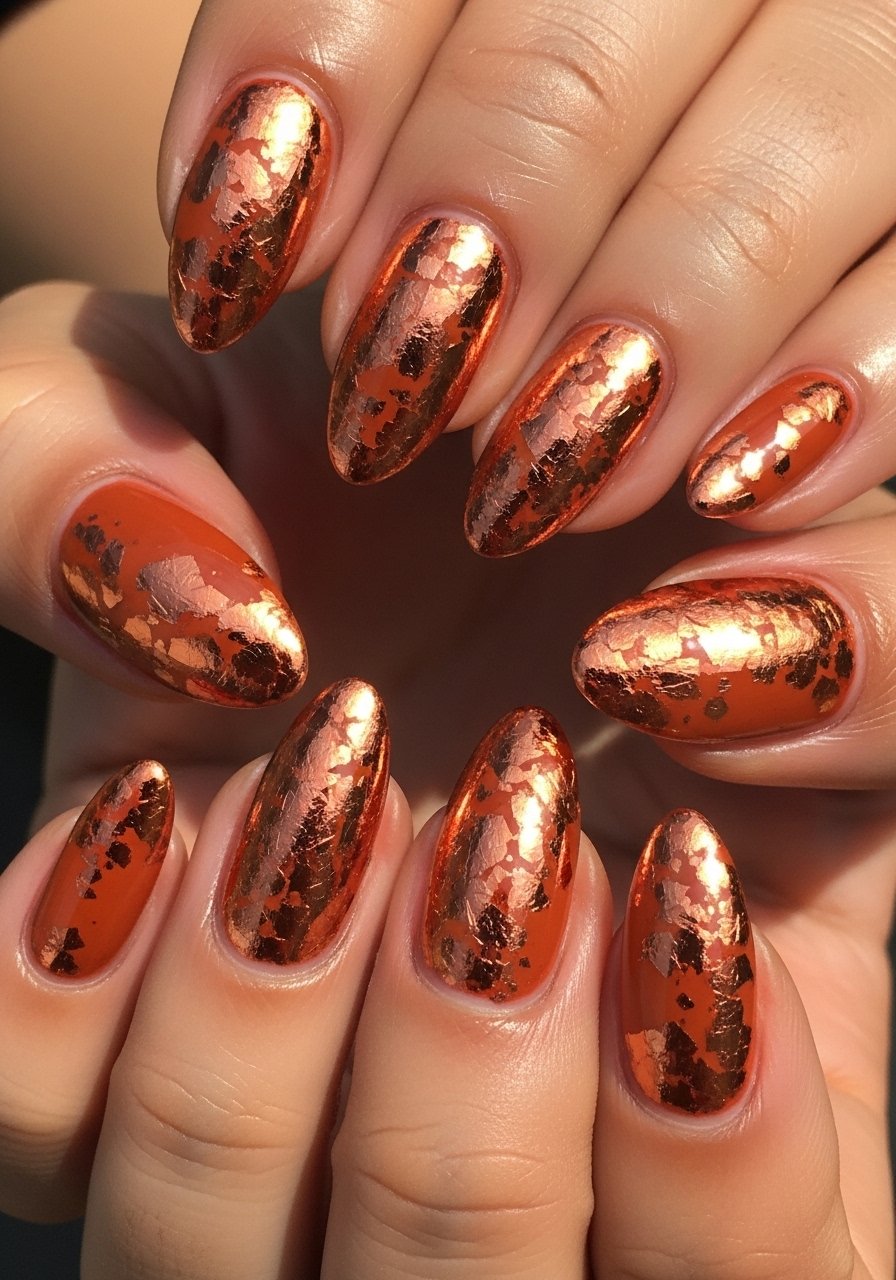
Style/Vibe: Shimmer with depth
Best For: Medium nails / special outings
Skill: Intermediate
Flakies add late-afternoon light without heavy glitter. Paint two coats of a warm brown base, then apply flakie flakes with a damp brush only on the center third of the nail for a layered, natural sheen. Use 70 percent flake density at the center, tapering to 20 percent toward the cuticle for an agate-like look. Seal with a glossy top coat like long-lasting top coat.
Mistake to Avoid: Overloading the brush. Too many flakes creates clumps that lift.
5. Cozy Plaid Accent Nail
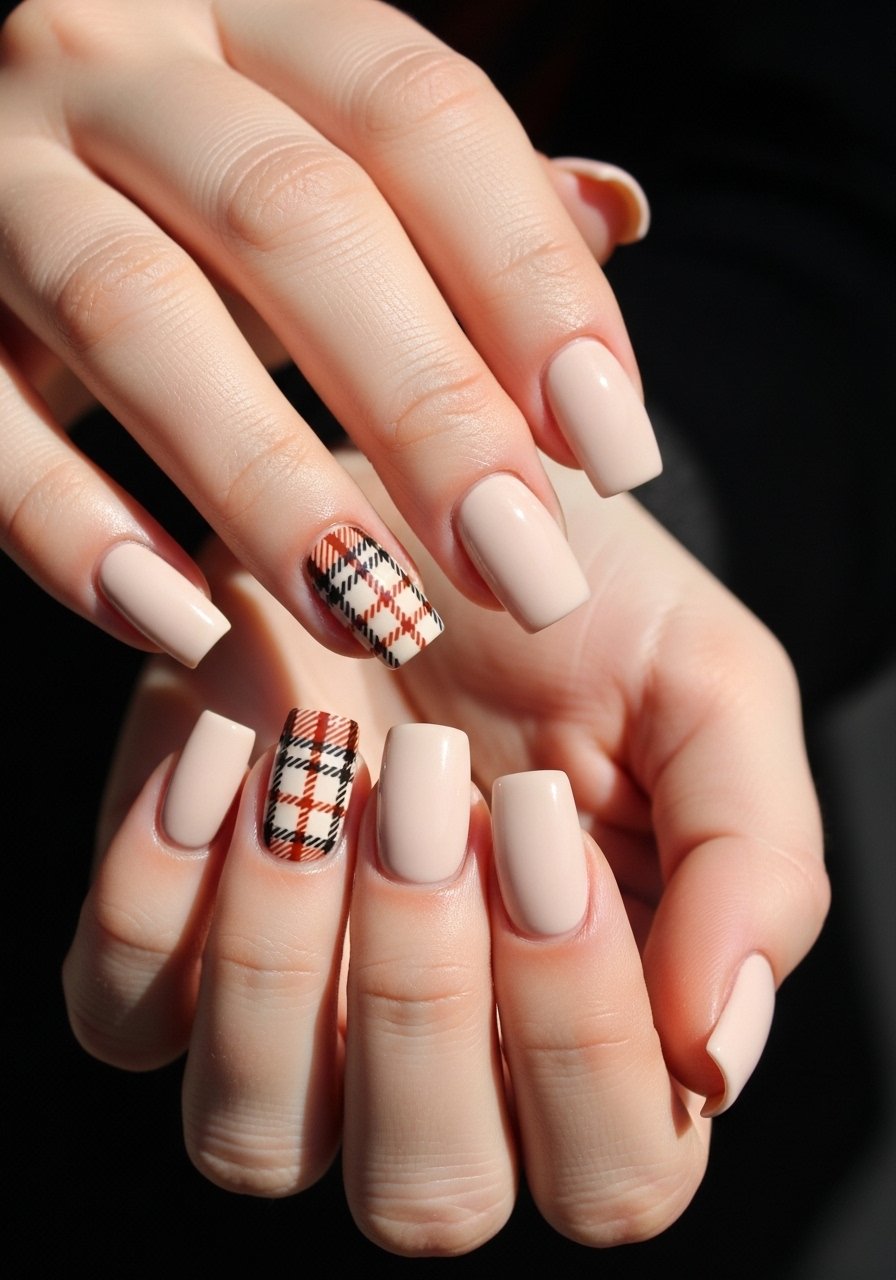
Style/Vibe: Cozy, textile-inspired
Best For: Medium nails / weekend wear
Skill: Intermediate
A single plaid accent reads seasonal without feeling costumey. Start with a cream base, then use a 1.5 mm striping brush for three vertical lines and three horizontal lines in varying thickness. Keep one line darker for contrast and wipe the brush between colors to avoid mud. Seal the accent with a glossy top coat and pair with two muted solids on the other nails. For tools, the striping brush set is worth having.
Mistake to Avoid: Using too many colors. Limit to three so the pattern reads clearly.
6. Rust Velvet Flocking
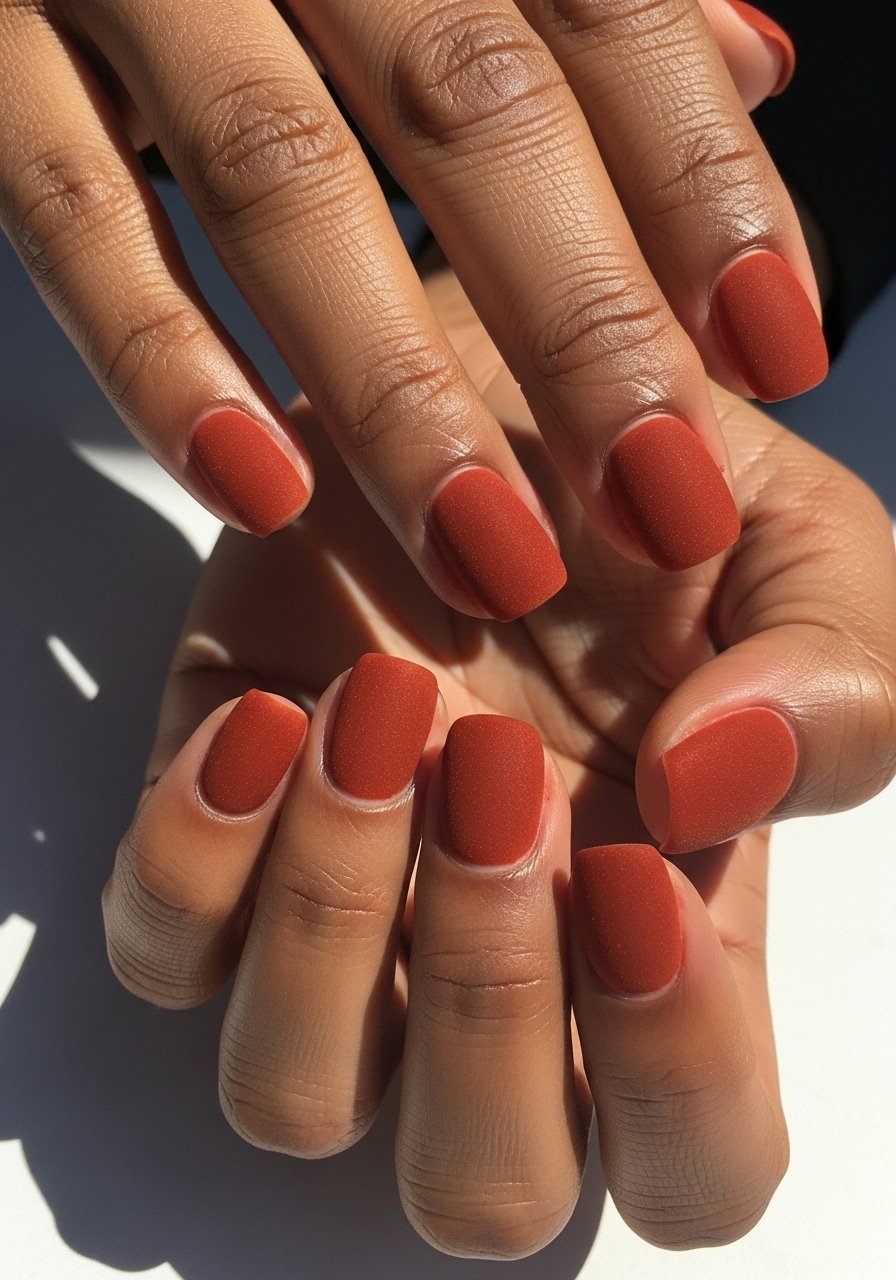
Style/Vibe: Textured, tactile
Best For: Short nails / party nights
Skill: Beginner
Flocking powder gives a plush, seasonal texture that feels like a sweater. Paint a sticky base coat, sprinkle the fine flocking powder while tacky, then press lightly for even coverage. Work one nail at a time and brush away excess after two minutes. A small jar of nail flocking powder makes multiple manicures and reads high-end without salon time.
Mistake to Avoid: Applying flock over a fully dry layer. It will not adhere.
7. Tiny Gold Foil Veins

Style/Vibe: Elegant, tiny-detail
Best For: Medium nails / date night
Skill: Intermediate
A hint of gold reads refined against forest hues. After your base color has cured, place tiny foil fragments with tweezers and press with a silicone tool. Keep foil coverage to 10 to 15 percent of the nail surface and finish with two thin layers of top coat to trap edges flat. I reach for nail foil sheets because the small leaf pieces are easy to tear and place.
Mistake to Avoid: Sealing with a thick final coat. Thin layers prevent visible ridges.
If any of these ideas have you ready to shop, these are the items I actually reach for most.
Essential Tools for Fall Manis
Polish & Color:
- Warm orange creme polish (~$8-14). A true pumpkin tone for gradients.
- Amber gel polish (~$12-20). Sheer layer for jelly looks.
- Deep forest green polish (~$8-15).
Top Coats & Finishes:
- Matte top coat (~$8-12).
- Long-lasting top coat (~$9-15).
Tools & Decor:
- Striping brush set (~$6-12) for plaid and fine lines.
- Nail dotting tool set (~$7-12) for speckles and acorn dots.
- Nail foil sheets (~$6-10) for metallic veins.
- Builder gel (~$15-30) for encapsulation and added strength.
8. Agate Marble in Warm Tones
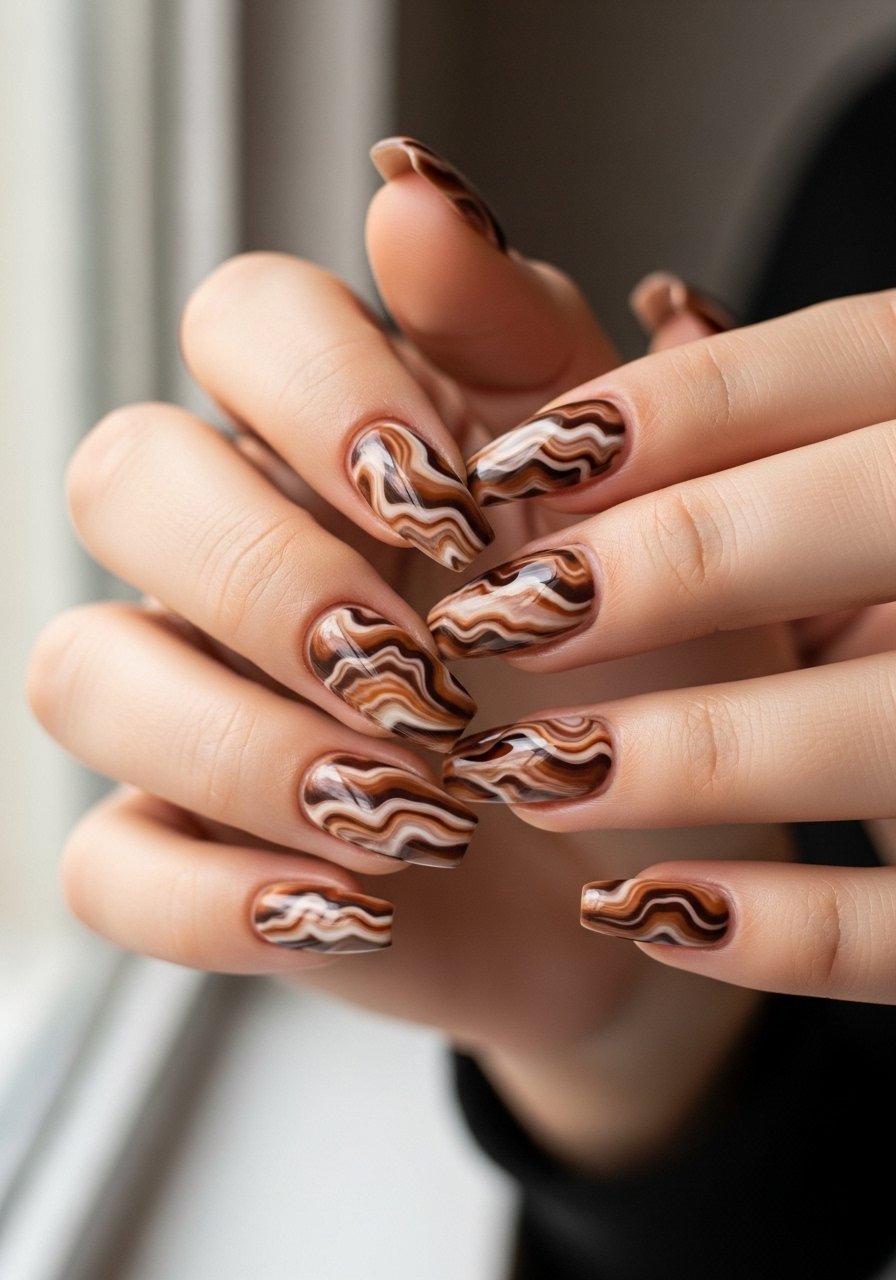
Style/Vibe: Polished, organic
Best For: Long nails / salon appointment
Skill: Advanced
Marble looks complex but a drag technique simplifies it. Drop three wet colors onto the nail, use a 0.5 mm brush to pull lines once, then lift. Keep each color in thin ratios, roughly 40 percent base, 30 percent secondary veins, 30 percent highlights for real depth. If using builder gel, cure each thin layer for 60 seconds. I rely on a fine detail nail brush for the veins.
Mistake to Avoid: Overworking the marble. A single pull creates natural lines; too many pulls look muddy.
9. Pressed Leaf Encapsulation
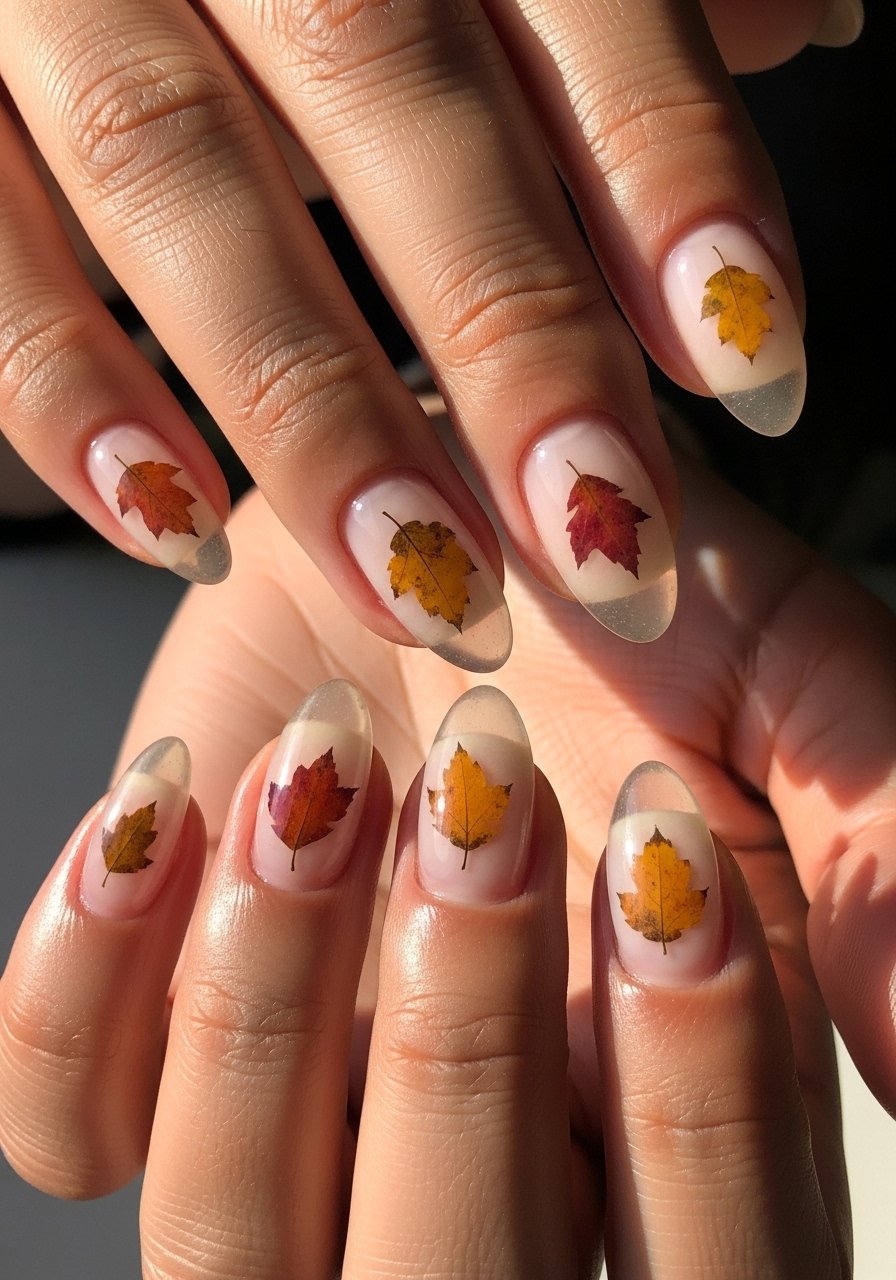
Style/Vibe: Natural, artisanal
Best For: Medium nails / special keepsake manicures
Skill: Intermediate
Real dried leaves sealed in clear gel create a delicate autumn moment. Use very thin, fragile leaves pressed flat in advance. Place the leaf on a thin tacky layer, then encapsulate with builder gel in two thin layers cured for 60 seconds each. Keep leaf pieces smaller than a quarter to avoid lifting. Seal edges carefully with a small bead of gel. The builder gel makes the piece durable.
Mistake to Avoid: Encapsulating a damp leaf. Any moisture leads to bubbles.
10. Satin Berry Two-Tone
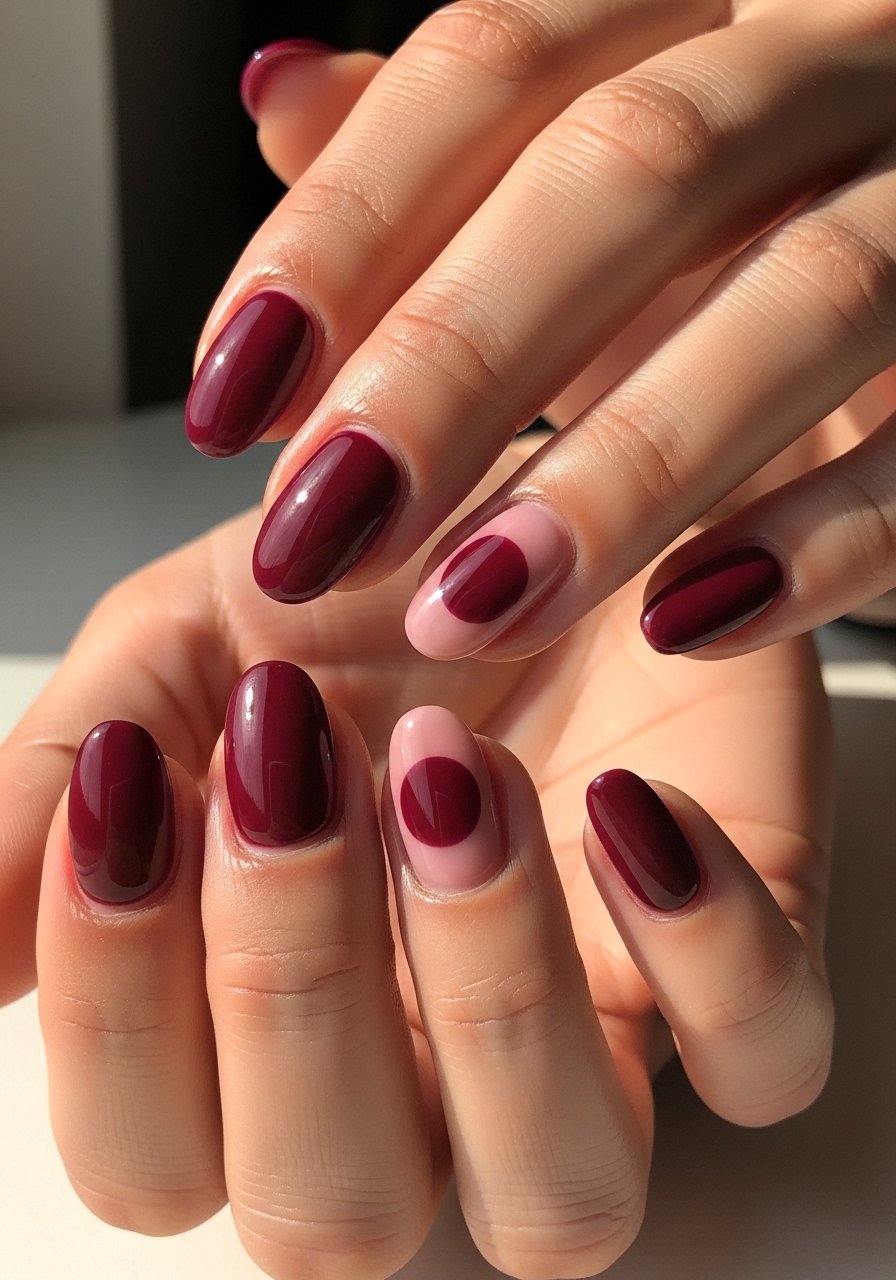
Style/Vibe: Soft, rich
Best For: Medium nails / office to dinner
Skill: Beginner
Satin finishes read luxe but are easy. Paint a deep berry base, then mask half the nail with a small dot and apply a lighter berry satin polish on the lunula area. A sheer satin top layer gives a fabric-like sheen without glitter. Use two thin layers and one quick-dry top coat. The quick-dry top coat keeps the finish neat.
Mistake to Avoid: Applying a glossy top coat over satin. It erases the texture.
11. Speckled Acorn Dots

Style/Vibe: Playful, detailed
Best For: Short nails / weekend casual
Skill: Beginner
Speckled dots mimic acorn texture and are forgiving. Use a 3 mm dot for larger speckles and a 1 mm for tiny seeds. Start with a warm beige base, then layer a few brown dots randomly, concentrating 60 percent at the tip and 40 percent near the center for visual balance. A toothpick works in a pinch but a dotting tool set keeps sizes consistent. I use the nail dotting tool set.
Mistake to Avoid: Uniform spacing. Random placement looks more organic.
12. Tiny Pumpkin Face Accent
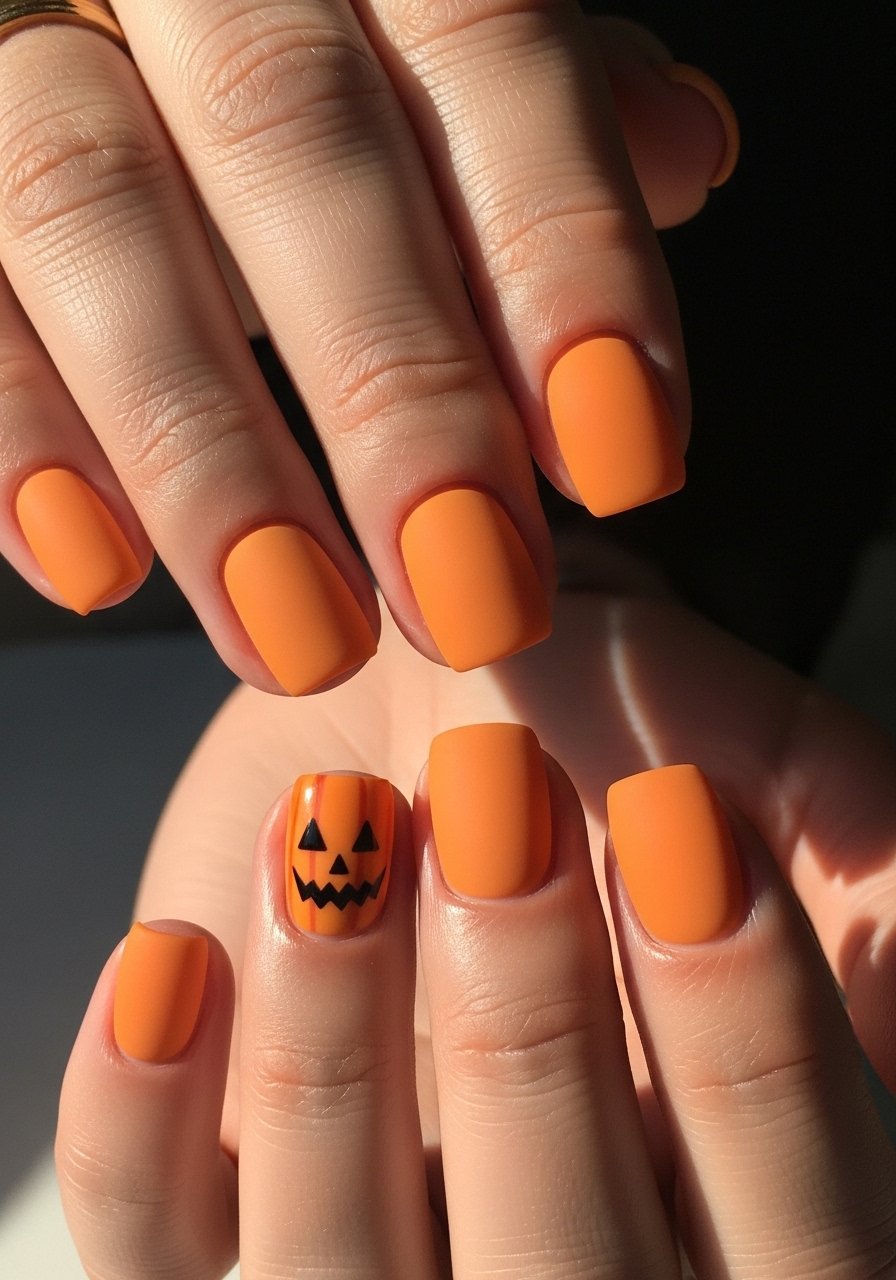
Style/Vibe: Cute, seasonal
Best For: Short nails / kids and playful looks
Skill: Beginner
A mini pumpkin is approachable and quick. Paint a sheer orange base, use a 0.5 mm detail brush to outline a tiny pumpkin about 4 mm wide, then add two tiny black dots for eyes and a thin curved smile. Keep the motif under 5 percent of nail surface so it reads delicate. Seal with a fast top coat. The detail nail brush helps make a small face legible.
Mistake to Avoid: Making the pumpkin too large. Scale down for charm.
13. Sheer Mauve with Chrome Edge
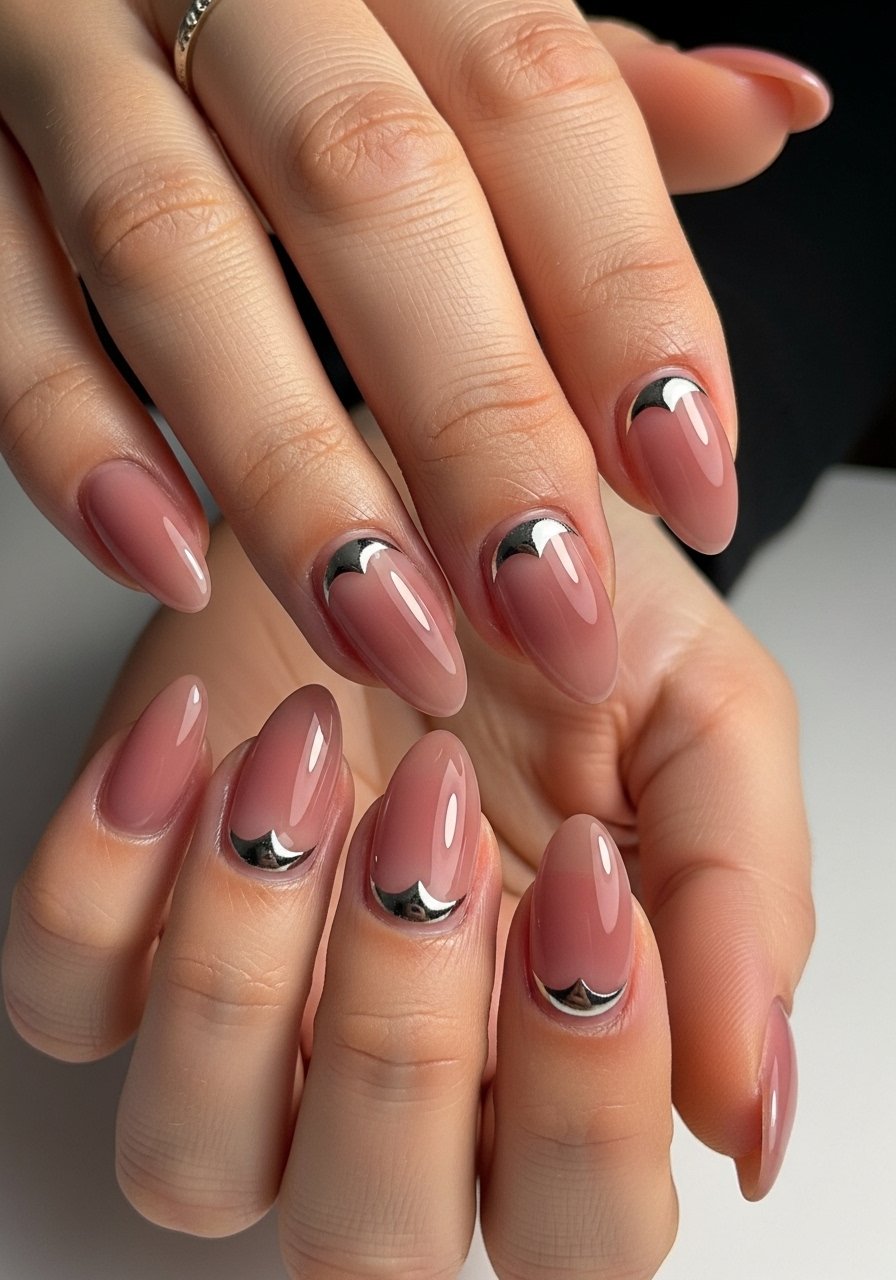
Style/Vibe: Modern, subtle sparkle
Best For: Medium nails / minimalist lovers
Skill: Intermediate
Chrome at the cuticle gives a jewel-like halo without full-on mirror nails. Apply a sheer mauve, then buff a 1 mm crescent at the proximal nail and rub chrome powder with a silicone tool. Seal with a non-layering top coat to keep the chrome reflective. The visual rule is 90 percent subtle base with a 10 percent metallic highlight. Try chrome powder.
Mistake to Avoid: Overbaking chrome under too much heat. It can dull the mirror finish.
14. Glossy French With Matte Stem
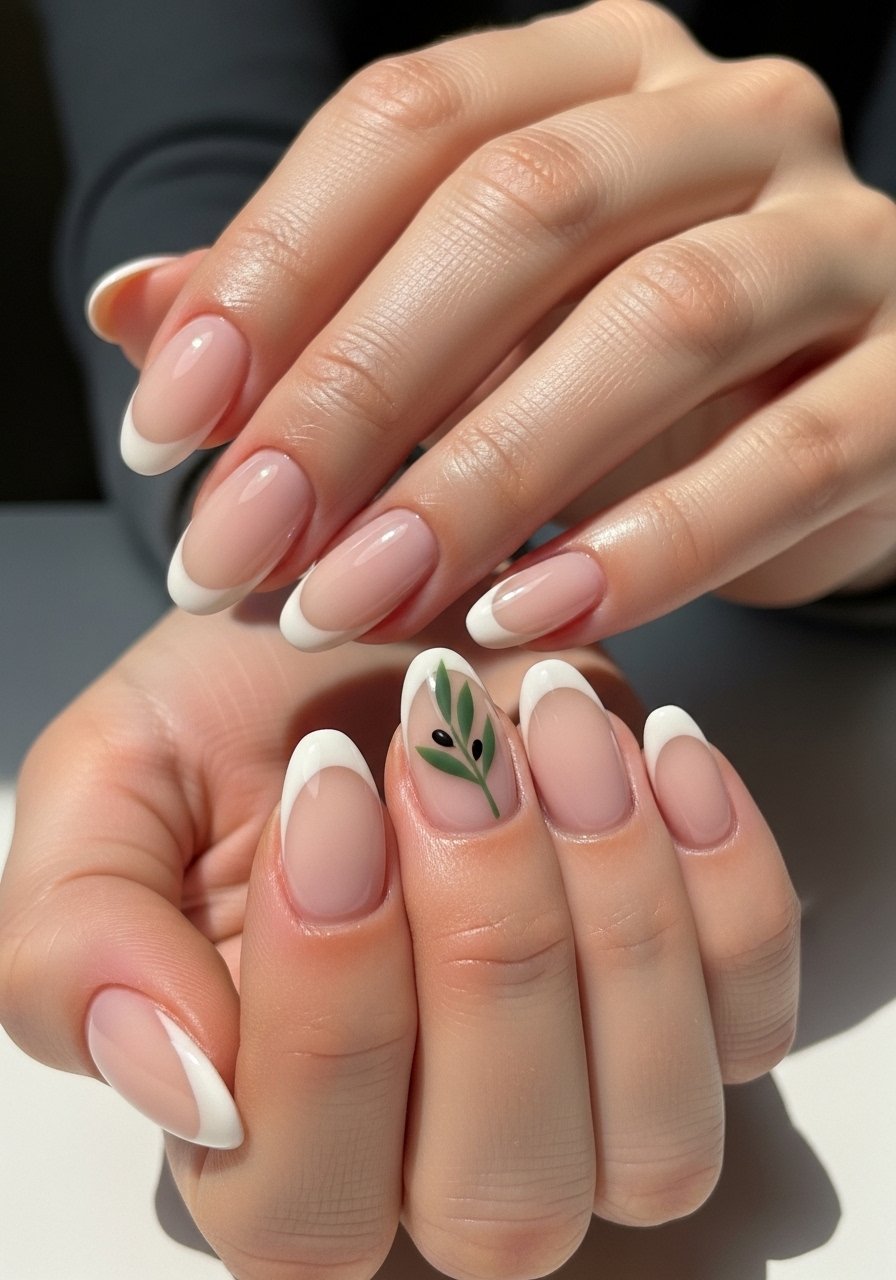
Style/Vibe: Classic with a twist
Best For: Medium nails / formal occasions
Skill: Intermediate
A glossy French paired with a matte stem or leaf feels intentional. Paint a clean glossy tip, then use matte polish to draw a single thin stem down one accent nail. Contrast works best when the matte stem covers less than 25 percent of the nail. Seal the glossy nails with a high-shine top coat and leave the matte nail unsealed or use a matte top coat for the stem. I alternate with high-shine top coat.
Mistake to Avoid: Making the stem thick. Keep it hairline thin for elegance.
15. Microglitter Forest Gradient
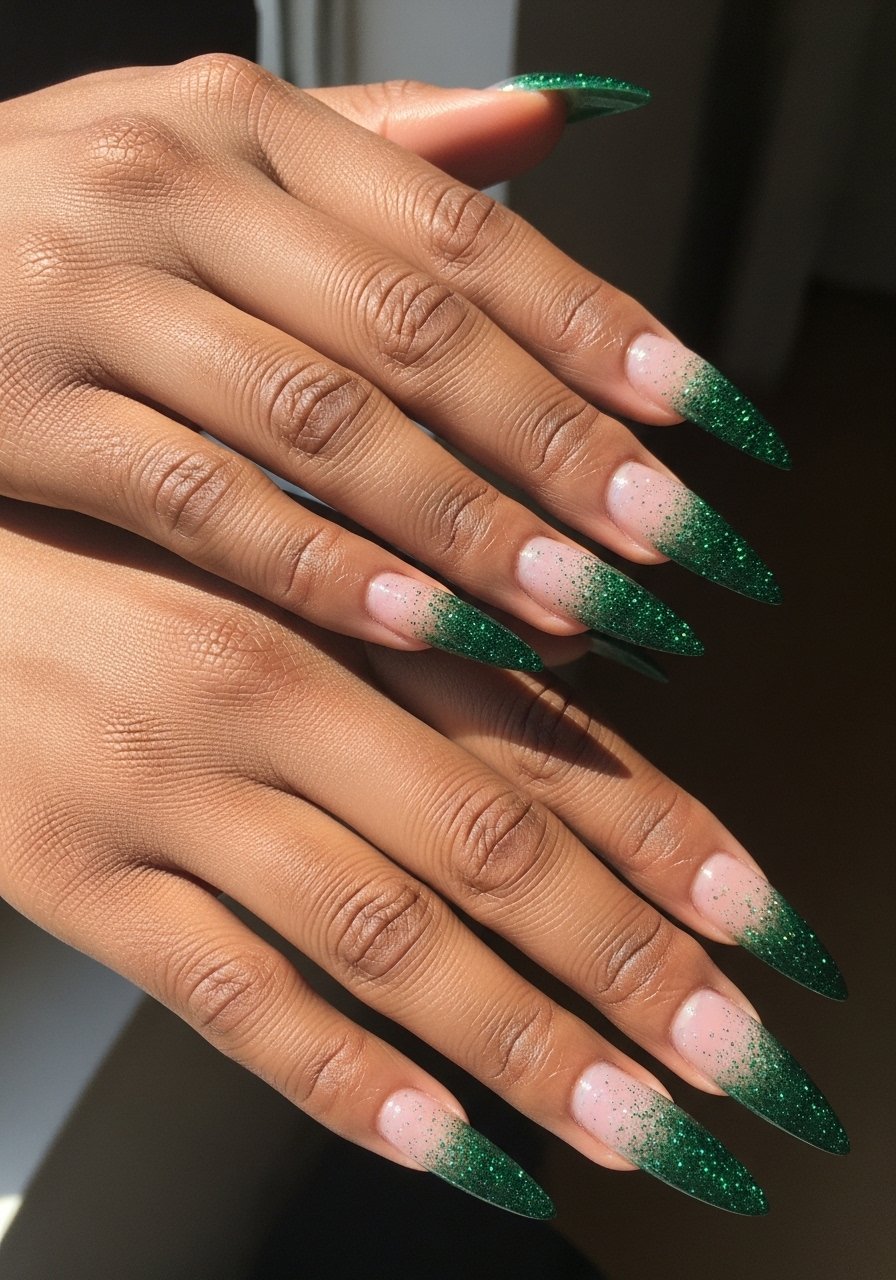
Style/Vibe: Sparkling depth
Best For: Long nails / night out
Skill: Intermediate
Microglitter fades look expensive when applied in a controlled gradient. Brush on dense glitter at the tip, then drag the brush upward in 3 short strokes to thin the coverage by about 60 percent at mid-nail and 90 percent at the base. The trick is layering thin coats until you have a smooth fade. Seal with two thin top coats to prevent texture. Microglitter polish works well.
Mistake to Avoid: One thick glitter coat. It creates lumps and peels.
Fall Mani Shortcuts
Thin coats beat one thick coat every time. Three thin layers of quick-dry top coat look smoother and last longer than one gloopy layer.
Grab a striping brush. A 1.5 mm brush is the trick for tiny leaf veins and plaid lines and it makes precision five minutes faster.
When you map a design, start on paper. Drawing a 4 mm pumpkin first keeps the tiny motif the right scale for short nails. Keep a detail nail brush handy.
Curled-up flakes come from overload. Use a small dab of adhesive and press foil fragments flat with a silicone tool for secure placement.
Most short-lived chips happen at the free edge. Cap the tip with top coat and run the brush horizontally across the edge to seal, then cure or air-dry fully. A final swipe of long-lasting top coat keeps everything in place.
