
I chased the perfect prom screenshot for years, saving pins with glossy highlights and undone buns, then showing up with flat waves and a clump of product at the roots. The moment I stopped trying to copy every photo and started matching the highlight placement to my face shape is the exact moment my hair actually looked like it belonged in someone else’s phone. These are the looks I still screenshot for real life, not just the grid.
These are for long hair with highlights, built to read in photos and hold under humid gymnasium lights. Picks range from low-effort looks you can do in 15 minutes to salon-level styles you can DIY at home. Most ideas work on straight, wavy, and curly textures, and there is a heat-free alternative where it makes sense, so you can pick based on time and skill.
1. Sun-Kissed Face-Framing Waves
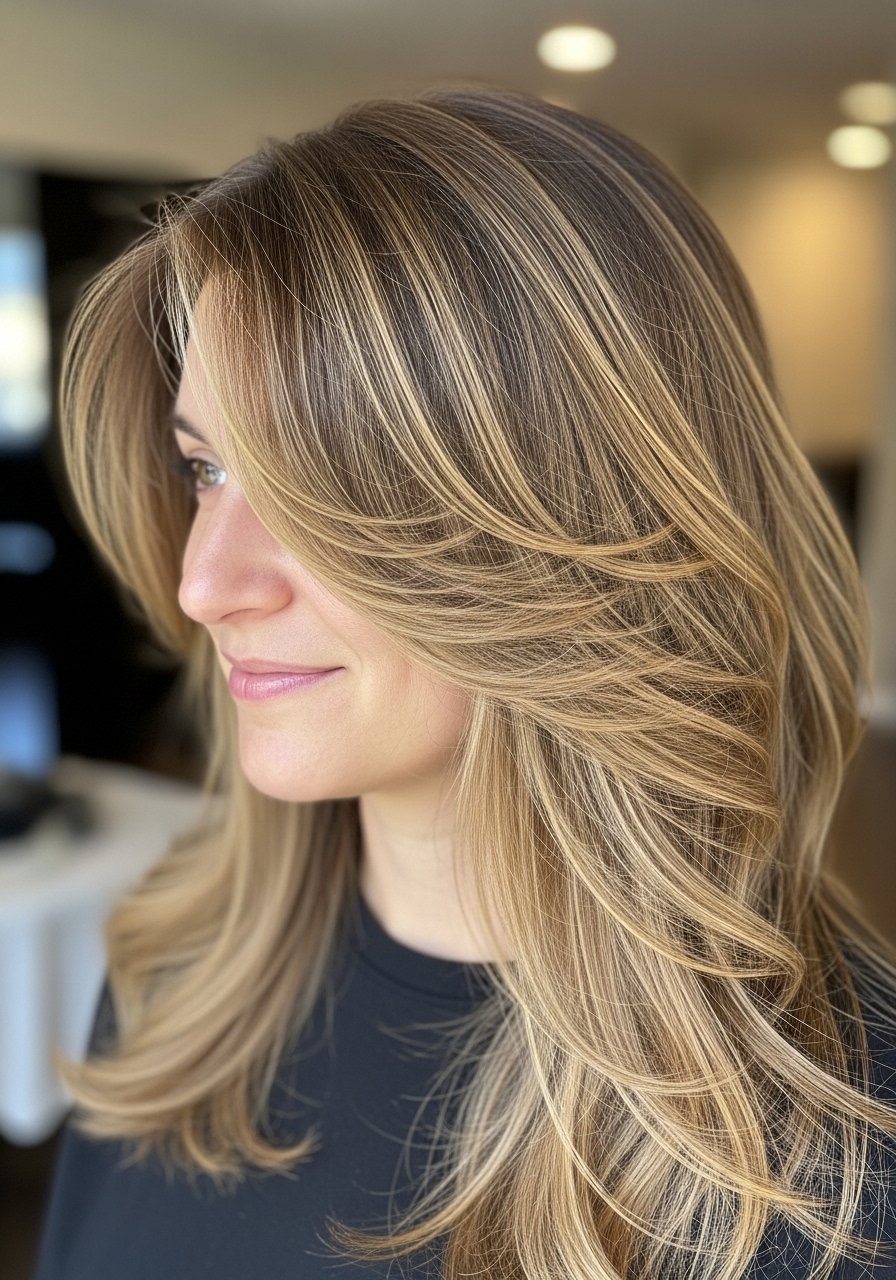
Start by parting slightly off center and curling with a 1-inch wand, wrapping 2-inch sections away from the face for 8 to 10 seconds each. Leave the bottom two inches uncurled to keep the look modern and let the highlights peek through. Finish with one mist of light-hold texturizing spray to separate pieces, then lightly finger-comb. Works on all porosities, but if your hair is low porosity, use a spray oil diluted 1 part oil to 3 parts leave-in to avoid weighing the waves down.
Mistake to Avoid: Curling tiny pieces and brushing them into one mass, which blurs highlight definition.
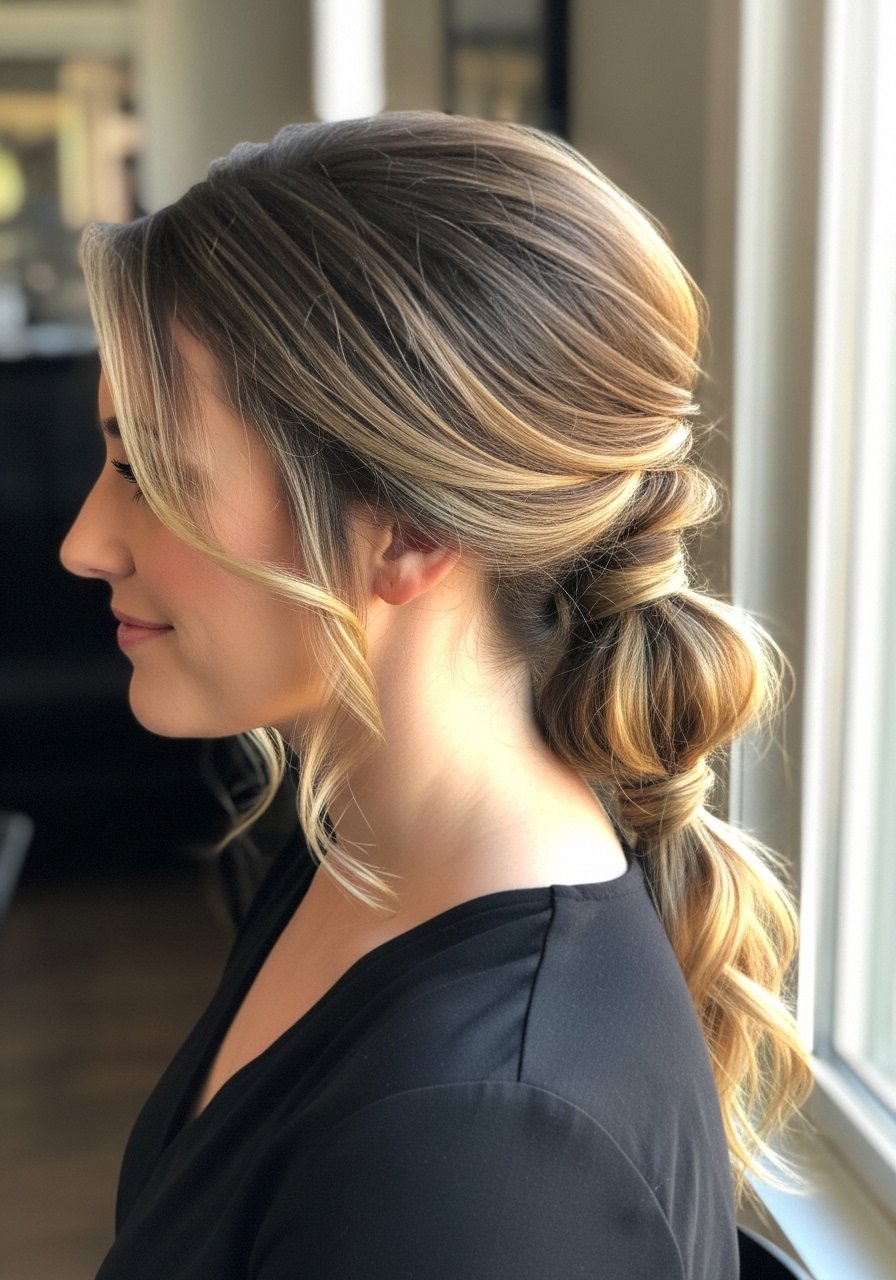
2. Low Twisted Bun With Highlight Halo
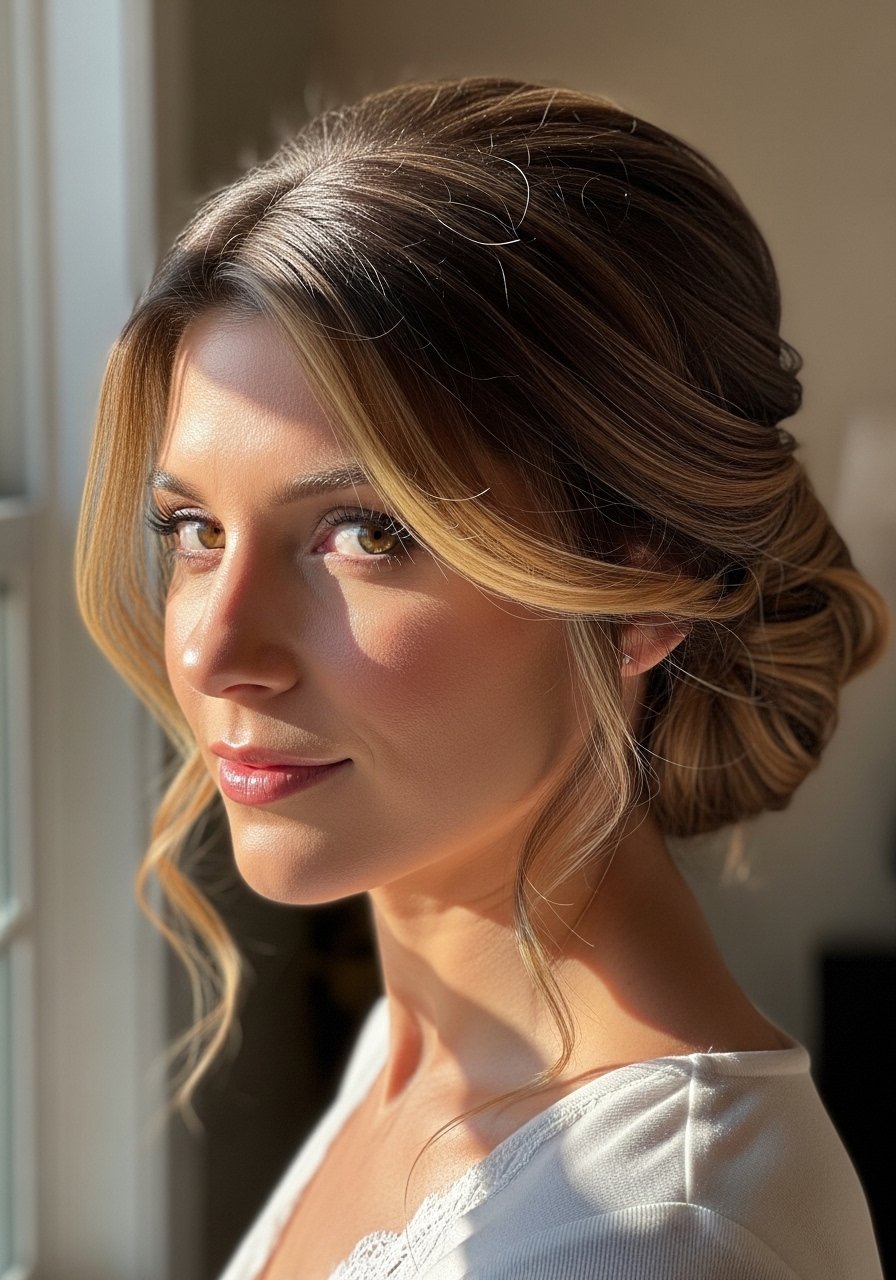
Gather hair at the nape and create two loose twists, pinning each to form a low bun that leaves the highlighted front strands loose. Pull at the crown gently for height, about one finger-width, to avoid a flat finish under photos. Use a medium-hold cream like smoothing styling cream on the lengths to keep flyaways sleek. This is elegant for formal gowns and takes about 10 minutes once you practice the twist count and pin placement.
Mistake to Avoid: Securing the bun too tightly, which hides the highlights and flattens the shape.
3. Voluminous Half-Up With Ribbon Tie
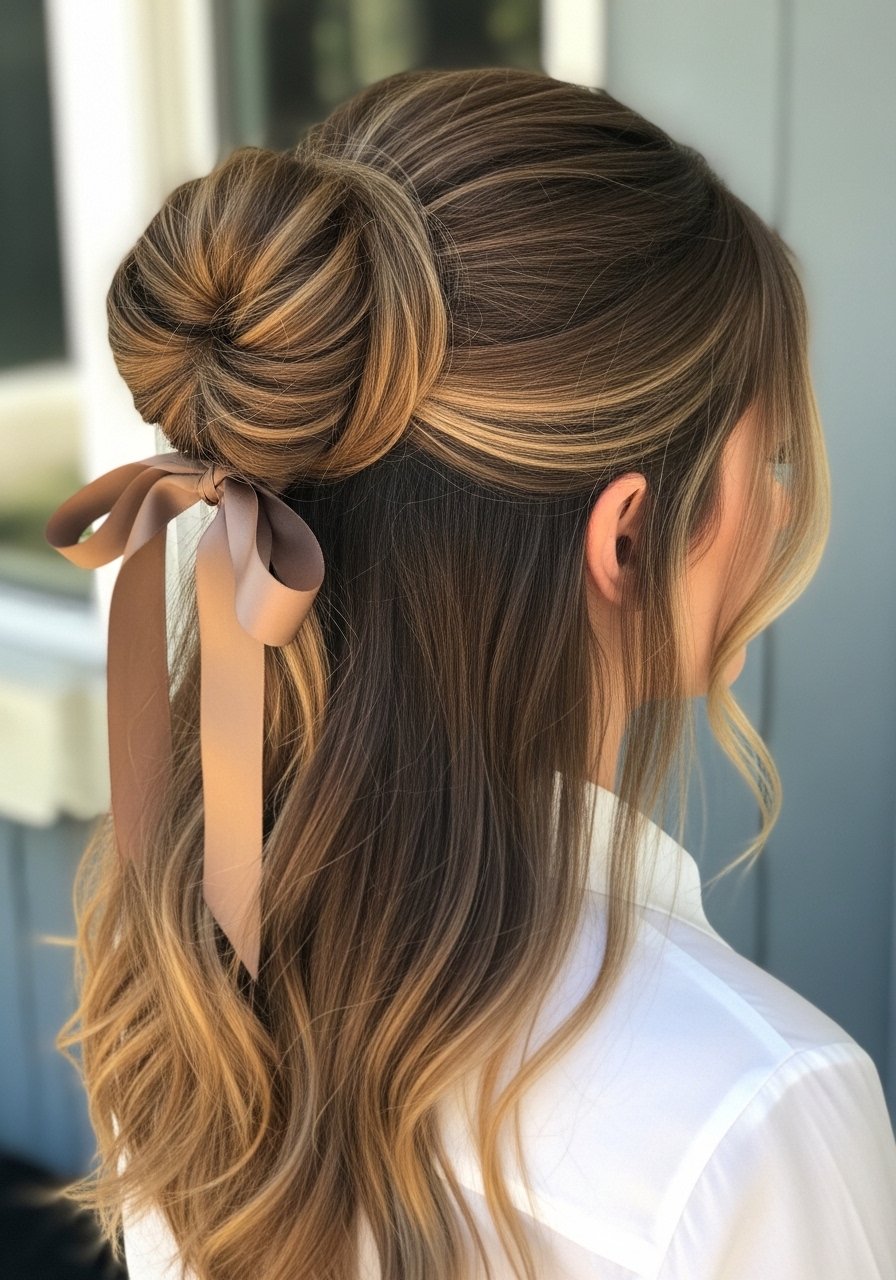
Tease the crown lightly across three 1.5-inch sections for texture, then smooth the top layer so volume reads in photos without frizz. Pull the top half into a looped knot and secure with pins, then tie a slim satin ribbon where the elastic sits for a romantic touch that complements light-reflective highlights. Use volumizing mousse at the roots when damp for staying power. This suits medium to thick hair and looks balanced on both petite and taller frames.
Mistake to Avoid: Overbrushing the teased crown, which flattens lift and mashes the highlights.
4. Blunt Long Layers, Super Sleek

Blow-dry with a round brush, then flat-iron in 1-inch sections on a moderate heat setting to avoid frying the highlighted ends. Add a pea-sized amount of shine serum along mid-lengths and ends only, avoiding the roots. The blunt finish shows highlight placement clearly, especially for face-framing pieces. This is low maintenance at the event and perfect if your gown is minimalist and you want hair that photographs cleanly.
Mistake to Avoid: Applying serum at the roots, which makes hair look oily and hides dimension.
5. Braided Crown That Shows Dimension
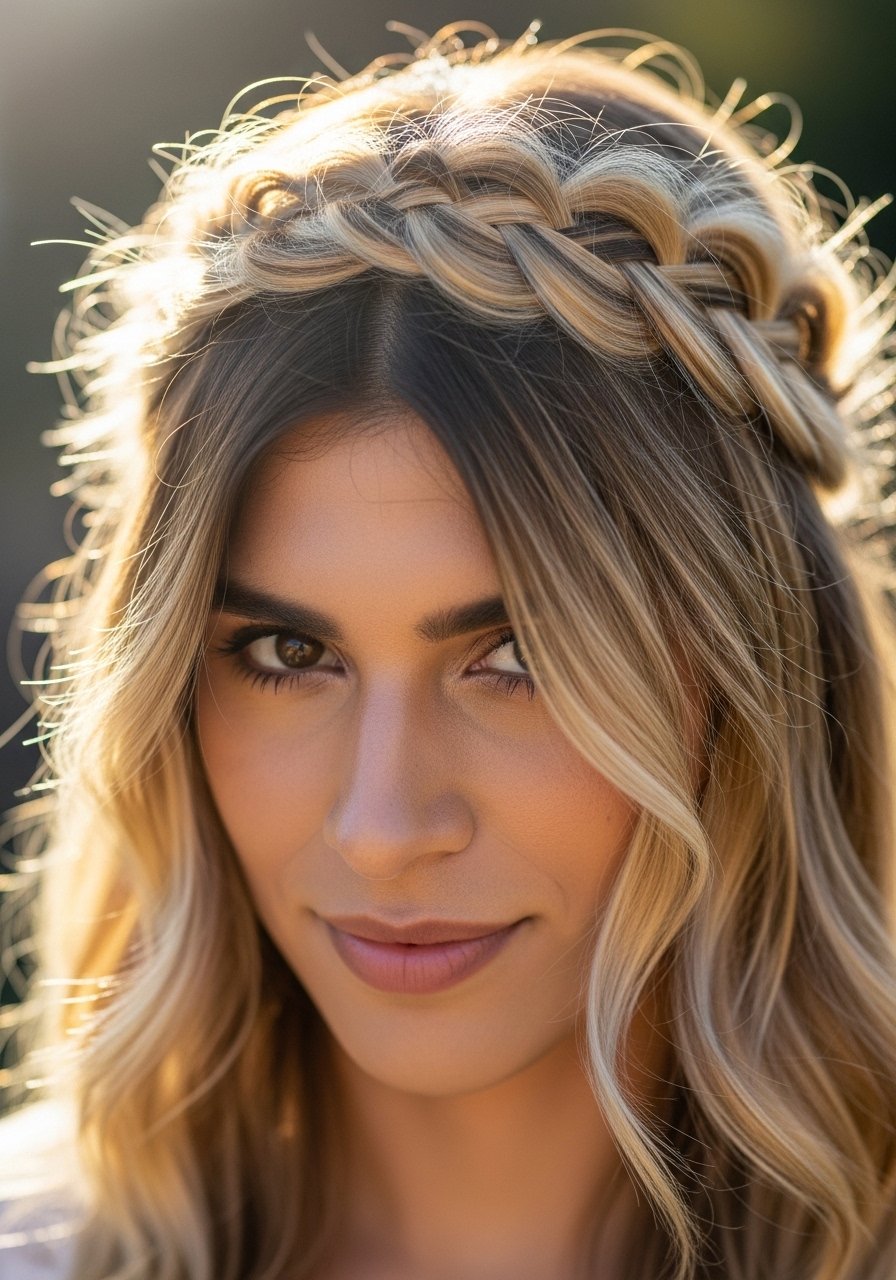
Create two three-strand braids starting just behind each ear, braid to the ends and pin them across the crown. Pull each braid gently to pancake it so highlights sit on top of the braid and catch the light. For fine hair, pad under the braid with a narrow strip of teased hair to bulk it without extensions. Use texturizing powder at the roots for grip when braiding tightness is an issue.
Mistake to Avoid: Making braids too tight, which buries the highlight contrast and looks severe.
6. Retro Glam Curls With Deep Side Part
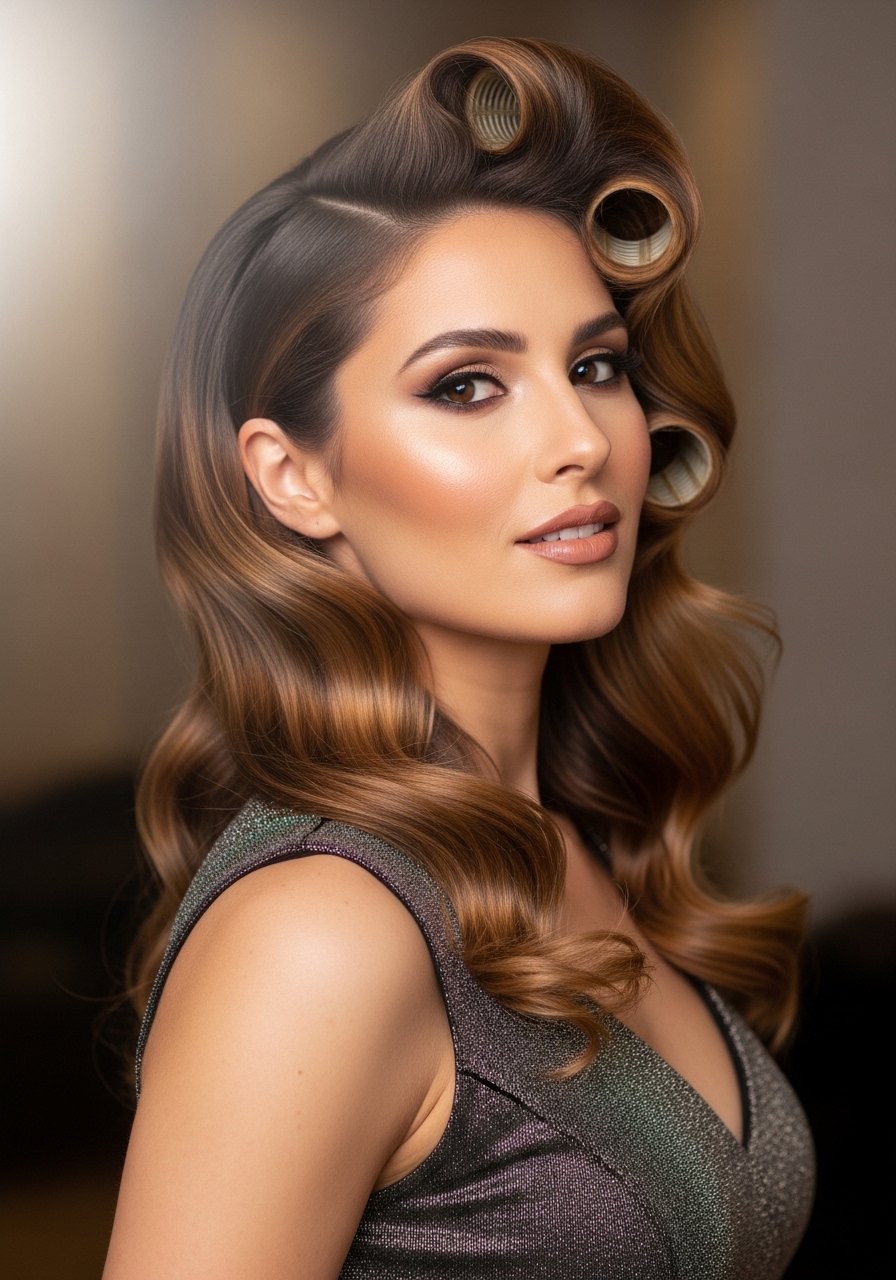
Set hair in large velcro rollers or use a 1.25-inch barrel to create S-shaped waves, pin each curl to cool for five minutes for longer hold. Brush out gently into smooth, defined waves that let thicker highlights form bands across the surface. Finish with a light mist of flexible-hold spray and a dab of anti-frizz balm on the ends. This is higher effort but very photo-friendly and pairs well with vintage-style gowns.
Mistake to Avoid: Brushing vigorously immediately after styling, which breaks the curl set and mattes the highlights.
7. Messy High Bun With Wisps for Motion
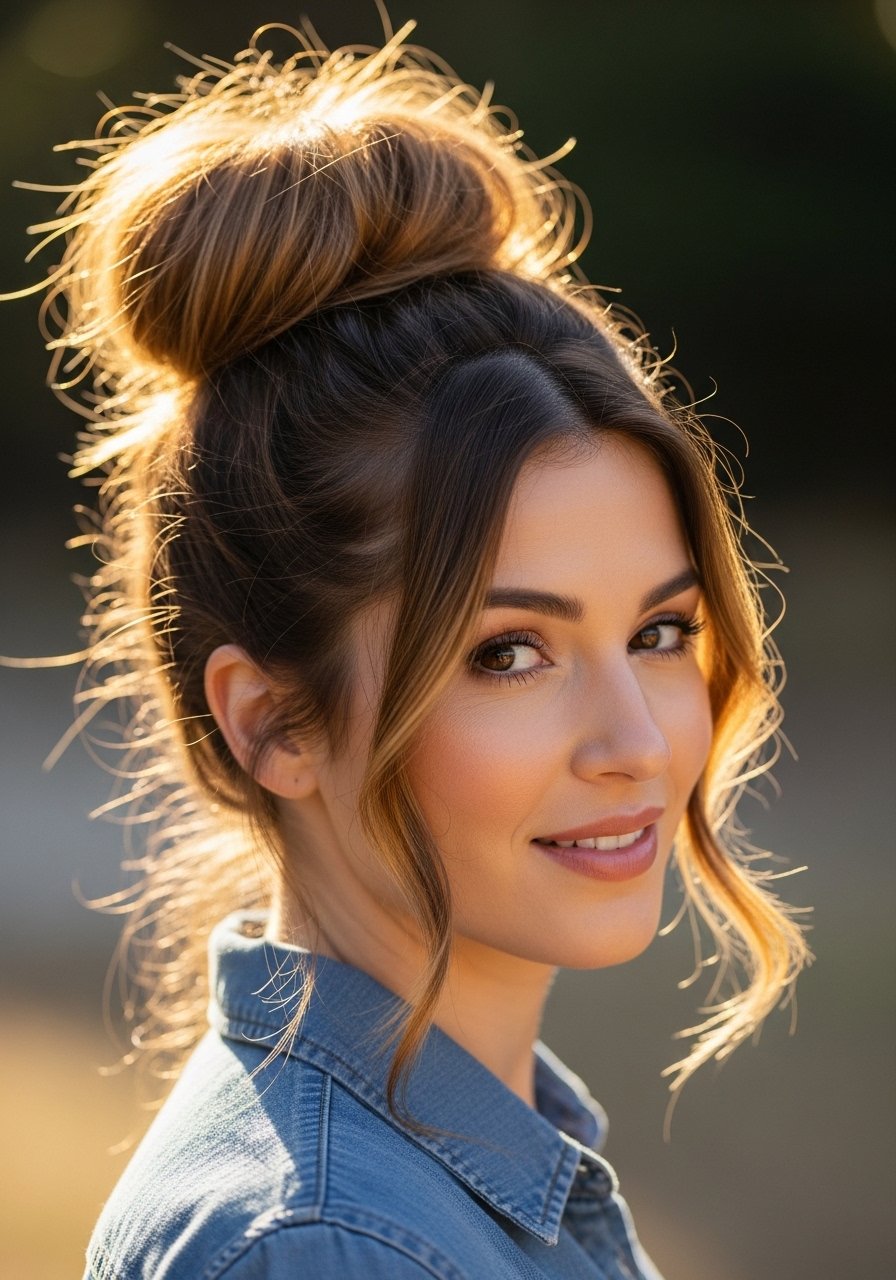
Pull hair into a high loose pony, twist it into a messy bun and let tendrils fall free. Use your fingers to pull sections out so highlights are visible around the bun, creating a halo effect in photos. Spray with a dry shampoo at the roots if hair is fresh, it adds texture and grip. For slip-prone hair, a single long U-pin holds better than multiple small pins. This look is quick, forgiving and suits textured and straight types.
Mistake to Avoid: Using too many pins, which creates lumps and hides the highlighted faces around the bun.
If any of these looks have you ready to try something, here are the tools and products I reach for most.
Prom Hair Essentials For Highlights
Styling Tools:
- 1-inch curling wand (~$25-45). The workhorse for soft waves and face-framing curls.
- Ceramic flat iron (~$40-90). Use for sleek finishes and smoothing ends.
Finishers:
- Light texturizing spray (~$10-20). Adds separation without dulling shine.
- Flexible-hold hairspray (~$8-18). Holds shape but still moves in photos.
Care & Prep:
- Heat protectant spray (~$8-16). Nonnegotiable when you use irons.
- Shine serum (~$10-20). Smooths ends and reinforces highlight bands.
- Volumizing mousse (~$7-15). For root lift that lasts.
Extras I Keep Around:
- Flexible satin ribbon (~$6-12). Small detail that photographs well.
8. Fishtail Side Sweep For Dramatic Motion
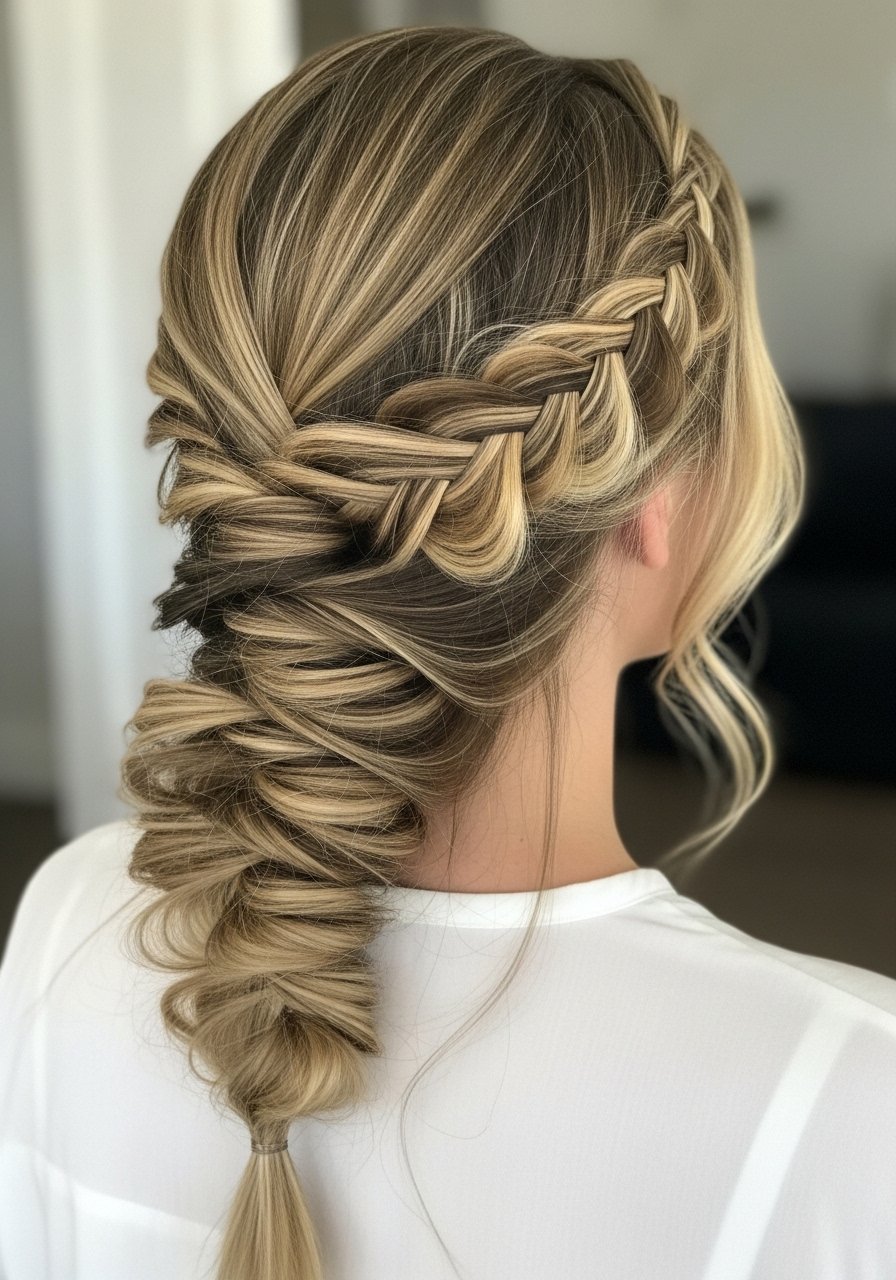
Start with a slightly textured base so the fishtail has bite. Divide hair into two sections and take 1-inch outer strands, crossing them over and adding until you reach the nape. Pull the braid gently at intervals to fan the highlighted strands, which creates a ribbon-like effect. Add a dab of finishing pomade to the end to secure flyaways. This works best on medium to thick hair and reads dramatic in side-profile photos.
Mistake to Avoid: Braiding too neatly, which hides the highlight streaks and makes the braid look flat.
9. Waterfall Braid That Lets Highlights Dance
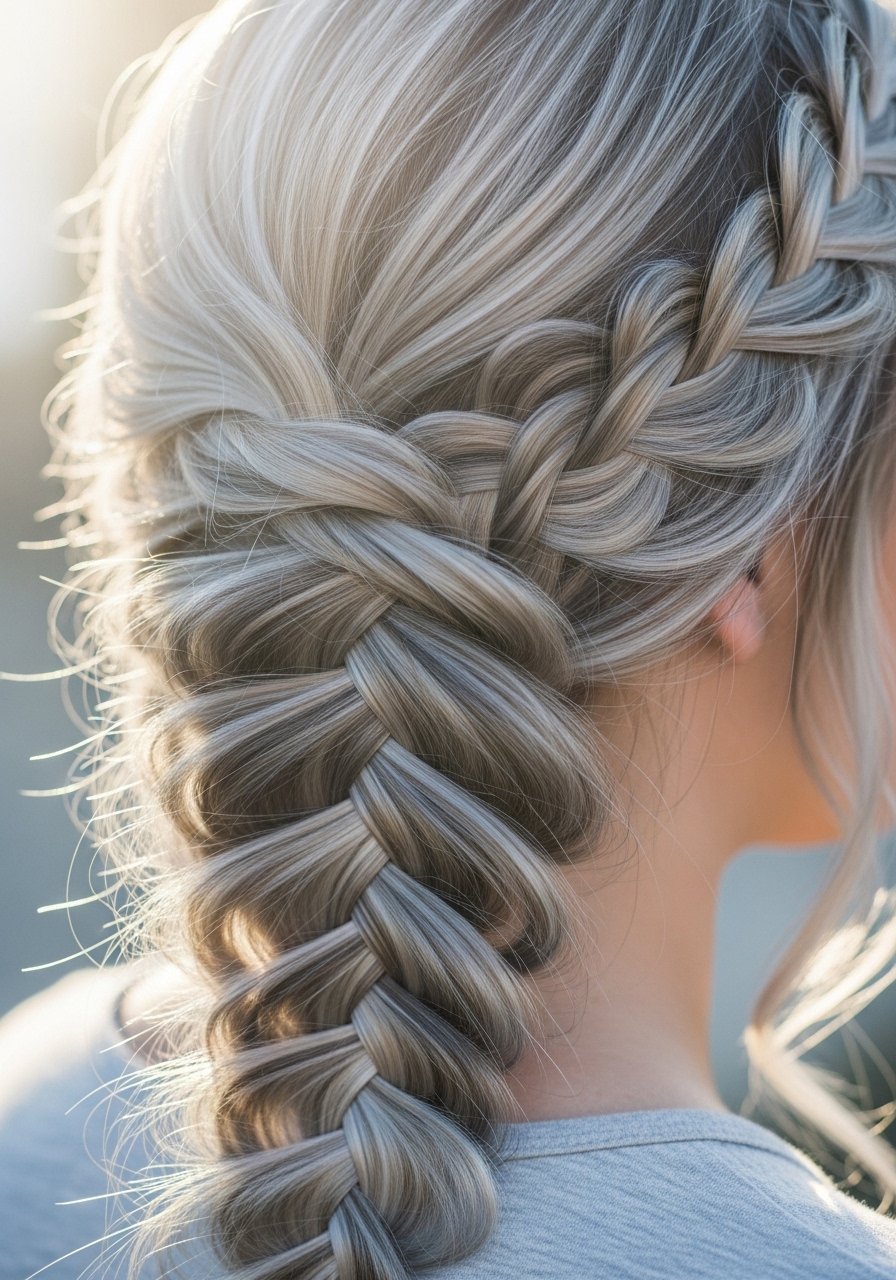
A waterfall braid drops sections so strands fall through, perfectly showcasing multi-tonal highlights. Work three 1-inch sections at the hairline and let the dropped strand be the highlighted piece each pass, alternating so brighter pieces peek forward. Lock with a clear elastic and hide it with a wrapped strand. If you avoid heat, this braid looks best on second-day hair. Try light-hold dry shampoo at the roots for lift before braiding.
Mistake to Avoid: Starting on freshly washed, slippery hair, which causes the braid to slide and lose structure.
10. Textured Low Pony With Hair Wrap
Create texture with a 50:50 mix of salt spray and a tiny bit of styling cream, scrunch through the lengths, then gather into a low pony at the nape. Take a 1-inch strand from the ponytail and wrap it around the elastic to conceal it and add polish. Use medium-hold elastic bands that do not snag highlighted ends. This is fast, flattering and keeps highlights visible without extra heat.
Mistake to Avoid: Pulling the pony too tight, which flattens the crown and hides face-framing highlight pieces.
11. Glassy Sleek Low Pony For Minimal Glam
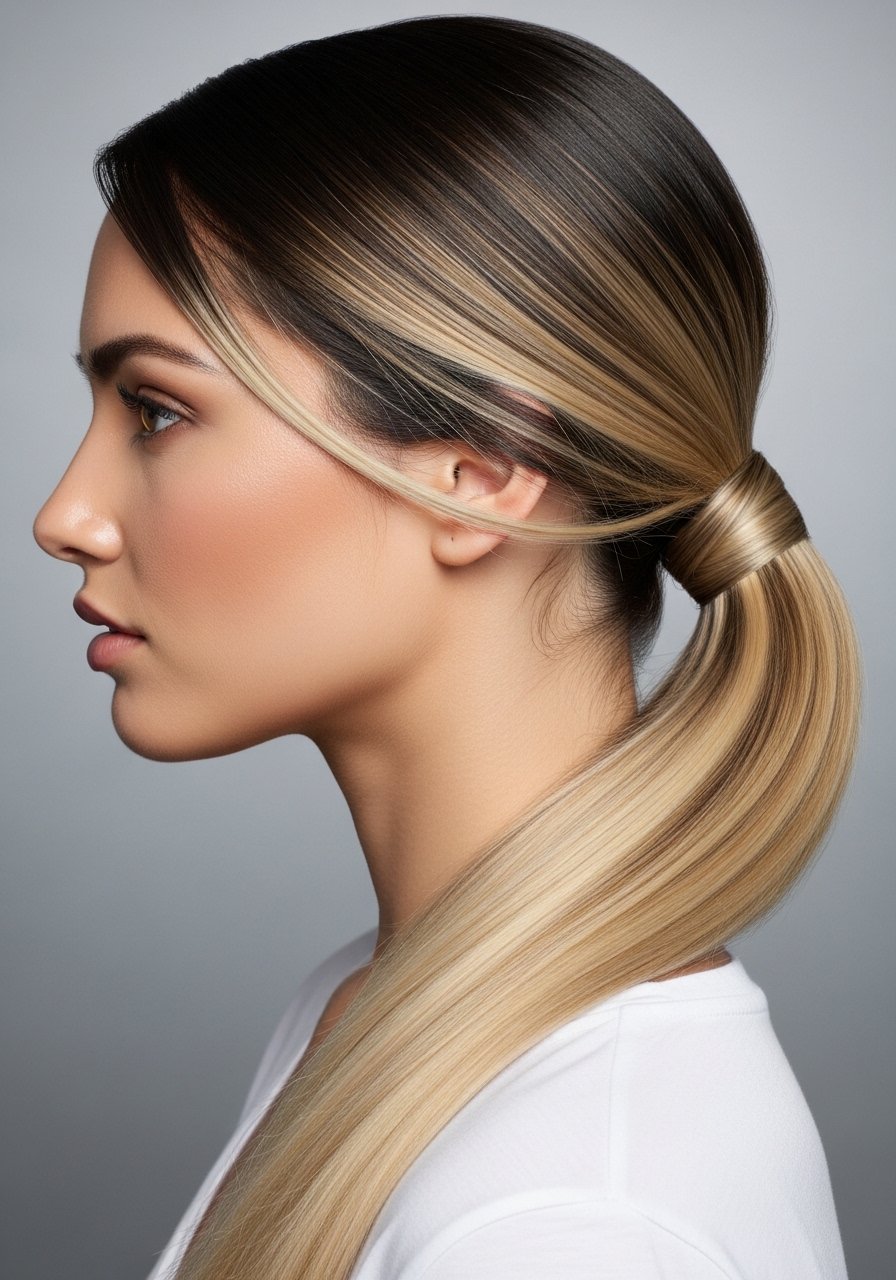
Apply heat protectant and smooth in sections with a flat iron for a glassy finish. Use a fine-tooth comb when securing the low pony to keep the part clean, then mist with a light gloss spray. The key is to apply the gloss only to mid-lengths and ends so the roots do not look greasy. Use fine-tooth styling comb to polish edges. This suits straight and relaxed textures and works well with strapless or one-shoulder dresses.
Mistake to Avoid: Overapplying gloss, which reads oily in photos and hides highlight contrast.
12. Boho Waves With Micro-Braid Accents
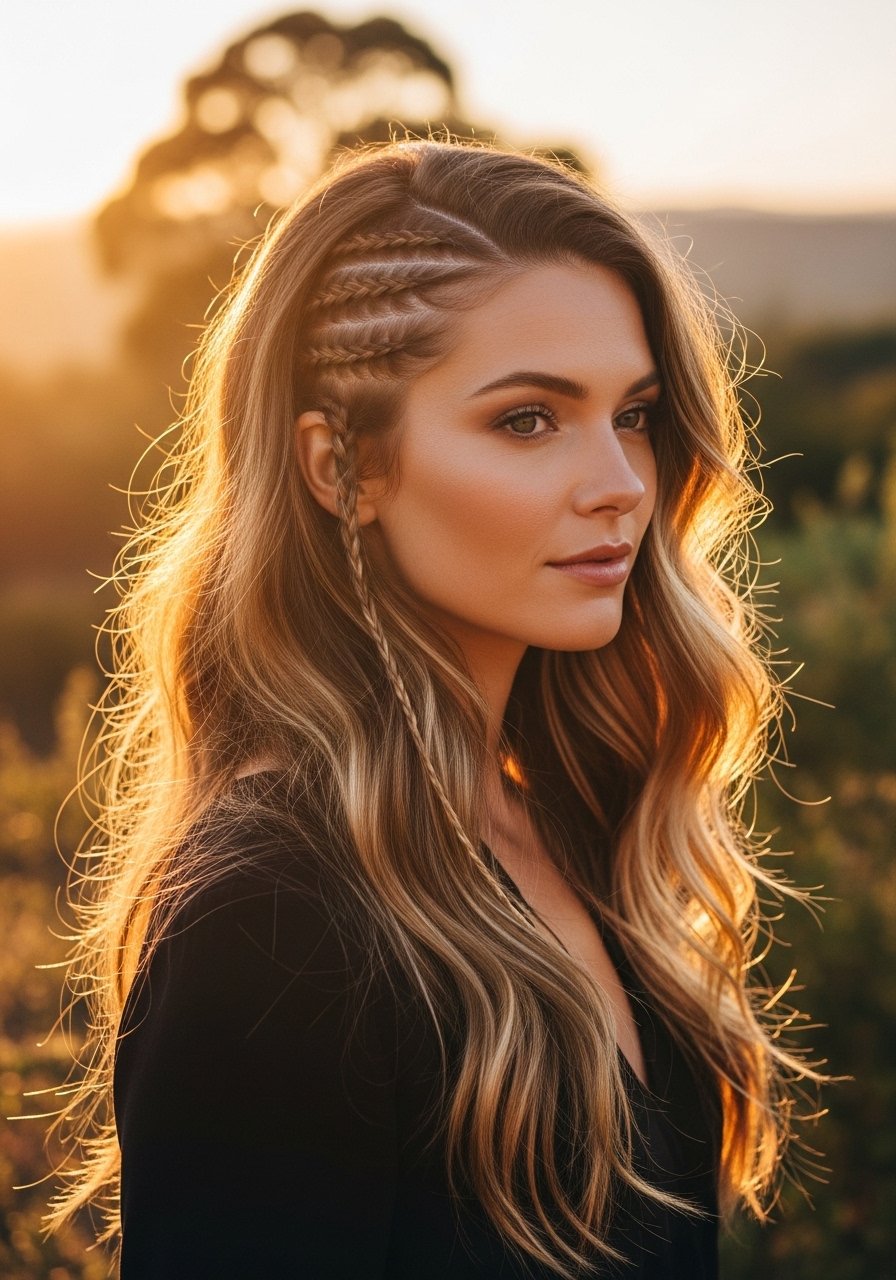
Add two to three tiny micro-braids at the temple before styling waves. Use a 1-inch iron on medium heat to form loose S-waves, then loosen with fingers so the braids peek through rather than dominate. The micro-braids trap small highlight strands and give a festival-inflected detail that looks deliberate instead of messy. Try mini elastic bands to secure the braids invisibly.
Mistake to Avoid: Making micro-braids too close to the hairline, which can pull and show scalp in photos.
13. Polish Blowout With Mirror Shine Finish

Section hair into four and blow-dry with a large round brush, roll each section and cool before releasing. Finish with a dime-sized pump of smoothing shine oil on the ends and a hair net for transport to keep the style intact. This is the prom-safe classic, especially good for highlighted hair because the sheen emphasizes color transitions. Works across four hair textures I have styled and photographs cleanly under venue lights.
Mistake to Avoid: Skipping the cool shot after blow-drying, which reduces shine and makes highlights look flat.
Prom Day Hold And Shine
Quick tip: Pack a small pouch with pins, one travel-size spray, and a shine serum. You will thank me.
Pack a flexible-hold hairspray. A small travel hairspray keeps curls from falling without that stiff helmet feeling.
Use a little dry shampoo at the roots. It refreshes the base and adds grip for touch-ups, try light dry shampoo for third-hour rescue.
Bring a small shine oil. A pea-sized amount of shine oil on the ends fixes flyaways and restores highlight band contrast after dancing.
Choose pins over elastics for fixes. Bobby pins placed in an X hold better than new elastics when you need a quick tuck mid-event.
Pin a small comb in your clutch. A mini styling comb helps reset part and polish edges in bathroom mirrors.
