
I kept trying to shrink a full sleeve into something the size of a coin, and every time the dots bled into a gray smudge after a year. The moment I learned to plan spacing, needle depth, and simple aftercare, the tiny pieces started to stay crisp. That simple correction saved a handful of designs that would otherwise have been ruined.
These ideas are for people who want subtle, keepable ink, not bold cover-ups or oversized pieces. Expect short sessions, easy aftercare, and designs that suit work-visible and coverable placements. I learned most of this across five shops I have visited, so the notes below mix studio practice, real healing looks, and budget-friendly product suggestions for stamping, inking, and keeping dots crisp.
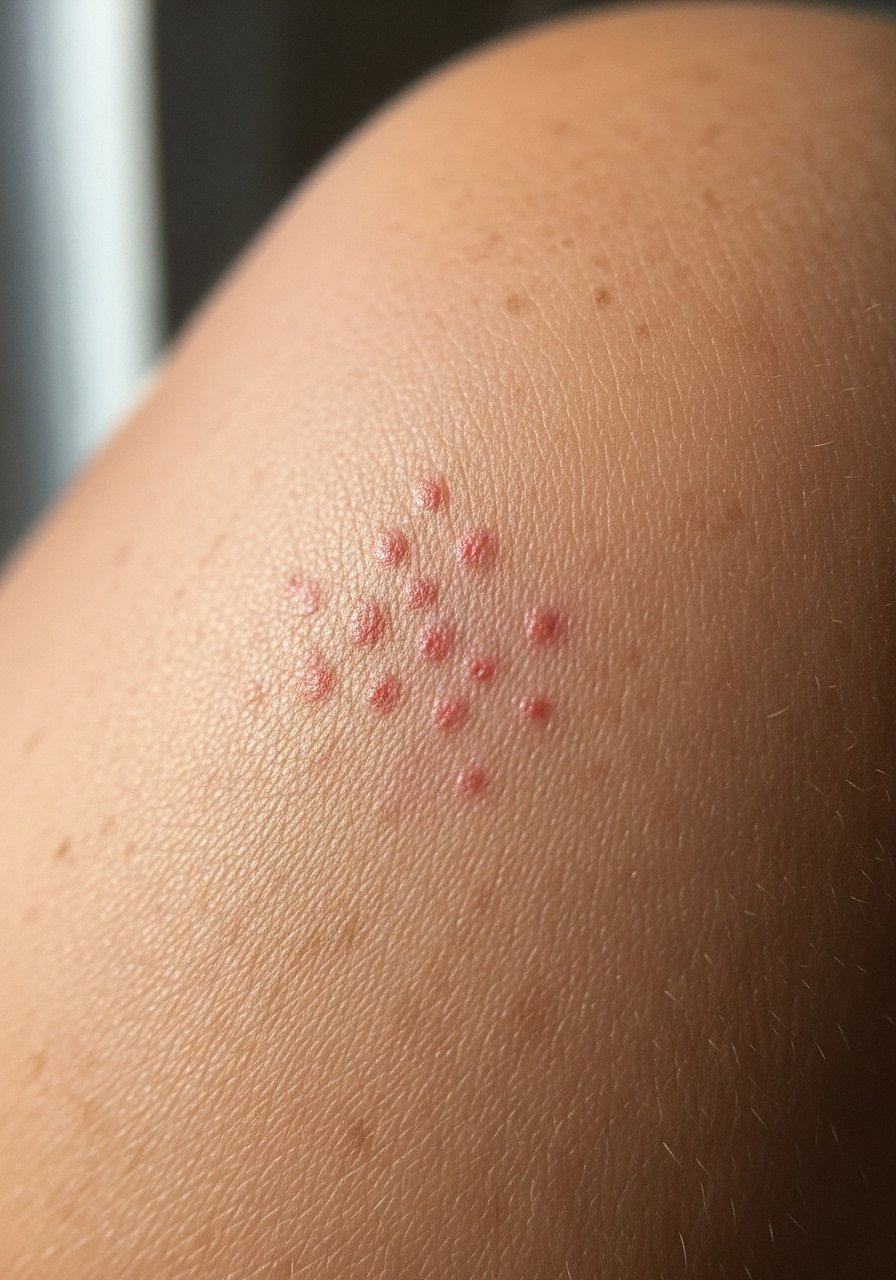
1. Tiny Crescent Moon Cluster
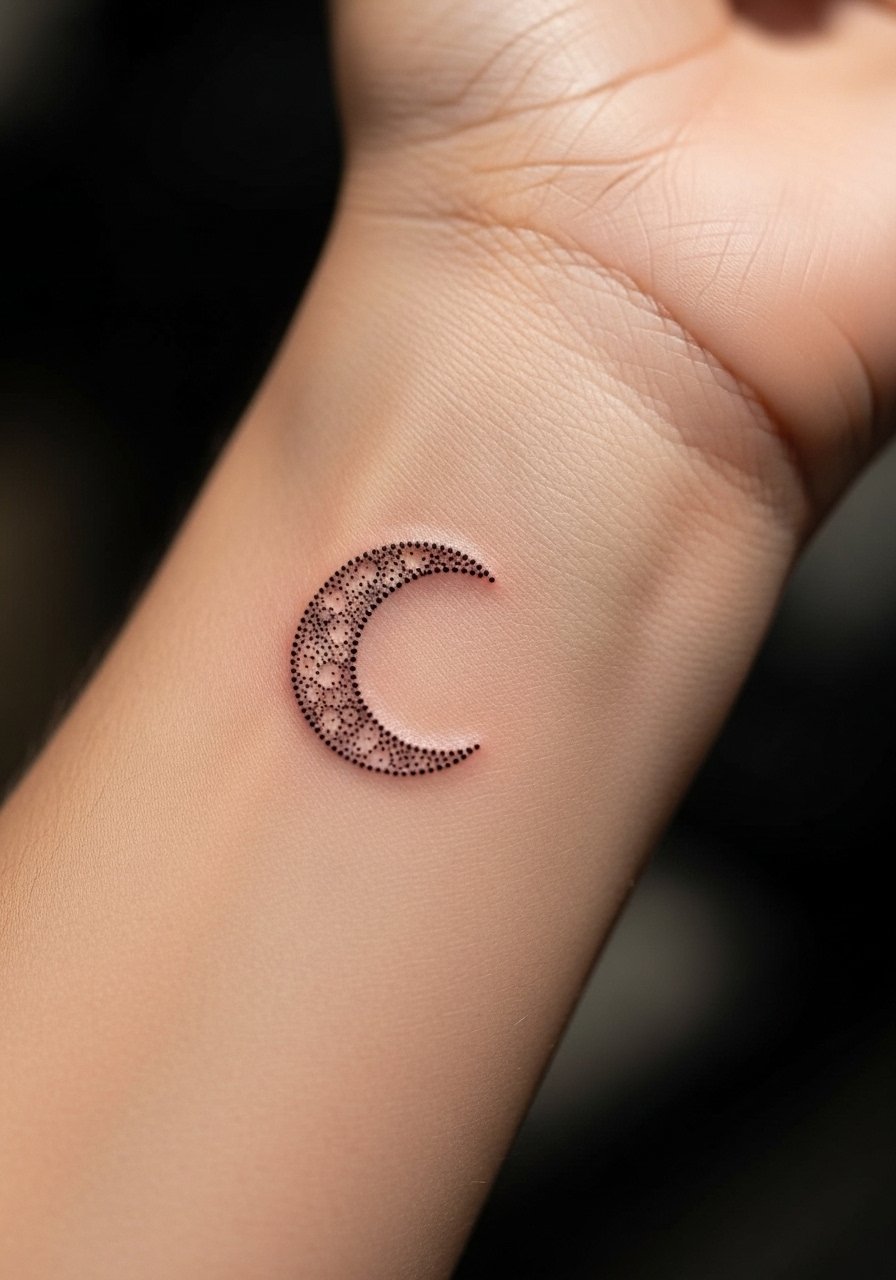
This is a simple cluster of three crescents built entirely from single dots, spaced about 1 to 2 millimeters apart to keep each moon readable as it heals. The result is delicate and wearable, a good fit for someone who wants a visible piece that can still read small. Skill level is beginner-friendly for an experienced small-needle artist, session time usually 20 to 40 minutes, and you can pair it with a tiny script or leave it alone. I used a 3RL liner for the outline and a 5RL for dot shading when I tested spacing over three sessions to lock the spacing visually. Try pairing with a vegan black tattoo ink for a stable, less muddy heal.
Mistake to Avoid: Packing dots too close together, which leads to blurring as the skin settles.
Style/Technique: Minimal Dot Cluster
Pain Level: 2/10
Session Time: 20 to 40 minutes
Best For: Wrist, forearm, first-timers
2. Micro Floral Sprig
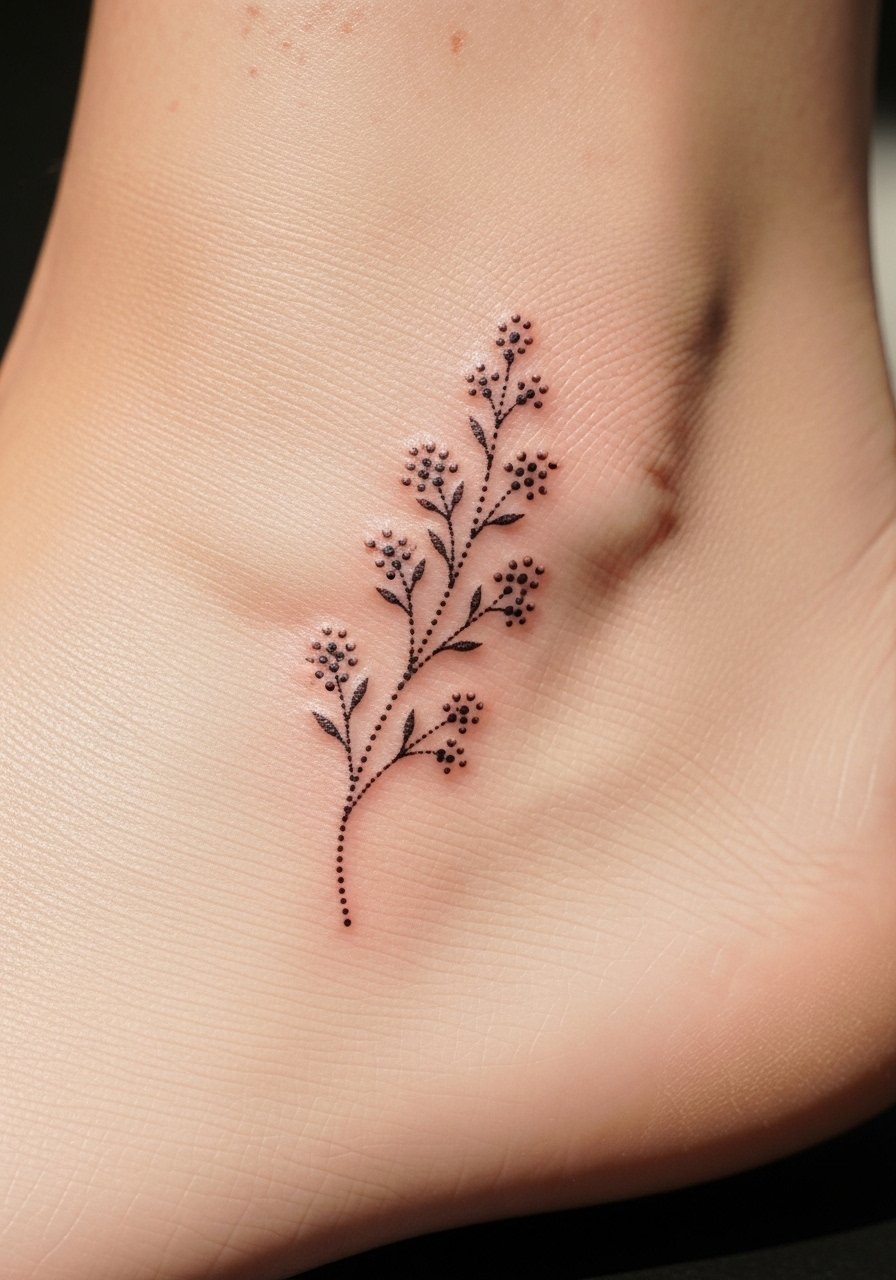
A tiny sprig of dots forming a stem and three petals reads floral without heavy lines. The trick is to use varying dot density, with 2 mm spacing on the stem and 1 mm in the petal centers so petals keep depth after healing. It reads fresh and organic, great for someone who wants a feminine but low-profile look. This design pairs well with a minimal ring or toe placement. For at-home reference and care I keep a small jar of green soap cleanser on hand after sessions. This is a one-session piece for most artists, about 30 to 50 minutes.
Mistake to Avoid: Asking for heavy black fill on petals, which flattens the floral shape as it ages.
Style/Technique: Dot-Gradient Floral
Pain Level: 3/10
Session Time: 30 to 50 minutes
Best For: Ankle, behind ear, collarbone
3. Single-Line Geometric Triangle

A triangle created from evenly spaced dots gives a crisp geometric look without firm lines. For longevity ask for 1.5 to 2 mm between dots and a light hand on depth so the top layer of ink does not spread. This style has a clean, modern feel and is ideal for petite placements like fingers or behind the ear. Expect a short session of 20 to 30 minutes. I recommend disposable liner needles as a reference when discussing needle groupings with your artist, because the needle type affects dot roundness and heal. If you want it coverable at work, place it on the ribcage or shoulder blade instead of the hand.
Mistake to Avoid: Requesting deep passes to darken dots, which creates smudged lines over time.
Style/Technique: Geometric Dotline
Pain Level: 4/10
Session Time: 20 to 30 minutes
Best For: Fingers, behind ear, nape
4. Micro Animal Silhouette With Dot Shading
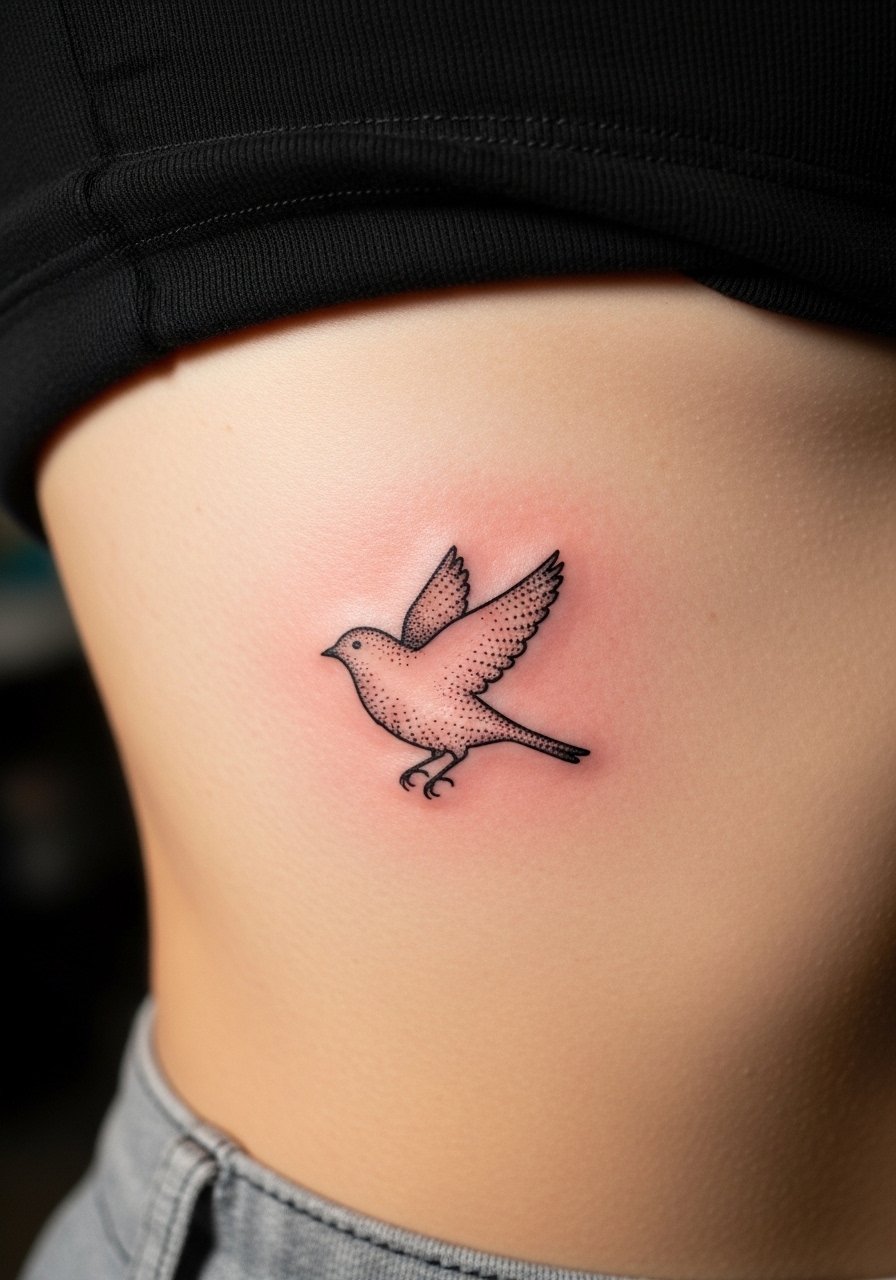
A tiny silhouette filled with subtle dot shading reads as a recognizable shape while staying delicate. Use a layered dot gradient, starting with 1 mm spacing at the darkest points and easing out to 3 mm at the edges. This approach keeps the silhouette readable without heavy solid fill. I tried this on a friend and the piece healed with soft texture rather than a block of gray, which felt more natural. Keep session time under an hour. For aftercare, a small tube of tattoo aftercare balm is practical and easy to use.
Mistake to Avoid: Asking for a single, dense fill instead of a dotted gradient, which loses detail as it ages.
Style/Technique: Dotted Silhouette
Pain Level: 5/10
Session Time: 30 to 60 minutes
Best For: Ribs, ankle, inner arm
5. Mini Constellation Wrist Map
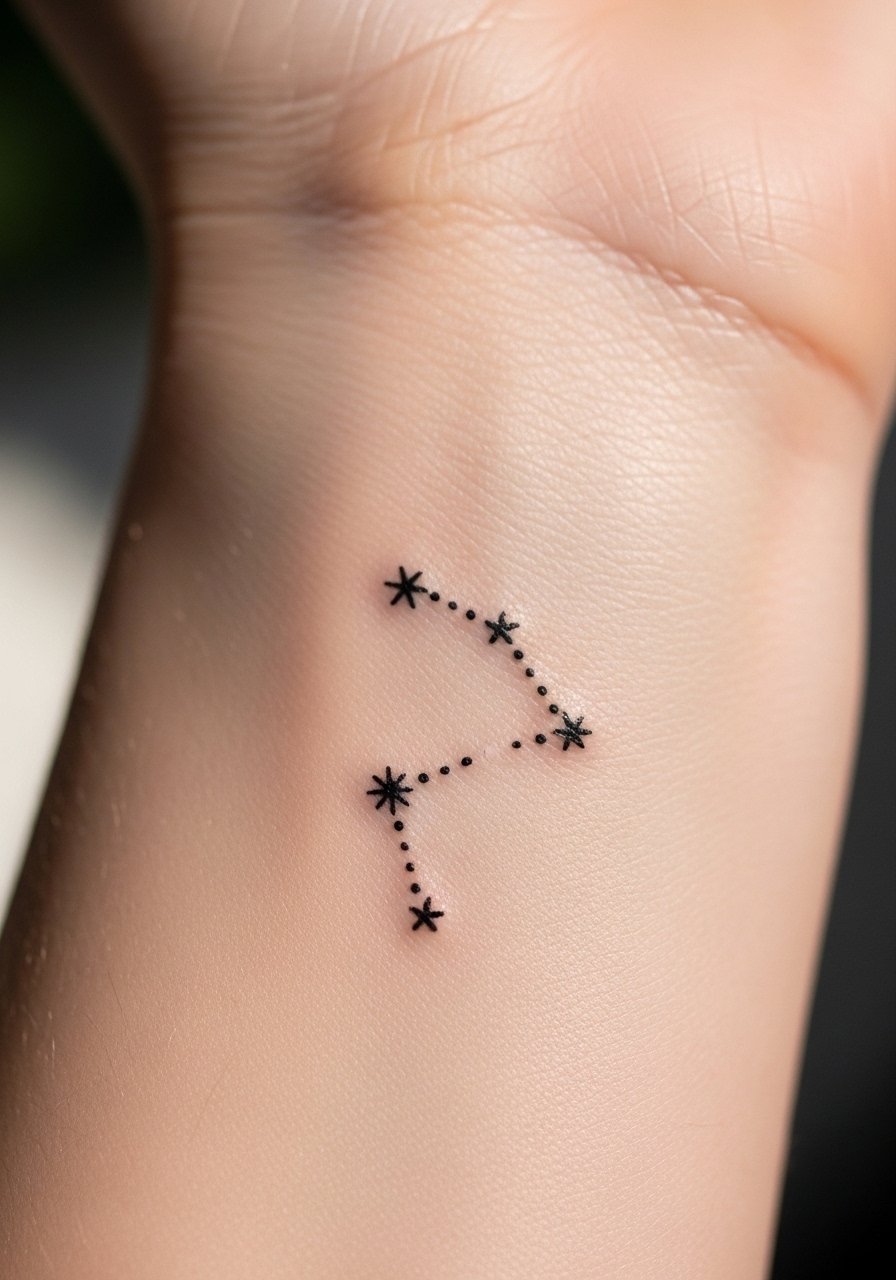
Constellations are perfect for dot work because the design is meant to be point-based. Keep connecting lines very fine or skip them entirely and let the dots form the pattern. I specify dot spacing roughly 2 mm apart and ask my artist to avoid over-saturating the skin so the pattern retains negative space as it heals. This is low-cost and quick, usually 15 to 30 minutes. If you want added contrast fast, ask for one tiny white dot highlight at key stars using a drop of white tattoo ink but be mindful white fades differently over time.
Mistake to Avoid: Filling in connecting lines too heavily, which makes the constellation read as a smudge.
Style/Technique: Point-Map Constellation
Pain Level: 2/10
Session Time: 15 to 30 minutes
Best For: Wrist, collarbone, ankle
6. Freckle Cluster Accent
Freckle-style dots sit on the face or hands for a soft, casual look. These are tiny single dots placed with no outline, spaced irregularly like actual freckles. Expect the dots to be 0.5 to 2 mm in diameter and mostly superficial so they fade gracefully. This is a sensitive area with faster sun exposure, so plan for touch-ups. For face placements, keep sessions brief and test one area first. A gentle aftercare balm is essential and sun protection matters once healed. If you work in a visible profession, choose placement that can be lightly covered with makeup.
Mistake to Avoid: Overdoing the dot density on the face, which draws attention rather than blending naturally.
Style/Technique: Cosmetic Freckling
Pain Level: 3/10
Session Time: 15 to 30 minutes
Best For: Cheekbones, nose bridge, hands
7. Dot-Only Ring Band
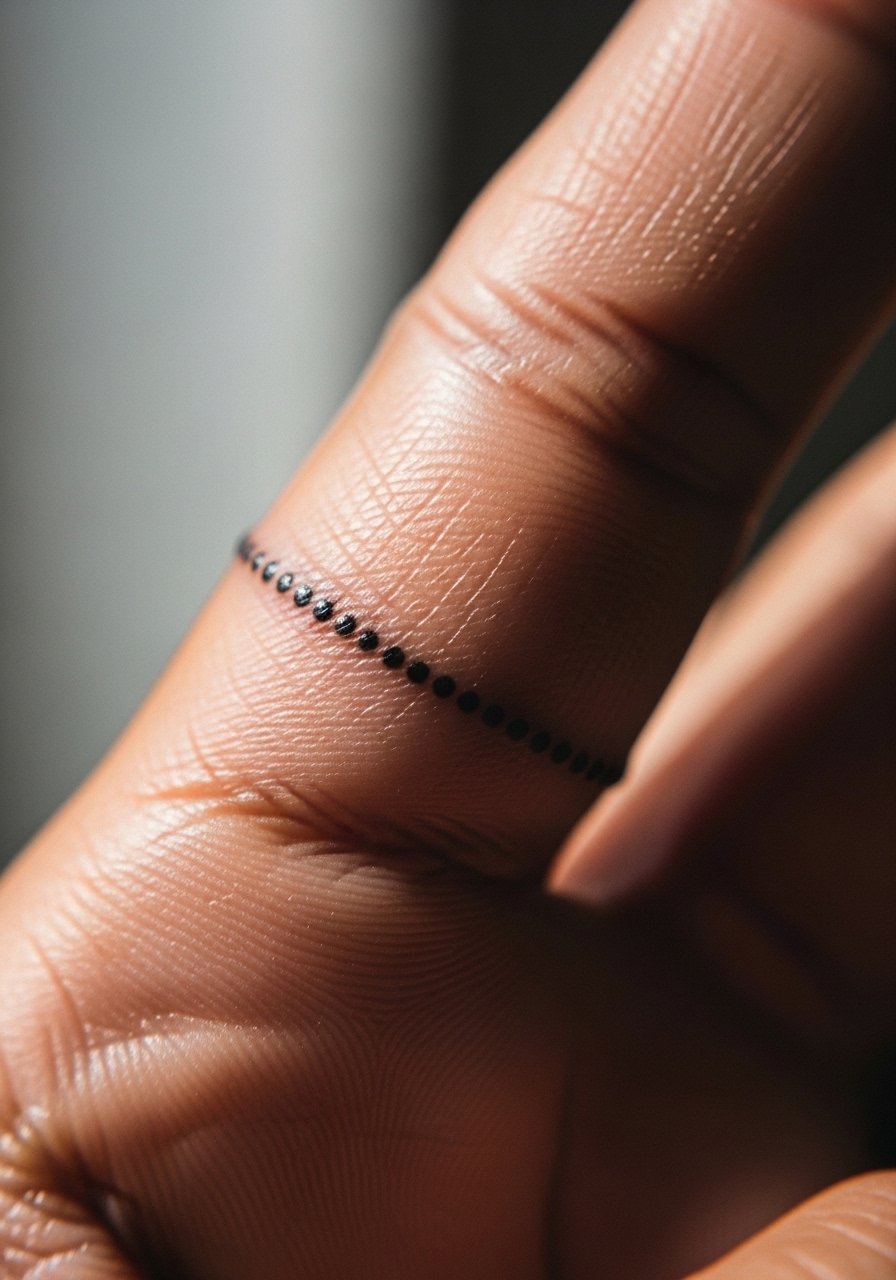
A ring made only of dots looks delicate and ages more predictably than a solid band. Use 1 to 2 mm spacing and consider a double-row of tiny dots for more presence. Fingers move and the skin thickens, so expect possible touch-ups after a year. This is an affordable, quick option for someone who wants ring symbolism without jewelry. I have seen this hold best with a light touch and a stable black ink. For practice reference, I keep a pack of tattoo stencil transfer paper when discussing placement because even tiny misalignments show on a ring.
Mistake to Avoid: Requesting a solid black band when you mean a dotted band, which will need heavy touch-ups.
Style/Technique: Dotted Band
Pain Level: 4/10
Session Time: 20 to 40 minutes
Best For: Fingers, toe, knuckle
If any of these tiny designs have you bookmarking, here are the actual items I reach for when planning or caring for small dot work.
Tiny Dot Work Supplies To Grab
Inks & Aftercare:
- vegan black tattoo ink (~$8-20), reliable for crisp heals.
- white tattoo ink (~$7-18), use sparingly for tiny highlights.
- tattoo aftercare balm (~$8-20), keeps dots from scabbing too hard.
Tools & Prep:
- disposable liner needles (~$10-25), ask your artist about grouping.
- tattoo stencil transfer paper (~$8-15), for precise dot placement.
- green soap cleanser (~$6-12), gentle cleaning during healing.
Practice & Extras:
- practice skin sheet (~$10-20), useful if you are tattoo-curious and want to see spacing.
Tiny-Dot Tattoo Habits
Thin passes keep dots round. One light pass with a correct needle grouping maintains clarity better than one heavy pass. Grab disposable liner needles if you want to talk specifics with an artist.
Start with an area you can sun-protect. A healed mini will stay sharp if you use sunscreen and avoid constant friction. Broad-spectrum sunscreen keeps small details from fading quickly.
Curate spacing on paper before booking. I sketch dots at 1 to 2 mm spacing on tracing paper to see how a patch looks on the body. A cheap tracing pad helps you visualize placement.
Most people ask for darker fills to make dots pop. That usually backfires. Let the dots sit light and let touch-ups add contrast later, not heavy initial saturation. Try a small tube of aftercare balm during the first two weeks to keep skin supple.
