
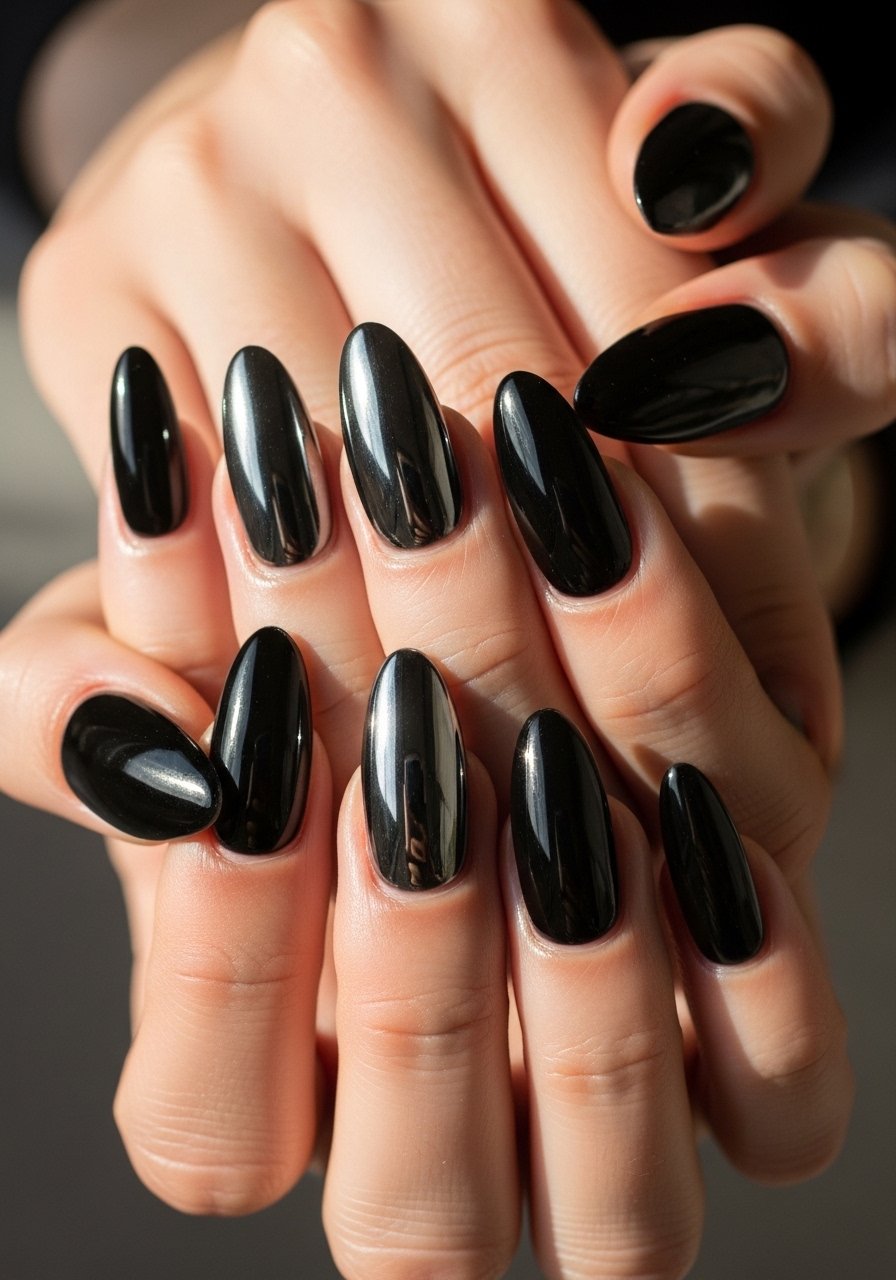
I kept painting solid black and blaming the polish, until a tech who works at a salon downtown stopped me and said it was the finish and the length, not the color. After trying three finishes and trimming my nails by two millimeters, the same black suddenly looked layered, wearable, and not harsh. That mistake is why these 13 ideas focus on finish, scale, and simple tools.
These designs are for anyone who likes dark nails but wants them to read intentional, not heavy. Most ideas are beginner friendly, some need an intermediate hand, and none demand salon-only tools. Expect short setup time for most looks and routine upkeep that fits two weekly touch-ups or a full salon visit every three to four weeks.
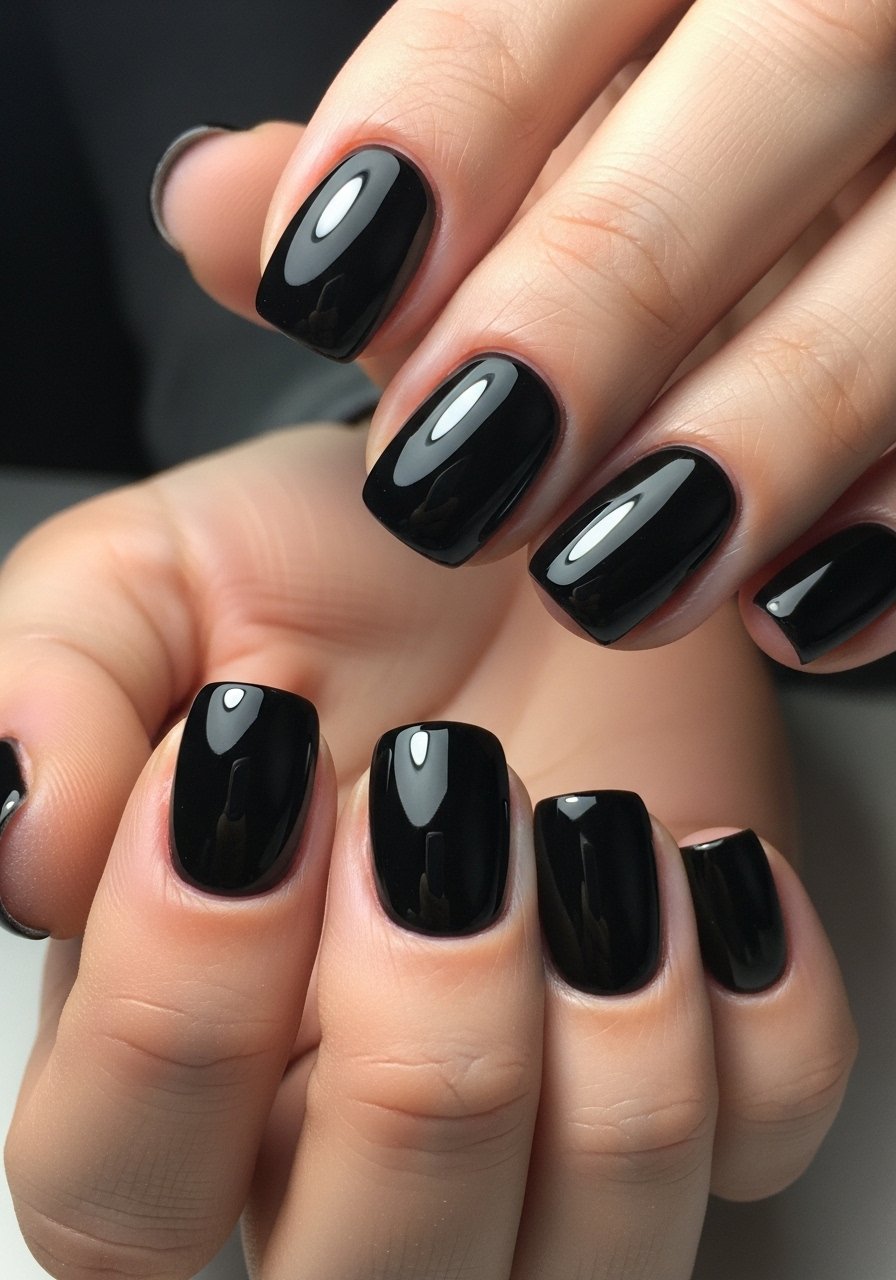
1. Sheer Black Jelly Ombre
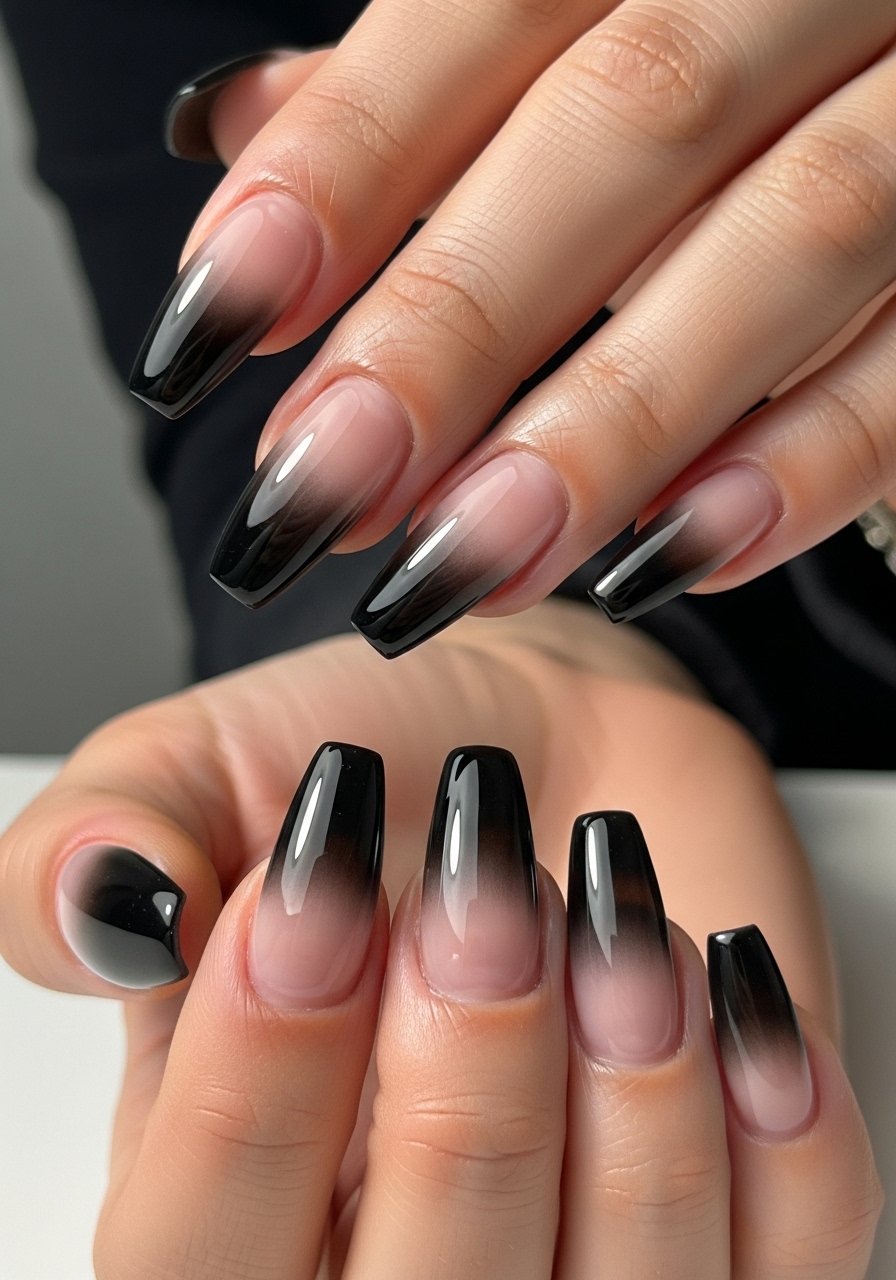
Style/Vibe: Sheer, moody, wearable
Best For: Medium length, everyday to night out
Skill: Beginner to intermediate
This is what makes black less severe, visually. Two thin coats of a translucent black gel, each cured 30 seconds under an LED lamp, build depth without the heaviness of full opacity. Blend the color toward the free edge with a damp sponge or a soft brush while the second coat is still tacky for a soft ombre. I usually add a single swipe of a quick-gloss top coat on the center nail for contrast. Pair with a black-gel-polish and a mini-sponge-set for fades.
Mistake to Avoid: Applying thick coats so the polish pools and looks clumpy instead of glassy.
2. Matte Black With Gloss Crescent
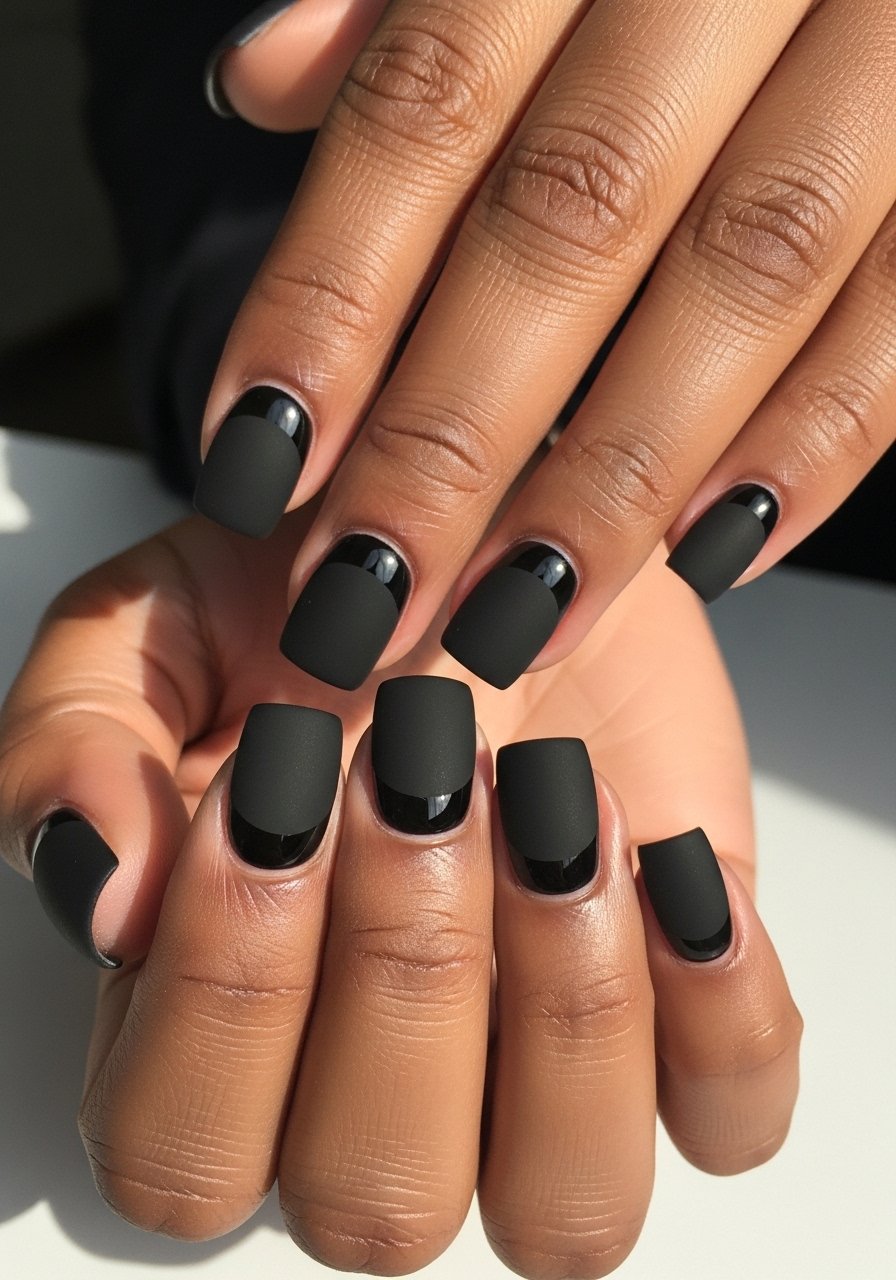
Style/Vibe: Modern contrast, refined edge
Best For: Short nails, office and evening
Skill: Beginner
Matte plus glossy is high-impact for very little effort. Paint two thin coats of black gel, cure 60 seconds total, then apply a matte top coat on all but a small crescent near the cuticle. Use a glossy top coat only inside the crescent and cure again, which makes the small glossy area pop. If you want a budget pick, try a reliable matte-top-coat and a separate gloss-top-coat.
Mistake to Avoid: Dragging matte over the glossy crescent, which dulls the contrast and causes lift.
3. Negative Space Thin Line
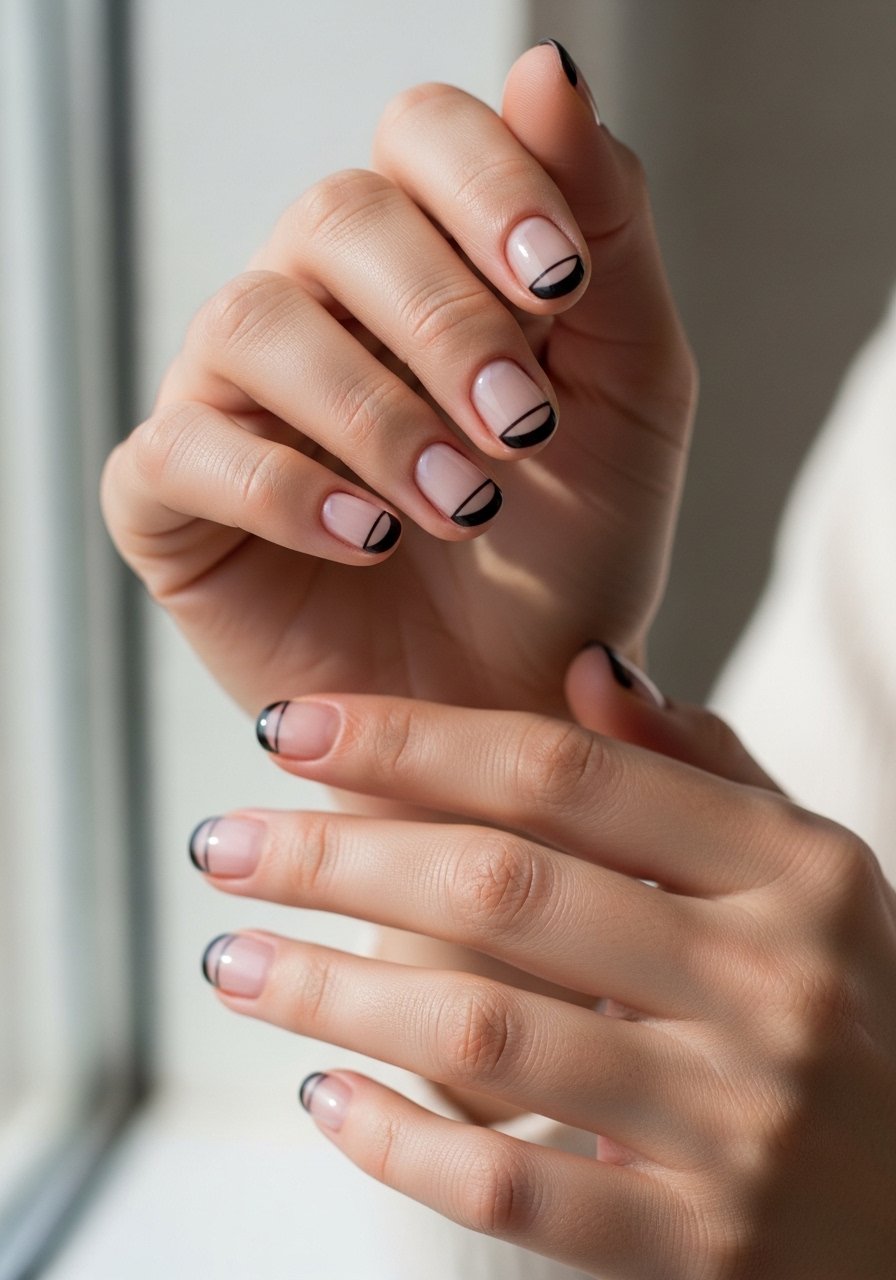
Style/Vibe: Minimal, graphic, clean
Best For: Short to medium nails, low-maintenance chic
Skill: Beginner
This is the answer when you want black but need breathable-looking nails. After a sheer base, use a striping brush to draw a 1 mm line just above the natural free edge or across the center. One steady stroke per nail usually does it. For control, rest your pinky on the table while you paint and cure 30 seconds. A reliable nail-striping-brush helps more than a pricier polish. I learned this while fixing clients who wanted black but worked with keyboards all day.
Mistake to Avoid: Pressing too hard with the brush and creating a lumpy, uneven line.
4. Micro-Glitter Black Fade
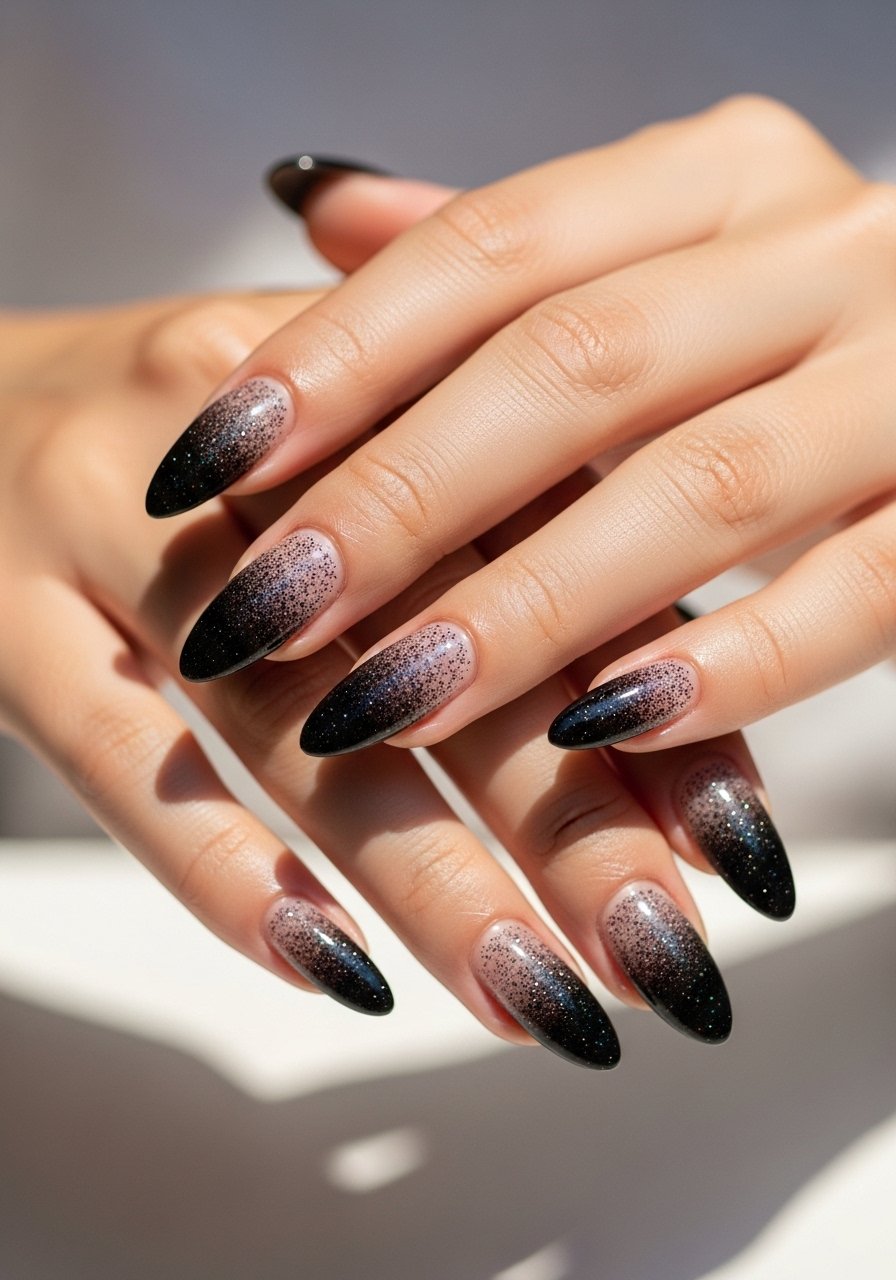
Style/Vibe: Subtle sparkle, evening ready
Best For: Long nails, special occasions
Skill: Intermediate
Micro-glitter softens black without looking disco. Mix one part fine holographic glitter into three parts clear builder gel, press lightly at the tip, and drag upward for a soft fade. Cure 60 seconds, then seal with a glossy top coat. The ratio keeps the glitter sparse so it reads like a sheen rather than flakes. For supplies, I use a fine-glitter-pot and a clear builder-gel.
Mistake to Avoid: Dumping glitter on the whole nail so it reads messy instead of graduated.
5. Black Chrome Accent Nail
Style/Vibe: Futuristic, polished
Best For: Medium to long, night looks
Skill: Intermediate
Chrome over black creates a metallic mirror that reads high-end. Start with a fully cured black gel base, buff the tacky layer away, then rub chrome powder with a soft sponge applicator until the shine is consistent. Finish with a no-wipe gloss top coat cured for 60 seconds. The buff-before-chrome step is the detail most guides skip, but it prevents streaks. A small chrome-powder-kit and a no-wipe-gloss are all you need.
Mistake to Avoid: Attempting chrome over a still-tacky layer, which traps dust and dulls the effect.
6. Satin Black With Gold Foil
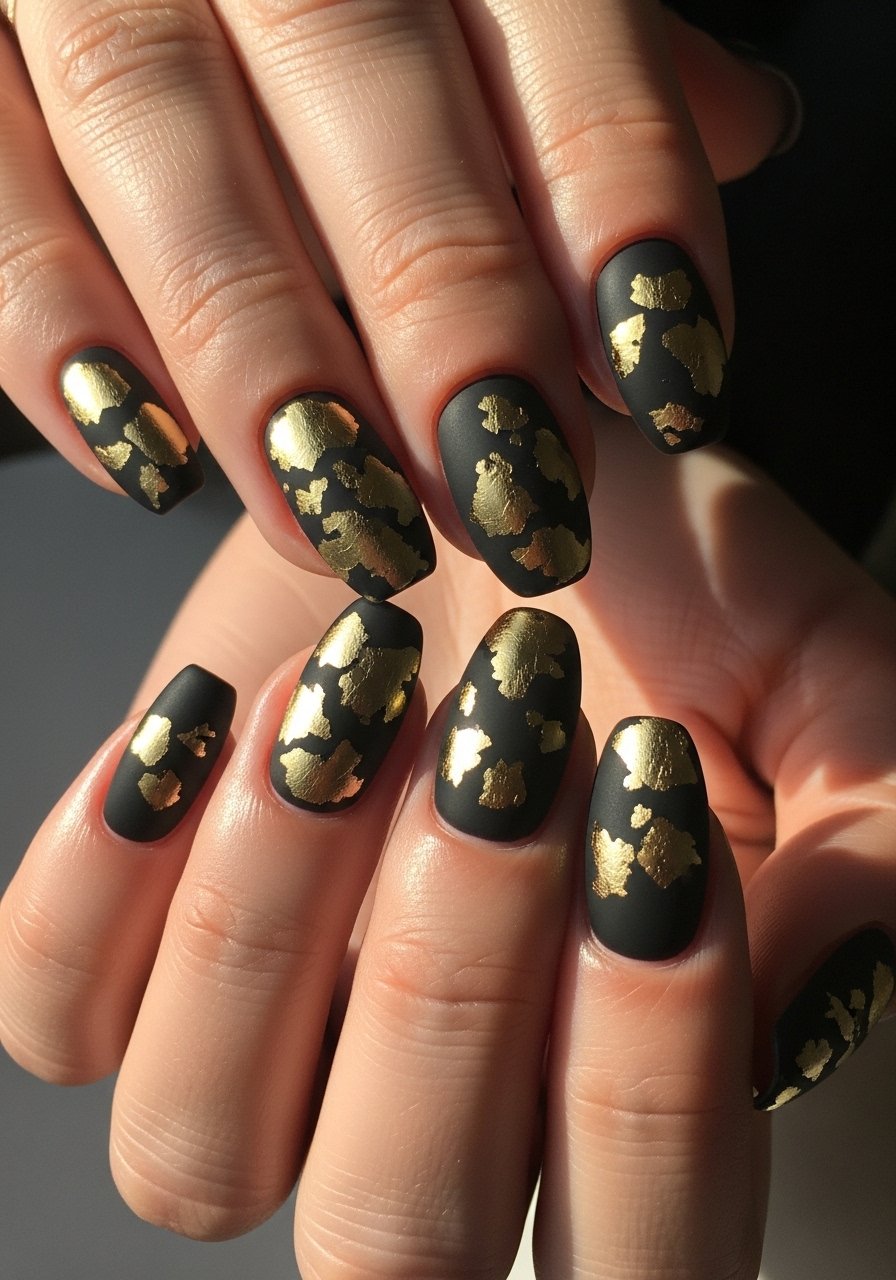
Style/Vibe: Luxe but lived-in
Best For: Medium nails, date nights and parties
Skill: Intermediate
Satin finishes soften black while foil adds warmth. Apply a satin-effect top coat over cured black gel and press tiny gold foil pieces into a thin layer of soft gel, cure 30 seconds to tack, then finish with a glossy seal. A tech at the salon taught me to pre-plan foil placement with a toothpick so pieces do not overlap. For supplies use a gold-foil-flakes set and a soft gel-sealer.
Mistake to Avoid: Smudging foil before the gel sets, which creates ragged edges instead of crisp flashes.
7. Textured Black Sugar Coat
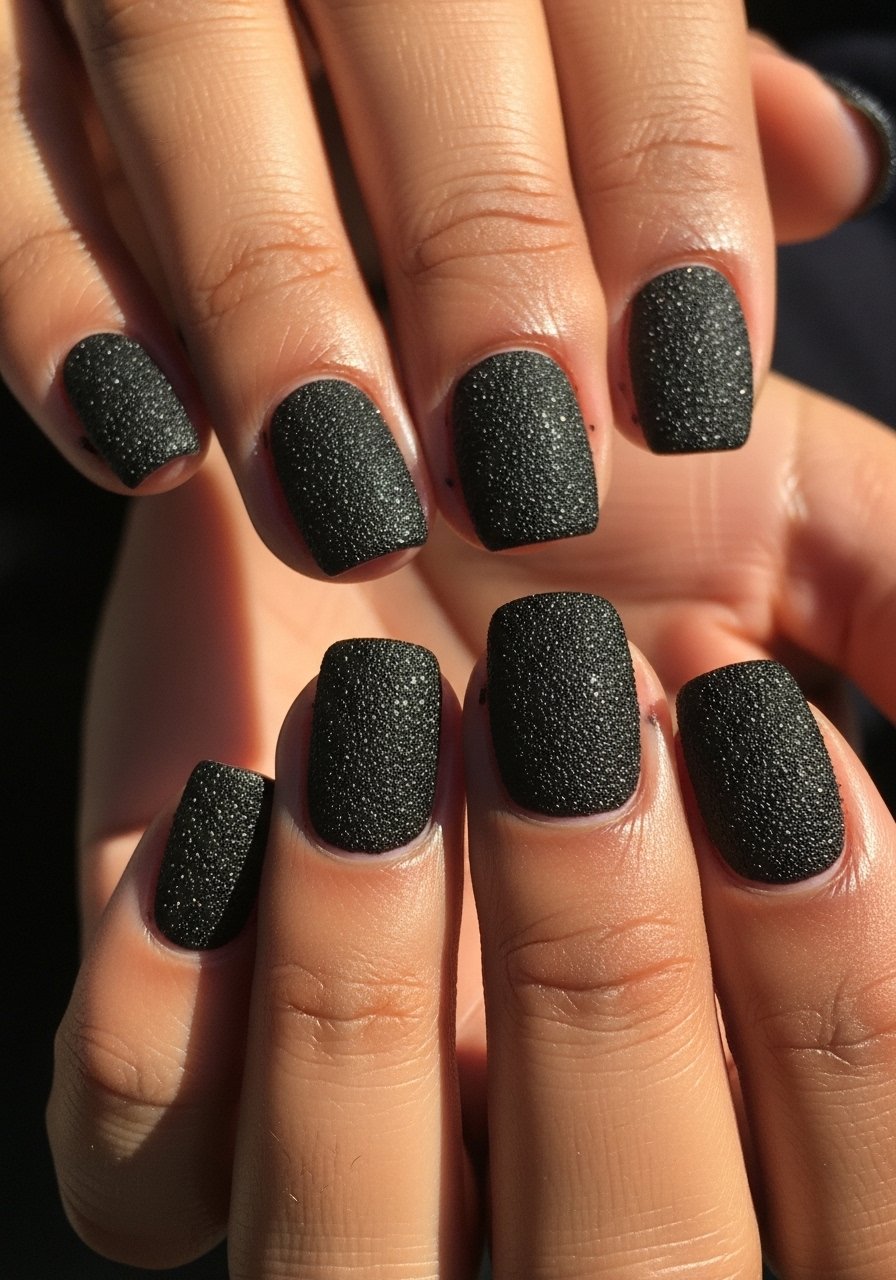
Style/Vibe: Tactile, casual luxe
Best For: Short nails, weekend and casual looks
Skill: Beginner
Textured finishes hide chips and add interest without nails looking overdone. After two thin black gel coats, sprinkle ultra-fine matte texture powder onto the last wet layer, then cure. Pat the texture lightly rather than rub for an even surface. The result feels like fabric under fingertips and lasts when sealed around the free edge with a thin glossy rim. Try a textured-powder and a small flat-tip-brush for placement.
Mistake to Avoid: Covering the entire nail in thick texture so it catches and flakes off.
If any of these ideas have you ready to shop, here are the essential items I actually reach for when I do a black gel set.
The Black Gel Essentials
Polishes & Gels:
- Black gel polish (~$10-20). A reliable opaque and a sheer version cover most looks.
- Clear builder gel (~$12-25). For glitter mixes and strength.
- No-wipe gloss top coat (~$8-18).
Tools:
- LED nail lamp (~$25-50). At least 24W for faster cures.
- Nail-striping-brush (~$6-12). Essential for thin lines.
- Chrome powder kit (~$8-20).
Extras:
- Gold-foil-flakes (~$6-15). For occasional luxe accents.
- Fine-glitter-pot (~$5-12). For subtle fades.
- Cuticle-oil (~$4-10). Keeps black frames looking intentional.
8. Tiny Dot Constellation
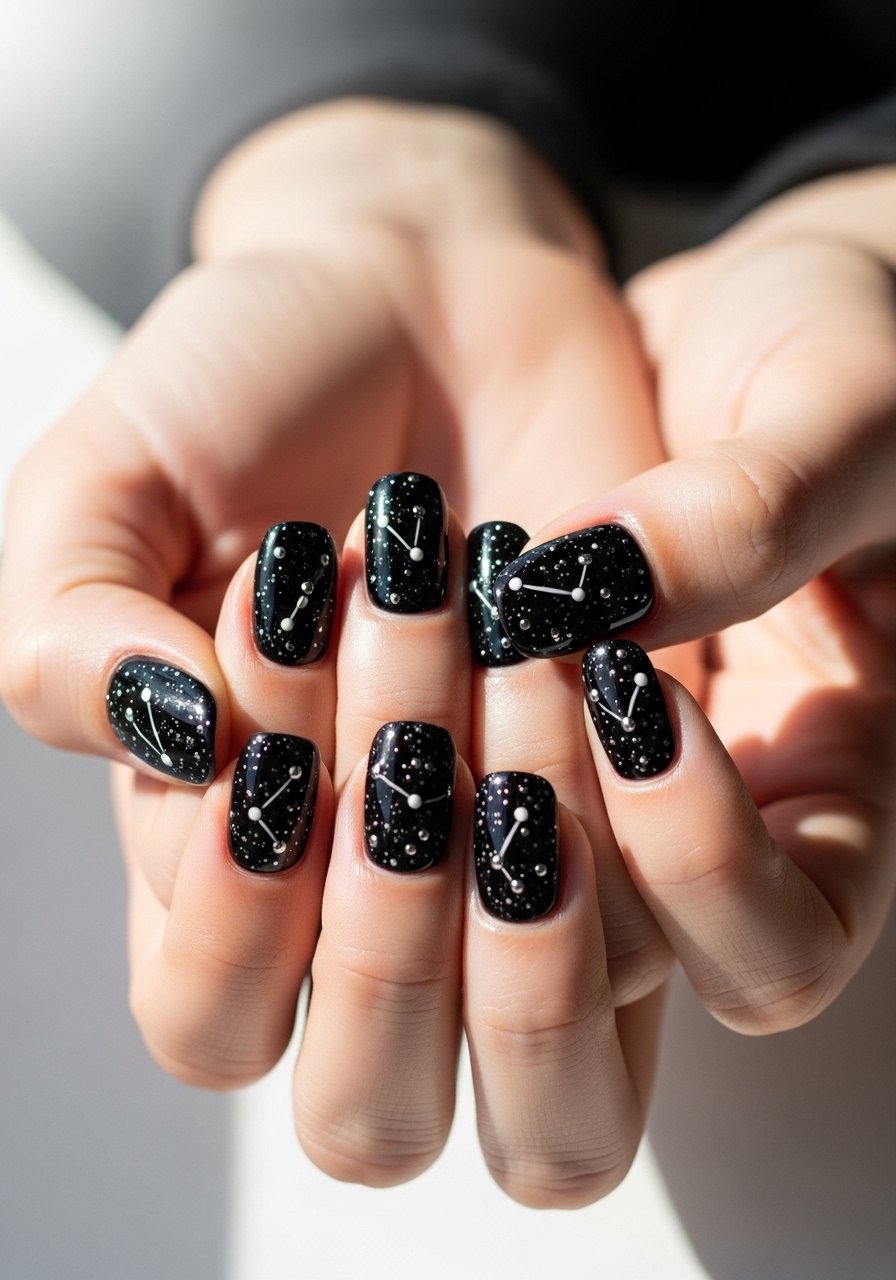
Style/Vibe: Playful, detailed, delicate
Best For: Medium nails, those who like tiny art
Skill: Beginner to intermediate
Dots read sophisticated when scaled small. Paint a black base, cure, then use a 1 mm dotting tool to place tiny silver or white dots in clusters. Keep spacing roughly 2 to 3 mm for a breathable pattern. I alternate sizes randomly for a natural feel. A dotting-tool-set and a thin brush for cleanup are all you need. This works on short nails if you keep the dots compact.
Mistake to Avoid: Crowding the nail with dots so it reads busy rather than airy.
9. Black Tip With Nude Base
Style/Vibe: Modern French, understated
Best For: Short nails, professional settings
Skill: Beginner
A reverse of the classic, paint a nude or sheer base and add a crisp thin black tip 1 to 2 mm wide. Use tape for a perfectly straight edge or freehand with a striping brush. Two thin coats of nude, cure 30 seconds, then a single thin black line, cure, and finish with a glossy top coat. Try a nude-sheer-gel and a striping-tape if you want perfect lines.
Mistake to Avoid: Making the tip too wide for short nails, which shortens the finger visually.
10. Smoky Marble With Silver Vein
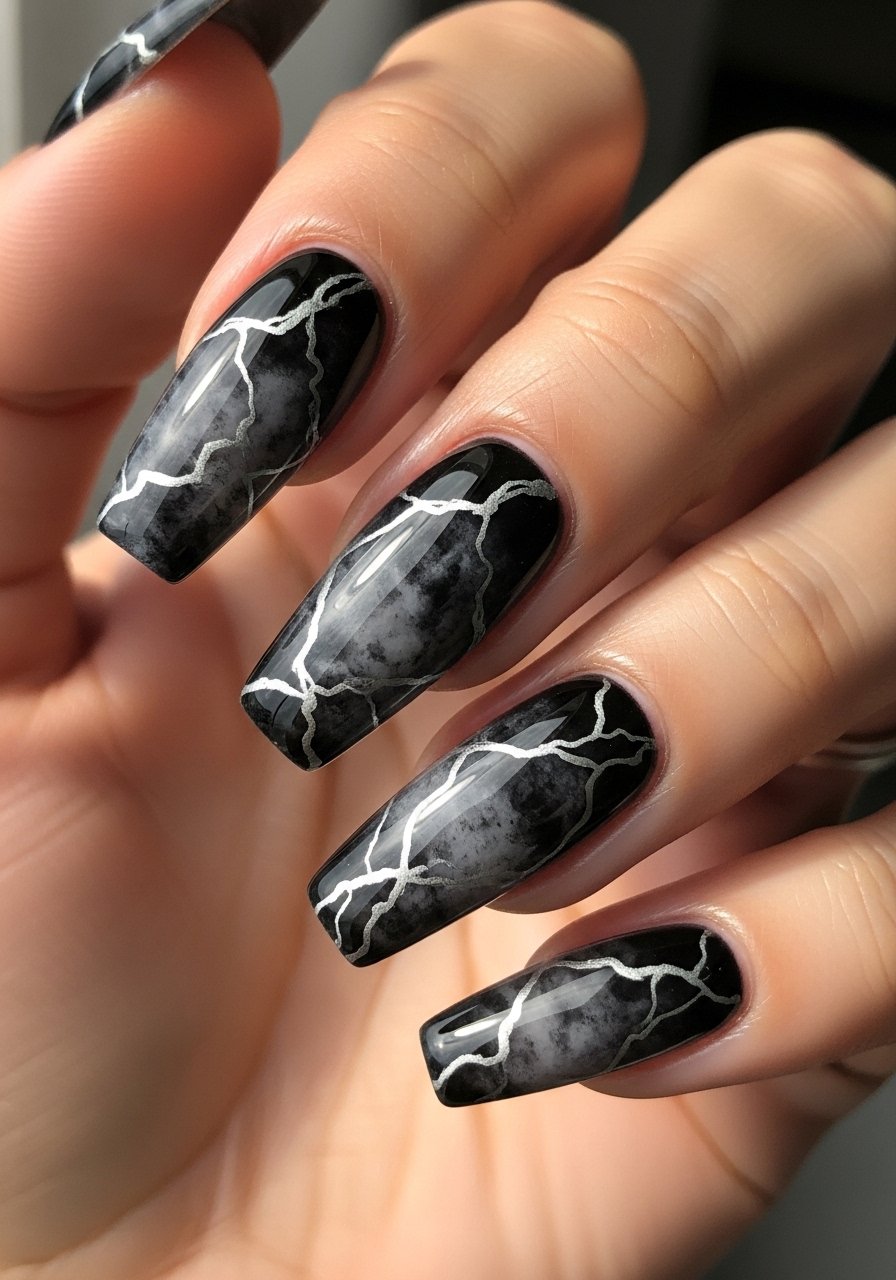
Style/Vibe: Artistic, moody, editorial
Best For: Long nails, statement looks
Skill: Intermediate
Marble works in black when you thin the contrast. Drag a watered-down black gel into a clear or soft gray base with a fine brush while the base is still slightly tacky. Add a hairline of silver with a striping brush for veins. One hair-thin silver stroke per nail reads luxe instead of loud. A fine-nail-art-brush and a silver-striping-lacquer are handy here.
Mistake to Avoid: Overworking the marble so it becomes muddy and loses the veining.
11. Matte Black With Glossy Heart Accent
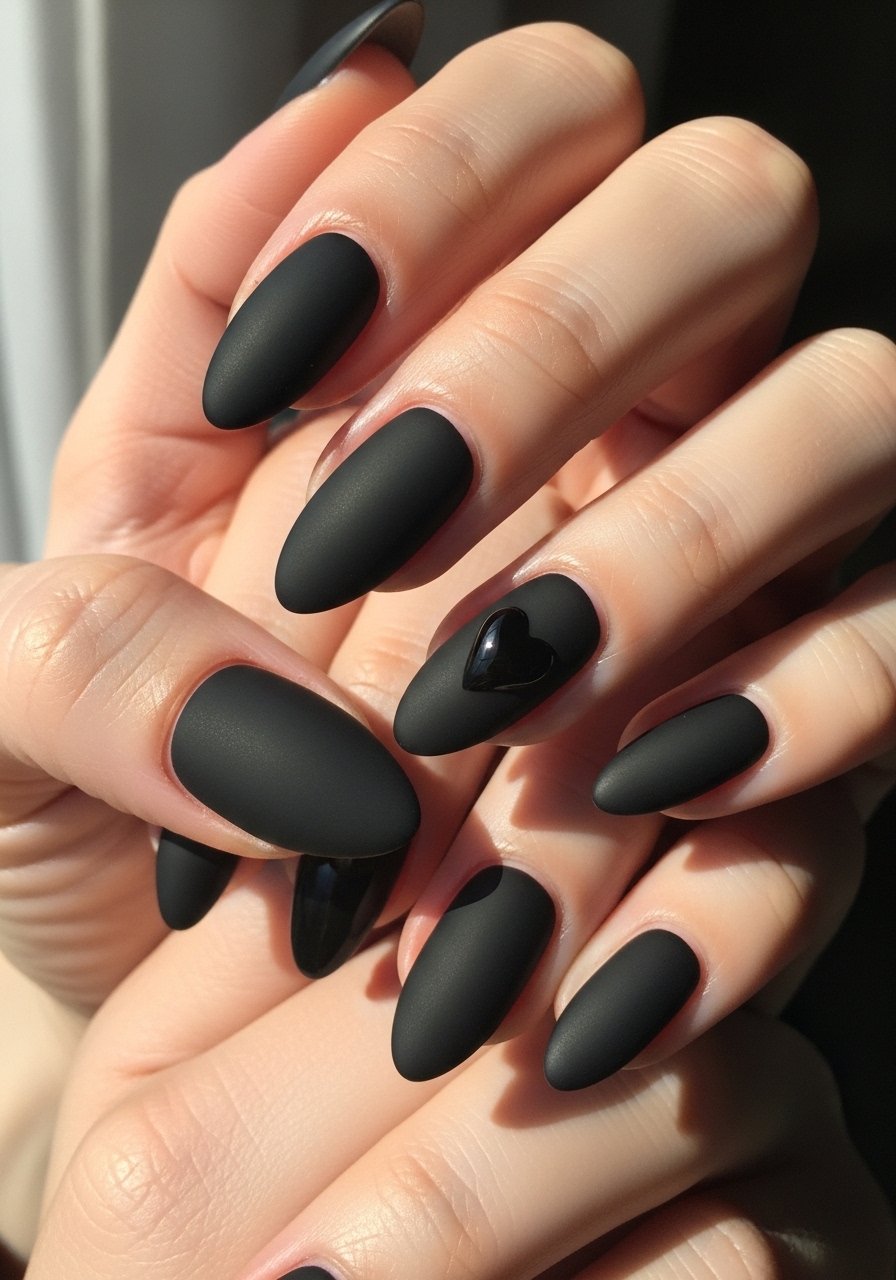
Style/Vibe: Sweet, modern, wearable
Best For: Medium nails, date or casual style
Skill: Beginner
One glossy heart on matte black is charming when tiny. Paint matte black, cure, then paint a small glossy heart at the center of the ring finger and cure again. Keep the heart under 4 mm for subtlety. A heart stamp or a tiny dot of polish dragged into shape works. Try nail-heart-stickers if freehand feels scary.
Mistake to Avoid: Making the heart too large so it reads juvenile instead of intentional.
12. Lace Stencil Over Black Base
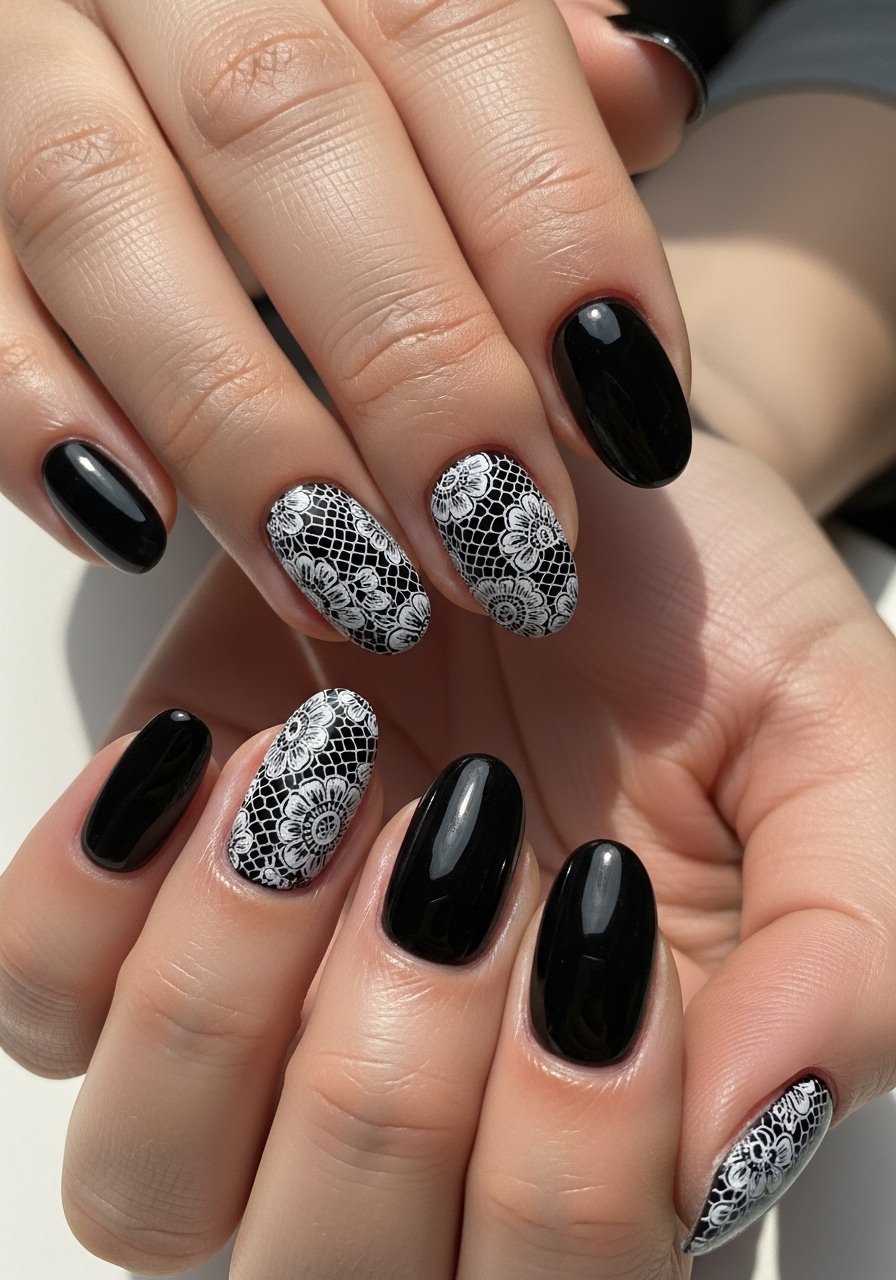
Style/Vibe: Feminine edge, texture play
Best For: Medium nails, special events
Skill: Intermediate
Stamping gives lace without painstaking freehand. Paint black, cure fully, then use a white stamping polish and a fine lace plate to transfer the pattern. Press the stamper once with even pressure for a clean image. A nail-stamping-kit and a couple of lace plates open a lot of looks. This is one of those competitor gaps many lists skip because stamping feels technical, but once you practice one plate it becomes fast.
Mistake to Avoid: Trying to stamp on a tacky surface, which smears the pattern.
13. Strengthening Gloss Seal
Style/Vibe: Classic, polished, secure
Best For: Short nails, everyday wear
Skill: Beginner to intermediate
If you love black but your nails chip easily, build strength with a thin clear builder gel base, two thin color coats, and a glossy seal. Cure each thin layer 30 seconds under LED and cap the free edge on every step. Two 30-second cures per coat versus one long cure reduces heat spikes and helps adhesion. Use a builder-base-gel and finish with a gloss-top-coat.
Mistake to Avoid: Skipping free-edge capping so tips peel within days.
Keep That Black Set Sharp
Thin coats beat one thick coat every time. Three thin layers of no-wipe-gloss-top-coat look smoother and last longer than one gloopy layer.
Wipe your cured tack layer with 70 percent isopropyl on a lint-free wipe before sealing. A quick lint-free-wipe costs a few dollars and removes dust that causes dull spots.
When filing, always file in one direction across the free edge to avoid micro-tears. Keep a fine-grit-file in your kit for quick touch-ups between fills.
If you feel heat during a long cure, break the cure into two 30-second steps with a 10-second rest to reduce discomfort. A compact led-nail-lamp with a timer makes this easy.
