
The first time I tried a brown French tip on my own short nails, I followed a perfect-looking tutorial and ended up with uneven tips and too-dark brown that swallowed my nail bed. After a few nights of repainting and one tech who works at a salon downtown showed me a simpler two-step way, I stopped overworking the shape and started getting the clean, warm look I actually wanted.
These ideas are for anyone who likes short nails but wants something warmer than classic white tips, from at-home quick fixes to salon-ready variants. Expect mostly low-cost polishes and simple tools, beginner-friendly techniques, and a few slightly fussy looks for special occasions. Most people getting their nails done these days are asking for gel, not acrylic. If you prefer natural polish, I note dry times and three quick tips to make short nails read neat instead of crowded.
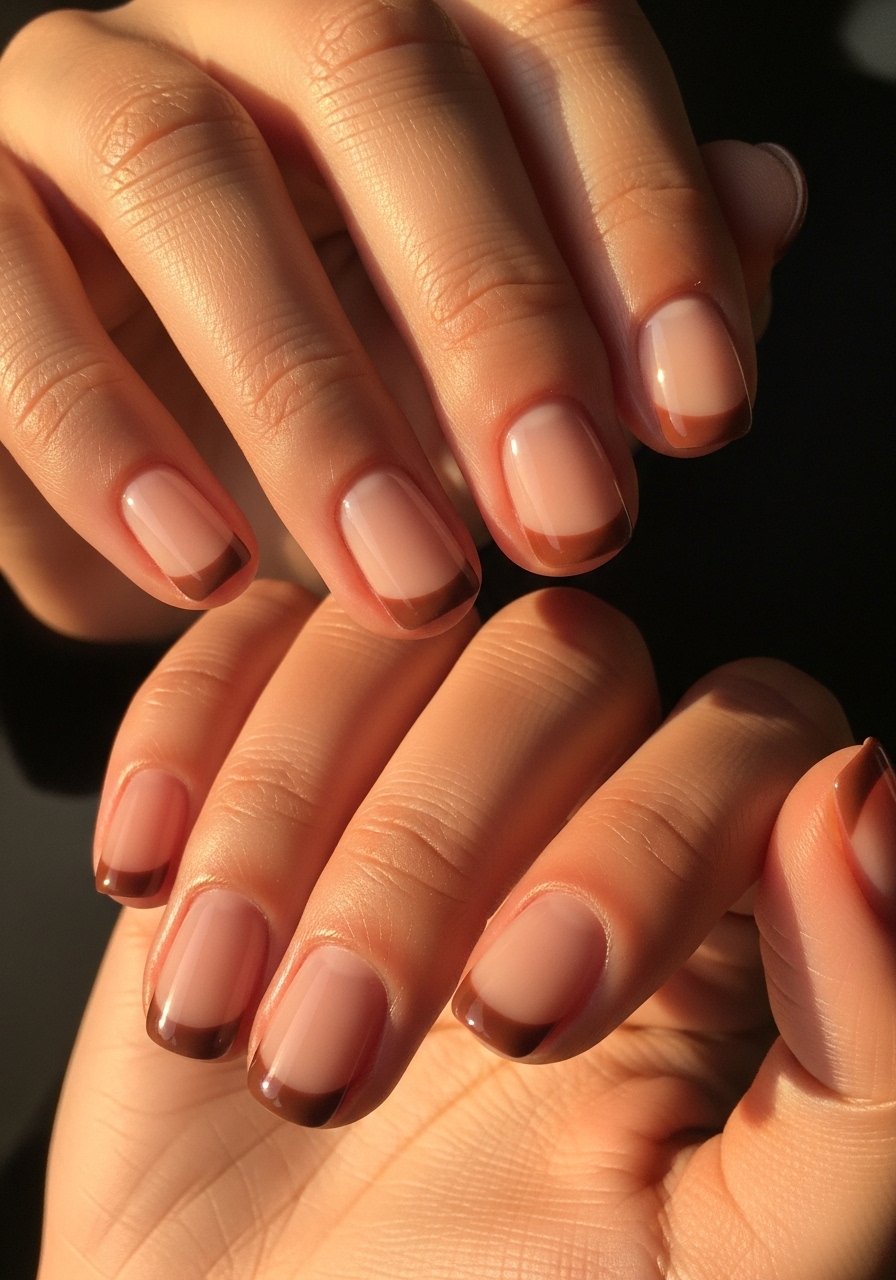
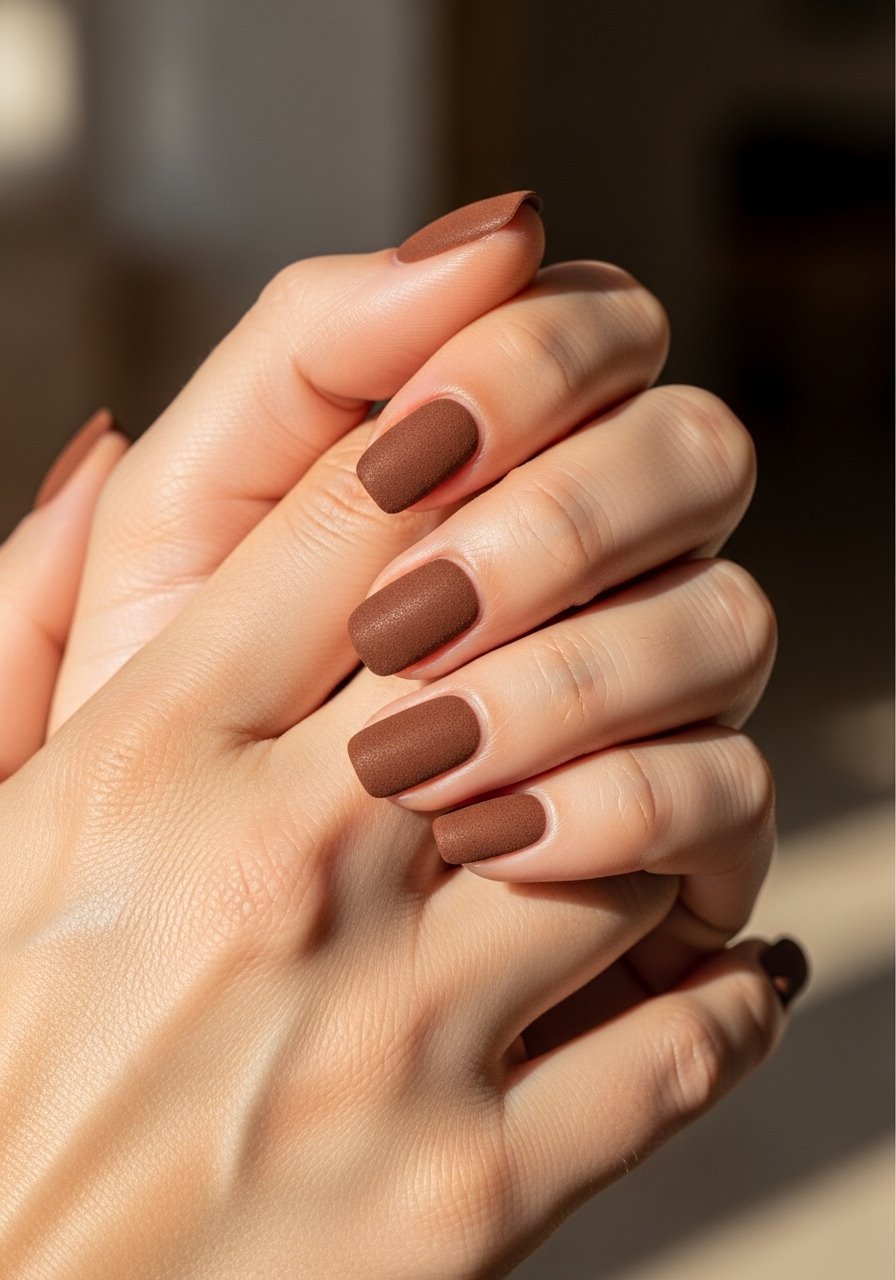
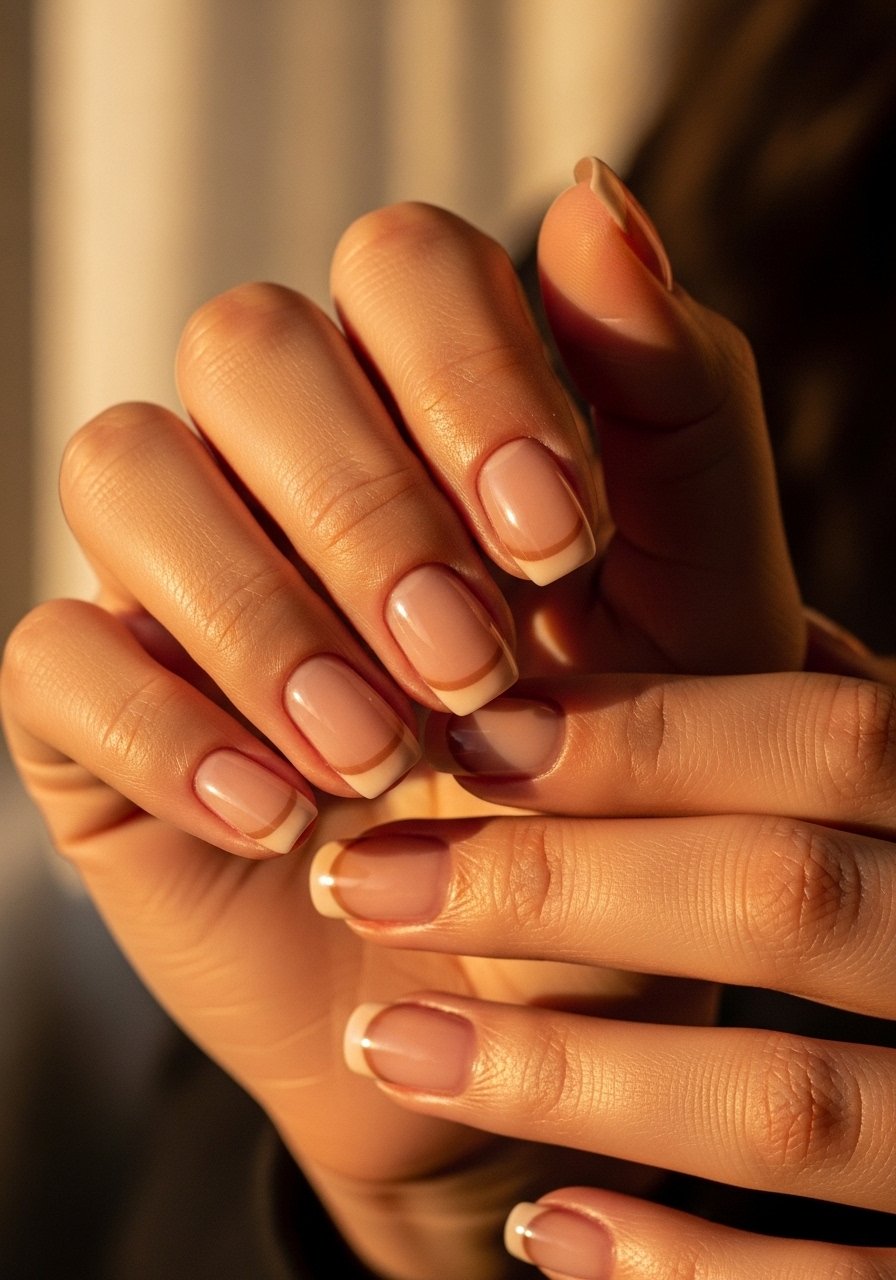
1. Soft Chocolate Squoval Tip

Style/Vibe: Soft Chocolate Squoval
Best For: Short nails, everyday warm look
Skill: Beginner
Start with a sheer nude base so the brown tip reads intentional instead of heavy. The trick is painting the tip with a slightly thinned brown polish, about 70 percent paint to 30 percent thinner, which helps the brush lay down a thin edge. I use brown-nail-polish for the tip and seal with quick-dry-top-coat. It reads soft and modern, perfect for low-key work weeks and weekend coffee runs.
Mistake to Avoid: Pushing too much polish onto the brush and trying to finish the tip in one stroke.
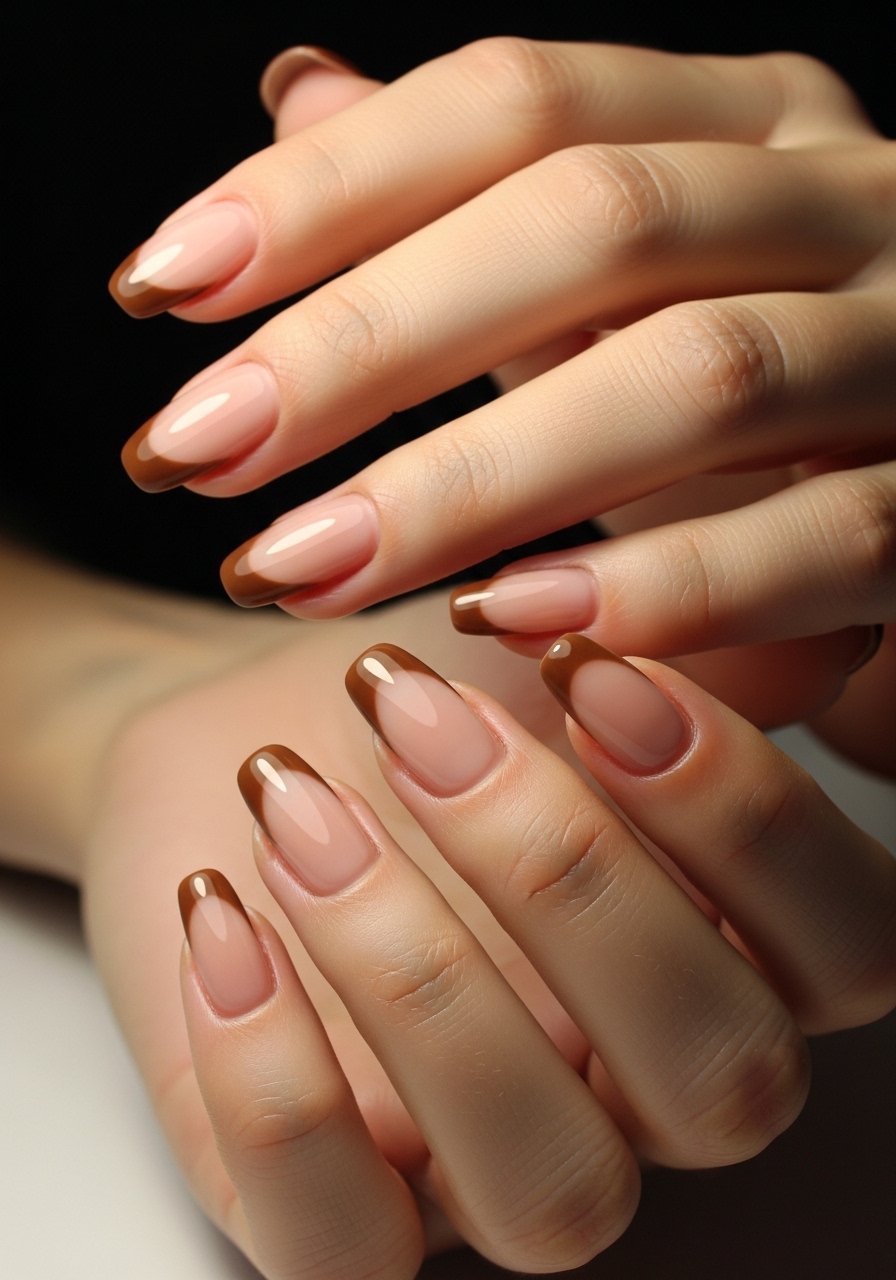
2. Milk Chocolate Micro-Smile Line
Style/Vibe: Milk Chocolate Micro-Smile
Best For: Short round nails, minimalist look
Skill: Intermediate
This is a thinner, almost calligraphic French line that widens slightly at the corners. Use a small liner brush and mix one drop of brown polish with a clear base to control flow. I prefer nail-liner-brush for steady strokes. It makes short nails look longer without adding length. Takes a bit of practice but five minutes per hand once you get the motion down. Great for someone who wants subtle warmth rather than a stark contrast.
Mistake to Avoid: Dragging the brush from base to tip, which creates uneven thickness.
3. Matte Cocoa Block Tip
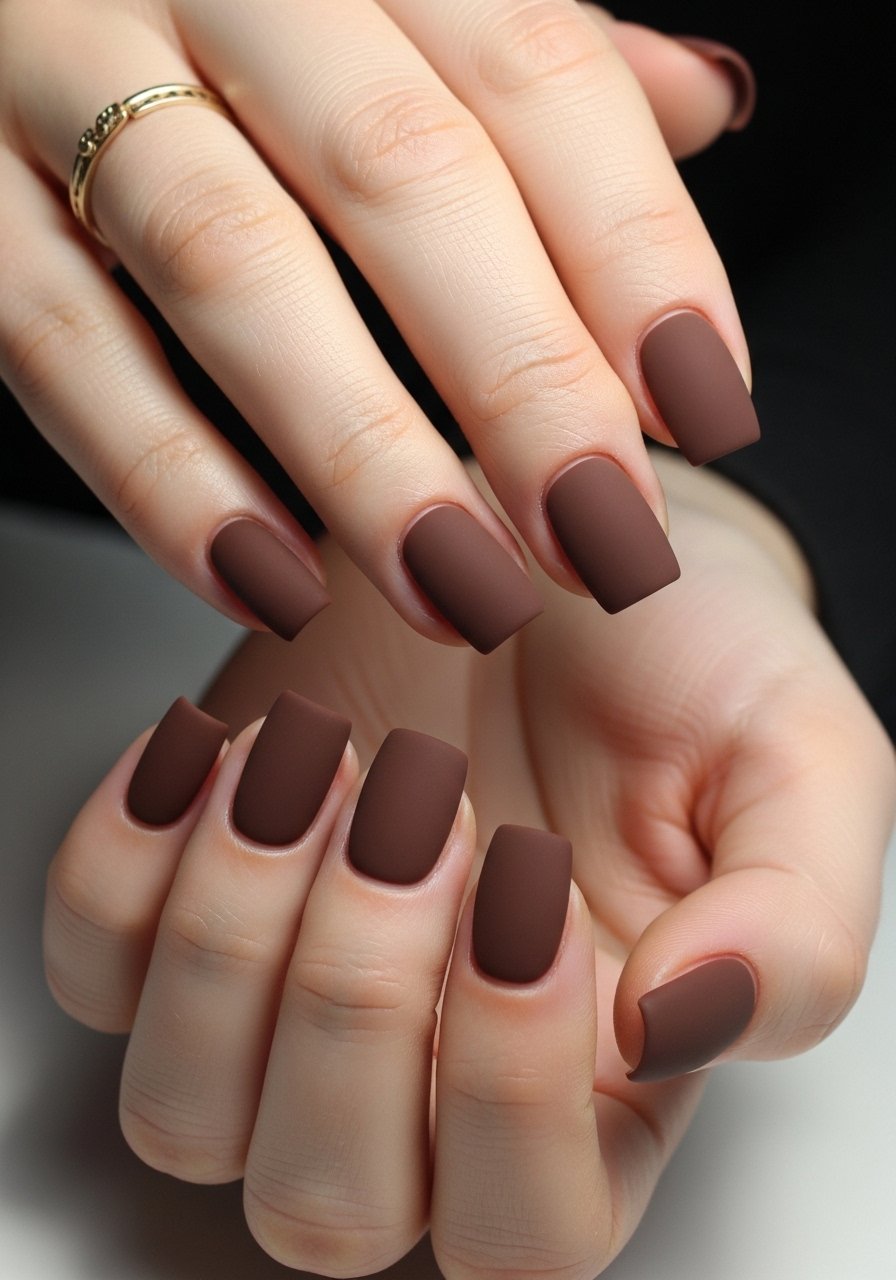
Style/Vibe: Matte Cocoa Block
Best For: Short square nails, fashion-forward outfits
Skill: Beginner
Swap glossy for matte to get a contemporary feel. Apply two thin coats of matte top coat over the tip area only, leaving the base satin. I like matte-top-coat and a bottle of deep-brown-polish that covers in two coats. This look reads crisp with neutral sweaters and leather accents. Quick, low-cost, and salon-looking on short nails when the tip width is kept to under one-third of the nail.
Mistake to Avoid: Applying matte over the whole nail, which can make the manicure look flat instead of intentionally styled.
4. Warm Caramel Gradient Tip
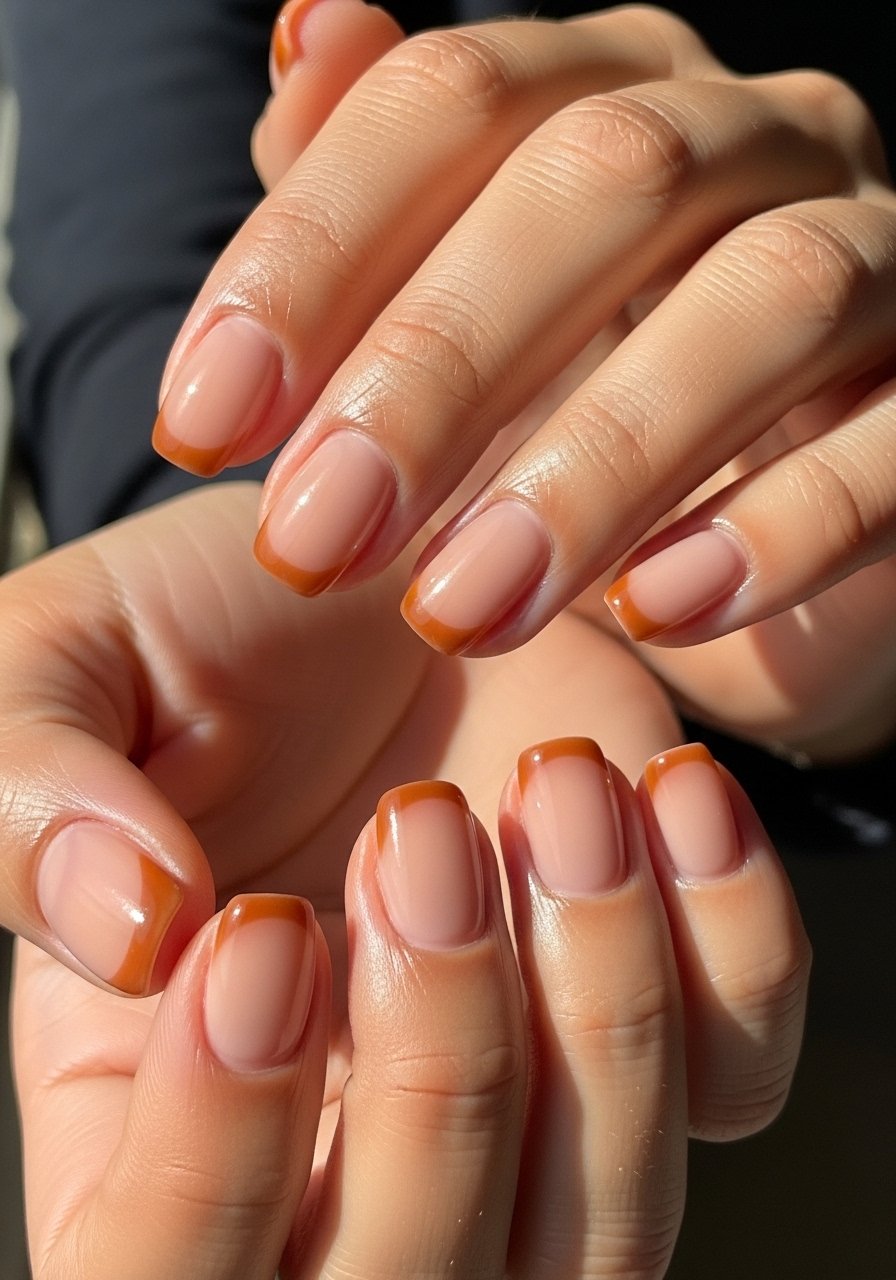
Style/Vibe: Warm Caramel Gradient
Best For: Short rounded nails, casual to date nights
Skill: Intermediate
Gradient tips add depth without the harsh line. Sponge a tiny amount of caramel and a lighter brown onto a makeup sponge, then press gently over the tip for a soft fade. Use a thicker base polish diluted with 20 percent clear polish to help blend. I reach for mini-makeup-sponges and caramel-nail-polish. Takes a few tries to get the fade even, but the result feels cozy and intentional.
Mistake to Avoid: Using a soaked sponge that deposits big blobs of polish.
5. Glossy Espresso Reverse Tip
Style/Vibe: Glossy Espresso Reverse
Best For: Short oval nails, trend-forward look
Skill: Advanced
Flip the script and paint a crescent at the lunula instead of the tip. Keep the shape small to avoid looking like a repaired nail. I use a thin synthetic brush and espresso-nail-polish. This one reads polished and modern, good for nights out when you still want short, wearable nails. It pairs well with ring stacking and darker winter wardrobes.
Mistake to Avoid: Making the reverse tip too wide, which competes with the natural nail bed.
6. Suede Finish Narrow Tip
Style/Vibe: Suede Finish Narrow Tip
Best For: Short squoval nails, textured finish lovers
Skill: Beginner
Suede or velvet finishes mute shine and make brown feel softer. Apply a textured top coat just on the tip area after the brown dries. The trick is waiting a full five minutes before applying texture so the polish does not drag. I use textured-top-coat and warm-brown-polish. Works well on nails that chip easily because the texture hides tiny flaws.
Mistake to Avoid: Rushing the dry time before adding the texture coat.
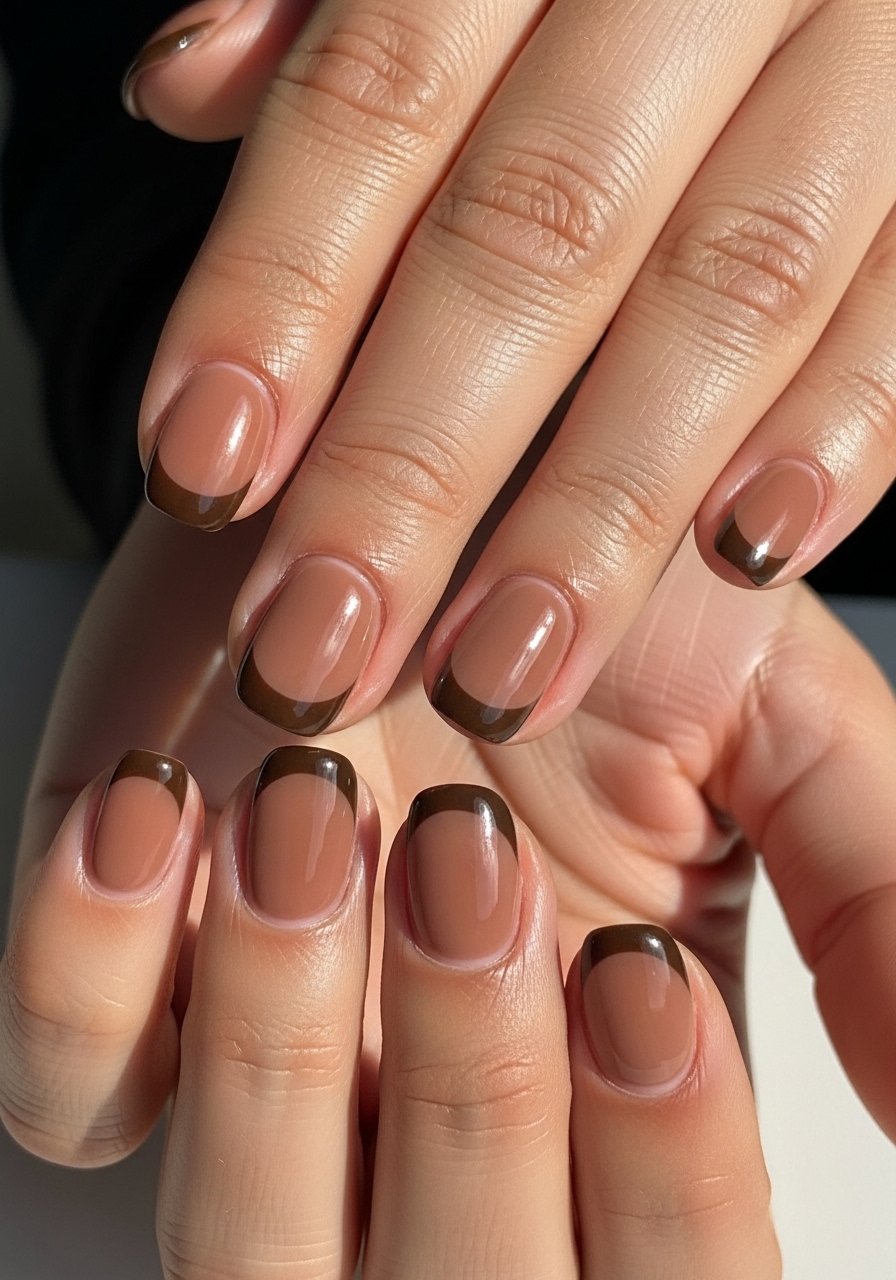
7. Two-Tone Chestnut Accent Tip

Style/Vibe: Two-Tone Chestnut Accent
Best For: Short square nails, creative everyday looks
Skill: Intermediate
Layer a thin tan stripe just above a chestnut tip for a painted border effect. Keep the bottom color slightly darker so the tan seems like an accent, not a mistake. I like the pairing of tan-polish and chestnut-polish. This look reads intentionally designed and plays well with layered rings. It is salon-level but doable at home with a steady hand.
Mistake to Avoid: Making both stripes the same opacity, which flattens the two-tone effect.
If any of these ideas have you ready to actually try something, here are the products I reach for most when doing short brown French tips.
Core Tools For Brown French Tips
Polishes and Finishes:
- brown-nail-polish (~$6-12), reliable starting shade.
- caramel-nail-polish (~$7-14), great for fades.
- espresso-nail-polish (~$8-15), for deep tips.
Top Coats and Textures:
- quick-dry-top-coat (~$8-16), speeds up wear.
- matte-top-coat (~$7-14), for modern finishes.
- textured-top-coat (~$9-18), for suede looks.
Tools and Helpers:
- nail-liner-brush (~$5-10), indispensable for thin lines.
- mini-makeup-sponges (~$6-12), for gradients.
- cuticle-oil (~$5-12), keeps short nails looking neat.
8. Tapered Coffee Bean Tip
Style/Vibe: Tapered Coffee Bean Tip
Best For: Short tapered nails, chic minimalists
Skill: Intermediate
A tapered tip narrows toward the center, which gives the illusion of a longer nail without adding length. Use a steady hand and thin polish; two thin coats work better than one heavy coat. I like pairing coffee-brown-polish with a glossy finish. The result is neat and slightly editorial, good for people who wear a lot of monochrome clothing.
Mistake to Avoid: Trying to drag a thick coat into a point, which ends in uneven edges.
9. Glossy Walnut Micro-Edge
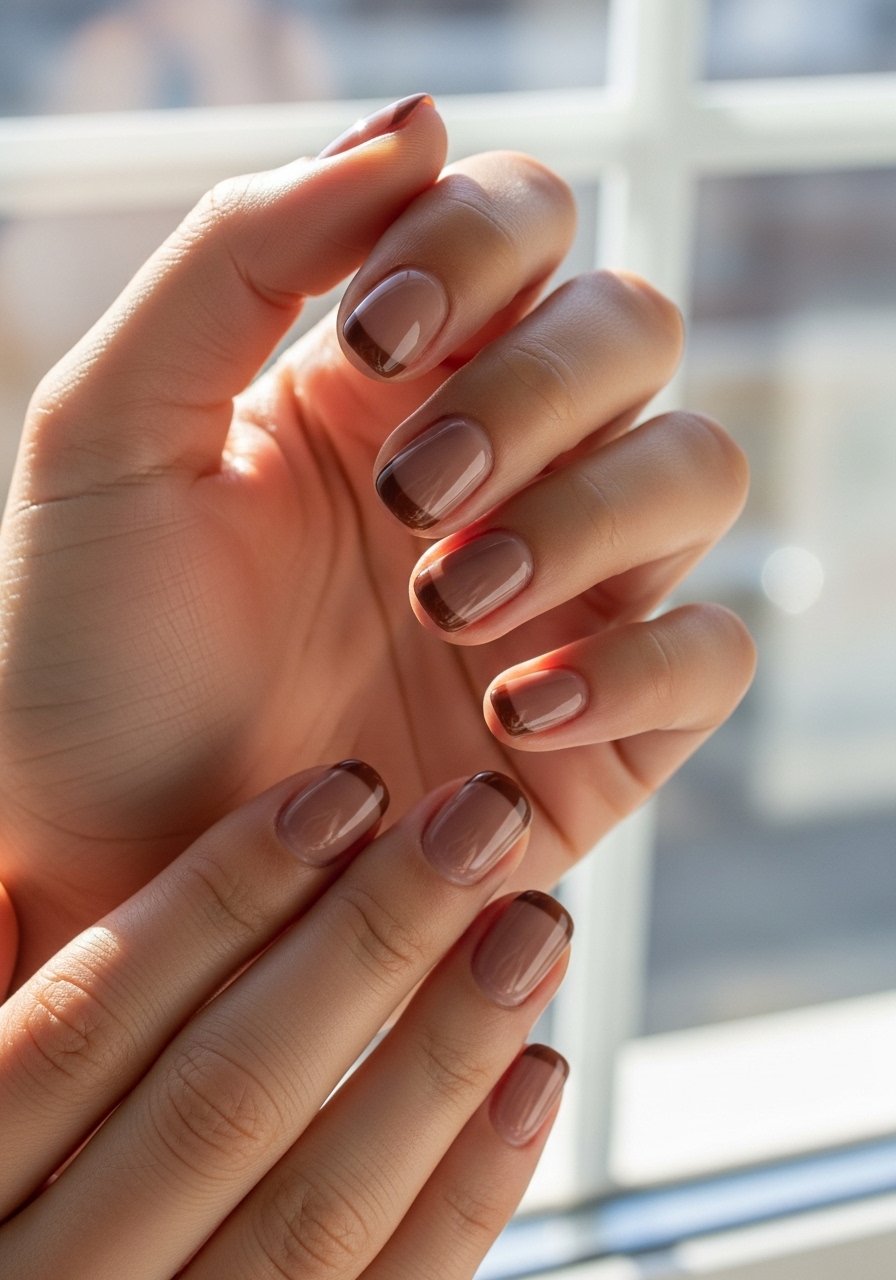
Style/Vibe: Glossy Walnut Micro-Edge
Best For: Short round nails, office-friendly style
Skill: Beginner
Make the tip just a hairline, almost like eyeliner on a lash line. It reads refined and keeps nails understated. Use a tiny amount of polish on the brush and a steady inward flick. walnut-nail-polish plus quick-dry-top-coat finishes it cleanly. It is forgiving for short nails because the line does not take up visual space.
Mistake to Avoid: Making the tip too thick, which shortens the look of the nail.
10. Cinnamon Split Tip Accent
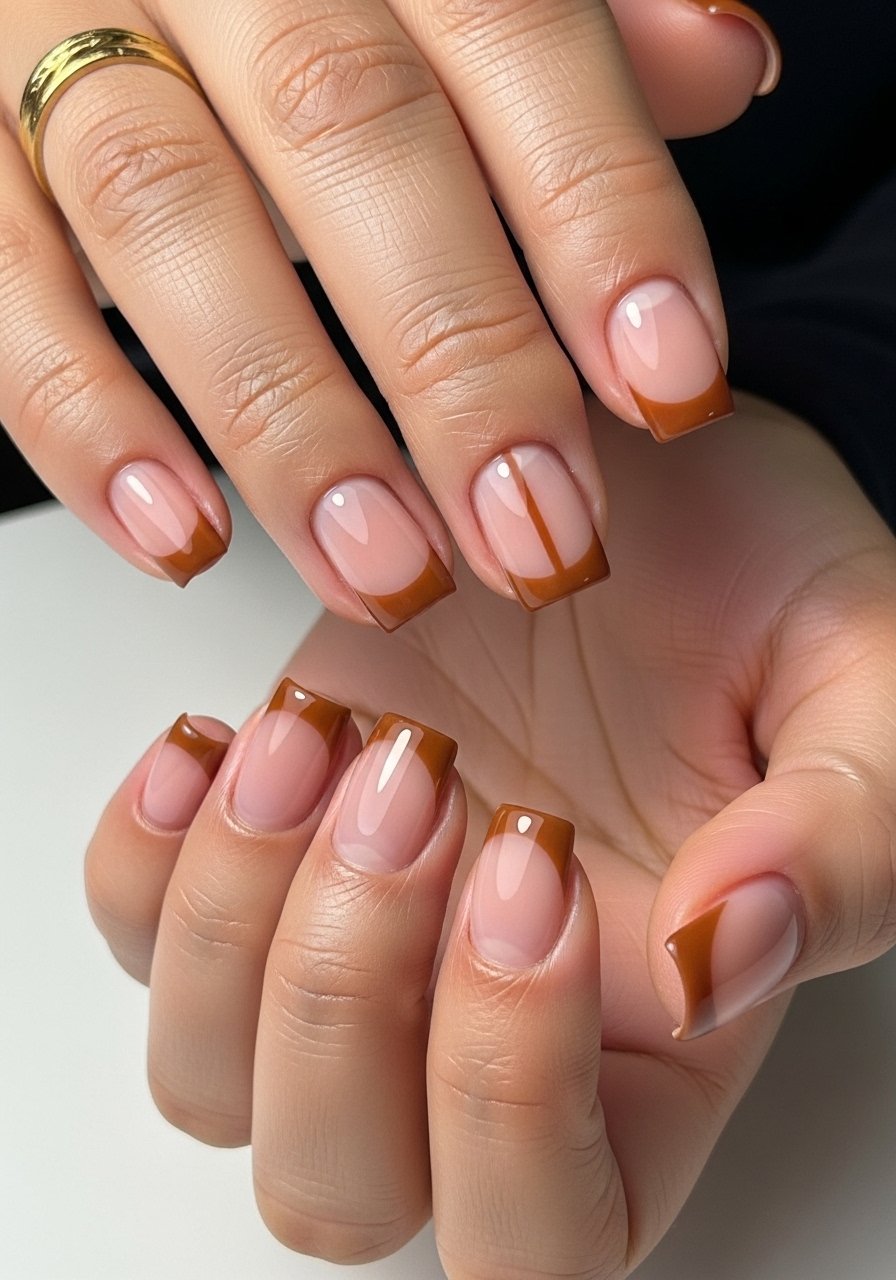
Style/Vibe: Cinnamon Split Tip
Best For: Short square nails, playful but neat
Skill: Intermediate
Split tips use a vertical negative space down the center or off to one side. Tape a thin strip before painting to keep the negative area crisp. cinnamon-nail-polish has a lively warmth that works with this shape. It looks modern and slightly cheeky without being fussy. Good for those who like a bit of pattern without full nail art.
Mistake to Avoid: Removing tape too slowly and pulling up fresh polish.
11. Honeyed Sheer Tip With Gold Fleck
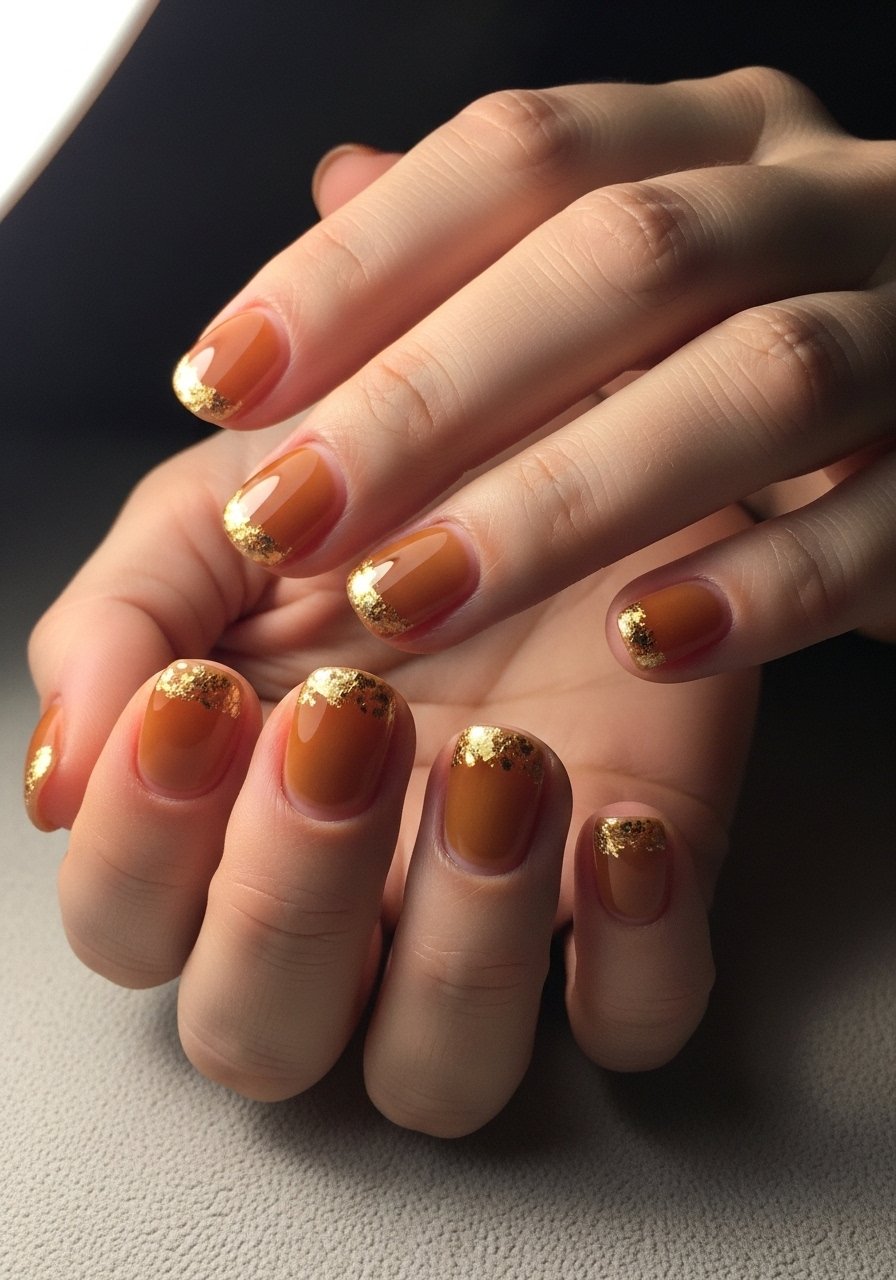
Style/Vibe: Honeyed Sheer Tip With Gold Fleck
Best For: Short rounded nails, special events
Skill: Intermediate
A sheer honey base with a whisper of gold foil at one corner reads like an accessory. Dab a tiny dot of gold leaf with top coat on the corner, not across the whole tip. I use honey-sheer-polish and a jar of gold-foil-flakes. It feels celebratory but still wearable for short nails.
Mistake to Avoid: Applying too much foil, which looks messy on a small canvas.
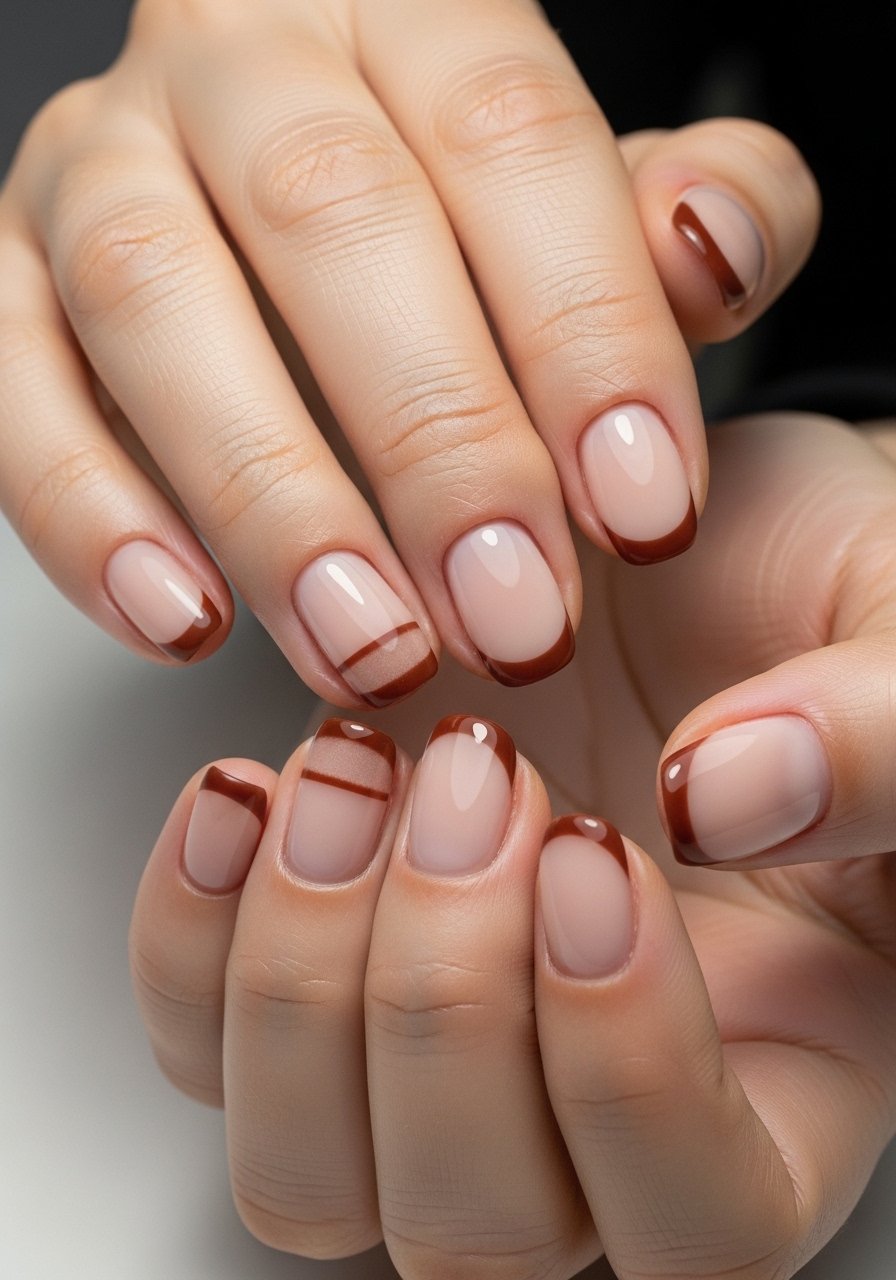
12. Brown Ombre With Negative Space Bar
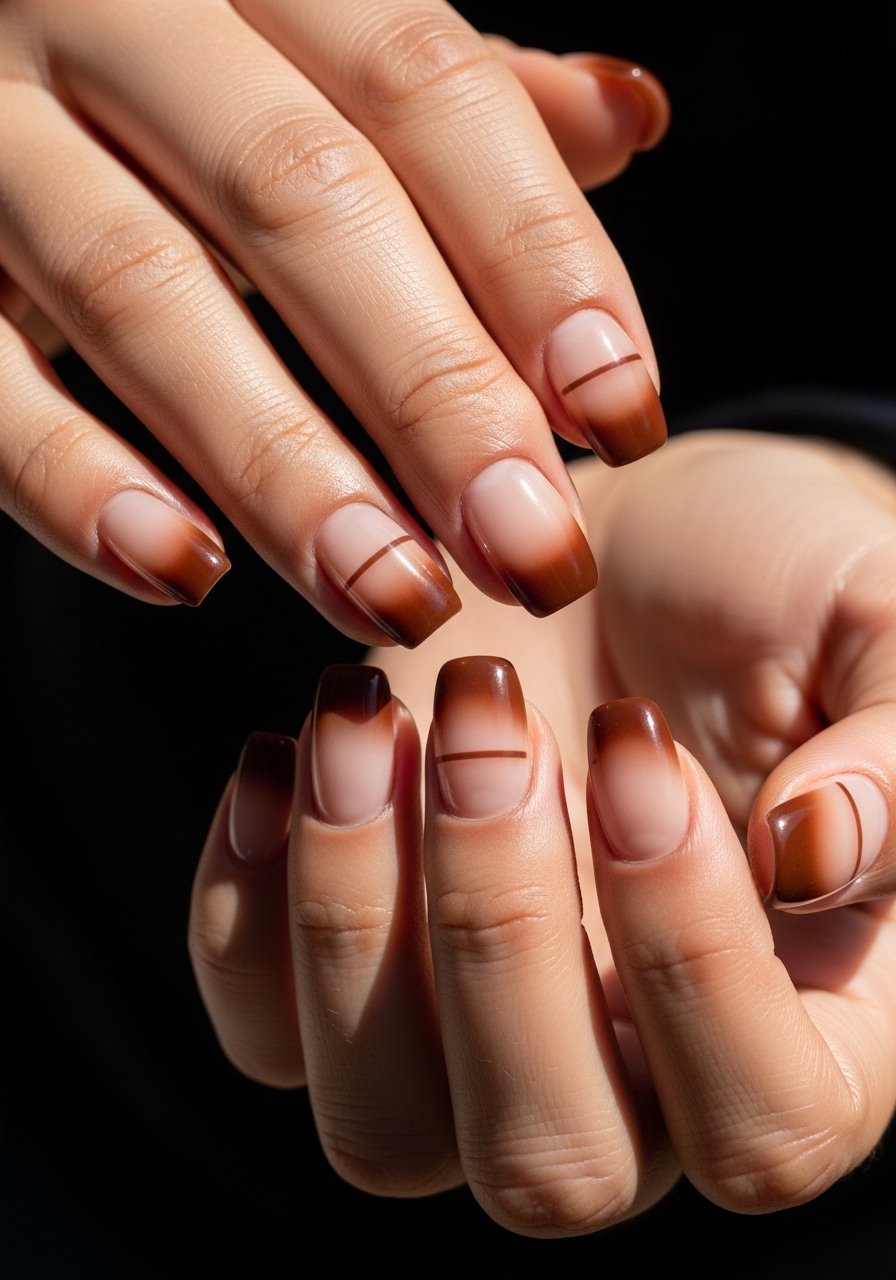
Style/Vibe: Brown Ombre With Negative Space Bar
Best For: Short squoval nails, fashion-forward everyday wear
Skill: Advanced
Combine a soft ombre tip with a tiny horizontal gap near the base to keep the look airy. The negative space prevents the brown from reading heavy on shorter nails. Use a nail-striping-tape and a gentle sponge blend. It is a small-time investment that pays off in a fresh silhouette.
Mistake to Avoid: Placing the bar too close to the tip, which visually shortens the nail.
13. Rustic Brick Edge With Matte Shine
Style/Vibe: Rustic Brick Edge With Matte Shine
Best For: Short oval nails, textured outfit pairings
Skill: Beginner
This mixes a matte base with a glossy brick edge for contrast. Paint the tip glossy and the rest matte, then seal carefully so the finishes do not bleed. brick-brown-polish reads cozy and works with knitwear. It is forgiving for beginners because the finishes hide small mistakes.
Mistake to Avoid: Applying thick glossy coats that smear into the matte area.
14. Walnut Chevron Tip
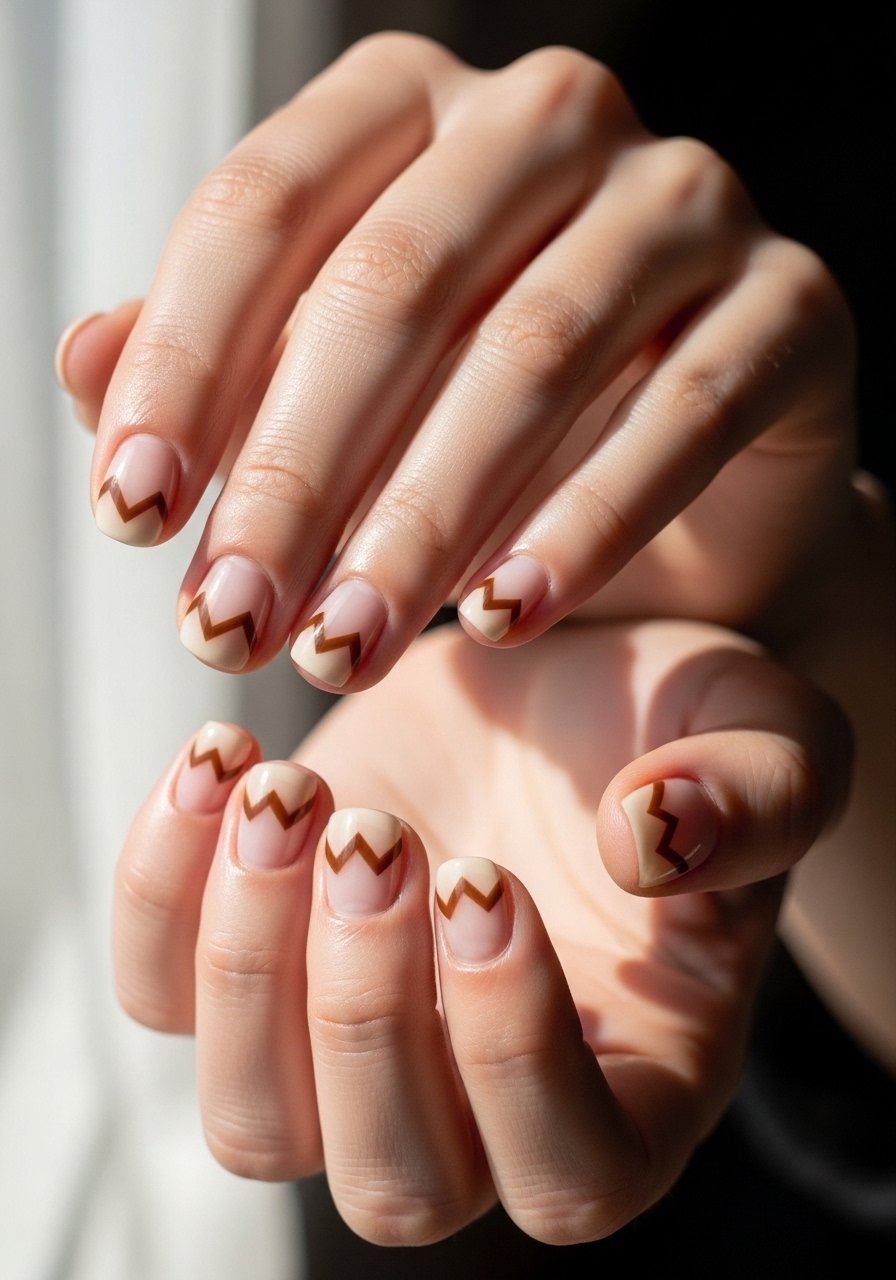
Style/Vibe: Walnut Chevron Tip
Best For: Short rounded nails, geometric accents
Skill: Intermediate
A chevron tip centers a V-shaped brown accent at the nail tip. Use a fine brush and steady strokes, or stamp it with a small triangle stamp. walnut-nail-polish and nail-stamping-kit make this quick once you practice. The small V helps nails look intentional and adds a graphic touch.
Mistake to Avoid: Making the chevron too large, which overwhelms the short nail.
15. Toasted Marshmallow Edge With Sheer Gloss
Style/Vibe: Toasted Marshmallow Edge
Best For: Short squoval nails, soft neutral looks
Skill: Beginner
Keep the tip very light, almost a wash, so it reads like a shadow at the edge. A sheer glossy base keeps the manicure delicate. This one is low-skill and low-cost, and it pairs well with daytime outfits. I reach for toasted-brown-polish and a clear gloss. It is a subtle way to wear brown without committing to bold color.
Mistake to Avoid: Pressing too much pigment near the cuticle when blending the sheer tip.
Short-Nail Mani Habits That Actually Help
Thin coats beat one thick coat every time. Three thin layers of quick-dry-top-coat look smoother and last longer than one gloopy layer.
Use a small brush dipped in acetone to clean edges immediately after each tip, not later. Grab nail-cleanup-brush and it saves five minutes and a redo.
If you file, file in one direction only. A single-direction nail-file prevents micro-tears and keeps short tips from catching.
Let polish dry under a fan or natural airflow for at least ten minutes before any activity. a-small-fan cuts dry time and reduces smudges.
When trying a new brown shade, test on one nail and photograph it in daylight. That way you see how it reads against your skin before committing.
