
When my artist laughed and said, "You do not need a whole sleeve to get a dragon," I nodded and booked the smallest slot they offered. What followed was a drawer of reference photos, two tiny touchups, and the realization that a small fine-line dragon can read as delicate, fierce, or quietly personal depending on scale, curve, and placement.
These picks are for people who want detailed work that stays subtle, not loud. Most are one-session pieces that fit a modest budget and heal quietly. I tested placement across five shops I have visited and wrote these options to help you pick a style, aftercare, and what to expect from pain and aging.
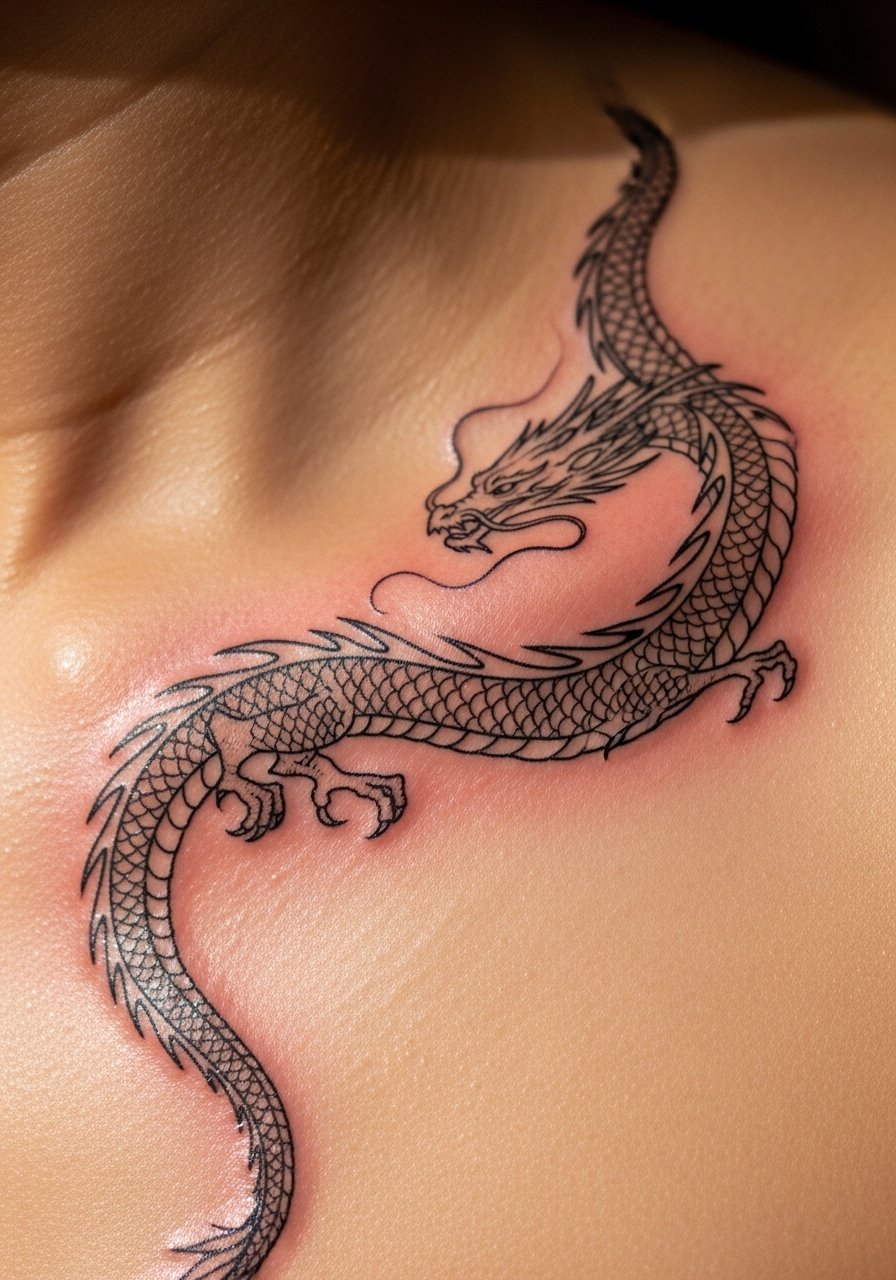
1. Collarbone Curve Dragon
Style/Technique: Fine-line illustrative
Pain Level: 4/10
Session Time: 30 to 60 minutes
Best For: Visible low-profile pieces, jewelry-adjacent placement
A collarbone dragon follows the bone and moves with clothing and necklaces, so the design reads as jewelry rather than body art. The fine 3RL lines keep scales whisper-thin, which gives motion without density. It looks poised with a micro-shading wash under the jawline and carries well for shorter sessions, so it fits budget-first clients. Prep with a close shave and a light stencil to check curve. I like pairing a single-session collarbone piece with a tiny aftercare balm like fragrance-free healing ointment and a soft transfer gel for crisp outlines.
Mistake to Avoid: Picking dense scale texture here makes the piece read heavy and ages poorly.
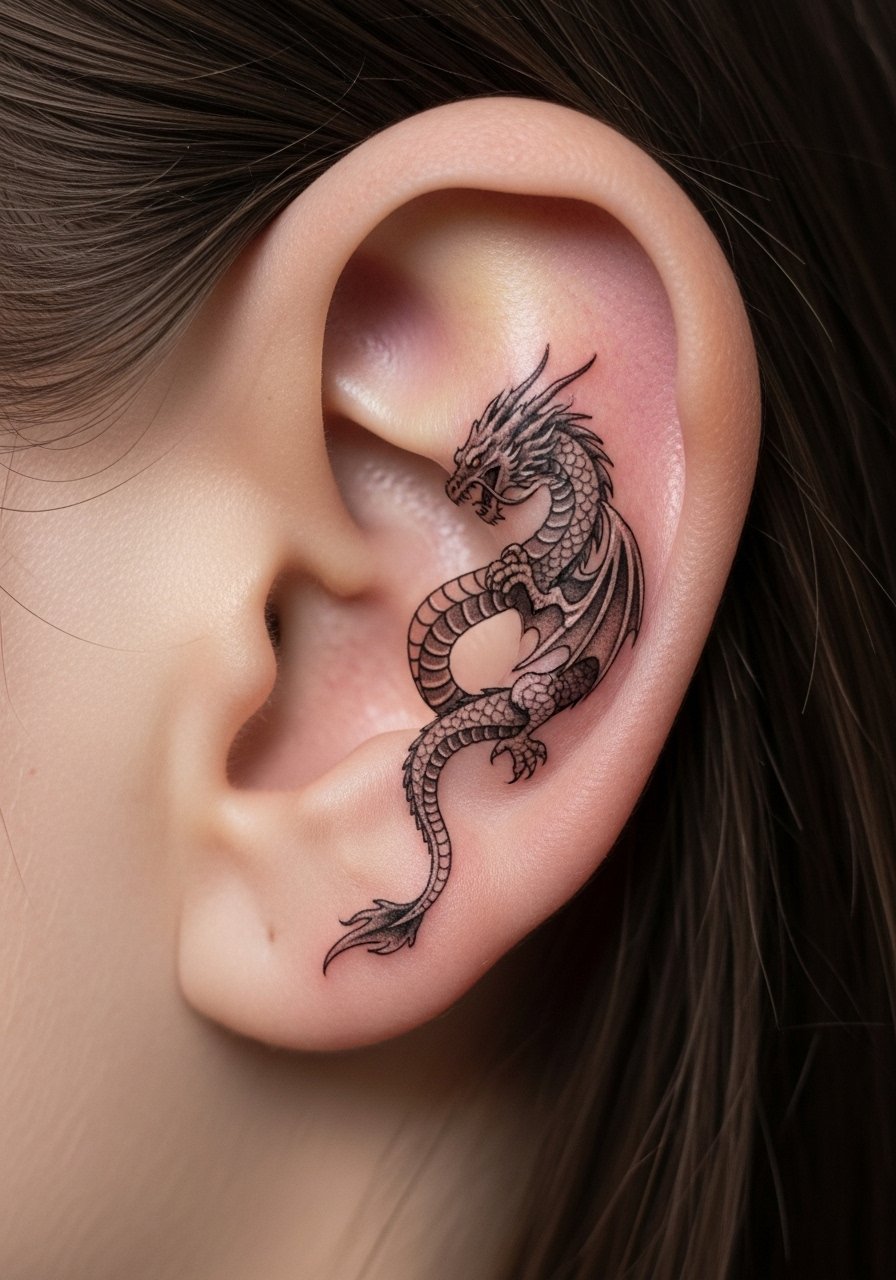
2. Behind-the-Ear Minimal Dragon
Style/Technique: Single-needle fine line
Pain Level: 3/10
Session Time: 20 to 40 minutes
Best For: Coverable work, first-timers, short hair or updos
A behind-the-ear dragon is perfect when you want a private talisman. One continuous 0.25 mm single-needle spine with tiny outward-facing scales gives a silhouette without looking like a doodle. It feels light and private because hair can hide it when needed, so this fits office workers and people testing an idea. For pre-care, a gentle exfoliation the day before keeps the stencil crisp. Bring a small touch-up balm such as tattoo aftercare balm to the session in case the artist needs to blot.
Mistake to Avoid: Asking for extra micro-shading behind the ear makes the area blur as it heals.
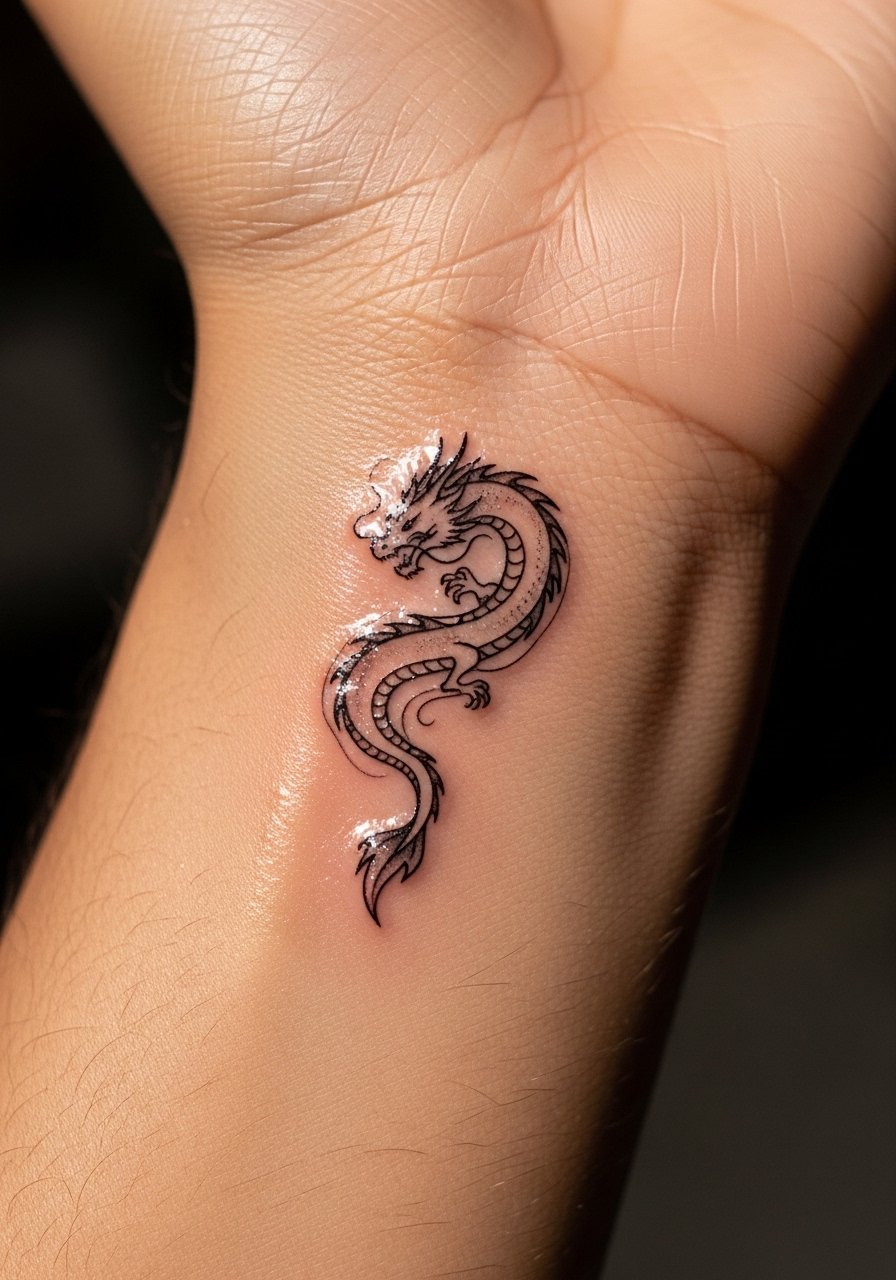
3. Wrists with Flowing Tail
Style/Technique: Fine-line wraparound
Pain Level: 4/10
Session Time: 30 to 50 minutes
Best For: Daily-visible pieces, bracelet alternative, medium-skill clients
A tiny wrist dragon that leaves the head at the top and tail flowing toward the inner wrist reads like a bracelet. The trick is keeping the tail made of 0.5 mm broken lines so it remains legible at small scale. Visually it creates movement; functionally it sits flat against the pulse area so touchups are easier. Budget-wise this is a one-session sitter unless you add color. Clean healing is faster with a mild antiseptic soap and a thin coat of fragrance-free healing ointment.
Mistake to Avoid: Asking for dense black fill on the tail, which hides the fine-line detail as skin settles.
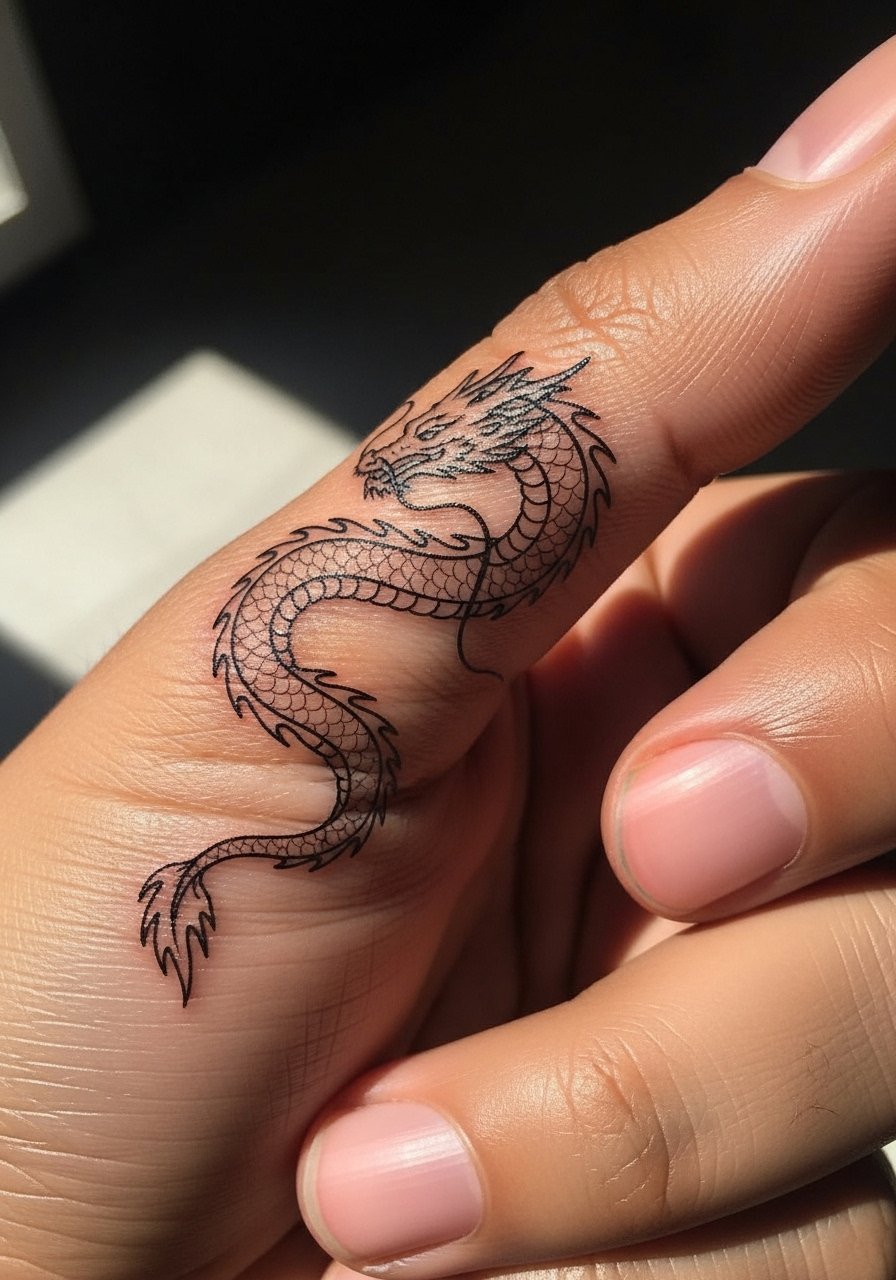
4. Finger Wrap Dragon
Style/Technique: Single-needle wrap
Pain Level: 5/10
Session Time: 20 to 35 minutes
Best For: Tiny visible accents, finger jewelry alternative
The finger is unforgiving, so a dragon here must be mapped to movement. Use single-needle outlines with 1 mm gaps between scale lines to avoid ink migration. The result is an organic, ring-like effect that wears like jewelry. Expect a faster fade and possible touchup; budget for that. I always recommend a sterile saline spray for first-week cleanings and antibacterial tattoo soap for daily care.
Mistake to Avoid: Choosing stacked scales instead of spaced lines; dense detail will blur within months on this skin.
5. Ankle Dragon with Scale Fade
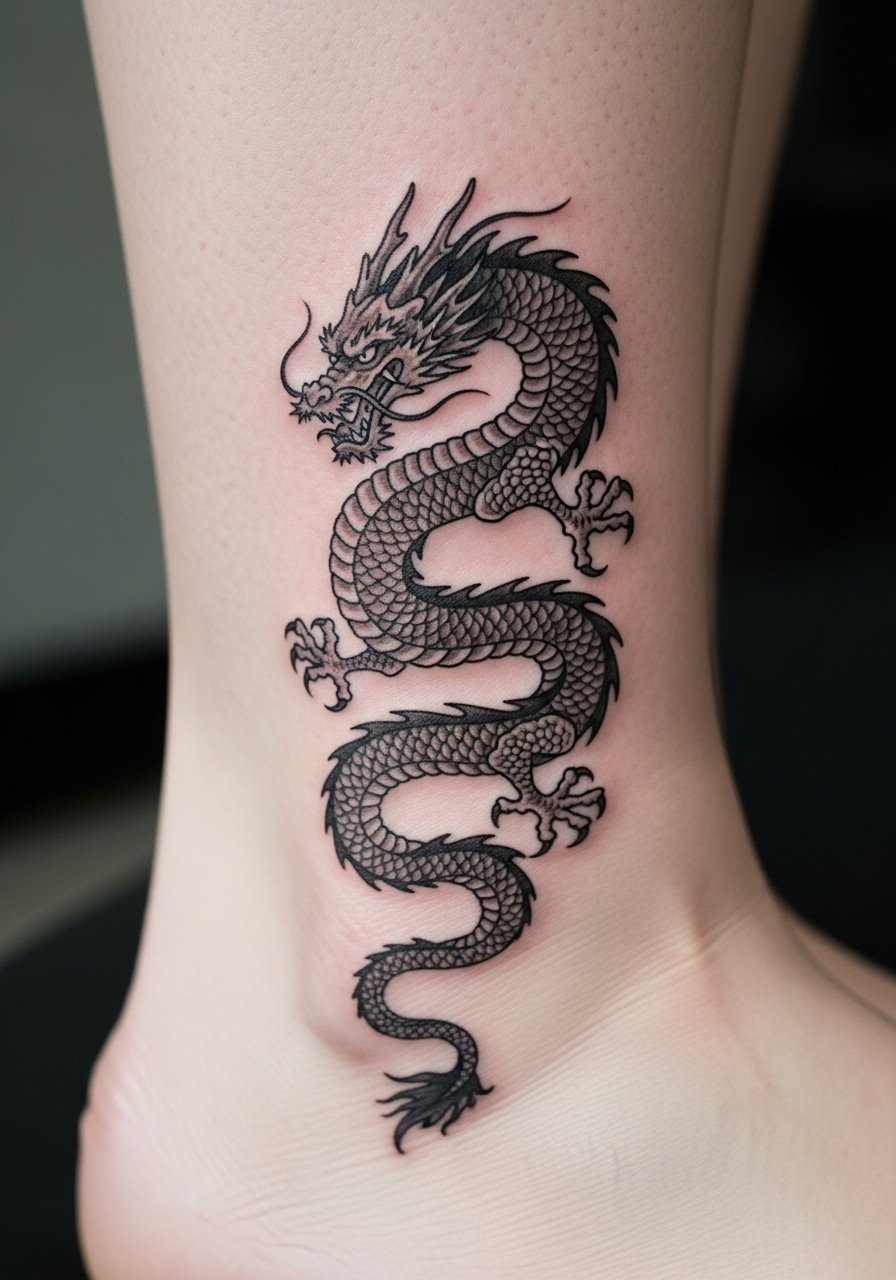
Style/Technique: Fine-line gradient scales
Pain Level: 4/10
Session Time: 35 to 60 minutes
Best For: Low-visibility pieces, seasonal show-off, medium-skill clients
An ankle dragon benefits from a scale fade, where scales near the joint are drawn finer and become more solid toward the belly. Use alternating 1RL and 3RL strokes to create that gradient. This makes the tattoo feel like it breathes as you walk. The placement is great for sandals season and is partially coverable with socks. Pack a thin layer of healing balm for the first five days to avoid scab heaviness.
Mistake to Avoid: Letting the artist pack too much black on the joint area; motion causes early touchups.
6. Rib Cage Single-Line Dragon
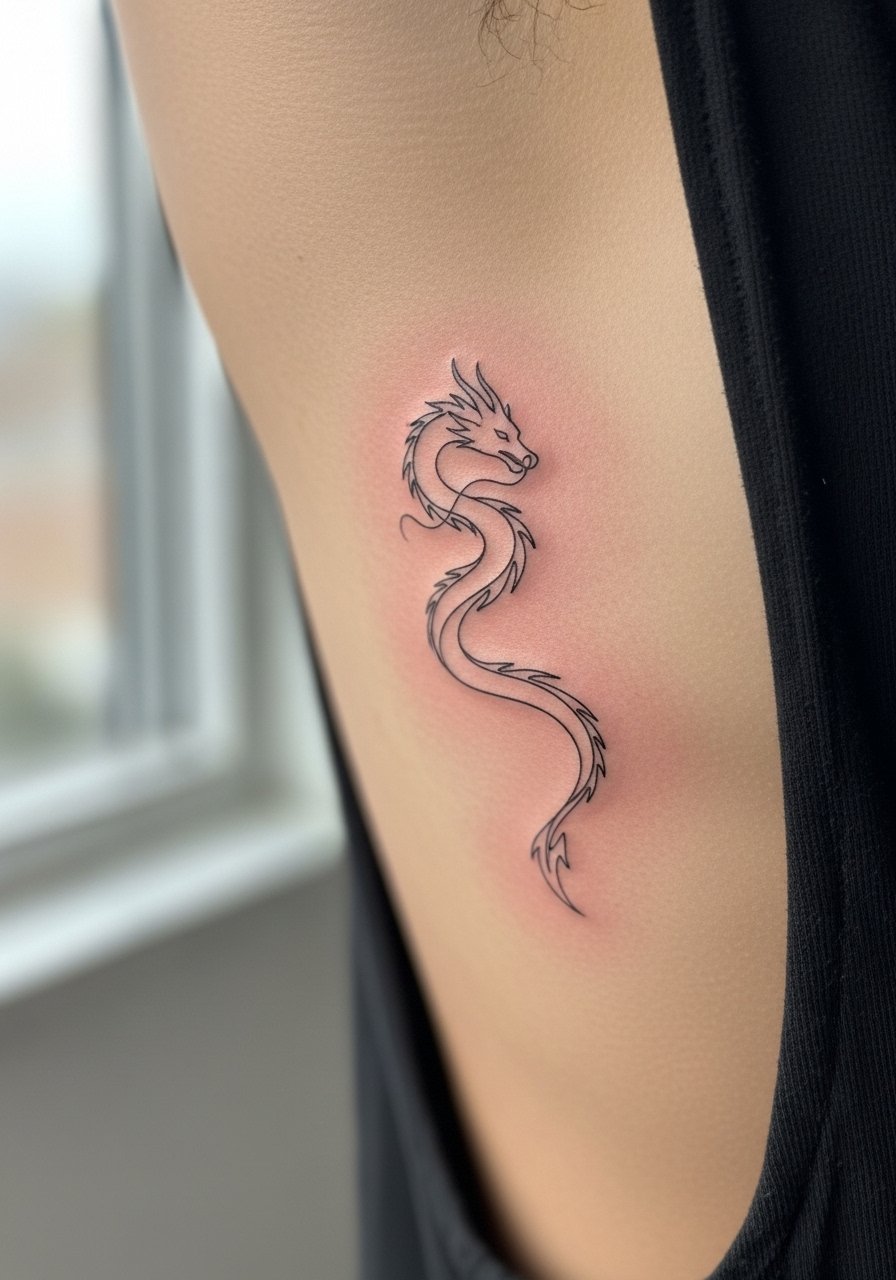
Style/Technique: Continuous line single-needle
Pain Level: 6/10
Session Time: 40 to 80 minutes
Best For: Coverable intimate pieces, elongating torso work
A continuous single-line dragon on ribs reads modern and clean. The design uses one uninterrupted 0.25 mm stroke that curves with the ribcage. It creates a subtle elongation and feels private because it is easy to hide. Expect more pain and slower healing here, and plan for a two-week downtime where you avoid tight clothing. I recommend bringing a simple unscented body wash suitable for sensitive healing skin.
Mistake to Avoid: Requesting heavy shading under the line; it defeats the single-line clarity.
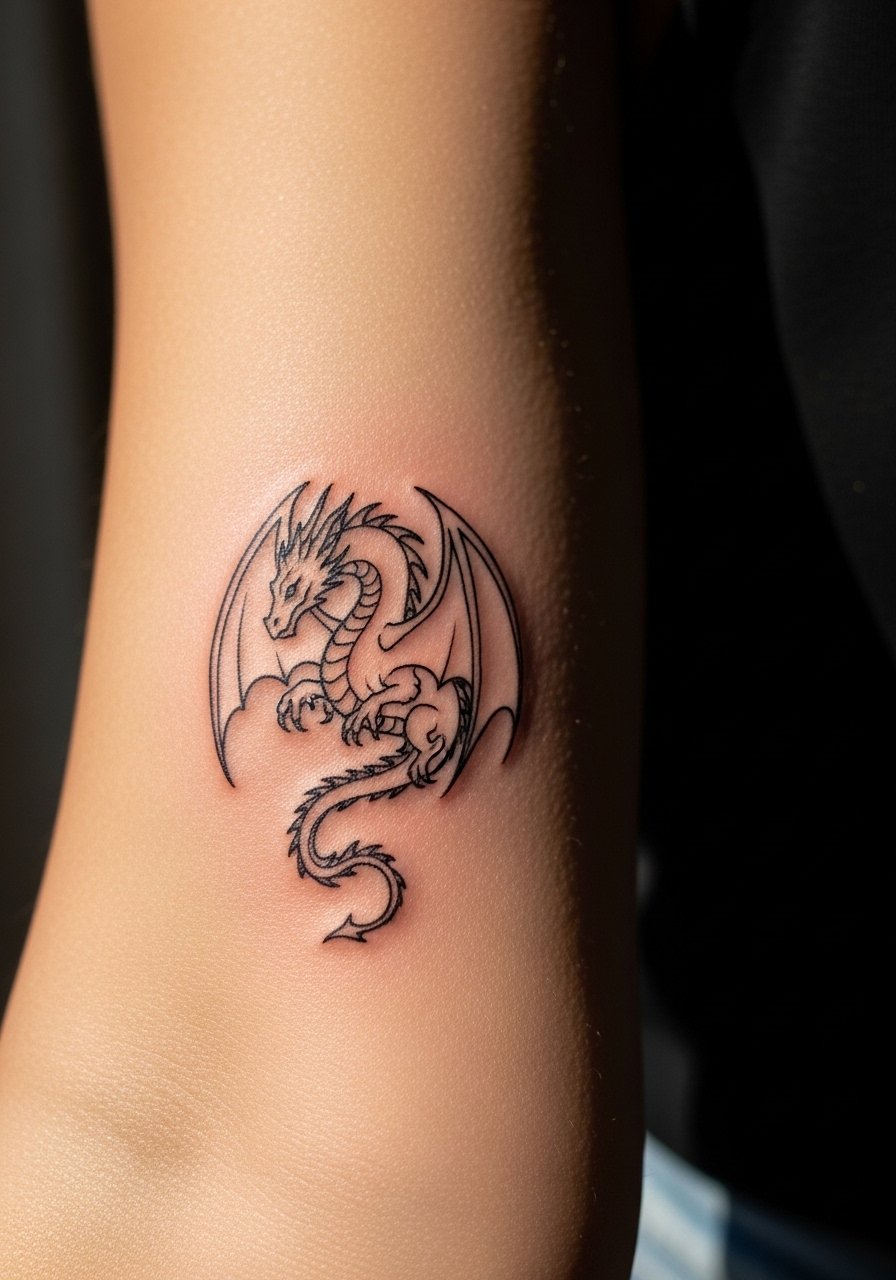
7. Shoulder Blade Tiny Flying Dragon
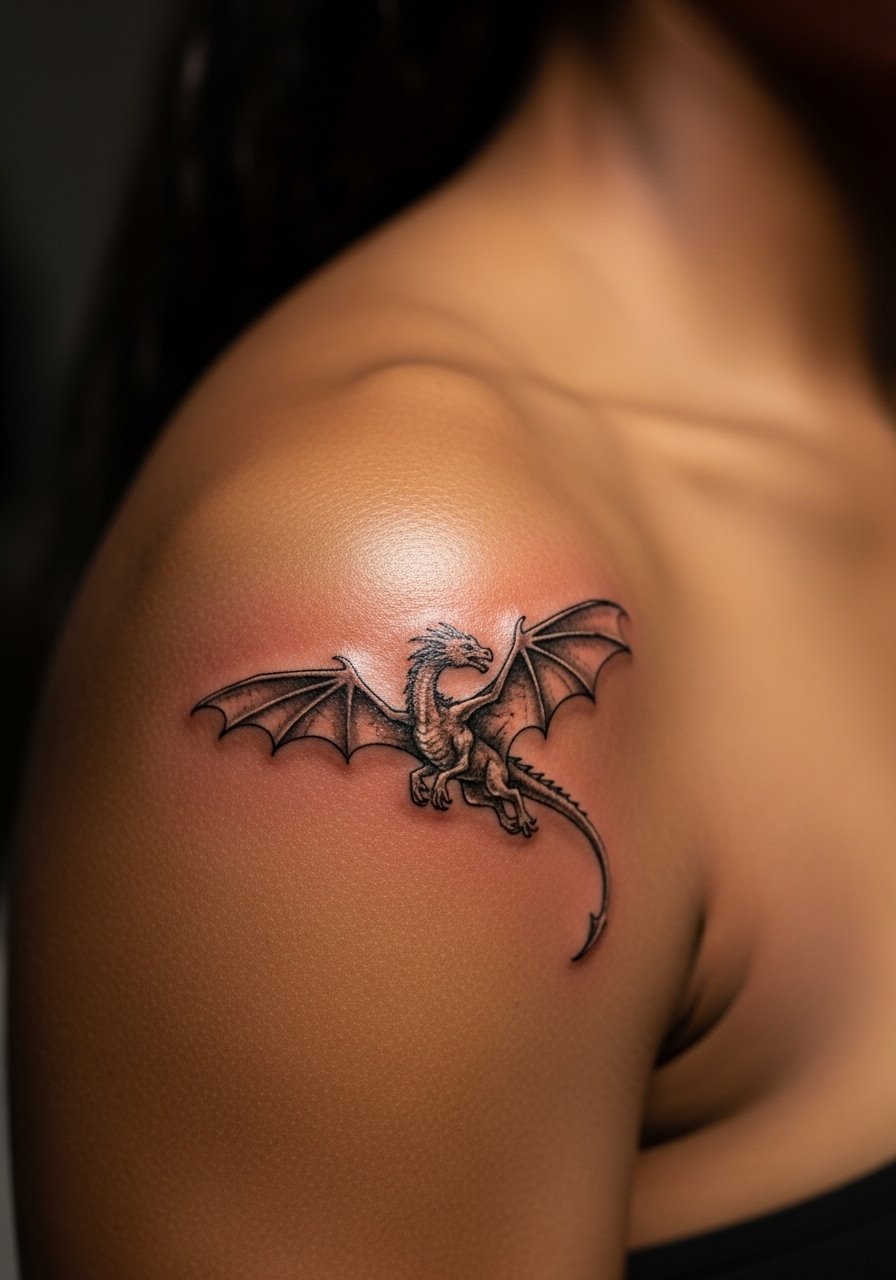
Style/Technique: Delicate linework with light dot shading
Pain Level: 3/10
Session Time: 25 to 45 minutes
Best For: Visible-back placement, layering with other pieces
A shoulder blade dragon that looks airborne benefits from tiny dot shading beneath the wings to imply lift. Use stippling at 1 to 2 mm density near the wing base, then fade outward. It creates depth without heavy ink. This area heals well and is an excellent choice for first-timers who want a visible but tasteful piece. Keep a breathable bandage like non-adhesive healing pads for the first night.
Mistake to Avoid: Compressing the wings into small black blocks instead of using dotwork for lift.
If any of these placements have you ready to act, here are the practical supplies that make fine-line dragons hold up.
Small Dragon Aftercare Kit
Healing Basics:
- fragrance-free healing ointment (~$8-15). Use thin layers for the first 3 to 5 days.
- antibacterial tattoo soap (~$6-12). Gentle daily washes prevent scabbing.
Protection & Prep:
- non-adhesive healing pads (~$10-18). Useful for first-night protection.
- disposable razor (~$5-10). For close, clean pre-tattoo prep.
Touchup & Sun:
- broad-spectrum mineral sunscreen stick (~$9-16). Use after full healing to prevent fading.
- sterile saline spray (~$7-14). Gentle cleansing option if water is irritating.
8. Inner Elbow Tail Accent
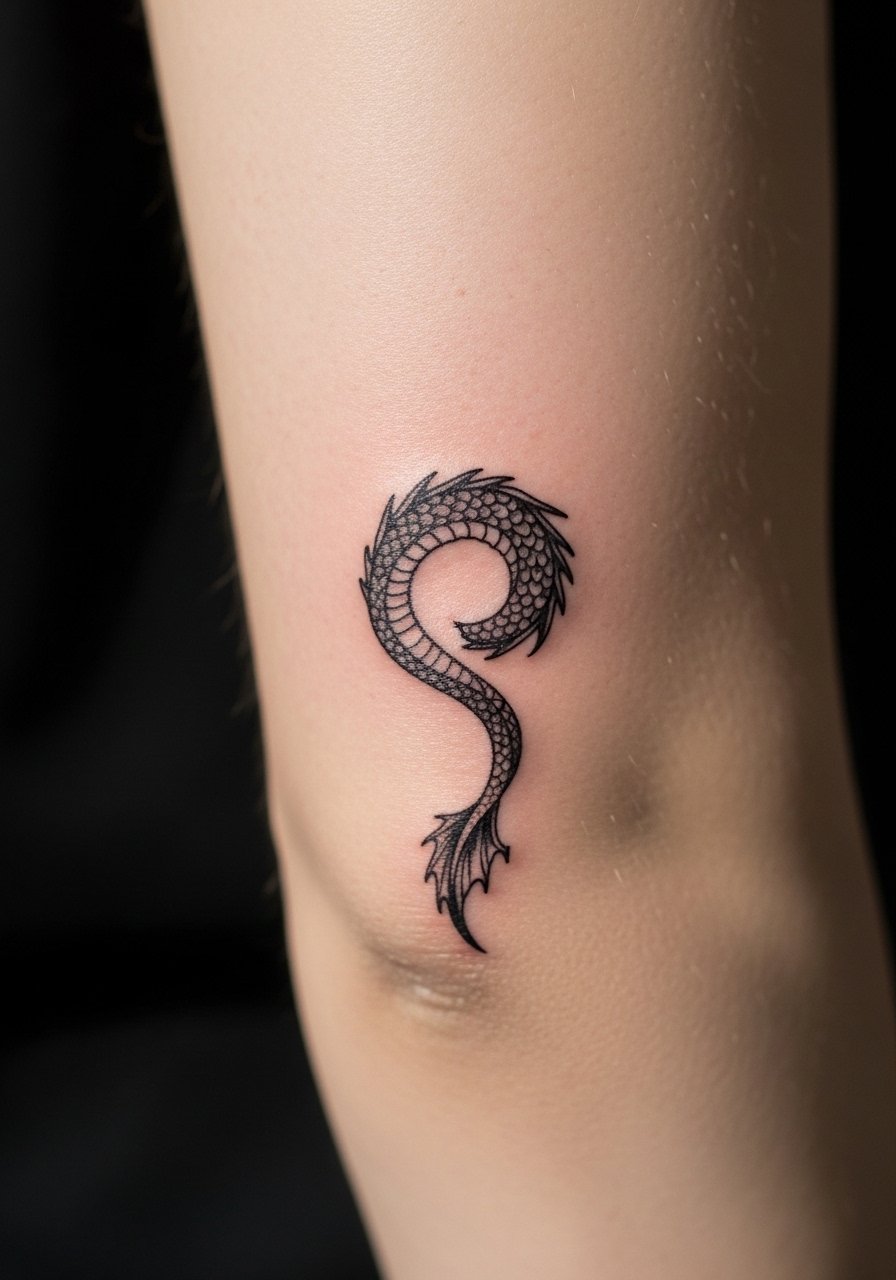
Style/Technique: Fine-line accenting with minimal fill
Pain Level: 5/10
Session Time: 25 to 45 minutes
Best For: Movement-forward pieces, visible when bending
An inner-elbow tiny dragon tail is a detail piece that surprises when you move. The design should avoid tight 0.5 mm loops that crease with the joint. Instead, a spaced-line approach with 1RL for the spine and micro-dots for scale hinting holds better over time. This is semi-visible and works for someone who wants a small statement. Healing needs light motion restriction for a week and frequent moisturization with tattoo aftercare balm.
Mistake to Avoid: Packing lines too close together into the crease, which leads to blowout during healing.
9. Negative-Space Blackwork Dragon
Style/Technique: Negative-space fine-line with blackwork contrast
Pain Level: 4/10
Session Time: 40 to 70 minutes
Best For: Bold-small pieces, medium-skill clients
This angle uses black surround and untouched skin to create scale shapes. The fine-line outline keeps the silhouette delicate while the negative space scales age more predictably than tiny filled scales. Visually it reads graphic and crisp, and it holds up for people who want the drama without large size. Budget for a longer single session if the black surround is heavy. Protect the piece after healing with a broad-spectrum mineral sunscreen stick.
Mistake to Avoid: Trying to cram intricate tiny filled scales into a piece that is too small for them.
10. Culturally Mindful Dragon Motif
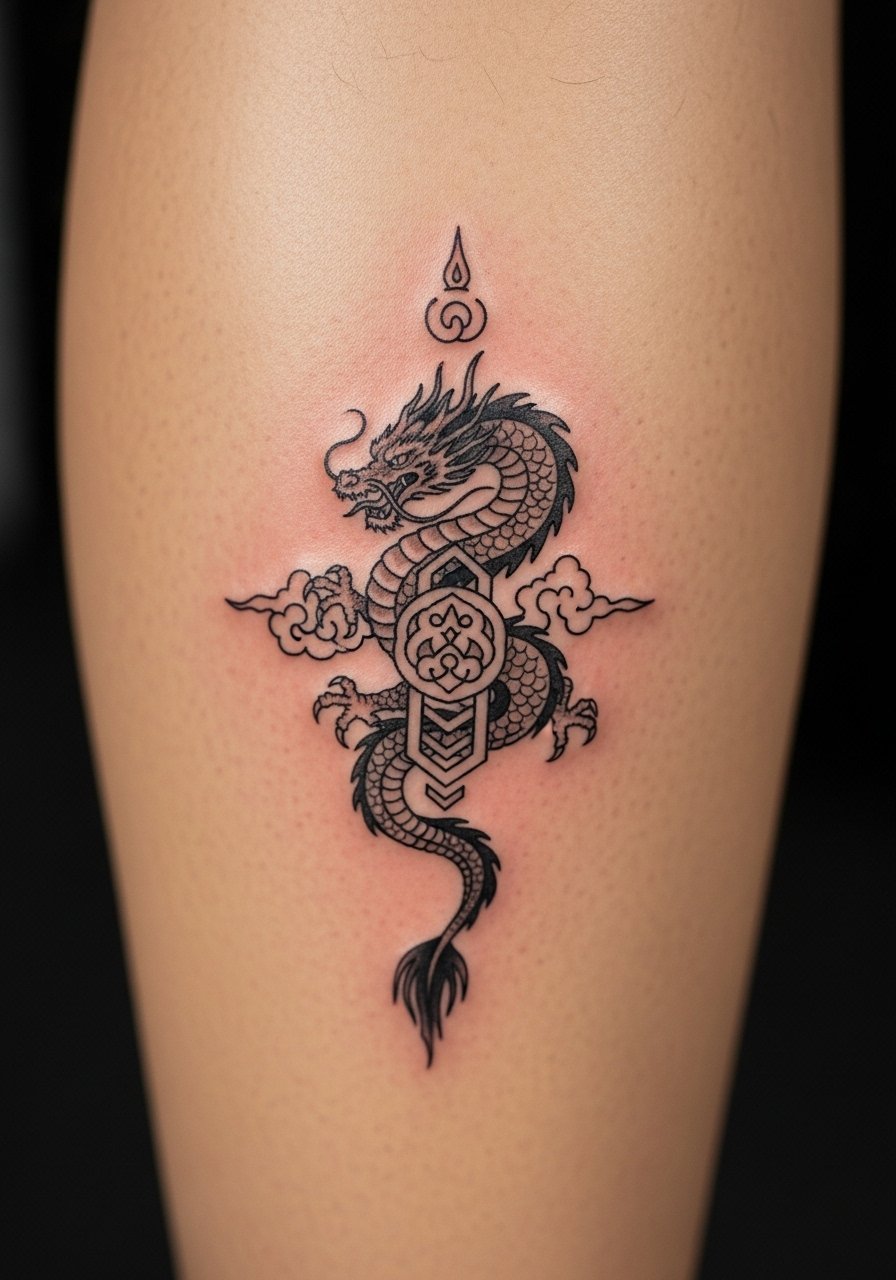
Style/Technique: Stylized fine-line with respectful iconography
Pain Level: 3/10
Session Time: 30 to 60 minutes
Best For: Meaningful work, culturally informed clients
Dragons appear in many cultures. If you choose a culturally rooted motif, research specifics and talk with your artist about respectful elements, color choices, and symbolism. A small fine-line reinterpretation that borrows form but avoids sacred iconography can be more appropriate for everyday wear. This approach takes a little extra time for reference and artist consultation, but it avoids issues later on. Keep reference notes and consider a consult fee. For portable reference, use a smartphone case or printed sheet and protect the final with non-adhesive healing pads post-session.
Mistake to Avoid: Asking for direct copies of culturally sacred designs without understanding meaning or permission.
11. Workplace-Friendly Healed Look Dragon

Style/Technique: Fine-line soft blackwork, healed-friendly
Pain Level: 2/10
Session Time: 20 to 40 minutes
Best For: Coverable but visible pieces, workplace settings
This design is purposely low-contrast and uses soft, broken lines so the healed piece sits low-key. It is drawn with slightly gray ink and micro-gaps so that when it fades it looks like a soft sketch, not a smudge. The result reads intentional and is easy to cover with makeup or a band when needed. Ideal for someone balancing visible tattoos and professional life. Aftercare includes gentle washing and a thin layer of fragrance-free healing ointment during the first five days.
Mistake to Avoid: Pushing for pitch-black contrast when you actually want something office-friendly; it will pop too much.
Fine-Line Tattoo Habits
Thin coats beat one heavy layer. Keep aftercare balm light and repeated. A thin coat of fragrance-free healing ointment twice a day prevents clogged pores during healing.
Grab antibacterial tattoo soap for daily cleaning. Lather gently and rinse with lukewarm water, do not scrub.
Start with a conversation about scale size. Ask your artist for line-width references like 1RL or 3RL so you know what the finished line thickness will be.
Use broad-spectrum mineral sunscreen stick on healed pieces. Sun is the fastest way to mute fine detail.
If you are unsure about cultural elements, bring printed references and ask for a design consultation fee. It saves awkward edits later and shows respect.
