
I almost threw out a whole manicure the night before a reveal because the reveal dot looked like a smudge in photos. I learned the hard way that short nails need tiny, decisive details, not giant decorations. After a few practice runs and one frantic midnight redo with a fine brush, I landed on short styles that read well in selfies, survive diaper-holding, and still feel playful.
These looks are quick, budget friendly, and mostly beginner friendly. Expect a mix of natural polish, gel accents, and simple decals. If you want mostly at-home options this list is for you. A few ideas require a UV lamp and steady hands, but I include heat-free swaps and press-on options when a lamp is not practical.
1. Peekaboo Confetti French
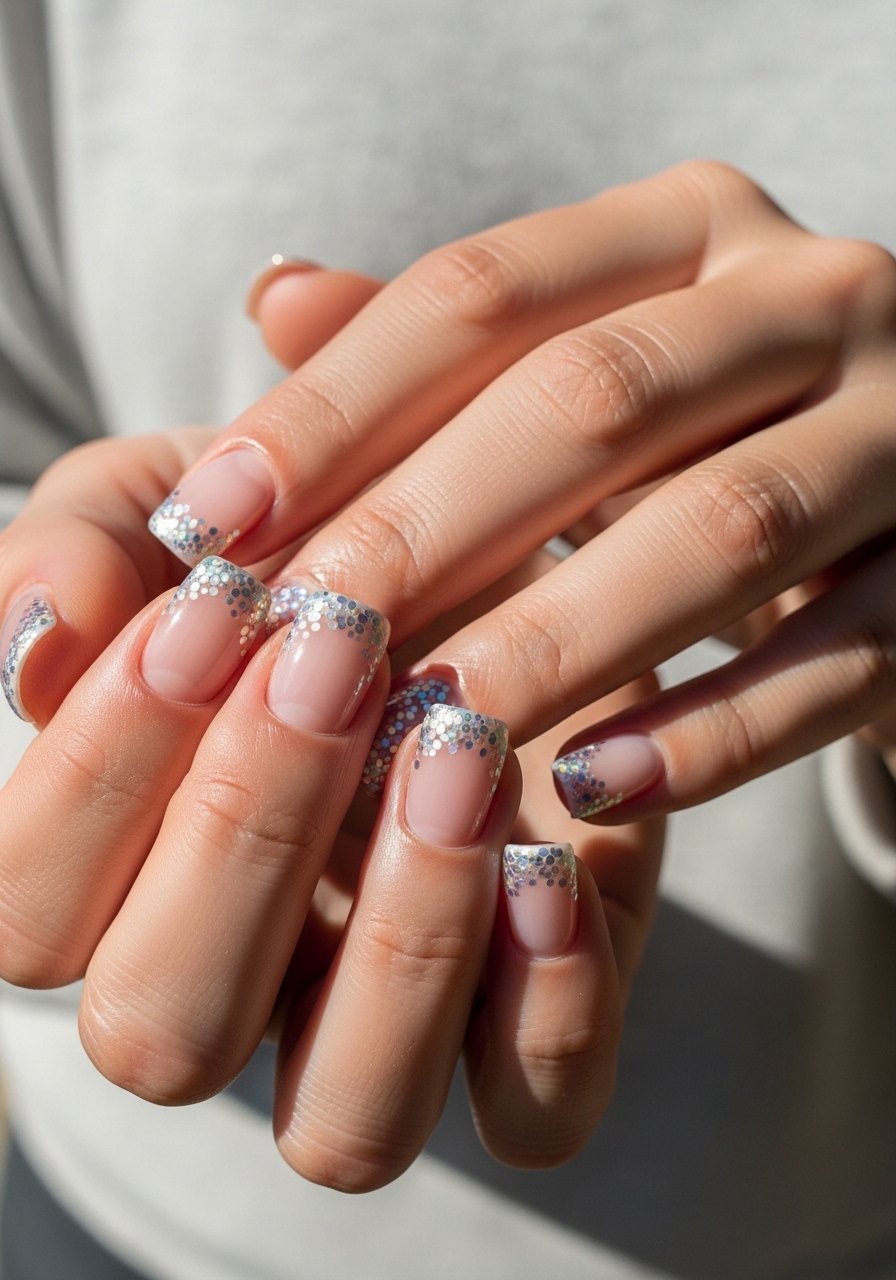
This is a tiny French with a twist, a sheer base with a narrow band of removable confetti at the tip so the reveal is obvious in photos. It works because the contrast reads at close range without overwhelming a short nail. For application use two thin coats of a sheer nude, then place micro-glitter with a dotting tool and seal with a fast-dry top coat. I like pairing a gel spot for the confetti, cured 30 seconds per thin layer under an LED lamp, but a peel-off base works if you want the confetti to come off cleanly after the party. Perfect for someone who wants a playful reveal with minimal length and about 20 minutes of setup.
Style/Vibe: Playful French
Best For: Short nails / gender reveal party
Skill: Beginner
Mistake to Avoid: Dropping chunky glitter on the whole tip instead of micro-confetti, which makes short nails look crowded.
2. Tiny Bow Accent Nail
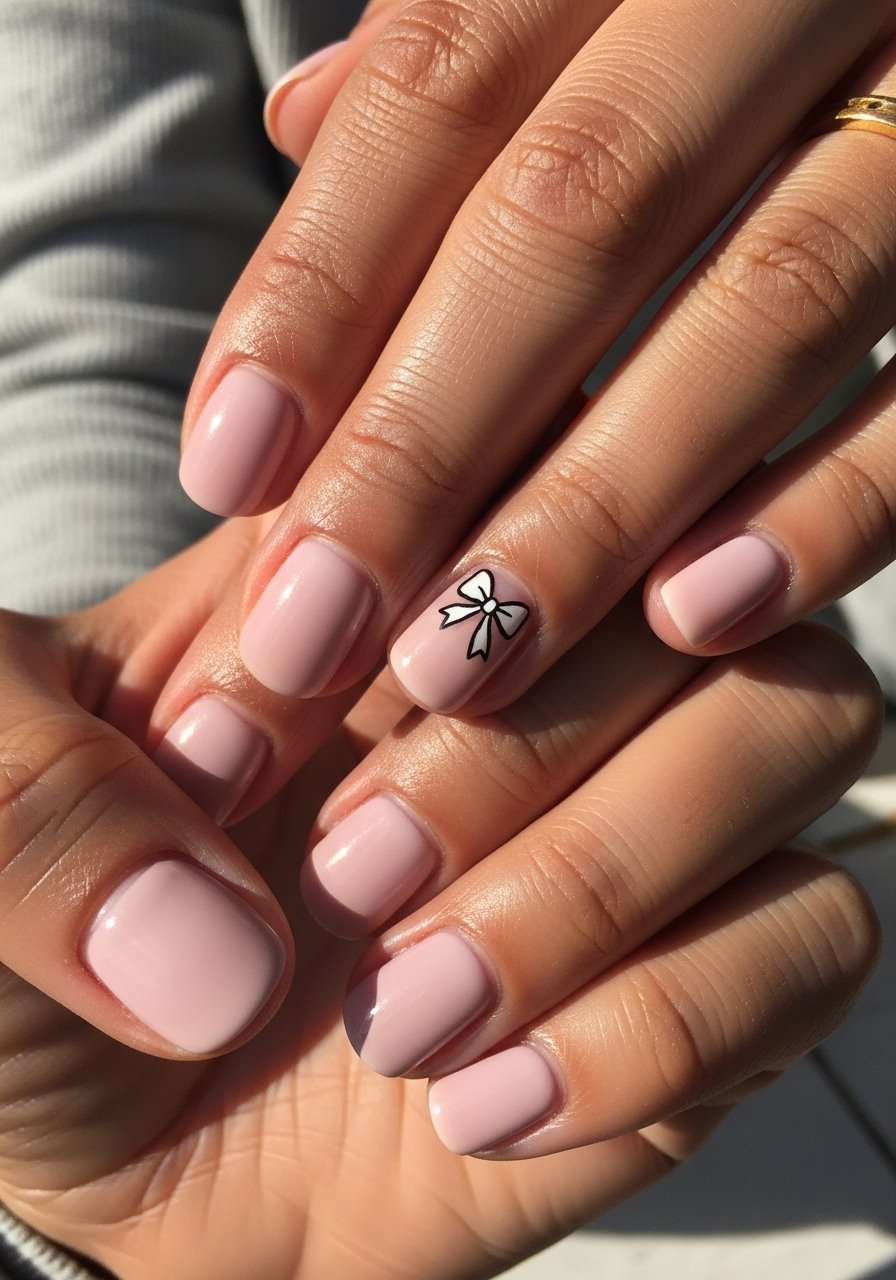
A single tiny hand-painted bow reads as deliberate and cute on short nails. Paint a neutral base, then use a fine liner brush to make a 2 mm bow outline. Fill with pastel pink or blue, then add a white highlight dot for dimension. This is a low-product look that benefits from a fine detail brush and a steady hand. If painting feels scary, try tiny pre-made bow decals pressed onto a tacky base then sealed. The result feels personal and fits nervous first-time DIYers who want a single focal nail without lengthening.
Style/Vibe: Minimal accent
Best For: Short nails / intimate reveals
Skill: Beginner
Mistake to Avoid: Making the bow too large for the nail, which shrinks the perceived nail size.
3. Metallic Flake Gradient

Metallic flakes catch camera flashes without needing extra length. Start with a cream base, then press fine metallic flakes near the cuticle and drag them halfway down with a micro brush for a gradient. Two thin layers of top coat lock the flakes in and keep the finish smooth. This style photographs as delicate shimmer rather than glitter overload. Use a foil-friendly adhesive or gel for better hold, cured 30 to 60 seconds per thin gel layer. It gives a modern reveal vibe and is a little dressy without being fussy.
Style/Vibe: Shimmer gradient
Best For: Short nails / evening reveals
Skill: Intermediate
Mistake to Avoid: Applying flakes in large clumps instead of feathering them for a true gradient.
4. Matte Balloon Silhouettes
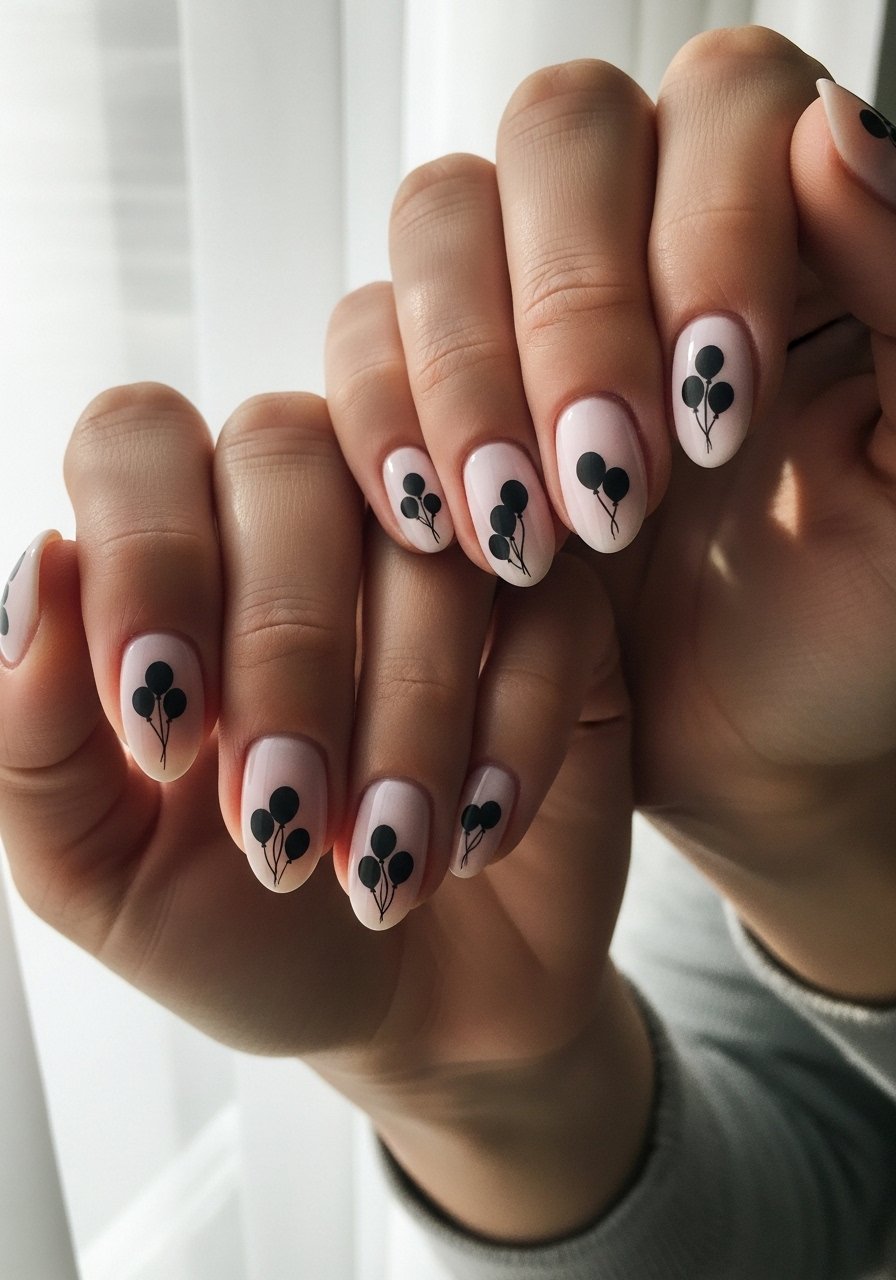
Matte finishes photograph flat and stylish, and tiny balloon silhouettes are a playful nod to reveal parties. Paint a satin base, use a fine brush to paint two small balloon shapes on alternating nails, and finish with matte top coat. The trick is scale; keep each balloon under 3 mm so it reads as a symbol instead of a sticker. For a glossy-matte contrast, paint balloons in gloss over the matte base on one nail. This is for someone who wants symbolic art and a soft, modern finish.
Style/Vibe: Graphic matte
Best For: Short nails / photo reveals
Skill: Beginner
Mistake to Avoid: Painting balloons too close to the edge, which makes them look squashed in photos.
5. Glitter Cuticle Crescent

Instead of tip glitter, place a narrow crescent of color at the cuticle and keep the rest sheer. The small shape adds a luxe detail while keeping most of the nail low maintenance. Apply a peel-off base at the cuticle area if you want an easy nighttime removal. Two thin coats of a jelly or sheer polish keep the reveal subtle in person and pop in selfies. This suits anyone who wants glamour without length, and it hides chips better than full-nail glitter.
Style/Vibe: Subtle sparkle
Best For: Short nails / casual reveals
Skill: Beginner
Mistake to Avoid: Using chunky glitter in the crescent, which creates uneven texture on short nails.
6. Micro Dot Gender Symbols
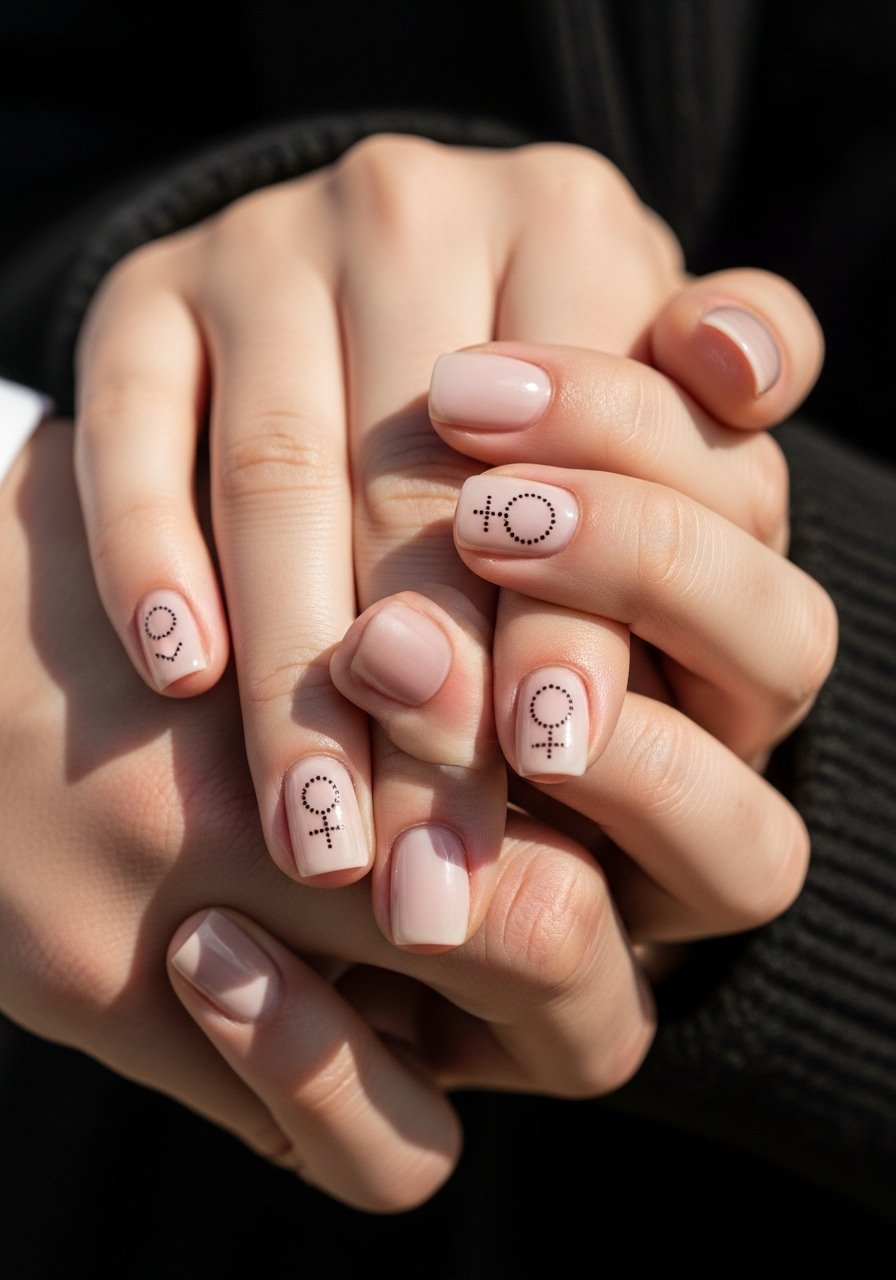
Tiny gender symbols made with precise dots are clear in photos and scale perfectly for short nails. Use a dotting tool or a toothpick to place the circles, then a single-line connector for the symbol cross or arrow. Keep the symbols under 4 mm. This style reads as intentional and modern. For longevity use a gel top coat cured 30 seconds per thin layer, or a non-gel top coat if you prefer living with normal polish. It works well for people who want literal reveal symbolism without loud colors.
Style/Vibe: Graphic micro art
Best For: Short nails / symbolic reveal
Skill: Intermediate
Mistake to Avoid: Freehanding without a guide, which produces uneven symbols that look messy in photos.
7. Soft Ombre Blush Reveal
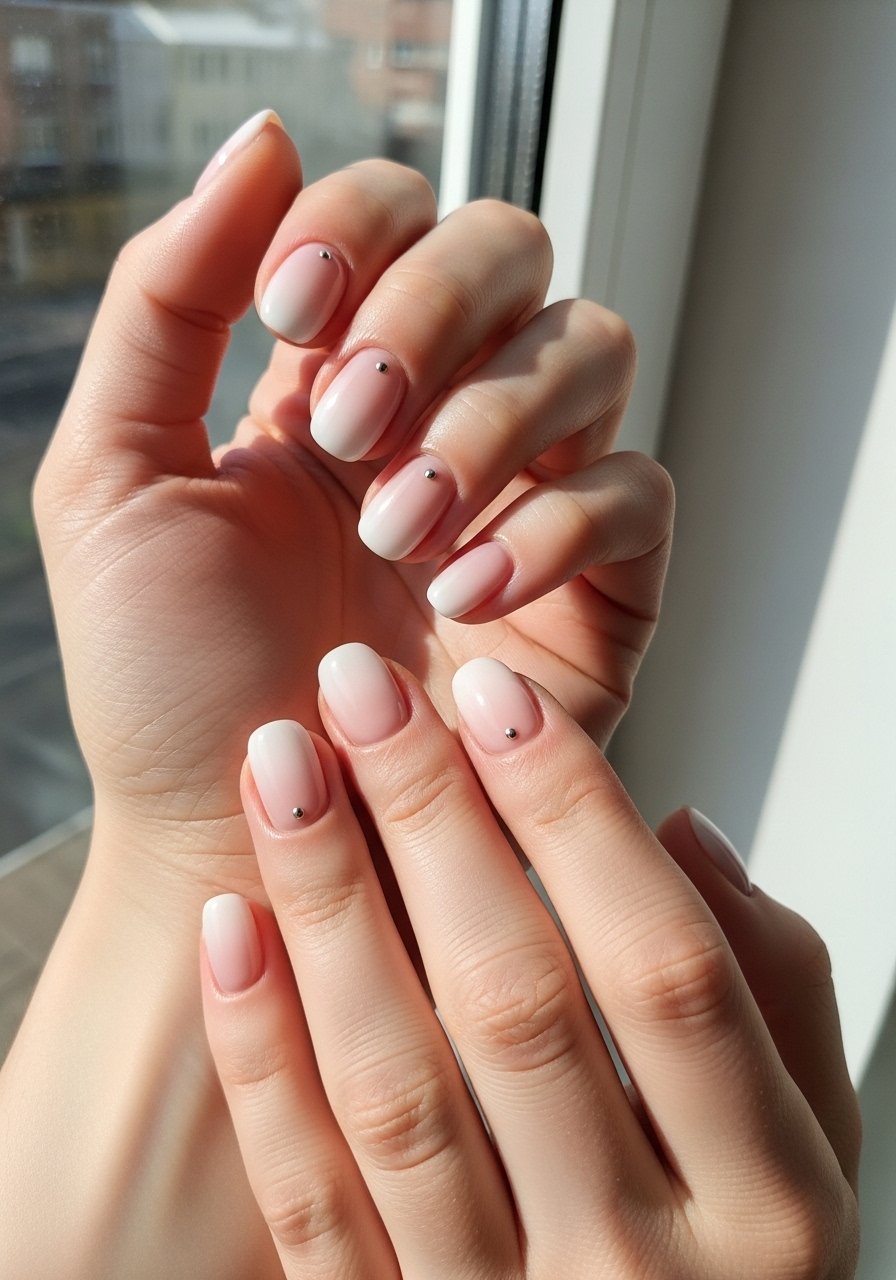
A soft ombre gives the impression of length by elongating the visual field of the nail. Blend a blush into a sheer white toward the tip using a small makeup sponge, then add a small reveal dot in the center of the nail bed. Two thin sponged layers blended with gentle dabs create the best gradient. This style takes a bit longer but rewards you with a soft, photo-friendly finish. It suits anyone who wants understated elegance with a small reveal element.
Style/Vibe: Soft gradient
Best For: Short nails / elegant reveals
Skill: Intermediate
Mistake to Avoid: Pressing the sponge too hard, which creates a harsh line instead of a subtle ombre.
Before the rest of the list, these are the staples I keep in my drawer when I know a reveal is happening.
Mini Reveal Mani Kit
Tools:
- Fine detail brush (~$8-15), great for bows and symbols.
- Dotting tool set (~$7-12), multiple sizes for precise dots.
- Micro glitter confetti (~$6-10), use sparingly.
Base & Finish:
- Peel-off base coat (~$8-12), for temporary confetti.
- Quick-dry top coat (~$6-10), smooth finish fast.
- UV LED lamp (~$25-40), optional for gel accents.
Extras:
- Press-on nail kit (~$12-20) for last-minute reveals.
- Nail foil sheets (~$5-9) for mirrored pops.
8. Navy Pinstripe Surprise
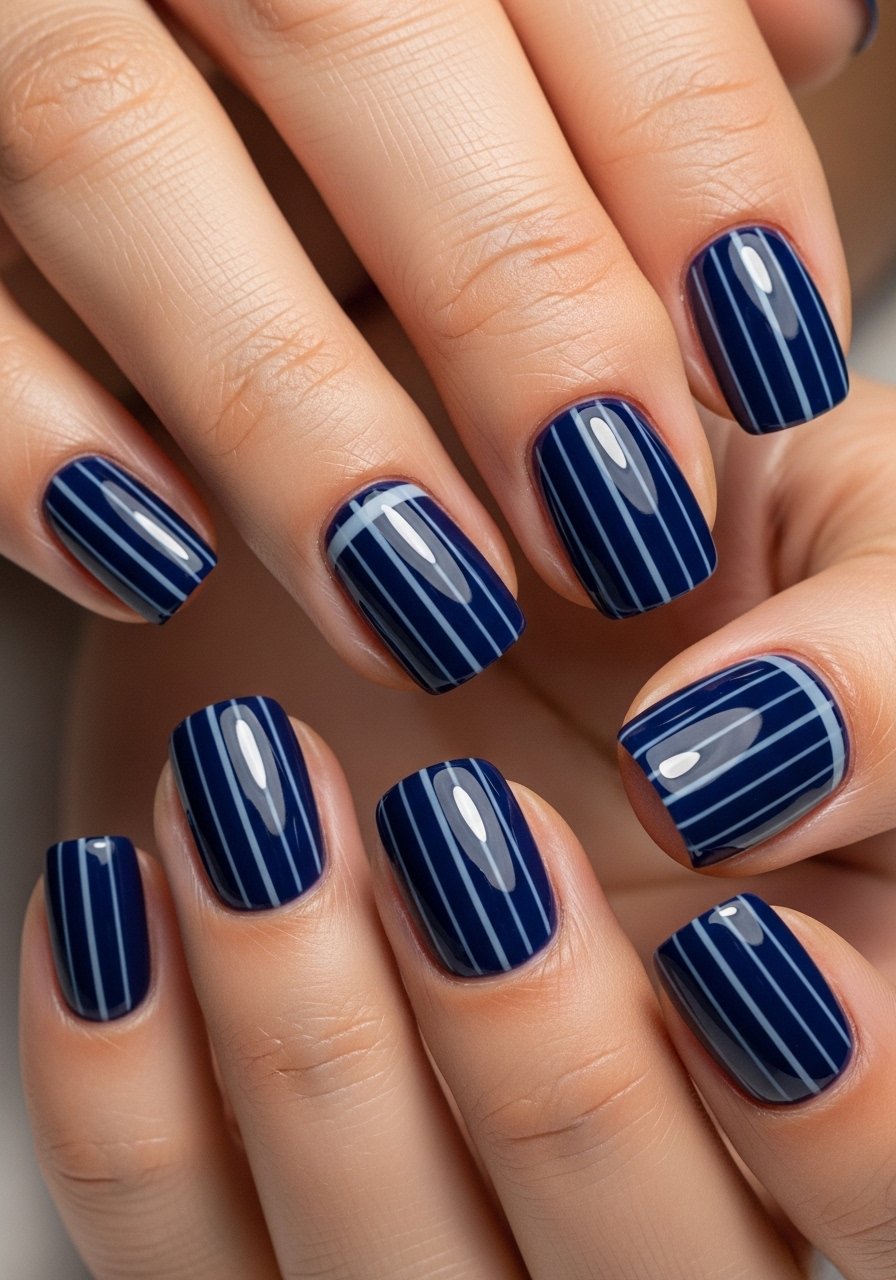
A thin navy pinstripe down the center that hides a pale blue stripe beneath the top coat reveals its color when a layer of peel-off polish is removed. Use a fine brush for the navy line, then paint a pale blue base. Seal with a peelable top layer that you can lift for the reveal moment. This is playful and controlled, good for people who like a small theatrical twist. Keep stripes under 2 mm so they do not visually shorten the nail.
Style/Vibe: Hidden color stripe
Best For: Short nails / staged reveals
Skill: Intermediate
Mistake to Avoid: Making the hidden stripe too thick so it dominates the nail when hidden.
9. Half-Moon Foil Pop
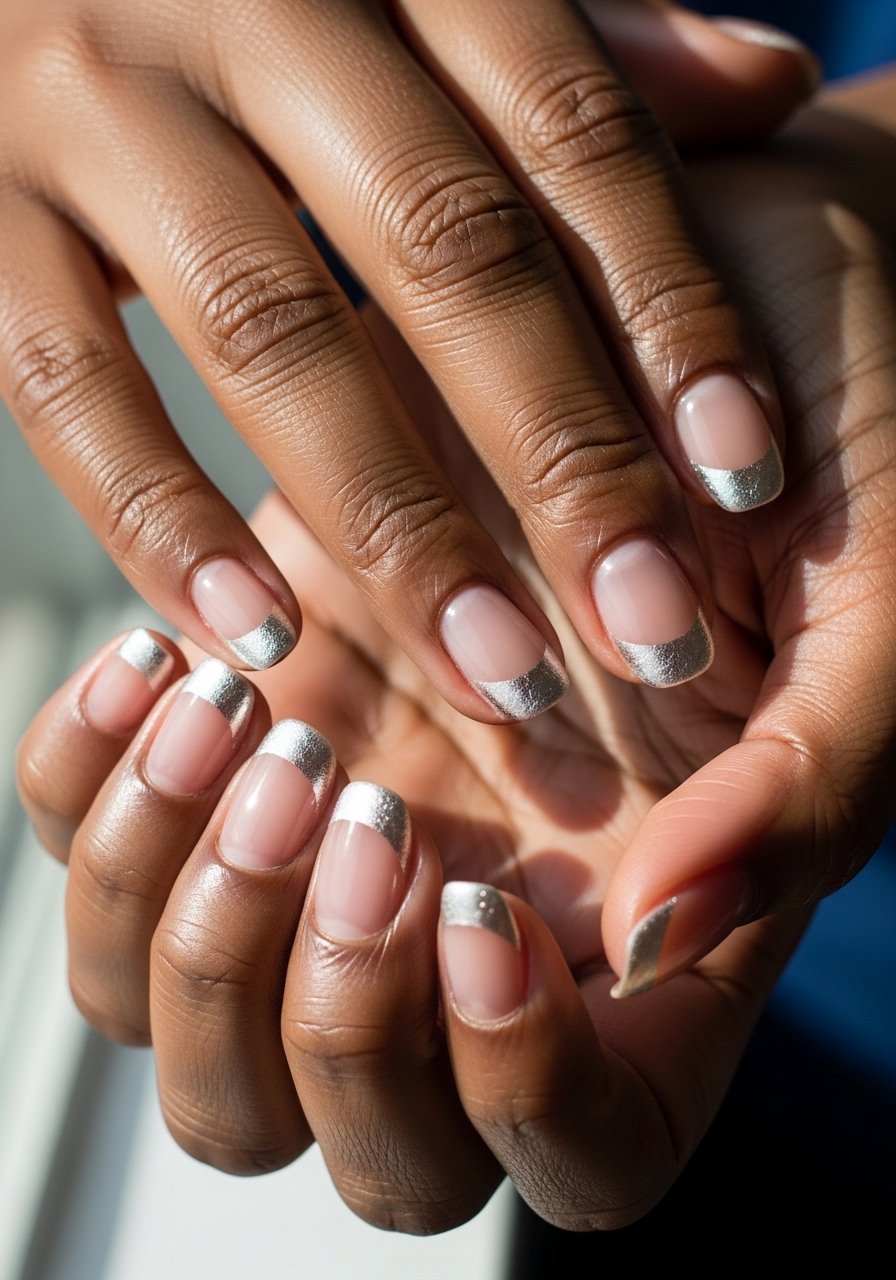
Place a tiny foil half-moon at the tip or base as a shiny signal for the reveal. Use a small circle punch or snip foil into a crescent, press onto a sticky gel layer, then seal with a top coat. Keep the foil limited to a 2 to 3 mm crescent so it reads as an accent. This is low-fuss and camera friendly, and it works with press-ons too. It reads luxe but only needs a few minutes of careful pressing.
Style/Vibe: Foil accent
Best For: Short nails / quick glam
Skill: Beginner
Mistake to Avoid: Sealing without fully pressing the foil, which causes bubbling and peeling.
10. Neutral Marble With Pink Vein
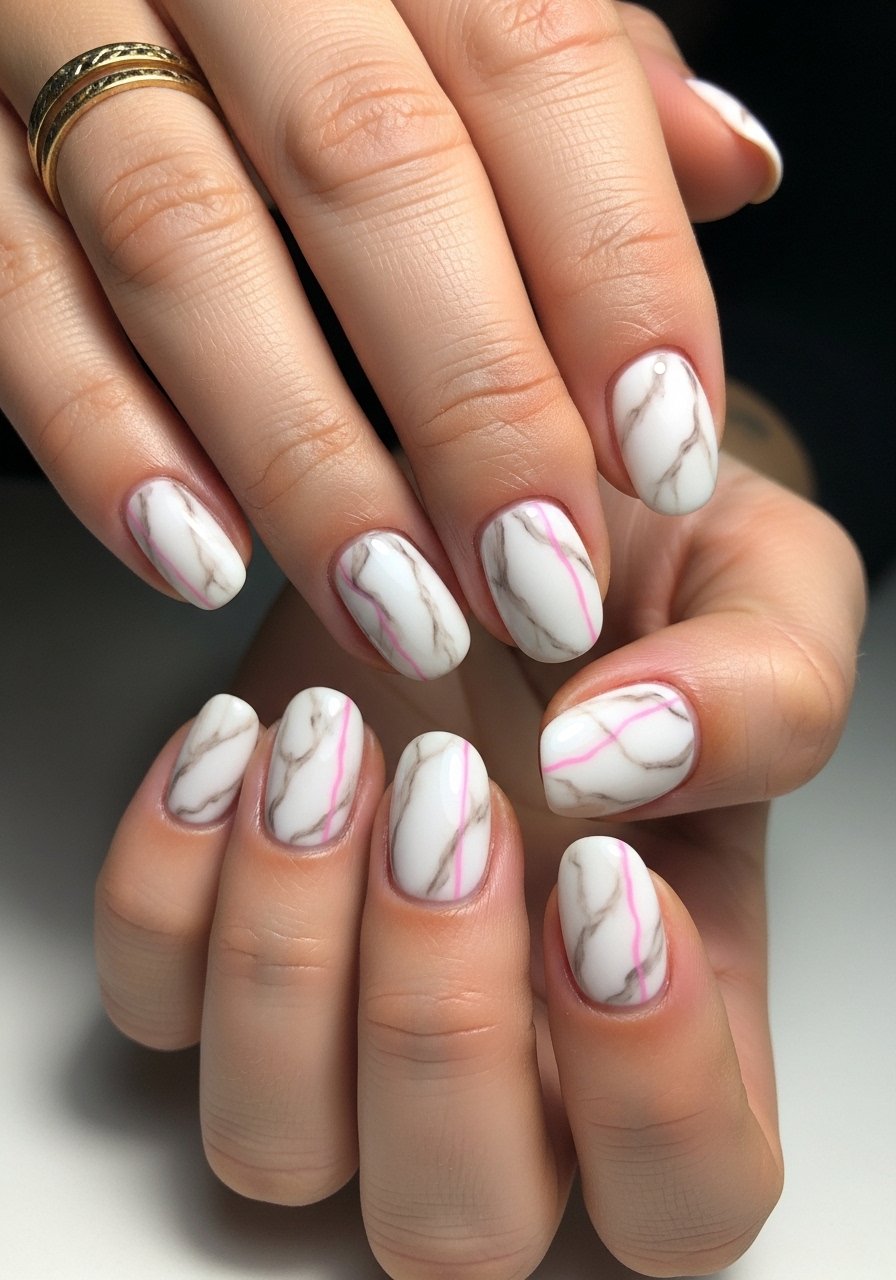
A tiny marble panel with one thin pink or blue vein gives a refined reveal that reads well up close. Use a dot of sheer white and a touch of nude, then pull a thin line of color through with a fine brush. Keep the colored vein narrow, under 1 mm, so it does not dominate. This style feels elevated and is surprisingly forgiving of small mistakes, since marble hides imperfections. It is a good choice for someone who wants a grown-up reveal.
Style/Vibe: Mini marble art
Best For: Short nails / sophisticated reveals
Skill: Intermediate
Mistake to Avoid: Overworking the marble and ending up with muddied color.
11. Press-On Tabs For Big Moments
If you want drama without salon time, press-ons with peel tabs let you switch from neutral to reveal color in one move. Pick press-ons sized slightly smaller than your nail for a natural line at the cuticle. Apply adhesive tabs or glue and carry a tiny file and mini top coat for touch-ups. This is a great option for last-minute reveals or if you want a consistent look across a group. It is beginner friendly and saves stress before the big moment.
Style/Vibe: Press-on reveal
Best For: Short nails / last-minute reveals
Skill: Beginner
Mistake to Avoid: Using oversized press-ons that overlap the skin and peel off during the reveal.
Short-Nail Reveal Habits
Work in thin layers. Two thin coats look smoother and last longer than one thick layer. Try a quick-dry top coat for a photo-ready finish.
Grab peel-off base coat if you plan a temporary confetti or glitter reveal. It saves removal time and stops polish staining.
Practice the tiny detail on a press-on before committing. A pack of practice tips lets you test scale and placement without messing your real nails.
If you are using gel accents, use a UV LED lamp and cure each thin layer 30 seconds. A uv-led-nail-lamp is worth it if you plan to do gel details regularly.
