
I kept starting every acrylic set the same way, thick and rushed, and the nails lifted by day five. The real turning point came when I slowed down and applied thinner beads, filed less aggressively, and let layers cure fully. That tiny change made salon sets stay intact through typing, dishwashing, and travel without feeling clunky.
These ideas are for someone who wants durable, modern acrylics without wasting hours or a big budget. I learned most of these from a tech who works at a salon downtown and by testing the same shapes across four nail lengths. Expect easy-to-source products, a mix of beginner-friendly looks, and a couple that need more filing time.
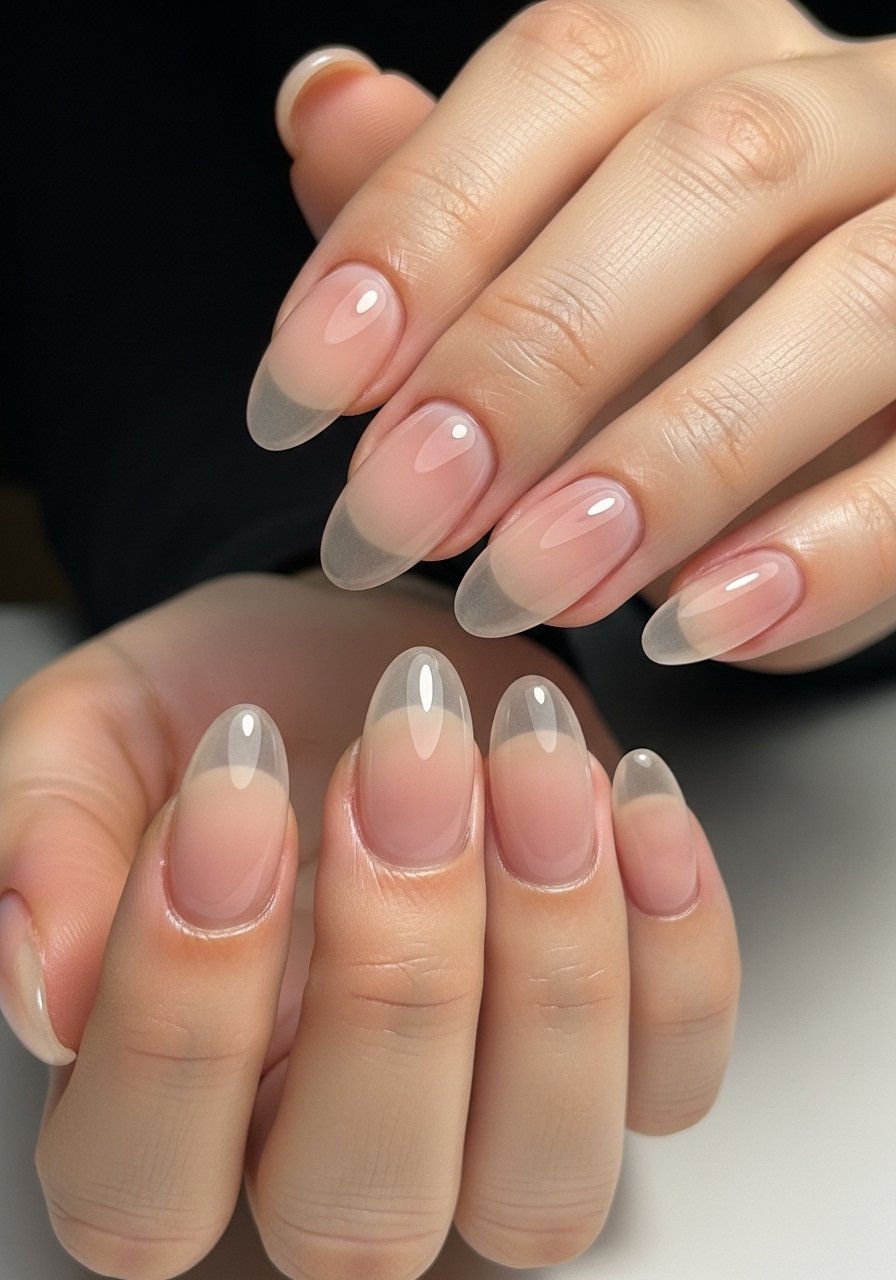
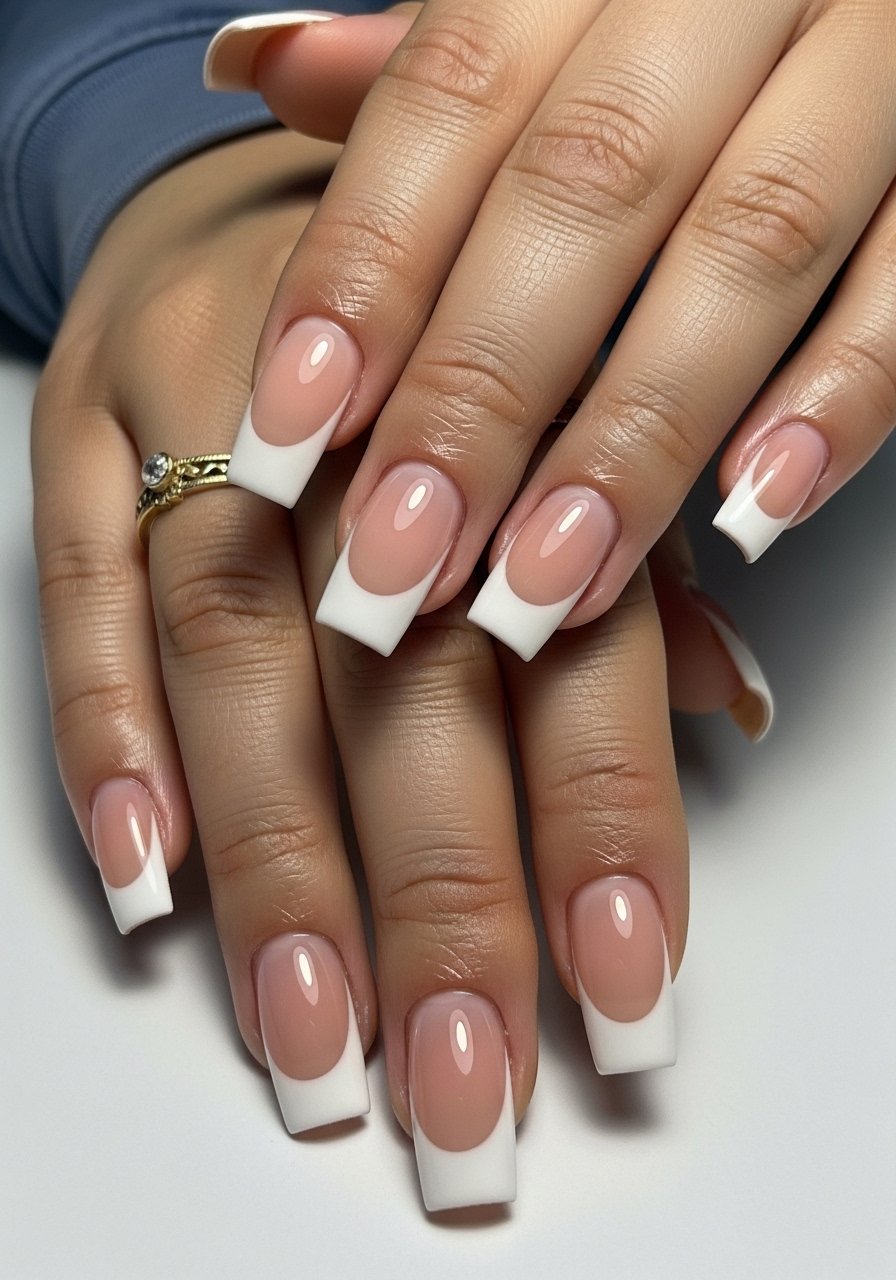
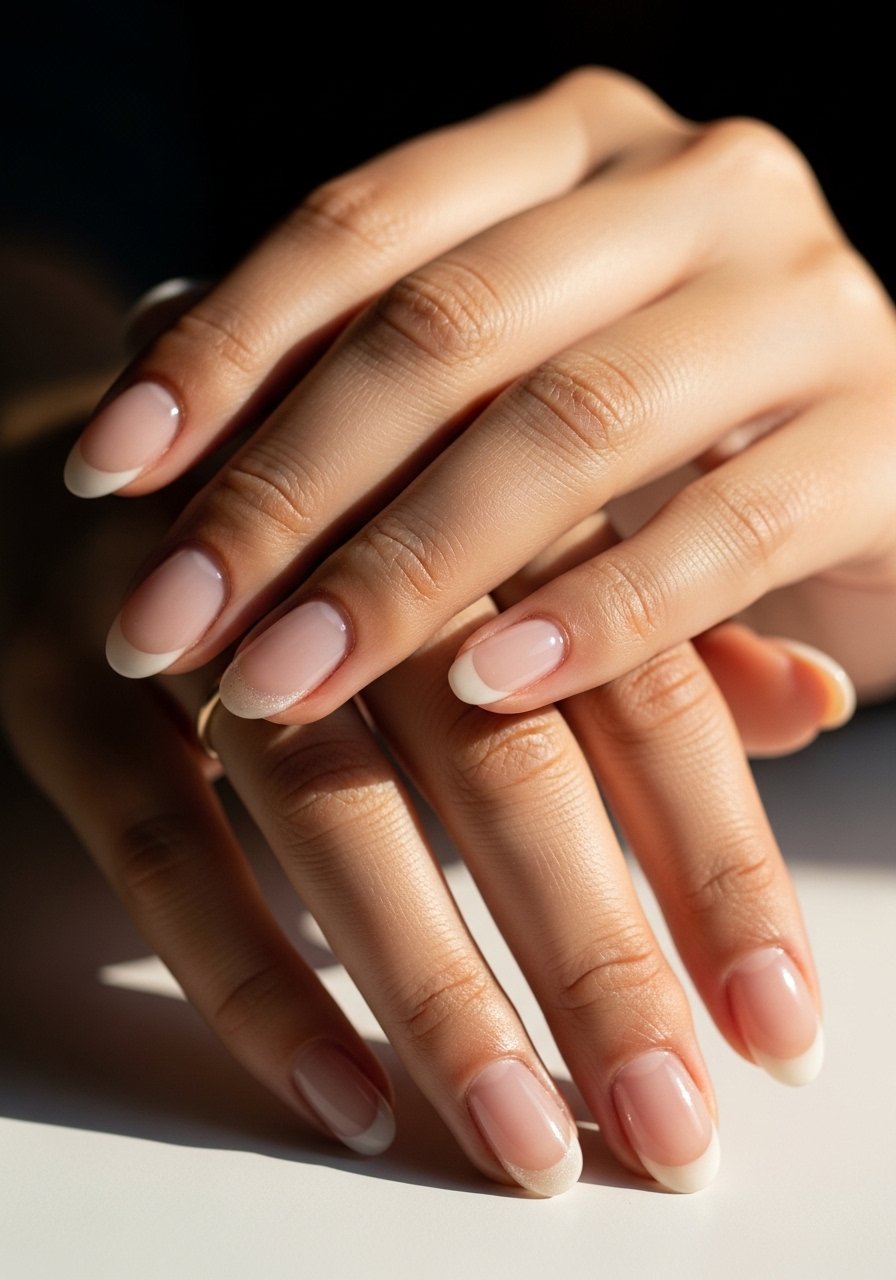
1. Glassy Nude Ombre
Style/Vibe: Glassy Neutral
Best For: Medium length, everyday wear
Skill: Beginner
A soft, glassy nude ombre reads clean and polished while hiding regrowth. What makes it work is thin, even acrylic application blended with a 1:1 mix of translucent and warm beige powders for a melt effect that photographs well. Pair with a quick-cure LED top coat like a high-shine top coat for mirror finish. This suits office wear or a wedding guest look and takes about 35 to 45 minutes for an experienced tech.
Mistake to Avoid: Applying one thick bead of powder at the cuticle instead of several thin beads, which causes bumps and lifting.
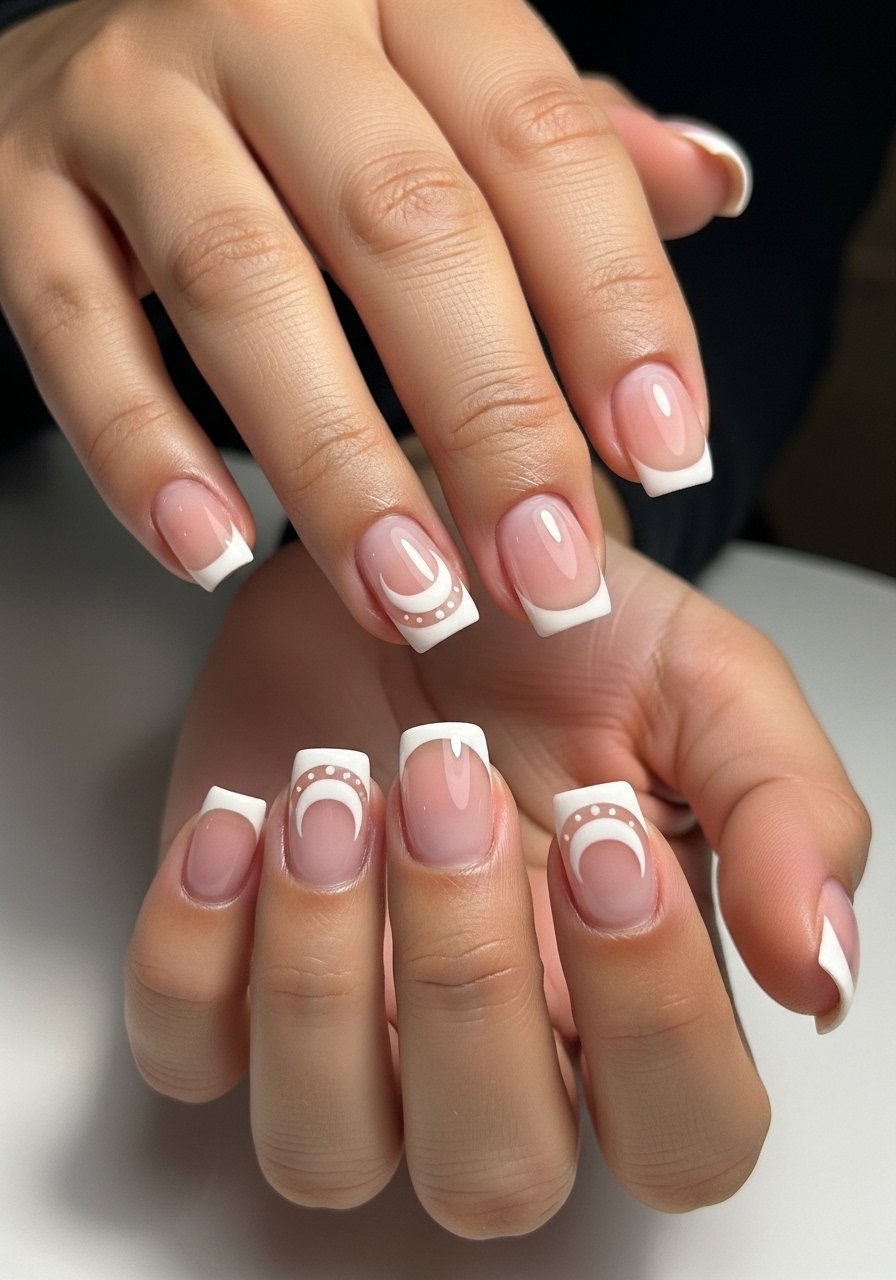
2. Micro-French With Negative Space
Style/Vibe: Minimal Graphic
Best For: Short nails, low-maintenance clients
Skill: Intermediate
A micro-french uses 1 to 2 mm thin tips and deliberate negative space to read modern and wearable. The effect comes from clean line work and sealing the edge with a thin layer of clear acrylic. Try a fine detail nail brush for crisp lines. This look is quick to maintain, and the negative space helps the design last longer between fills because less pigment meets the natural nail.
Mistake to Avoid: Painting thick tip lines that sit proud of the nail surface, which causes chipping and an uneven shine.
3. Soft Matte With Micro-Glitter Fade

Style/Vibe: Soft Glam
Best For: Long nails, evening events
Skill: Intermediate
Matte plus micro-glitter gives dimension without feeling overworked. Apply a matte top coat, then buff a tiny crescent of micro-glitter into the tip area using a 30 percent pressure technique so the glitter looks diffused. For sparkle that stays, seal with a fast-cure gloss only over the glitter zone for 20 seconds then rematte if needed. I keep a jar of ultra-fine cosmetic glitter on hand for this.
Mistake to Avoid: Dumping glitter on before sealing, which flattens it and leads to a rough surface.
4. Metallic Smile Line Accent

Style/Vibe: Sharp Accent
Best For: Medium nails, date nights
Skill: Intermediate
A metallic smile line is a small detail that reads luxe. Use a 0.5 mm metallic striping polish or foil applied after the final cure then sealed with two thin coats. The thin metallic line catches light and lengthens the nail visually. It pairs well with a neutral base and costs little in time. For a clean application, I prefer a gold striping polish.
Mistake to Avoid: Pressing foil into uncured top coat so it wrinkles and lifts after wear.
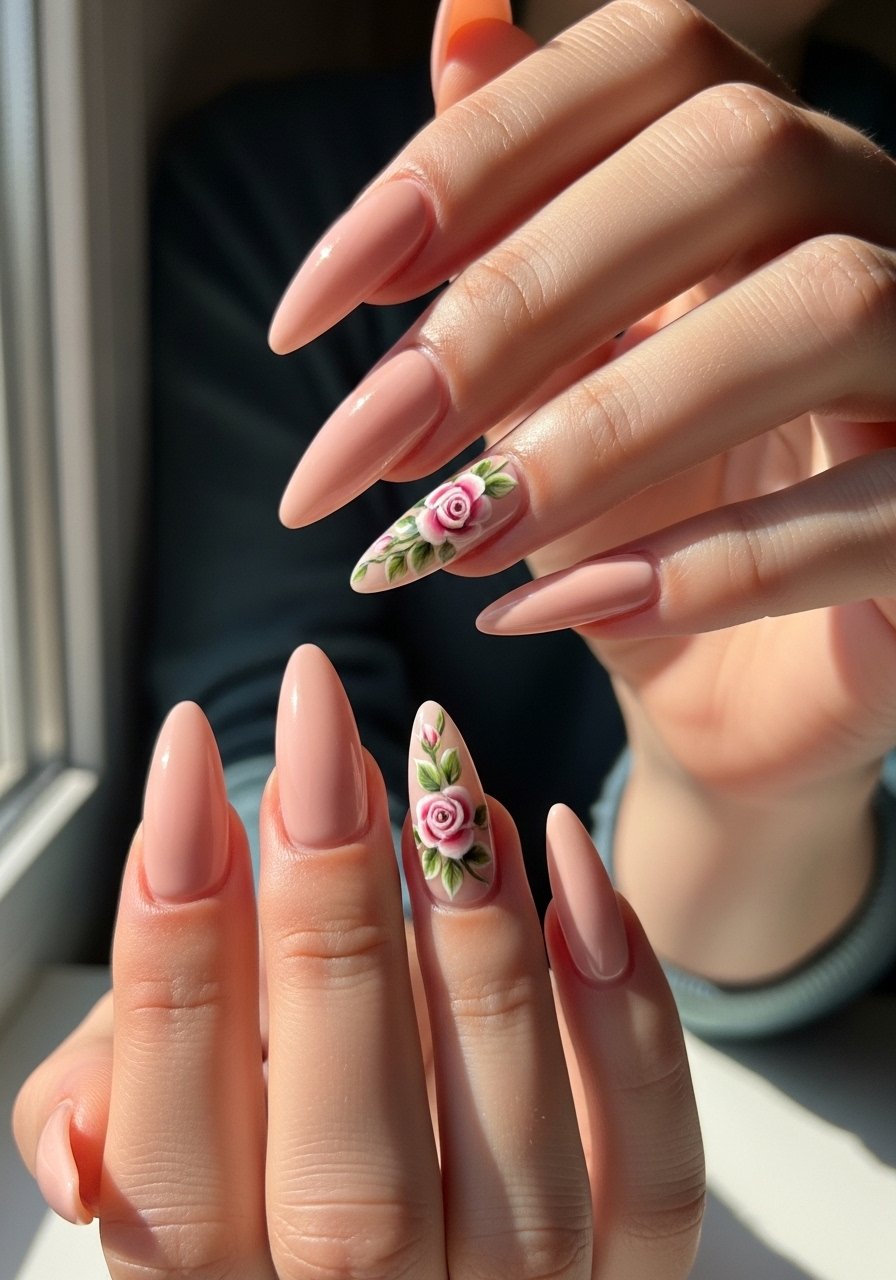
5. Hand-Painted Miniatures On Accent Nails
Style/Vibe: Tiny Art
Best For: Long nails, special occasions
Skill: Advanced
Tiny hand-painted scenes show craft without needing a full set of art. Use a thin acrylic paint and a 000 brush for detail. Keep designs to one or two accent nails to avoid extended fill times. I tested small florals across four lengths and the detail reads best on long or medium shapes. If you want a shortcut, try a micro detail brush set and a gel seal to protect the paint.
Mistake to Avoid: Painting directly on tacky top coat which causes bleeding and dull lines.
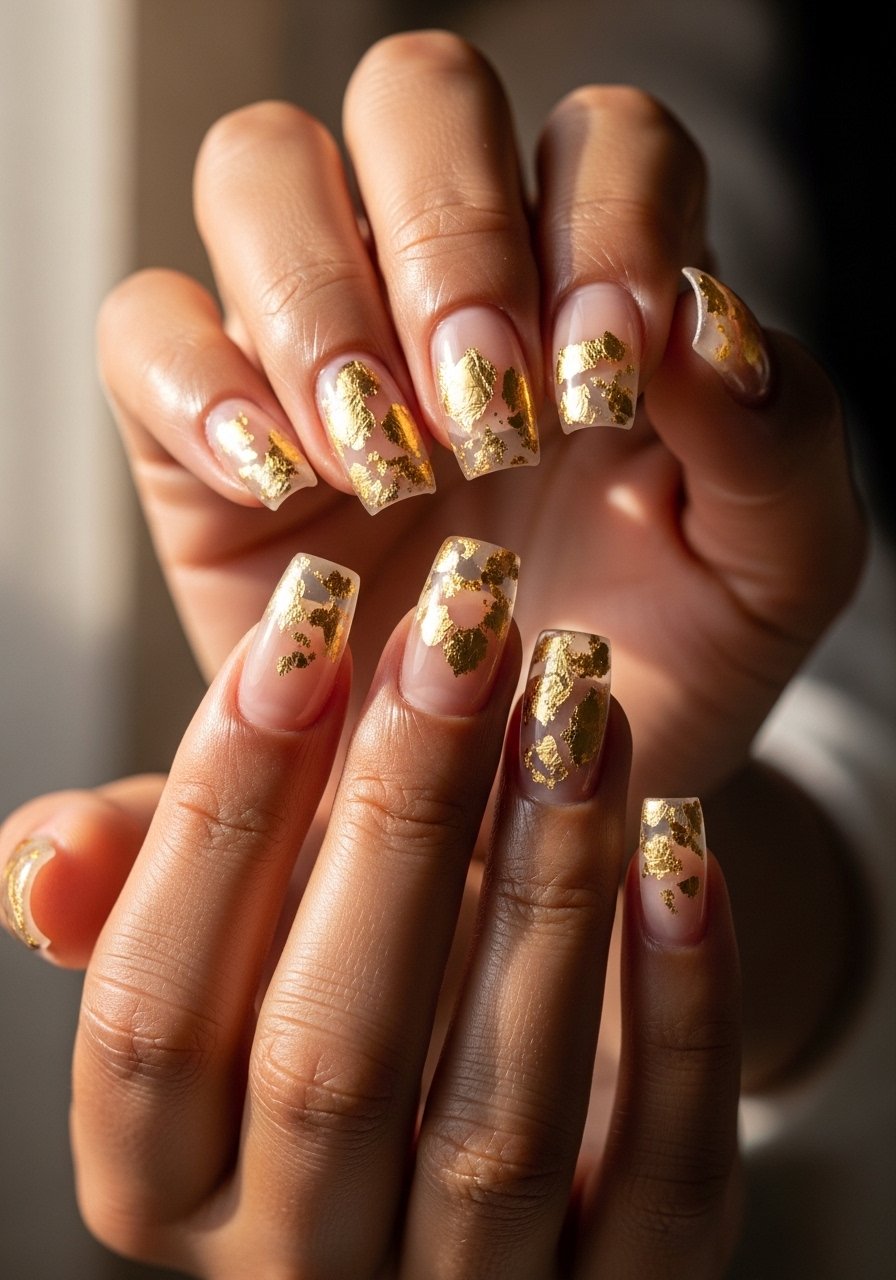
6. Clear Tips With Embedded Foil
Style/Vibe: Modern Jewelry
Best For: Medium length, party looks
Skill: Intermediate
Clear tips with embedded foil feel like jewelry for your hands. Embed tiny foil pieces into the clear acrylic layer rather than gluing on top. That keeps the surface smooth and makes fills simpler. Work in thin 0.3 mm layers to avoid trapped bubbles. I like pairing this with a clear builder gel to add strength without weight. Try a builder gel for reinforcement.
Mistake to Avoid: Pressing large foil chunks into the surface which creates lift points at the next fill.
7. Soft Chrome With Satin Finish

Style/Vibe: Soft Metallic
Best For: Office to evening, medium length
Skill: Intermediate
Soft chrome is less reflective than mirror chrome and reads wearable for daytime. Apply chrome powder over a fully cured, glossy base in light strokes. Then give a single thin matte spray or a satin top coat to tame the shine. Chrome powders work best when buffed in with a foam applicator and a 10 to 15 second polish motion. Keep a chrome powder set nearby for quick touch-ups.
Mistake to Avoid: Rubbing chrome hard and thinning the base coat so it flakes in spots.
If any of these ideas have you ready to actually try something, here are the products I reach for most while doing acrylics.
Essentials For Lasting Acrylic Sets
Tools & Prep:
- Nail dehydrator (~$6-12). Gets rid of oils so the product adheres.
- Cuticle pusher (~$4-10). Clean prep saves fills.
- Fine grit file (~$3-8). Use for gentle shaping.
Product Base & Finish:
- Clear builder gel (~$12-25). Adds strength without bulk.
- High-shine top coat (~$8-18). For glossy finishes.
- Matte top coat (~$8-15). For satin or muted looks.
Detailing & Extras:
- Ultra-fine cosmetic glitter (~$5-12). For diffused sparkle.
- Micro detail brush set (~$7-20). For tiny painted accents.
- Foam chrome applicators (~$6-14). For soft chrome application.
8. Sculpted C-curve French
Style/Vibe: Sculpted Classic
Best For: Long nails, formal events
Skill: Advanced
A sculpted C-curve gives depth and structure to a classic French. Build the apex close to the free edge using thin, layered beads. The visual lift makes nails look professionally contoured. This requires precise shaping and at least 10 minutes of filing per nail for a clean silhouette. Use a dual-form set if you need consistent curves across fingers.
Mistake to Avoid: Over-filing the sidewalls to force a curve which weakens the apex and causes breakage.
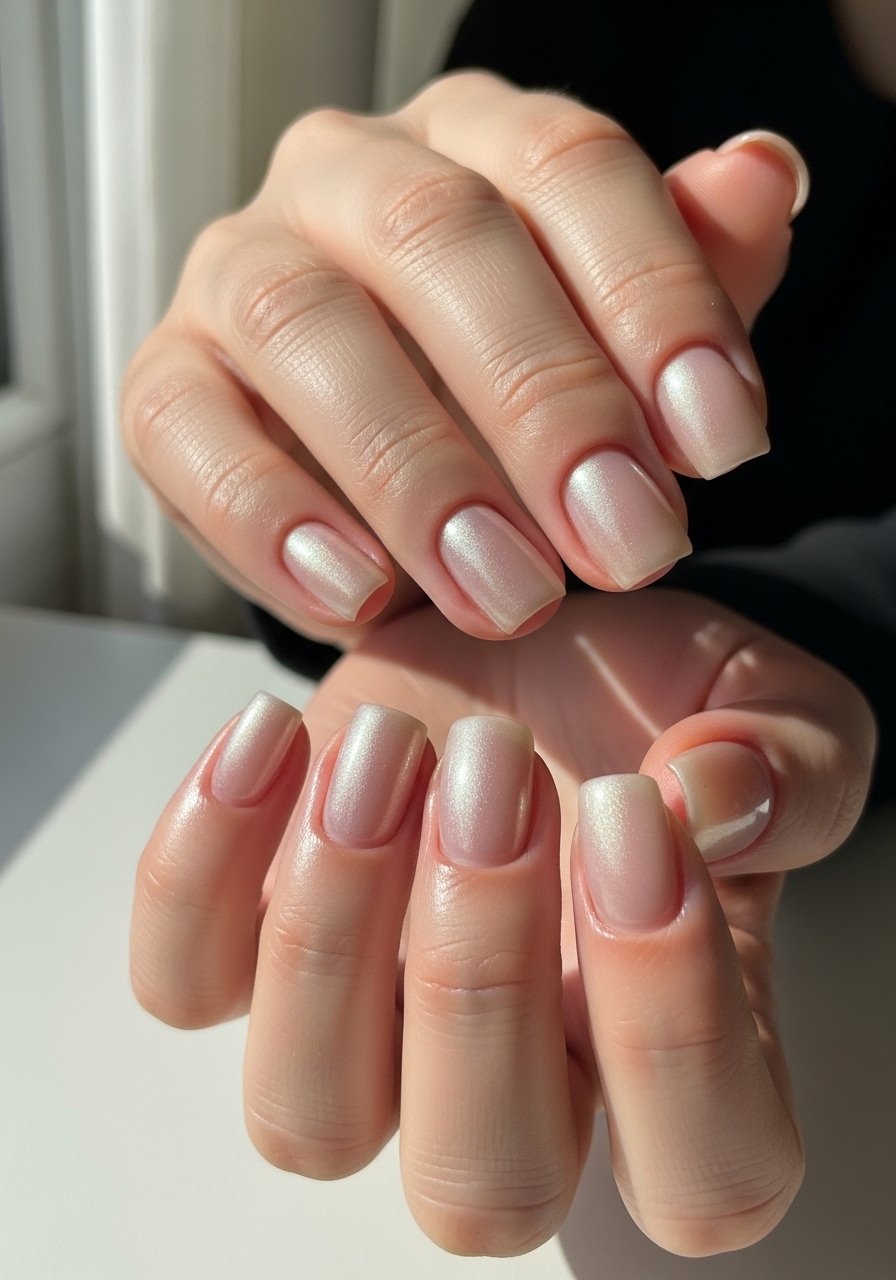
9. Short Square With Pearlescent Sheen
Style/Vibe: Everyday Refined
Best For: Short nails, practical wear
Skill: Beginner
Short square nails with a pearlescent sheen read fresh and low-maintenance. Pearlescent powder applied over a sheer base gives dimension without thickness. Keep layers thin and add only a single thin top coat to keep the sheen visible. This look works for nurses, parents, and anyone who types a lot. I like a pearlescent powder because it hides tiny surface scratches.
Mistake to Avoid: Loading heavy pigment on short nails so they look clunky and catch on fabric.
10. Fluffy Baby Boomer With Sheer Tips

Style/Vibe: Soft Gradient
Best For: Medium length, classic occasions
Skill: Intermediate
A baby boomer fade that uses ultra-sheer tips reads modern and soft. Use a 70:30 ratio of translucent white to clear powder for a subtle melt. Feather the powder outward with a soft brush before sealing to avoid hard lines. This approach takes slightly longer but photographs beautifully. Keep a soft blending brush in your kit for this.
Mistake to Avoid: Dropping a hard white line at the smile, which makes the fade look staged and thick.
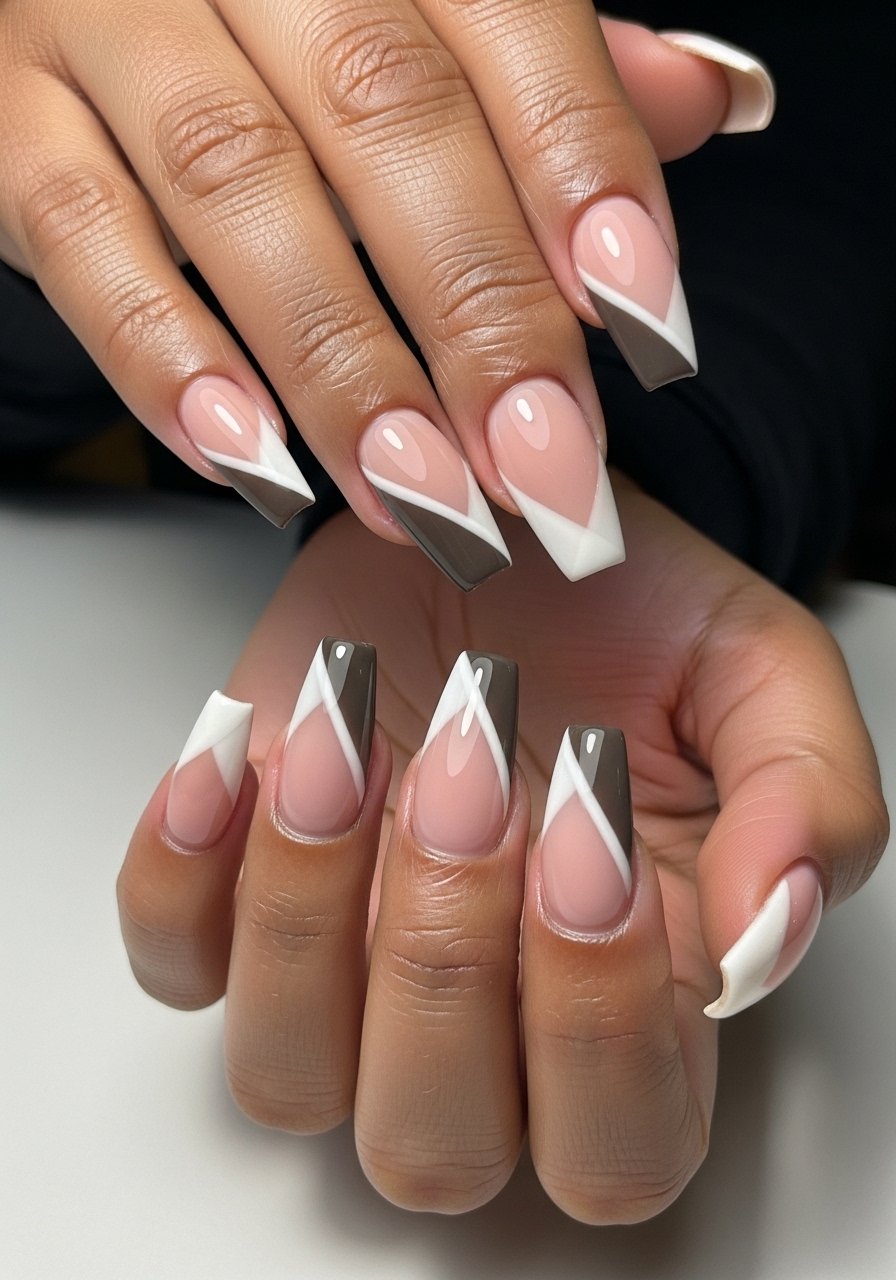
11. Two-Tone Diagonal Block
Style/Vibe: Graphic Color
Best For: Medium length, creative clients
Skill: Intermediate
Diagonal color blocking creates energy without heavy detail. Tape off a clean diagonal and paint two complementary shades. Seal with two thin coats of top coat to avoid pooling at the line. This works well on medium nails and lets you test bold colors without full coverage. I recommend a long-wear nail polish set for crisp color.
Mistake to Avoid: Leaving one thick paint layer which wrinkles and chips at the diagonal junction.
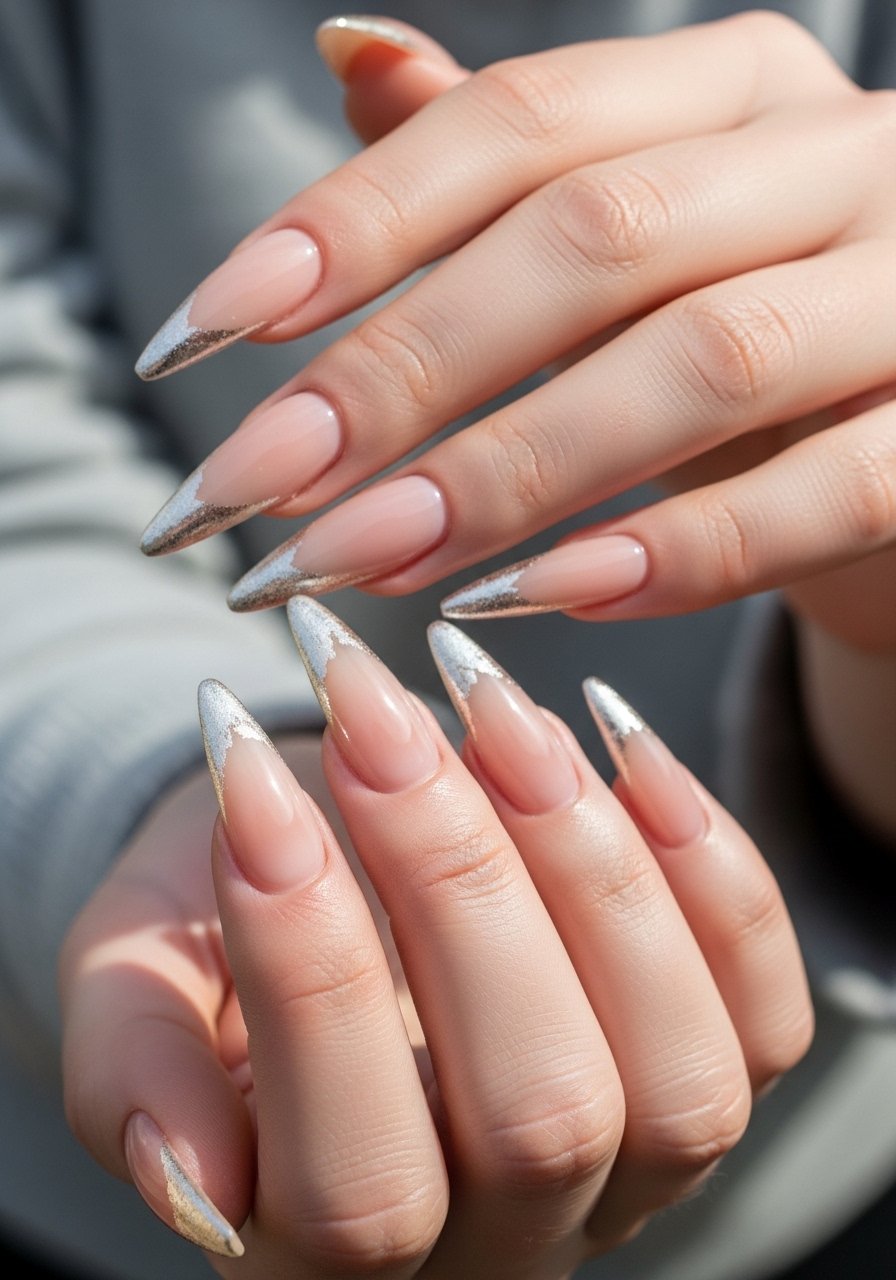
12. Thin Metallic Foil French
Style/Vibe: Subtle Edge
Best For: Long nails, editorial looks
Skill: Advanced
A thin foil French is an editorial twist on the classic. Apply foil sparingly on the free edge using a brush-on foil adhesive. Seal with two thin layers of gloss leaving the edge intact. The result is delicate but high impact, and it photographs without looking heavy. Keep a foil adhesive on hand for consistent application.
Mistake to Avoid: Gluing large foil pieces that lift at the sides and make fills harder.
13. Gel Overlay For Extra Strength
Style/Vibe: Reinforced Natural
Best For: Weak natural nails under acrylics
Skill: Beginner
A thin gel overlay over acrylic adds flexibility and resistance to cracking for clients who use their hands a lot. Apply a 0.5 mm gel layer and cure for the full recommended LED time to bond properly. This method keeps the acrylic from becoming brittle and helps with impact resistance. I use a clear builder gel layer after filing for 20 seconds per side to lock everything in. Try a clear builder gel for reinforcement.
Mistake to Avoid: Skipping final cure time which leaves the overlay undercured and prone to lifting.
Acrylic Aftercare Tricks That Stick
Thin coats beat one thick coat every time. Three thin layers of a quick-dry top coat look smoother and last longer than one thick gloopy layer.
Grab cuticle oil. Daily oiling at night keeps the skin soft and reduces stress at the cuticle which prevents early lifting.
If you find edges catch, lightly buff the free edge with a fine buffer before sealing with a flexible top coat. That small matte pass evens micro-burrs and helps polish adhere.
Most people use acetone for anything stubborn. Instead soak in warm soapy water first, then spot-dissolve with a cotton swab and 100 percent pure acetone only when necessary to avoid drying the natural nail.
