
I kept asking artists for the smallest possible version, then ended up surprised when lines softened and the shape blurred. After the third touch-up I stopped blaming the needle and started dialing in placement, line weight, and aftercare. Tiny tattoos need planning as much as skill. These are the small puzzle piece approaches that survived real sessions and real mistakes, along with what to buy and what to skip.
This list is for anyone who wants a small puzzle piece that still reads at a glance, not a dot that disappears after a year. Most ideas are single-session, low-budget, and beginner friendly when you pick the right placement. I pulled these approaches from across five shops I have visited, so you get what actually holds up on skin, not just the pinboard version.
1. Single Fine-Line Piece Behind the Ear

A behind-the-ear spot keeps the tattoo private and lets a 3RL single-needle line sing without needing heavy fill. Visually it works because the negative space around the jaw makes the tiny silhouette read, and it feels like a secret accent. This is great if you want something coverable for work, and it usually costs less because it is one short session. Pair the session with a gentle healing balm like a gentle healing balm and a fragrance-free soap. Ask the artist to use a single 3RL for crisp 0.25 mm lines and one light pass rather than forcing depth.
Style/Technique: Fine-line single needle
Pain Level: 3/10
Session Time: 15 to 30 minutes
Best For: Coverable, subtle personal pieces
Mistake to Avoid: Requesting ever-thinner lines than your artist recommends, which causes early blowout and patchy healing.
2. Two Interlocking Pieces on the Wrist
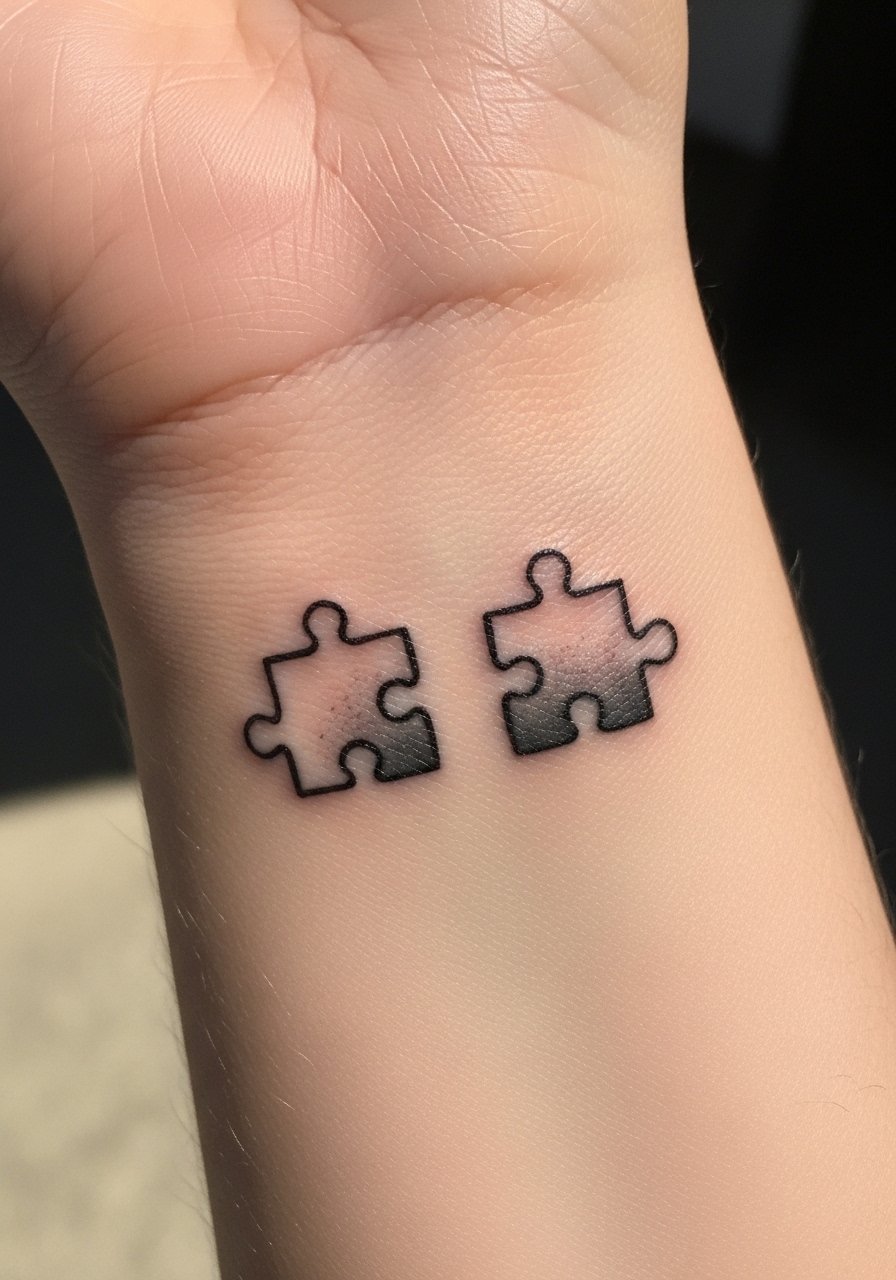
Interlocking pieces on the inner wrist read as a pair without crowding the skin. The small gap between the two pieces and a tiny bit of skin bridge makes them read as connected even at a glance. This is a friendly option for partners or friends because each piece is meaningful on its own and scales well from 1 to 2 centimeters. Use a light wash of shading rather than solid fill so touch-ups are easier. Bring a non-stick sterile bandage for the ride home and apply thin layers of balm twice a day for two weeks.
Style/Technique: Micro-pair fine-line
Pain Level: 4/10
Session Time: 20 to 40 minutes
Best For: Visible wrist placement, matching pairs
Mistake to Avoid: Centering both pieces too close to the wrist crease, which causes more friction and faster fading.
3. Floral-Filled Piece on the Ribcage

Filling the puzzle piece with miniature florals turns a symbol into a micro-scene. On the ribcage the skin has a natural curve that helps the details sit well, so you can get tiny petals without them blurring into a blob. This is a slightly higher pain area but worth it if you want an intimate piece with color or grayscale shading. Ask for fine dotwork shading and soft washes in place of solid blocks. Bring a fragrance-free gentle soap for aftercare and expect a three-week visible tender period.
Style/Technique: Micro floral fill with dotwork shading
Pain Level: 6/10
Session Time: 30 to 60 minutes
Best For: Private placement, decorative small pieces
Mistake to Avoid: Demanding saturated color in a space that moves a lot, which leads to uneven healing and early touch-ups.
4. Finger Edge Piece with Tiny Negative Space
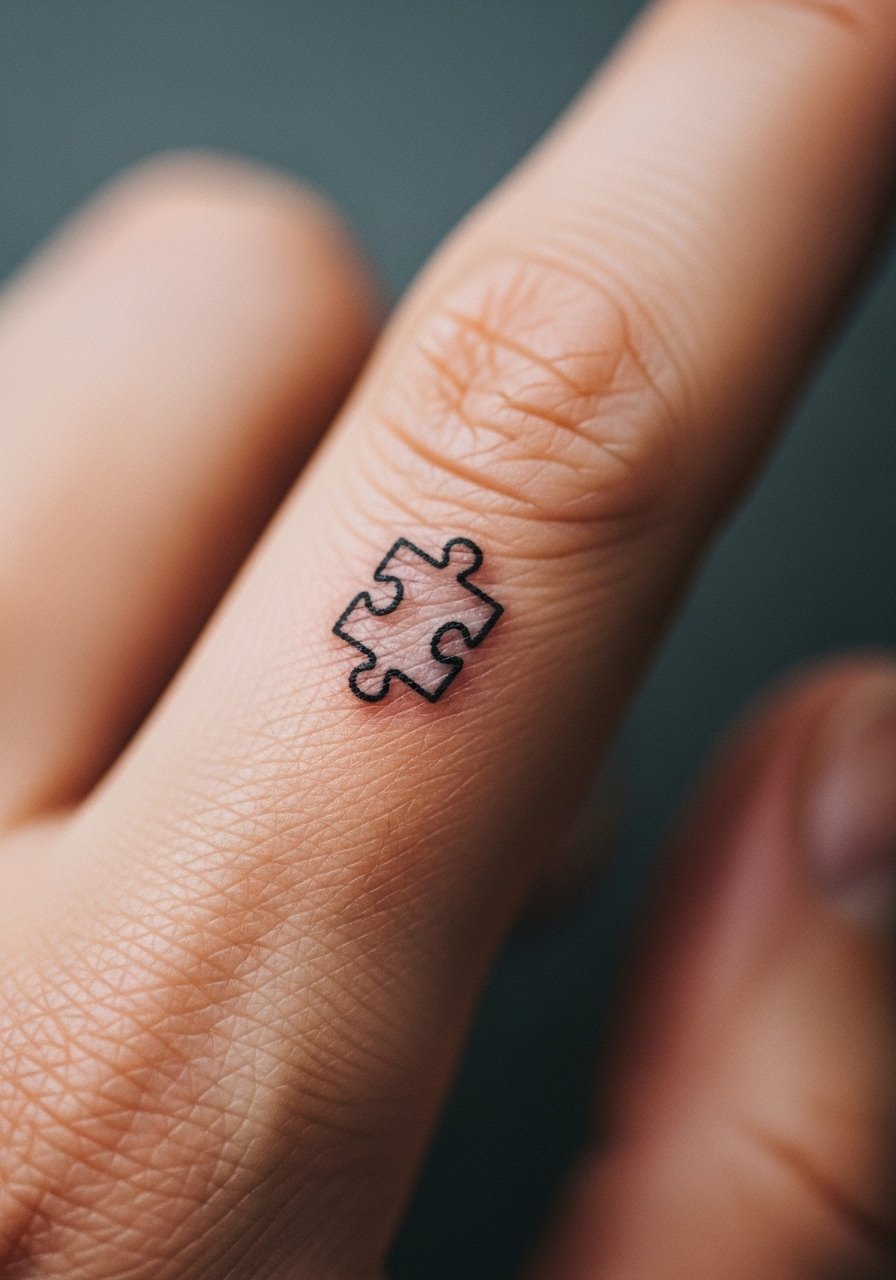
A finger edge puzzle piece is discreet and tactile, but take the trade-off: fingers weather ink faster. This style works visually because the edge placement uses natural contours to define the shape. Artists often use a 5RL or tight shading to avoid heavy saturation that flakes. Plan for semi-annual touch-ups, and protect it heavily with mineral sunscreen once healed. Pack a second-skin tattoo bandage for the initial 24 hours and commit to gentle washing twice a day.
Style/Technique: Micro edge placement with conservation shading
Pain Level: 5/10
Session Time: 20 to 35 minutes
Best For: Fingers, knuckles, tactile placements
Mistake to Avoid: Expecting a finger tattoo to stay as crisp as forearm work without planning for touch-ups.
5. Negative-Space Puzzle Band Around the Upper Arm
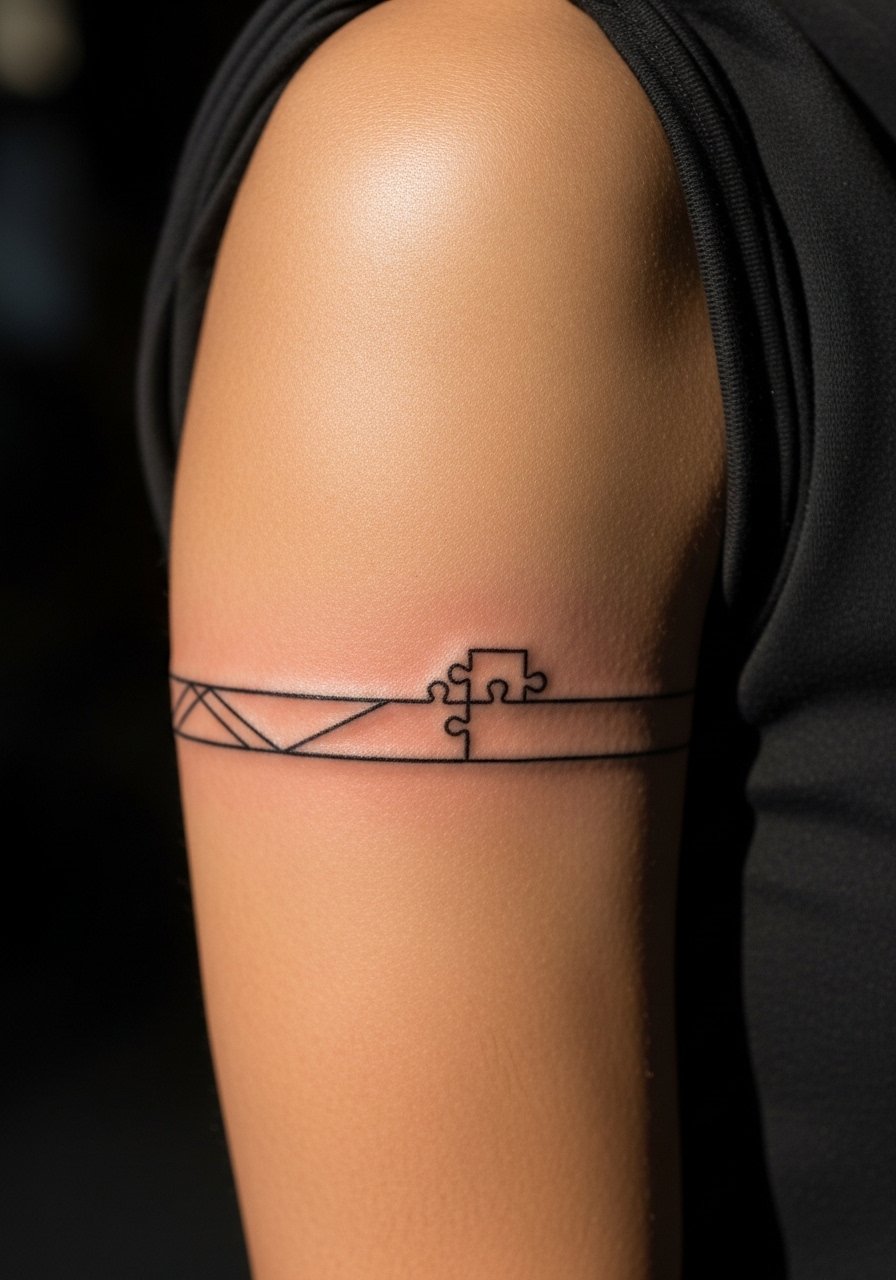
Turning the piece into negative space inside a thin band makes the shape feel intentional rather than tiny and lost. Negative space reads sharply against lightly shaded bands because the surrounding ink frames the empty shape. This approach is low-risk for visibility since a sleeve can hide it and the arm gives room for a clean composition. Ask for a calibrated 3RL for outline work and soft 7M mag for the band fill. Apply a lightweight sunblock once fully healed to slow fading.
Style/Technique: Negative-space geometric band
Pain Level: 3/10
Session Time: 30 to 50 minutes
Best For: Upper arm, coverable accents
Mistake to Avoid: Choosing a band width that is too thin to support the negative shape, which makes the piece disappear as it ages.
6. Watercolor Splash Accent Over a Tiny Outline
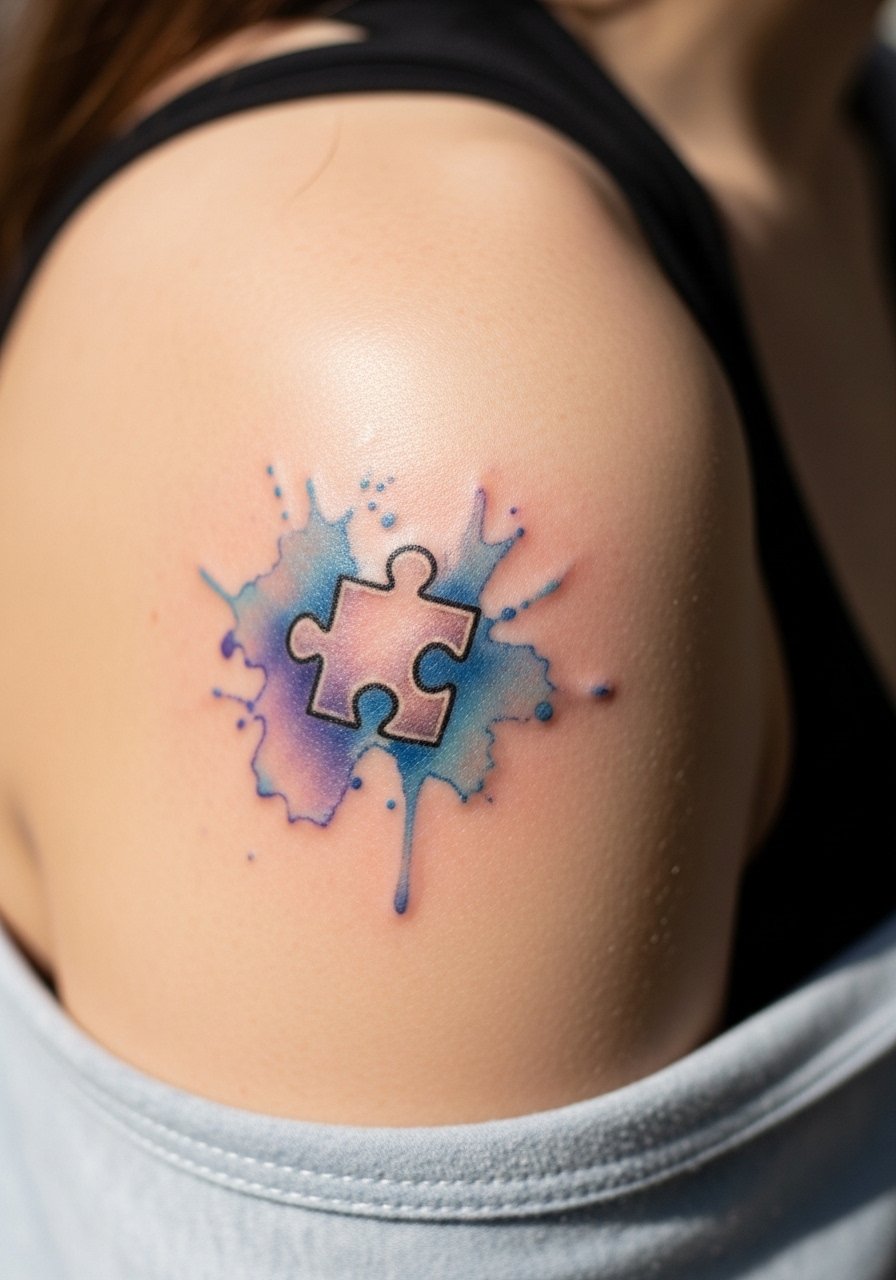
Watercolor around a tiny outline gives the piece personality, but color behaves differently than black. Small, saturated color patches can migrate in thin skin, so artists often use micro washes with multiple thin passes rather than one heavy fill. Visually the contrast between crisp black outline and airy color makes the puzzle read larger than its size. Use a gentle balm and avoid scrubbing while it heals. Keep expectations realistic: pastel tones will soften over months and usually need a color top-up.
Style/Technique: Outline with diluted color wash
Pain Level: 4/10
Session Time: 25 to 45 minutes
Best For: Shoulders, collarbone, visible decorative pieces
Mistake to Avoid: Asking for dense watercolor saturation in a tiny space, which leads to excessive spreading and loss of detail.
7. Scar-Friendly Puzzle Piece to Mask Texture
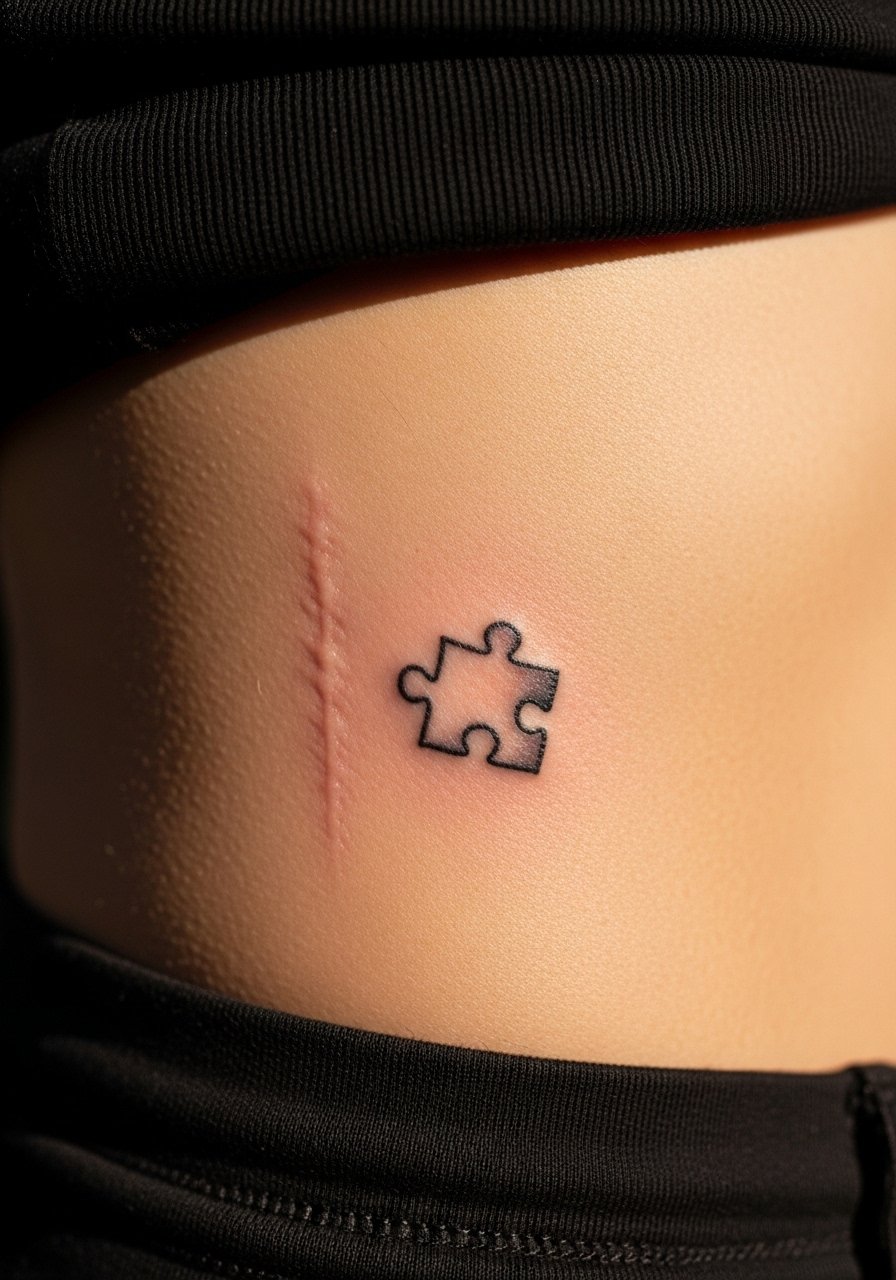
A purpose-designed puzzle piece can sit over a faint scar if the artist adjusts depth and spacing. Scar tissue holds ink unpredictably, so techniques like lighter lines, stippling, and slight distance from the highest scar ridge create a softer mask. This option focuses on texture camouflage rather than perfect lines. Expect touch-ups and a slower initial healing window. Consider using a silicone scar sheet in the months before tattooing to improve texture first and schedule a consult.
Style/Technique: Scar-friendly stipple and distance shading
Pain Level: 5/10
Session Time: 30 to 60 minutes
Best For: Scar camouflage, textured skin areas
Mistake to Avoid: Picking a standard line approach over scar tissue without a consultation, which causes patchy retention and disappointment.
If any of these ideas have you ready to actually try something, here are the essentials to pick up before you go.
Aftercare & Tiny Tattoo Supplies Worth Having
Aftercare basics:
- a gentle healing balm (~$8-20), everyday protection while healing
- fragrance-free castile soap (~$6-12), for twice-daily wash
- non-stick sterile bandage (~$8-15), for the first 24 hours
Sun and protection:
- mineral sunscreen spf 30 (~$10-20), for healed tattoos
- second skin tattoo bandage (~$10-20), if your artist recommends it
Prep and scar care:
- silicone scar sheet (~$12-25), for pre-tattoo texture smoothing
- non-stick sterile gauze pads (~$7-15), travel-friendly
Tiny Tattoo Care Tricks
Start with thin coats of balm. Apply a pea-sized amount of a gentle healing balm and rub until barely glossy. Thick layers trap moisture and can cause scabbing.
Grab second skin bandages for long hair days. They keep friction down and help small placements avoid rubbing against clothing overnight.
Most people over-wash. Clean with fragrance-free castile soap twice a day and pat dry. Over-scrubbing lifts pigment and delays healing.
If a piece is work-visible, plan placement and clothing for the first two weeks. Keep mineral sunscreen spf 30 on hand for healed skin to slow fading.
