
The first time I tried to recreate a baby shower mani from my feed, the tiny bows and glitter looked cartoonish under real light. I backed off the extras, stuck to soft almond shapes, and learned that two thin washes of a milky base and one small accent read far better in photos and in person. These looks are meant to be wearable, not fussy, and they work on short to medium nails.
These nine almond ideas are scaled for anyone doing an at-home mani or sitting in a salon chair. Most are beginner friendly, a few need light tools, and the budget range runs from drugstore polish to a small splurge. A tech who works at a salon downtown showed me how much a single thin coat can change the final photo, and I tested the quickest versions across short and medium lengths to make sure they actually hold up for party photos.
1. Soft Milky Almond With Bow Accent
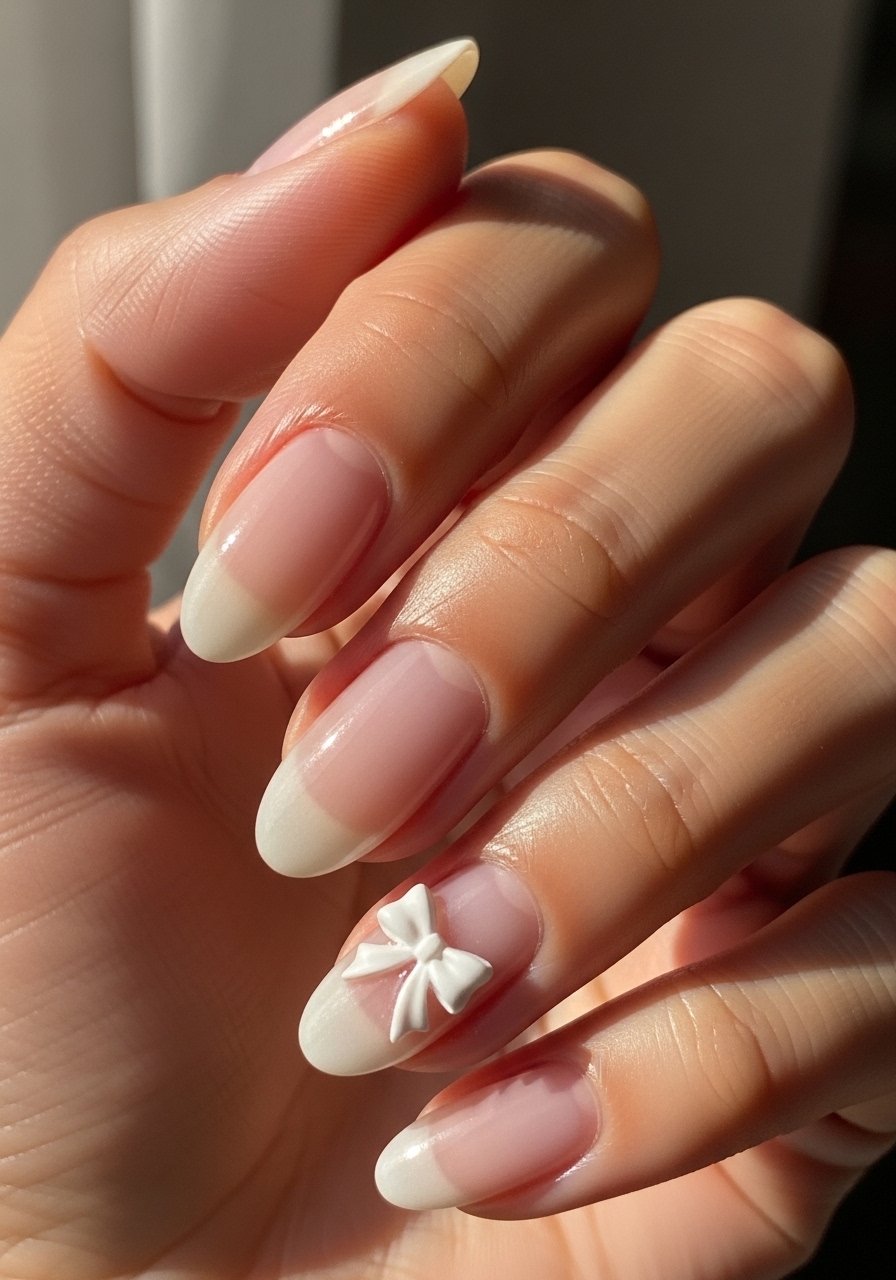
Style/Vibe: Soft milky, delicate accent
Best For: Short to medium almond / baby shower guest
Skill: Beginner
Start with two thin coats of a milky pink, painting three strokes per nail, center then each side, to avoid streaks. Let each coat sit 30 seconds before the next brush, then seal with a quick-dry top coat for a glossy finish. Place a single tiny bow on the ring finger with a fine dotting tool and a drop of clear top coat to anchor it. Use a milky pink polish and a fine nail-art brush if you freehand the bow.
Mistake to Avoid: Applying one thick milky coat that dries streaky instead of two thin even layers.
2. Blushed Ombre Almond
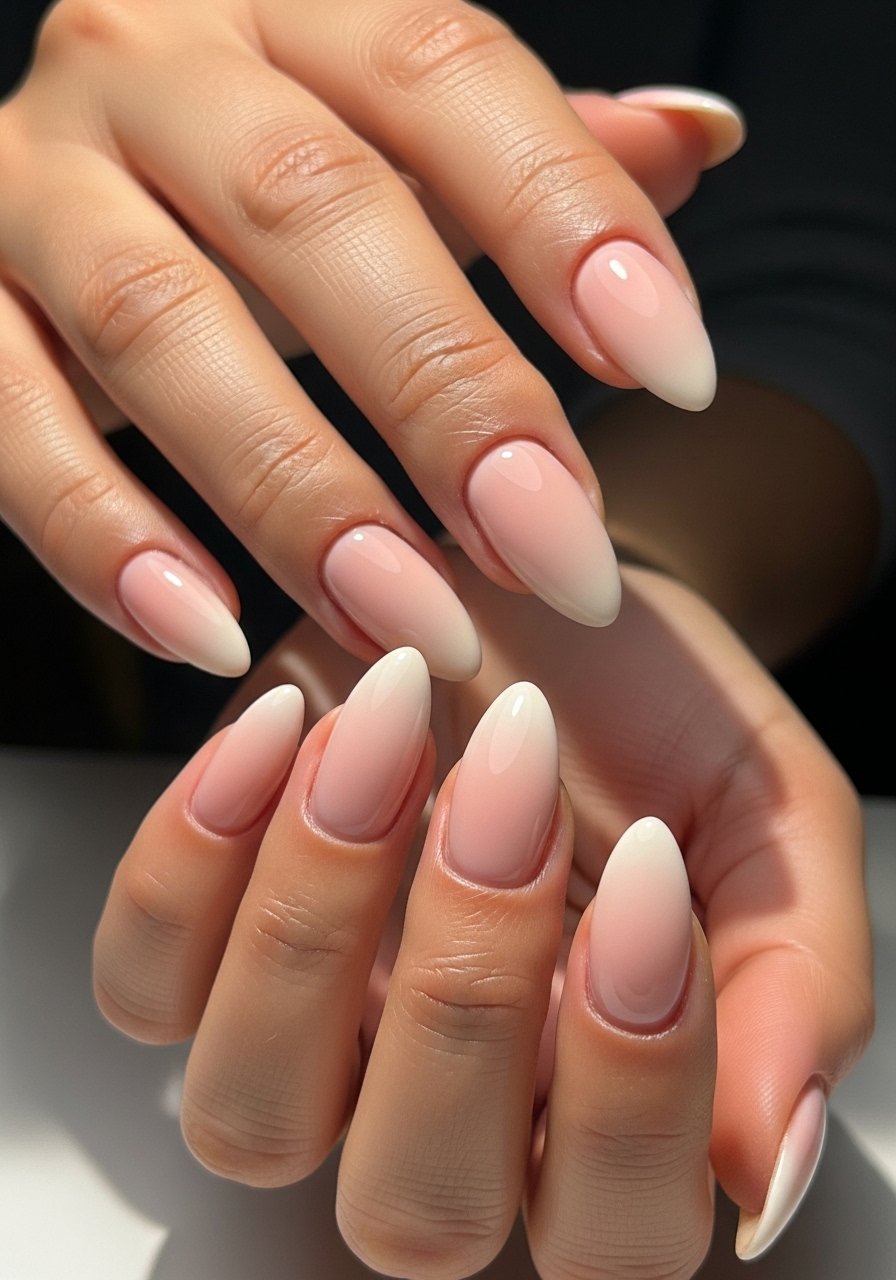
Style/Vibe: Blended ombre, soft gradient
Best For: Medium almond / host or mom-to-be photos
Skill: Intermediate
The ombre reads best when you sponge on two thin layers of color, using a 70 to 30 pigment-to-top-coat ratio on the sponge to keep the gradient soft. Dab the sponge in short presses from the cuticle toward the tip, then buff the texture lightly before a glossy top coat. This look pairs well with a sheer base underneath for extra depth. I like a neutral base like a soft beige and a blushing pink on top, both in thin passes, and finish with a quick-dry top coat.
Mistake to Avoid: Rubbing the sponge too aggressively and losing the soft blend.
3. Sheer Pearl With Tiny Pearls

Style/Vibe: Pearl sheen, minimalist jewelry
Best For: Long almond / photographed guest or mom
Skill: Intermediate
A sheer pearl polish layered over a sheer nude creates a mother-of-pearl effect without heaviness. Two thin coats of the pearl, with 20 to 30 seconds between, build opalescence without going opaque. For the accent, press a micro pearl into tacky polish or use a drop of nail glue and seal it with a thin rim of top coat to prevent edges from catching on fabric. Use a pearl-effect polish and a small container of micro pearls.
Mistake to Avoid: Overloading on top coat around the pearl, which can make it sit uneven.
4. Neutral French With Baby Blue Edge
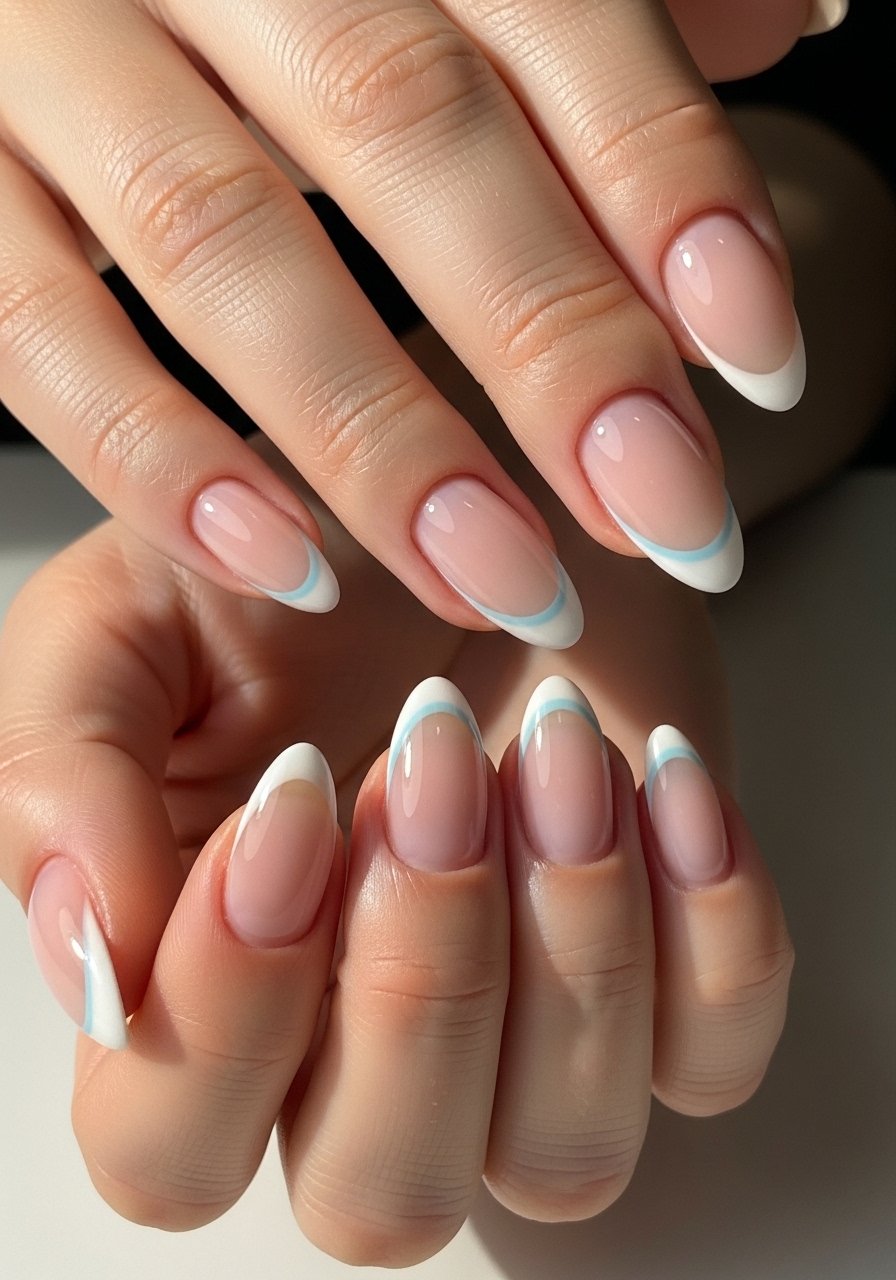
Style/Vibe: Neutral with a pop of color
Best For: Medium almond / party host wanting a subtle nod to theme
Skill: Beginner
Swap a classic white tip for a whisper of baby blue to match invitations or decor. Paint a sheer neutral base, then use a thin brush to draw a 1.5 to 2 mm blue line at the tip. The key is restraint; the thin colored edge reads intentional in photos. If you prefer a softer look, blur the line slightly with a top coat brush stroke. This is an easy salon ask or a patient at-home job with a baby blue polish.
Mistake to Avoid: Making the colored tip as wide as a classic French tip, which makes it look heavy.
5. Pastel Marble Accent Nail
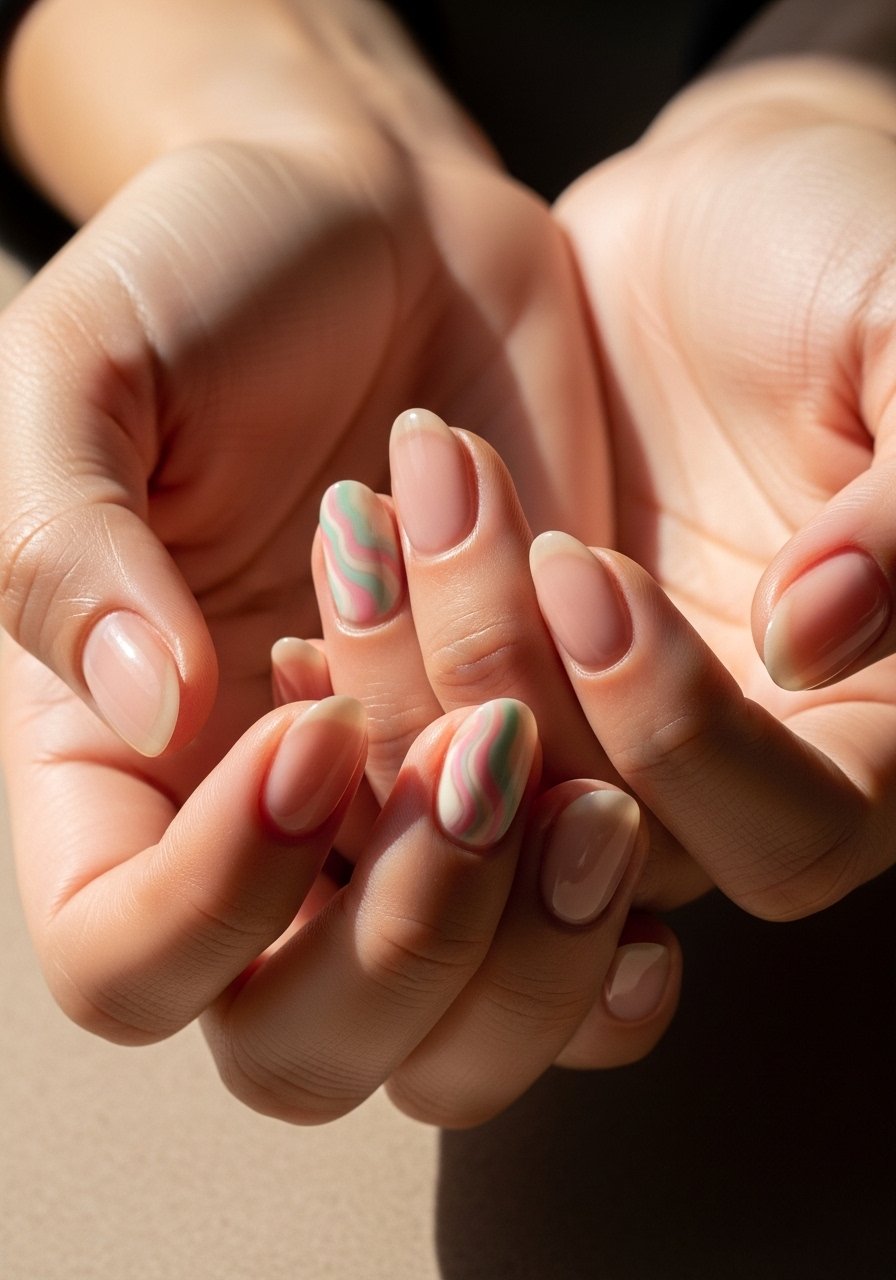
Style/Vibe: Single marble accent, soft pastels
Best For: Short almond / guest wanting a playful accent
Skill: Intermediate
Keep eight nails soft and reserve the pattern for one accent. Use a dot of three pastel colors on a clear surface, swirl with a toothpick, then pick up the mix with a brush and press onto the nail for a controlled marbling effect. Thin coats avoid the thick, gloopy look. Seal with two thin layers of top coat so the marble sits smooth. The trick is mixing just enough pigment to keep translucency. Try a set of pastel polishes and a dotting tool.
Mistake to Avoid: Overmixing the colors so the marble becomes muddy.
6. Negative Space 'Oh Baby' Script Tip
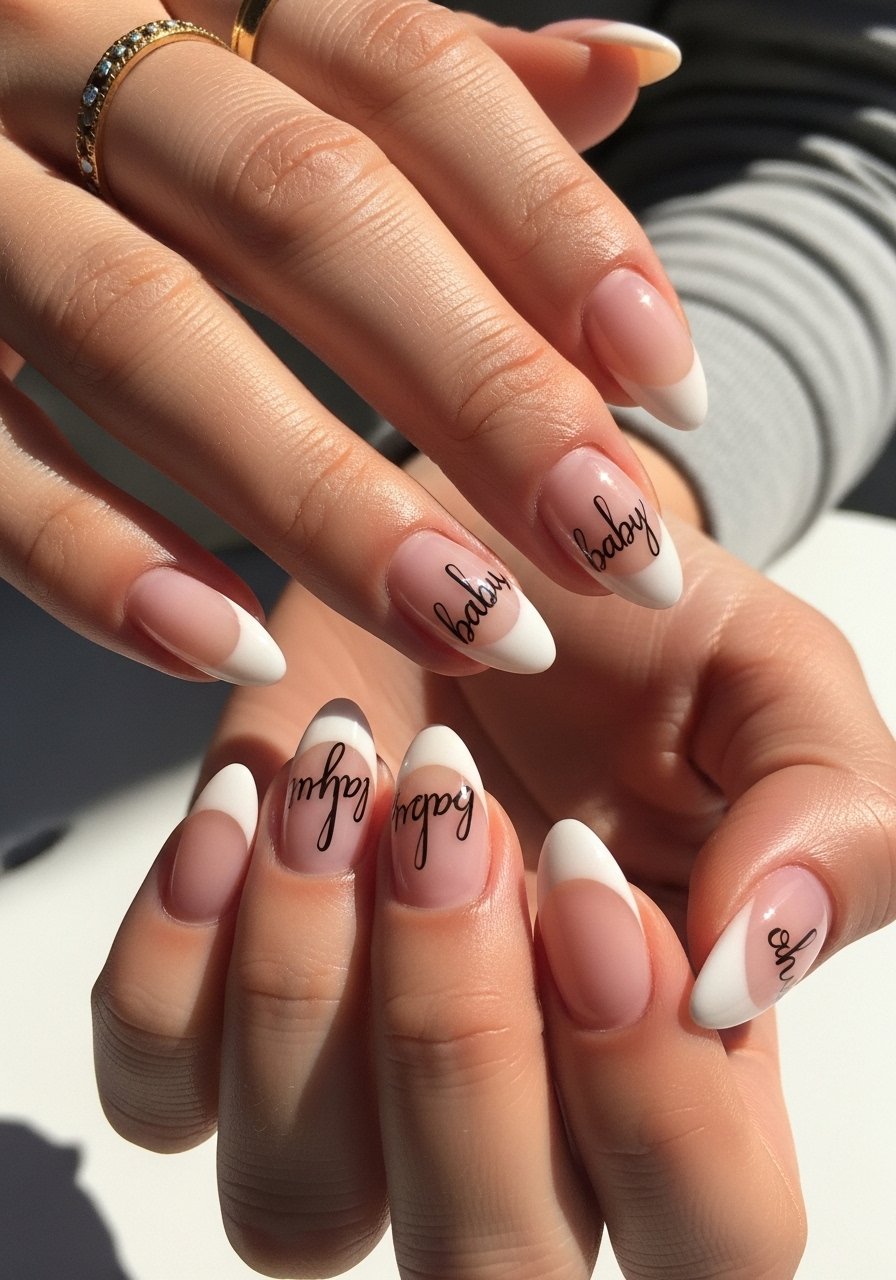
Style/Vibe: Text tip, modern minimal
Best For: Medium almond / playful guest or shower host
Skill: Advanced
Tiny handwritten script on the tip looks custom and keeps most nails neutral. Use a gel pen for practice, then transfer with a steady micro brush or a fine liner nail brush and a darkened polish. Work in 1 mm strokes, letting each thin pass set for 10 to 15 seconds under natural convection before drawing the next. This is one to book at a salon if you want a crisp result, but it can be done at home with patience.
Mistake to Avoid: Trying the full phrase on every nail instead of choosing one or two nails as accents.
7. Nude Satin With Micro-Glitter Fade
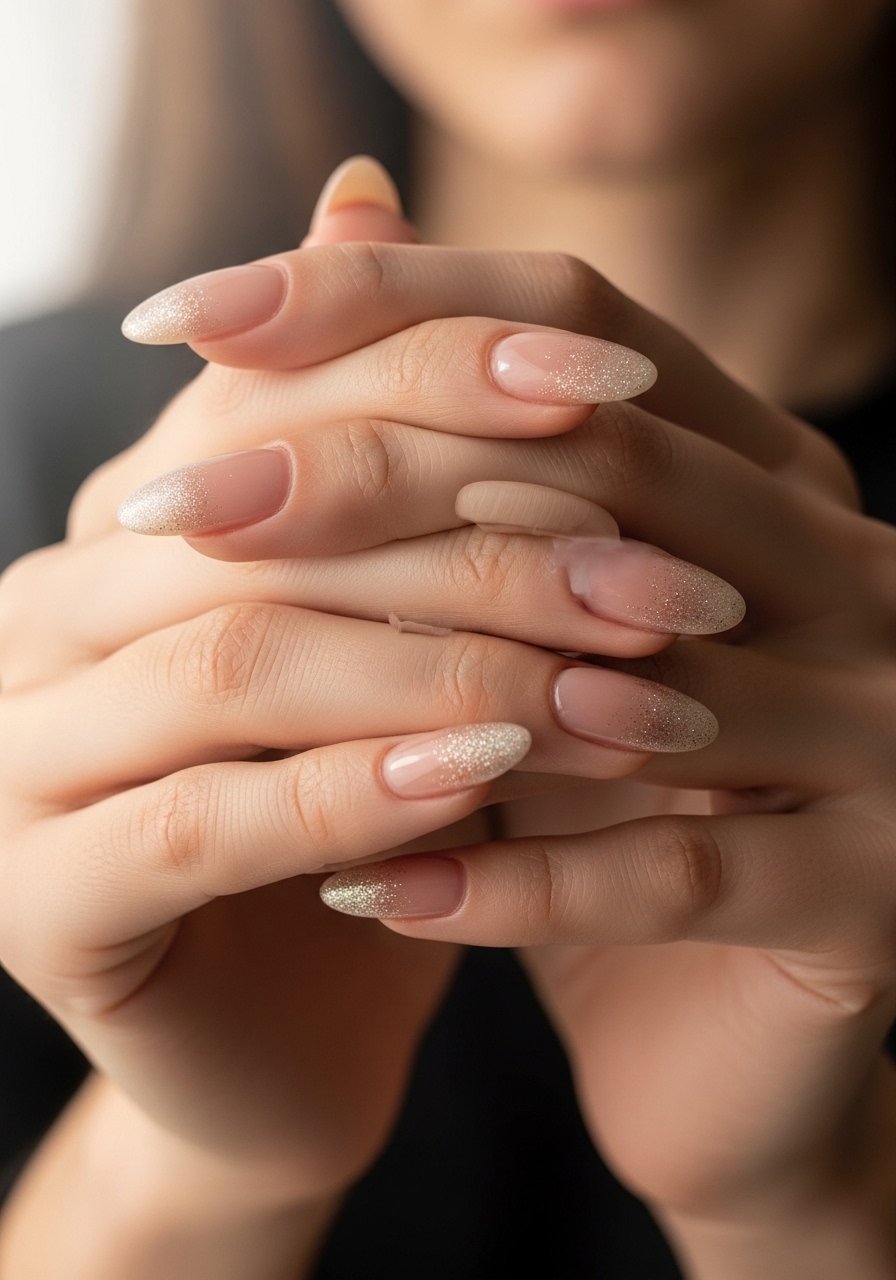
Style/Vibe: Satin finish with sparkle fade
Best For: Long almond / elegant guest, evening shower
Skill: Intermediate
A satin or soft matte finish with glitter focused at the cuticle keeps the look polished without overdoing sparkle. Paint a nude satin base, then press a small amount of micro-glitter into the wet base near the cuticle and drag outward with a soft brush in a 60 to 40 density fade. Top with a thin glossy seal only where the glitter is, leaving the rest satin for contrast. For easy application use a matte top coat and a jar of biodegradable glitter.
Mistake to Avoid: Covering the entire nail in glitter instead of concentrating it for a delicate fade.
Before the last two looks, here are the products I reach for when doing a baby shower almond mani.
Baby Shower Mani Kit Picks
Base & Color:
- non toxic base coat (~$8-15), gentle under pregnancy-safe polishes.
- milky pink polish (~$6-12), neutral base for most looks.
- pastel nail polish set (~$12-20), for marbles and accents.
Tools:
- fine nail-art brush (~$7-15), essential for scripts and liners.
- dotting tool (~$5-10), for bows and pearls.
- glass nail file (~$6-12), to shape almond without splitting.
Finish & Care:
- quick-dry top coat (~$8-14), for glossy seals.
- cuticle oil (~$6-12), keeps the mani photo-ready and hydrated.
8. Non-Toxic Polish For Moms-To-Be

Style/Vibe: Safe and wearable, low-fume polish
Best For: Medium almond / pregnant guests or hosts
Skill: Beginner
When a mom-to-be wants photos and low odor, pick a non-toxic polish labeled 3-free or higher. Apply two thin coats and allow at least 2 minutes dry time between coats, then finish with a quick-dry top coat. A light oil massage after the mani keeps cuticles glossy and camera-ready. These formulas sometimes need one additional thin layer because they are more sheer, so plan for an extra five minutes. Try a non toxic base coat and a soft nude shade from the same line for best adhesion.
Mistake to Avoid: Expecting the same opacity as regular lacquer and applying one thick coat.
9. Short Almond With Matte Florals

Style/Vibe: Matte floral, tiny garden accents
Best For: Short almond / guest who wants delicate detail
Skill: Intermediate
Tiny florals read best on a matte canvas. Paint a satin nude base, use a tiny brush to dot two colors into a simple bloom, then set with a light matte top coat. Keep the flower scale small, roughly 3 to 4 mm across on short nails, and avoid crowding the nail. One thin glossy pass over the center of the flower can add a focal sheen if you like. Use a matte top coat and a fine liner nail brush.
Mistake to Avoid: Painting oversized florals on short nails that make the design look cramped.
Baby Shower Mani Shortcuts
Thin coats beat one thick coat every time. Three thin layers of quick-dry top coat look smoother and last longer than one thick, gloopy layer.
Grab a glass nail file for about $8. Shape first, paint second, and the almond silhouette will actually look longer and cleaner on camera.
If you want sparkle but not cling, press micro glitter into a tacky base and seal with a thin rim of top coat. It photographs better than loose glitter on the surface.
Most people skip cuticle oil the night before photos. A quick massage with cuticle oil softens the skin around the nail so the shape reads neater in close-ups.
Everyone thinks more accent nails equal impact. One well-placed accent, like a tiny pearl or a colored tip, anchors the look. Keep a dotting tool handy so you can add that precise dot without fuss.
