
I kept choosing muddy forest greens and then wondering why my manicure looked flat in photos and dull in daylight. After one too many touch-ups I started treating green like any other color, testing thin layers, finish swaps, and placement until the shade read like a deliberate choice instead of a mistake.
These nine looks are for people who want green nails that translate from coffee runs to close-up photos. Most are achievable at home with basic tools, a couple are salon-level details, and a tech who works at a salon downtown showed me a few tricks that make gel and polish look equally crisp. Expect quick options for short nails, a few steps for longer shapes, and budget picks sprinkled throughout.
1. High-Gloss Emerald Two-Coat Shine
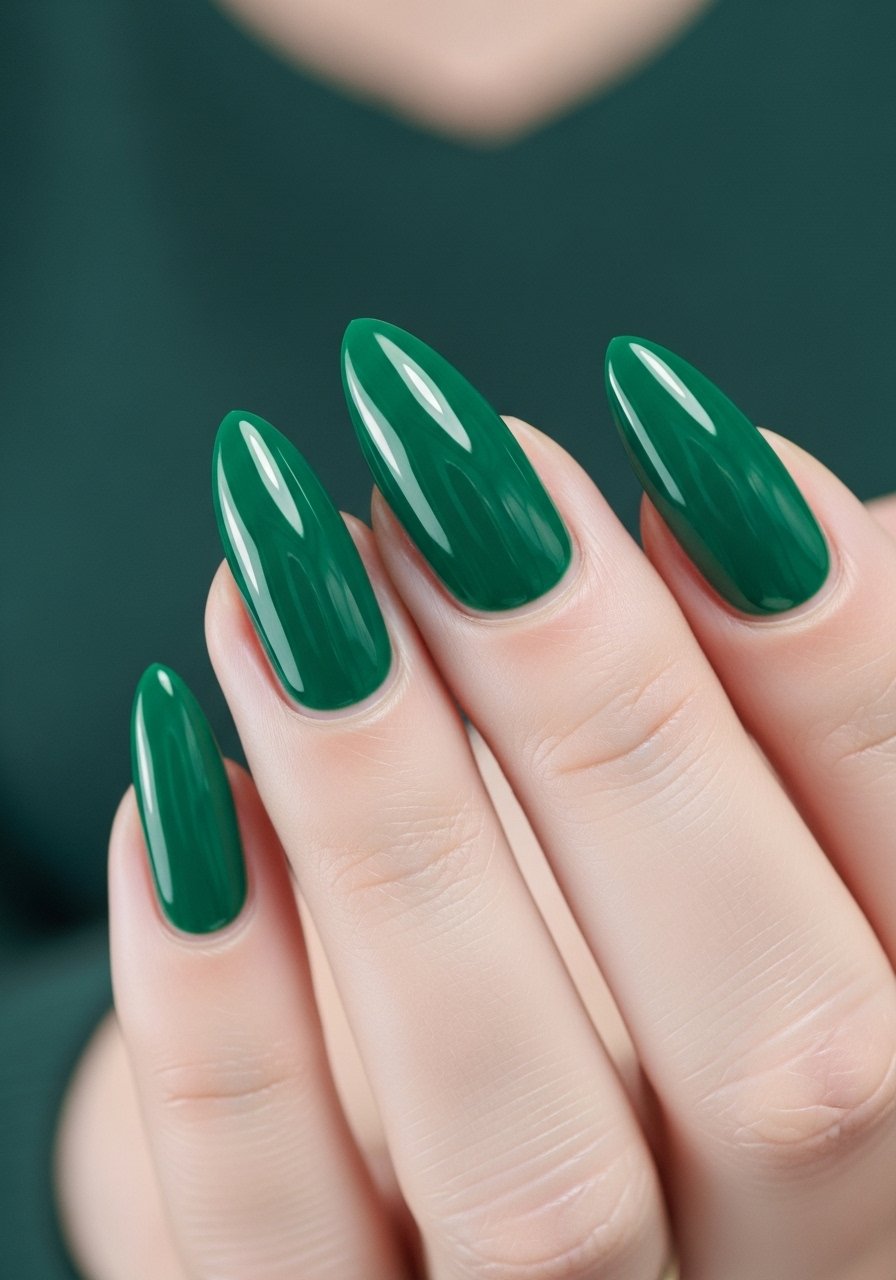
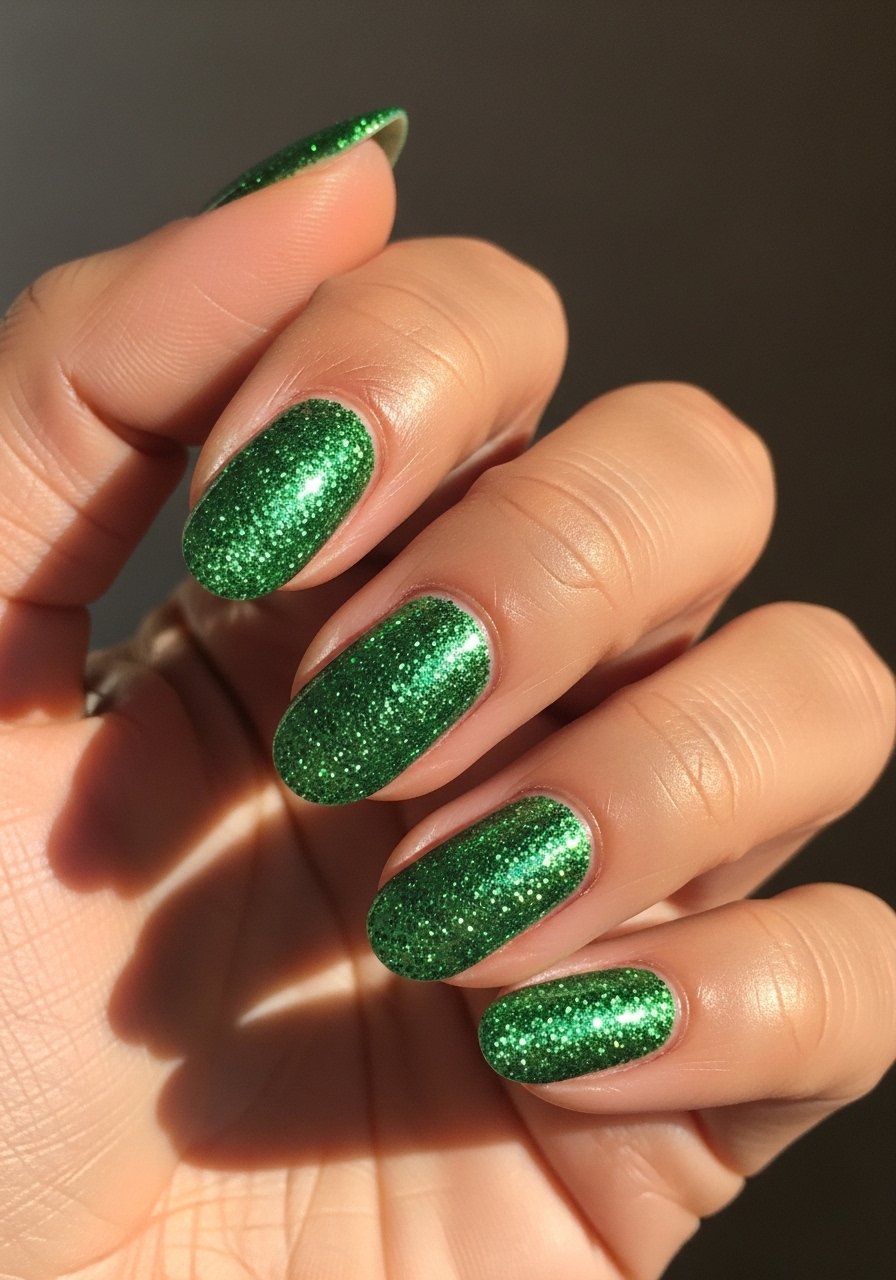
A saturated emerald on long almond nails reads luxe and modern because the shape gives the pigment room to catch light. What makes it work is two thin coats applied from base to free edge, each cured or dried fully before the next pass. For gel, cure each layer 60 seconds under an LED lamp. For polish, a fast-dry top coat seals the color without pooling. Pair an emerald green nail polish with a hydrating base coat so the color lays smooth and lasts. This look fits date nights, events, and anyone comfortable with longer nails. Depth note, slightly warmer lamp light brings out the gold undertone in many emeralds, so check your shade in daylight.
Style/Vibe: Lush Gloss
Best For: Long almond / special occasions
Skill: Intermediate
Mistake to Avoid: Applying one thick coat and expecting it to dry evenly, which causes streaks and uneven shine.
2. Sage Matte Minimalism With Negative Space
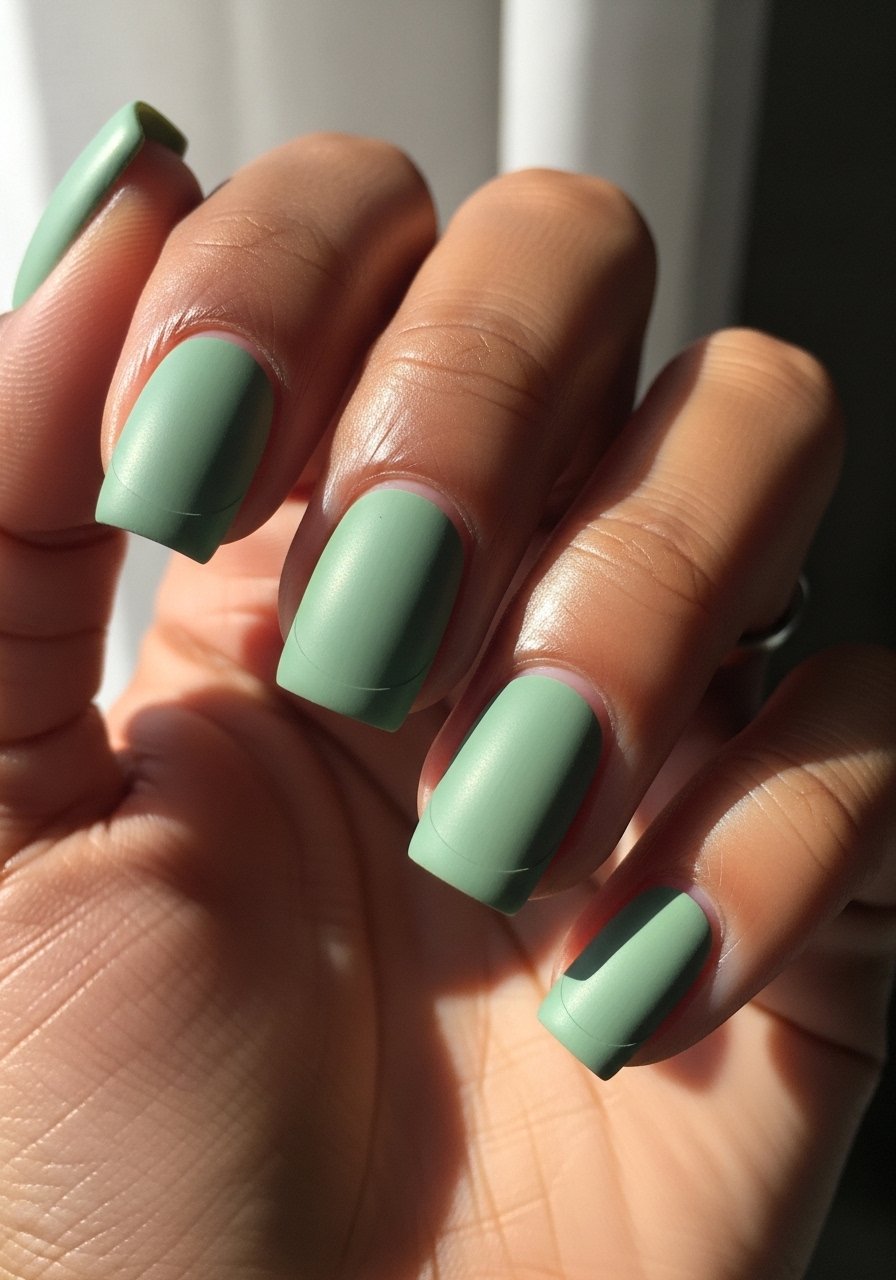
Sage looks modern when you give it breathing room. Paint a matte sage on most nails and leave a small crescent of natural nail at the base for negative space. The matte finish keeps the look grounded and less flashy, great for short nails and office settings. Use two thin coats of sage nail polish and finish with a matte top coat. For a cleaner edge, place a half-moon vinyl before painting. This is budget friendly and beginner friendly if you work slowly. Depth detail, buffing the nail lightly helps matte polish adhere without patchy spots.
Style/Vibe: Quiet Minimal
Best For: Short square / work-friendly
Skill: Beginner
Mistake to Avoid: Rushing the vinyl placement and peeling it too late, which smudges the crisp negative space.
3. Moss Marble Accent Nail
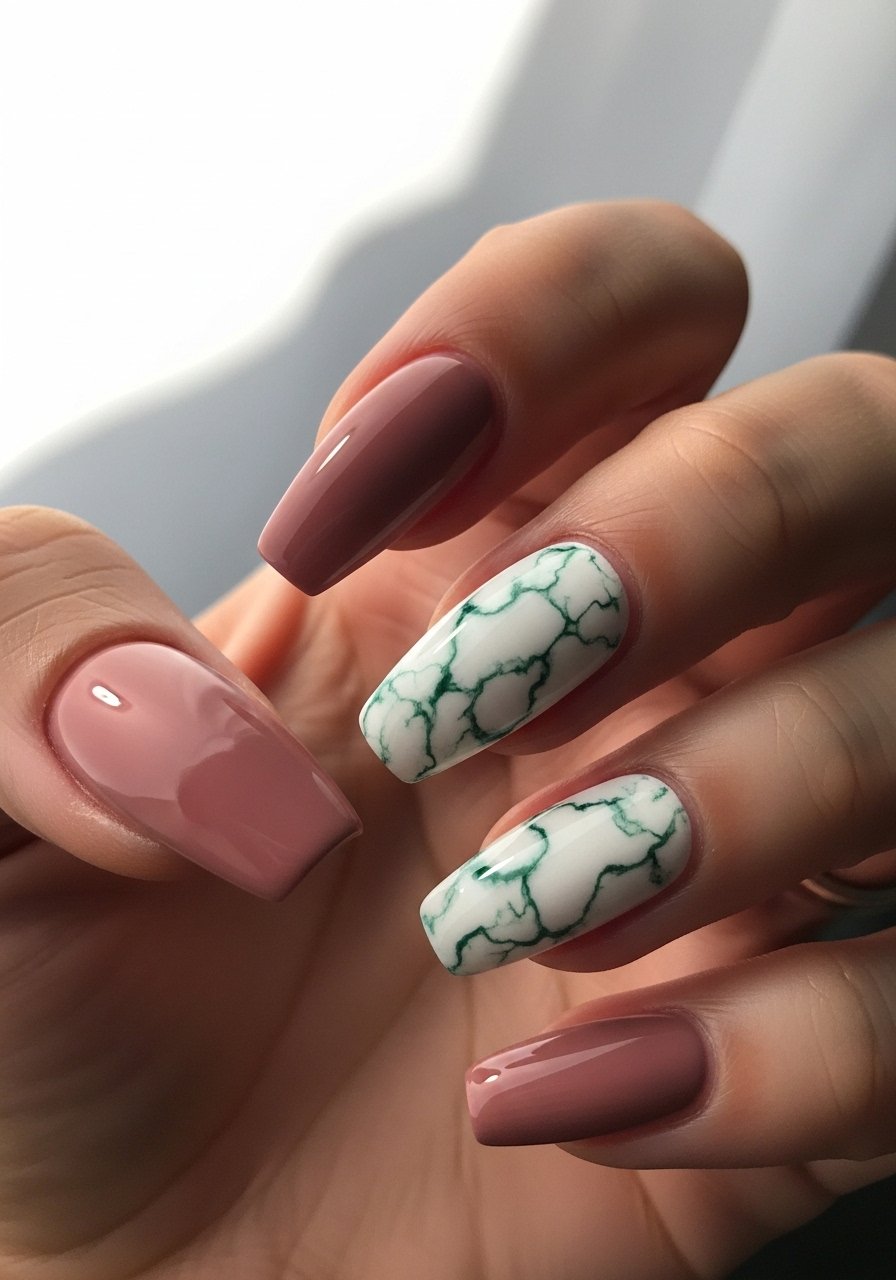
A single marble accent turns simple green into intentional art. Start with a sheer base, then drop tiny dots of moss and deep forest green into a few drops of top coat and swirl with a thin nail art brush. The key is working small areas and blending while the polish is wet. Use a fine nail art brush and a deep forest green polish. This look reads creative and slightly moody, best for medium to long lengths. Technique note, two-to-three microscopic motions with the brush make veins that look natural, not cartoonish.
Style/Vibe: Artistic Accent
Best For: Medium coffin / nights out
Skill: Intermediate
Mistake to Avoid: Overworking the marble and blending until the colors muddy together instead of keeping thin, defined veins.
4. Neon Lime Reverse French

Reverse French tips in neon lime make green feel energetic and modern. Paint a sheer or nude base, then use striping tape to mark a thin crescent at the cuticle and fill with neon lime. The contrast between the soft base and sharp neon makes the green read intentional instead of loud. Try a long-lasting neon lime polish with a glossy finish and a thin striping tape set to keep lines clean. This is bold and fits fashion-forward looks. Depth detail, slightly thicker neon pigment often needs a thin white base under it to pop on darker nail beds.
Style/Vibe: Bright Edge
Best For: Long stiletto / fashion looks
Skill: Intermediate
Mistake to Avoid: Cutting the striping tape too early and smudging wet neon, which blurs the crisp reverse French line.
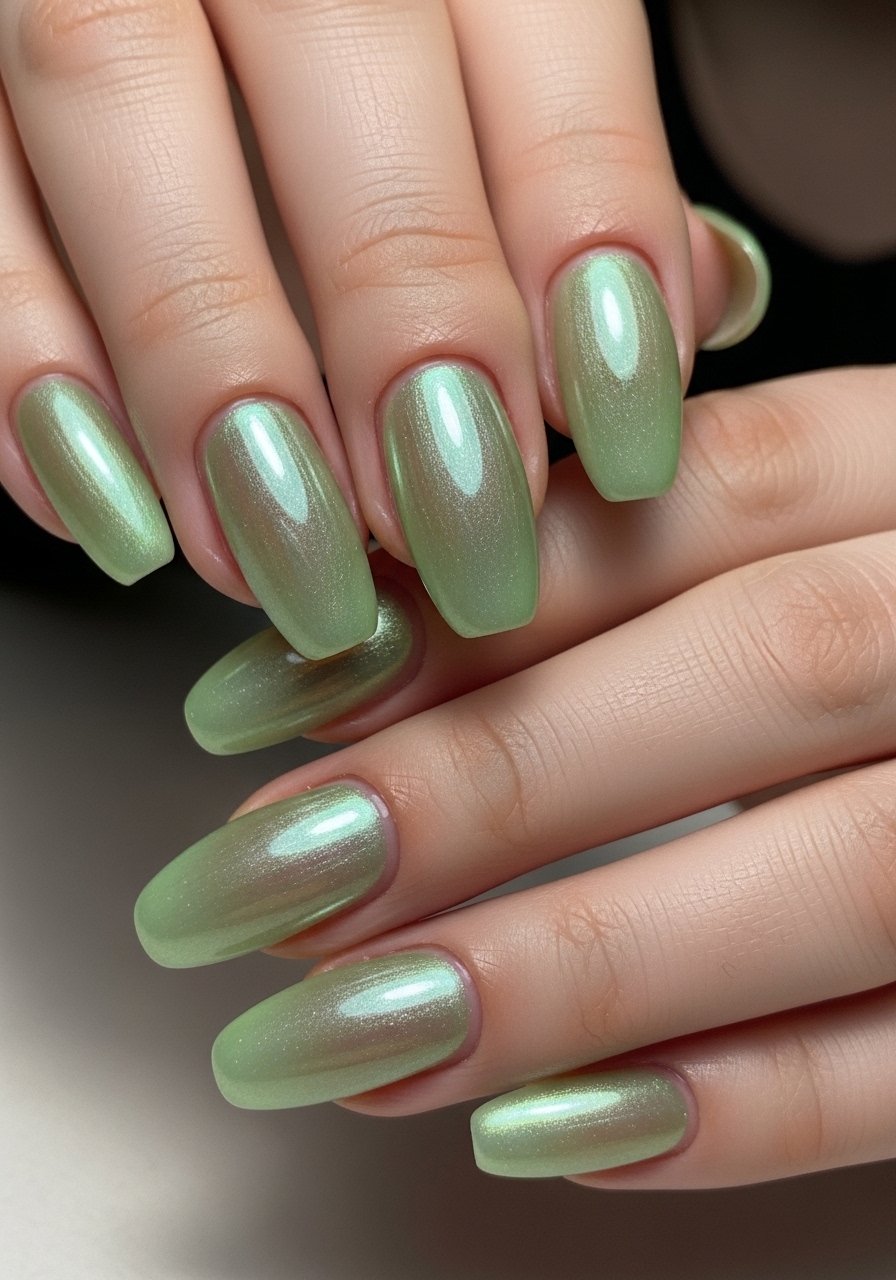
5. Olive Metallic Sponge Ombre
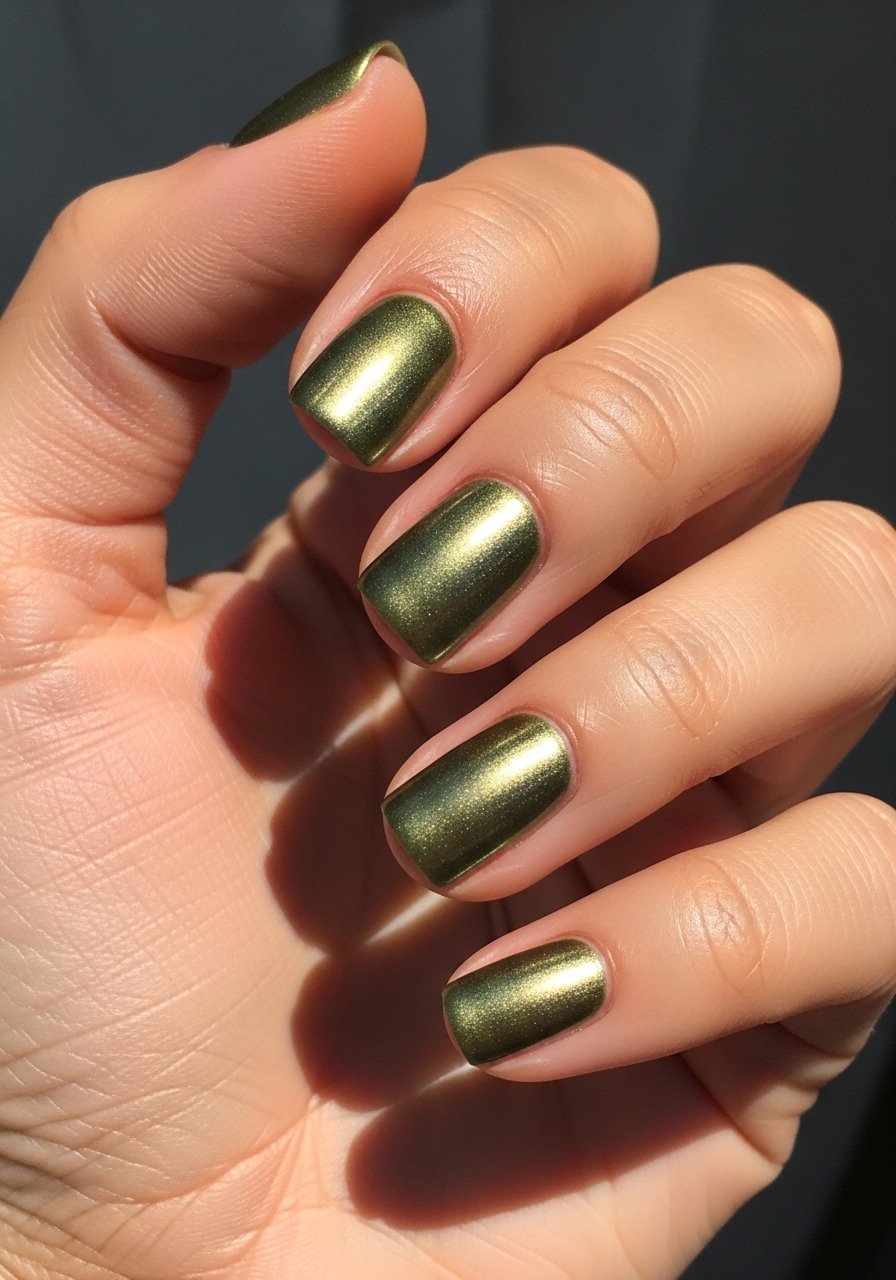
Metallic olive reads chic on short rounded nails because the shimmer hides minor chips. Sponge a metallic olive over a dark olive base to create a soft ombre. Use a makeup sponge for gentle gradation, dab in light taps, and seal with a glossy top coat. Pair a metallic olive polish with household makeup sponges. This technique is salon-feeling but easy at home with patience. Depth detail, remove excess from the sponge edge to avoid blotchy application and build color in two light layers.
Style/Vibe: Subtle Shine
Best For: Short rounded / everyday with a twist
Skill: Beginner to Intermediate
Mistake to Avoid: Pressing the sponge too hard and creating harsh, spotted patches instead of a smooth fade.
6. Forest Glitter Gradient Accent
A concentrated glitter gradient makes green playful without overwhelming. Dab dense green glitter at the base and feather it upward with a clear top coat to diffuse the sparkle toward the tip. This works on medium oval nails and is forgiving for nail growth. Use a loose green glitter powder and a thin-layer friendly clear top coat. For gel, press the glitter into tacky gel and cure 30 to 60 seconds between layers. Depth note, layering a tinted jelly polish under the glitter enriches depth so the sparkle looks suspended.
Style/Vibe: Sparkle Gradient
Best For: Medium oval / parties and weekends
Skill: Beginner
Mistake to Avoid: Piling glitter on in one go, which creates a bumpy finish instead of a soft gradient.
7. Minimal Geometric Green Lines
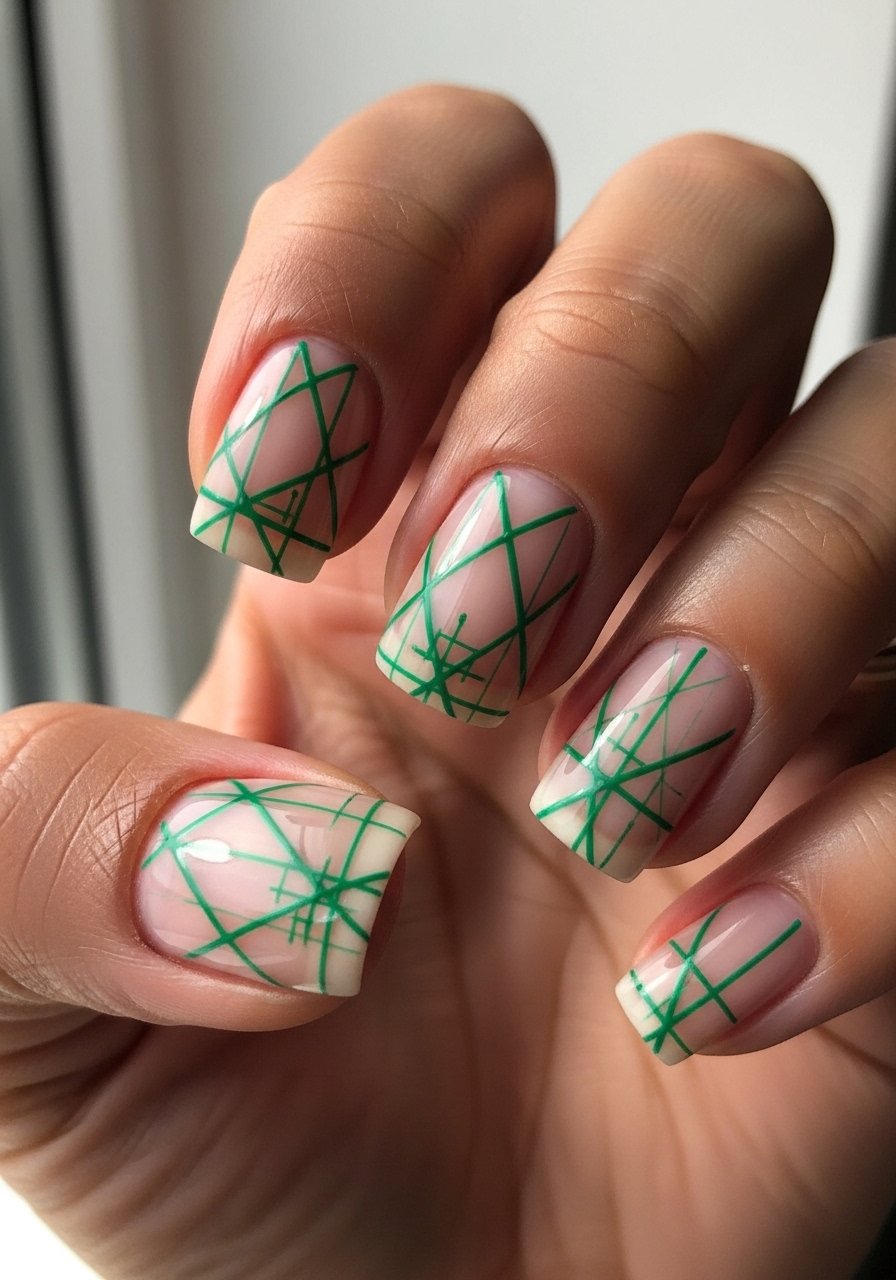
Thin geometric lines give green a modern, editorial edge while staying subtle. Use a striping brush or ultra-thin polish pen to draw single-line triangles or offset squares on a neutral base. This look suits short nails and people who want a graphic touch without full coverage. A striping brush plus a clean sheer nude polish does most of the work. Technique detail, steady your painting hand on a table and lift the brush in one confident stroke to avoid shaky lines.
Style/Vibe: Graphic Minimal
Best For: Short square / work-friendly creativity
Skill: Beginner to Intermediate
Mistake to Avoid: Trying to correct shaky lines by repainting over them, which makes lines look thick and messy.
Before the rest of the list, here are the actual products I reach for when trying these looks at home.
Green Mani Tools and Polishes
Polishes:
- Emerald green nail polish (~$8-18). A rich pigment for saturated looks.
- Sage nail polish (~$6-14). Soft, work-friendly green.
Top and Base Coats:
- Hydrating nail base coat (~$8-15). Prevents staining and smooths the canvas.
- Matte top coat (~$7-12). For that modern flat finish.
Tools & Accents:
- Striping tape nail art set (~$5-10). Crisp lines and reverse French.
- Green glitter nail powder (~$6-12). For gradients and sparkle.
- Nail art brush set (~$8-16). Detail work, marble, and stripes.
8. Pearlescent Tea-Leaf Sheer
Sheer pearlescent green is for people who want green that reads refined. Apply a thin pearlescent green jelly over the nail for a tea-leaf tint, then buff a micro-chrome powder lightly on the curve to catch the light. The result is delicate and wearable for office days or brunch. Use a sheer pearlescent green polish and a small jar of micro chrome powder. Depth signal, two very thin coats keep the translucency while showing shimmer, and a thin glossy top coat brings the chrome to life. This adapts well across nail lengths.
Style/Vibe: Soft Sheer Shine
Best For: Medium squoval / daytime elegance
Skill: Beginner
Mistake to Avoid: Applying chrome powder over an uneven base, which creates patchy reflective spots.
9. Pressed Floral Accent Encapsulation
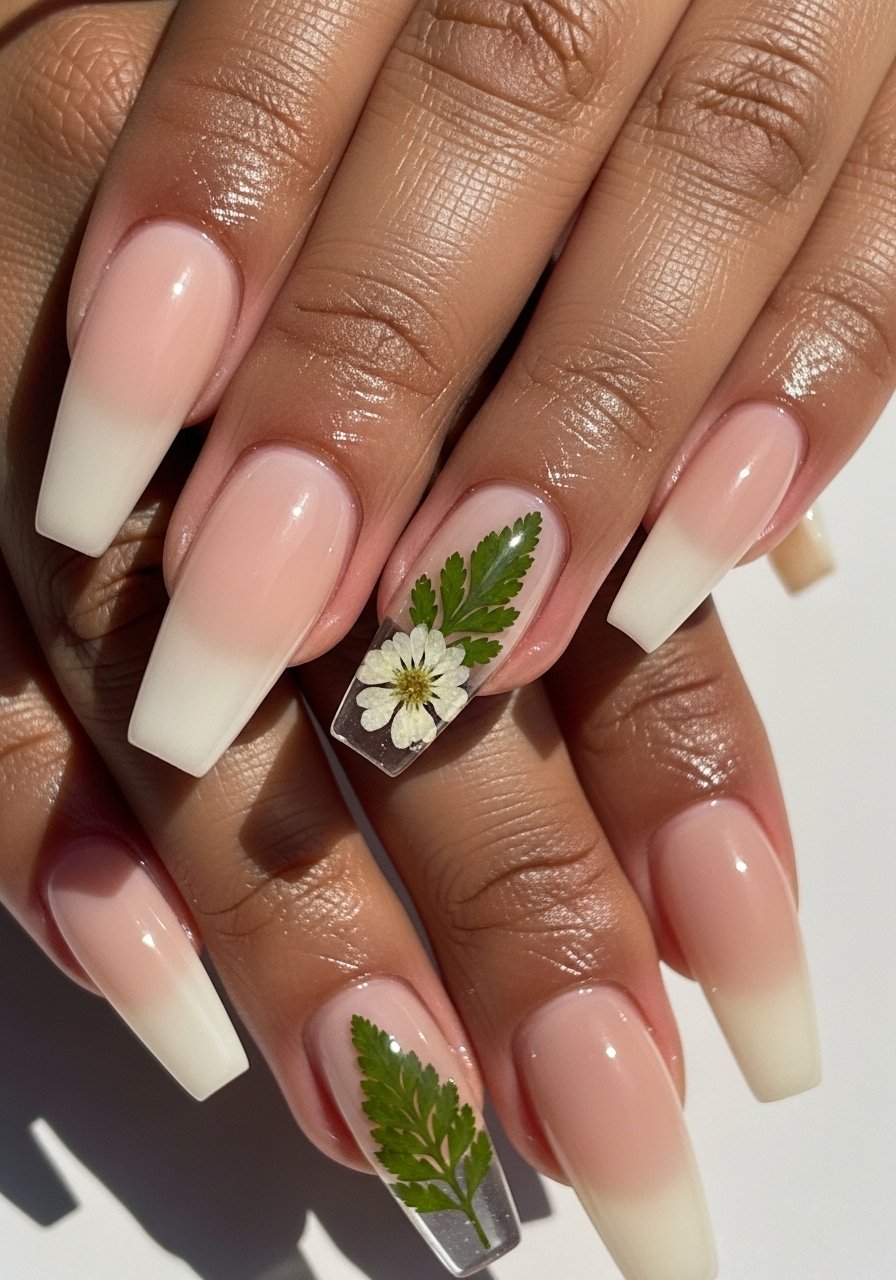
Pressed florals give green a garden feel without kitsch. Arrange tiny dried greenery or petals on a tacky layer of clear builder gel and encapsulate with another layer to seal them flat. The look is especially pretty on a single accent nail paired with a muted green or clear base. Use dried flowers for nails and a clear builder gel. Cure each gel layer 30 to 60 seconds depending on your lamp. This is an advanced accent that reads editorial and lasts when sealed properly. Depth note, trim florals to under 2 millimeters wide so they lie flat under gel.
Style/Vibe: Botanical Accent
Best For: Long coffin / special occasions
Skill: Advanced
Mistake to Avoid: Encapsulating without pressing out air pockets, which traps bubbles under the flowers.
Green Mani Maintenance Moves
Thin coats beat one thick coat every time. Three thin layers of a quick-dry top coat look smoother and survive chipping better than one thick, gloopy layer.
Using a small amount of cuticle oil daily softens the nail bed and keeps any green shade from looking dry, especially matte finishes.
If you work with gel, keep an LED lamp near your setup. Curing each thin layer 30 to 60 seconds prevents overcuring and makes removal easier.
Most people clean up edges with a tiny brush dipped in remover rather than scraping. Grab a fine nail cleanup brush and swipe around the cuticle for a cleaner finish.
