
I tried to recreate three different Instagram manis before a friend’s summer wedding and every one looked flat in photos, or worse, chipped by dinner. After the third redo I stopped chasing trends and started thinking about what actually reads well in camera flash, sits comfortably for long hugs, and survives a buffet run without looking sad.
These ideas are for guests who want nails that photograph reliably, pack light for travel, and do not require salon-level skill every time. Expect mostly short to medium lengths, beginner to intermediate techniques, and a mix of gel-safe and polish-only options that can be finished in under an hour with the right tools.
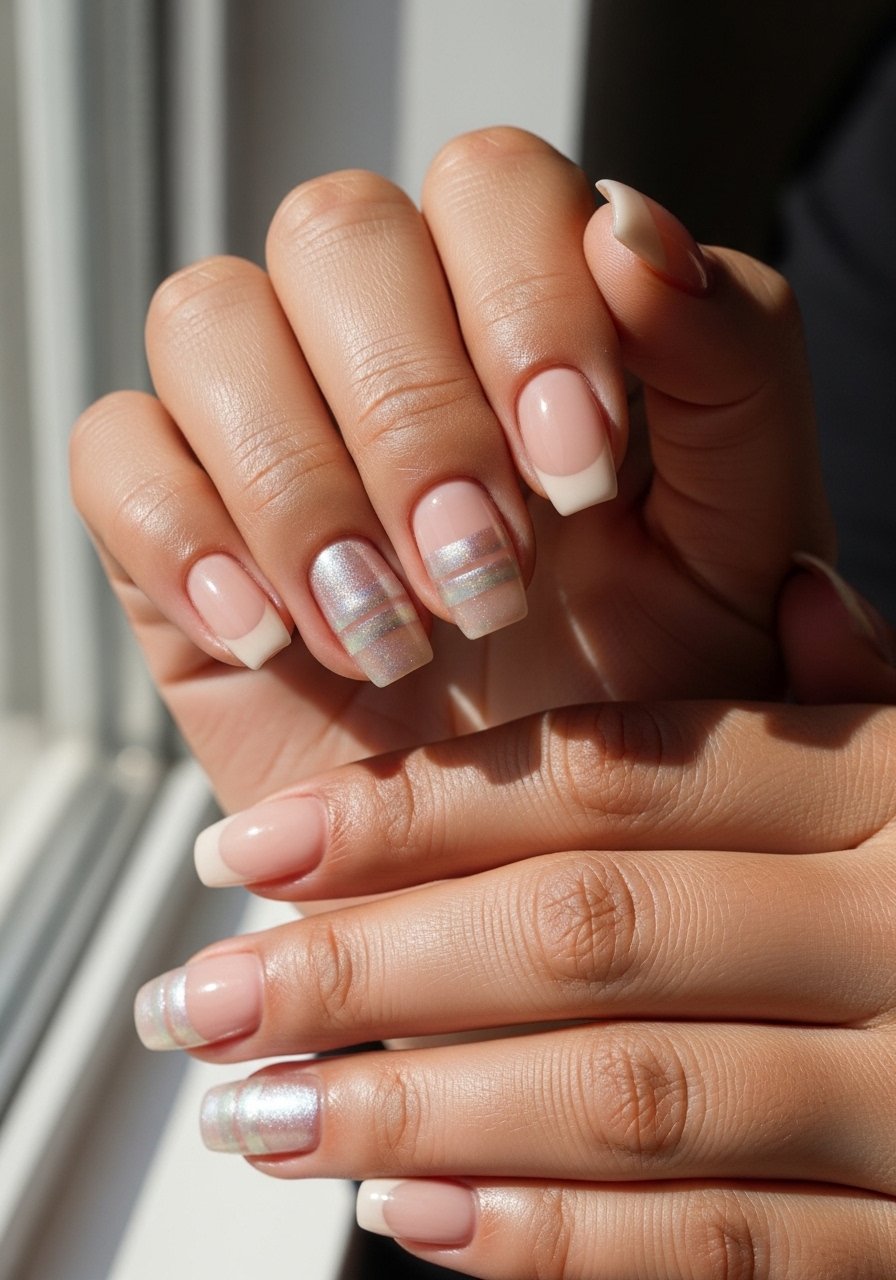
1. Sheer Pearl With Gold Leaf Edge

A sheer pearl base reads luminous in flash without looking glossy like a gel. Paint two thin coats of a sheer pearlescent polish, curing each 30 seconds under LED if you use gel, then press 1mm gold leaf strips along the free edge and seal with one 60-second top coat. The small amount of metallic keeps the look bridal-appropriate while staying subtle next to a patterned dress. It fits short nails and is beginner friendly if you use tweezers for the foil. Try a strengthening base first to prevent lifting on natural nails. I prefer pairing this with a quick-dry top coat for travel days, fast-dry top coat and gold-foil-flakes.
Style/Vibe: Soft metallic accent
Best For: Short nails / daytime receptions
Skill: Beginner
Mistake to Avoid: Painting one thick coat of pearl polish, which pools and hides the gold leaf detail.
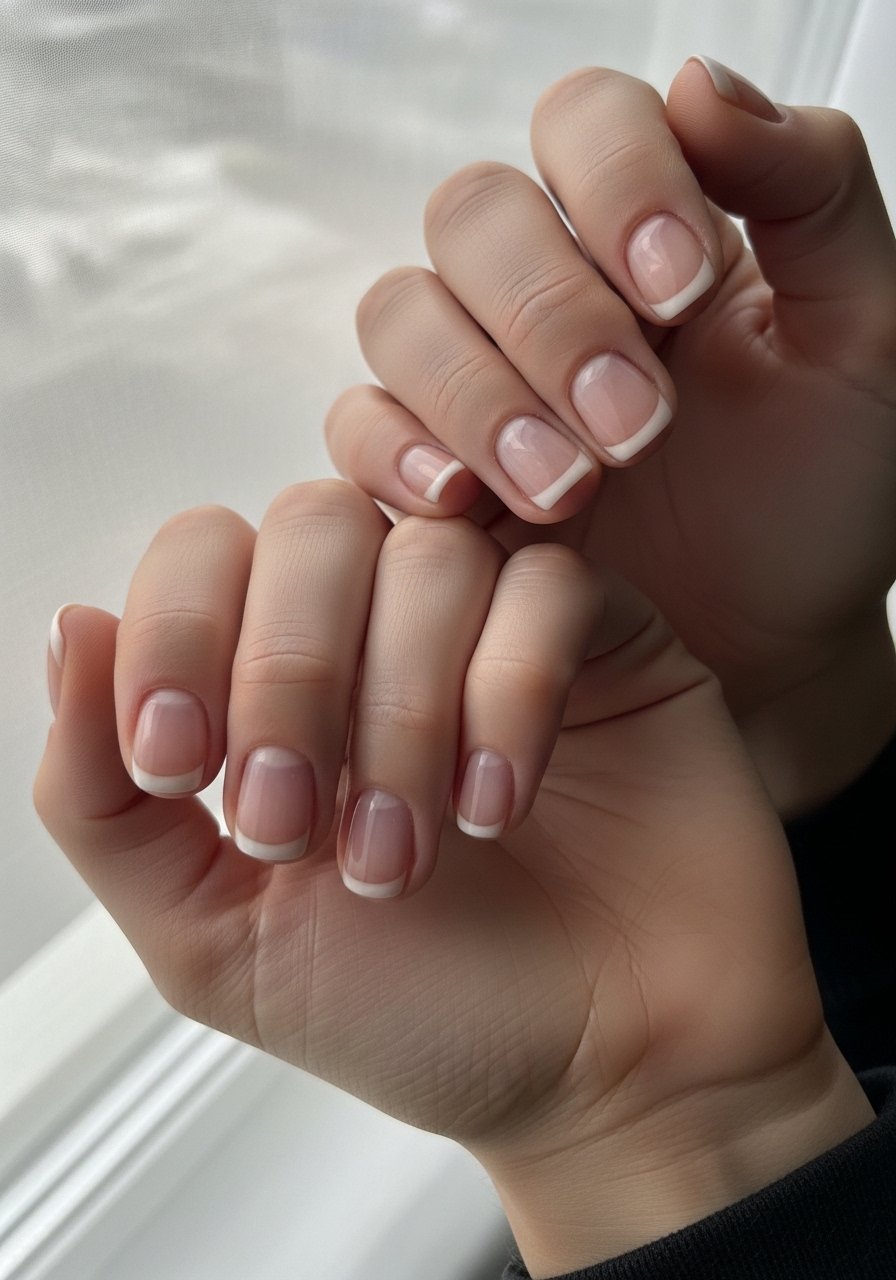
2. Short Satin French With Negative Space
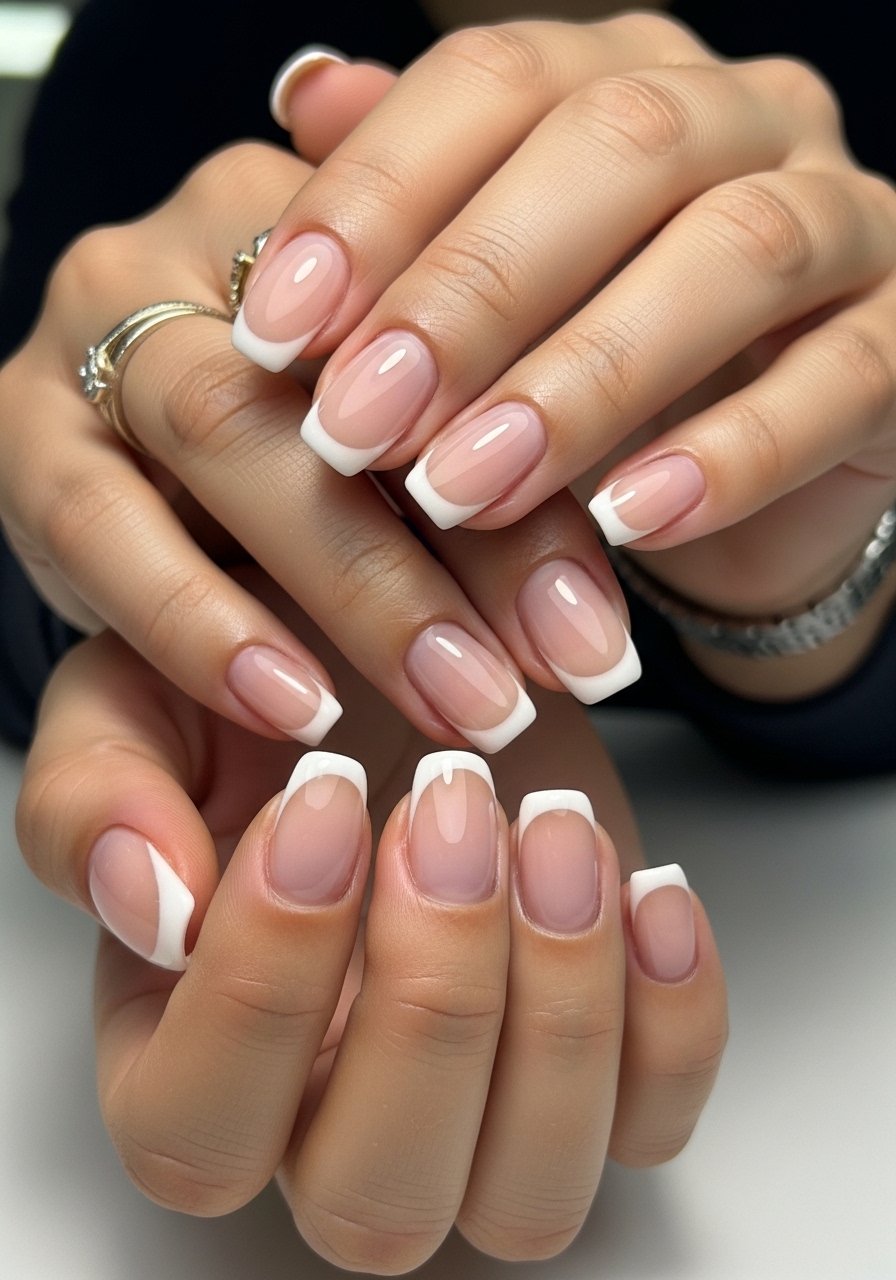
For guests who hate waiting but want restraint, a satin-finish French with deliberate negative space looks modern without length. Use two thin coats of opaque white on the tips only, leaving a 2mm crescent of natural nail at the base. Finish with a matte top coat for a soft fabric-like look that reduces glare in photos. This requires minimal file work and is ideal if your dress has long sleeves or lace. For an easy at-home attempt, a striping brush helps and a gel polish cured 30 seconds per layer makes the edge cleaner. Try precision striping brush and matte top coat.
Style/Vibe: Modern classic
Best For: Short nails / formal dinners
Skill: Beginner
Mistake to Avoid: Extending white too far down the nail, which makes fingers look shorter.
3. Soft Blush Gradient For Dresses With Warm Tones
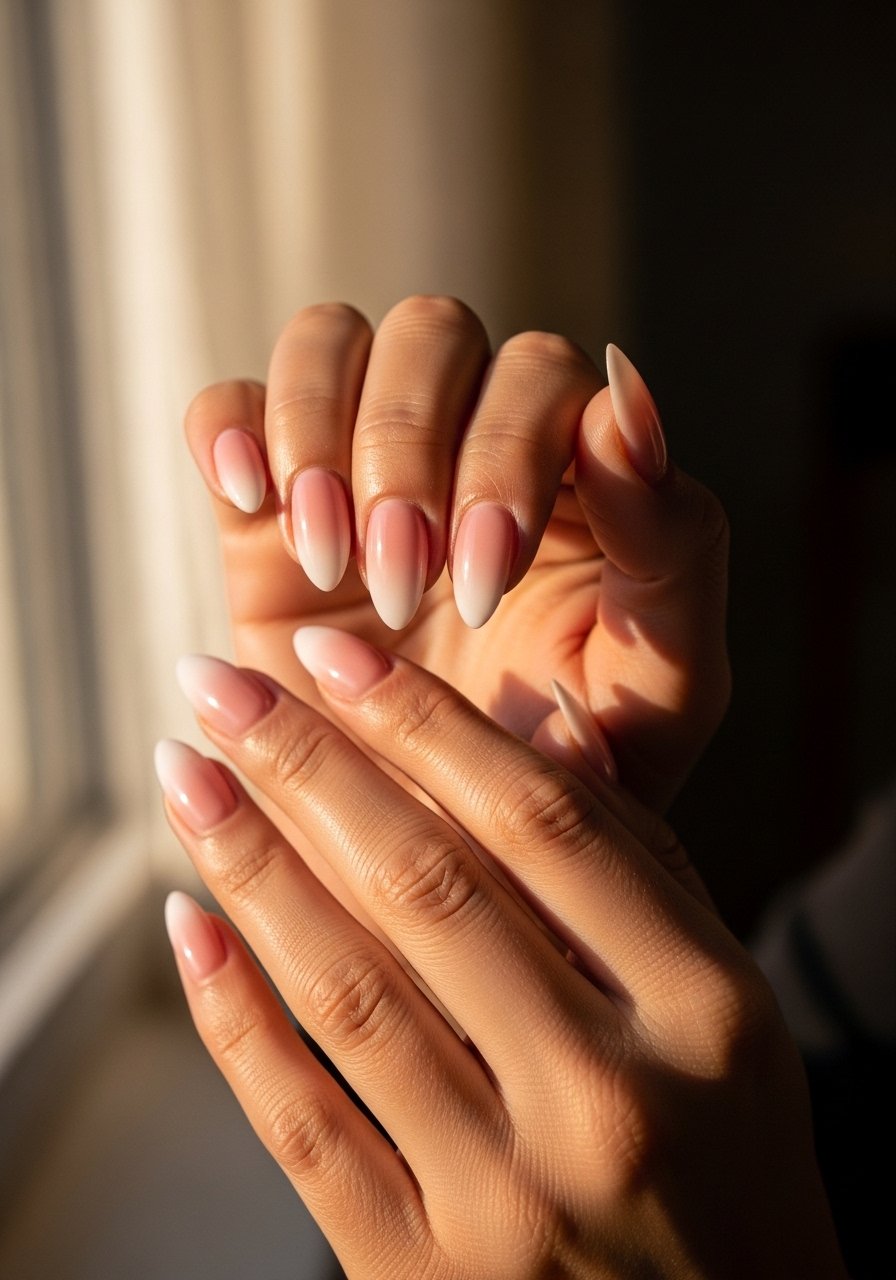
A soft blush gradient ties into warm-toned dresses without clashing. Sponge a 70/30 mix of blush to nude polish, building three feather-light layers rather than one heavy swipe. For gel users, cure each layer for 30 seconds. The subtle fade reads better in flash than a block color and masks tiny chips, which is handy for long receptions. This style pairs with neutral jewelry and suits medium-length nails. I like using a sheer builder gel as the base for extra durability, then a flexible top coat. Use a sponge and blush-pink-polish for quick blending.
Style/Vibe: Soft ombre
Best For: Medium nails / outdoor ceremonies
Skill: Intermediate
Mistake to Avoid: Applying the gradient in one thick sponge dab that leaves visible ridges.
4. Tiny Accent Rhinestone On One Nail
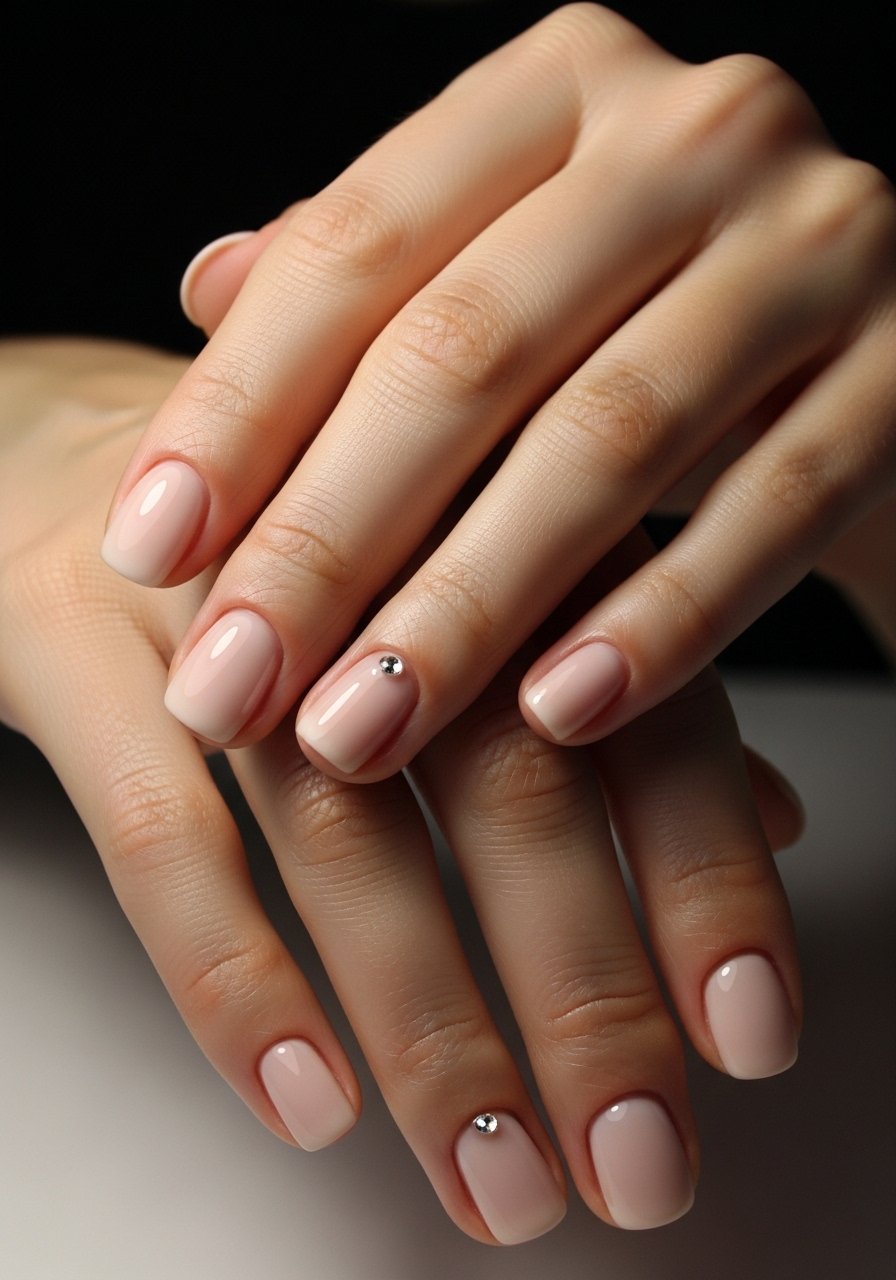
If you want sparkle without going full crystal, place one 1.5mm rhinestone at the base of the ring finger over a sheer neutral. It creates a focal point in close-up photos of ring shots, but keeps the rest of the hand low-key for hugging and eating. Use a tiny dab of gel or nail glue and press for five seconds, then seal with top coat. This is a wallet-friendly option that works on short natural nails and with any polish color. Pair with a clear cuticle oil for longevity. Try mini rhinestones pack and cuticle oil pen.
Style/Vibe: Subtle sparkle
Best For: Short nails / ring photo moments
Skill: Beginner
Mistake to Avoid: Using a giant rhinestone that looks costume-like in close-up shots.
5. Sheer Taupe With Satin Finish For Neutral Dresses
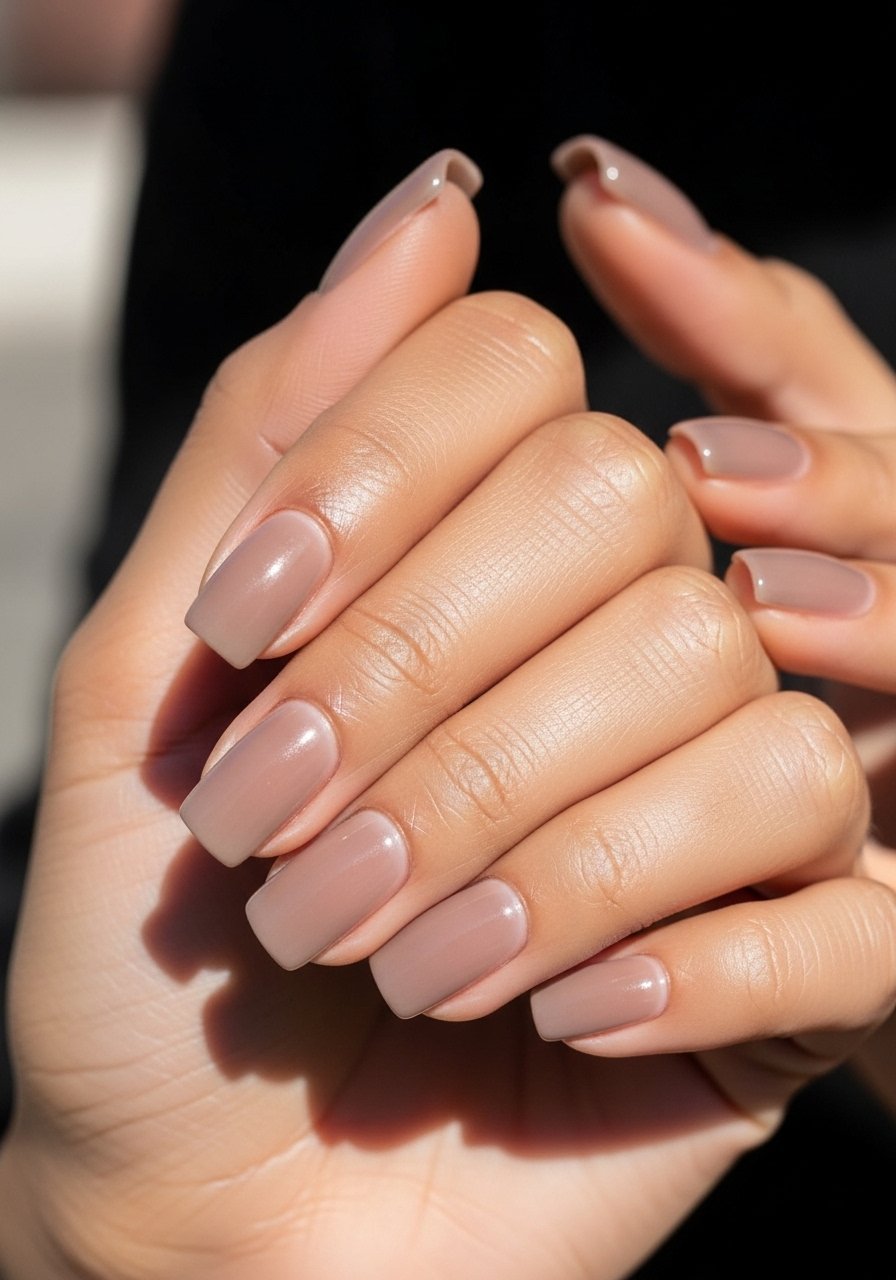
A sheer taupe with a satin finish reads polished and versatile next to most dress colors. Two thin coats, each dried fully, keep the look breathable. Satin top coats mute brightness so your nails do not steal focus from patterned outfits. This is a great no-fuss choice for guests who want a neat look that hides minor chips. It also translates well between natural, gel, and dip systems if you prefer salon durability. For fragile nails, add a strengthening base and a 60-second cure top coat if using gel. I like pairing it with a glass nail file in my travel kit and satin-top-coat.
Style/Vibe: Understated neutral
Best For: Medium nails / mixed dress colors
Skill: Beginner
Mistake to Avoid: Choosing a taupe that is too gray or too brown without testing it next to your outfit.
6. Photogenic Pearl Chrome Accent
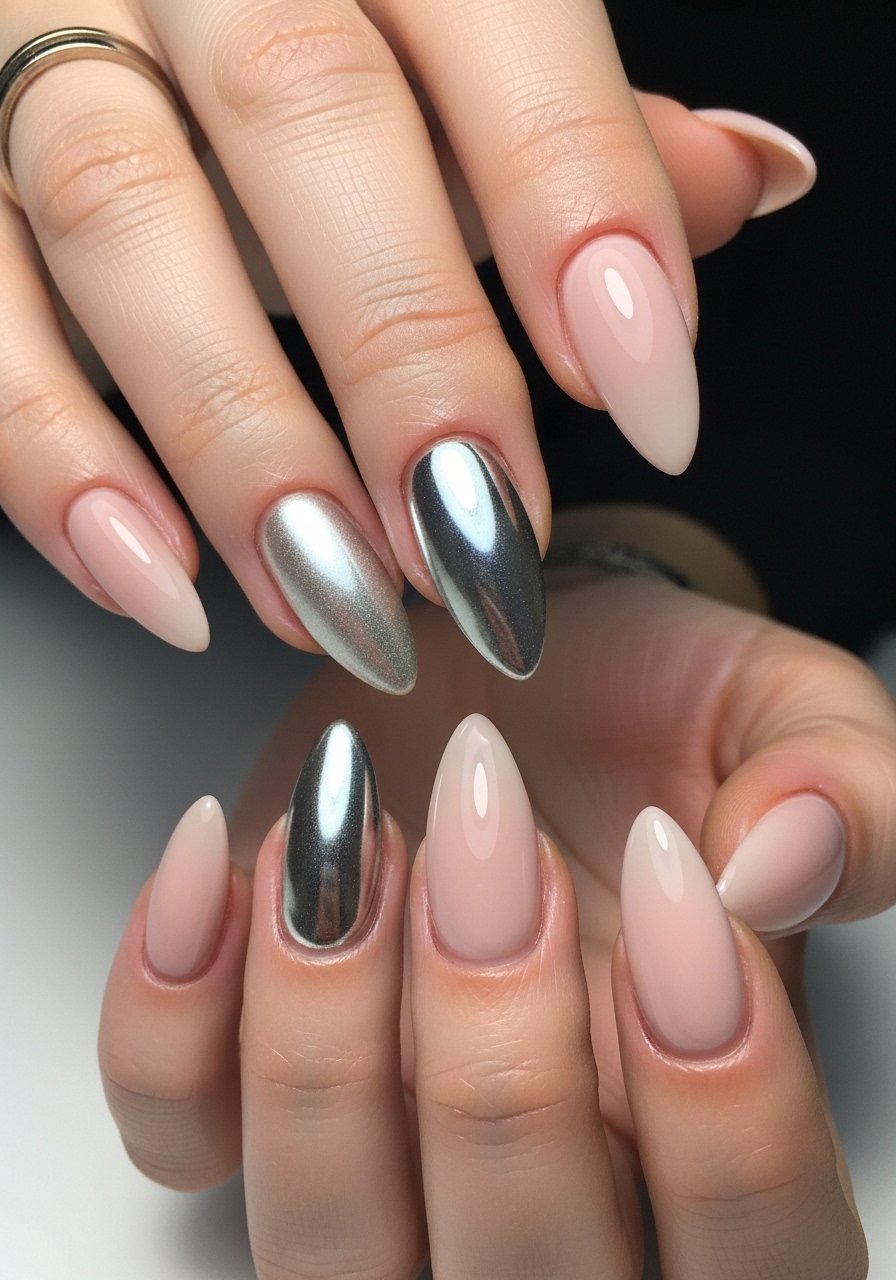
A tiny pearl chrome accent reflects flash in a friendly way and photographs like a highlight on skin. Keep the chrome to one or two nails only. Apply a sticky-base coat, rub on chrome powder with 2mm pressure, then finish with a glossy 60-second top coat. Chrome looks better with medium to long nails but a tiny accent on short nails can still read. This is a gap most articles skip, the exact pressure and rub count matter for even shimmer. I use a dedicated applicator and a chrome-powder with a no-wipe top coat.
Style/Vibe: Flash-friendly accent
Best For: Medium to long nails / evening receptions
Skill: Intermediate
Mistake to Avoid: Rubbing chrome too hard, which causes streaks instead of a smooth mirror effect.
7. Gel Overlay On Natural Short Nails
If you want gel durability without extensions, a thin builder-gel overlay adds strength and a subtle natural lift while keeping real nails. The technique is two coats of builder gel, each cured for 30 to 60 seconds, followed by one 60-second finish. It protects against splitting and still photographs as your natural nail, not a sculpted tip. This is a lifesaver for guests who use their hands a lot. Ask your tech for a soft apex and avoid overfiling. For travel, bring a 9W LED lamp for quick at-home touch-ups and builder-gel for minor fills.
Style/Vibe: Natural strong hold
Best For: Short nails / active guests
Skill: Intermediate
Mistake to Avoid: Filing too thin after overlay, which removes the protective layer and creates weak points.
Before the rest of the ideas, these are the products I actually reach for when I need a manicure to last a long reception.
Guest Mani Kit Picks
Tools & Basics:
- nail-file (~$4-8). Cheap, replace regularly.
- buffer-block (~$3-7). Smooths ridges before polish.
- cuticle-pusher (~$6-12). Use gently.
Polish & Finish:
- fast-dry top coat (~$8-14). Saves time.
- satin-top-coat (~$10-15). For non-gloss looks.
- cuticle-oil-pen (~$6-10). Keeps hands camera-ready.
Extras:
- gold-foil-flakes (~$5-12) for tiny accents.
- mini rhinestones pack (~$4-9) for ring-finger sparkle.
8. Satin Nude With Single Matte Tip
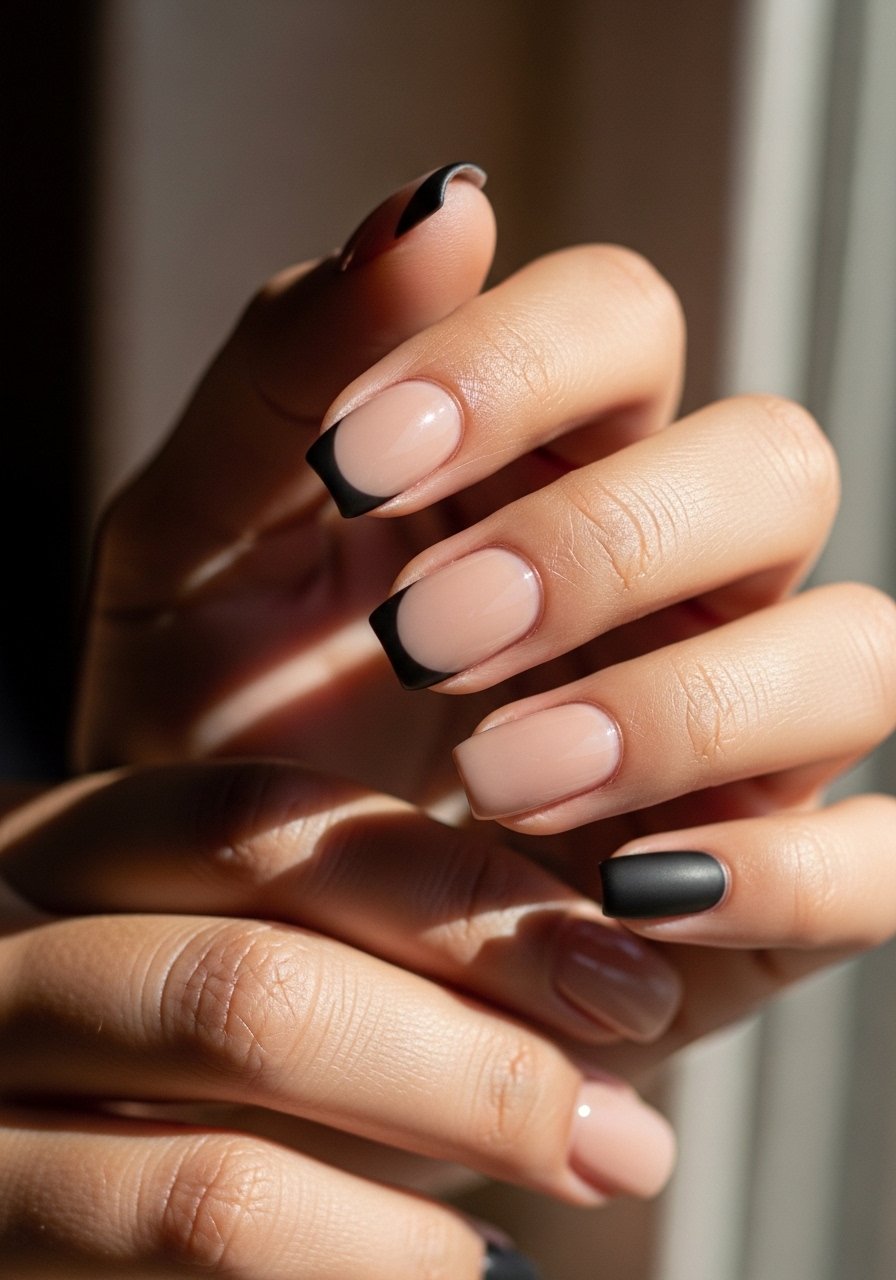
A single matte tip gives a contemporary twist to a safe nude. Keep the matte to one finger so it does not read punk at family events. Apply two thin coats of nude, cure each layer if using gel, then mask one tip and buff to matte with a matte top coat. It pairs well with darker dresses and looks deliberate in photos. For short nails this keeps proportions balanced. I often start with a ridge-filling base to avoid bumps in the matte finish and use a matte-top-coat.
Style/Vibe: Minimal edge
Best For: Medium nails / evening attire
Skill: Beginner
Mistake to Avoid: Making the matte area too large so it overwhelms the hand.
9. Warm Coral Pop On One Nail
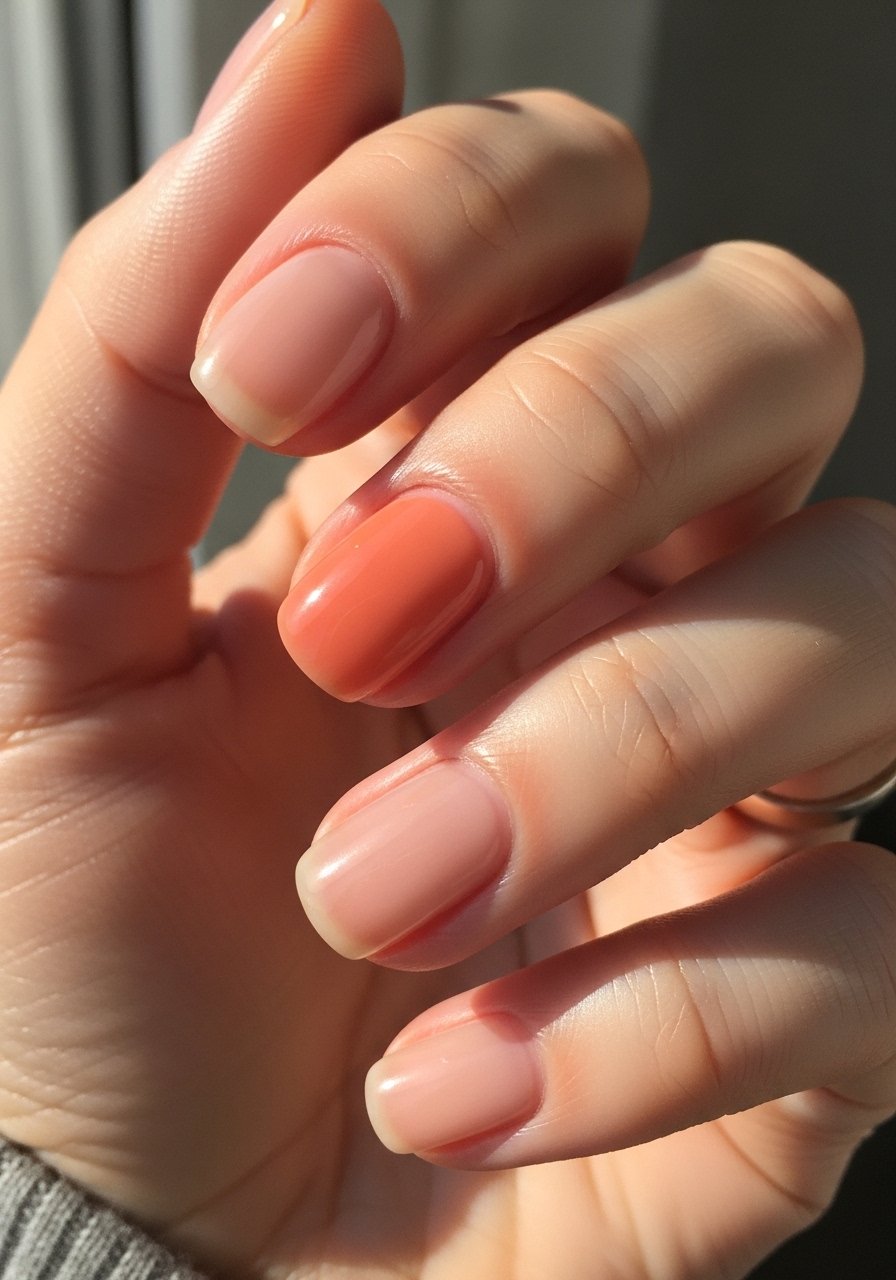
If you expect lots of photos with the couple and guests in muted tones, one warm coral accent nail brings life without clashing. Paint three thin coats of coral on one nail only, each layer drying fully, to avoid streaks. Coral shows up well against greenery and suits olive and fair skin tones. Keep the rest of the hand a clean sheer or pale pink. This is a competitor-gap item because many lists ignore single-accent color that photographs consistently. I pack a tiny polish bottle in my clutch and a coral-polish for touch-ups.
Style/Vibe: Single-color pop
Best For: Short nails / outdoor weddings
Skill: Beginner
Mistake to Avoid: Choosing a neon coral that reads oversaturated on camera.
10. Lace-Inspired Negative Space

For anyone wearing lace, mimic the fabric with thin white negative-space strokes across a sheer base. Use a 0.5mm liner brush and paint three thin lines that do not touch, keeping 1.5mm gaps for the skin to show through. This looks bridal-appropriate but guest-friendly and photographs without creating busy glare. The technique feels advanced but is achievable with a steady hand and practice on a single nail first. Seal with a flexible top coat so the painted lines do not crack. Try a fine-liner-brush.
Style/Vibe: Delicate patterned accent
Best For: Medium nails / wedding with lace details
Skill: Intermediate
Mistake to Avoid: Overworking the brush and creating thick, clumpy lines.
11. Short-Stacked Pearlescent Tips
Stacked pearlescent tips involve layering a sheer nude base, one thin coat of pearlescent polish on the tip, and a second pearlescent layer with a tiny touch of shimmer powder for depth. The rule is two pearlescent layers max, otherwise the tip reads opaque and heavy. This technique reads like a fresh manicure in photos while keeping hands practical for dancing and toasting. It works great on short nails because the tip stays proportional. I use a micro brush to feather the edge and finish with a flexible top coat. Try pearlescent-polish.
Style/Vibe: Layered luminous tip
Best For: Short nails / evening receptions
Skill: Intermediate
Mistake to Avoid: Painting three thick pearlescent coats which looks clumpy and artificial.
Manicure Survival Moves
Thin coats beat one thick coat every time. Three thin layers of fast-dry top coat look smoother and last longer than one gloopy layer.
Grab cuticle oil and apply twice the day before any long event. It plumps the skin and keeps photos from showing dry lines.
When you need a fast fix, a mini LED lamp cures a single-coat gel in 30 to 60 seconds and prevents smudges.
Most people file the nail straight across, which causes chips. File with a slight curve following the fingertip, then finish with a soft buffer and nail-file for a cleaner edge.
If your mani will face heavy use, choose a builder-gel overlay for short nails, not extensions. Builder-gel-clear adds strength without bulk.
