
I kept sketching full bouquets on my forearm and watching them blur into a yellow smudge as they healed. The narcissus looks delicate in photos, but on skin the fine white petals and tiny corona need space and contrast to read years later. After a few fixes across sleeves and cover-ups, I learned to plan placement, negative space, and aftercare before the needle hit.
These thirteen arm ideas are small to mid-scale designs that work whether you want something obvious or easy to hide under long sleeves. They run from one-session pieces to multi-session shading work. I pulled these styles from sketches and conversations across five shops I have visited, so expect a mix of fine-line, single-needle detail, and bolder graphic options that suit different budgets and pain tolerances.
1. Single Narcissus Linework, Inner Forearm
A single-needle outline of the narcissus reads like handwriting on the inner arm, which makes it great for first-timers and tight schedules. The thin lines let the corona stay crisp, so the flower keeps its shape even as it fades. It feels quiet and personal, a low-budget one-session option that pairs well with a narrow script or small dates. Use a gentle aftercare balm and avoid thick ointments that trap moisture and cause ink migration. I like including a small fragrance-free healing balm to the aftercare plan.
Style/Technique: Fine single-needle linework
Pain Level: 3/10
Session Time: 0.5 to 1 hour
Best For: Inner forearm, first tattoos, minimalists
Mistake to Avoid: Packing fine detail too close together, which will blur during the first week of healing.
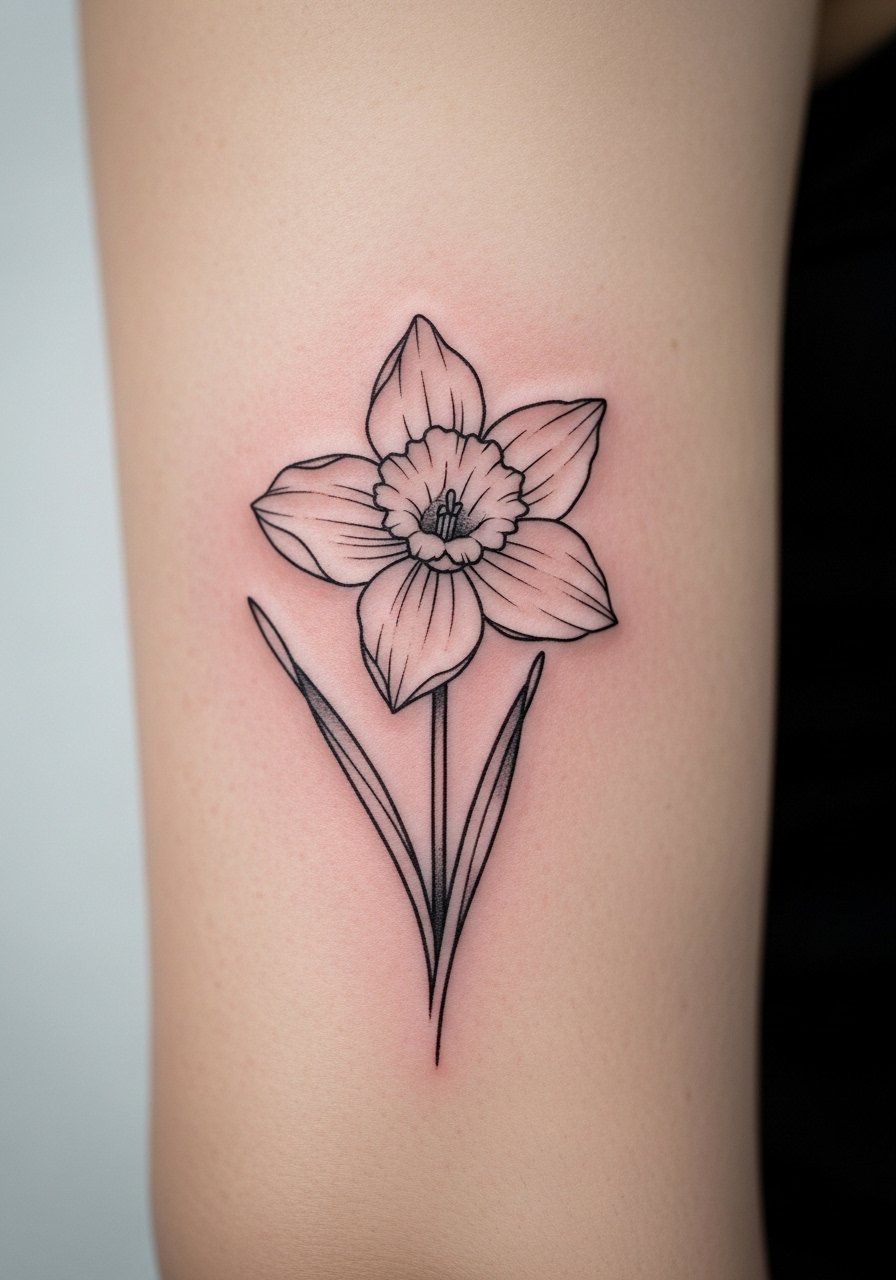
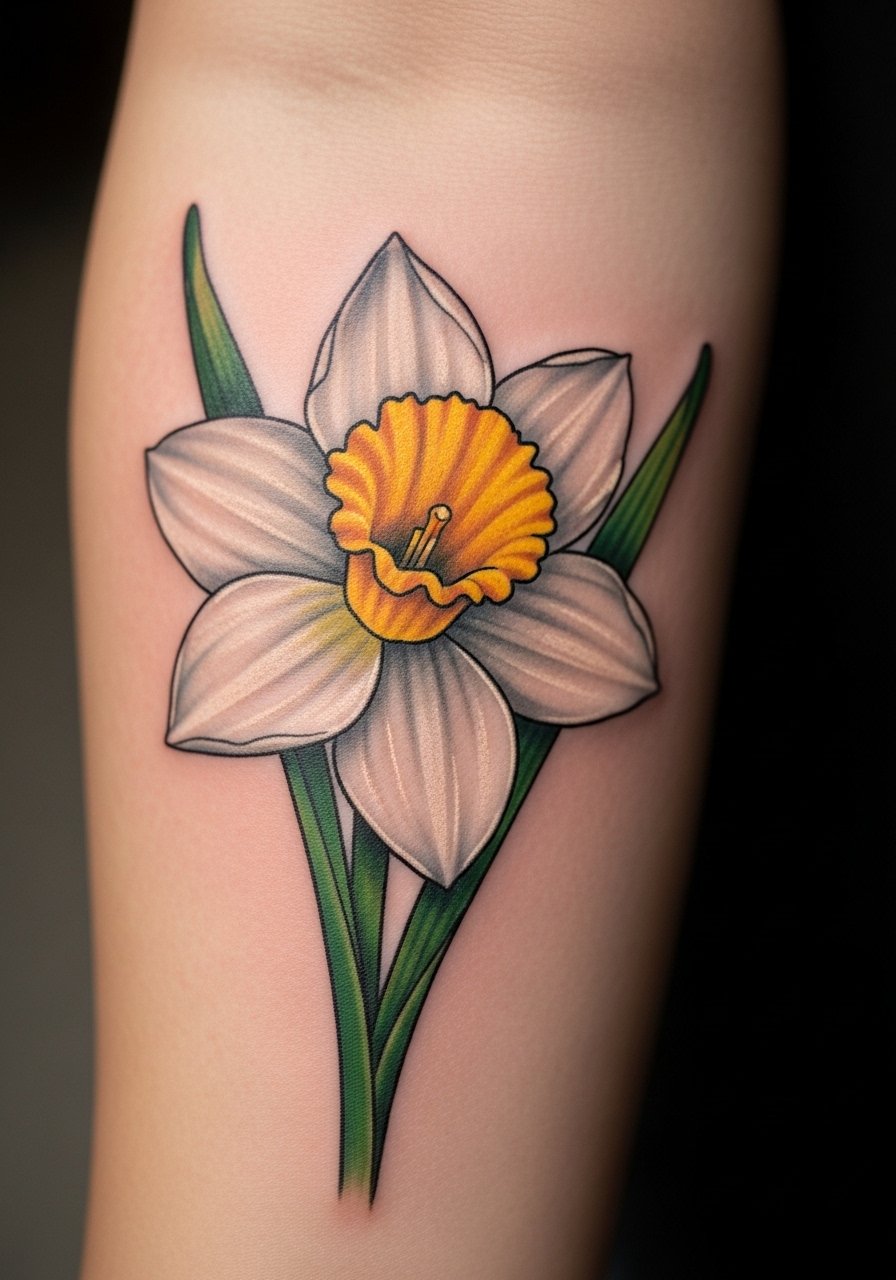
2. Little Narcissus with Stem, Outer Wrist
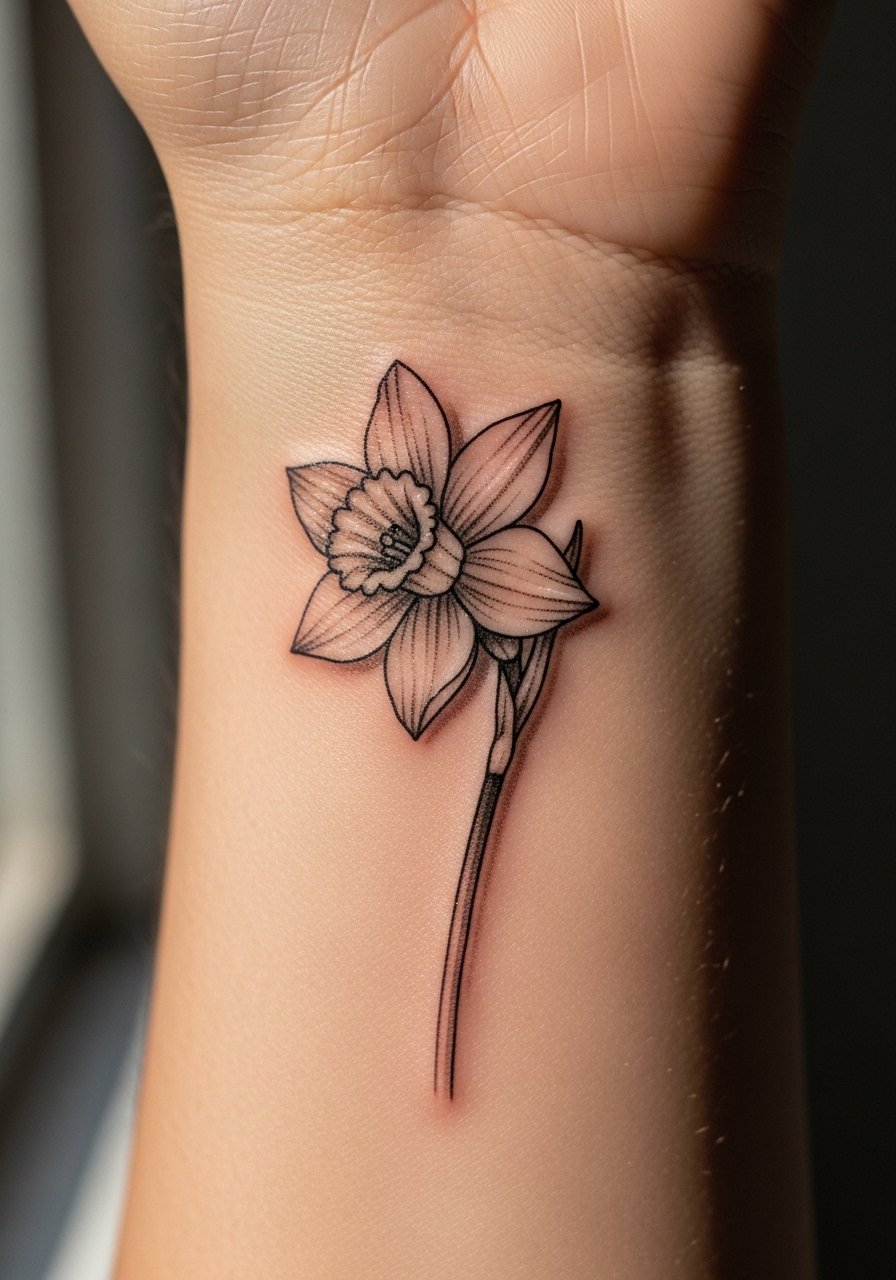
A vertical stem carries the eye along the wrist and gives the bloom breathing room, which helps a narcissus keep its identity on a small canvas. This placement is visible but easy to cover with bracelets at work. Design this as a compact, slightly graphic piece that uses negative space inside the petals for contrast. Budget-wise it is beginner-friendly and often done in one appointment. Add a thin layer of unscented gentle soap to your cleaning kit to prevent irritation during the first few days.
Style/Technique: Small botanical with negative space
Pain Level: 2/10
Session Time: 0.5 to 1 hour
Best For: Outer wrist, coverable work settings
Mistake to Avoid: Using heavy black fill to force contrast, which can overpower the delicate shape.
3. Corona-First Micro Realism, Upper Forearm
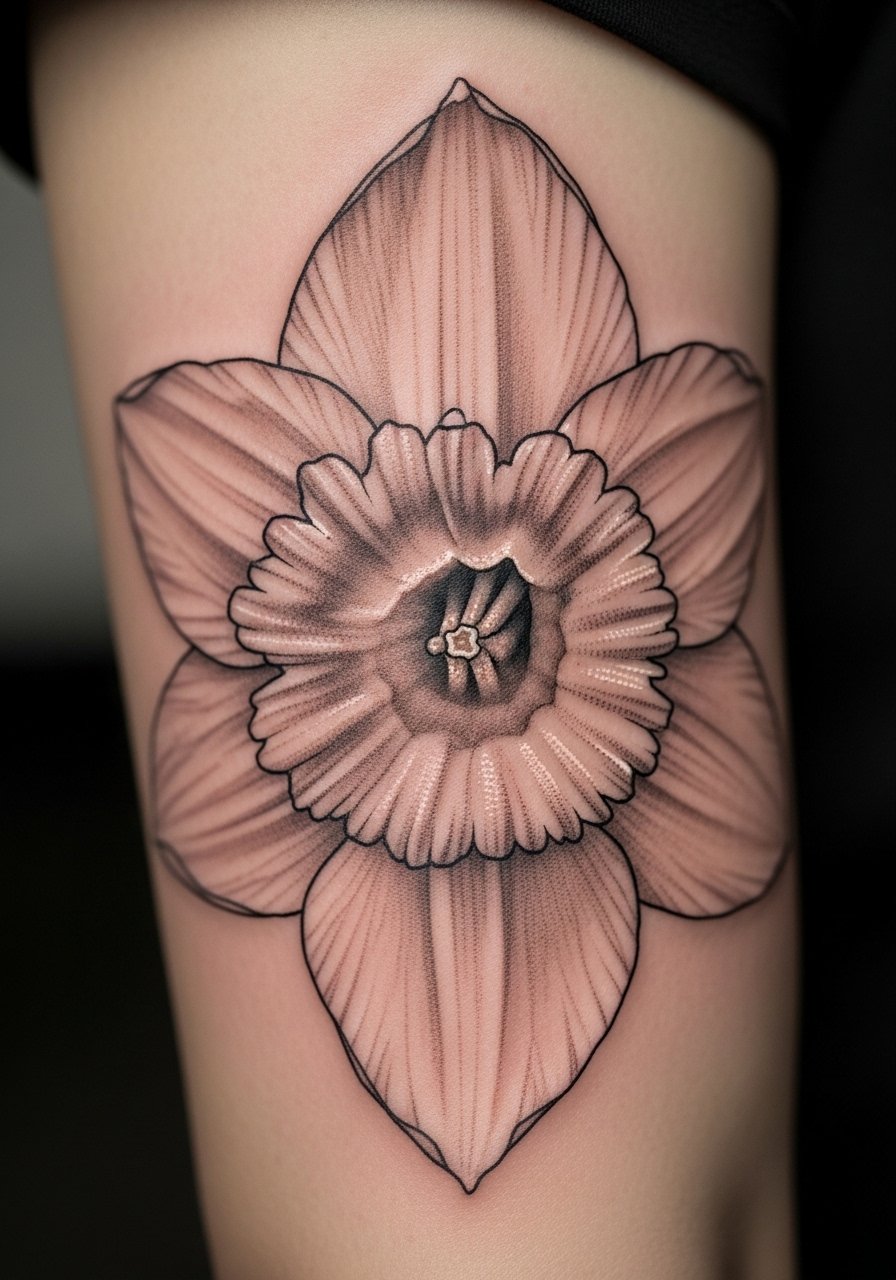
Centering micro-realism on the corona gives you a tiny focal point that still reads at arm distance. The trick is soft dotwork shading around the corona to imply petals without crowding the skin. This feels intimate and artistic, better for intermediate artists who do dot shading. It ages gracefully because the central detail anchors the image as edges soften. I recommend bringing a reference photo and asking for slightly larger spacing between petal veins. Keep a sterile non-stick dressing on hand for the first 24 hours.
Style/Technique: Micro-realism with dotwork shading
Pain Level: 4/10
Session Time: 1 to 2 hours
Best For: Upper forearm, art-forward clients
Mistake to Avoid: Requesting copybook-level tiny detail without allowing the artist to scale it up slightly for longevity.
4. Bold Graphic Narcissus, Outer Bicep
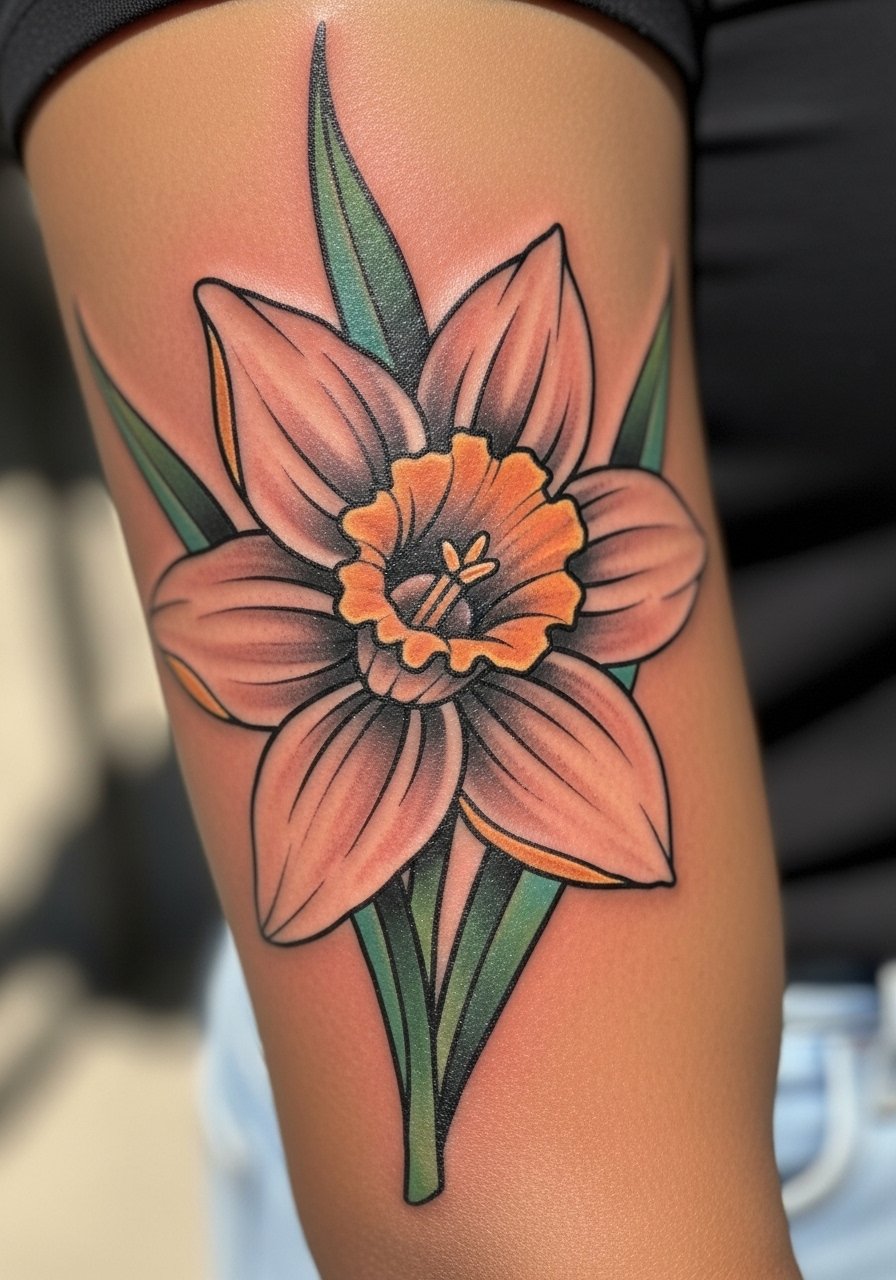
A graphic narcissus uses flat color blocks and thicker outlines to read from a distance, which is perfect for the bicep. It brings a modern poster-like vibe and ages into a pleasant, graphic silhouette. This option is higher contrast and fits someone who wants visible arm art with less concern for ultra-fine detail. It often needs one session for linework and one for fill, so budget accordingly. Pair with a broad-spectrum tattoo sunscreen once fully healed to preserve the flat fills.
Style/Technique: Bold neo-traditional graphic
Pain Level: 5/10
Session Time: 1 to 2 hours
Best For: Outer bicep, people preferring visible, bold pieces
Mistake to Avoid: Filling small petals with heavy color that will crack and flake during healing.
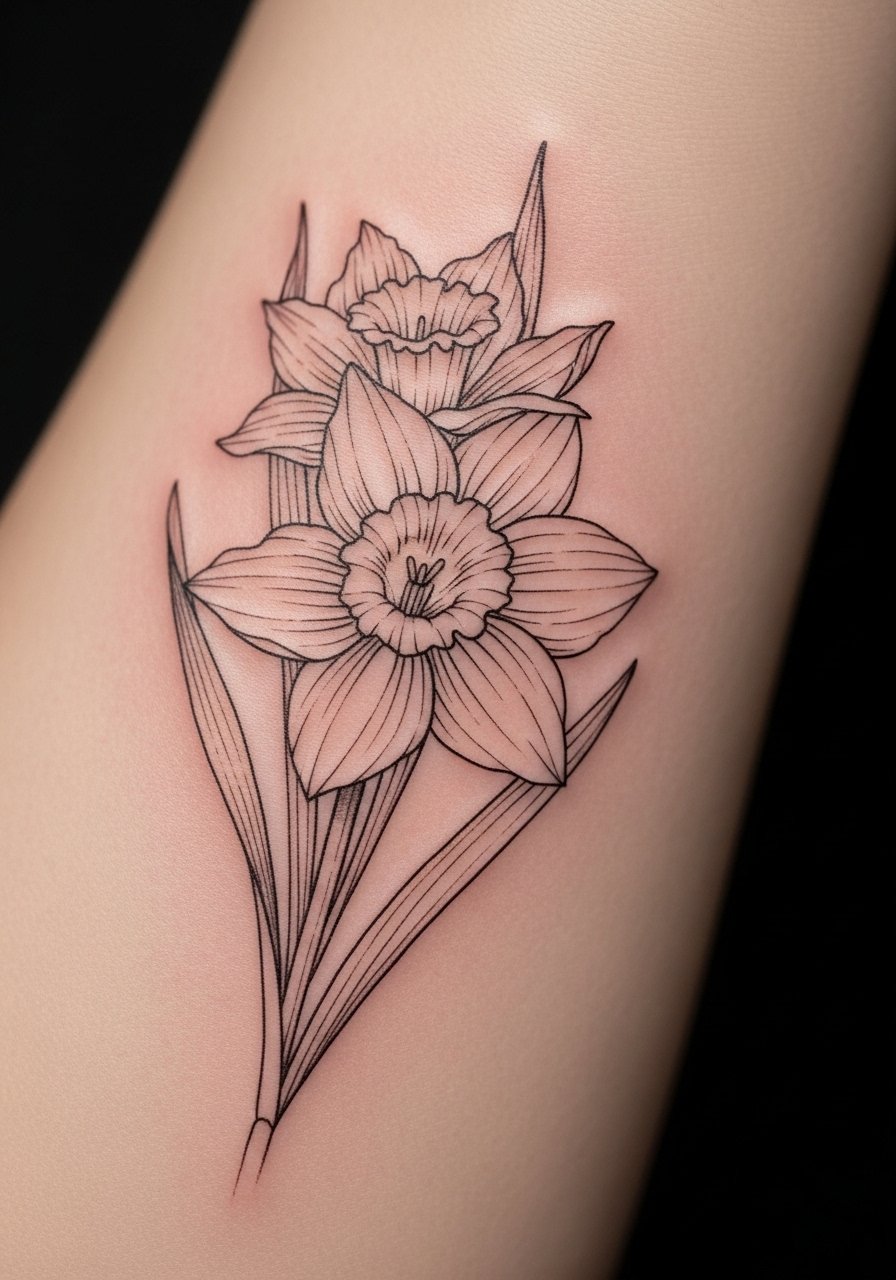
5. Tiny Narcissus Cluster, Side Forearm
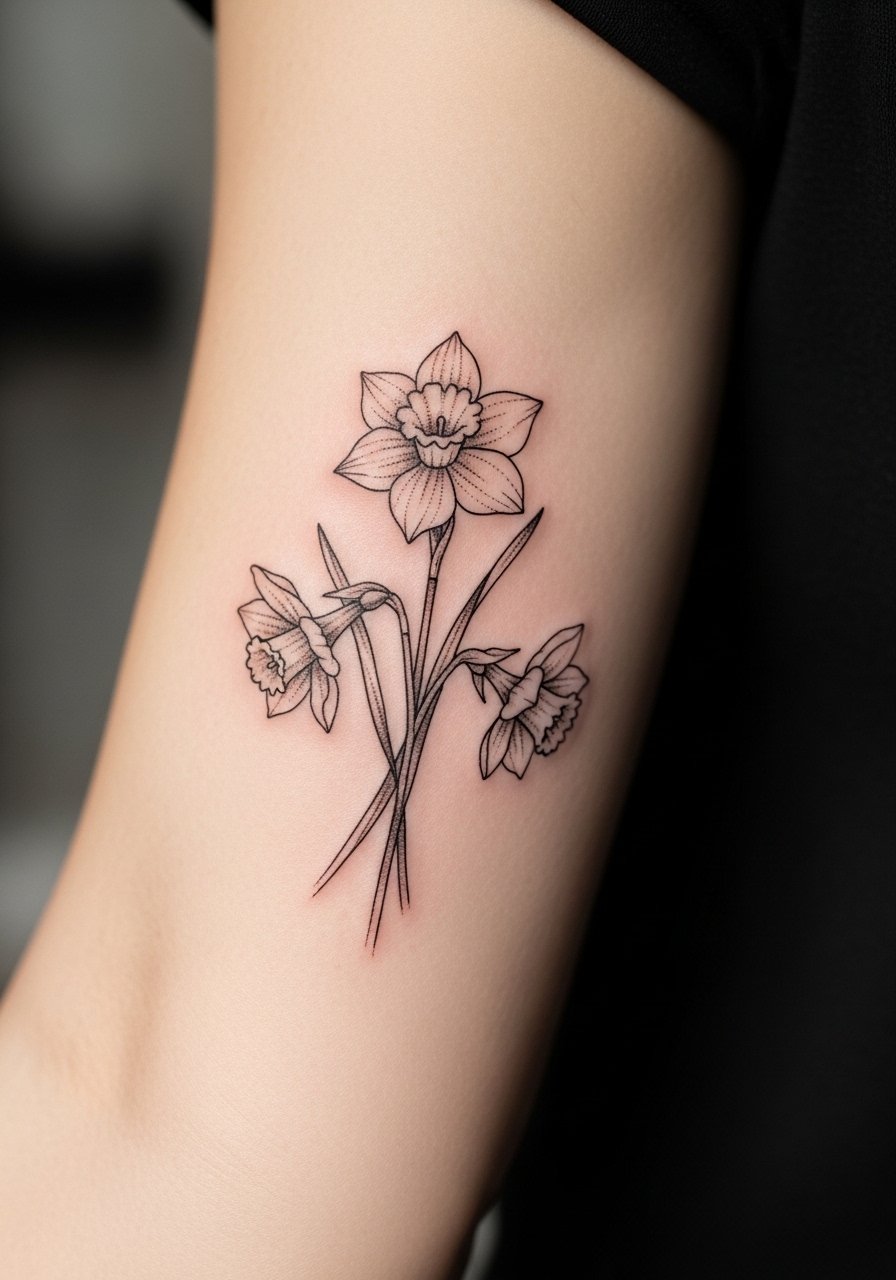
Three small blooms staggered along the forearm create movement and let you play with spacing so each flower gets room. Clusters like this work well for people who want a subtle arm sleeve starter that can expand later. They feel approachable and low-commitment, good for those on a budget or who want to test placement. Ask for slightly varied stem lengths so the cluster reads like a natural spray. Pack a non-scented healing cream in your kit to keep touch-ups minimal.
Style/Technique: Small cluster composition
Pain Level: 3/10
Session Time: 1 to 1.5 hours
Best For: Side forearm, expansion-ready designs
Mistake to Avoid: Placing the blooms in a straight line, which reads static rather than organic.
6. Negative Space Narcissus, Inner Elbow
Using skin as the petal color keeps the narcissus airy and makes it easier to cover with a sleeve if needed. This technique uses bold outlines and deliberate negative space in the petals so the flower reads at arm length while remaining subtle up close. It suits someone who likes graphic restraint and wants a lower-maintenance piece. Healing in joint areas takes care, so plan for aftercare and light mobility. I recommend packing a breathable adhesive wrap for the first night.
Style/Technique: Graphic negative space
Pain Level: 4/10
Session Time: 1 to 1.5 hours
Best For: Inner elbow, coverable yet visible designs
Mistake to Avoid: Asking for tiny negative gaps that will close up as skin swells during healing.
7. Antique Botanical Study, Mid Forearm
An antique study brings fine cross-hatching and light wash shading to suggest texture, like an old botanical plate. It gives the narcissus a timeless, scholarly feeling and holds up well on the flat plane of the forearm. This approach is slightly more time intensive and may need two sessions for crisp hatch marks. It is ideal for someone who likes a vintage vibe and plans to keep the piece for life. Bring in a paper reference and discuss needle groupings to avoid overworking the skin. A small aftercare ointment stick is handy for spot treatments.
Style/Technique: Botanical plate with hatch shading
Pain Level: 4/10
Session Time: 1 to 2 hours
Best For: Mid forearm, vintage aesthetic lovers
Mistake to Avoid: Requesting ultra-fine cross-hatching in one pass, which can traumatize the skin.
If any of these ideas have you ready to actually try something, here is what I keep in my kit for arm pieces.
Arm Tattoo Aftercare and Extras
Aftercare Basics:
- Fragrance-free healing balm (~$8-15). Lightweight and non-greasy for daily care.
- Unscented gentle soap (~$5-10). For twice-daily cleaning.
- Sterile non-stick dressing (~$7-12). Protects the first night.
- Breathable adhesive wrap (~$10-18). Handy for joint areas.
Sun and Preservation:
- Broad-spectrum tattoo sunscreen SPF 30 (~$12-20). Use after healing to slow fading.
- Tattoo-friendly lotion (~$8-15). Keep healed skin hydrated.
Tools & Comfort:
- Cooling gel pack (~$10-25). For swelling.
- Disposable gloves (~$8-15). For clean touch-ups at home.
- Numbing cream (~$12-25). Optional, consult your artist first.
8. Half-Arm Band of Narcissus, Mid Upper Arm
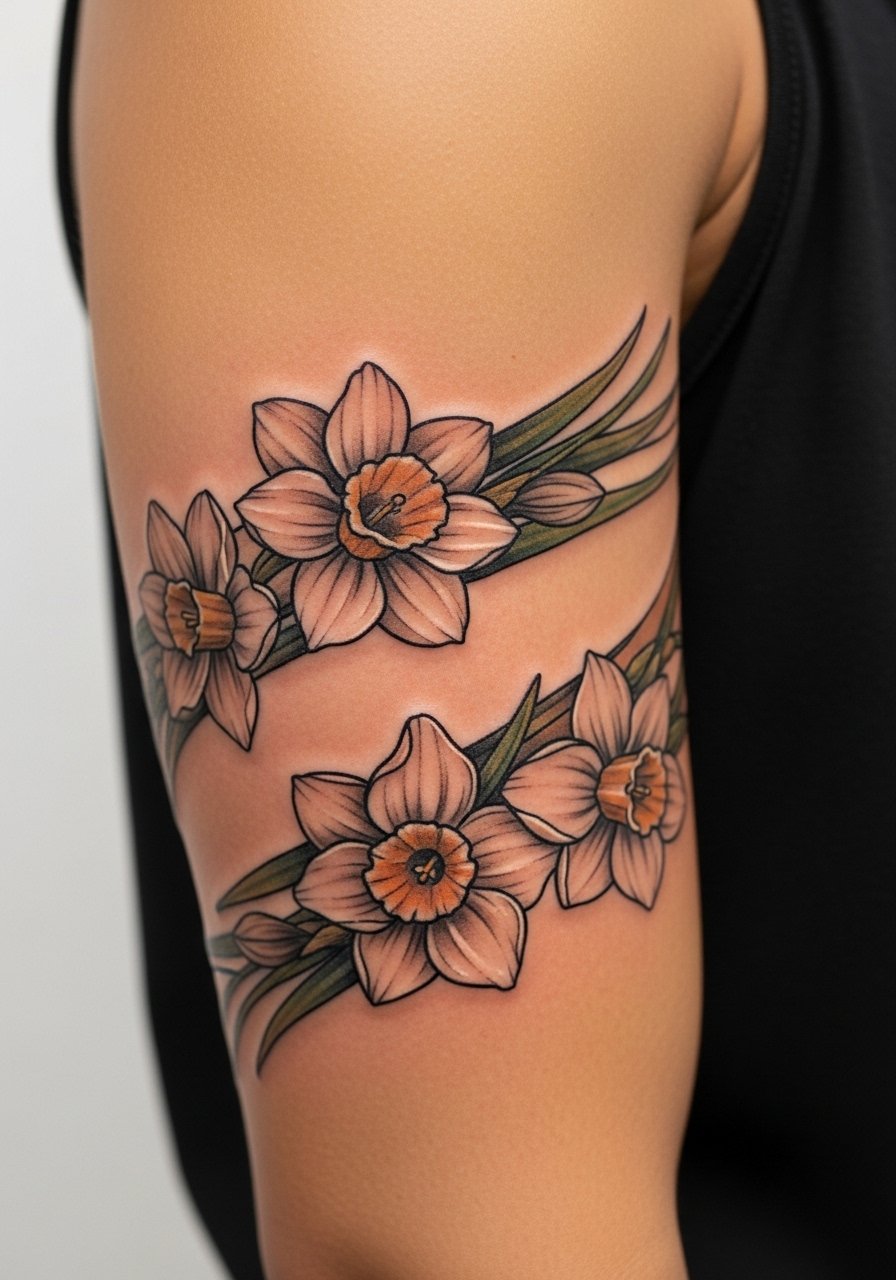
A band composed of repeating narcissus motifs creates a wearable cuff that can feel both ornamental and modern. This design benefits from alternating scale so each bloom has a focal point. It reads as intentional jewelry and can be done in sections if you want to space sessions. Bands are great for people who like coordinated arm art and have medium budget for a multi-session piece. Discuss how cuffs will sit when the arm flexes and ask for slightly larger spacing on the inner curve. Bring a broad mixing palette reference if you plan color shifts.
Style/Technique: Repeating band with scale variation
Pain Level: 5/10
Session Time: 2 to 4 hours total
Best For: Mid upper arm, people wanting an arm-cuff look
Mistake to Avoid: Lining the band too tightly so it compresses when the arm moves.
9. Watercolor Narcissus with Light Wash, Outer Forearm
A watercolor wash around the narcissus gives a painterly look and keeps the petals airy while allowing color to soften over time. It suits someone who prefers an artistic, less literal tattoo and is willing to accept some gradual fading. Use muted yellows and soft ochres rather than heavy pigments to avoid mud. This style often needs touch-ups after a year or two depending on sun exposure. I like pairing it with a gentle color-safe lotion once healed.
Style/Technique: Watercolor wash with delicate line anchors
Pain Level: 4/10
Session Time: 1 to 2 hours
Best For: Outer forearm, artistic clients
Mistake to Avoid: Asking for saturated bright yellow fills that can age into an indistinct patch.
10. Minimal Dot Narcissus, Wrist Wrap
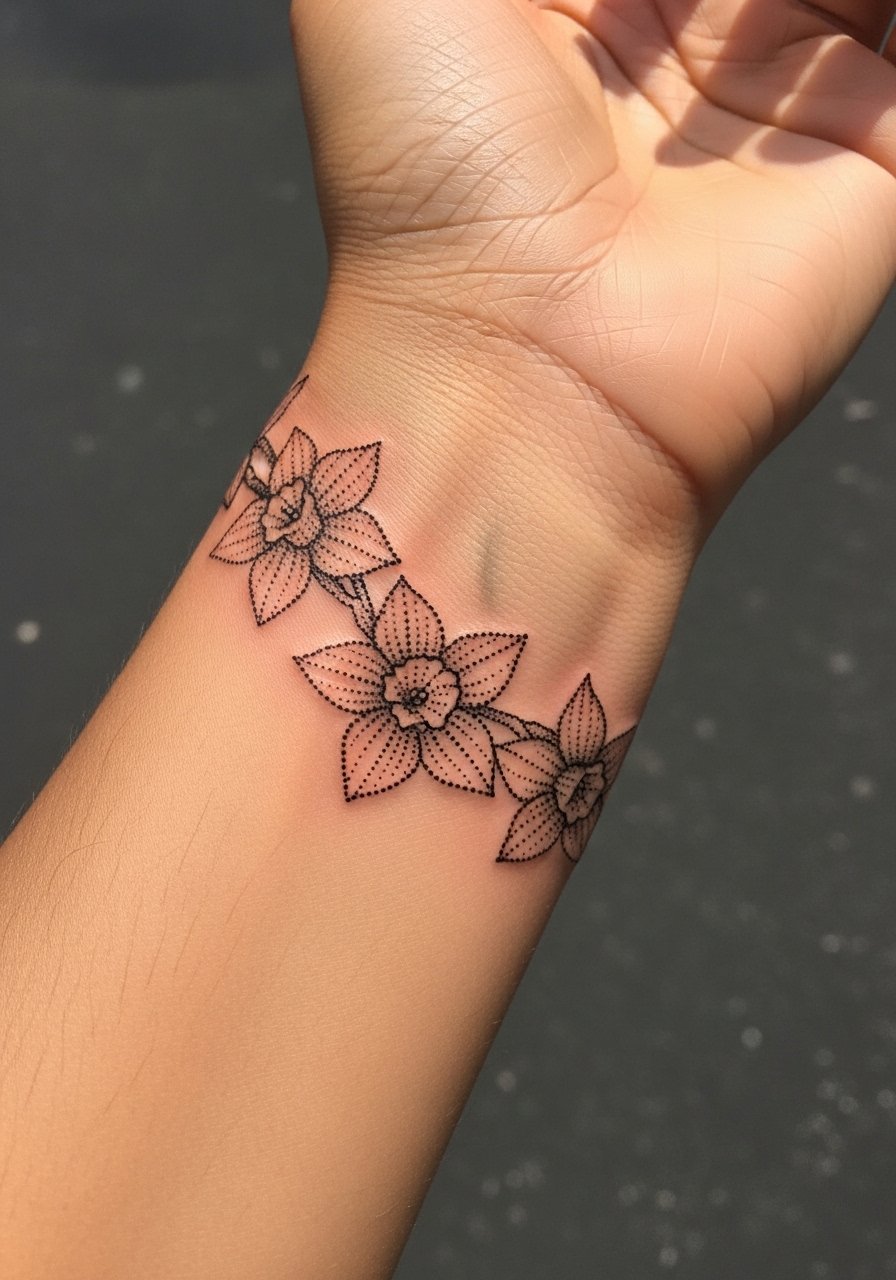
Dotwork creates texture without heavy lines, which is perfect for a slim wrap around the wrist. It feels modern and meditative, especially when the dots vary to suggest petal shapes. This is a low-ink, low-commitment look that usually fits in a short session and suits people wanting subtle arm decoration. Keep the design spaced so each dot can breathe during the initial swelling. Pack a small aftercare balm jar for travel.
Style/Technique: Minimal dotwork wrap
Pain Level: 3/10
Session Time: 0.5 to 1 hour
Best For: Wrist wraps, subtle decor
Mistake to Avoid: Clustering dots too tightly so they merge as the skin heals.
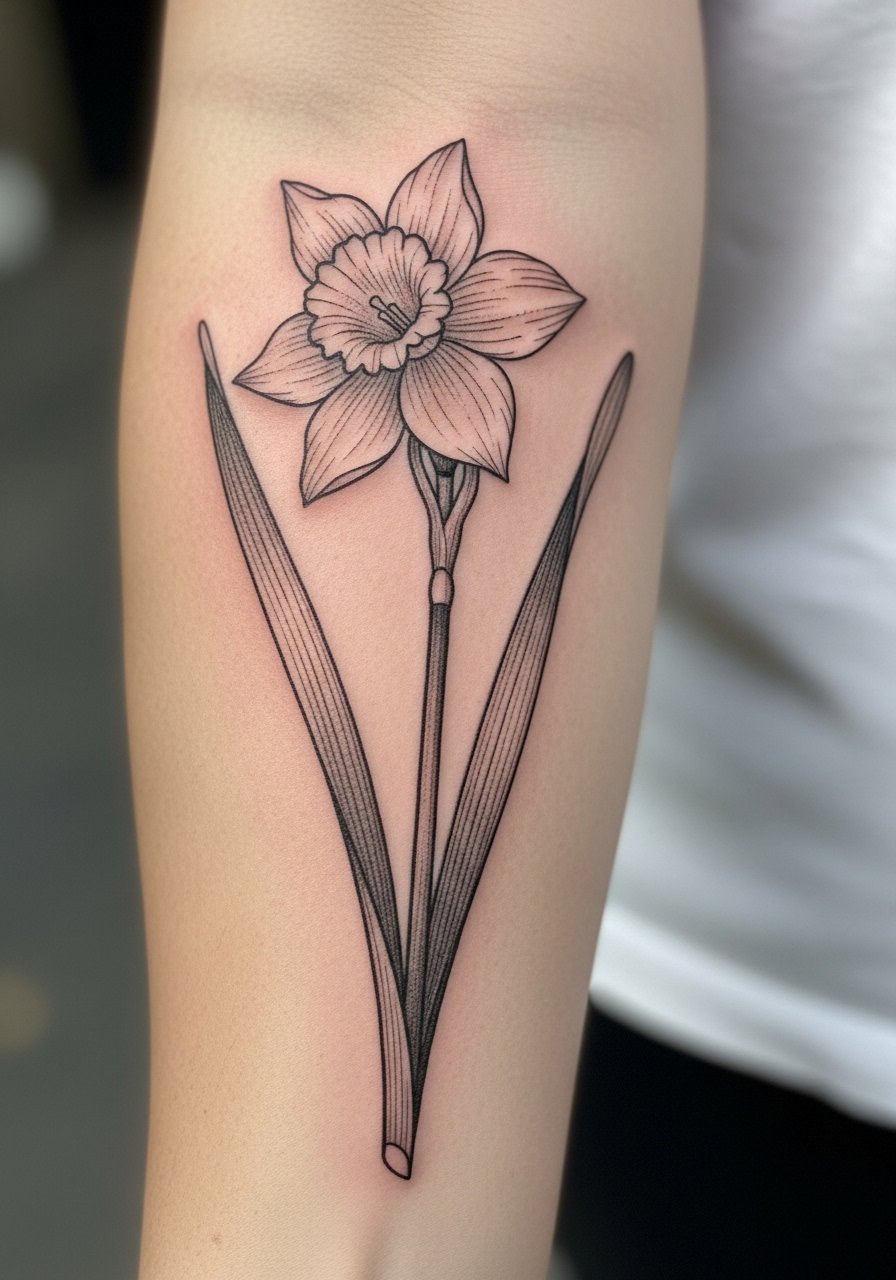
11. Stylized Line Art Narcissus, Inside Bicep

Stylized continuous line art gives the narcissus a modern, sketchbook feel. The inside bicep is an intimate spot where the piece can be mostly private yet dramatic when revealed. This approach is budget-friendly and usually sits in one session. The line weight should vary slightly so the corona reads distinct from the petals. Ask for stronger anchor lines at points that will rub against clothing. I bring a gentle laundry soap sample to avoid new clothing irritants in the healing week.
Style/Technique: Continuous stylized line work
Pain Level: 4/10
Session Time: 1 to 1.5 hours
Best For: Inside bicep, private but striking tattoos
Mistake to Avoid: Demanding a single identical line thickness across the whole piece, which flattens the design.
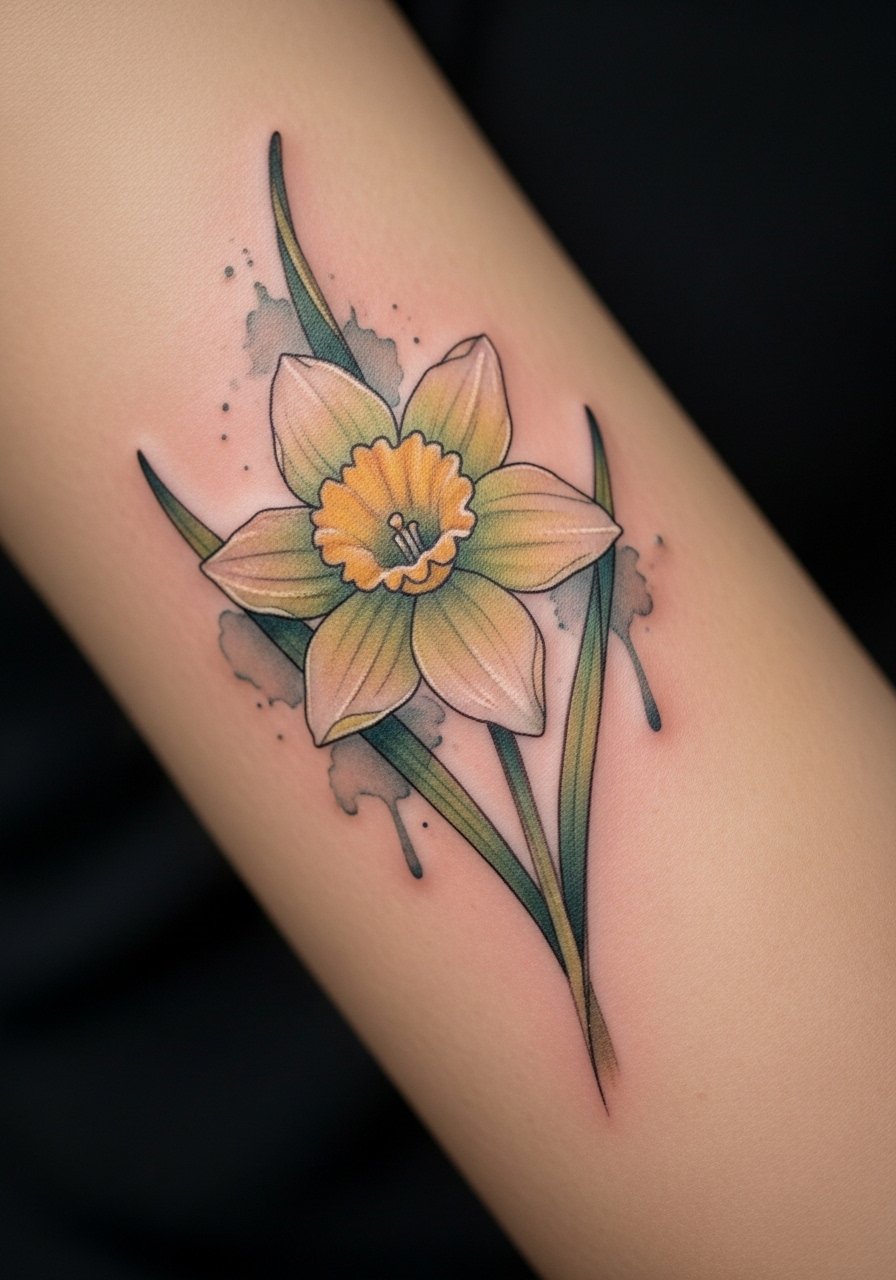
12. Graphic Yellow Corona Accent, Forearm Ridge
Making the corona the only vivid color point creates a small, punchy design that still reads across the arm. The forearm ridge gives enough flat surface for color to sit without heavy distortion. This is a moderate-budget piece because color requires careful saturation and sometimes a follow-up. It offers a fresh mood without turning the whole flower bright. Protect color with a tattoo sunscreen stick once fully healed.
Style/Technique: Selective color accent
Pain Level: 4/10
Session Time: 1 to 2 hours
Best For: Forearm ridge, color-conscious clients
Mistake to Avoid: Using too much pigment in small areas, which can lead to blowout.
13. Multi-Scale Narcissus Sleeve Starter, Lower Arm
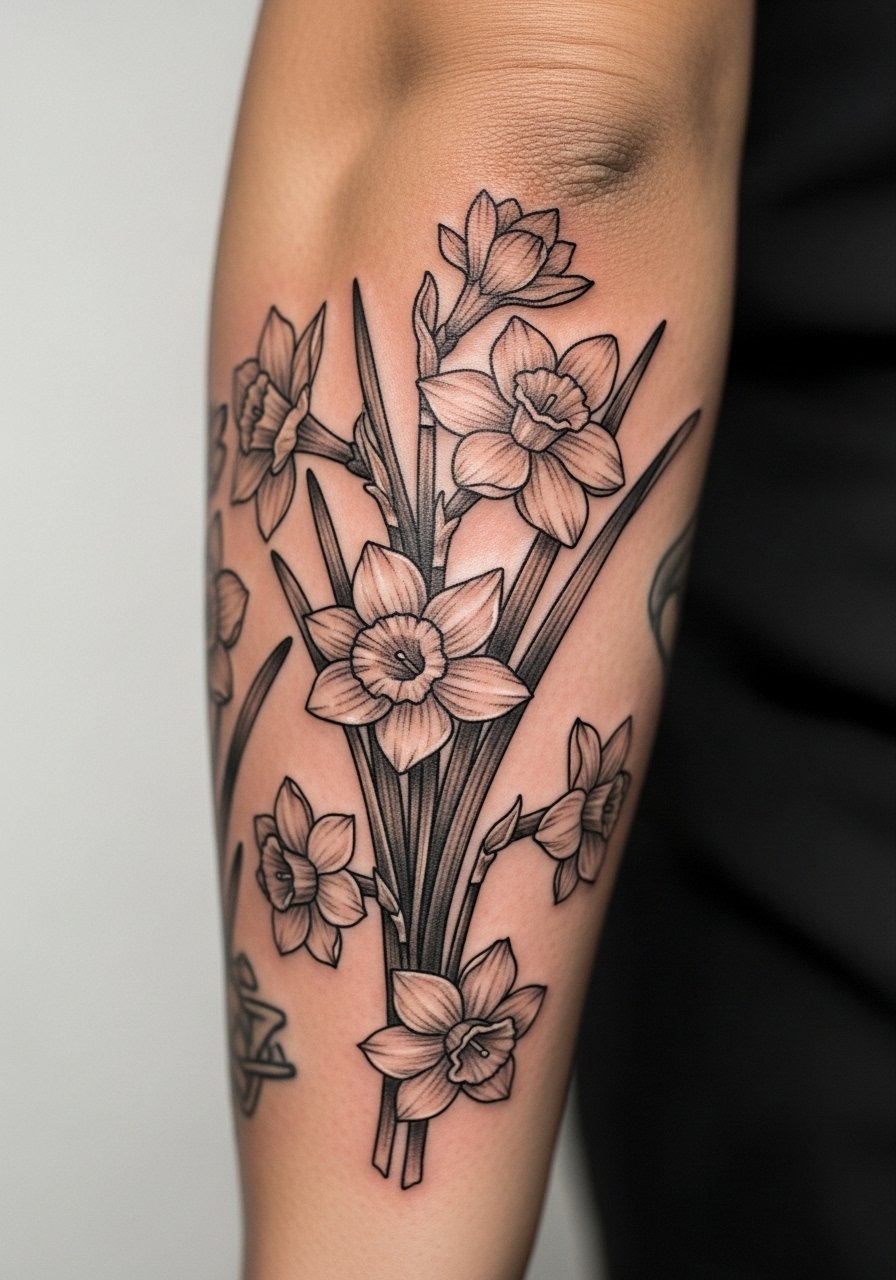
A lower-arm sleeve starter mixes scales and styles so you can expand later. Start with a couple of larger narcissus and a few small fillers like leaves and stems. This plan balances budget and ambition because you can add sessions over time. It feels cohesive and gives artists room to breathe when placing future pieces. For session planning, expect longer appointments and stagger shading to avoid overworking skin. Keep a cooling gel pack handy for swelling after longer sessions.
Style/Technique: Multi-scale composite starter
Pain Level: 5/10
Session Time: 2 to 4 hours initial
Best For: Lower arm, people building towards a sleeve
Mistake to Avoid: Starting with too many tiny elements in a single session, which can force unnecessary touch-ups.
Arm Tattoo Healing Habits
Plan your first 24 hours around rest. Sleep with your arm elevated and covered with a sterile non-stick dressing. Sterile non-stick dressing helps reduce sticking.
Bring a small travel tube of balm to the studio. Apply a thin layer as soon as your artist signs off. Fragrance-free healing balm keeps scabs supple.
Avoid heavy exercise the first three days. Sweat soaks bandages and increases infection risk. Cooling gel pack reduces swelling.
When sun returns, use dedicated tattoo sunscreen on healed work. Broad-spectrum tattoo sunscreen SPF 30 prolongs vibrancy.
If a scab pulls or looks abnormal, call your artist rather than picking. Keep disposable gloves in your kit for safe spot care.
