
I kept painting perfect lines and watching them blur the minute I set the hand down, until a tech at a salon showed me to hold the magnet like a painter holds a brush, steady and close. That tiny change stopped the smeared galaxy look and made cat eyes sit like a stripe of light. After a few ugly attempts and a lot of practice, I stopped overworking the polish and started letting the magnet do the work.
These ideas are for people who want wearable drama, not gaudy party nails. Most are beginner friendly and wallet-conscious, with a few that require a steady hand and a UV lamp. Expect 30 to 75 minutes per set depending on length and whether you build acrylic overlays. I leaned on magnetic gels, a 48W lamp, and one small steel bar magnet across all these looks so you can shop once and mix styles.
1. Deep Sapphire Magnetic Cat Eye
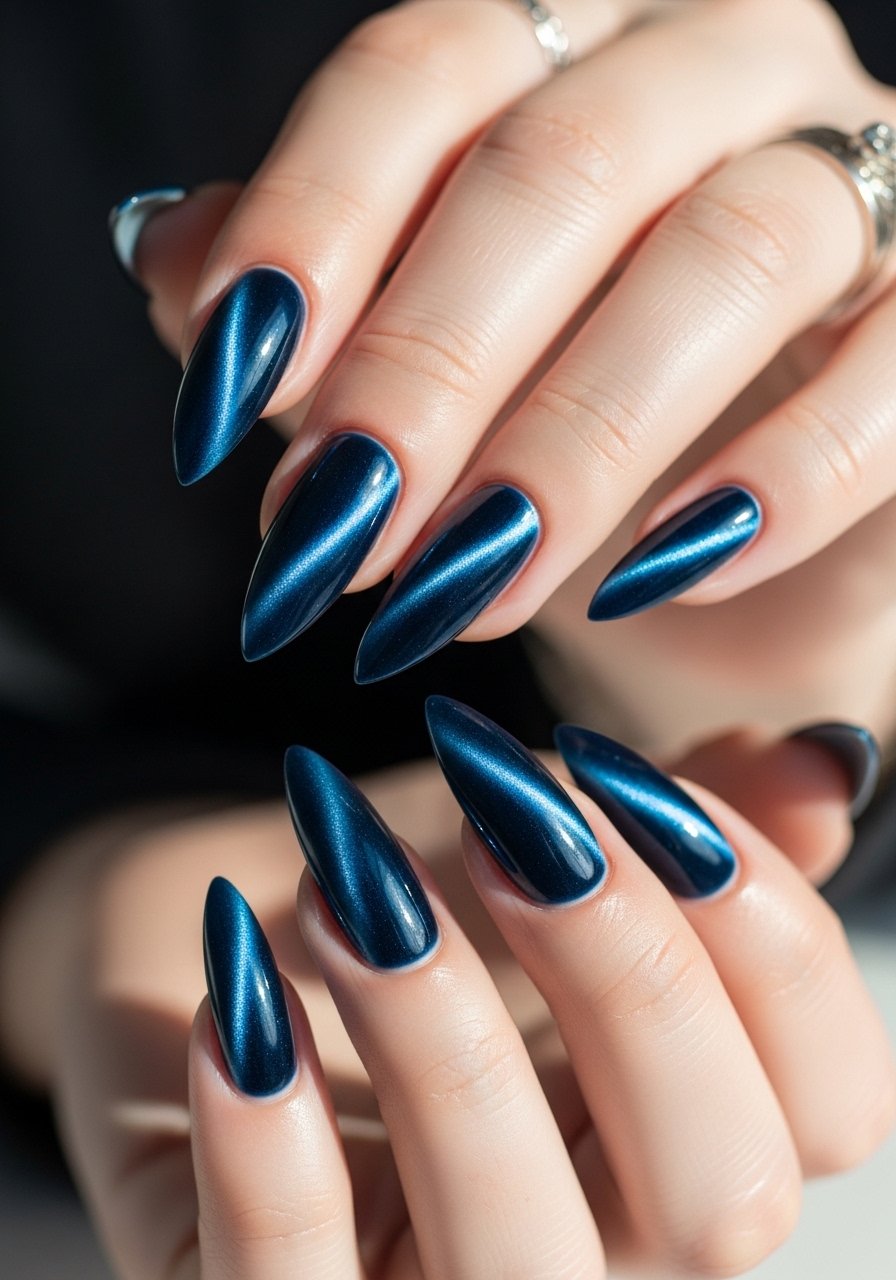
Style/Vibe: Shiny magnetic chrome
Best For: Long nails, night out
Skill: Intermediate
Start with a black or navy base, then layer a magnetic cat eye polish. What makes it work is contrast, the dark base lets the blue stripe read like a slash of light. Hold the magnet 2 to 3 millimeters above the wet polish and sweep in one direction for about 4 to 6 seconds, then cure 60 seconds under a 48W lamp. It creates a precise band of shimmer that reads luxe. Try magnetic cat eye polish and a 48w uv led lamp.
Mistake to Avoid: Moving the magnet back and forth instead of a single steady sweep blurs the line.
2. Sky Blue Ombre Cat Eye
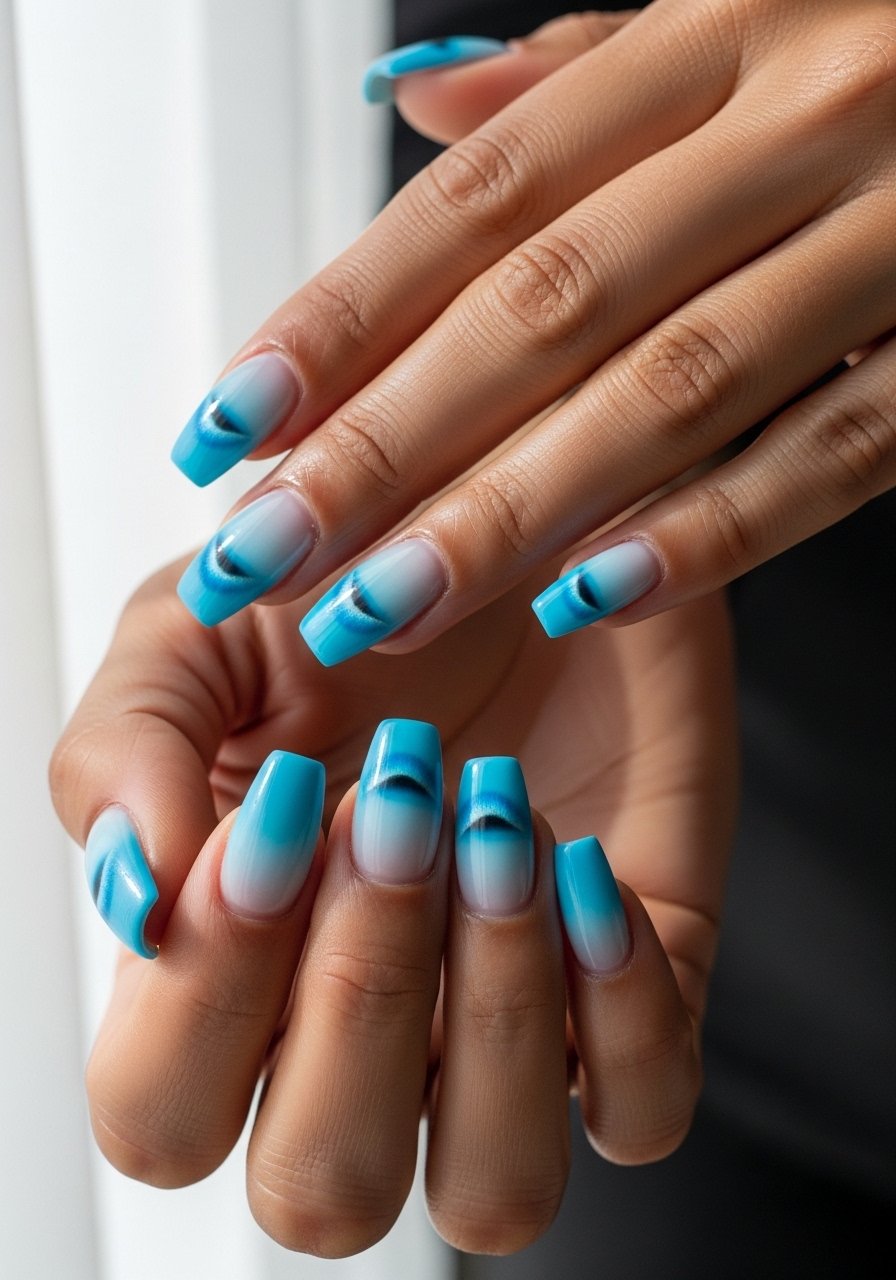
Style/Vibe: Soft ombre glow
Best For: Medium nails, daytime events
Skill: Beginner
Blend a baby blue into a slightly deeper sky blue, then add a thin cat eye stripe across the gradient. The ombre gives depth so the cat eye looks like it lives in the polish, not pasted on. Use three thin coats of colored gel, then a magnetic top layer, holding the magnet for 3 seconds only at the apex to avoid flattening the gradient. It feels fresh and less obvious than a single-tone cat eye. Try sky blue gel polish and a magnet bar tool.
Mistake to Avoid: Rushing thick layers, which eats the ombre fade and makes the cat eye patchy.
3. Midnight Blue Glitter Fade
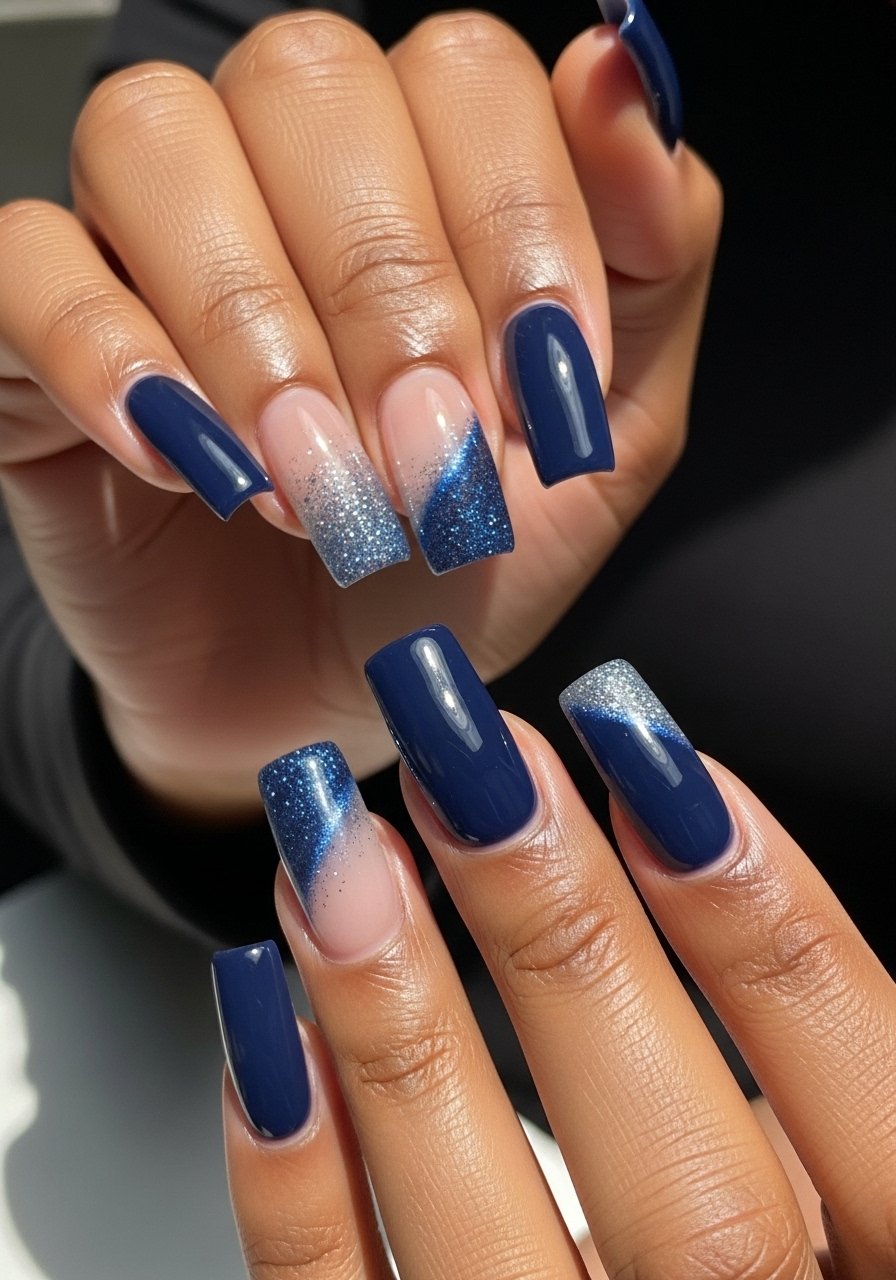
Style/Vibe: Subtle sparkle gradient
Best For: Longer nails, party looks
Skill: Intermediate
Start with a glossy navy and sponge a fine blue glitter toward the free edge. The sparkle catches the cat eye stripe differently across the nail, so the magnet should skim briefly to emphasize one shimmer line. The result reads moody and festive without being loud. Work in thin layers, cure between coats, and seal with a high-shine top coat. Use a concentrated glitter topper and a magnetic polish for the stripe, like blue glitter topper and magnetic nail polish.
Mistake to Avoid: Overloading glitter at the cuticle, which makes the nail look heavy rather than luminous.
4. Matte Navy Cat With Gloss Tip
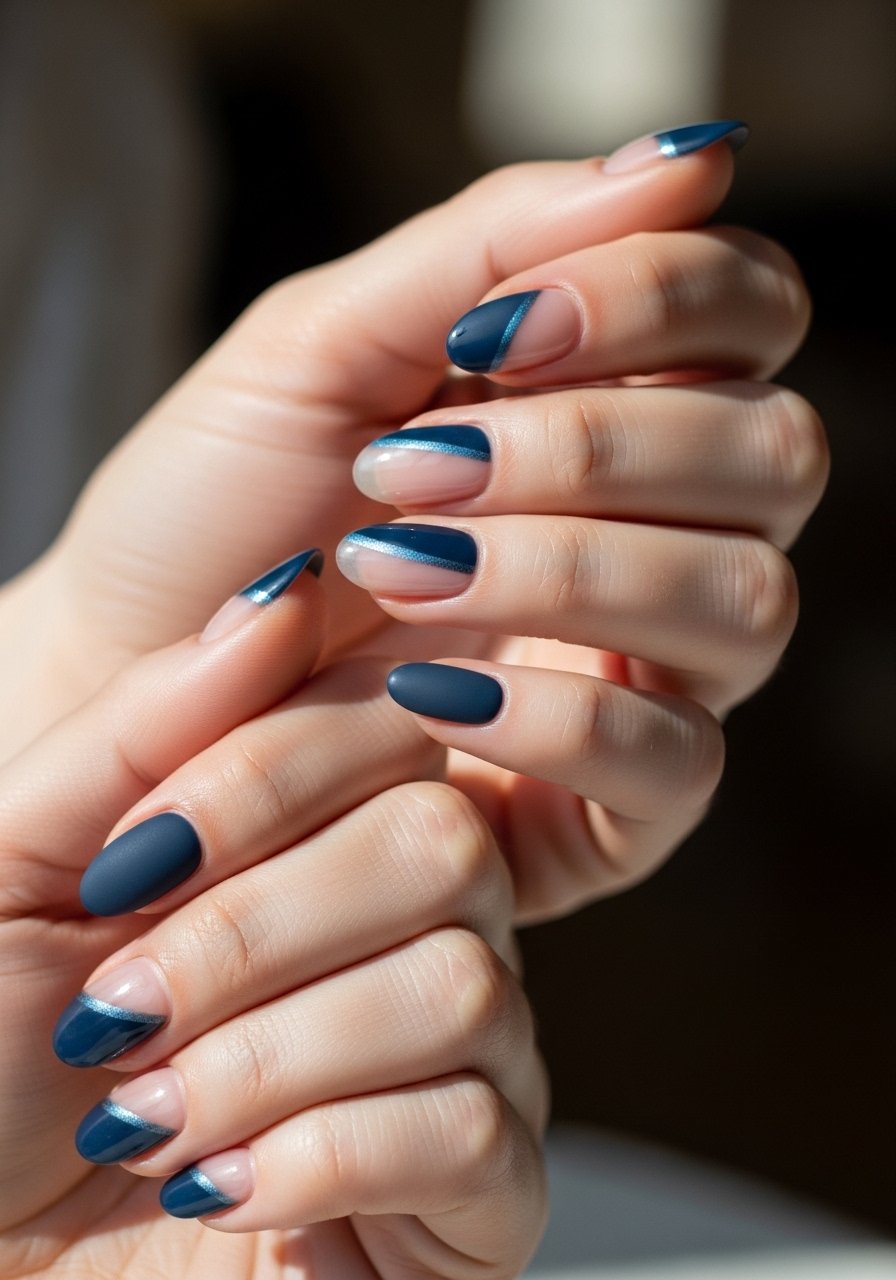
Style/Vibe: Textured contrast
Best For: Office friendly, medium nails
Skill: Beginner
A matte base with a single glossy cat eye tip reads intentional and chic. Apply a matte top coat overall, then mask the tip and add a glossy stripe with a small brush before magnetizing the gloss area. The play between matte and gloss makes the cat eye pop without intense shimmer. This is quick if you keep coats thin and use a fast-cure lamp. I like pairing a matte top coat with glossy top coat.
Mistake to Avoid: Trying to matte the whole nail after the cat eye is done, which dulls the stripe.
5. Nude Base Crescent Cat Eye
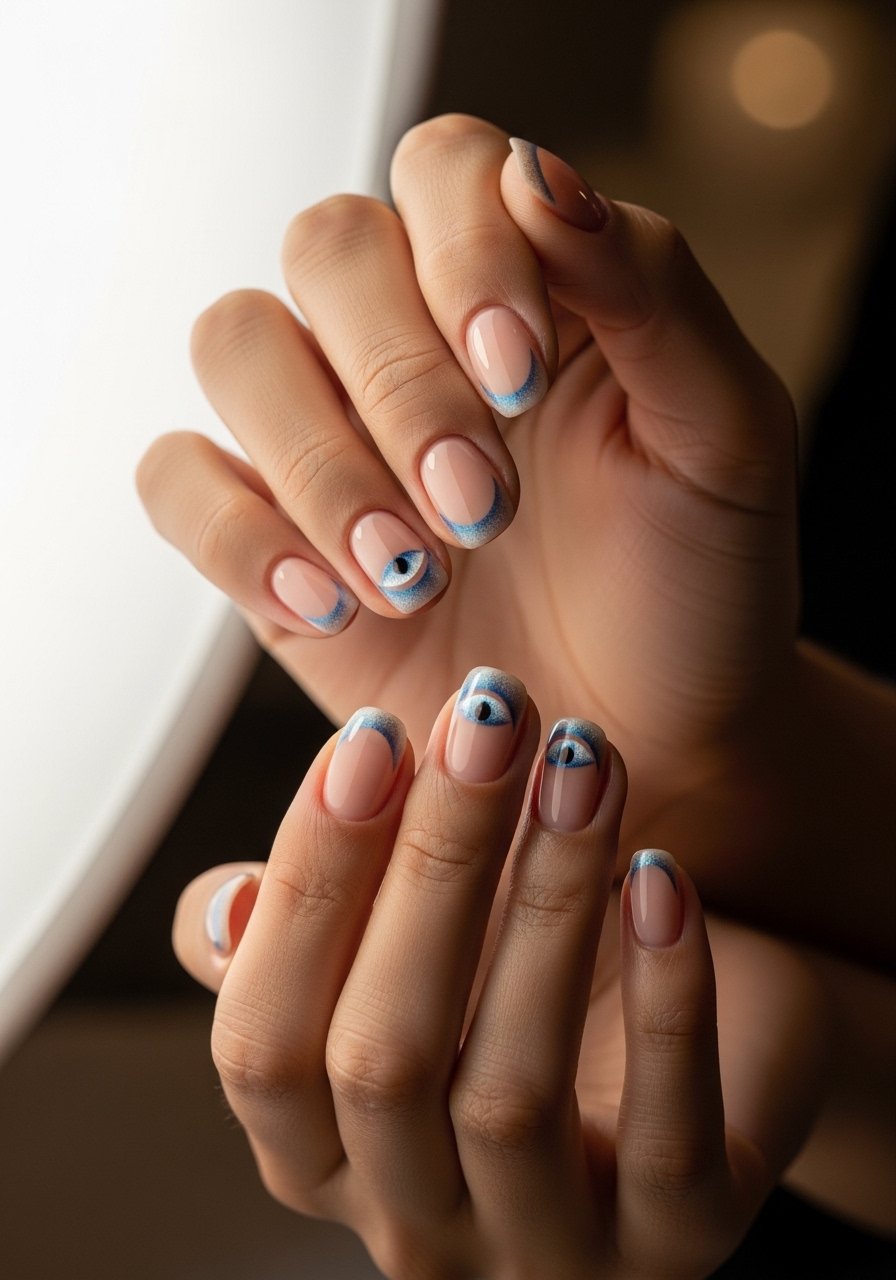
Style/Vibe: Minimal chic
Best For: Short nails, everyday wear
Skill: Beginner
Swap the classic center stripe for a tiny crescent of cat eye near the cuticle on a nude base. It reads modern and is less maintenance for short nails. Paint a sheer nude, cure, then apply a dab of magnetic polish and hold the magnet close at the crescent edge for 3 seconds. It gives the feeling of detail without length. Ideal if you want a hint of blue without full-on drama. Try sheer nude gel polish and mini nail magnet.
Mistake to Avoid: Using too much magnetic polish, which spreads the crescent into a blob.
6. Short Nail Subtle Cat Eye
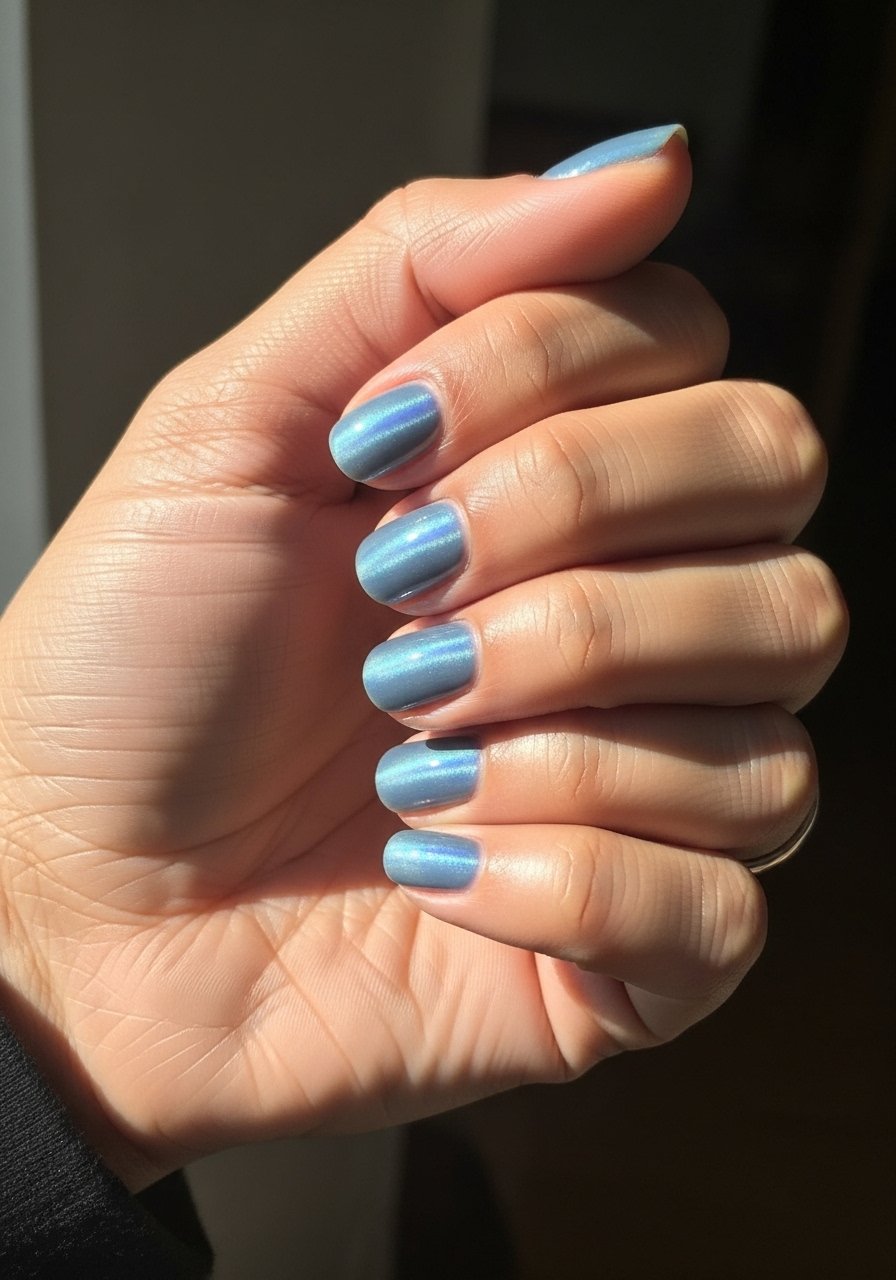
Style/Vibe: Understated shimmer
Best For: Very short nails, low-maintenance
Skill: Beginner
Short nails need narrower stripes. Use a fine brush to place a thin line of magnetic gel where you want the cat eye, then magnetize for 2 to 3 seconds. The thinner line sits neatly on the nail plate and looks like a sliver of light. This is the most time-effective option and works in 30 to 40 minutes. Pair a precision brush with a thin gel like fine nail art brush and a thin magnetic polish.
Mistake to Avoid: Using the same magnet sweep as for long nails, which makes the stripe too thick.
7. Holographic Blue Accent Nail
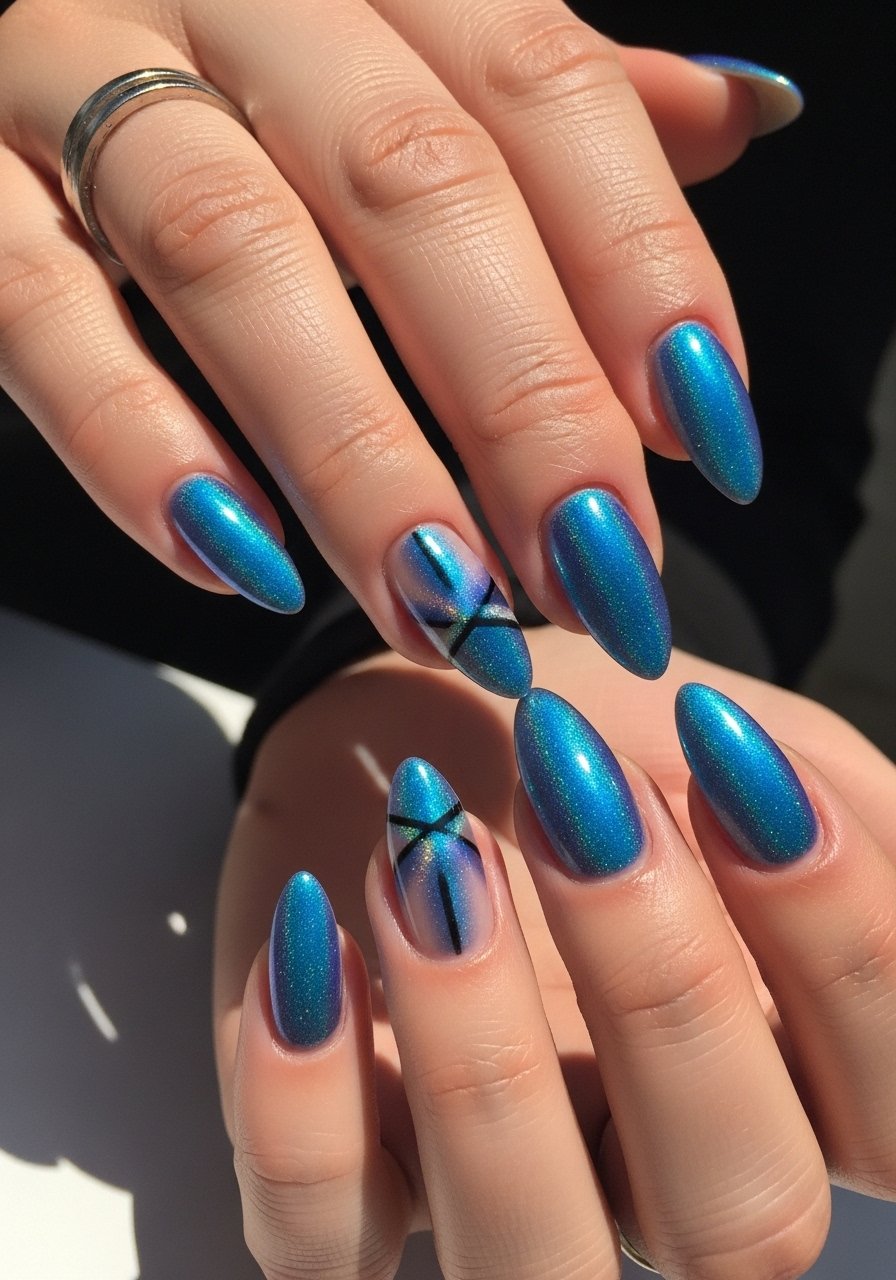
Style/Vibe: Multi-dimensional shimmer
Best For: Accent nail, special events
Skill: Intermediate
Keep most nails simple and save the holographic cat eye for one nail. A holo powder over a blue base then a light cat eye pass creates a stripe that changes color as you move your hand. Buff the holo into the cured base, then seal. It feels like a small investment with big payoff visually. Use a holographic powder and a magnetic polish.
Mistake to Avoid: Skipping a proper seal over the holo, which lets it dull quickly.
If any of these looks have you ready to try one at home, here are the tools I reach for most.
Blue Cat Eye Nail Kit
Tools:
- magnet bar tool (~$6-12), small and precise for single sweeps
- 48w uv led lamp (~$25-40), cures fast and evenly
Polishes & Powders:
- magnetic cat eye polish (~$8-15) for the stripe
- blue holographic powder (~$6-10) for accents
Basics & Aftercare:
- sheer nude gel polish (~$9-15) for bases
- high-shine top coat (~$8-14) to seal and protect
- cuticle oil (~$5-10) to finish the set
Extras:
- fine nail art brush (~$4-9) for thin lines
- mini nail magnet (~$5-8) for crescents
8. Reverse French Cat Eye Line
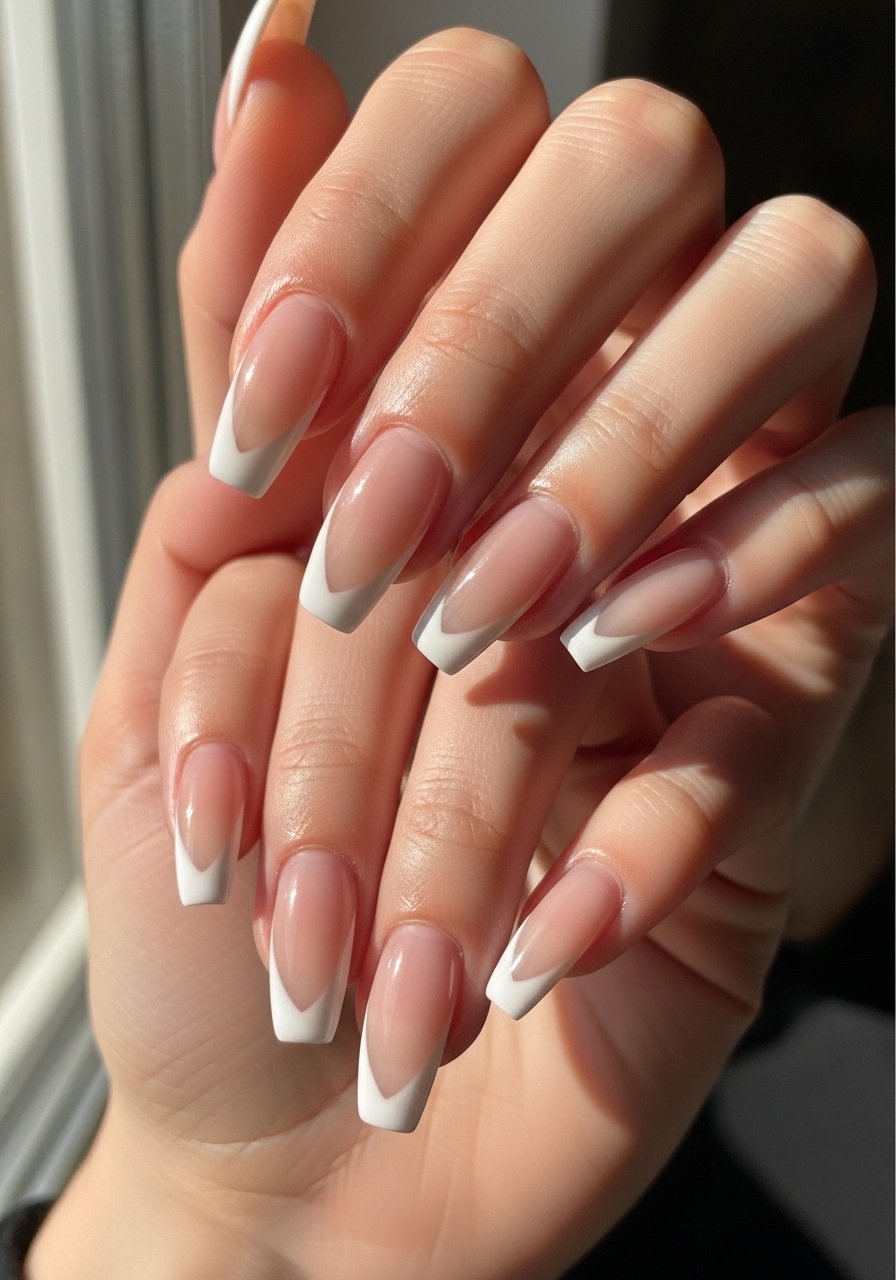
Style/Vibe: Modern French hybrid
Best For: Long nails, fashion-forward looks
Skill: Advanced
Flip the classic and place the cat eye stripe along the free edge as a reversed French. The technique is a thin reverse line with magnet held just at the edge for 2 to 4 seconds so the light appears to sit on the tip. Use builder gel to shape the edge first if you need structure. It gives a crisp, editorial result ideally suited to longer shapes. I usually use a 1:1 builder gel to monomer ratio when extending tips. Try builder gel and magnetic polish.
Mistake to Avoid: Dragging the magnet too far into the nail, which ruins the reverse French clean line.
9. Chunky Chrome Blue Cat Eye
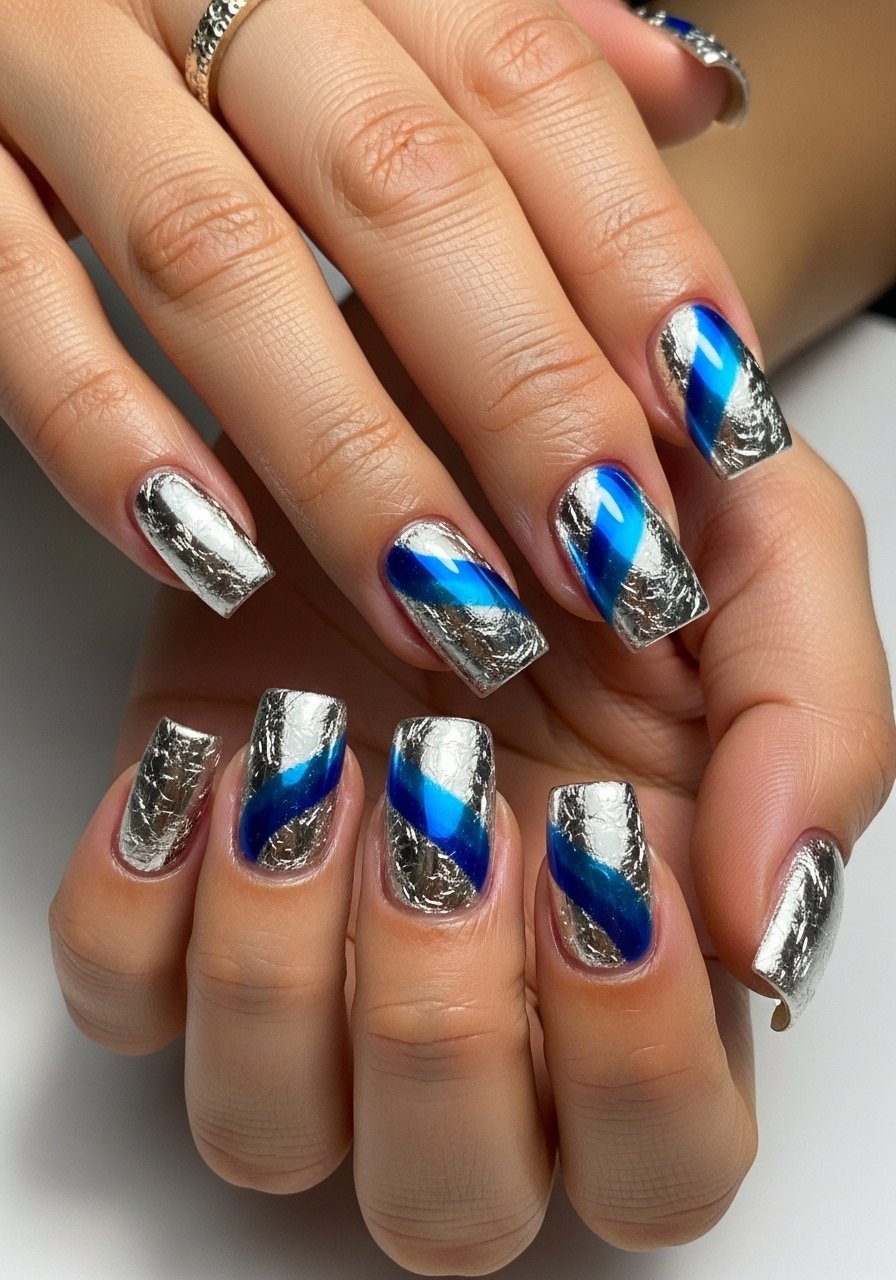
Style/Vibe: Edgy metallics
Best For: Statement sets, medium nails
Skill: Intermediate
Layer chrome flakes over a navy base, then place a thicker cat eye stripe so the metallic textures catch the sweep. The chunky chrome breaks the light for an industrial glam feel. Press flakes into tacky gel, cure briefly, then add the magnetic polish and magnetize. Timewise this takes longer because you place flakes deliberately, around 60 to 80 minutes. Use chrome flakes and magnetic polish.
Mistake to Avoid: Applying flakes over a fully cured base, which prevents them from adhering smoothly.
10. Negative Space Crescent Cat Eye
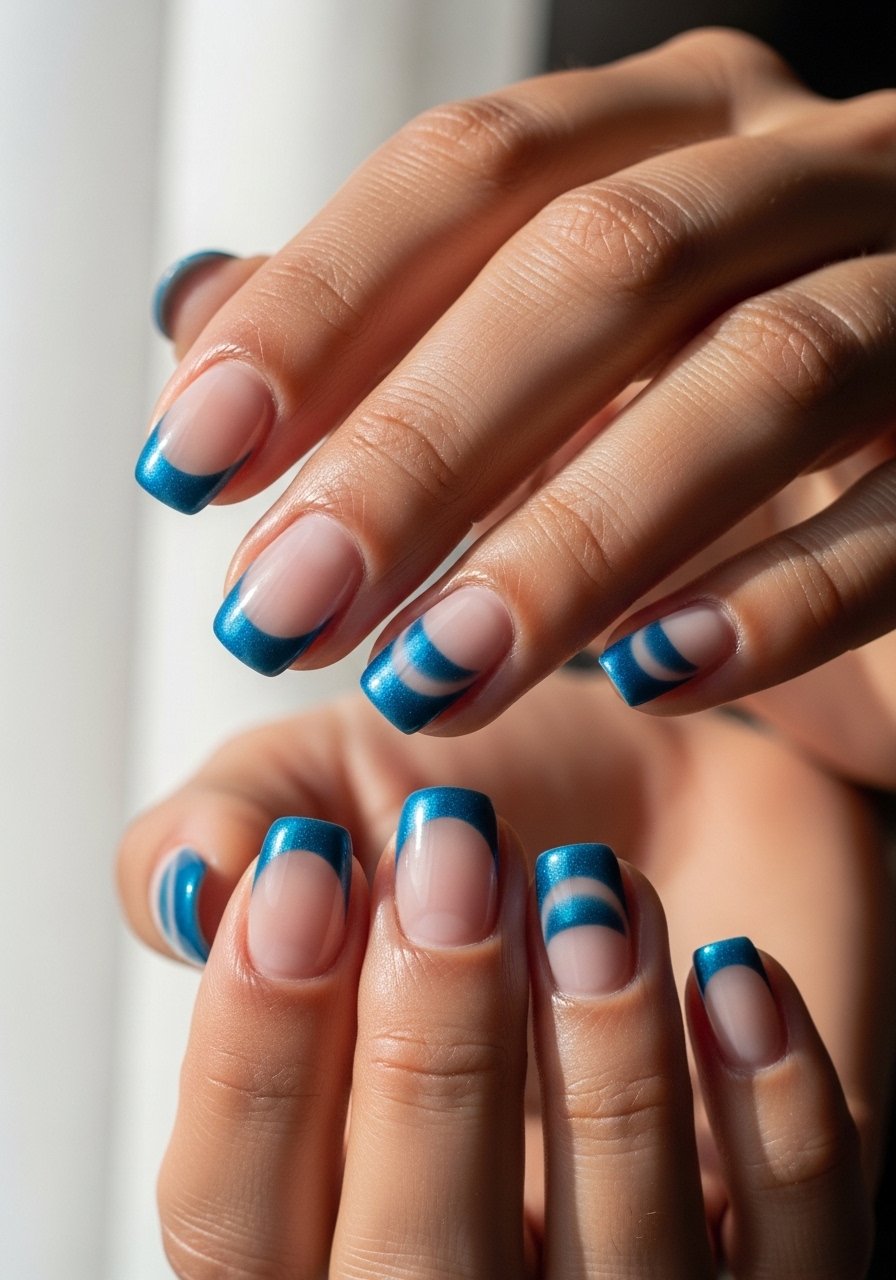
Style/Vibe: Graphic minimalism
Best For: Modern office looks, medium nails
Skill: Intermediate
Negative space carved into a crescent with a blue cat eye arch reads architectural. Tape a crescent shape, paint the surrounding area, let it cure, then remove tape and apply the magnetic stripe inside the crescent. The crisp negative area makes the cat eye feel intentional and wearable. It works on medium nails in about 45 to 60 minutes. Try nail striping tape and magnetic polish.
Mistake to Avoid: Removing tape too soon, which smudges the edges and ruins the negative space.
11. Pearlized Soft Blue Cat Eye
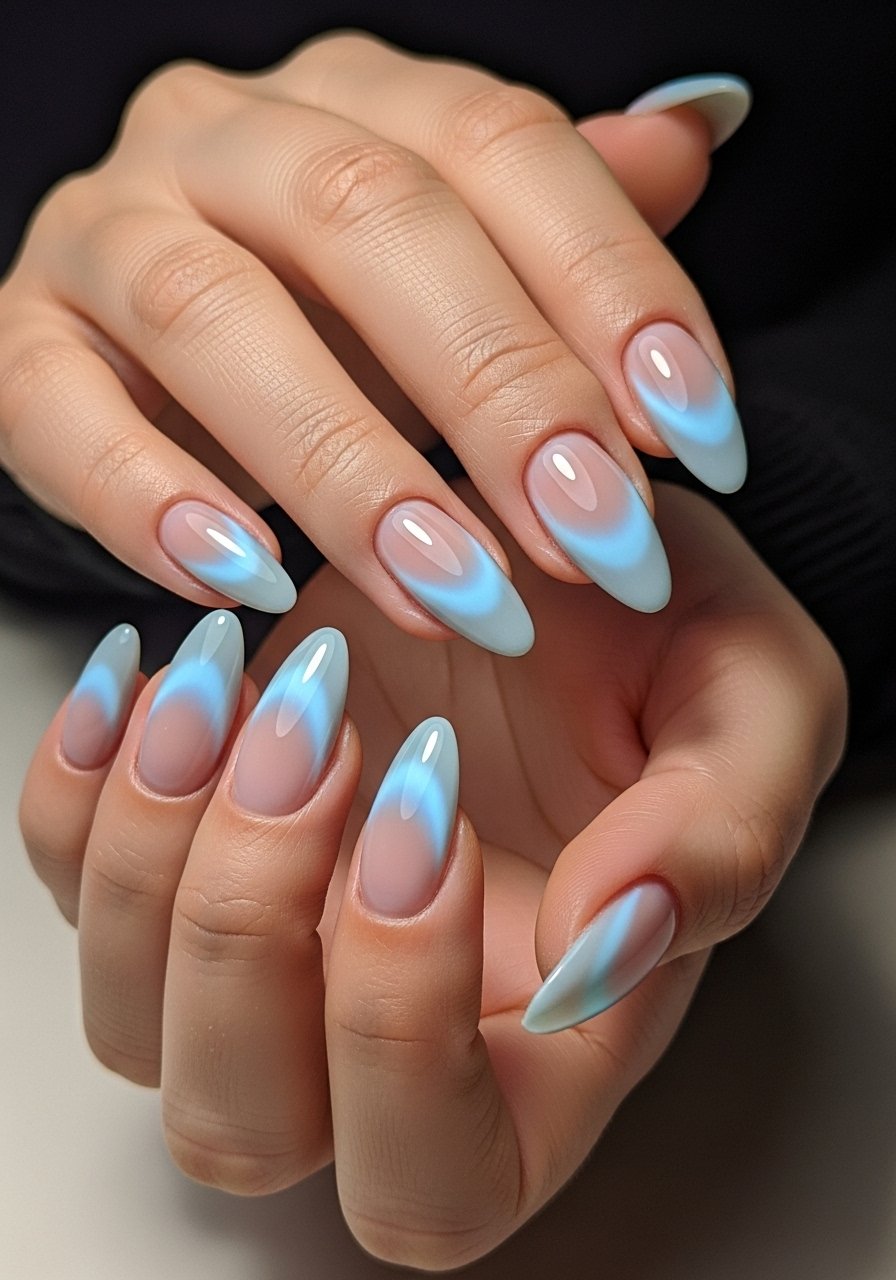
Style/Vibe: Soft pearlescent sheen
Best For: Bridesmaids, daytime events
Skill: Beginner
Pearlized finishes make a cat eye look more refined and work well for daytime events. Use a sheer pearl top layer over a sky blue base and magnetize with a gentle pass. It reads softer than chrome but still picks up light. Cure fully before top coating and finish with a thin high-shine seal. Use pearlized top coat and sky blue polish.
Mistake to Avoid: Applying the pearl layer too thick, which hides the cat eye effect.
12. Textured Velvet Blue Cat Eye
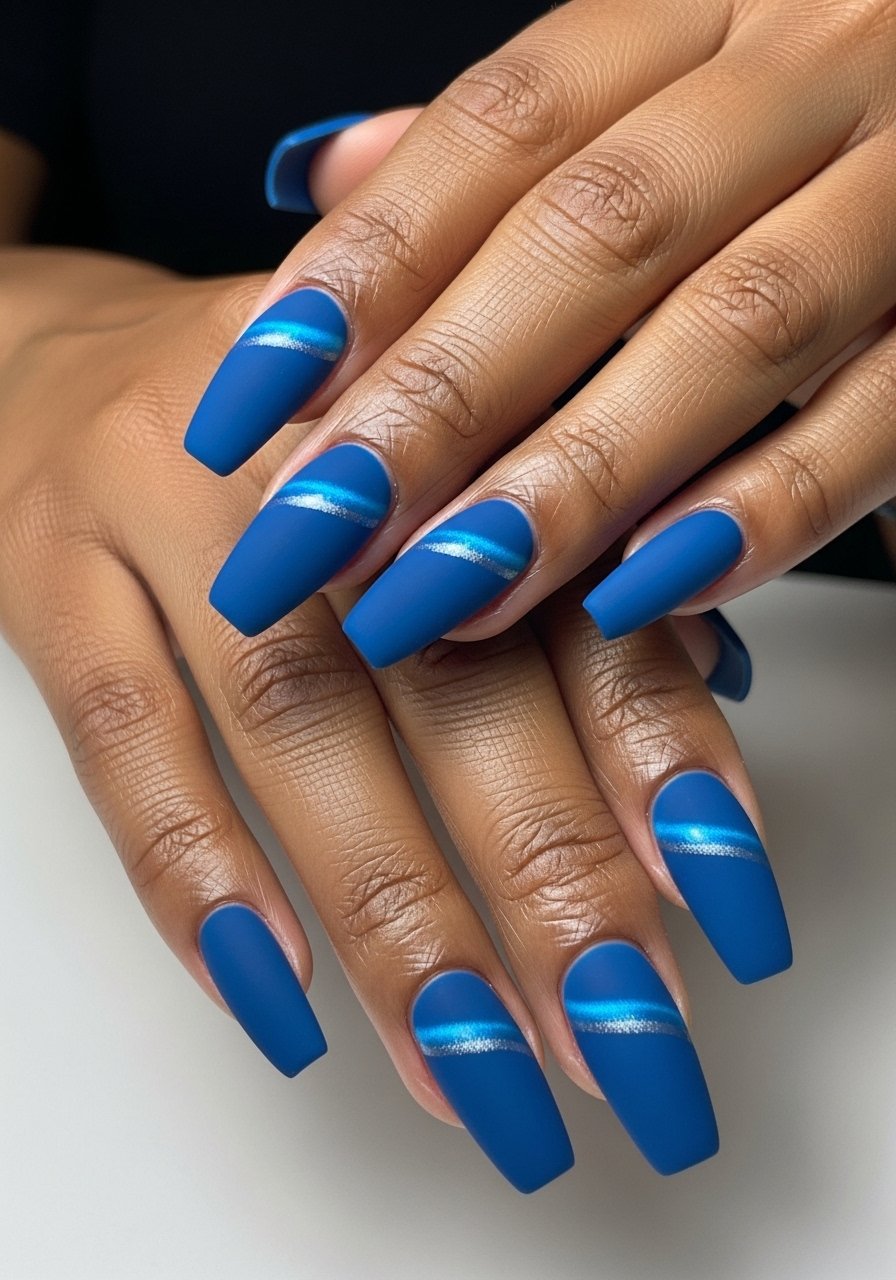
Style/Vibe: Soft velvet contrast
Best For: Fall looks, medium nails
Skill: Intermediate
A velvet matte base with a glossy cat eye stripe reads tactile and modern. Use a matte top coat to set the velvet, then add a glossy magnetic stripe on a small area left untopped and cure. The contrast in textures creates subtle drama without heavy shine. It takes an extra step but works for anyone who likes a tactile finish. Pair a matte top coat with velvet matte top coat and magnetic polish.
Mistake to Avoid: Applying matte over the stripe, which cancels the glossy effect.
13. Statement Long Stiletto Cat Eye
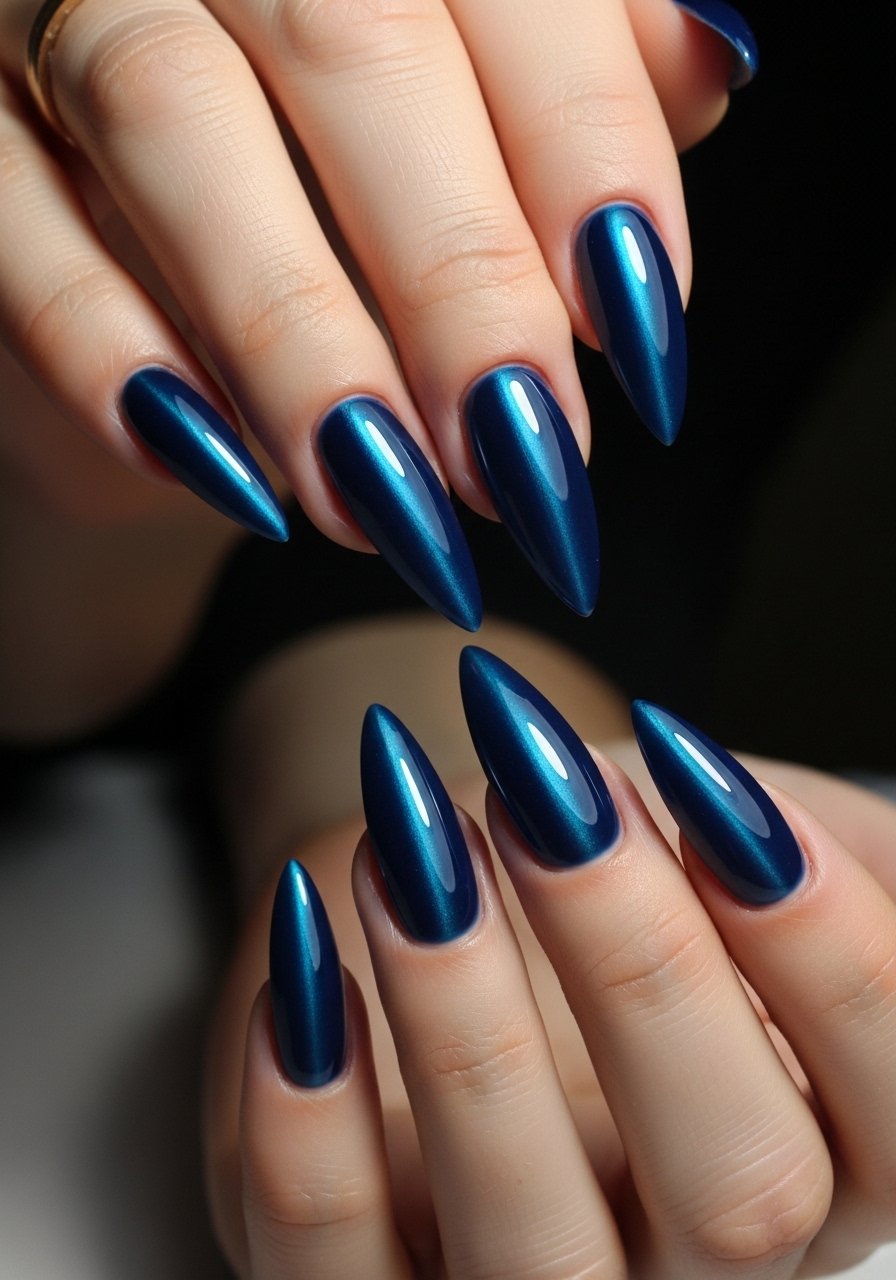
Style/Vibe: Bold editorial
Best For: Events, long nail lovers
Skill: Advanced
This is the one that reads runway. Build a strong apex with builder gel, shape into a stiletto, then use a wide sweep of magnetic polish down the center. Because of length, hold the magnet steady for 5 seconds to create a continuous band. It requires patience and a steady magnet hand, but the finish is a long luminous line that reads clean from every angle. Use builder gel and magnetic polish vivid blue.
Mistake to Avoid: Skipping proper apex shaping, which makes the stripe look off-center on long nails.
Cat Eye Mani Shortcuts
Thin coats beat one thick coat every time. Three thin layers of magnetic gel polish cure smoother and hold the cat eye line better than one heavy coat.
Grab a mini magnet set. Different magnet shapes give you crescent, center streak, and diagonal options without buying specialty polishes.
If you want a quick at-home fix, do the cat eye on one or two accent nails only. A fast-dry top coat helps you finish in under 20 minutes for a subtle update.
Most people hold the magnet too far away, which softens the effect. Hold it close, almost touching but not touching, and sweep once for a crisp line. A small precision magnet costs under $10 and saves cleanup.