
I almost threw out a thrift-store mirror because it was chipped across one corner. I shoved it behind a plant for months until one evening I propped it off-center, hung a small print beside it, and the whole entryway stopped feeling like leftovers and started feeling intentional. That single stubborn piece taught me how much a wall detail can change a room without buying new furniture.
These nine ideas are practical and renter friendly, tested after trying this in three rentals. They work on a tight budget or with one afternoon of effort. Expect low- to medium-skill projects, most under an hour once you have the tools. I call out when something needs a stud or a permanent anchor, and I give quick size or spacing notes so the results look like a pro hung them, not like impulse Ikea decisions.
1. Minimal Gallery Wall With Mixed Frame Sizes
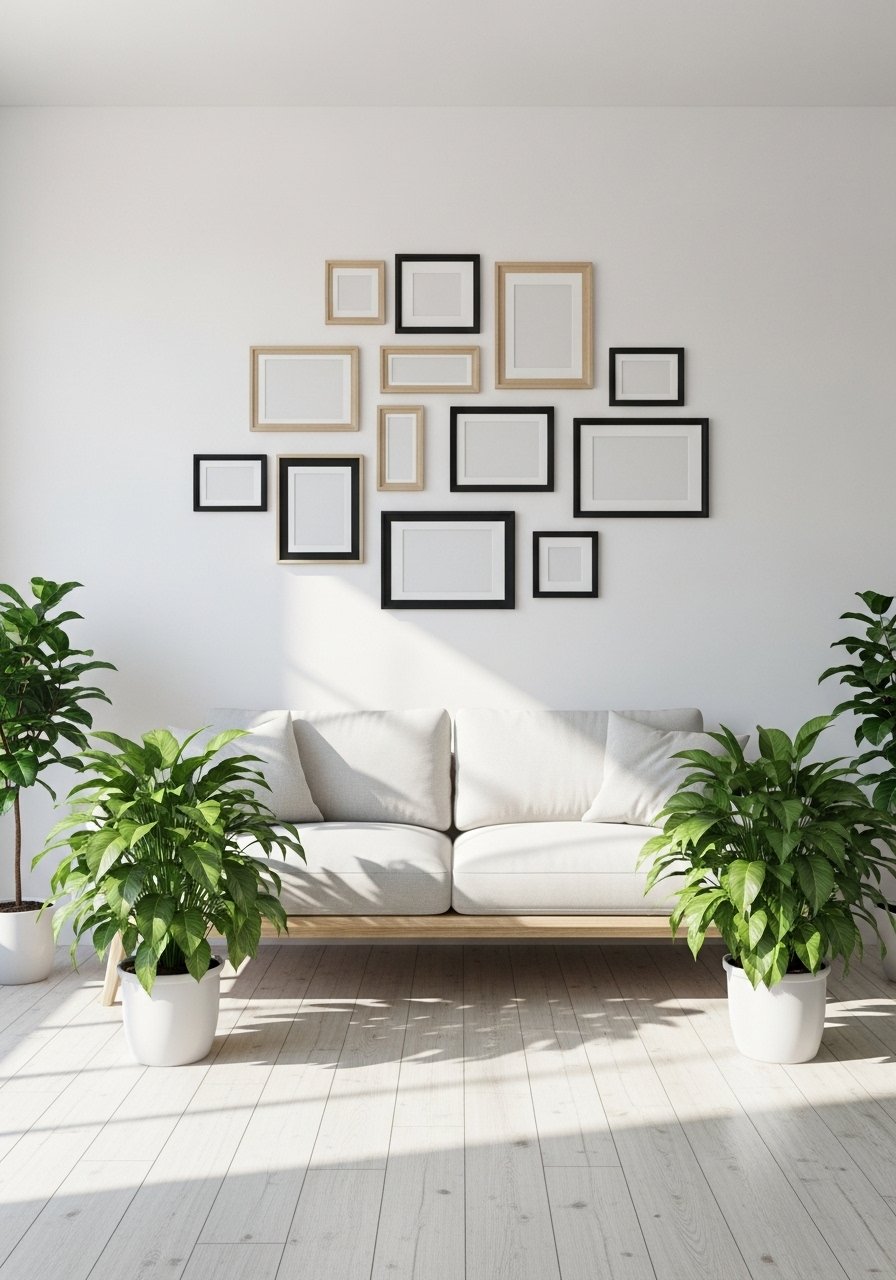
A gallery wall feels like a whole room decision, but it works when you use a disciplined formula. I hang the largest piece first at eye level, then build around it with two smaller frames, keeping 2 to 3 inches between edges for cohesion. The mixed frame sizes create rhythm, and the matte finishes keep it modern and grounded. This is great for renters because you can use removable picture-hanging strips for lighter frames, or small anchors for larger ones. Pair this with a set of black picture frames to keep the look consistent.
Mistake to Avoid: Hanging frames at random heights so the whole wall reads messy instead of intentional.
2. Leaning Floor Mirror With Soft String Lighting
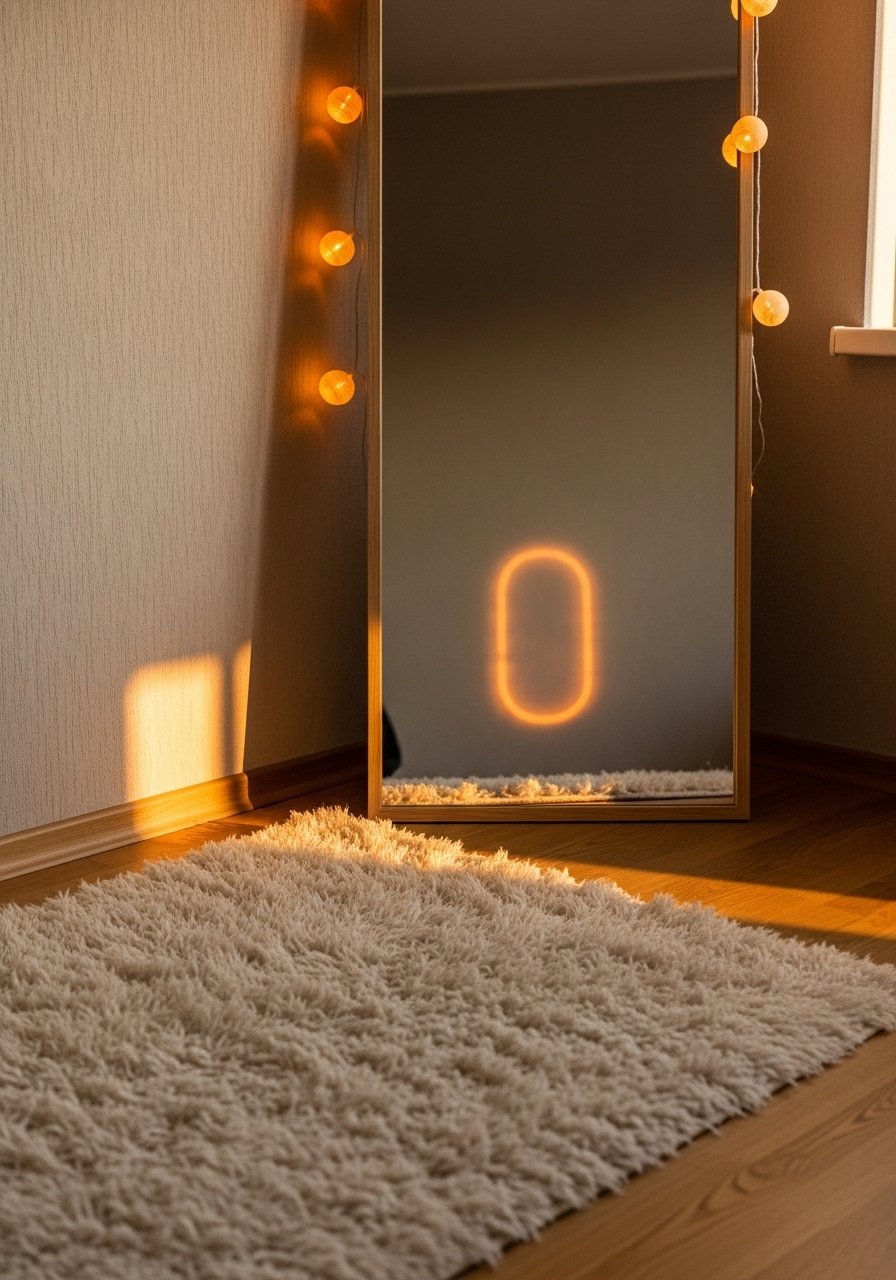
Leaning a mirror changes scale and adds depth without hardware. I wrap a lightweight string of warm bulbs around the frame to make evenings feel curated. The mirror doubles the light from windows and makes small rooms read larger. For stability, add a small wall anchor near the top if children or pets pull at things. This setup is budget friendly and takes under 30 minutes once you pick the mirror. I like a tall 5 to 6 foot mirror in narrow rooms and a 3 inch gap from the baseboard to avoid scuffing. I used a simple plug-in string lights set that dimmed easily.
Mistake to Avoid: Leaning heavy mirrors without an anchor so they tip forward.
3. Textured Tapestry Layered Over Paint
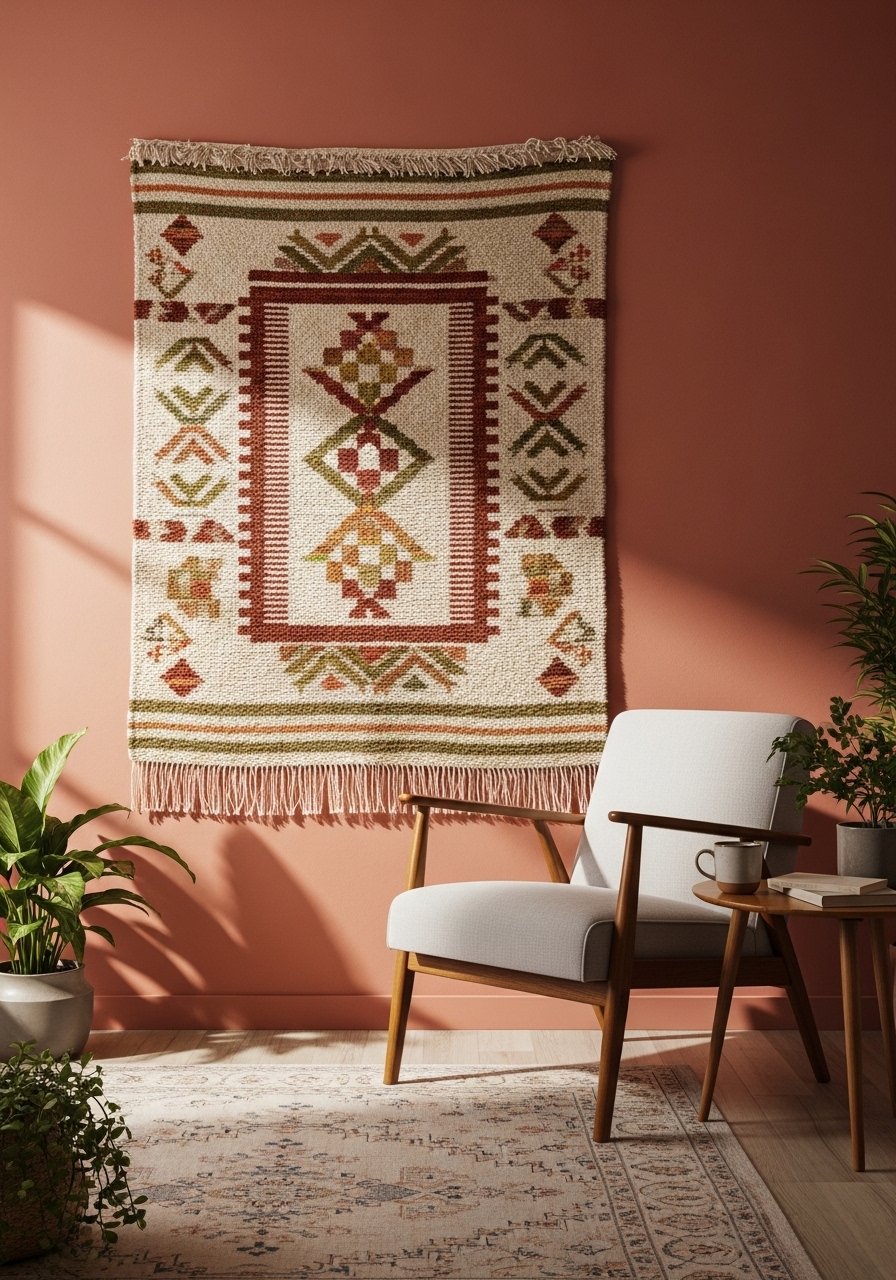
A woven tapestry brings texture and absorbs echo while making a wall feel designed. I layer a neutral tapestry over a block of color, usually a warm terracotta or muted sage, to create depth. Texture reads well in photos and in real life because it hides small wall imperfections. This is ideal for renters when you use hooks or removable adhesive hangers rated for the tapestry weight. Time: about 20 minutes to hang. For easier swaps, I use a lightweight woven wall tapestry that folds up without creasing.
Mistake to Avoid: Picking a tapestry too heavy for removable hardware, which will sag or pull paint.
4. Floating Shelf Vignette For Small Walls

A single floating shelf gives you a stage for rotating objects without committing to a full gallery. I keep the shelf depth between 8 and 10 inches so frames and ceramics sit comfortably. The trick is to group odd numbers: one tall object, two medium, and one small to anchor the vignette. This approach suits small hallways and apartments because it requires only two anchors and no full redecoration. Use a floating shelf kit with concealed brackets to keep the look clean and simple.
Mistake to Avoid: Overloading the shelf so it droops and hides the clean line.
5. Modular LED Picture Lighting Strip
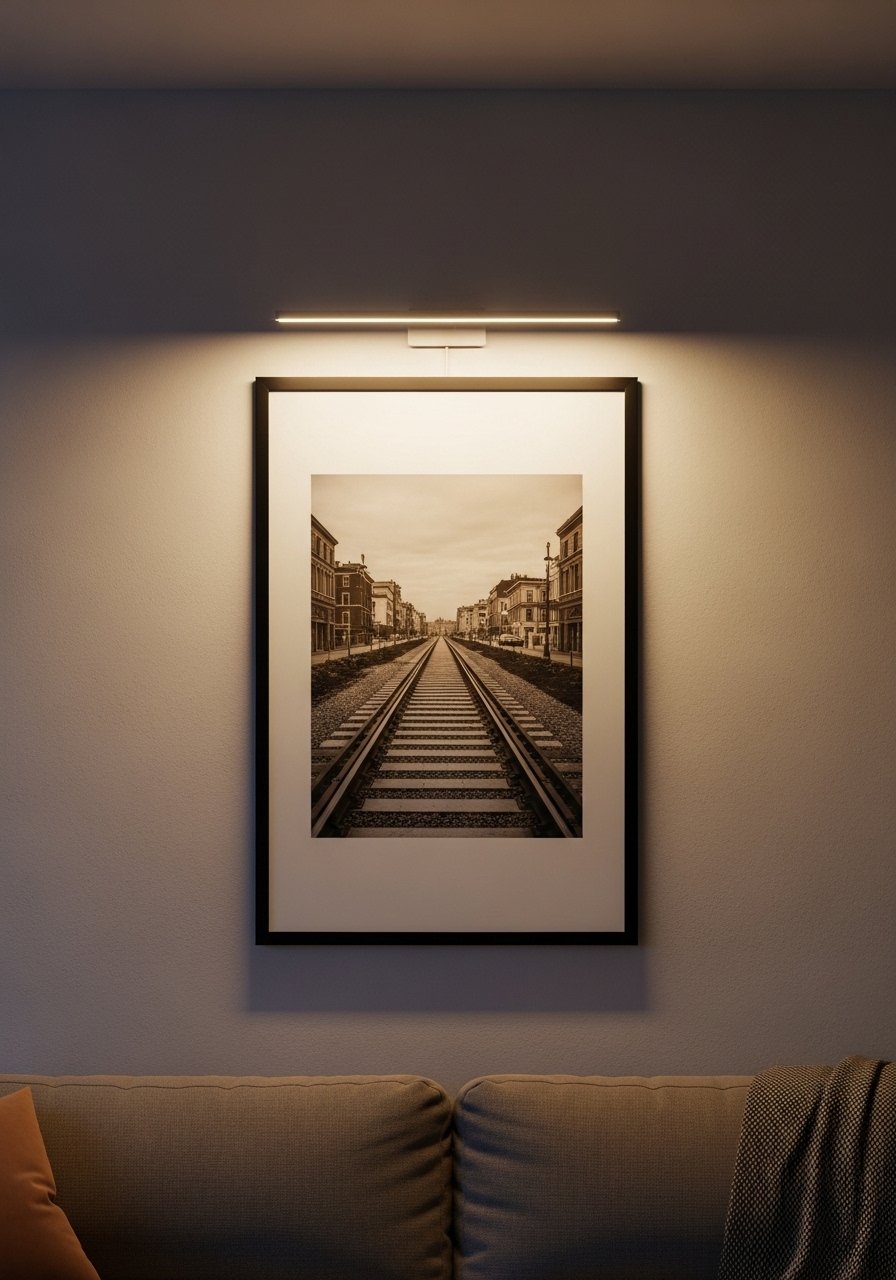
LED picture strips give art presence without rewiring. I install a slim modular strip above a print and set it to warm 2700K so the artwork reads true. The modular design lets you link multiple pieces and control brightness from a remote. It is especially useful for dim corners where overhead light washes out color. Installation usually takes 15 minutes and uses adhesive-backed channels, so it is renter friendly for lighter frames. I linked a compact LED picture light strip that runs on a plug-in transformer.
Mistake to Avoid: Choosing a cool white LED that makes art look clinical and flat.
6. Acoustic Art Panels That Double As Art
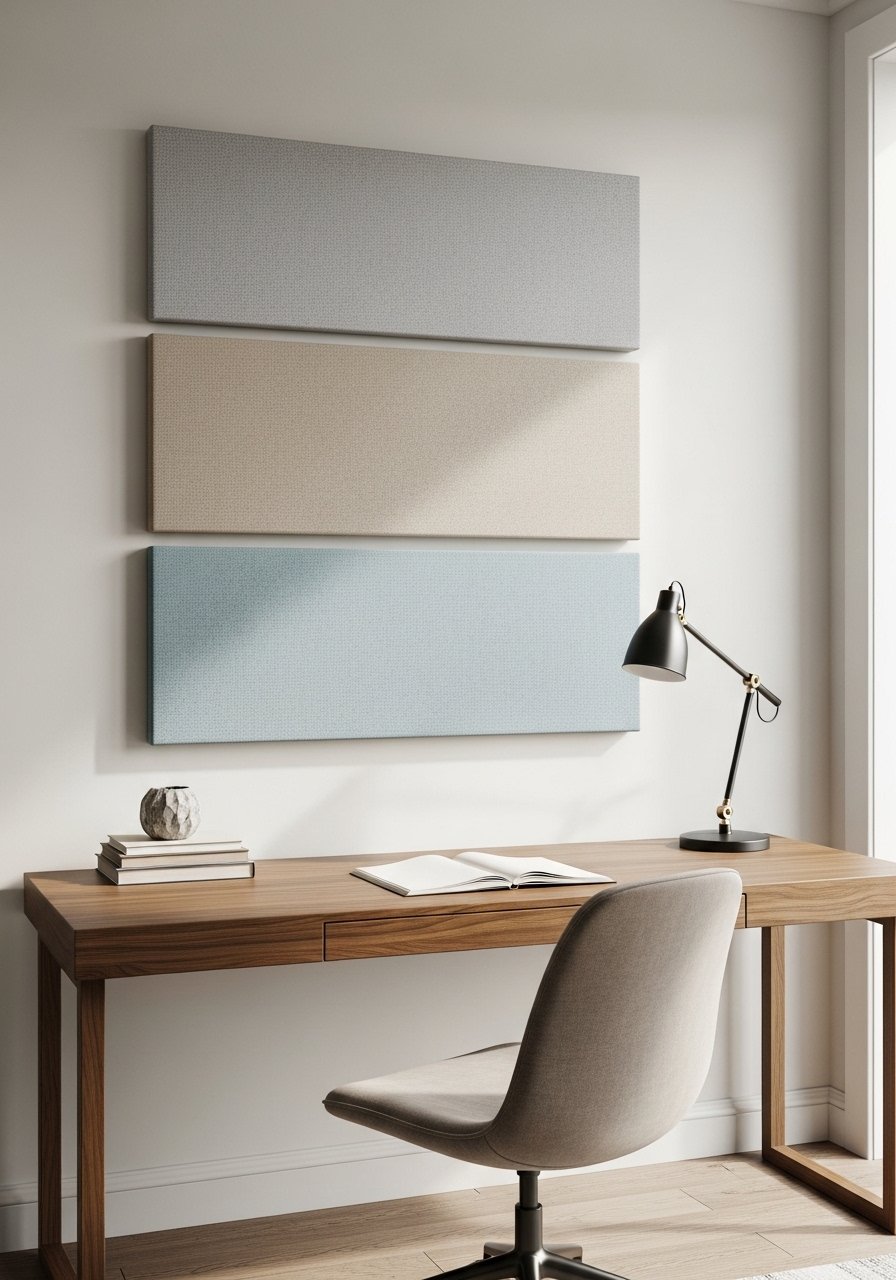
If your room echoes, acoustic panels fix sound and fill dead wall space. I used fabric-wrapped panels that come in multiple colors to create a graphic block. They absorb mid and high frequencies, making calls clearer and music better. Install is simple with French cleats or strong adhesive strips for lighter panels. This is one of those things competitors miss because it both functions and looks intentional. For small apartments, pick thinner panels rated for partial absorption and layer them with a print on one side. I used a set of fabric acoustic panels.
Mistake to Avoid: Buying decorative panels with zero sound rating and expecting quieter rooms.
7. Peel-and-Stick Fabric Accent Panel
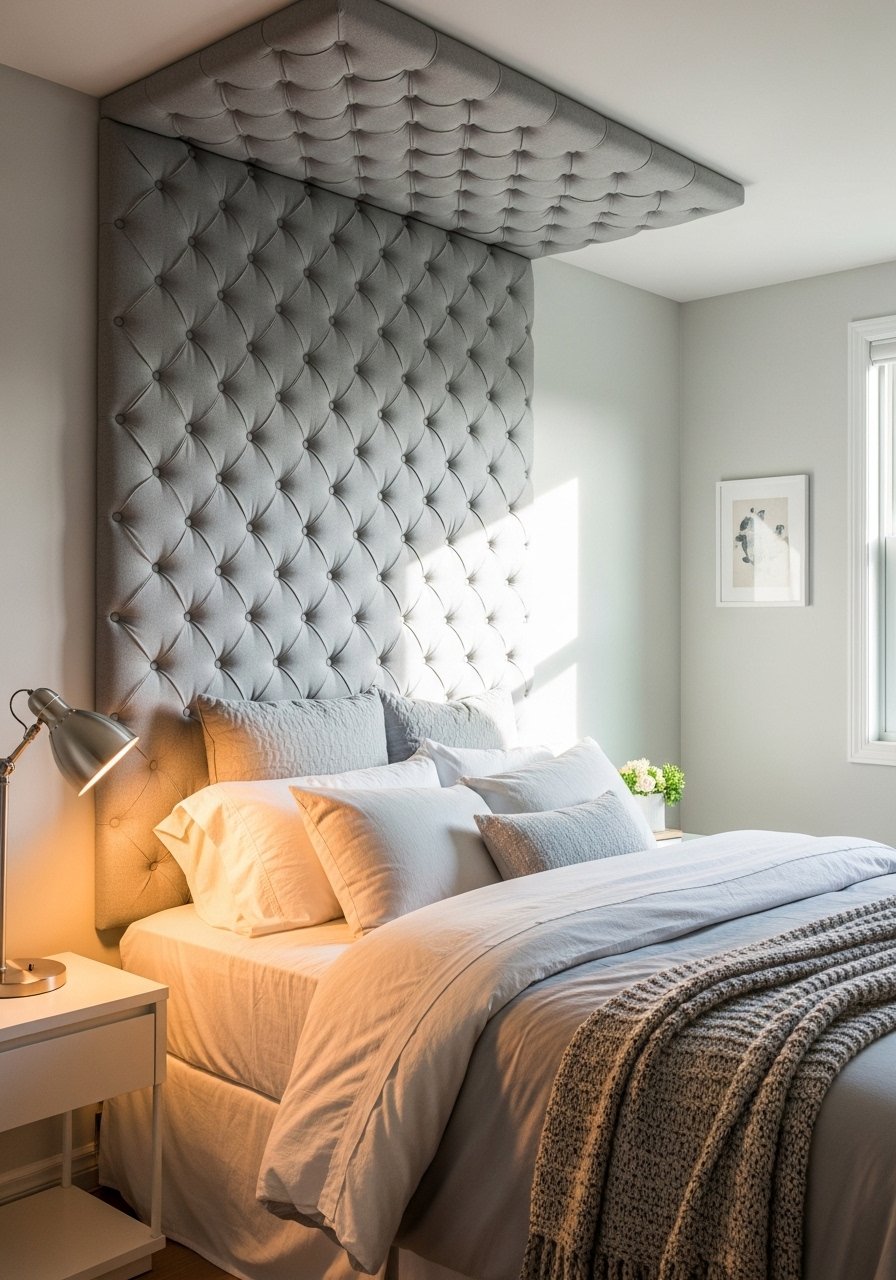
Peel-and-stick fabric panels are a renter-friendly way to add a tailored backdrop without paint. Install is faster than wallpaper and the texture changes the whole vibe from plain to curated. I cut panels to cover just the upper third of the wall behind the bed, using 1 inch overlap at seams for a seamless look. They are washable and removable, and swapping colors per season takes one afternoon. If you want a more permanent feel, finish edges with simple trim. Try a peel-and-stick fabric panel for a quick anchor.
Mistake to Avoid: Stretching the fabric too tight, which creates ripples once it settles.
If any of these ideas have you ready to try something, here are the products I actually reach for across projects.
Wall Styling Starter Picks
Hardware & Hanging:
- picture hanging kit (~$12-20), for mixed frame sizes and studs.
- removable picture hanging strips (~$8-15), renter-friendly and clean removal.
Lighting & Accent:
- plug-in string lights warm (~$15), soft evening glow for mirrors.
- led-picture-light-strip (~$30-60), slim and modular for prints.
Textiles & Panels:
- woven wall tapestry (~$25-45), layered over paint for texture.
- peel-and-stick-fabric-panel (~$35-70), removable and washable.
- fabric-acoustic-panels (~$60-120), for sound and style.
Wall Hanging Habits I Stopped Doing
Use a tape measure and mark first. I stopped eyeballing and started marking the center and 6 to 8 inches above furniture. A small laser level saves time and keeps the whole arrangement straight.
Grab a bag of different hardware. A picture hanging kit covers nails, anchors, and wire, so you do not need to run back to the hardware store mid-project.
If you swap art seasonally, store backing boards flat. A set of cardboard backing sheets protects prints and keeps frames from bending in storage.
Think in odd numbers for objects. Three objects on a shelf read more composed than two or four. A small ceramic vase plus a stack of books and one framed photo is a quick shelf trio.
Test lighting before final install. A plug-in warm LED bulb can change artwork color dramatically, so swap bulbs until skin tones and paper look right.
