
I kept choosing the tiniest script I could find and ended up with a fuzzy line that read like a smudge in photos. After three touch-ups and a panicked call to my artist, I learned that fine line means precise choices, not impossibly small lettering. The change came when I picked needle-friendly placements and an aftercare routine that avoided rubbing at night.
These ideas are not about loud statement pieces, they are about quiet markers that age well. They lean budget-friendly for a single-session touch-up, most sit as work-visible or easy to cover, and every option lists what to expect for pain, session time, and simple aftercare. If you want something subtle and personal without constant fuss, these are the kinds of dates that hold up.
1. Tiny Roman Numeral Wrist Band
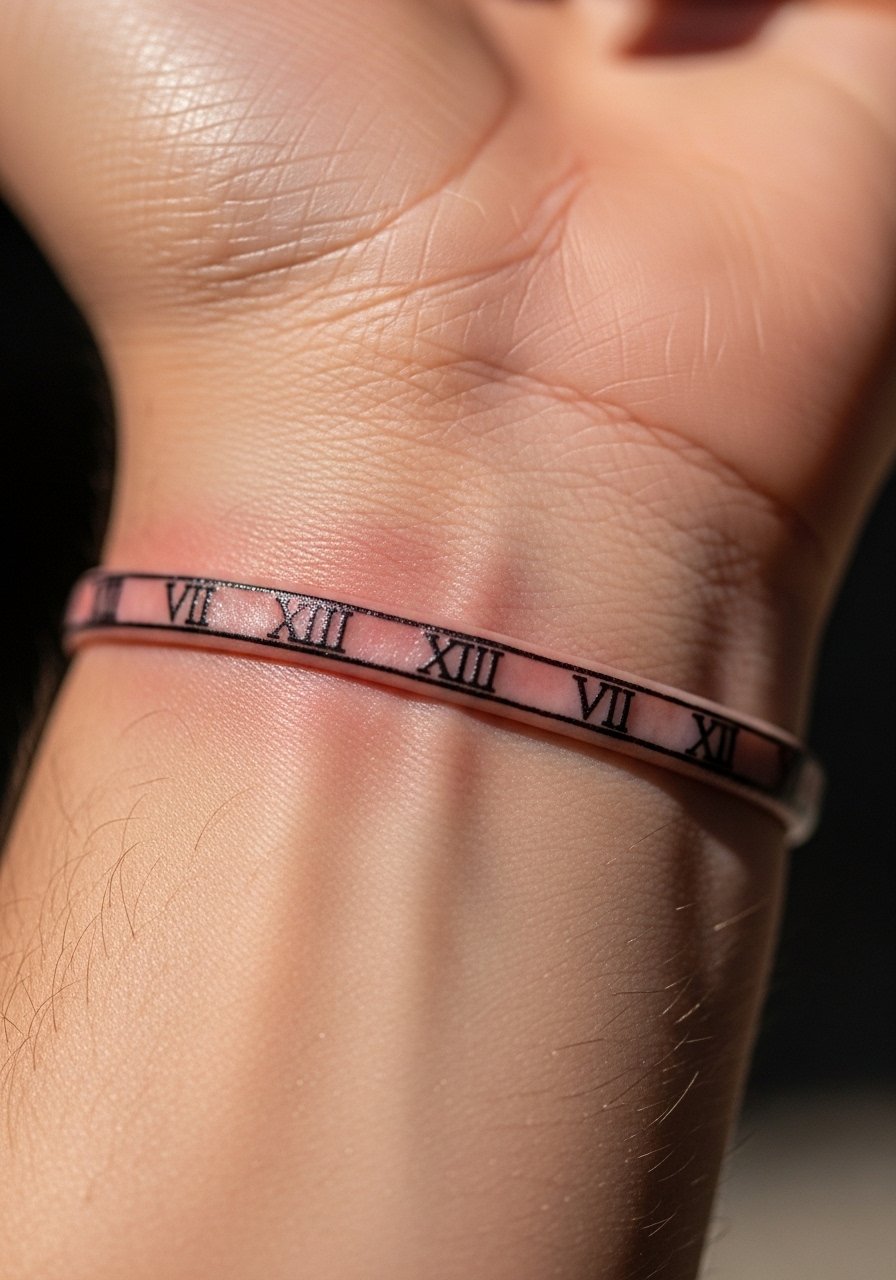
This is the classic choice when you want a readable number that still feels minimal. Use a single-needle 1RL for crisp numeral edges, and ask your artist to keep negative space around each character so lines do not merge as the tattoo settles. It reads formal but understated, fits someone who likes jewelry-free wrists, and usually takes 20 to 40 minutes. Pair this with a fragrance-free tattoo balm for the first week to reduce scabbing shine.
Style/Technique: Fine single-needle numerals
Pain Level: 3/10
Session Time: 20 to 40 minutes
Best For: Inner wrist, visible but coverable
Mistake to Avoid: Asking for numerals thinner than one single-needle width, which blurs within months.
2. Micro-Script Date on the Collarbone
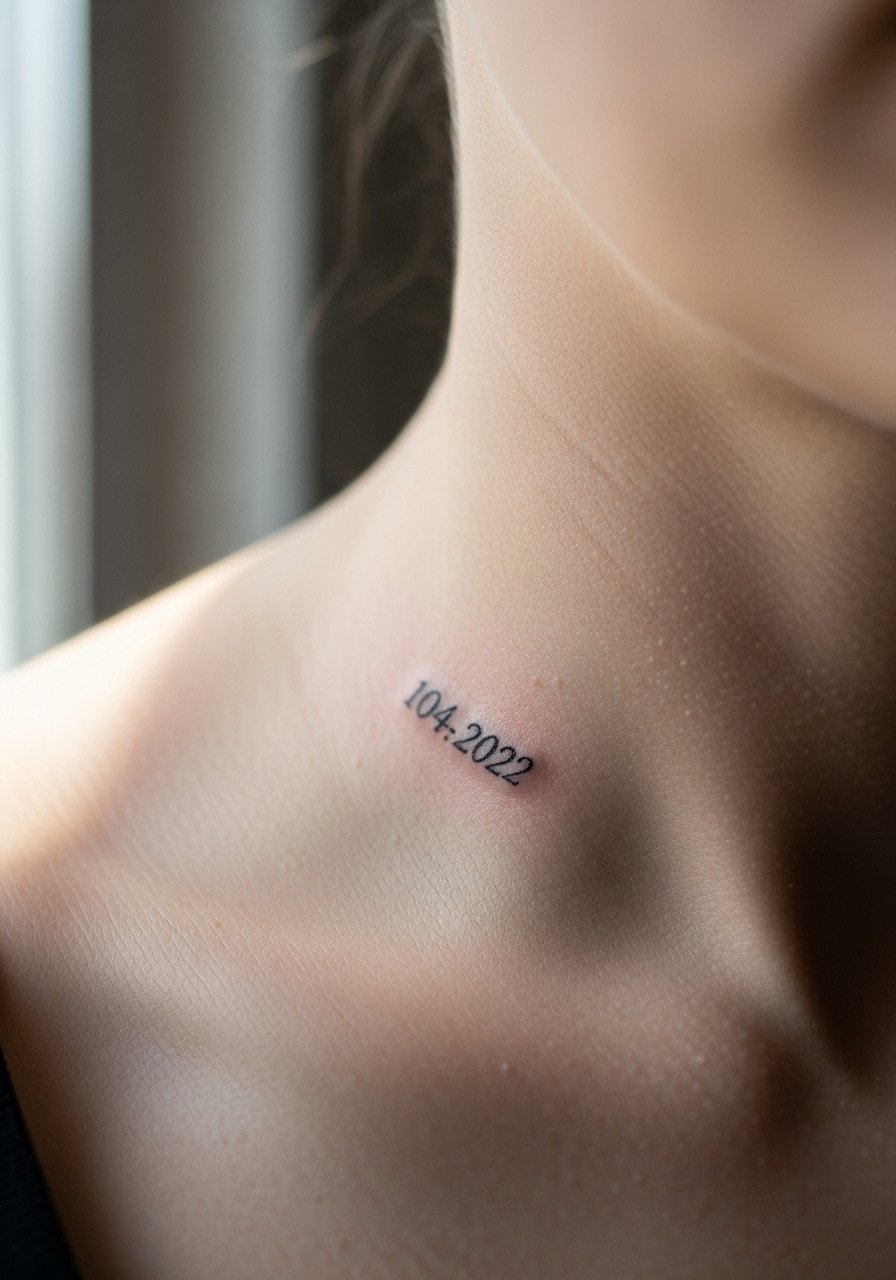
A narrow cursive date along the collarbone reads like a secret line you only notice up close. It works visually because the collarbone gives a long, flat canvas that keeps letters steady during healing. This suits someone who dresses to reveal the area sometimes and wants a subtle personal detail. Budget is low since many artists do this in a single pass. I recommend a light antiseptic wash and a thin film of tattoo aftercare ointment for the first 48 hours.
Style/Technique: Micro cursive script
Pain Level: 4/10
Session Time: 30 to 45 minutes
Best For: Collarbone, visible with scoop necks
Mistake to Avoid: Choosing a densely loopy script that looks cramped once healed.
3. Morse Code Dots On Inner Arm
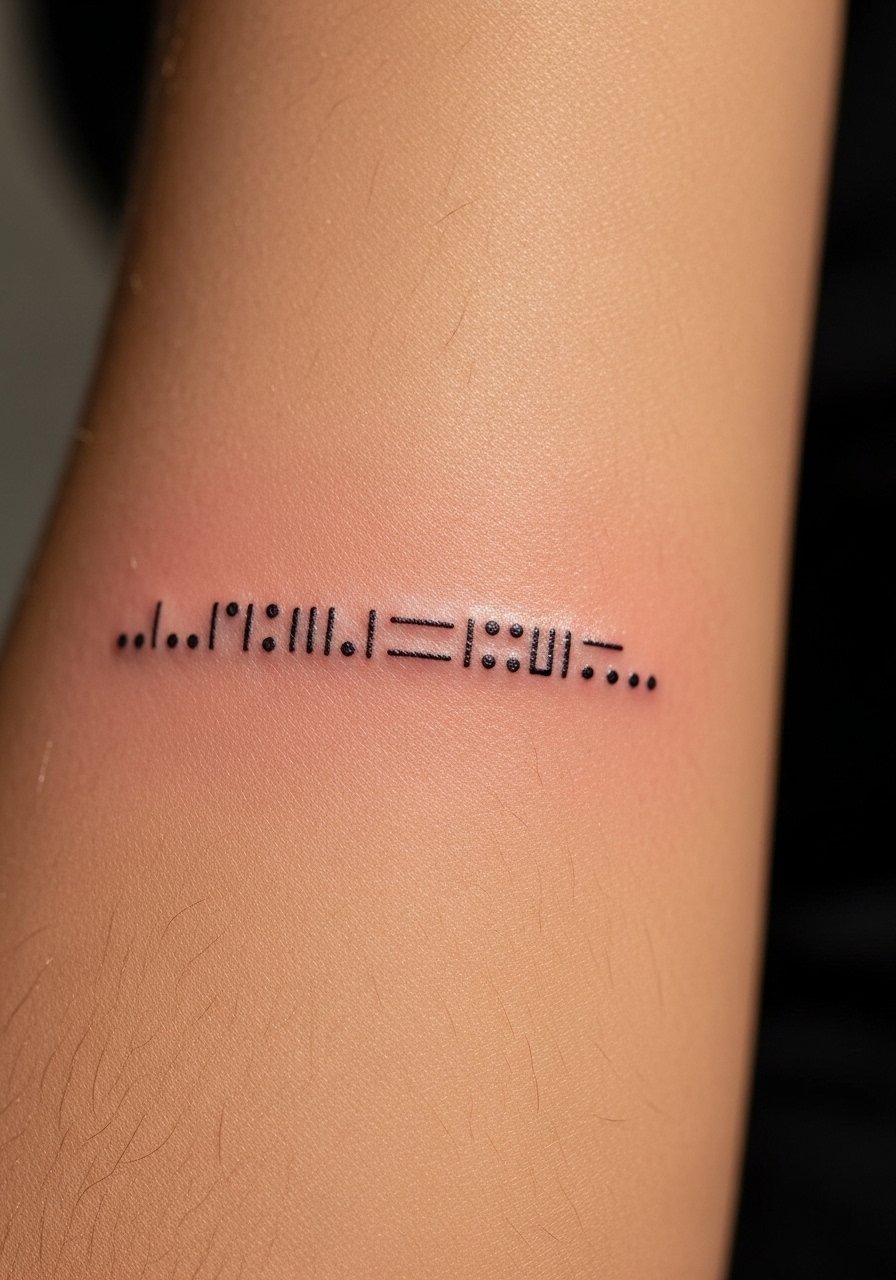
This is one of the gaps most lists miss, and it is perfect if you want a private code only a few people know how to read. The visual rhythm of dots and short lines reads modern. Use single-point dot work spaced at least 3 mm apart so tiny dots do not connect during settling, a detail my artist taught me the hard way. It lasts well on the inner arm, is low maintenance, and pairs with a lightweight unscented soap for tattoos for gentle cleaning.
Style/Technique: Micro dot and short-line work
Pain Level: 3/10
Session Time: 15 to 30 minutes
Best For: Inner arm, low visibility
Mistake to Avoid: Packing dots too close together, which makes the code blur into an indistinct line.
4. Barcode-Style Numeric Line Along the Ribcage
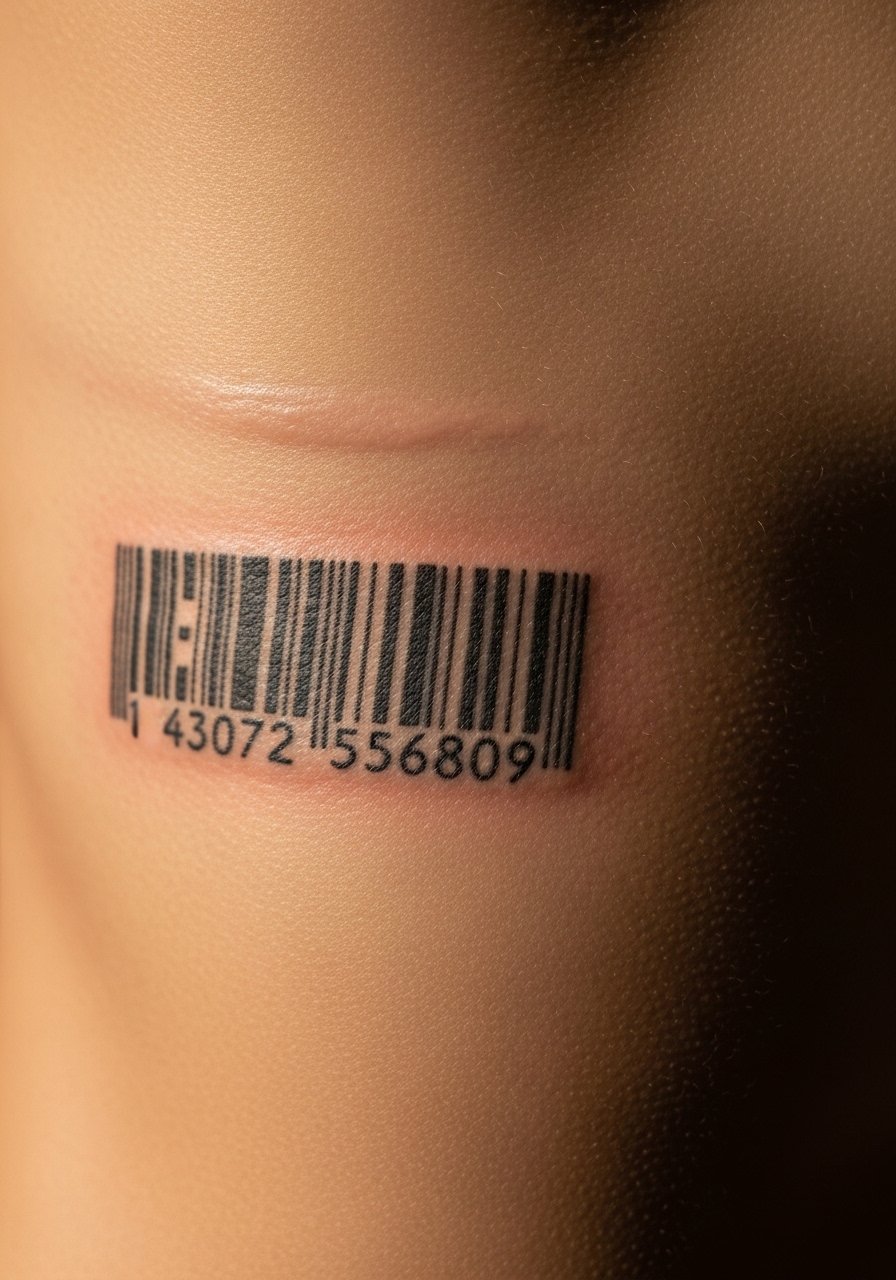
A barcode interpretation gives the date a graphic, modern twist and is a fresh angle most competitor lists skip. It reads as a design from a distance and decodes up close. Because ribs shift with breathing, ask for spaced lines with a tiny gap and a 3RL for steadier ink laydown. Expect higher pain and a longer session. This fits someone who wants a bold-but-hidden piece and budgets for a 60 to 90 minute session. Bring a soft breathable compression bandage for the ride home.
Style/Technique: Graphic fine-line bars and numerics
Pain Level: 7/10
Session Time: 60 to 90 minutes
Best For: Ribcage, coverable with shirts
Mistake to Avoid: Requesting solid black bars without spacing, which looks muddy after healing.
5. Coordinates in Fine Script Behind the Ear
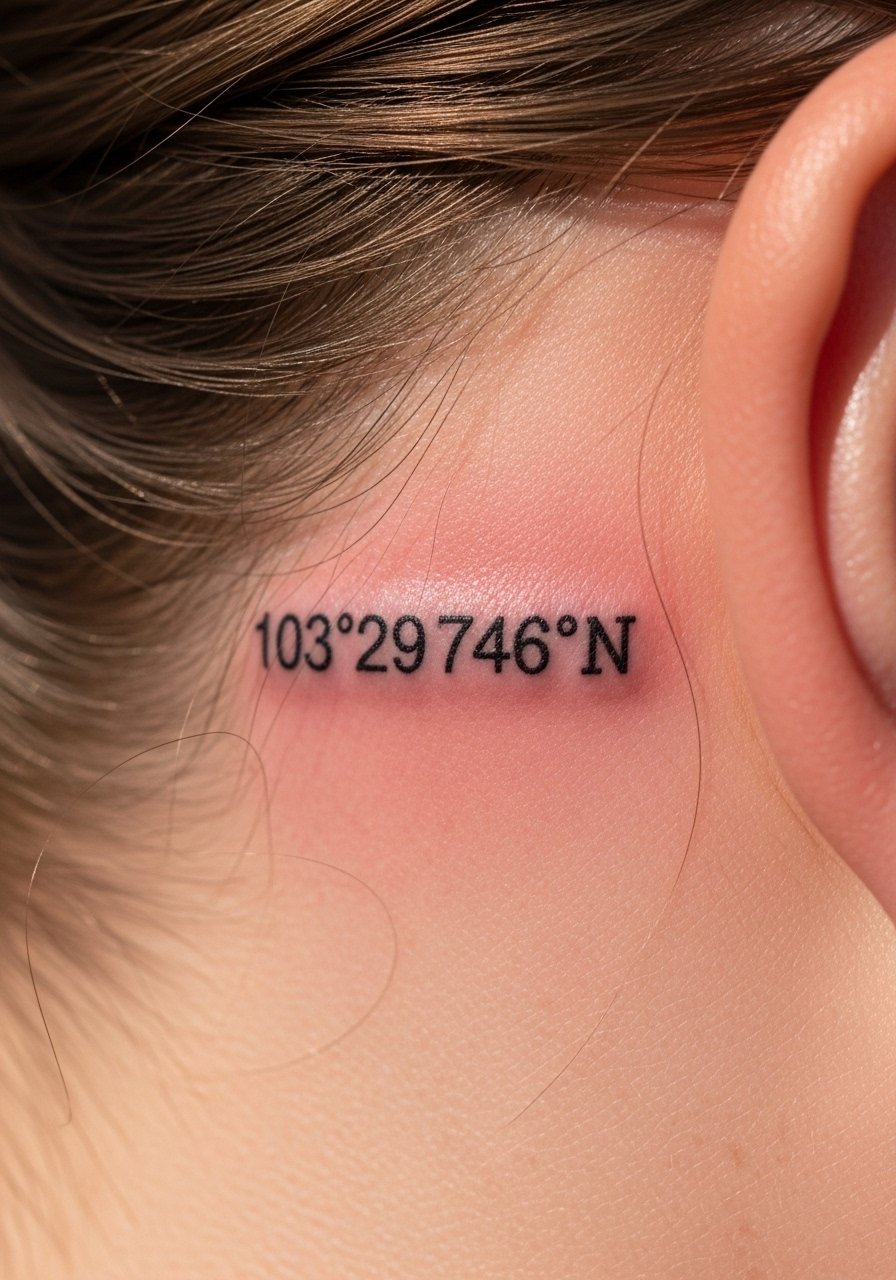
Coordinates are discreet and personal. Behind the ear is a low-pain spot with natural hair cover, making it work-visible only when you want it to be. Use tiny numerals with slight spacing and a 1RL so digits remain legible. Because the skin is thin, expect the ink to heal slightly lighter, so discuss contrast with your artist. For aftercare, a small dab of healing salve stick makes nighttime care less messy.
Style/Technique: Micro numeric script
Pain Level: 2/10
Session Time: 15 to 25 minutes
Best For: Behind ear, easily hidden by hair
Mistake to Avoid: Choosing dense fonts that flatten on thin skin.
6. Interlocking Date Rings Around a Finger
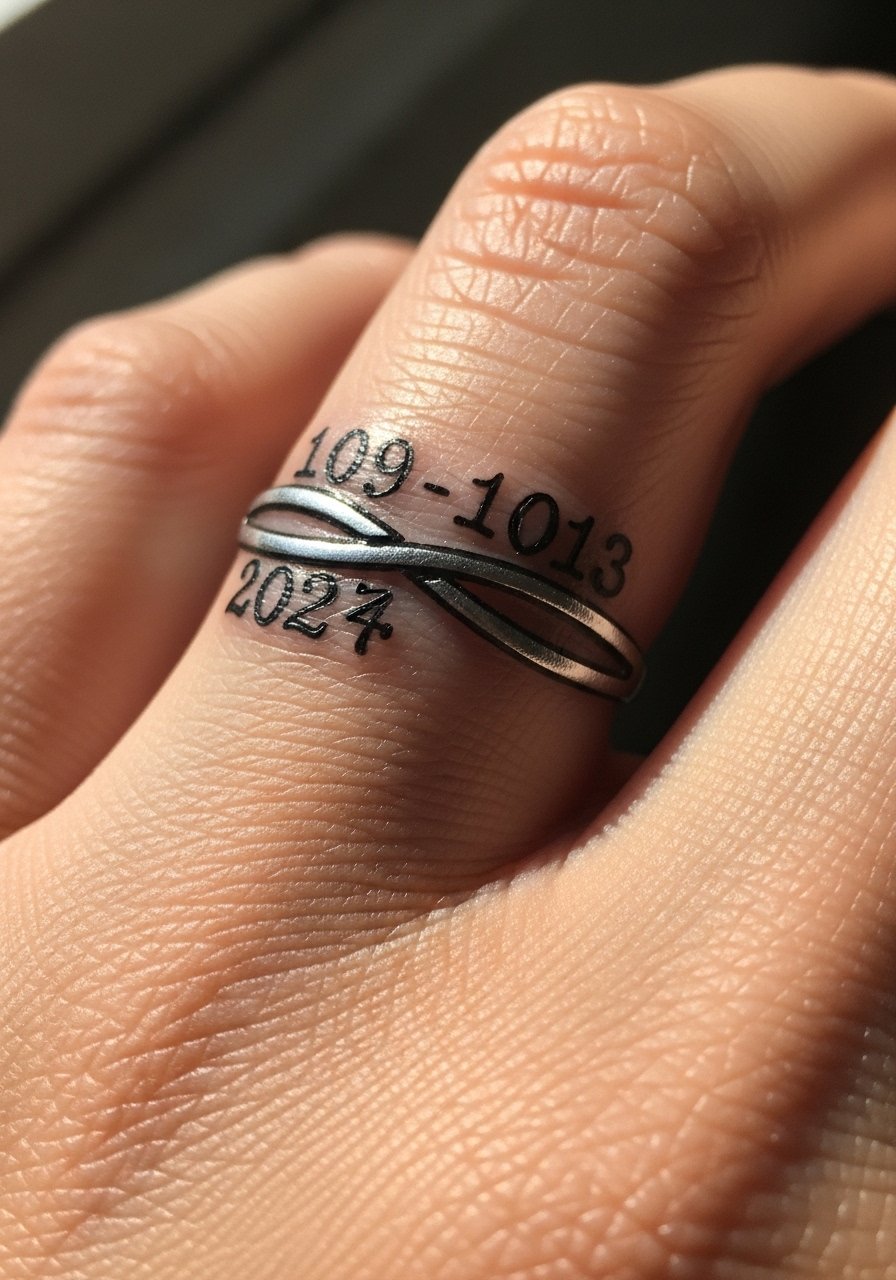
Ring tattoos age differently than flat placements, so space digits a hair wider and accept a touch-up within a year. This is for people who like jewelry-like permanence. Use a 3RL for steadier line weight on the curved surface and expect faster fading from hand wear. If you plan to cover with a real ring sometimes, talk to your artist about placement to avoid constant metal rubbing. Protect during healing with a thin layer of tattoo-specific petroleum-free balm.
Style/Technique: Curved single-line numerals
Pain Level: 4/10
Session Time: 30 to 45 minutes
Best For: Finger base, jewelry-style visibility
Mistake to Avoid: Asking for hairline spacing on a finger, which disappears under skin movement.
7. Vertical Stack Along the Spine
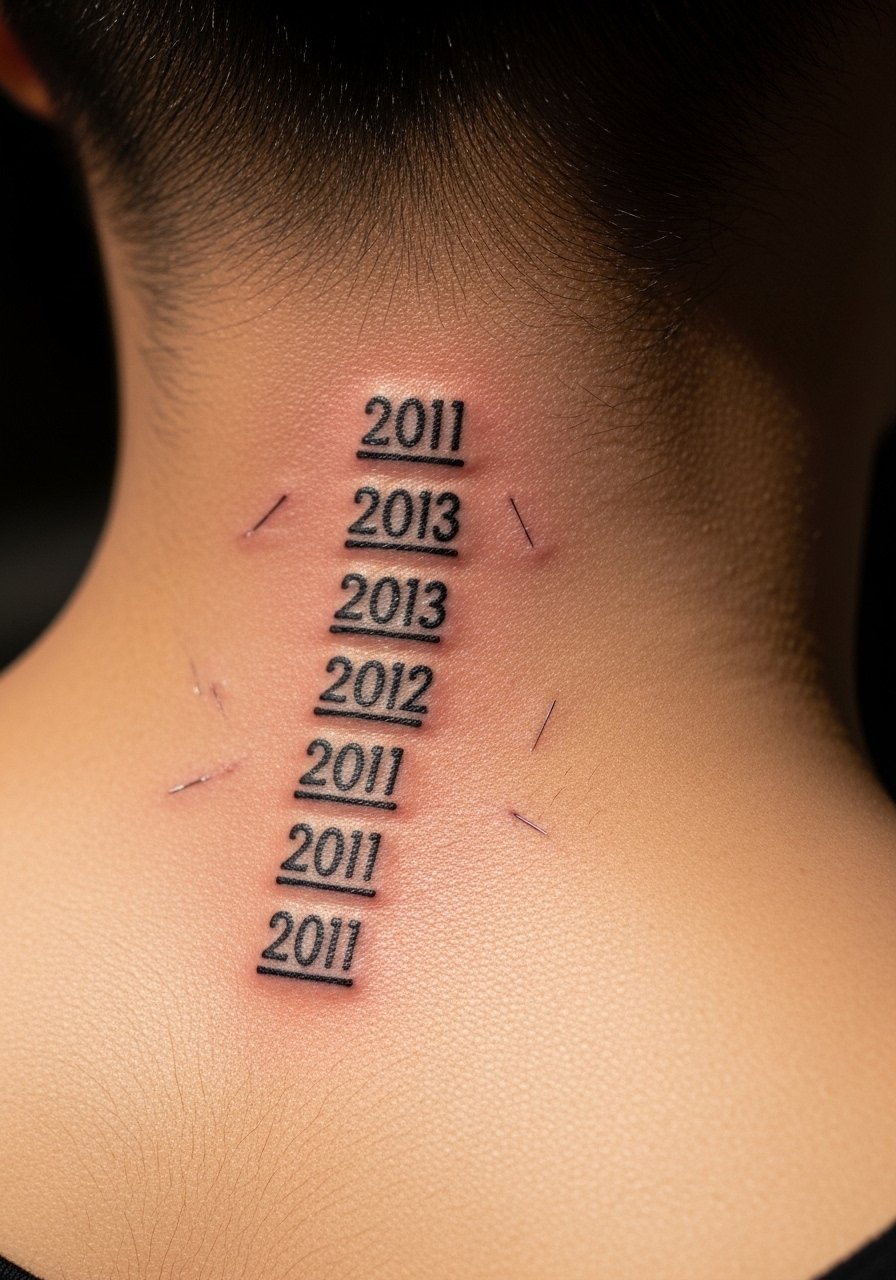
Stacking numbers vertically gives a vintage ledger feel while staying refined. The spine breathes and stretches, so choose slightly larger numerals and a 3RL for consistent saturation along the column. This placement suits someone who likes center-line symmetry and wants something coverable by hair or tops. Expect moderate pain and a steady session. Keep the area flat during sleep and use a sleeping shirt collar or soft silk pillowcase to reduce friction.
Style/Technique: Vertical numeral stack
Pain Level: 5/10
Session Time: 30 to 60 minutes
Best For: Spine/nape, central placement
Mistake to Avoid: Choosing ultra-tiny numerals that warp along the spine as you move.
If any of these ideas have you ready to actually pick supplies, here are the essentials I use and recommend.
Date Tattoo Supply Picks
Aftercare:
- Fragrance-free tattoo balm (~$8-15), easy to apply and keeps scabs soft.
- Unscented gentle soap (~$5-12), for twice-daily cleaning.
Protection & Sleep:
- Silk pillowcase (~$15-30), less friction while healing.
- Breathable compression bandage (~$10-20), helpful for larger chest or rib pieces.
Artist Supplies (if discussing with your artist):
- Thermal transfer stencil paper (~$12-25), for crisp micro scripts.
- Single-needle cartridge pack (~$25-45), specify 1RL for fine work.
Sun Care & Long-Term:
- Mineral sunscreen stick (~$8-16), for healed tattoos in sunlight.
- Petroleum-free healing ointment (~$7-14), for stubborn dry patches.
8. Constellation Date With Tiny Stars
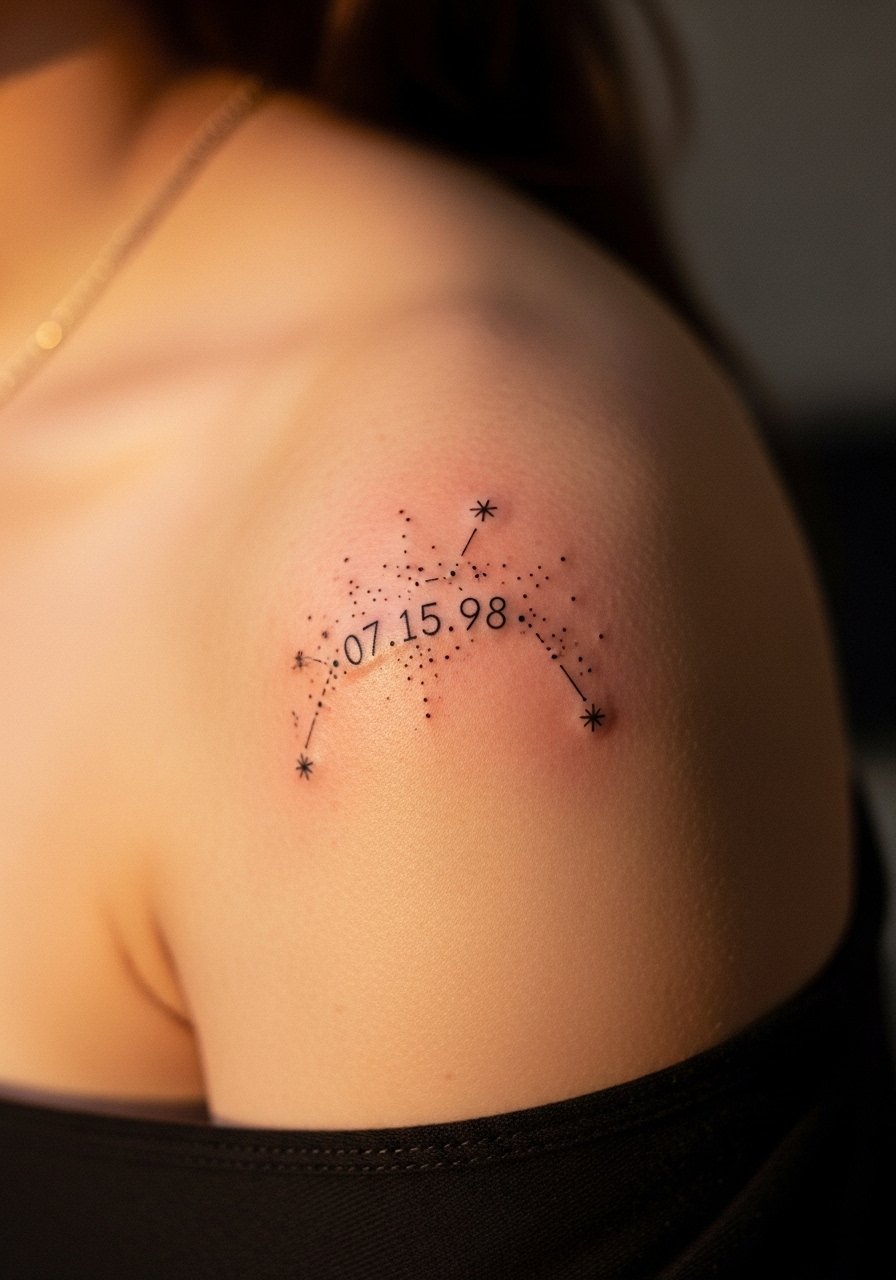
Pair a few tiny stars with a date to tie the memory to a night sky motif. Dot spacing matters here, keep at least 2 to 3 mm gaps to avoid merging. It reads delicate and pairs well with sleeveless tops. The piece is low pain and usually 20 to 40 minutes. For long-term crispness, ask for slightly darker initial ink since stars often heal lighter. I like using a thin layer of aloe-based aftercare gel to calm redness.
Style/Technique: Dot and fine-line starwork
Pain Level: 3/10
Session Time: 20 to 40 minutes
Best For: Outer shoulder, seasonal visibility
Mistake to Avoid: Crowding stars around the digits so the date becomes unreadable.
9. Negative Space Date Inside a Geometric Shape
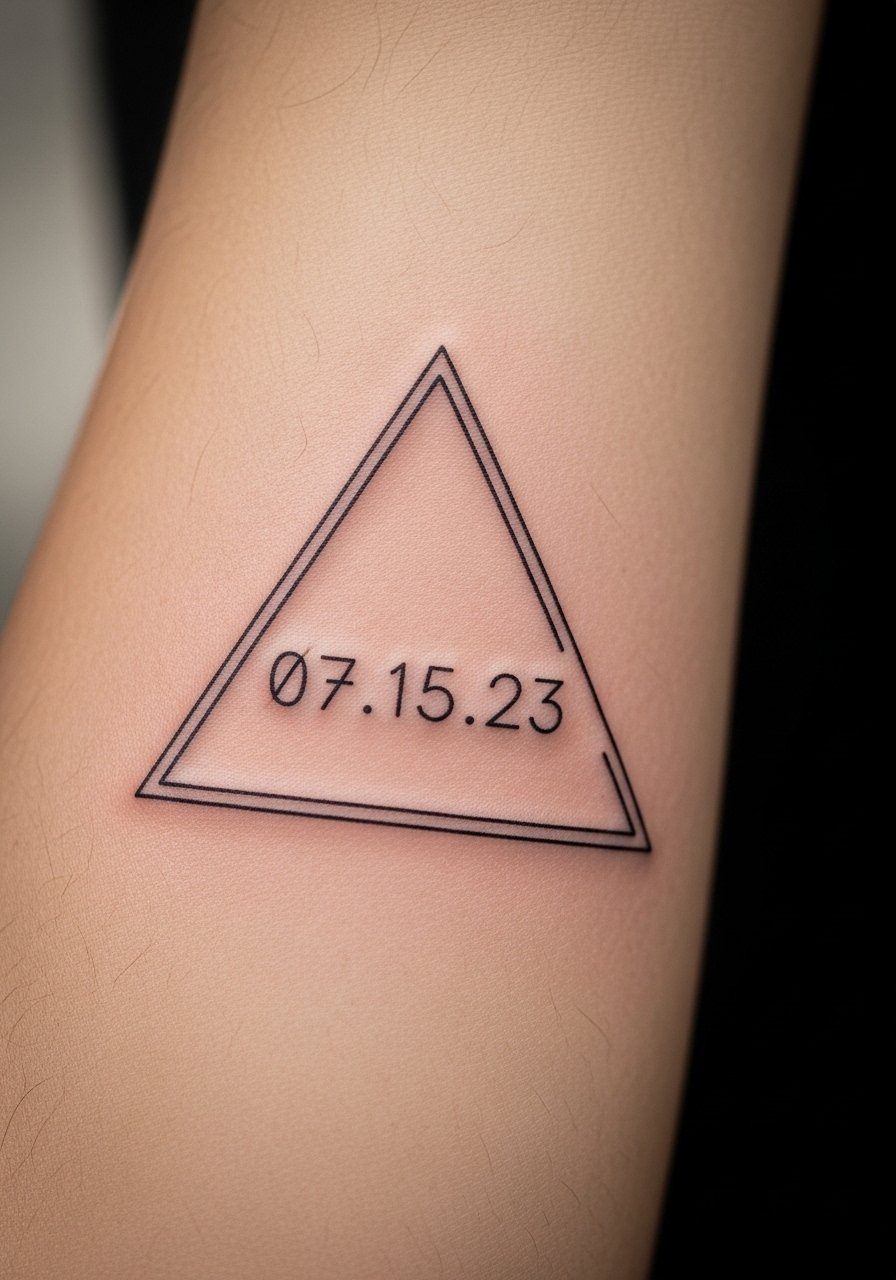
Using negative space frames the date without extra ink. The trick is to keep the border thin but bold enough so the empty digits hold shape against skin texture. Artists often use a 3RL for the geometric outline and a 1RL to refine inner gaps. This feels modern and suits someone who wants a designed element rather than plain numbers. Protect the flat area with a silicone-based overnight healing patch during the first week.
Style/Technique: Geometric outline with negative-space numerals
Pain Level: 3/10
Session Time: 30 to 50 minutes
Best For: Forearm, visible and design-forward
Mistake to Avoid: Choosing a border so thin it fades and loses the negative-space effect.
10. Script Hidden in a Cuff Under the Wrist
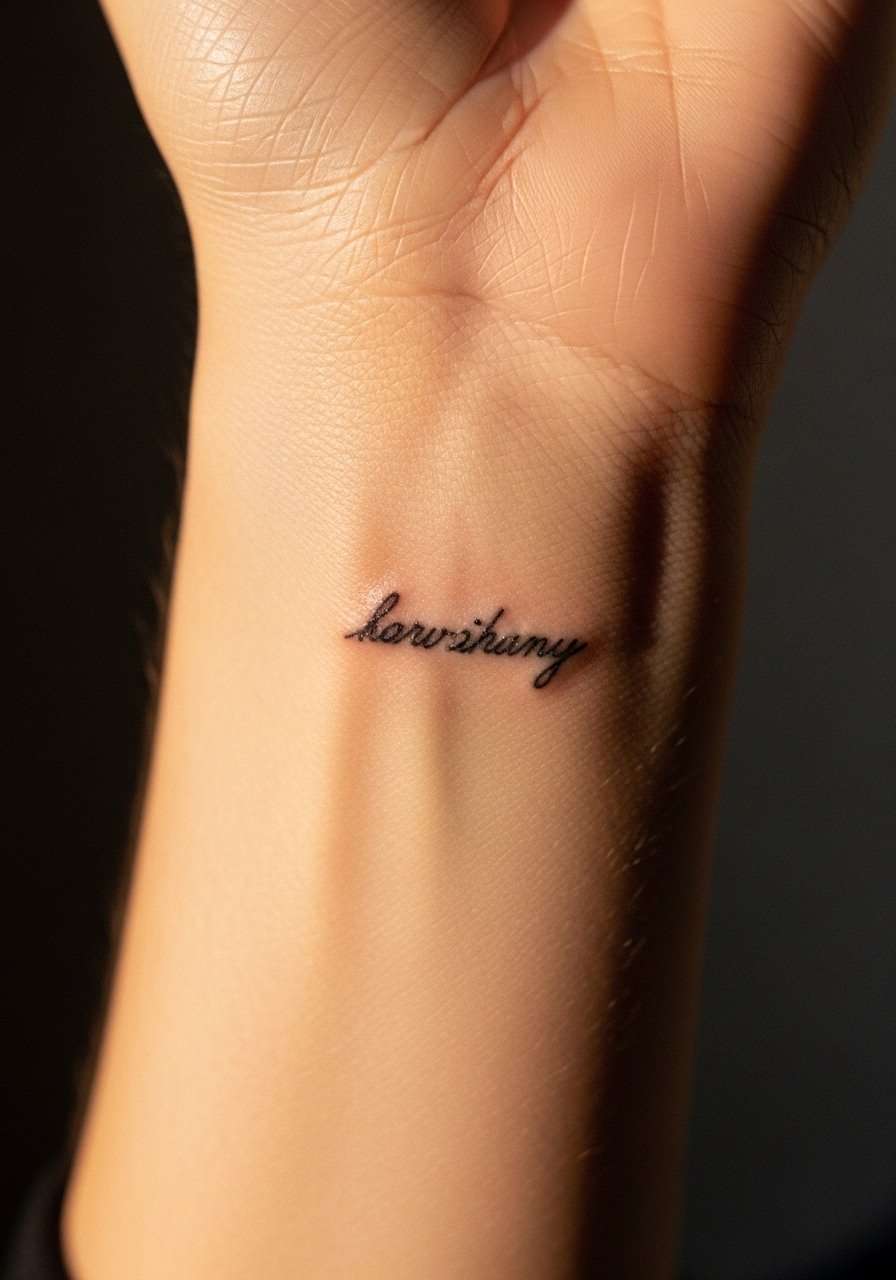
A micro-script tucked under the wrist sits like handwriting hidden by a watch or bracelet. It is coverable, intimate, and often caught in photos only by chance. Ask for a slightly bolder initial stroke because skin there moves and can soften lines. This is quick, low cost, and suits someone who wants a private reminder. For sleeping, keep the area loose and use a dab of non-greasy healing lotion at night.
Style/Technique: Hidden micro-script
Pain Level: 2/10
Session Time: 15 to 25 minutes
Best For: Under wrist, very coverable
Mistake to Avoid: Picking an overly ornate font that blurs on wrist skin movement.
11. Minimal Stamp Date on the Ankle
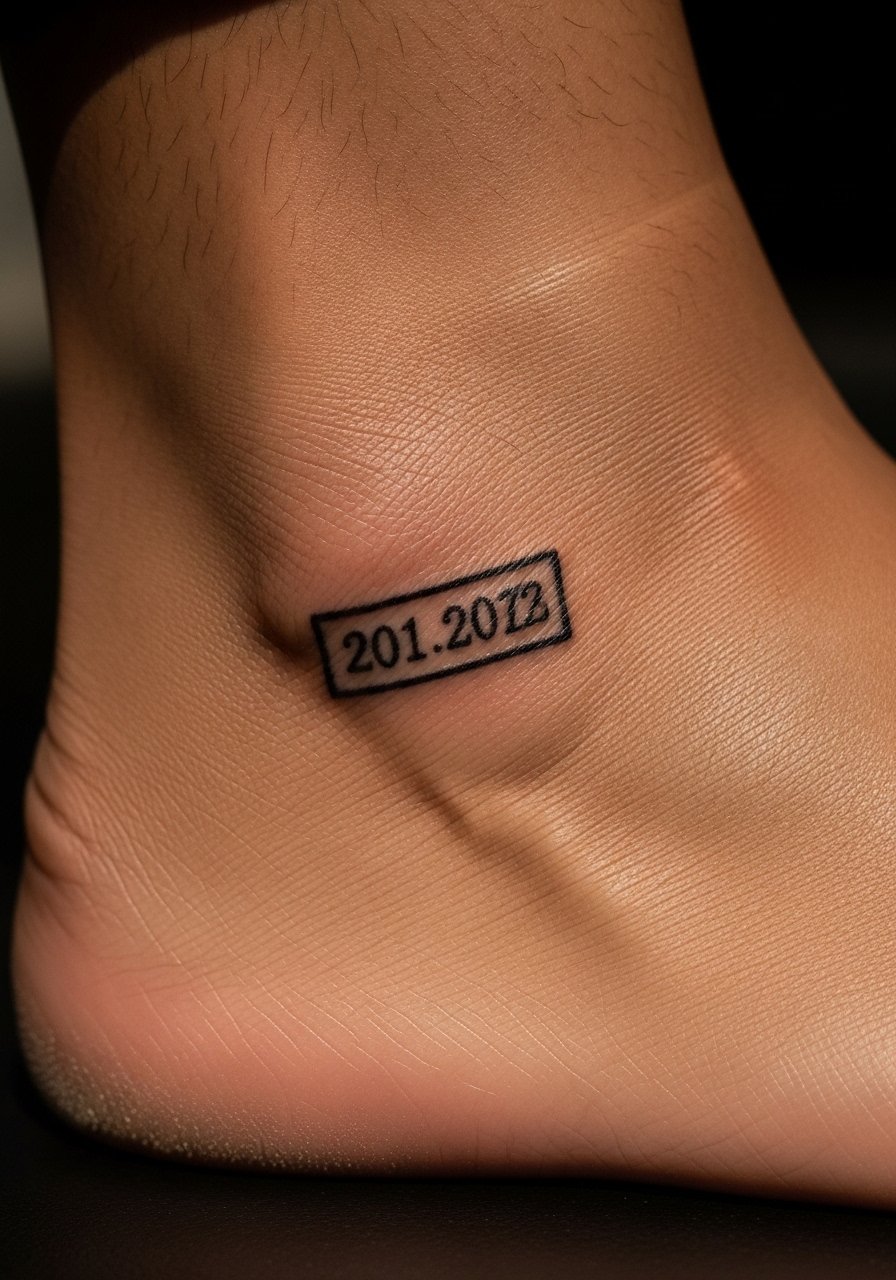
A tiny rectangular stamp with the date inside reads like a passport mark. It is playful, simple, and sits well on ankle bone to peek out from shoes. The ankle tolerates single-needle work but requires clear spacing so edges do not feather. This is a good budget option that usually needs only one session. Keep shoes loose while the area peels and use a travel-size aftercare balm stick for touch-ups on the go.
Style/Technique: Boxed micro numerals, stamp look
Pain Level: 4/10
Session Time: 20 to 35 minutes
Best For: Ankle, casual visibility
Mistake to Avoid: Choosing a filled background which traps ink and ages poorly on ankles.
12. Tiny Heart-Linked Date Along the Clavicle
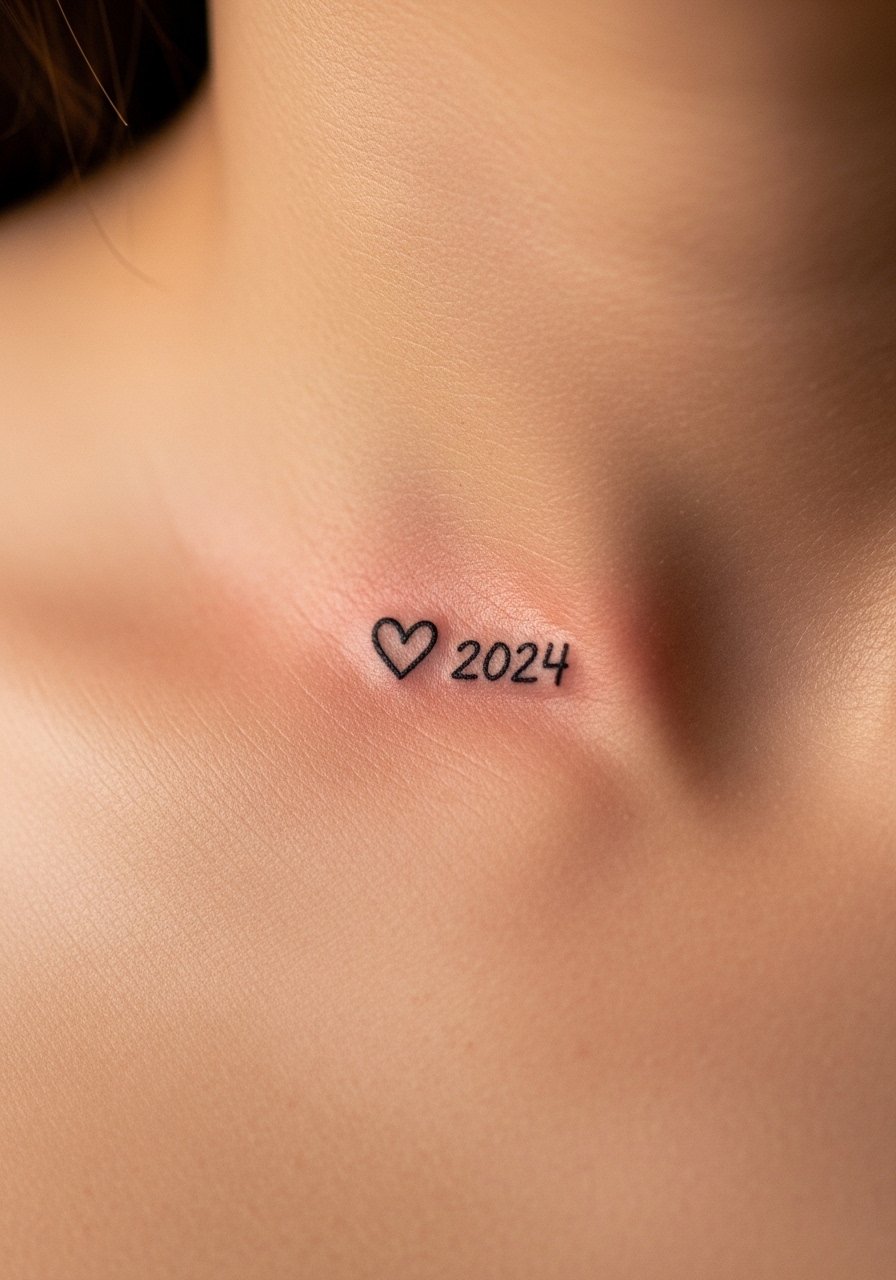
A tiny heart next to a date softens a numeric mark and reads romantic without being overt. Place it along the clavicle so it follows natural lines. Use a 1RL for the heart and numerals, and keep the heart open rather than filled so it does not blur. It communicates sentiment and pairs well with simple jewelry. For showers, keep the area away from direct hot water and pat dry before applying a thin coat of healing salve.
Style/Technique: Open-heart micro with date
Pain Level: 3/10
Session Time: 20 to 30 minutes
Best For: Clavicle, romantic and visible
Mistake to Avoid: Filling the tiny heart solid, which often looks like a blotch later.
13. Binary Code Date Along the Forearm
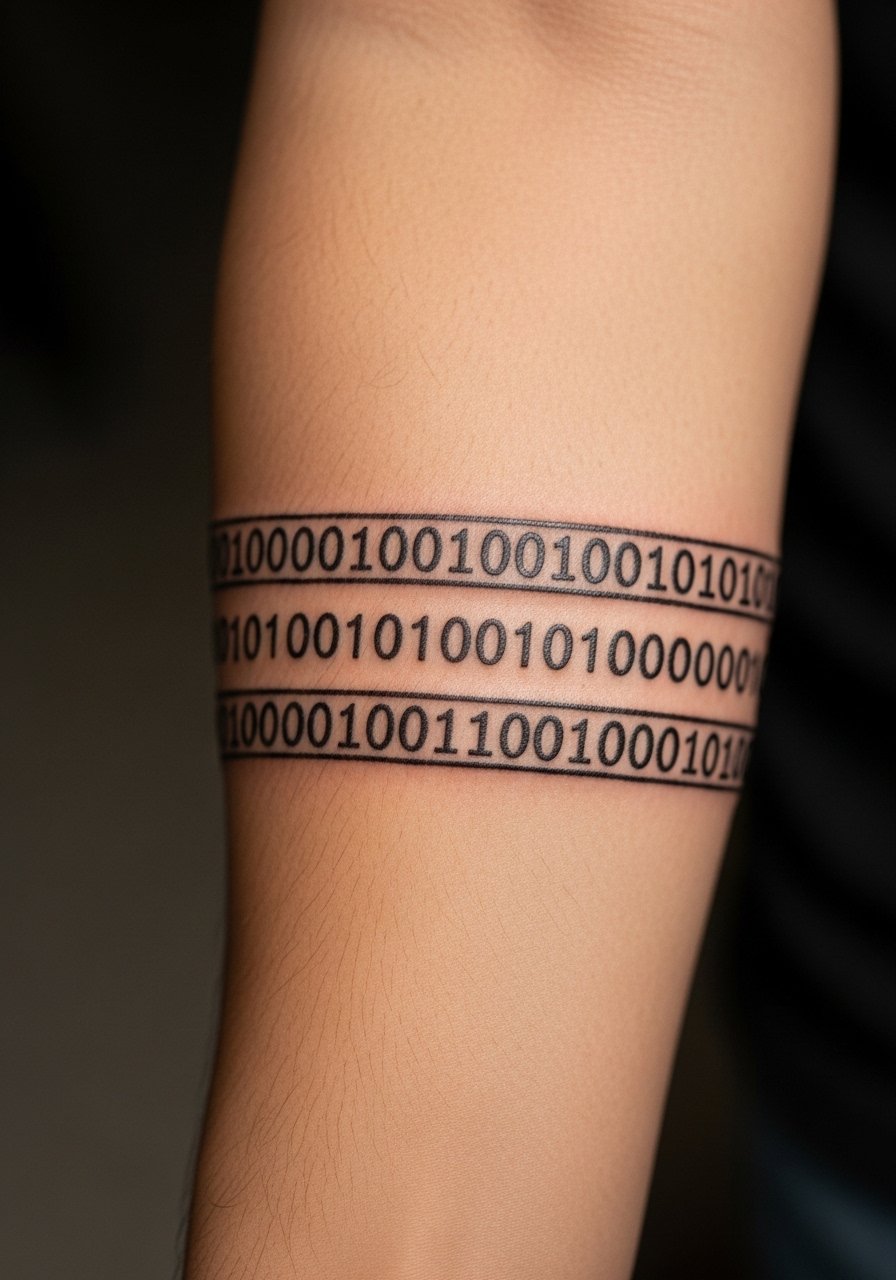
Another competitor gap, binary code converts a date into a neat, techy line that reads like pattern. Keep ones and zeros spaced clearly; use a 3RL for consistent circular zeros and a 1RL for thin ones to ensure contrast. This suits someone who likes geek-chic details and wants a long visual element. It takes modest time and ages predictably. For longer runs, cover with loose sleeves during the first two weeks and treat with unscented healing balm.
Style/Technique: Micro numeric-to-binary line
Pain Level: 3/10
Session Time: 30 to 50 minutes
Best For: Forearm, tech-forward aesthetic
Mistake to Avoid: Compressing the sequence so zeros and ones blur into an indistinct band.
14. Tiny Calendar Icon With Circled Day on Shoulder Blade
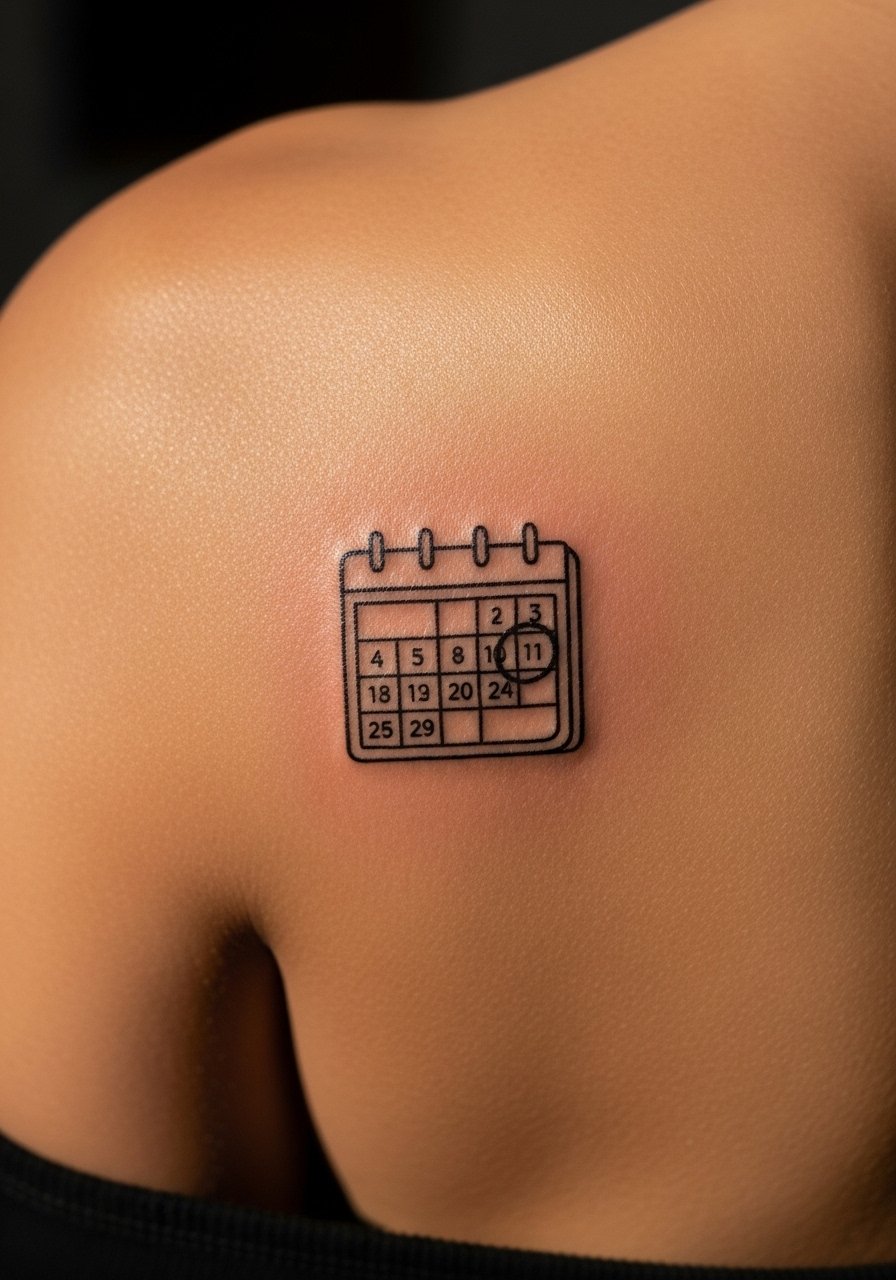
This gives the date a playful visual: a small calendar with the day circled. It reads like a private reminder and sits nicely on the shoulder blade under clothing. Keep the icon minimal so the circled day remains legible; a 3RL border and 1RL inner details work well. Expect low maintenance and easy coverage with shirts. If you plan on sun exposure, use a mineral sunscreen stick once healed.
Style/Technique: Mini icon with circled numeral
Pain Level: 3/10
Session Time: 25 to 40 minutes
Best For: Shoulder blade, hidden unless revealed
Mistake to Avoid: Over-detailing the calendar, which looks cluttered at tiny scale.
15. Single Micro-Dot Date at the Nape
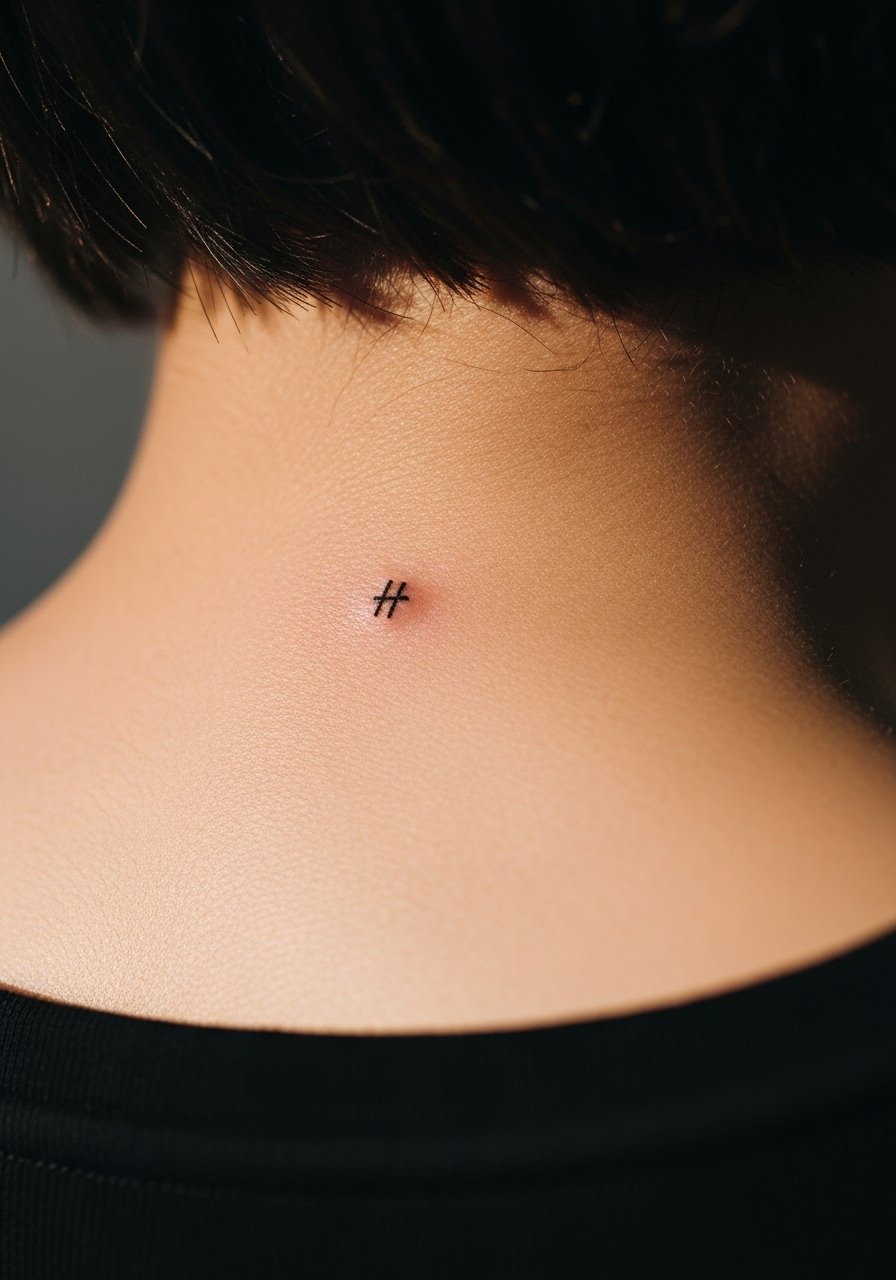
If you want the smallest possible nod to a date, consider a single micro-dot or tiny mark that represents the day only you know. It ages subtly and is almost never the focal point. Use one precise 1RL dot per element, placed with millimeter care so it does not migrate. This is budget-friendly and nearly painless. Keep hair loose during the first week and apply a pea-sized amount of healing gel rather than rubbing.
Style/Technique: Micro-dot shorthand
Pain Level: 1/10
Session Time: 5 to 15 minutes
Best For: Nape, very discreet mark
Mistake to Avoid: Stacking too many dots close together, which reads as a blur rather than individual markers.
Fine-Line Aftercare Moves
Keep it clean. Gently wash with unscented gentle soap twice daily. Pat dry, do not rub, and apply a thin layer of balm to avoid suffocating the skin.
Let scabs be. Resist picking and use a breathable cover if clothing rubs the area. A breathable compression bandage helps with larger spots.
Start sun protection. Once healed, shield tattoos with a mineral sunscreen stick to keep lines crisp.
Sleep smart. Swap to a silk pillowcase to reduce friction on fresh tattoos.
Plan for touch-ups. Fine lines sometimes need one small refresh after the first year; budget that early so you are not surprised.
Ask about needle choice. When you book, ask your artist if they plan to use 1RL for single strokes or 3RL for steadier lines so you know what to expect.