
I kept darkening the brown until my tips read like a stripe, not a manicure, and then I learned to think about width and translucence before color. The mistake I kept making was matching photos of long almond nails to my short squoval hands. Once I started designing around my nail shape, brown tips looked warm and wearable instead of heavy.
If you want brown tips that actually suit your hands, this list focuses on realistic lengths, easy salon moves, and small extras that stop chipping and muddy color.
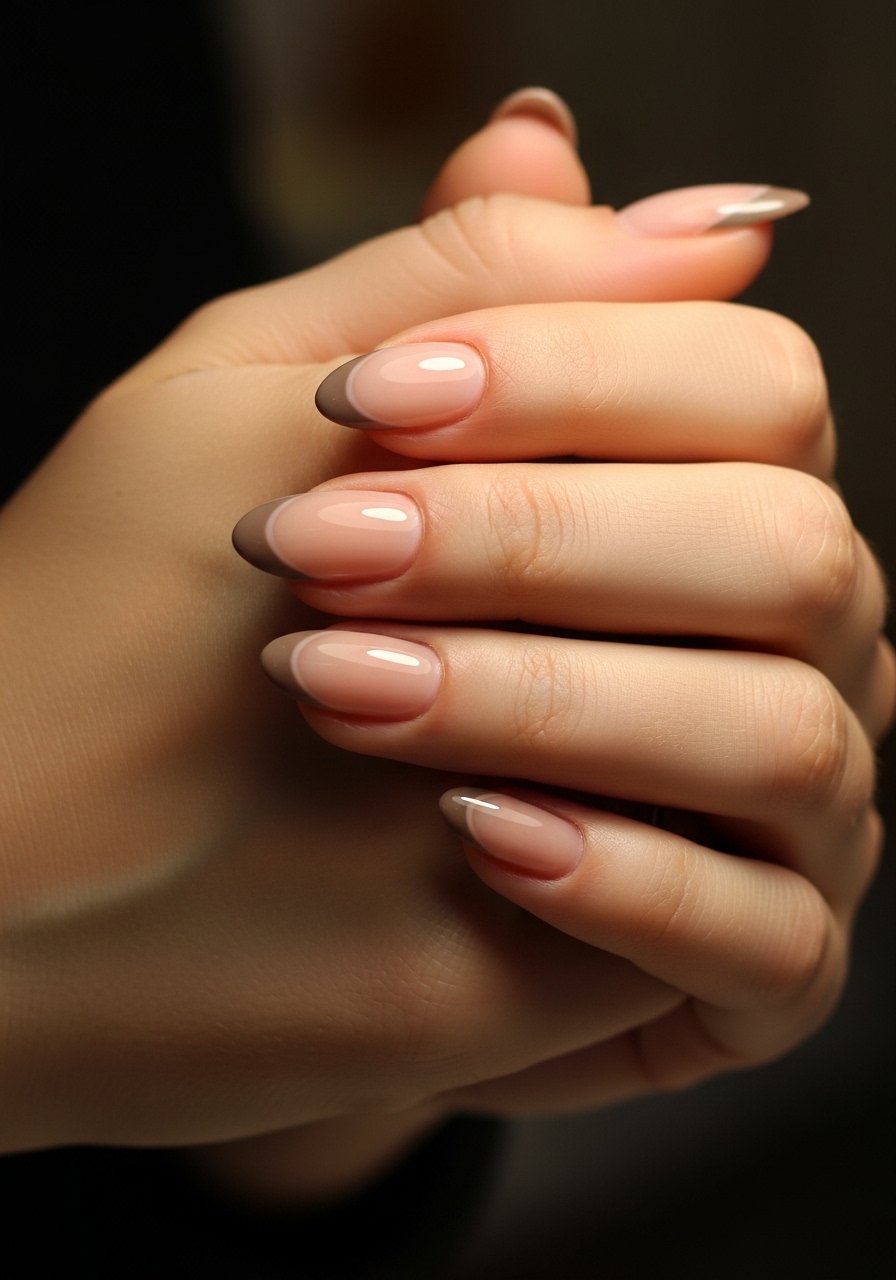
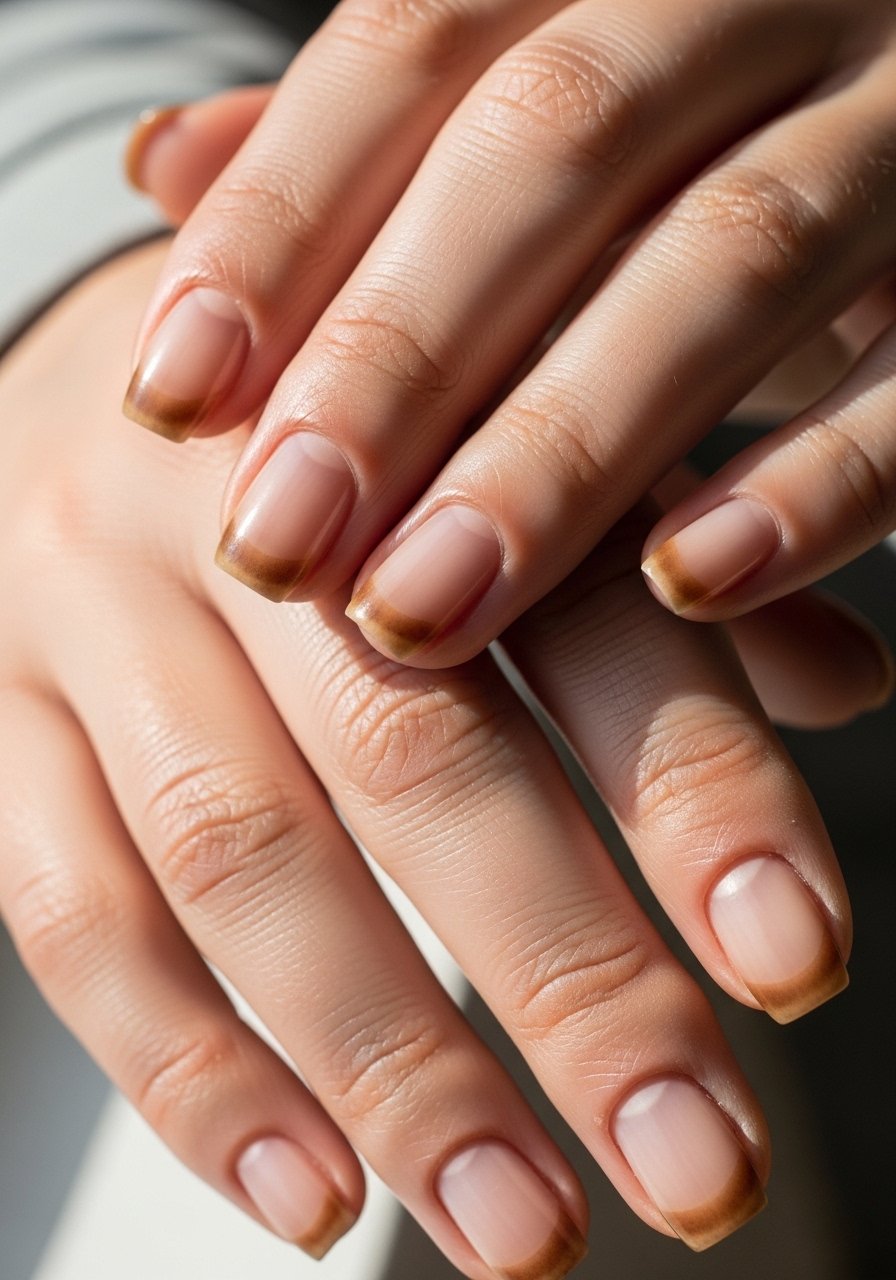
1. Classic Warm Chocolate Smile
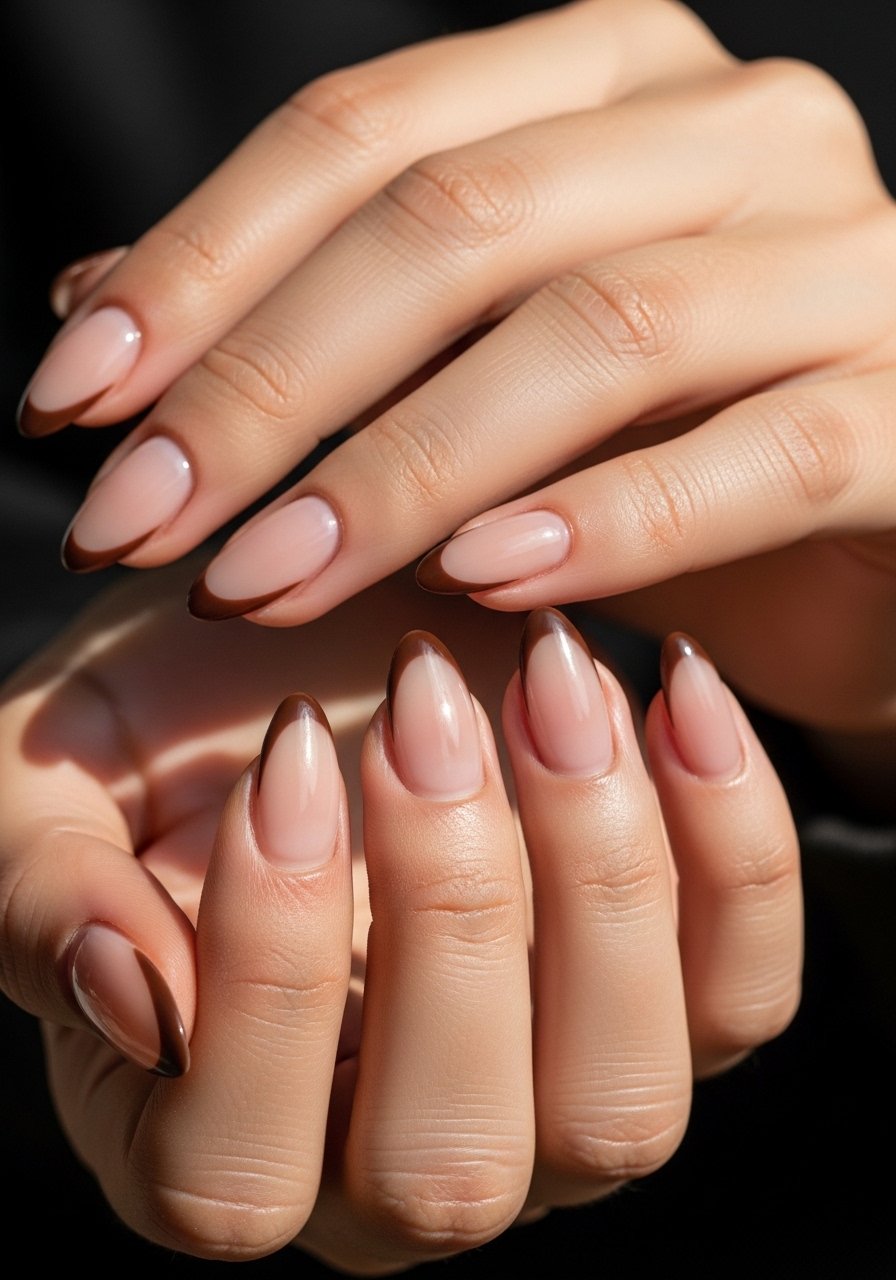
Style/Vibe: Classic Warm Chocolate
Best For: Medium almond, everyday wear
Skill: Beginner
The visual trick here is a 0.5 millimeter smile line, not a thick band. Visually the thin chocolate line reads tidy and modern, and it plays friendly with a sheer pink-beige base. Apply two thin coats of the brown, cure 60 seconds per gel layer, then seal with a glossy top coat for shine that keeps the line crisp. Use a small nail brush to pull the curve, or try a nail art brush set if you prefer control at home. This suits someone who wants low drama but intentional color.
Mistake to Avoid: Drawing the smile line too wide so it overpowers the nail bed.
2. Coffee Ombre Tip That Fades Up
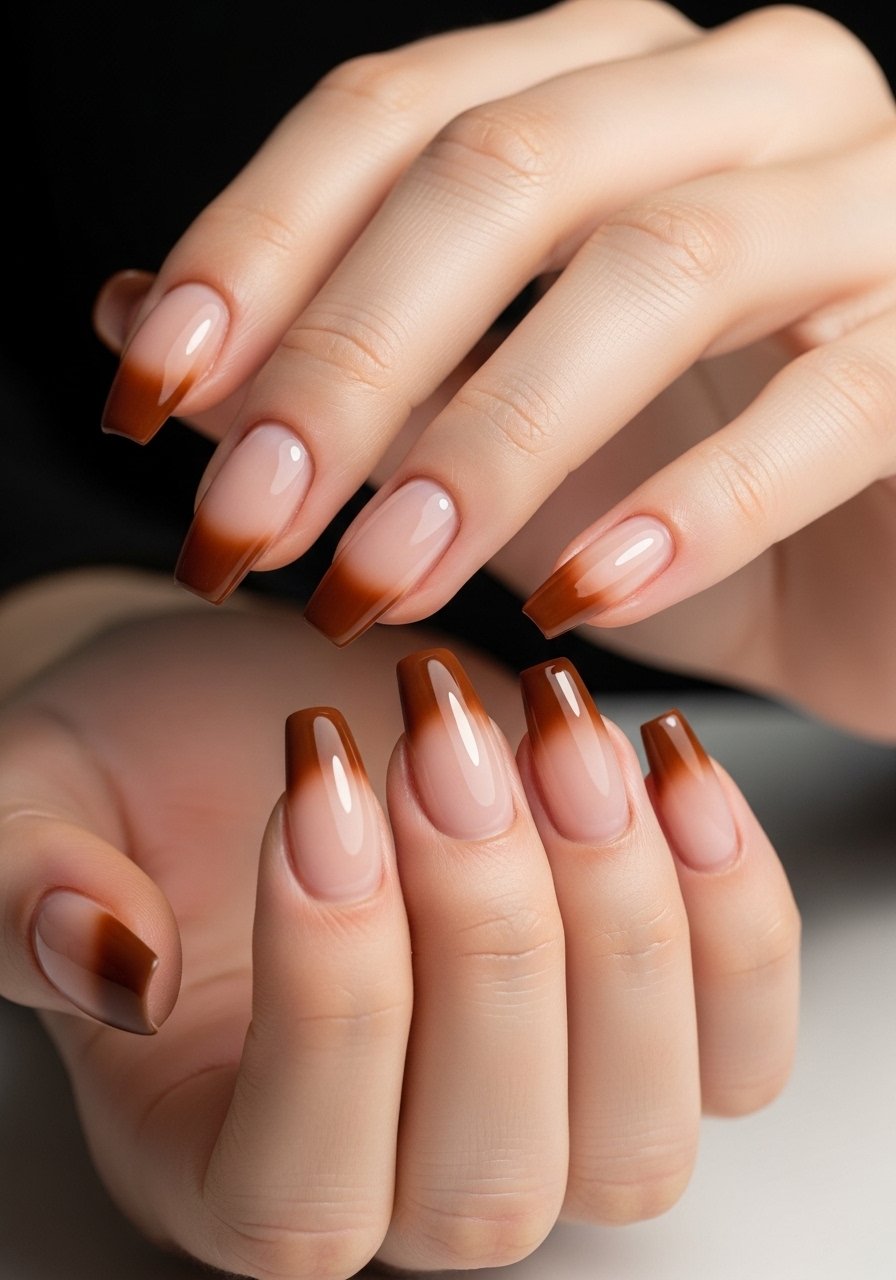
Style/Vibe: Coffee Ombre
Best For: Long coffin or almond, nights out
Skill: Intermediate
This ombre uses a 3 to 1 brown-to-clear blending ratio at the tip, feathering upward over two passes. A tech who works at a salon downtown showed me to dab the darkest pigment just at the free edge and buff upward with a flat brush for a lived-in gradient. It creates warmth without a harsh line and wears well on longer acrylics. Try layering a thin gold micro-foil on one nail for contrast. Pair this with a builder acrylic powder for structure and longer wear in low-effort fills.
Mistake to Avoid: Rubbing the pigment too hard and creating a muddy blob instead of a gradual fade.
3. Tiny Espresso Tip on Short Nails
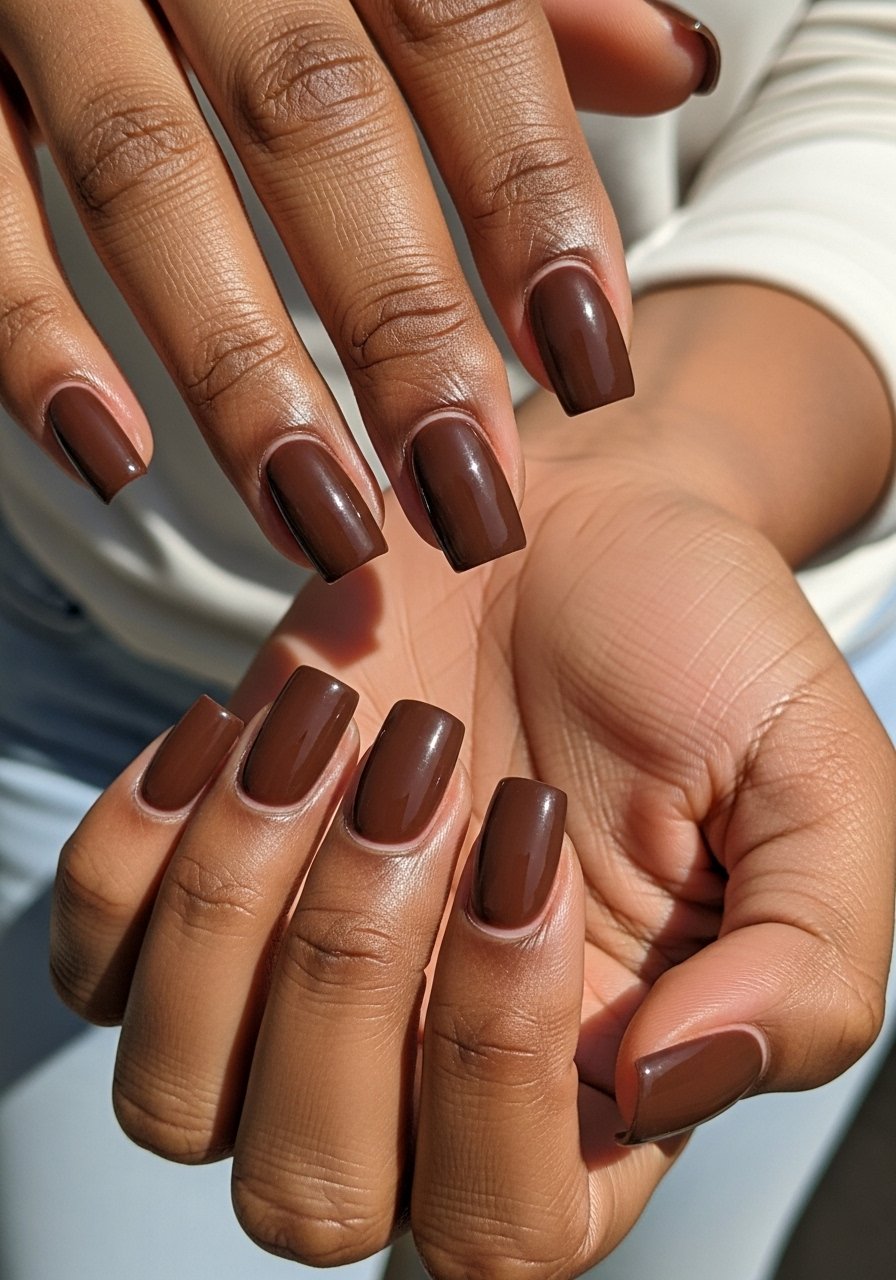
Style/Vibe: Tiny Espresso Tip
Best For: Short square, office friendly
Skill: Beginner
Short nails need narrow tips to avoid a cramped look. Keep the tip width around 10 to 15 percent of the nail width. A single slim brown line paired with a matte top gives a neat, professional finish that is quick in the chair. This style solves the common frustration of brown looking overwhelming on short nails. Use a fast-curing gel polish and a precision nail striping brush for the fine edge.
Mistake to Avoid: Making the tip as wide as on long nails, which makes short nails look shorter.
4. Matte Cocoa Tips With One Glossy Accent
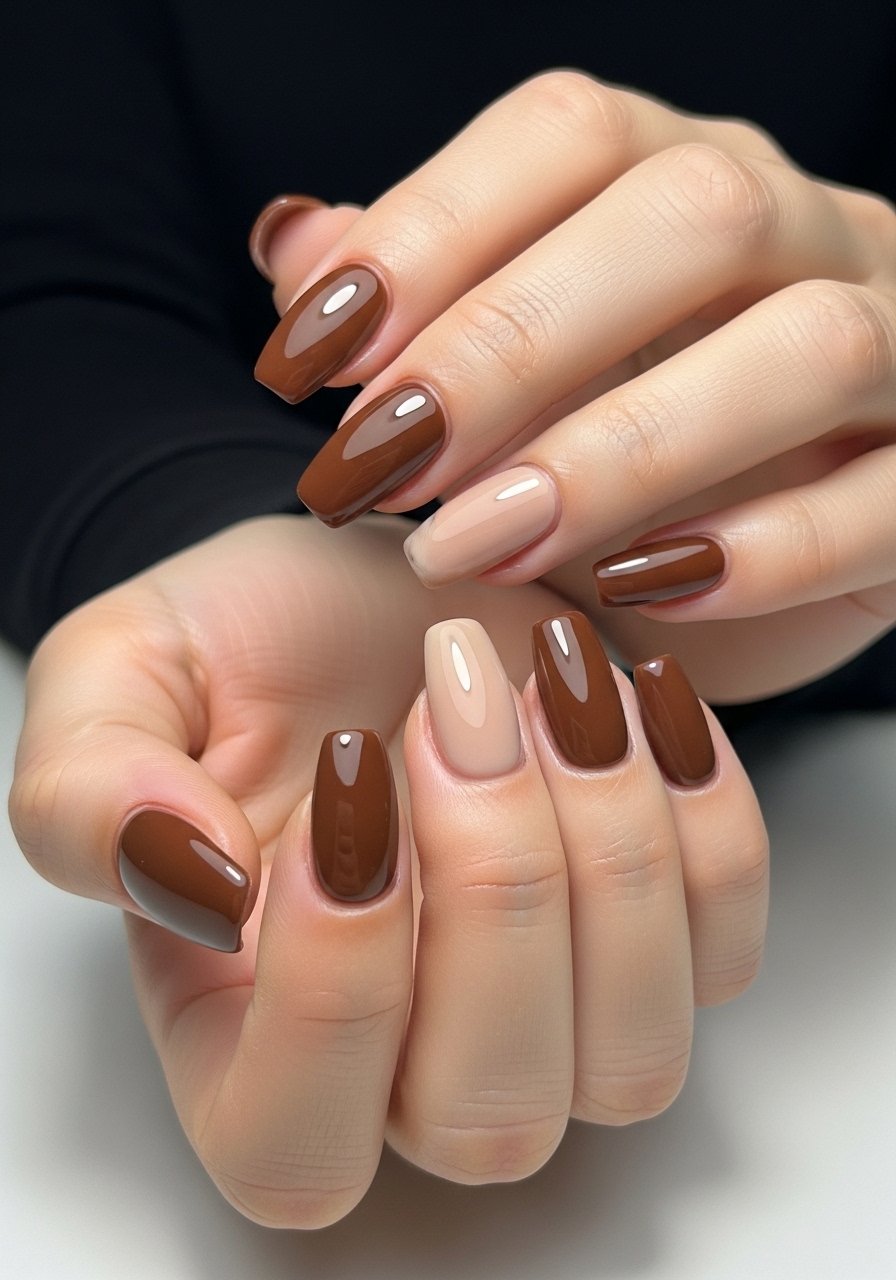
Style/Vibe: Matte Cocoa With Gloss Accent
Best For: Medium squoval, casual weeks
Skill: Beginner
Swap high-gloss across the board for matte tips and keep one nail glossy to add a point of interest. The matte cocoa makes the brown feel soft and modern, and the glossy accent offers a reflected highlight that keeps the mani from looking flat. Start with two thin coats of matte pigment, then on the chosen accent nail use a glossy top coat. A small bottle of matte top coat is inexpensive and stretches the style across looks.
Mistake to Avoid: Applying matte over a thick, uncured layer so it pills up later.
5. Caramel Swirl Accent Tip
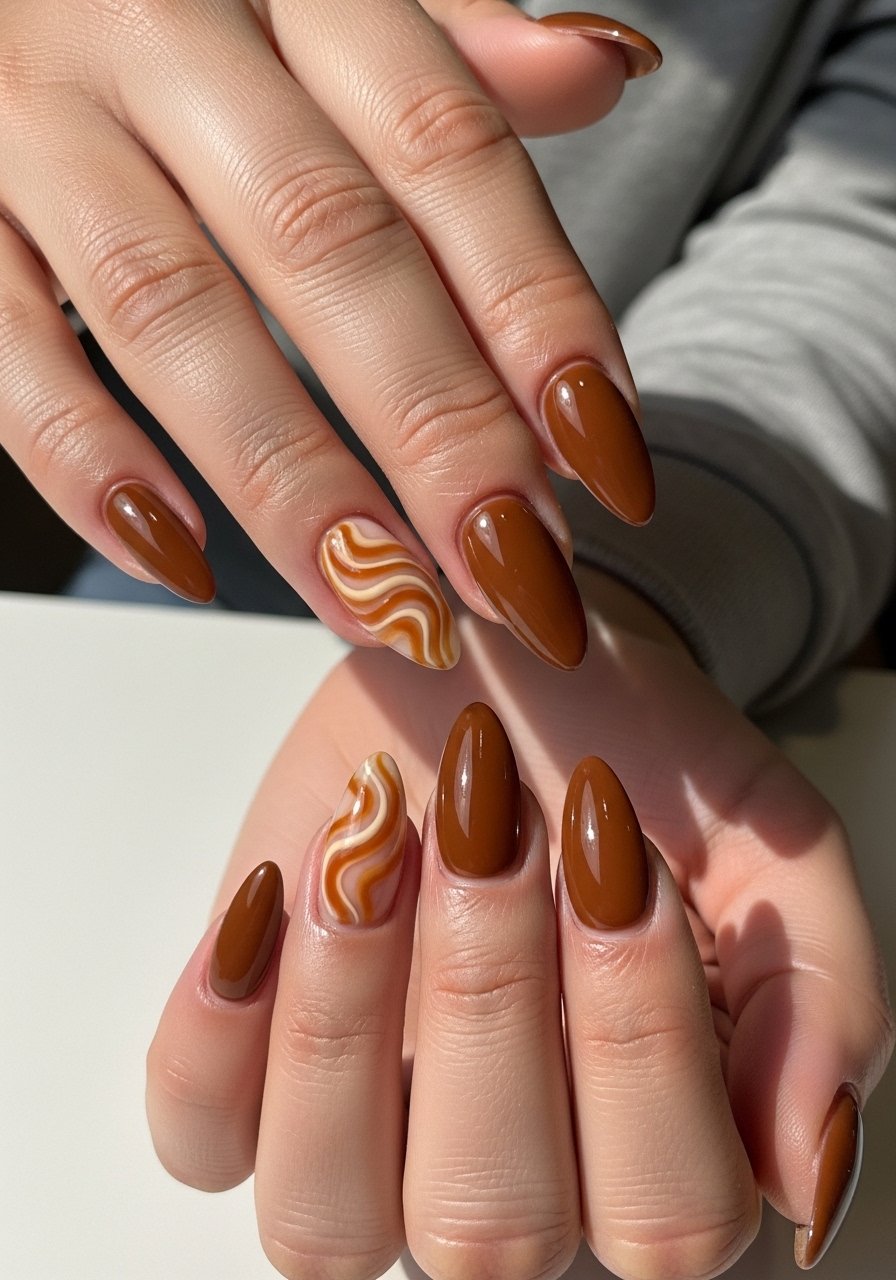
Style/Vibe: Caramel Swirl Accent
Best For: Long almond, creative accents
Skill: Intermediate
A single caramel swirl on the ring finger gives a personal touch without becoming busy. Use a thin dot of caramel and a darker brown, then pull one line through both to make a soft wave. The effect reads like a small accessory and pairs well with neutral outfits. For longevity, encapsulate the swirl in a clear acrylic overlay or a builder gel layer. Try a micro detail brush for the lines so the swirl stays delicate.
Mistake to Avoid: Overworking the swirl until the colors mix into one indistinct shade.
6. Sheer Taupe Reverse French
Style/Vibe: Sheer Taupe Reverse French
Best For: Medium almond, minimalist vibes
Skill: Intermediate
Reverse French tips place the brown crescent near the cuticle instead of the free edge. Using a sheer taupe base keeps the look soft, and a 2 millimeter half-moon band looks intentional rather than cartoonish. This fits someone who wants the French idea but in a low-contrast, grown-up way. A frame stencil set helps make the curve uniform across nails.
Mistake to Avoid: Making the reverse crescent too thick so it looks like a stain.
7. Milky Brown Negative Space Edge

Style/Vibe: Milky Brown Negative Space
Best For: Medium square, trendy everyday
Skill: Intermediate
Negative space lets the natural nail breathe and reduces overall polish weight. Paint a narrow brown band at the tip and leave the center clear or with a 20 percent milky wash. That 20 percent wash keeps the nail from reading bare while preserving minimalism. This fixes the frustration of brown feeling heavy and it is quick to touch up. Use a clear base coat as an anchor and clean edges with an angled brush.
Mistake to Avoid: Trying to freehand the clear window without a guide, which makes uneven gaps.
If any of these tools look useful, here are the products doing most of the work.
Brown French Mani Essentials
Tools:
- nail art brush set (~$8-18), for thin lines and swirls
- precision-striping-brush (~$6-12), for fine smile lines
- reverse-french-stencil (~$5-10), for consistent cuticle crescents
Products:
- builder-acrylic-powder (~$12-25), for extra structure on long tips
- matte-top-coat (~$6-14), for the matte tip look
- clear-base-coat-nail (~$7-15), to anchor color
Aftercare:
- cuticle-oil (~$5-12), daily to stop lifting
- nail-file-buffer (~$4-10), keep edges smooth
8. Espresso Micro Tip With Gold Lining
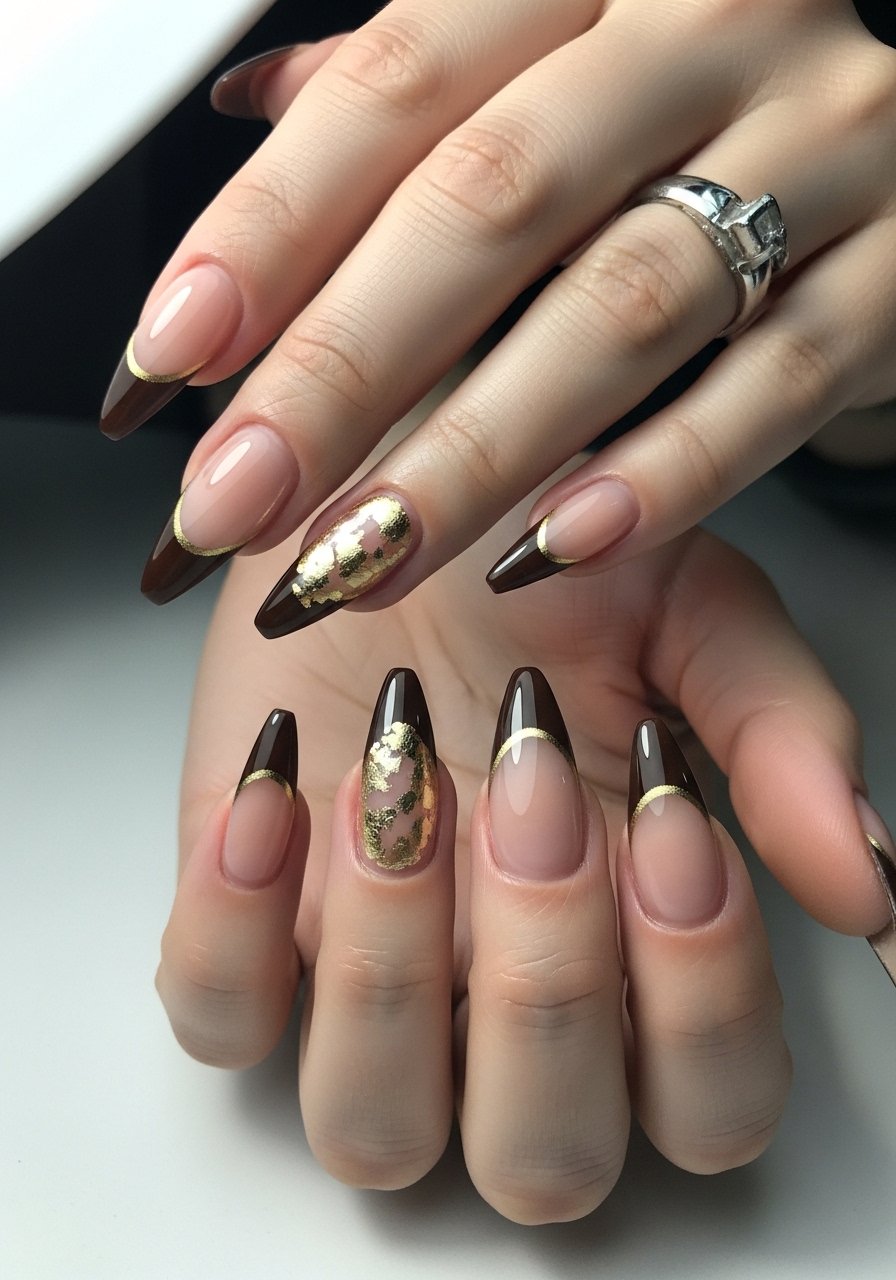
Style/Vibe: Espresso Micro Tip With Gold
Best For: Long stiletto, evening looks
Skill: Advanced
A 1 millimeter espresso tip with a micro gold line on the border reads luxe without being loud. This is for people who want a detail that shows up in photos and in person. Apply the brown in a steady thin pass, let it cure, then carefully add a hairline of gold foil or gold gel polish. A gold nail foil kit makes placement easier than loose leaf. This solves the problem of brown tips looking plain by adding a sharp fine edge.
Mistake to Avoid: Adding thick gold so it overwhelms the brown and looks bulky.
9. Ombre Using Dip Powder for Durability
Style/Vibe: Dip Powder Ombre
Best For: Medium almond, long-wear priority
Skill: Intermediate
Dip powder offers long-lasting ombre without the weight of thick acrylic. Use a staged gradient: dark powder at the free edge, two-part blending with a lighter brown about 30 percent up, then clear near the cuticle. This technique reduces chips and keeps edges intact for weeks. A starter dip powder kit helps you practice the layers. It answers the complaint of tips chipping at the corner by giving a more bonded finish.
Mistake to Avoid: Dipping too deep into the base and creating a ridge at the color transition.
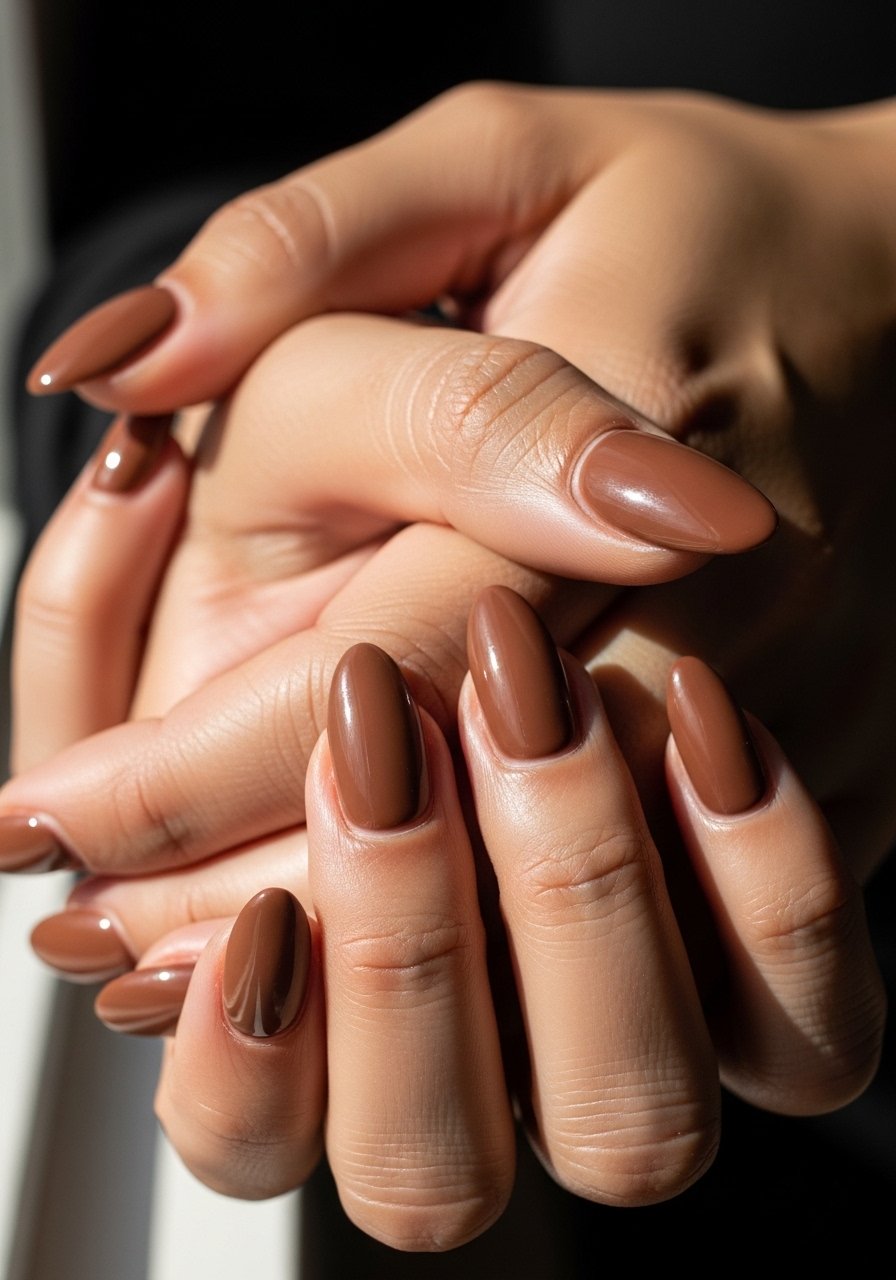
10. Short Natural Brown Tapered Square
Style/Vibe: Short Natural Brown Tapered Square
Best For: Very short nails, low maintenance
Skill: Beginner
If you keep your nails short, go for a thin stained tip instead of a painted band. Dilute a brown pigment with 50 percent clear to make a wash and apply at the free edge, wipe slightly for a soft fade. It looks intentional and is faster to fix as nails grow. This is great for people who want brown but cannot commit to long lengths. Try a transparent brown gel for control.
Mistake to Avoid: Painting a thick opaque band on very short nails that reads clumsy.
11. Brown Tip With Single Rhinestone Accent
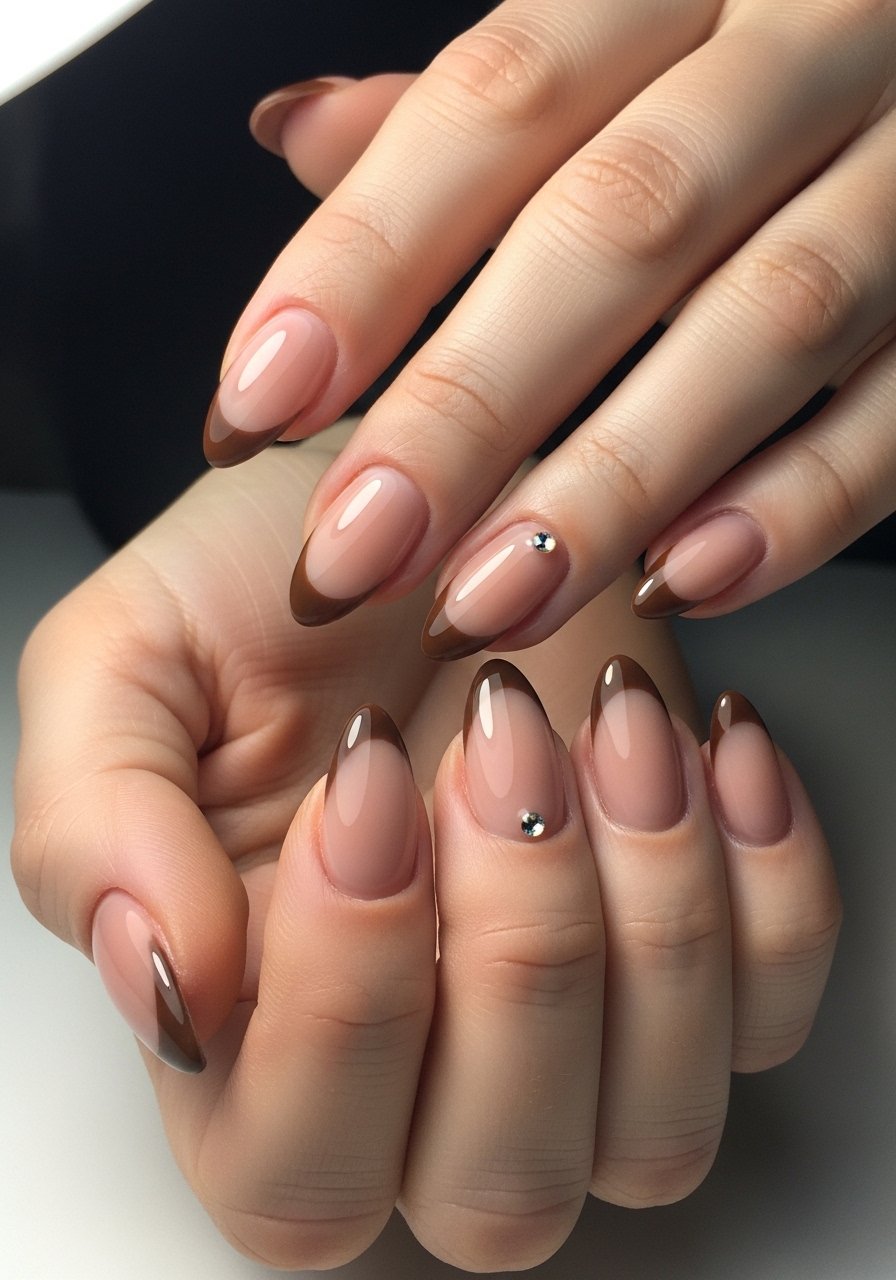
Style/Vibe: Brown Tip With Rhinestone Accent
Best For: Special occasions, date night
Skill: Beginner
Add one small rhinestone at the base or side of the ring finger to lift a minimal brown tip. Use a dab of nail glue and a quick cure with a top coat to secure. The rhinestone acts like jewelry for the nail and avoids piling on pattern. Keep the stone small, around 1.5 to 2 millimeters, so it does not snag. A rhinestone nail mix gives options if you like switching placement.
Mistake to Avoid: Gluing oversized gems that catch on sleeves and lift the tip.
12. Subtle Leopard Tip Accent
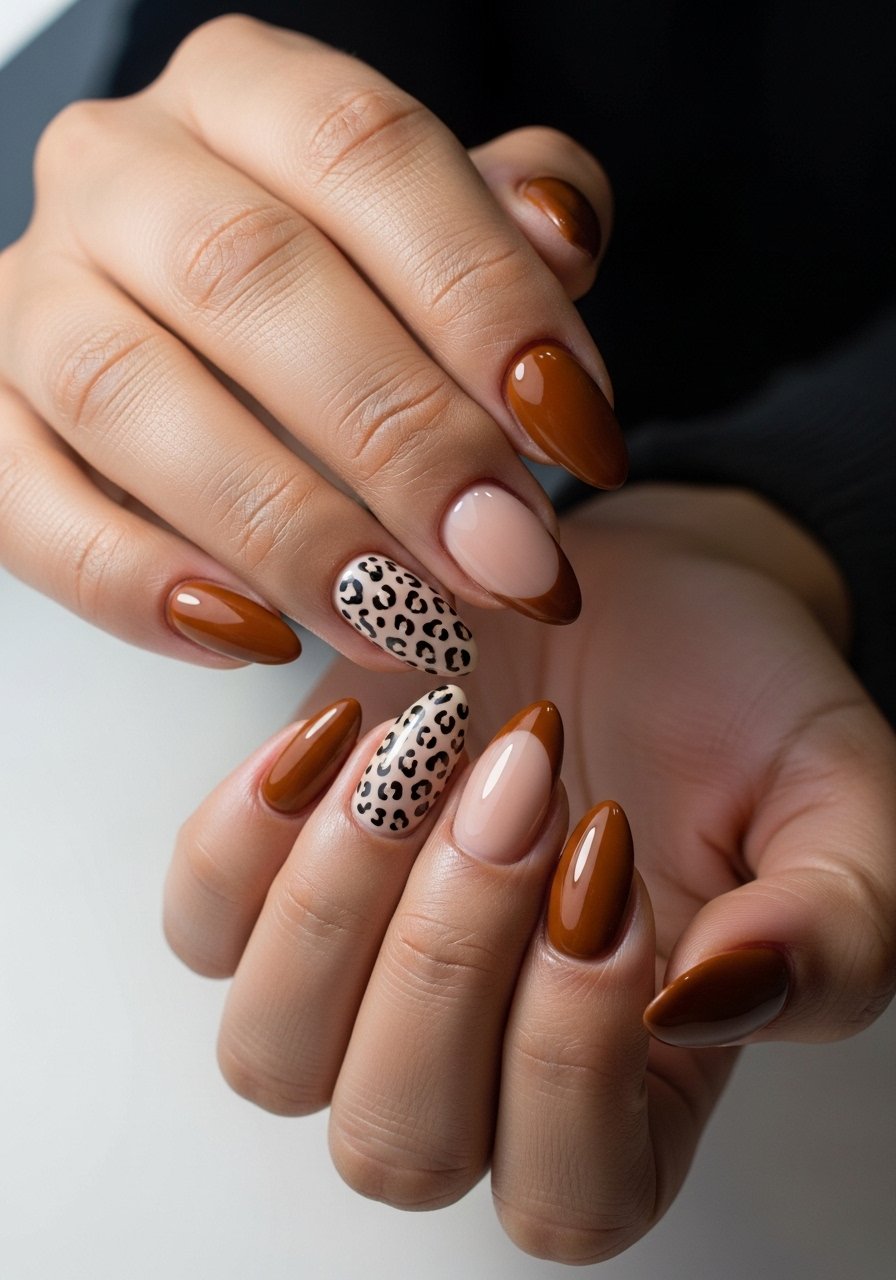
Style/Vibe: Subtle Leopard Tip
Best For: Medium almond, playful accents
Skill: Intermediate
Animal print can be small and tasteful as a tip accent. Paint tiny irregular spots in dark brown and outline with an even darker dot, keeping each spot under 2 millimeters. Spread them sparingly, two nails max, to avoid a busy mani. This addresses the gap most articles miss, which is how to keep prints delicate on tips instead of full-coverage. A dotting tool set helps control spot size.
Mistake to Avoid: Covering too many nails with print so the design loses its subtlety.
13. Deep Cocoa Tip With Warm Blush Base
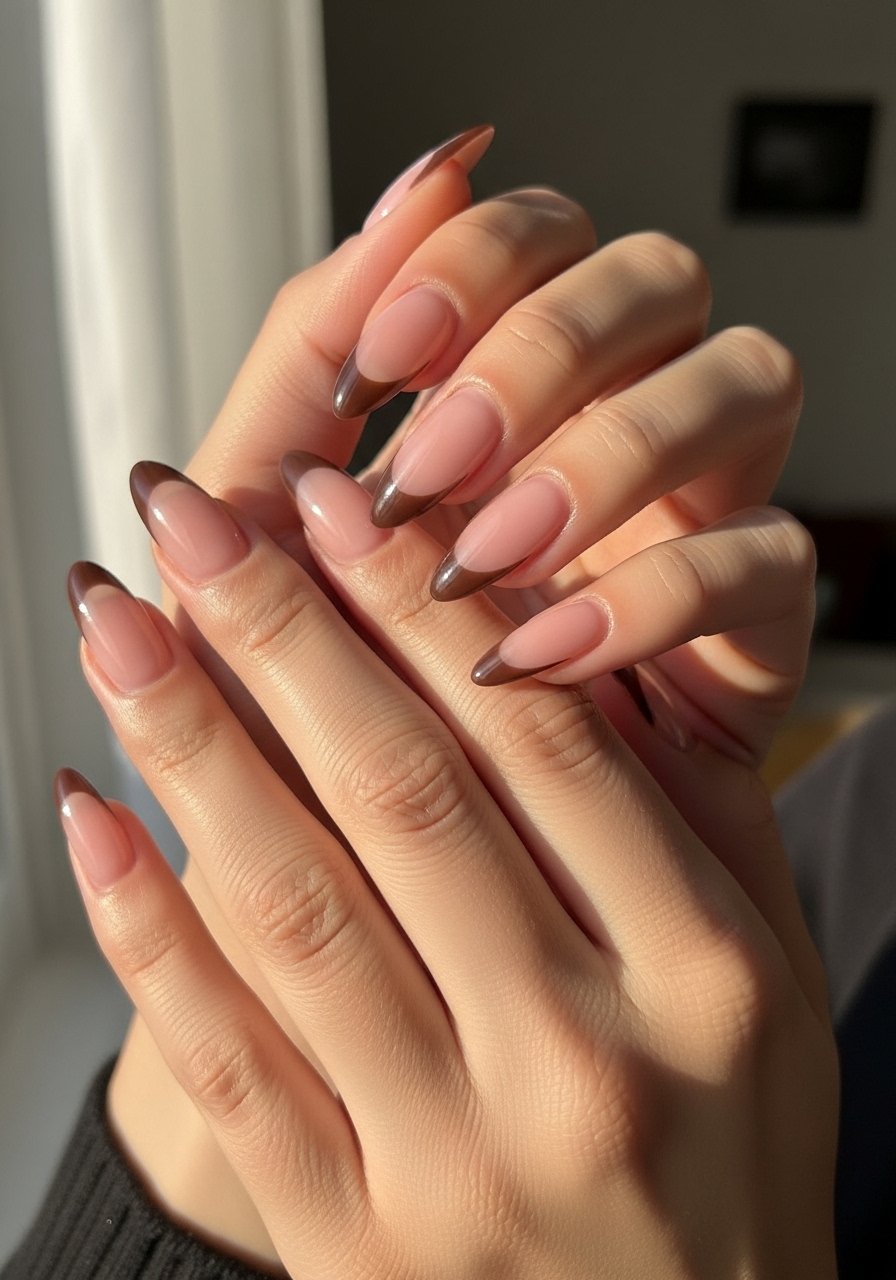
Style/Vibe: Deep Cocoa With Warm Blush Base
Best For: Long almond, romantic evenings
Skill: Intermediate
A warm blush sheer base pairs with a deep cocoa tip to make the brown feel intentional and skin-flattering. Use a sheer base at about 25 percent opacity so the natural nail shows through, then add a two-coat cocoa tip. The contrast pops in photos while remaining soft in person. Seal with a glossy top coat. For at-home wearers, a fast-cure UV lamp speeds the process and reduces smudges.
Mistake to Avoid: Using an opaque base that competes with the cocoa and makes the nails look busy.
Brown French Wear-and-Care Moves
Thin coats beat one thick coat every time. Three thin layers of a quick-dry top coat look smoother and last longer than one gloopy layer.
Grab cuticle-oil and apply each night. It keeps the acrylic edge from lifting at the cuticle and makes fills less frequent.
If you are trying brown on short nails, use a diluted wash, not opaque paint. Transparent brown gel gives that stained look and hides growth better.
Most people file only the free edge. File lightly across the sides too, and round any sharp corner. A fine-grit nail file prevents small snags that lead to chipping.
