
I kept tracing stencils too small, then sat through a touch-up that never matched the original line work. After scaling the next stencil 110 percent and swapping to a heavier transfer paper, the outline sat on skin like it belonged there. That one technical change saved me hours of correction and made shop days less frantic.
These stencils are for people who want bold, readable traditional pieces that age well, whether you are a weekend apprentice or someone booking a small session. Most ideas here are low-equipment, studio-friendly, and work on coverable placements or on wrists and forearms for visibility. Across five shops I have visited, these motifs kept coming up because they transfer cleanly, heal predictably, and photograph reliably.
1. Bold Old School Rose Outline
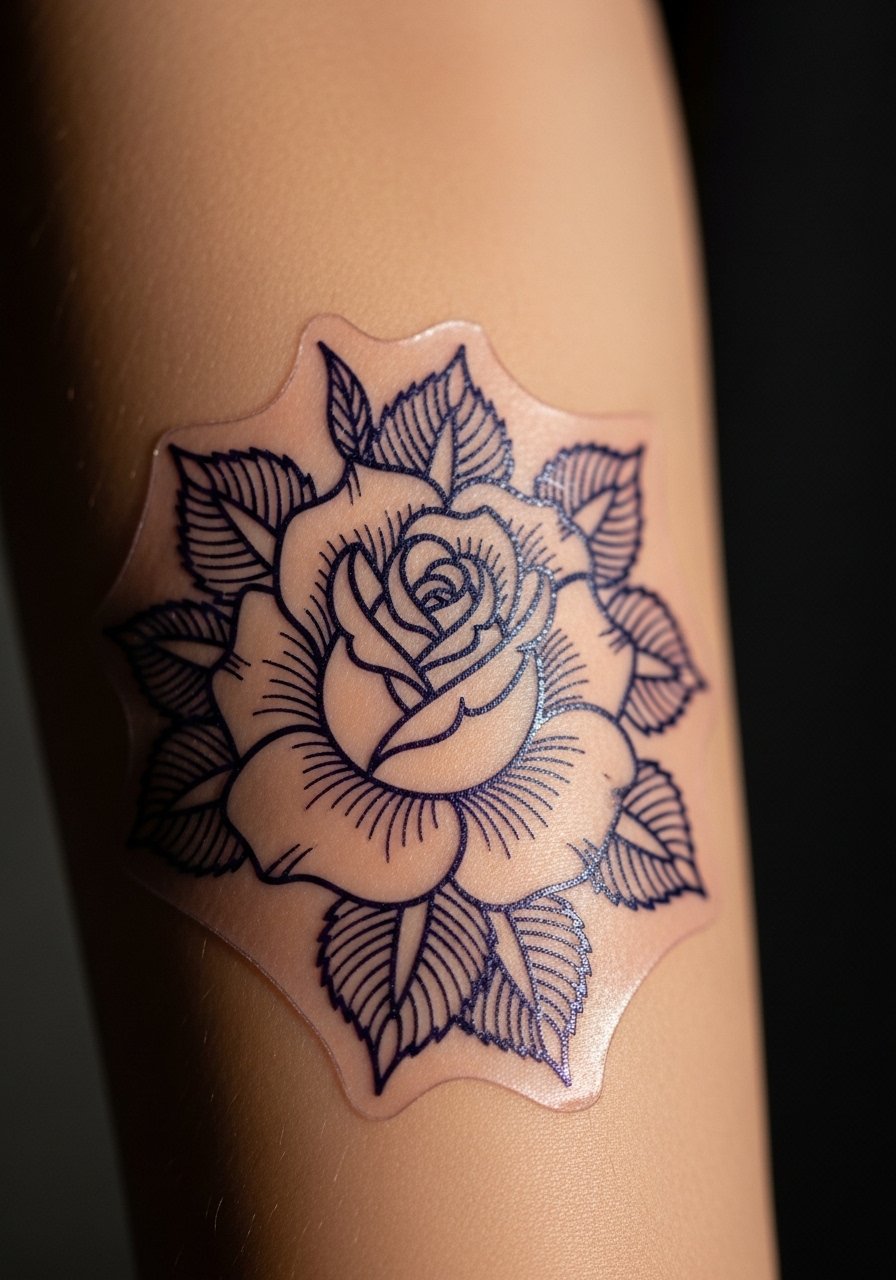
Style/Technique: Traditional linework
Pain Level: 3/10
Session Time: 30 minutes to 1 hour
Best For: Forearm, calf, coverable chest
The rose works visually because the negative space around petals reads at a distance and the bold outer line keeps it readable as it ages. I like using a slightly oversized stencil for forearms, about 110 percent scale, so petals don’t compress when wrapped around a curve. For a cheap studio supply, single-use stencil paper is reliable. Pair it with black rotary needles if you want crisp outlines fast. This is a beginner-friendly motif, low time, low cost, and it photographs well for portfolios.
Mistake to Avoid: Tracing the stencil at 100 percent for curved placements, which flattens petal proportions on the body.
2. Classic Dagger Through Heart
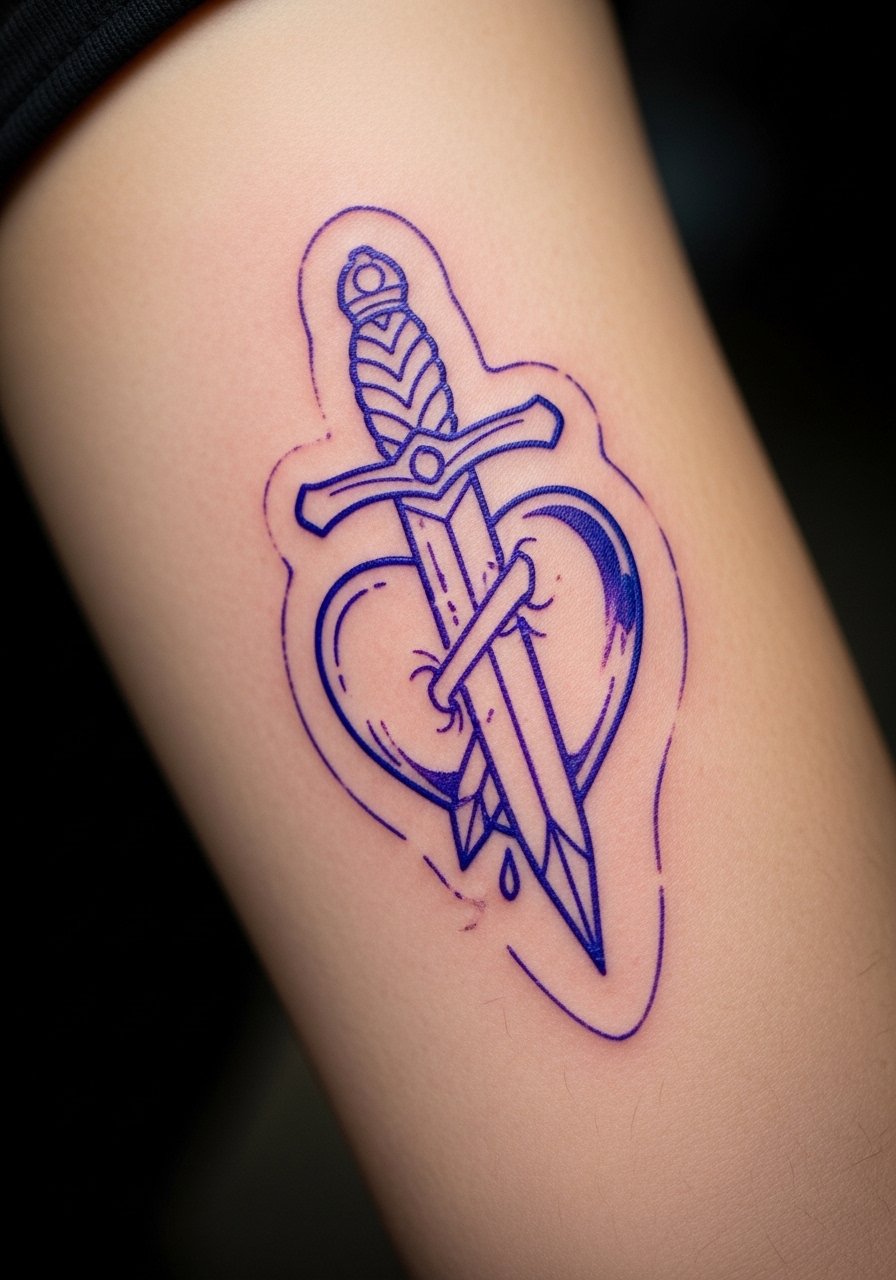
Style/Technique: Neo-traditional bold outline
Pain Level: 4/10
Session Time: 45 minutes to 1.5 hours
Best For: Inner bicep, thigh, coverable spots
A dagger-heart combo reads as narrative because the dagger provides a vertical anchor and the heart gives a round counterpoint. I scale the blade narrower and lengthen it by 10 mm on sleeve-extending placements so it does not look stubby. Use a mid-weight transfer gel and thermal stencil paper when working on muscular areas. The result feels classic and a bit dramatic, good for clients who want a statement without long sessions.
Mistake to Avoid: Letting the blade sit too short on limbs, which makes the composition top-heavy.
3. Swallow in Flight
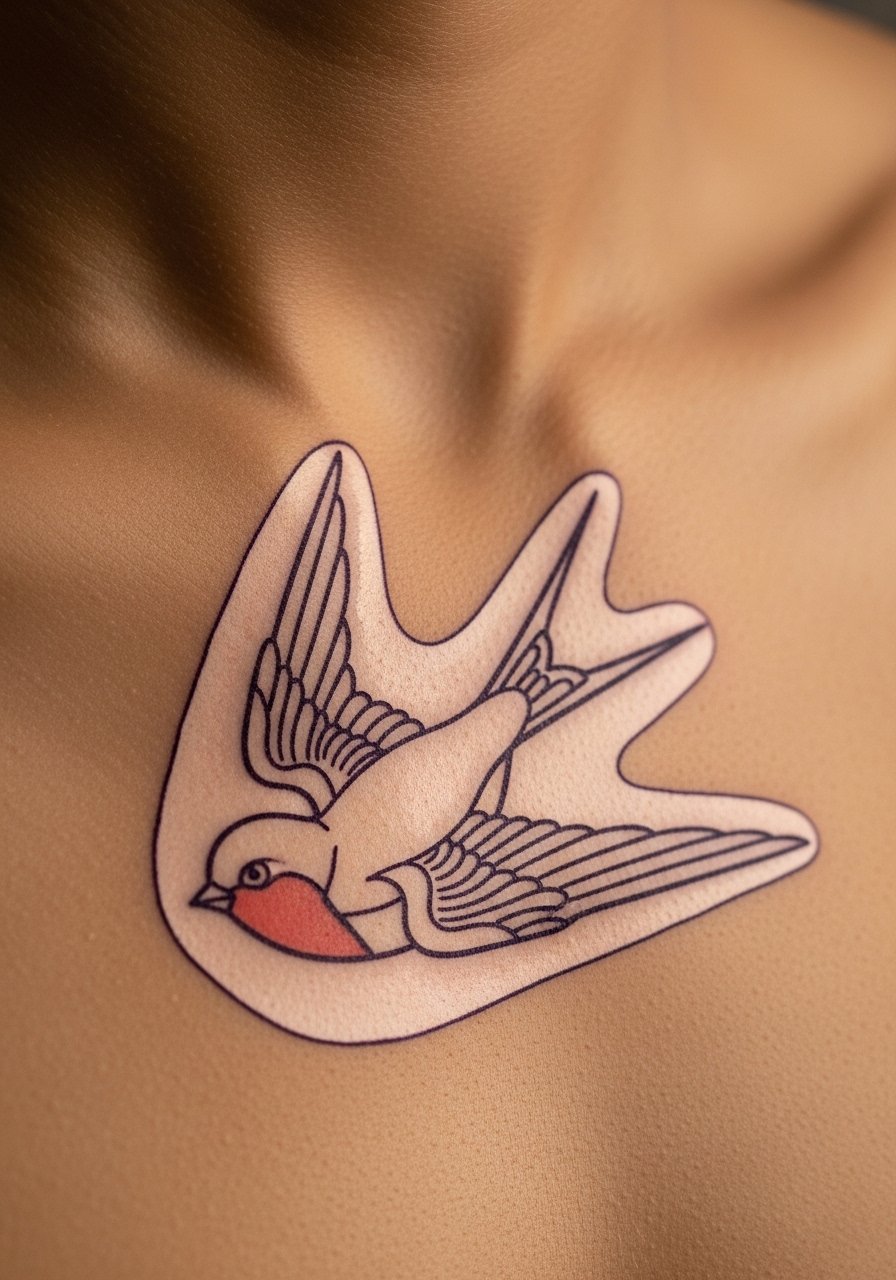
Style/Technique: Sailor classic, curved placement
Pain Level: 2/10
Session Time: 30 to 50 minutes
Best For: Collarbone, upper chest, visible work
Swallows rely on silhouette, so the stencil needs clean negative space and a clear tail. I print these slightly wider for clavicle placements to follow the bone line. For crisp transfer use wax-based stencil transfer gel. The feeling is upward and light, perfect for visible but small pieces. Swallows also heal predictably with solid black work, which is vintage-friendly and low touch-up risk.
Mistake to Avoid: Printing the bird too small, losing the distinct forked tail when healed.
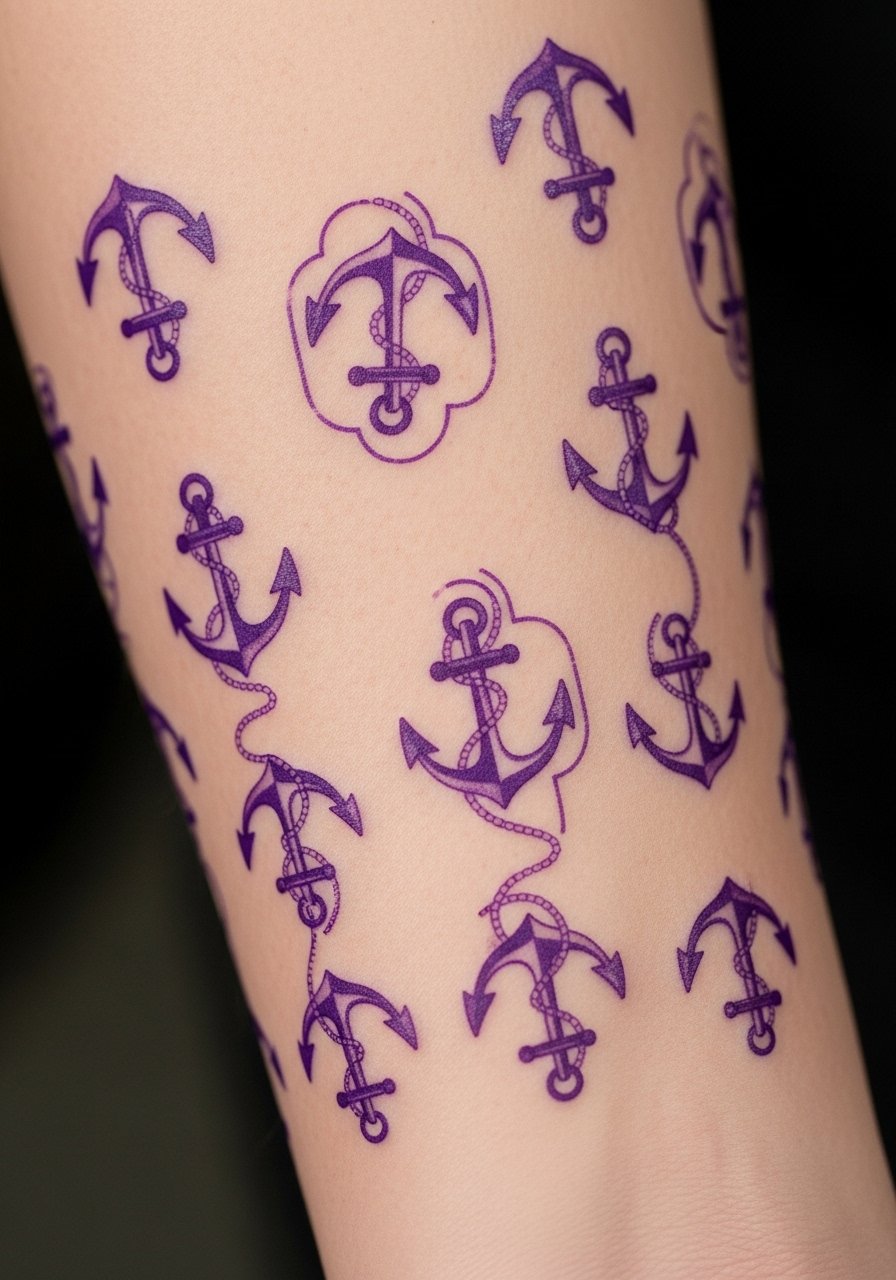
4. Nautical Anchor With Rope
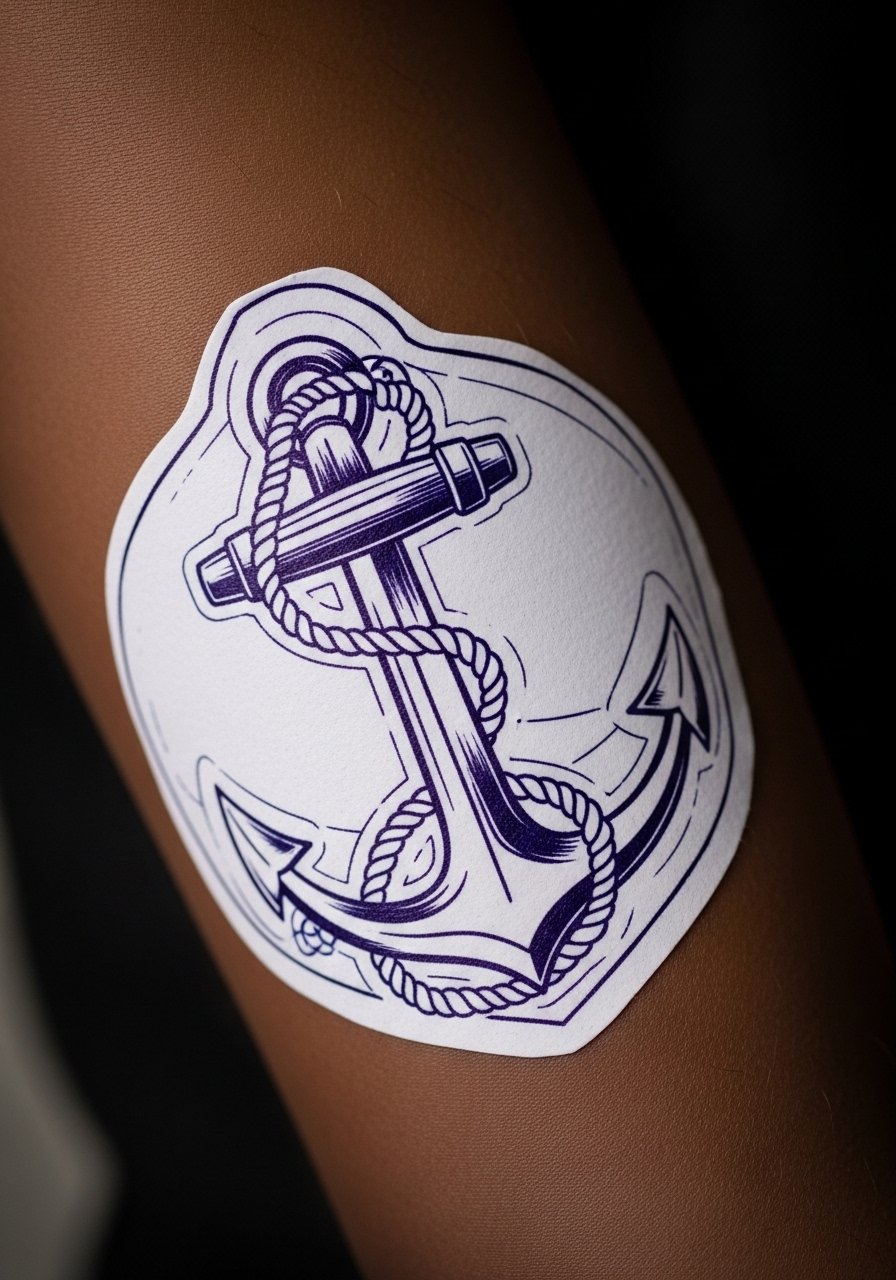
Style/Technique: Nautical traditional
Pain Level: 3/10
Session Time: 30 minutes to 1 hour
Best For: Forearm, calf, visible but coverable placements
An anchor reads as solidity because of its simple, heavy shapes. When scaling for forearms, I increase rope thickness by about 15 percent to keep texture after healing. I often sketch a small negative gap at the rope crossing in the stencil so the knot reads after scabbing. Use black transfer film for bold visibility on darker skin tones. This is a quick session idea and suits first-timers.
Mistake to Avoid: Using a thin rope line that disappears after the first healing cycle.
5. Traditional Skull With Banner
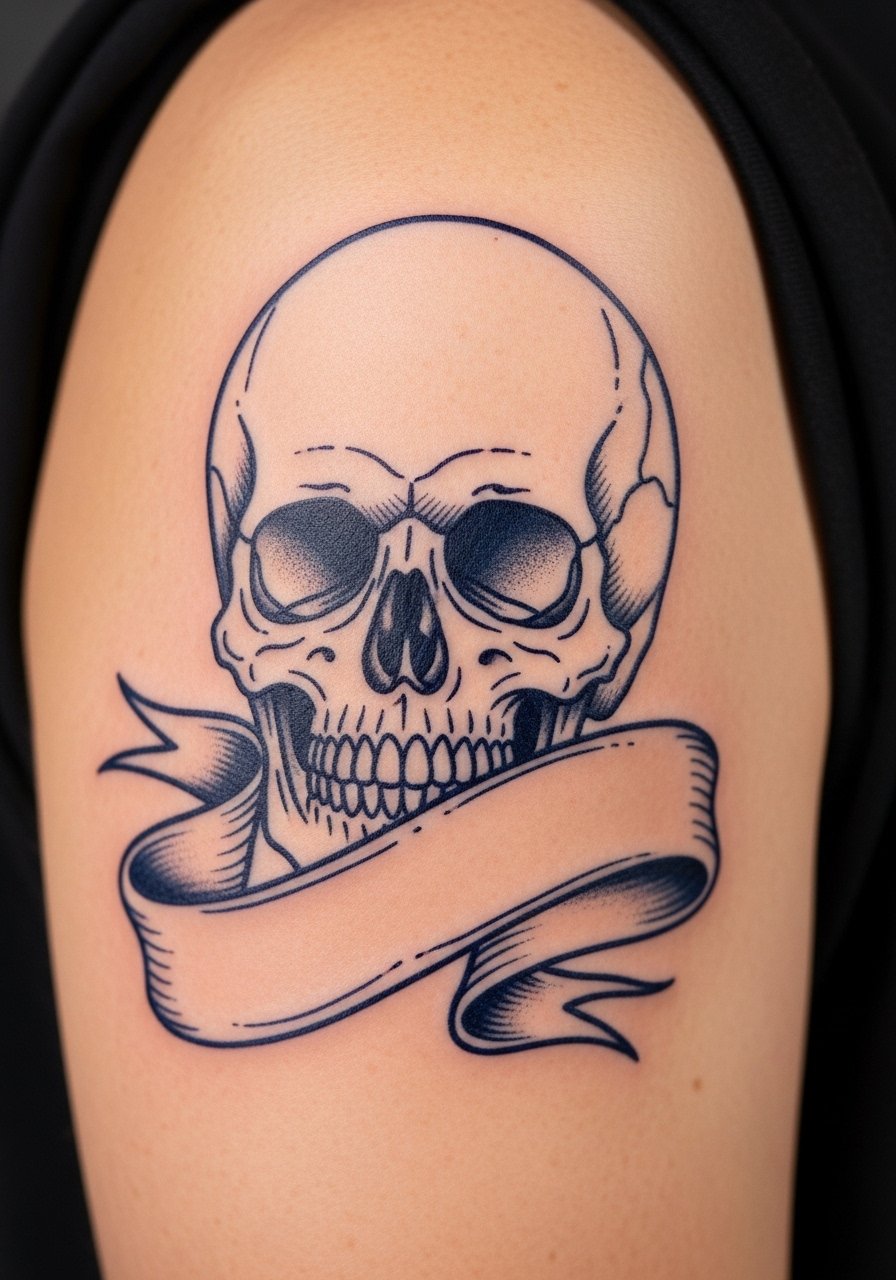
Style/Technique: Bold contrast, banner text
Pain Level: 4/10
Session Time: 1 to 2 hours
Best For: Upper arm, shoulder, visible in short sleeves
Skull motifs work because of strong contrast between jawline and eye sockets. For the banner, I advise tracing the text at least 14-point equivalent in stencil scale so it remains legible. I use stencil thermal copier paper for clean edges. This piece feels classic and slightly moody, and it is a good fit for clients who want a piece that ages into a graphic silhouette.
Mistake to Avoid: Shrinking banner text too small to fit into a curved banner, which blurs at healing.
6. Panther Head, Mid-Snarl
Style/Technique: Bold animal head
Pain Level: 5/10
Session Time: 1 to 2 hours
Best For: Thigh, chest, coverable spots
Panther designs need confident negative space around the mouth and eyes to read aggression. I usually scale the jawline slightly down and widen the eye socket by 8 percent so expressions stay sharp after swelling. Use black liner needles for thick outlines and a solid fill ink that packs well. This idea fits clients who want a bold centerpiece without detailed shading work.
Mistake to Avoid: Packing too many tiny teeth details that blur into a single dark block.
7. Bannered Name Piece

Style/Technique: Lettering with banner
Pain Level: 2/10
Session Time: 20 to 45 minutes
Best For: Wrist, forearm, coverable spots
A simple name in a curved banner reads intimately because the banner frames the letters. I recommend printing letters in a condensed serif and testing the stencil on paper first, then increasing by 12 percent for wrist wraps so the letters do not compress. Single-line script fonts are easy to stencil and reduce needle dwell. This is a low-cost, quick session option for sentimental pieces.
Mistake to Avoid: Using ornate script too small, which heals into an unreadable line.
If any of these tools look useful, here is what I actually reach for before finishing the rest of the list.
Traditional Stencil Supply List
Stencil Bases:
- Single-use stencil paper (~$10-20), reliable for quick transfers.
- Thermal stencil paper (~$20-40), cleaner lines for detailed banners.
Application & Prep:
- Stencil transfer gel (~$8-15), makes the lines pop on oily skin.
- Disposable razors for prep (~$6-12), cheap and sterile prep.
Needles & Ink:
- Black liner needles (~$12-25) for bold outlines.
- Black tattoo ink (~$10-30) that packs well.
Extras:
- Stencil-practice skin sheets (~$15-30) for testing scale.
- Disposable gloves (~$10-15) because hygiene matters.
8. Tiny Sailor Star
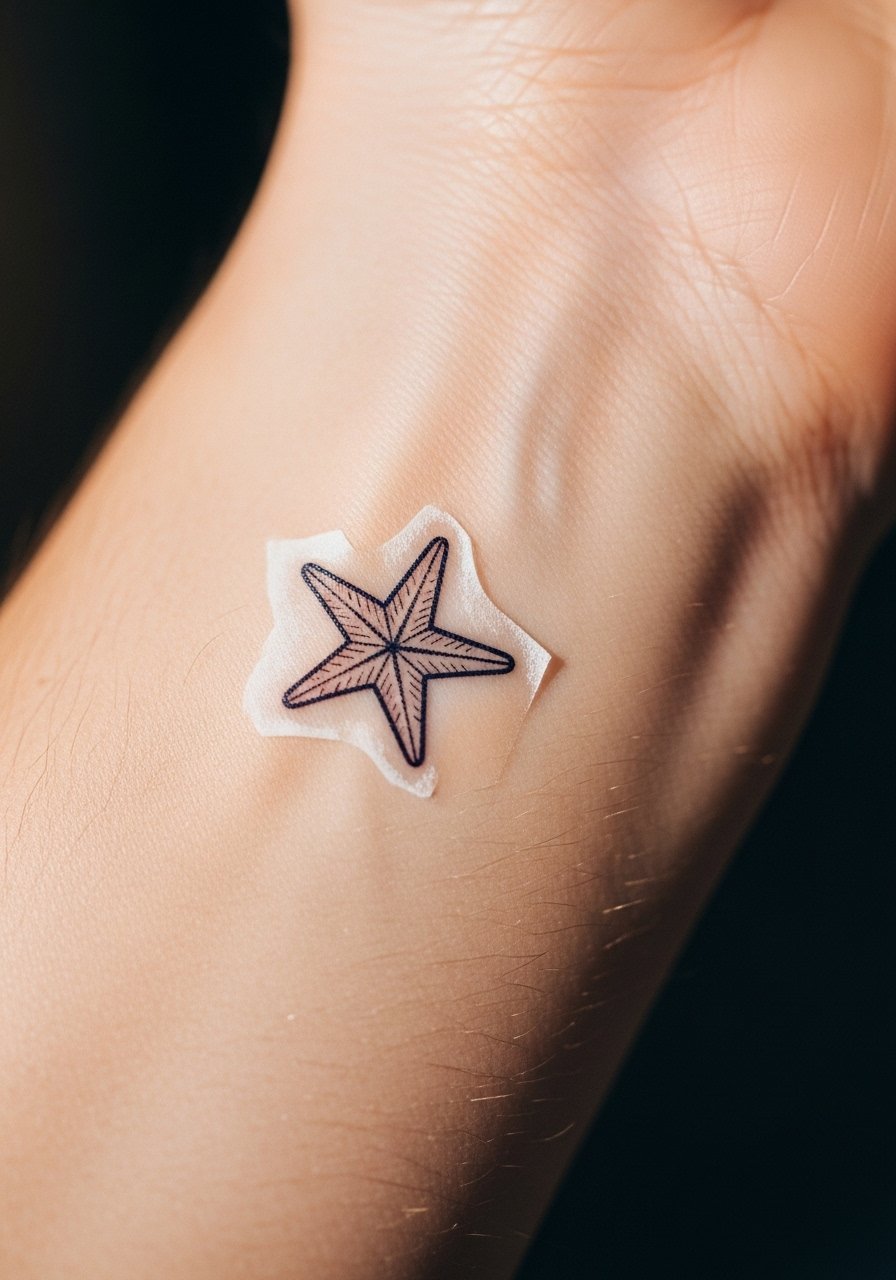
Style/Technique: Micro traditional
Pain Level: 1/10
Session Time: 15 to 30 minutes
Best For: Wrist, behind-ear, finger-adjacent
Tiny stars need room to breathe, and the stencil must be crisp. I usually enlarge star points by 6 percent when placing on bony wrists so points do not fade. Use a fine liner needle and avoid overworking skin. This is a fast, low-cost pick for clients seeking subtle, visible motifs.
Mistake to Avoid: Printing the star at tiny scale without adjusting point thickness, which makes points disappear as the piece heals.
9. Coiled Snake Around Dagger
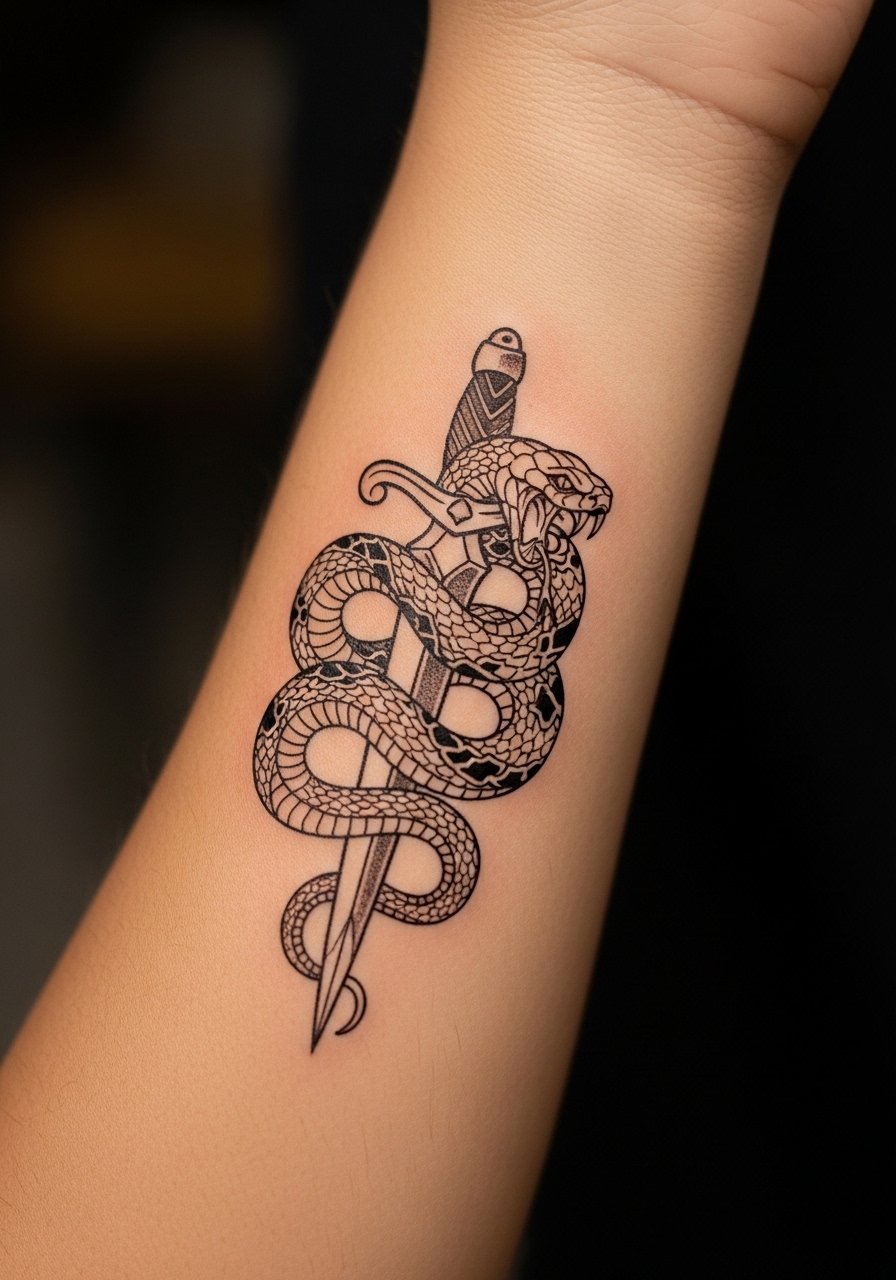
Style/Technique: Intertwined elements
Pain Level: 4/10
Session Time: 1 to 2 hours
Best For: Forearm, calf
Interplay between snake curves and dagger straight lines delivers movement. I space the coils at about 2 to 3 mm apart in the stencil so the scales do not blend into a single dark band. Use thermal stencil paper for consistent transfer, and solid black ink to keep the snake silhouette readable. This works for clients who like a slightly edgier traditional look.
Mistake to Avoid: Letting scales sit too close together in the stencil, causing a muddy fill when healed.
10. Mermaid Bust, Classic Pose
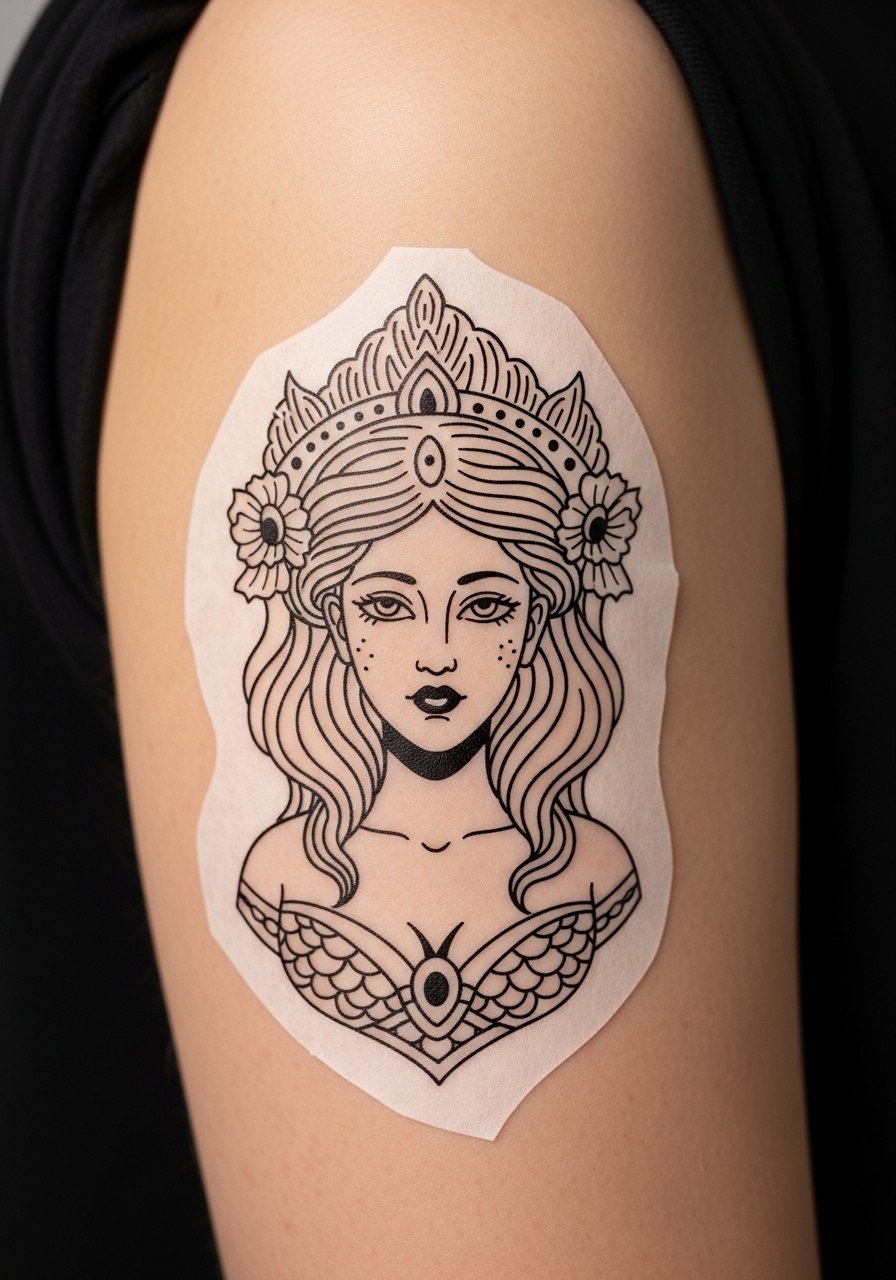
Style/Technique: Figural traditional
Pain Level: 3/10
Session Time: 1 to 2 hours
Best For: Upper arm, shoulder, visible placements
A mermaid relies on silhouette and facial clarity. I trace facial features a touch larger in the stencil, about 8 to 10 percent, because tiny facial lines disappear during healing. Use stencil practice sheets to test facial scale first. This is a mid-budget idea that gives a vintage pinup feel without a full portrait session.
Mistake to Avoid: Stenciling tiny facial lines that end up as smudges once healed.
11. Sacred Heart With Flames
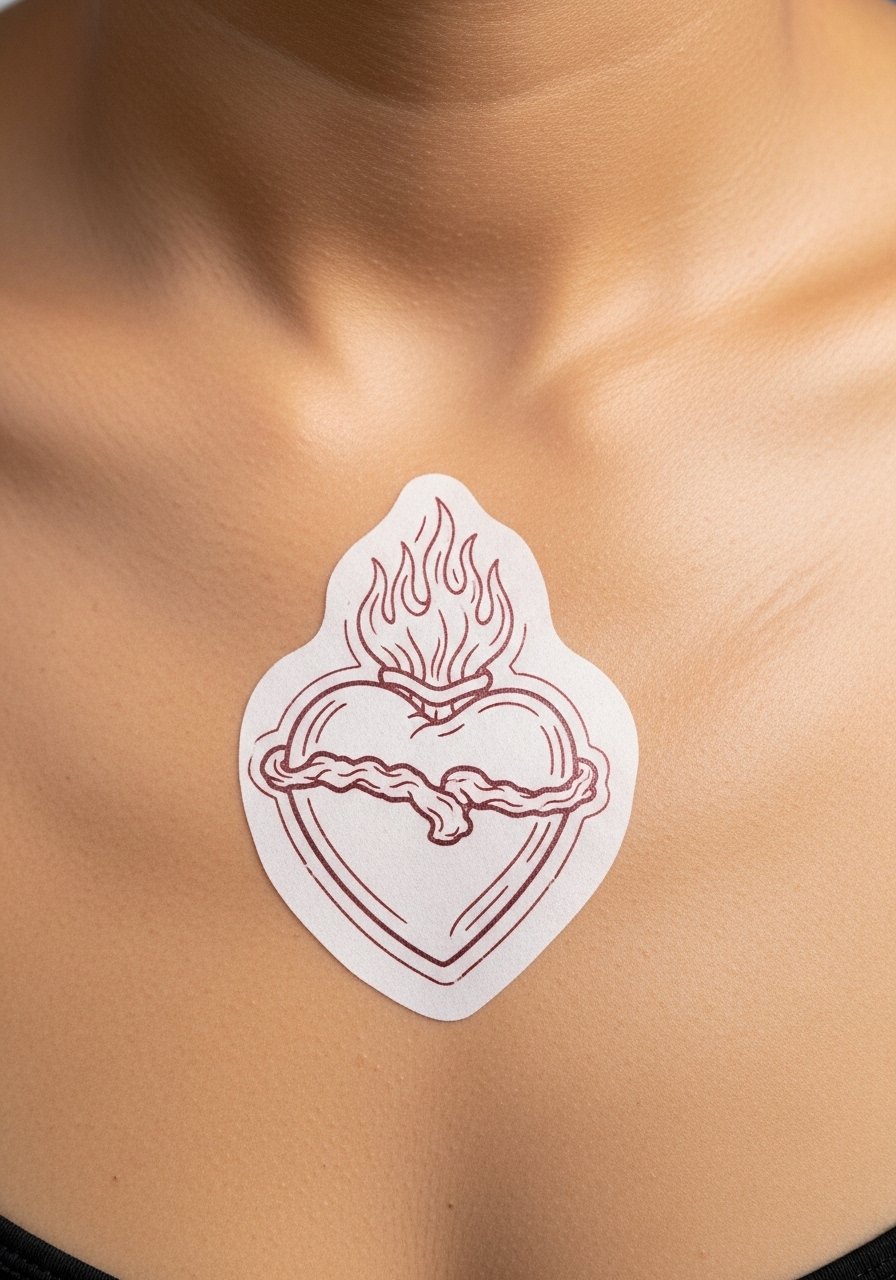
Style/Technique: Iconic religious motif
Pain Level: 4/10
Session Time: 45 minutes to 1.5 hours
Best For: Sternum, chest, coverable spots
Sacred hearts need a clear central negative space and bold flame edges. If the design references cultural or religious iconography, discuss meaning first and avoid appropriation. I slightly increase the heart's border by 1 mm on the stencil to preserve shape after swelling. Use bold outline needles. This design suits clients looking for symbolic pieces with traditional roots.
Mistake to Avoid: Ignoring cultural context when using religious iconography, which can offend or misrepresent.
12. Compass Rose, Small Scale
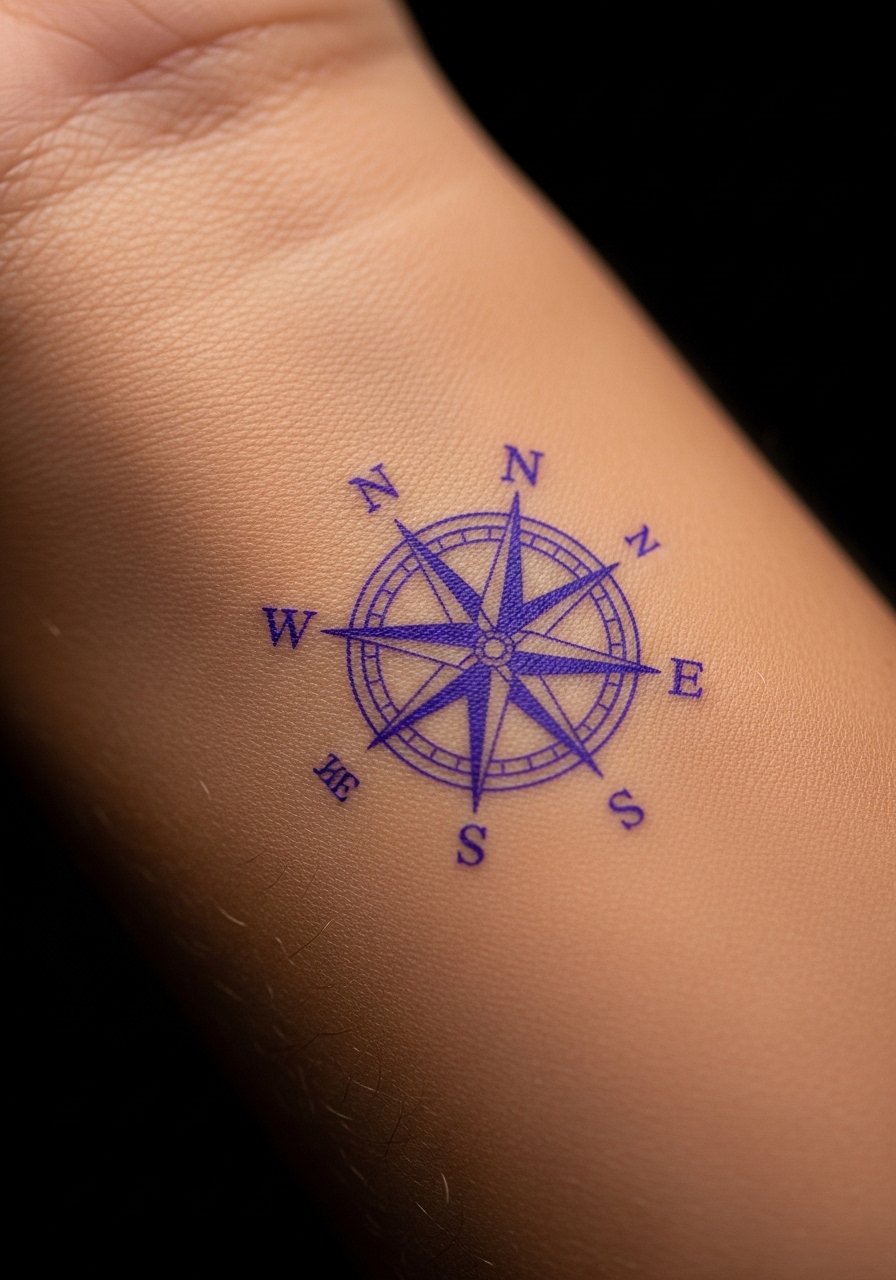
Style/Technique: Micro geometric traditional
Pain Level: 2/10
Session Time: 20 to 40 minutes
Best For: Wrist, behind ear, ankle
Compass roses depend on radial symmetry and crisp points. I print these at 120 percent for wrists and ankles so points align with bone structure. Use a stencil thermal copier when you need multiple consistent copies. This is a neat, low-time idea for travelers or clients who like geometric anchors.
Mistake to Avoid: Stenciling asymmetrical points that skew when wrapped around a curve.
13. Traditional Mermaid Tail Accent
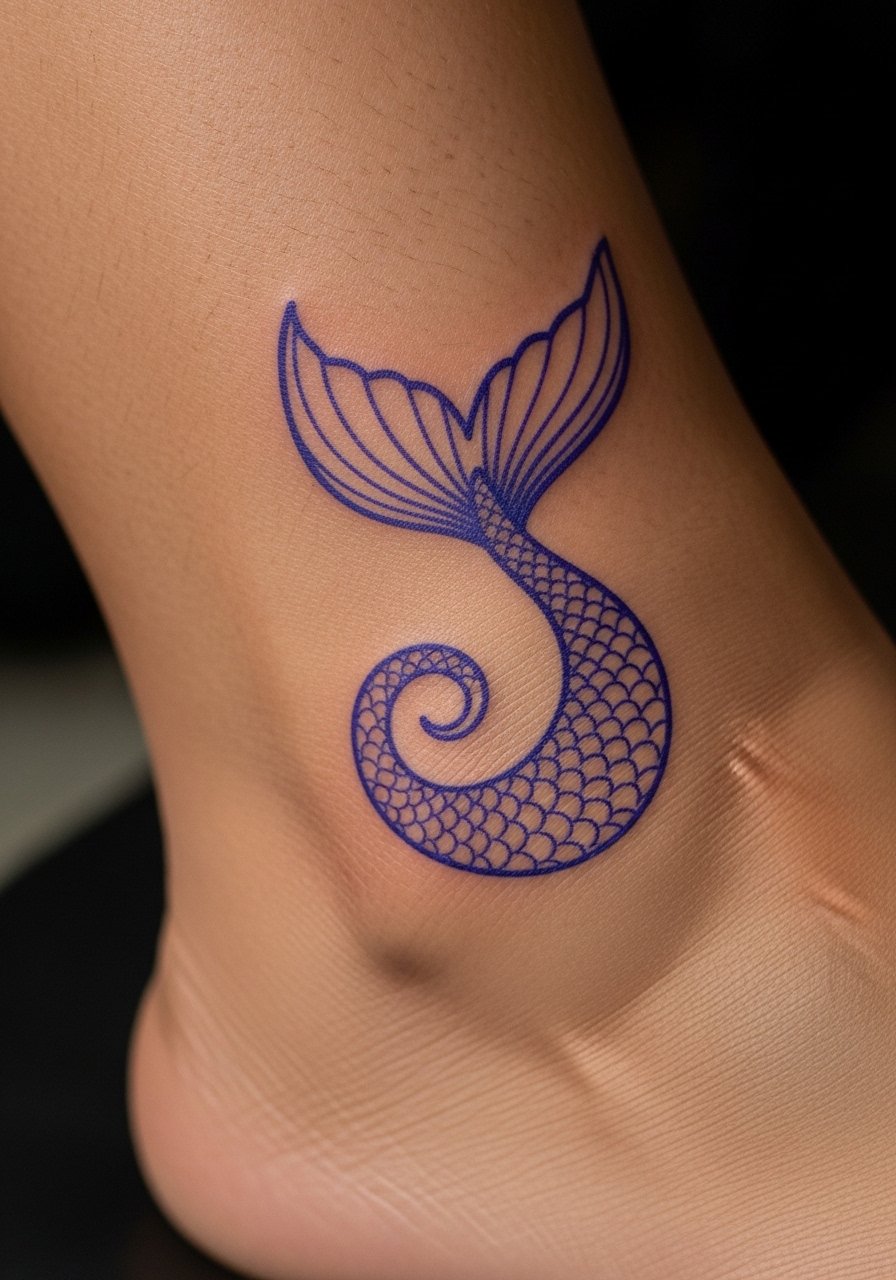
Style/Technique: Accent piece
Pain Level: 2/10
Session Time: 20 to 40 minutes
Best For: Ankle, wrist, subtle visible spots
Small tail accents read best when the curvature follows body lines. I adjust curve radius in the stencil by measuring the circumference and increasing curve length by about 10 percent for ankles. Use single-use stencil paper for quick placement. This is a low-cost addition for clients who liked idea 10 but want something smaller.
Mistake to Avoid: Picking a straight-tail stencil for a curved ankle, which buckles visually on the body.
14. Anchor and Rope Mini Sleeve
Style/Technique: Clustered placement, modular stencils
Pain Level: 3/10
Session Time: 1 to 3 hours depending on fills
Best For: Forearm sleeve, calf
Group stencils into a modular layout so each motif reads individually and as a whole. I print each piece on separate transfer sheets and test-fit them on paper before final placement. A useful studio item is stencil-practice skin sheets for mockups. This technique suits clients wanting a compact themed sleeve in one or two sessions.
Mistake to Avoid: Applying clustered stencils without negative space planning, causing a crowded healed look.
15. Healed-Look Stencil for Touch-Ups
Style/Technique: Touch-up alignment technique
Pain Level: 1 to 3/10 depending on coverage
Session Time: 30 to 90 minutes
Best For: Cover-ups, faded traditional pieces
This stencil type is drawn directly over healed work to match grain and replacement thickness. I recommend tracing the healed line and then increasing thickness by 1.5 mm in the stencil to compensate for scar tissue. For accurate matching, use transfer gel with high contrast and test on practice skin. This is a practical idea for clients returning for maintenance or color refresh.
Mistake to Avoid: Matching old, thin lines exactly without thickening, which makes touch-ups look timid and underworked.
Stencil Application Shortcuts
Measure twice, print once. I always outline the placement on paper first, then print the stencil slightly larger for curved areas. A portable thermal stencil copier saves rounds of reprints.
Grab single-use stencil paper and a cheap practice skin pack. Practicing the exact scale three times before a client session saved me a panic remake once.
Most artists wipe the transfer too aggressively. Use a light blot technique with stencil transfer gel to keep lines crisp and avoid smearing.
If a client has textured or scarred skin, print the stencil larger and simplify internal detail. Bold liner needles will help the work read consistently during healing.
