
I kept shrinking the art until the geisha looked like a smudge, then blamed my artist. After the third blur I learned the hard way: small does not mean tiny detail. There is a sweet spot for scale, line weight, and placement that keeps a small geisha readable for years. I learned it after covering up one faded piece and visiting five shops to see how different artists scale faces and kimono patterns down without losing the design.
If you want a small geisha that reads as art, not a blob, this list is for you. These ideas skew low-to-moderate cost, most fit a single short session, and they work whether you want something discreet for a job or a visible piece on summer arms. I learned the scale and aftercare tips across five shops I have visited, so each idea includes placement, healing notes, and a simple product that helped me avoid touch-ups.
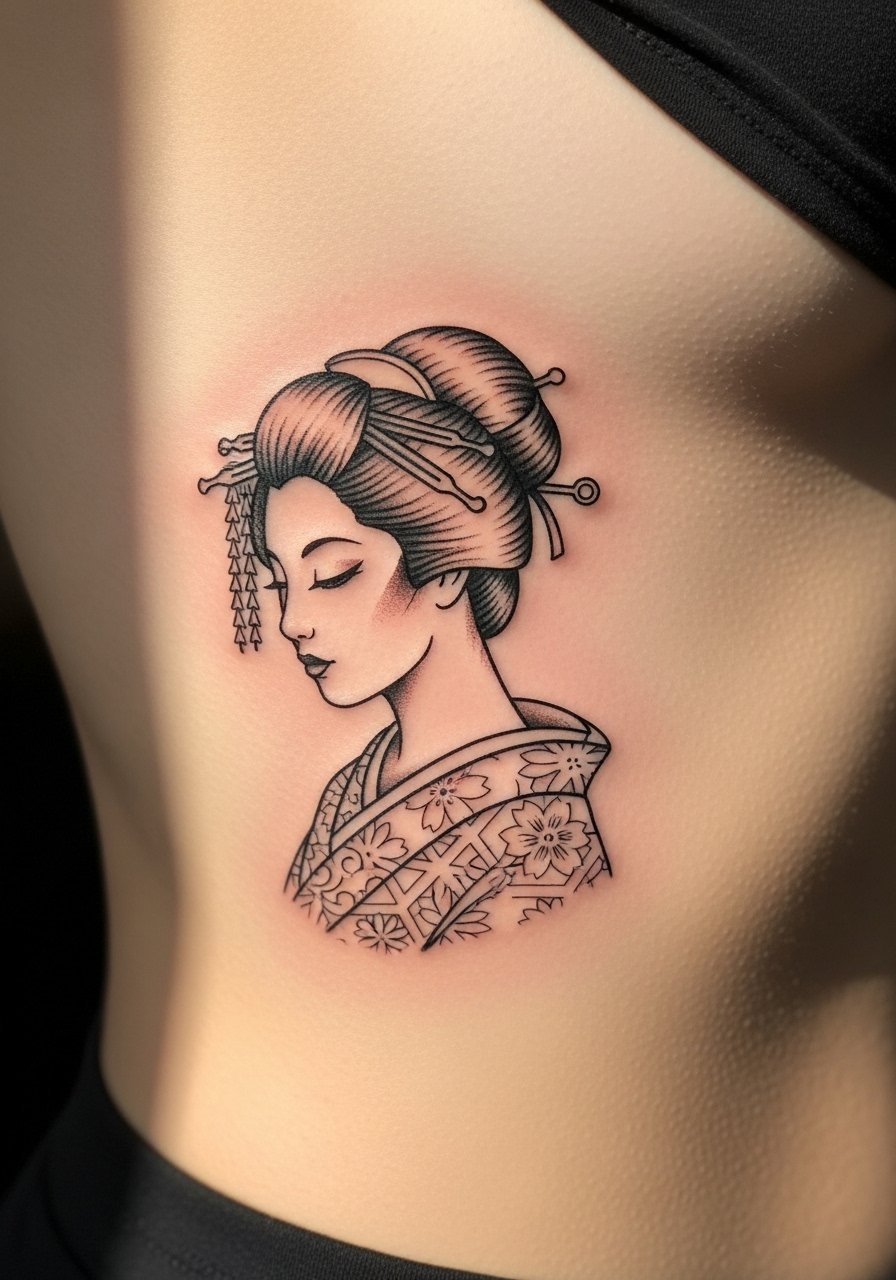
1. Micro Linework Geisha Profile
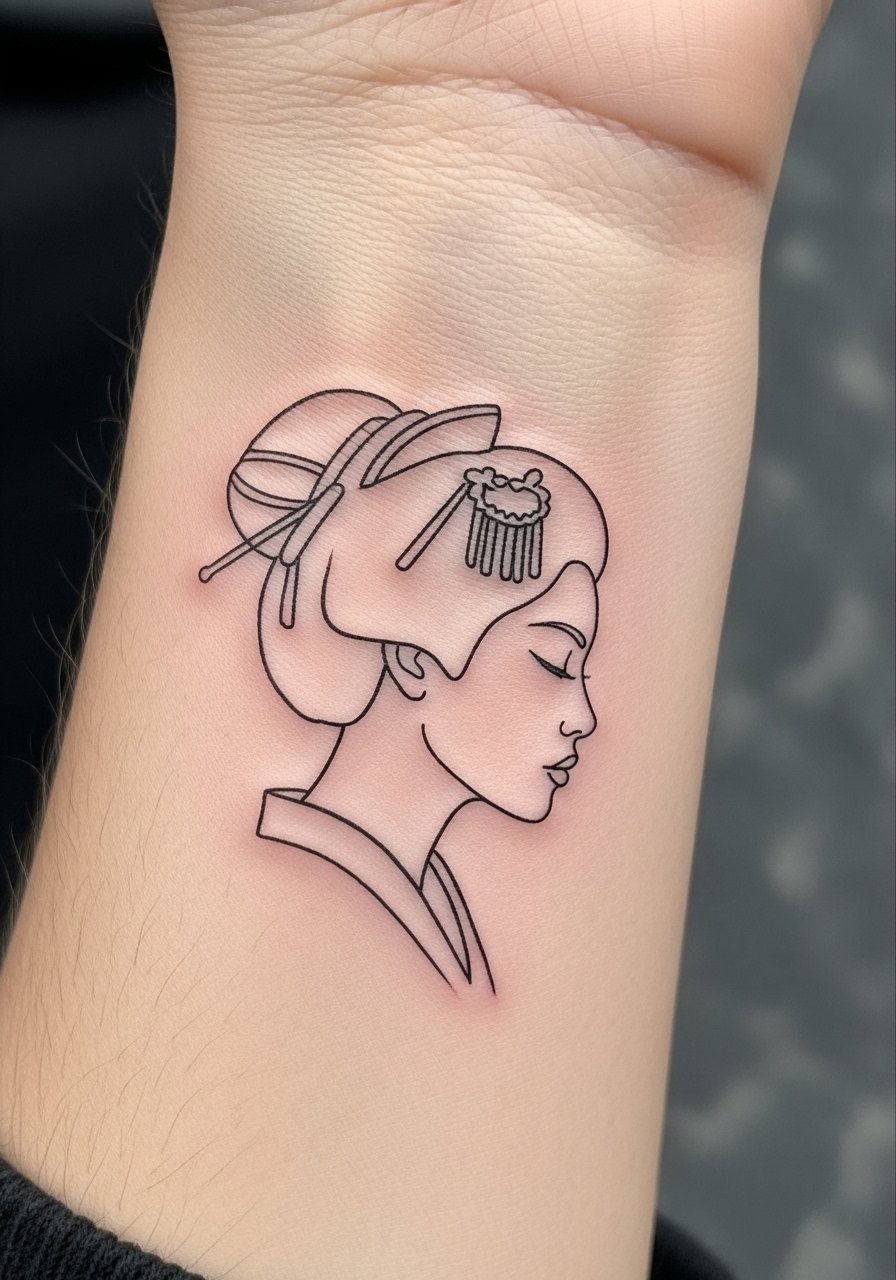
Tiny single-needle profiles work because the eye reads silhouette, not tiny faces. Keep the height around 1.2 to 1.8 inches so the line weight can sit at about 0.3 to 0.5 millimeter. That ratio keeps hair bun details and the neckline from blurring after healing. This style feels modern and quiet, good for someone who wants cultural reference without full color, and it is coverable under long sleeves. I linked a simple fragrance-free soap I used during healing and a small tattoo balm that prevented crusting on thin lines.
Style/Technique: Single-needle minimal linework
Pain Level: 3/10
Session Time: 0.5 to 1 hour
Best For: Wrist, behind the ear, first-timers
Mistake to Avoid: Shrinking a full-face reference down without asking the artist to simplify shapes, which causes blurring.
2. Little Red Accent Geisha
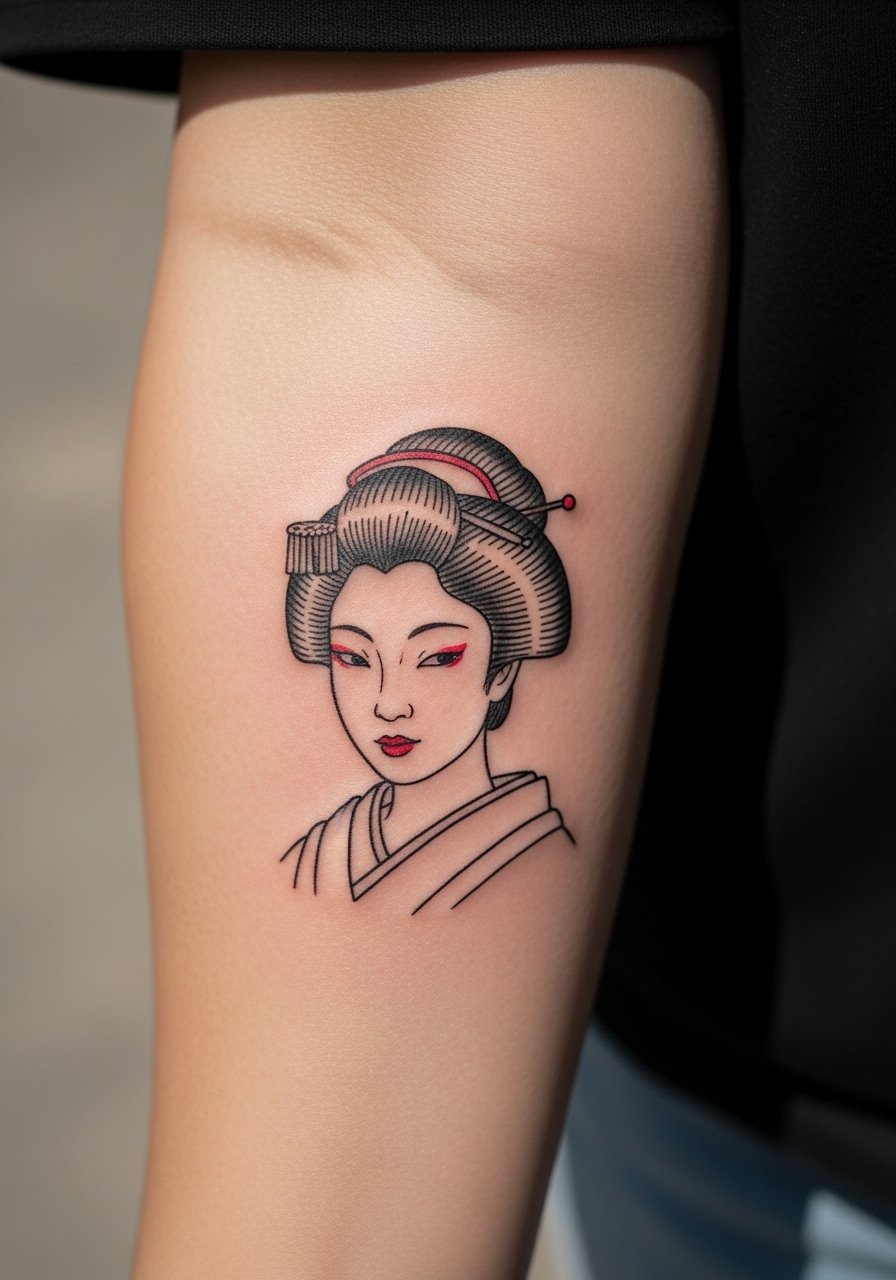
A single red pop brings life to a tiny geisha without relying on heavy shading. Use one spot of color no larger than 0.3 inch, placed where contrast will stay visible as the skin ages. This choice reads as intentional, not cartoonish, and works well on medium skin tones where the red stays rich. It is a good middle ground if you want color but worry about touch-ups. Pair with a gentle color-safe tattoo balm and ask your artist for slightly bolder outline near the accent so it holds through healing.
Style/Technique: Micro color accent with solid outline
Pain Level: 4/10
Session Time: 0.5 to 1 hour
Best For: Inner forearm, ankle, calf
Mistake to Avoid: Adding multiple small colors that overlap, which increases the chance of muddying during healing.
3. Tiny Geisha Silhouette Behind The Ear
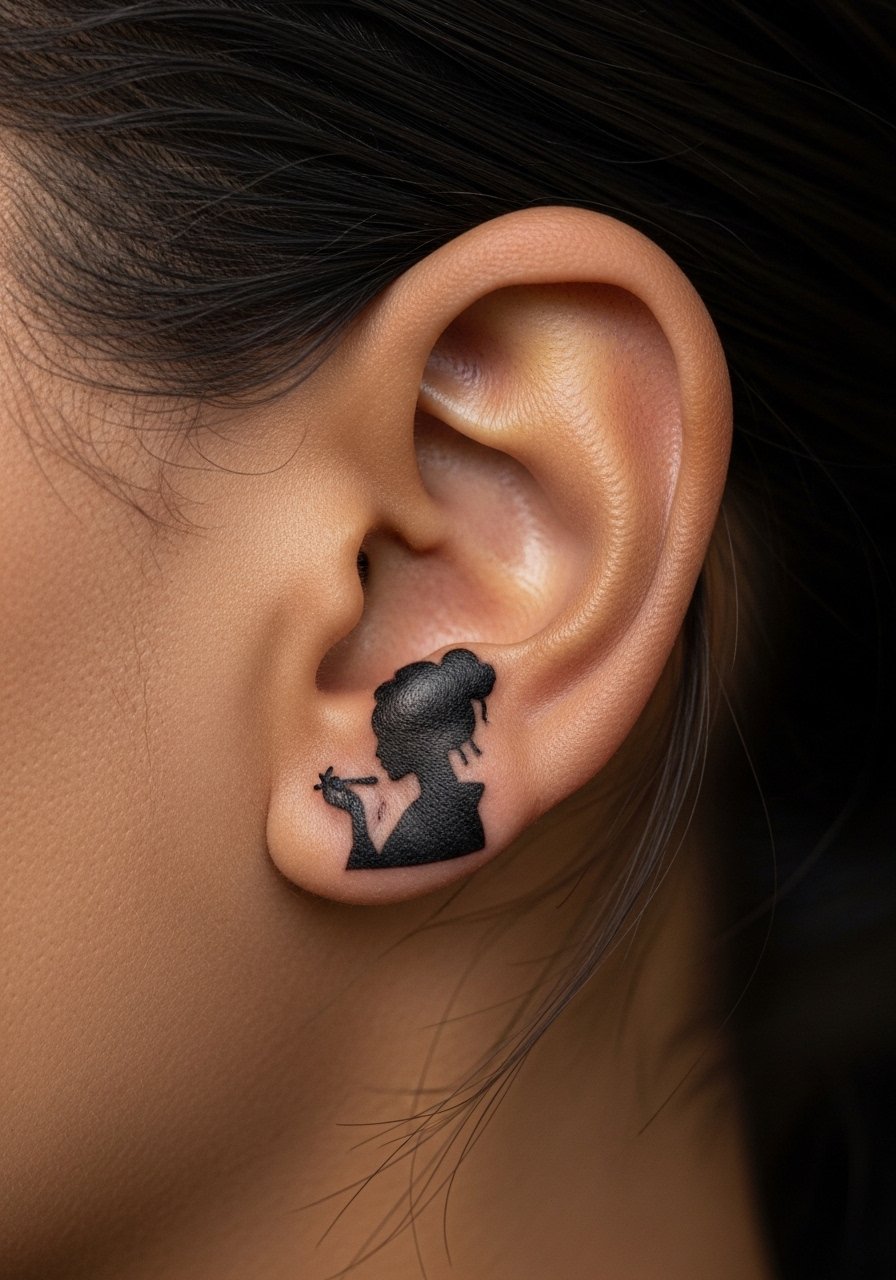
A silhouette behind the ear gives the idea of a geisha without facial detail, perfect if you need something extremely discreet. Keep the silhouette under 1 inch in height and opt for solid black to maintain contrast through the peeling phase. This placement is semi-coverable with hair and heals faster because of lower friction. It works well for people who want cultural nods but need to keep visibility low for work. Bring a plastic wrap or breathable bandage the artist recommends, and use a gentle antiseptic spray for the first 48 hours.
Style/Technique: Solid silhouette
Pain Level: 2/10
Session Time: 20 to 45 minutes
Best For: Behind the ear, nape, small and coverable
Mistake to Avoid: Asking for fine interior details on a sub-inch silhouette, which disappear when the skin heals.
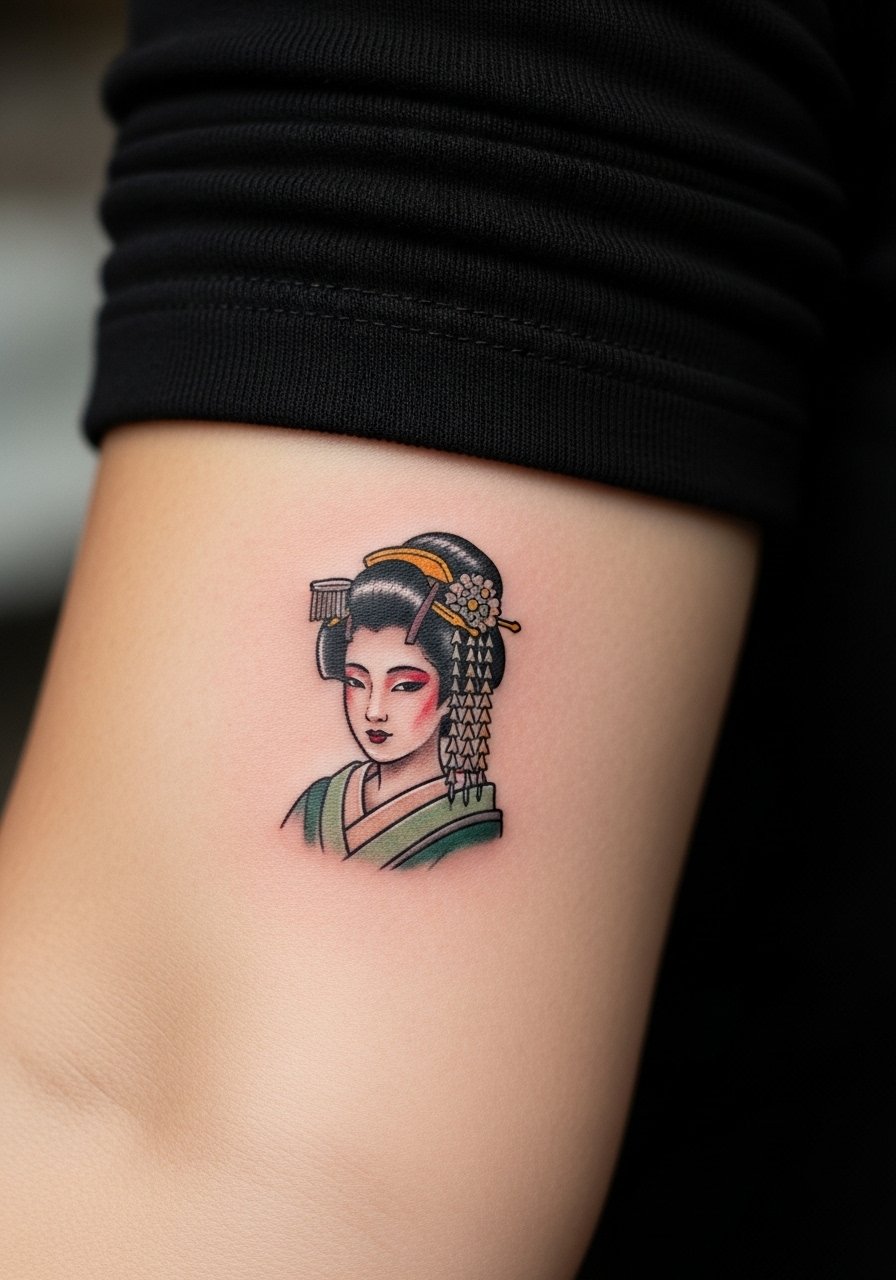
4. Micro Realism Geisha Face
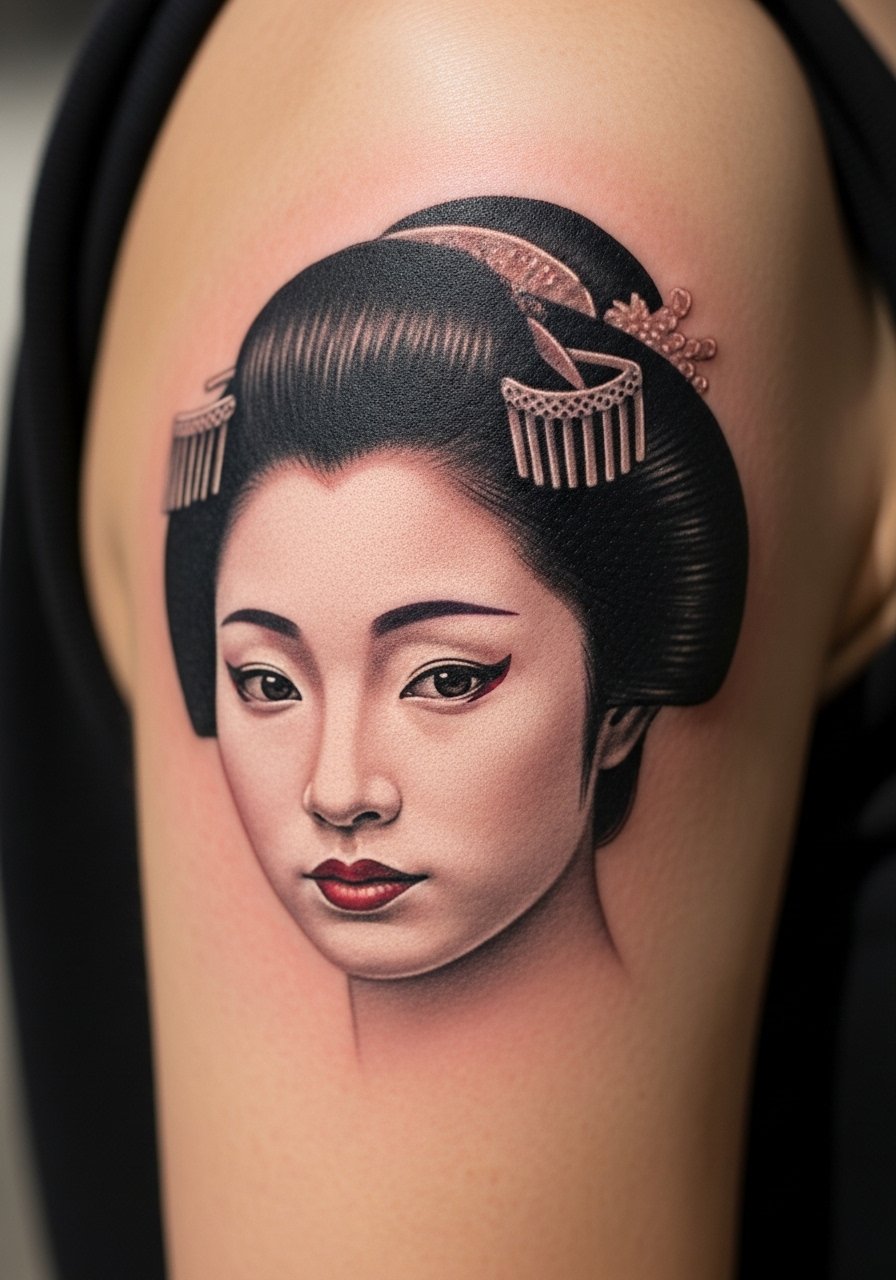
Micro realism uses tiny patches of shading rather than thin fussy lines. For a readable micro face, limit it to 1.5 inches and ask for soft stippling instead of continuous tones. That technique ages better because it leaves small skin islands that keep contrast. This style reads intimate and refined, and suits someone who likes small portraiture over symbolic motifs. It takes a steadier hand, so budget for a slightly higher hourly rate. I brought a small magnifying mirror once for placement checks and used a light, unscented aftercare balm during healing.
Style/Technique: Micro realism stippling
Pain Level: 5/10
Session Time: 1 to 1.5 hours
Best For: Outer upper arm, shoulder, visible but tasteful
Mistake to Avoid: Expecting a tiny portrait to hold hair and facial lines like a large piece, which causes disappointment.
5. Negative-Space Kimono Pattern
Using negative space to suggest a kimono pattern is a clever way to imply detail without extra ink. The trick is mapping out the pattern so the naked skin creates the motif, then surrounding it with soft shading about 0.5 inch wide. That keeps the pattern readable and reduces session time. This feels modern and artistic, and is a good option if you want texture without clutter. I recommend a repositionable stencil paper for testing placement and a lightweight aftercare lotion that does not fill the negative space during peeling.
Style/Technique: Negative-space patterning with soft shading
Pain Level: 4/10
Session Time: 0.75 to 1.25 hours
Best For: Rib, thigh, upper arm where there is enough flat surface
Mistake to Avoid: Packing pigment into the negative shapes, which defeats the whole effect.
6. Tiny Watercolor Wash Geisha
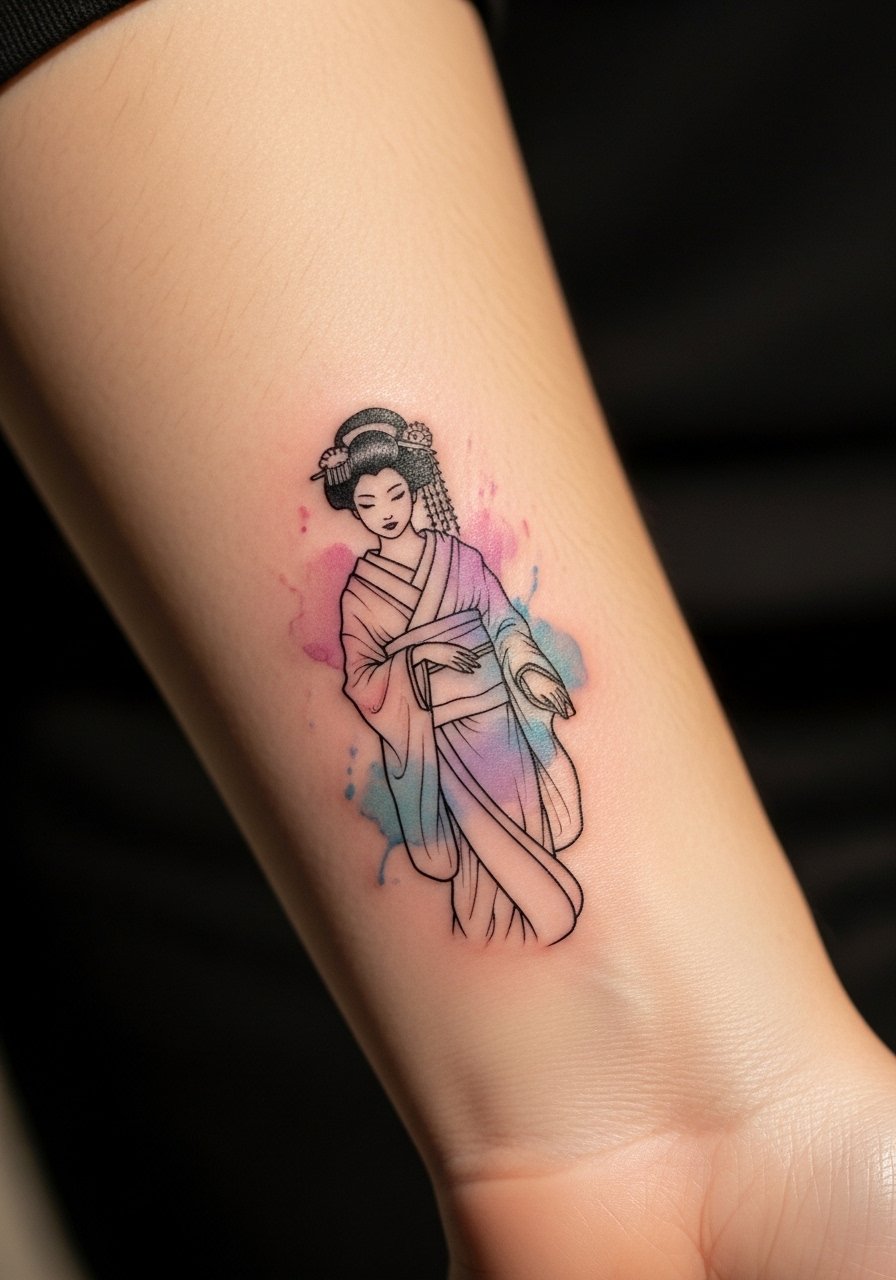
A pale watercolor wash behind a simple geisha outline can look painterly without heavy touch-ups if done sparingly. Limit the wash area to about 1.5 inches and keep pigments low-saturation so they fade evenly. Ask the artist to layer color in thin passes, one or two light coats rather than a saturated fill. This creates a soft mood and suits creative wardrobes. Use a color-protecting balm after the initial peel to prolong vibrancy.
Style/Technique: Subtle watercolor wash with line outline
Pain Level: 4/10
Session Time: 0.75 to 1.5 hours
Best For: Wrist, forearm, visible art-friendly areas
Mistake to Avoid: Asking for saturated watercolor fills on a small scale, which require frequent touch-ups.
7. Origami Geisha Fusion

Mixing geometric origami shapes with a simplified geisha silhouette is a fresh angle most places skip. The crisp planes of origami balance the organic lines of the figure, so you can scale the piece down to about 1.25 inches and still keep clarity. This hybrid reads as symbolic rather than literal, which helps with cultural respect because it abstracts the reference. It also fits small spaces like ankles and wrists. I used a waterproof bandage while showering during the first week and a gentle, pH-balanced cleanser for day two cleanings.
Style/Technique: Geometric-organic fusion
Pain Level: 3/10
Session Time: 0.5 to 1 hour
Best For: Ankle, wrist, behind the knee
Mistake to Avoid: Combining very fine geometric details with soft shading, which competes and blurs.
If any of these ideas have you ready to actually try something, here are the specific items I used and recommend.
Tiny Geisha Tattoo Essentials
Aftercare Basics:
- Fragrance-free soap (~$6-12). Gentle cleansing for the first week.
- Unscented tattoo balm (~$8-18). Light hydration after peeling.
- Waterproof bandages (~$7-15). For short showers on day one.
Placement & Planning:
- Repositionable tattoo stencil paper (~$10-20). Test small placements at home.
- Travel magnifying mirror (~$10-18). Check exact placement on limbs.
Protection & Care:
- PH-balanced tattoo cleanser (~$8-16). Less irritation while the skin peels.
Small Geisha Aftercare Habits
Thin layers work best. Put on a very thin ribbon of unscented tattoo balm and massage it in, then wait an hour before adding more. Too much product clogs tiny lines.
Grab a travel magnifying mirror for placement checks. Seeing your design at actual scale before the needle helps you notice if features will be too small.
Curious about color longevity? Ask your artist for a 60 percent scale test of the reference. If the face still reads at 60 percent, it will survive healing better.
Most people touch at their new piece. Keep a pack of waterproof bandages for the first 48 hours to stop accidental rubbing.
8. Hidden Fan Geisha On The Ribcage

A small geisha tucked under a folding fan lets you play with composition without extra facial detail. The fan can be 1.5 to 2 inches wide and the face about 0.8 inch. This placement is intimate, holds well because of flat vertical canvas, and is easy to hide under clothing. It ages gracefully when the body does not stretch much in that spot. I used a repositionable stencil paper to test how the fan sits with clothing waistlines and a low-fragrance aftercare balm.
Style/Technique: Compositional small piece with accessory element
Pain Level: 6/10
Session Time: 1 to 1.5 hours
Best For: Ribcage, torso, under-clothing placement
Mistake to Avoid: Designing the fan with tiny interior motifs that blur into a gray when reduced.
9. Origami Hairpin Minimal Geisha
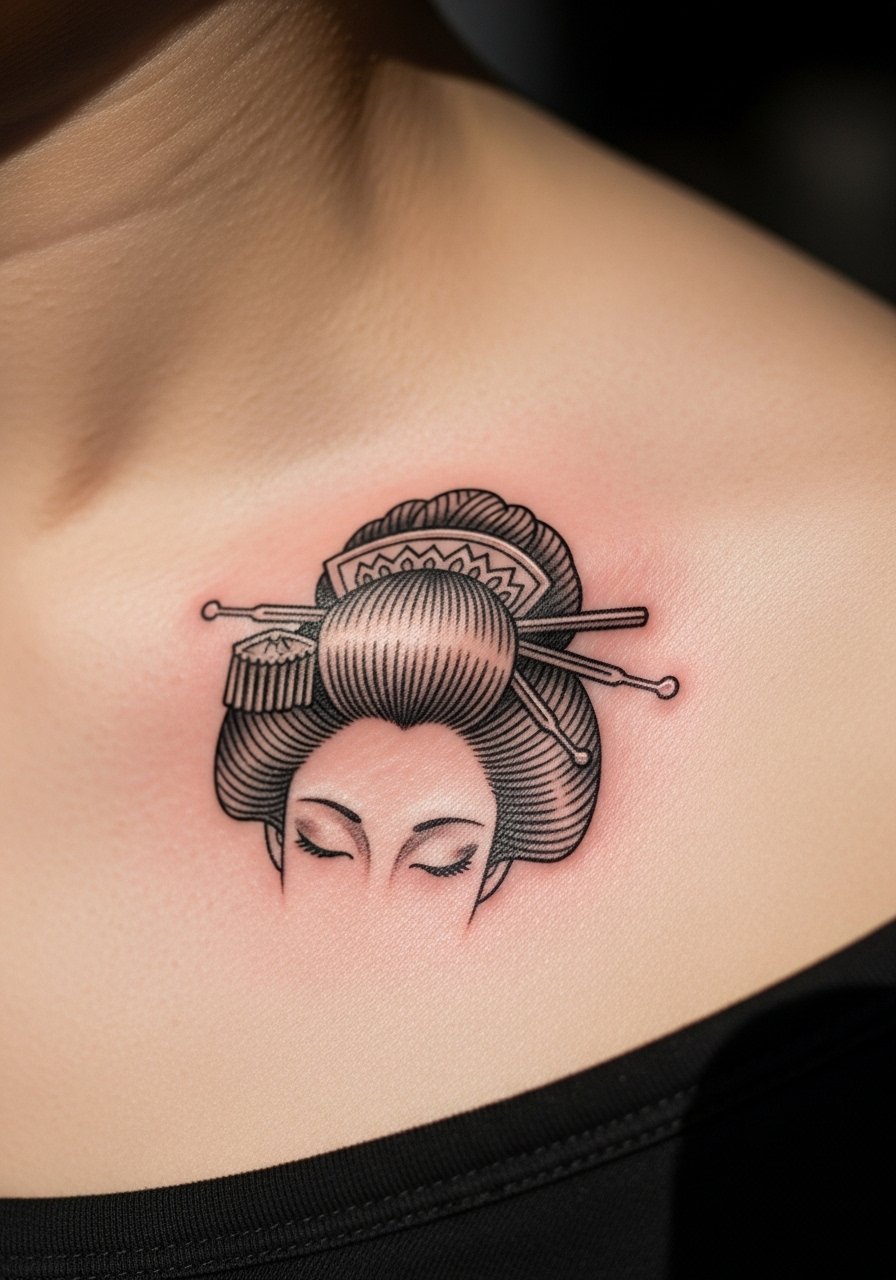
Focusing on a single object, like a stylized hairpin and bun, implies the geisha without drawing the whole figure. Keep the motif under 1 inch and give it a bold outline so it does not lose shape during crusting. This approach is respectful because it nods to cultural elements rather than depicting stereotyped features. It fits collarbones, fingers, or the back of the arm. Carry a tiny antiseptic wipe pack for the first few days if your clothing rubs the area.
Style/Technique: Focused motif, symbol-first approach
Pain Level: 3/10
Session Time: 20 to 40 minutes
Best For: Collarbone, finger base, small visible places
Mistake to Avoid: Requesting ornate hairpin filigree that cannot be executed at under 1 inch.
10. Work-Friendly Sleeve Edge Geisha
Placing a small geisha at the sleeve edge lets you show it off in summer and cover it in professional settings. Keep the piece 1 to 1.5 inches tall and orient it to read from the hand up so it looks intentional when the arm hangs. This placement reduces sun exposure compared to an exposed shoulder, which helps pigment longevity. Use a pH-balanced cleanser and a light balm during healing. If you need to cover it, a neutral-toned sleeve usually does the job.
Style/Technique: Edge placement for visibility control
Pain Level: 3/10
Session Time: 0.5 to 1 hour
Best For: Outer forearm, sleeve-edge visibility
Mistake to Avoid: Placing it on the high-sun part of the shoulder, which ages color faster.
11. Tiny Geisha With Crane Pairing
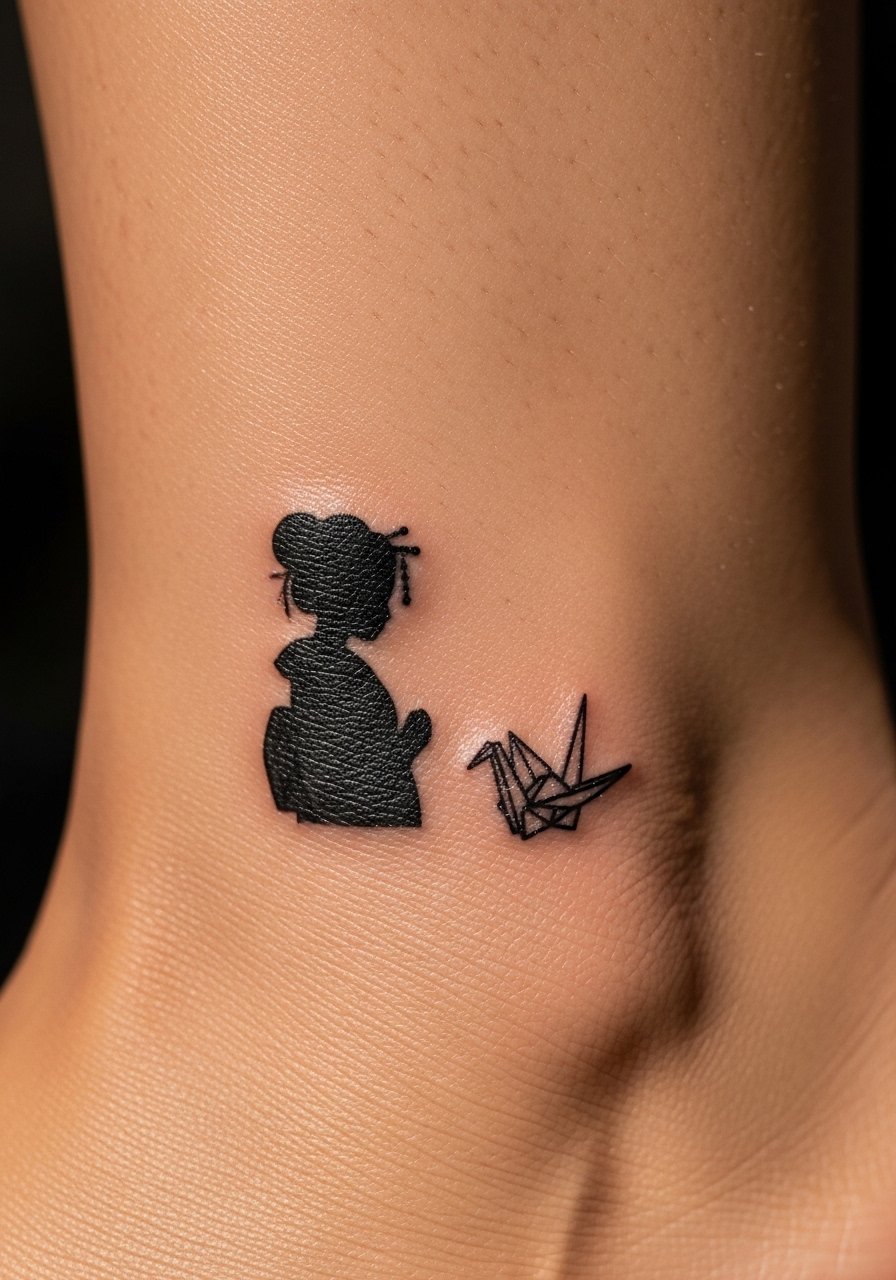
Pairing a micro geisha with a small crane lets you tell a story in a very small composition. Keep each element at or under 1.25 inches and allow 0.5 inch breathing room between them. The negative space between figures reads as intentional rather than crowded. This pairing adds movement and tends to age well because shapes stay distinct. It is a great choice if you want a small narrative rather than a single motif. Pack a lightweight aftercare lotion for the second week to keep the skin supple.
Style/Technique: Paired minimal motifs with spacing
Pain Level: 2/10
Session Time: 0.5 to 1 hour
Best For: Ankle, wrist, small paired placements
Mistake to Avoid: Tucking elements too close, which causes them to merge as the skin heals.
