
I kept filing my almond tips into a point because every Pinterest photo had that sharp silhouette. The result was a fragile nail that split the first time I opened a can. One afternoon I filed at a 45 degree angle, softened the tip, and the shape lasted two weeks without a chip. That small change is the backbone of every summer almond mani that actually survives sunscreen straps, pools, and the snack table.
These nine ideas are for people who want a polished summer mani without a daily salon schedule, and most are done in under an hour at home or in-salon. Most people getting their nails done these days are asking for gel, not acrylic. I tested versions with a tech who works at a salon downtown and at-home kits so you get both pro habits and approachable tools.
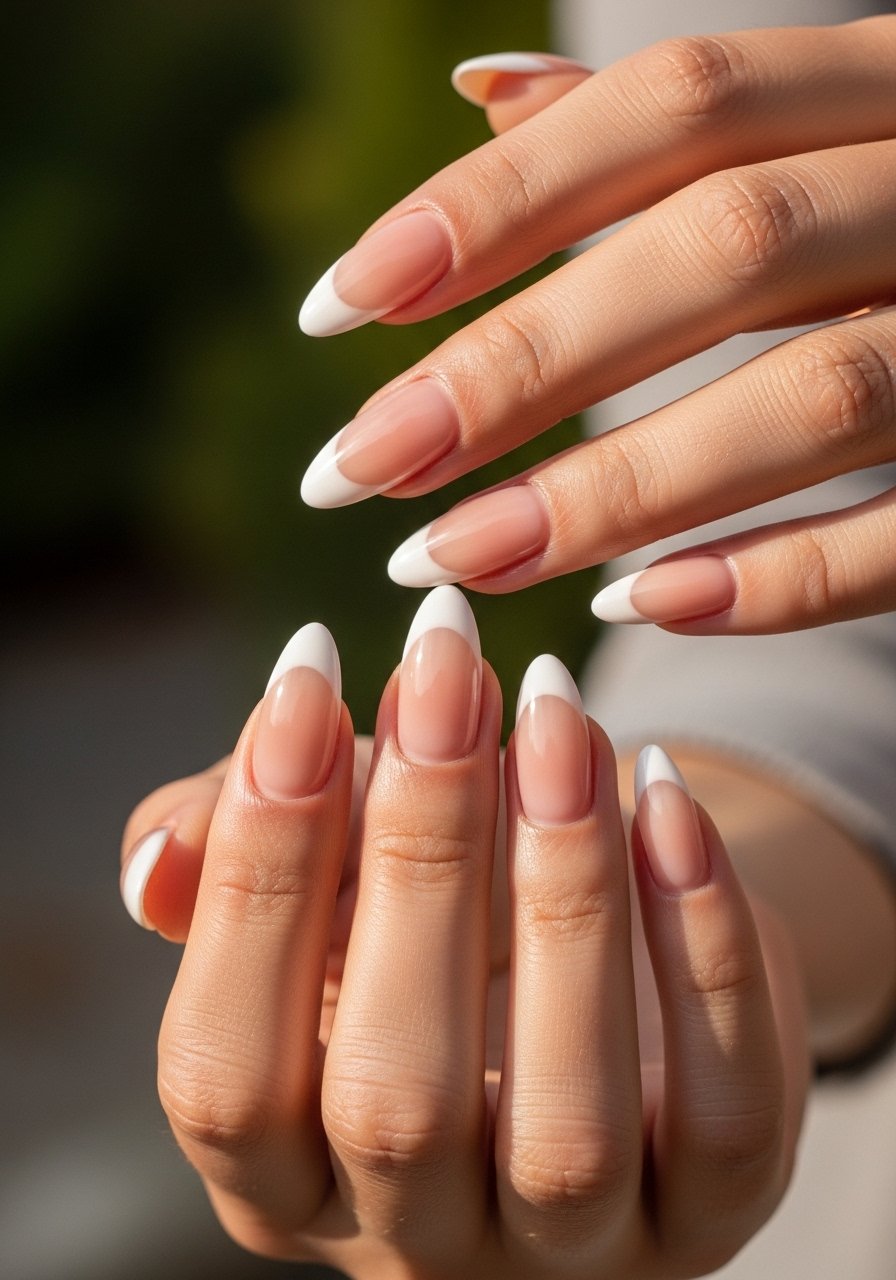
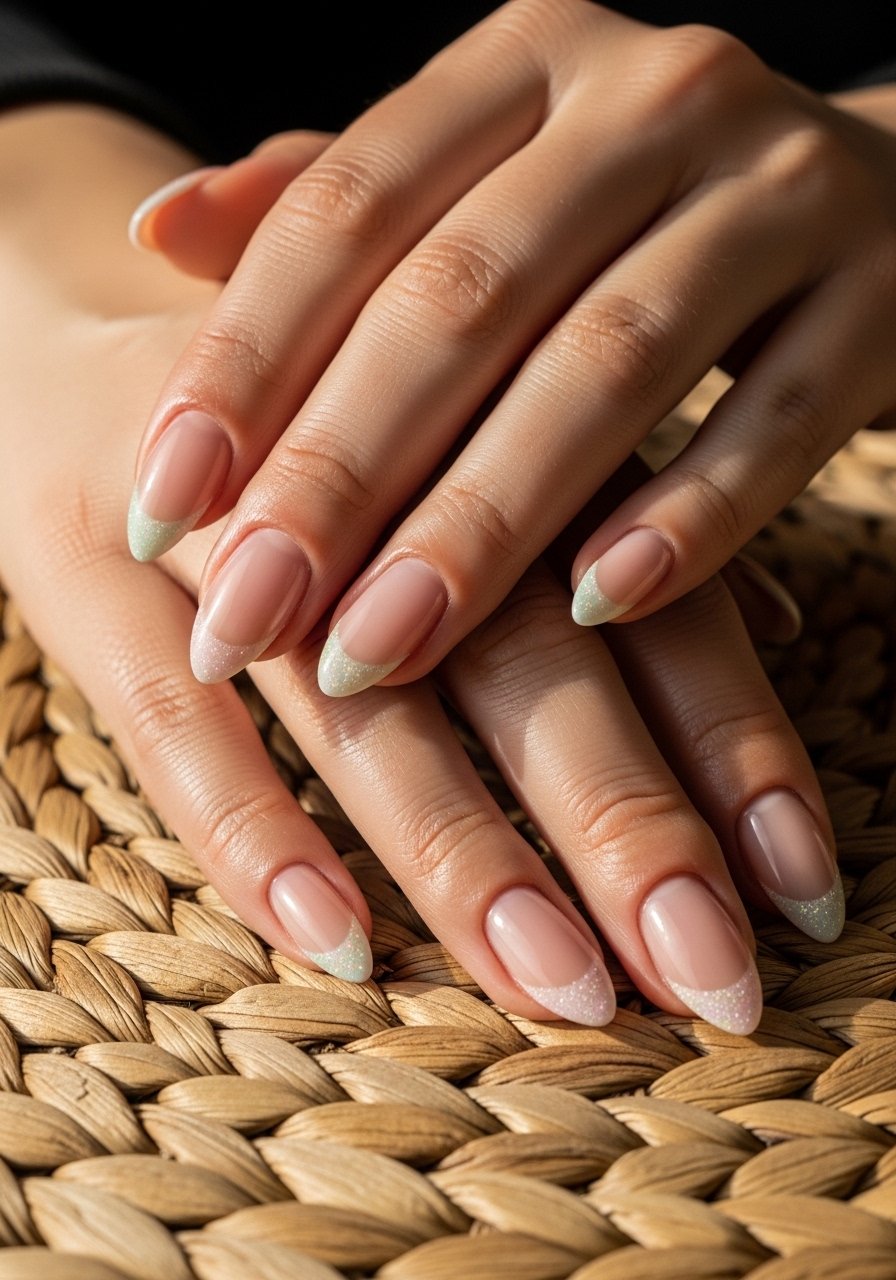
1. Sheer Warm Nude With Glossy Tip
Style/Vibe: Soft summer nude
Best For: Medium-length nails / everyday wear
Skill: Beginner
Start with two thin coats of a warm nude gel, cured 60 seconds each under an LED lamp. I like a 70 percent sheer base so the nail looks natural and breathable, then paint the tip with a glossy white for contrast. Use a thin striping brush to keep the tip narrow, about 2 to 3 millimeters at the center. For at-home options, try gel polish warm nude and seal with a quick-dry top coat.
I recommend less filing when you plan this look because the glossy tip reads fragile on a too-pointed shape.
Mistake to Avoid: Filing the tip too sharp before painting, which makes the white tip look needle-like rather than soft.
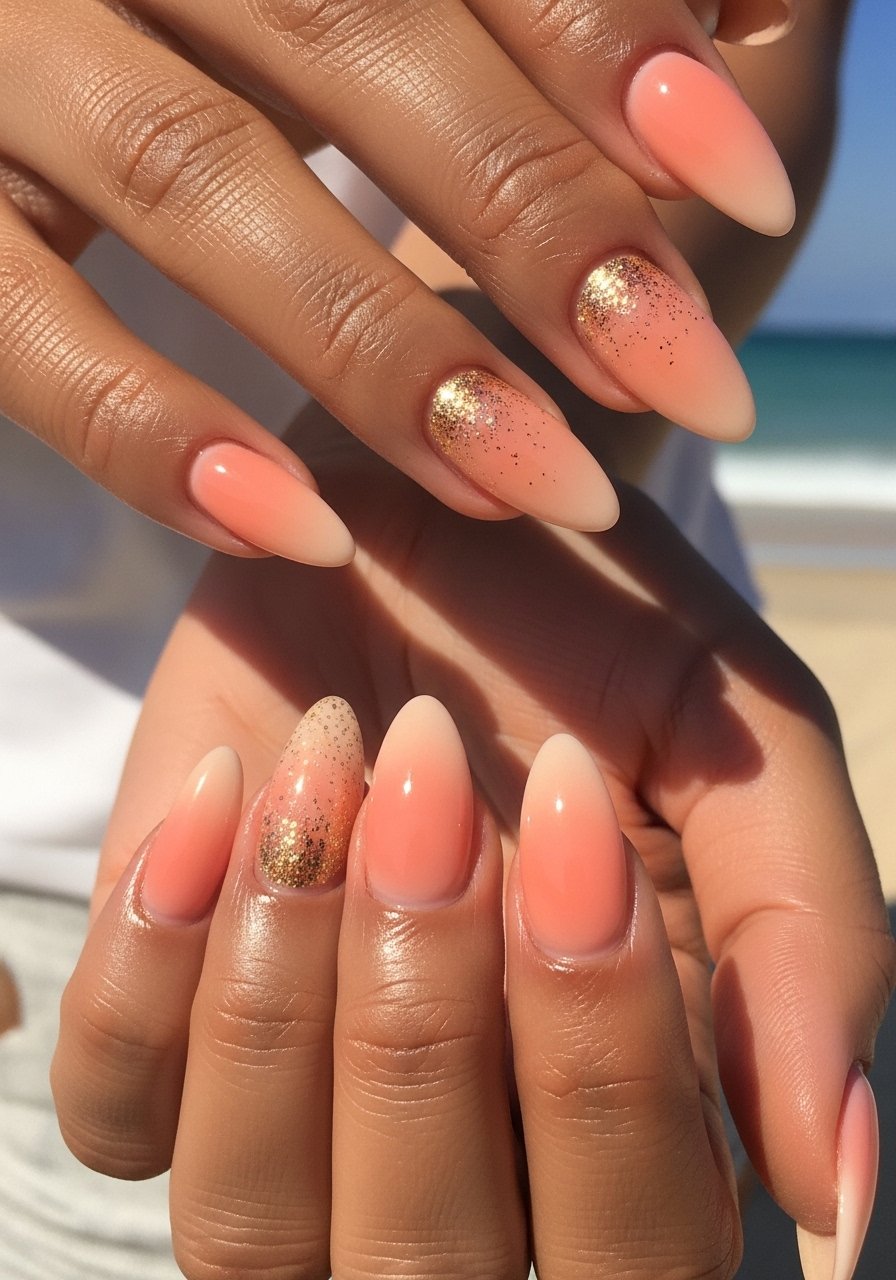
2. Sun-Kissed Ombre With Subtle Glitter
Style/Vibe: Warm gradient shine
Best For: Long nails / weekend events
Skill: Intermediate
Ombre this summer by sponging a matte peach into a sheer apricot, then press a fingertip of fine gold glitter into the wet gel at the lower third for a sun-reflect effect. Use two thin ombre coats and a single glitter layer at the cuticle, cured 45 seconds per thin coat. The visual works because the glitter mimics sun flare near the cuticle and keeps the tips readable from a distance. Pair with pearl top coat to soften the sparkle into a warm glow.
Mistake to Avoid: Applying heavy glitter all over, which reads loud and chips faster than a small concentrated accent.
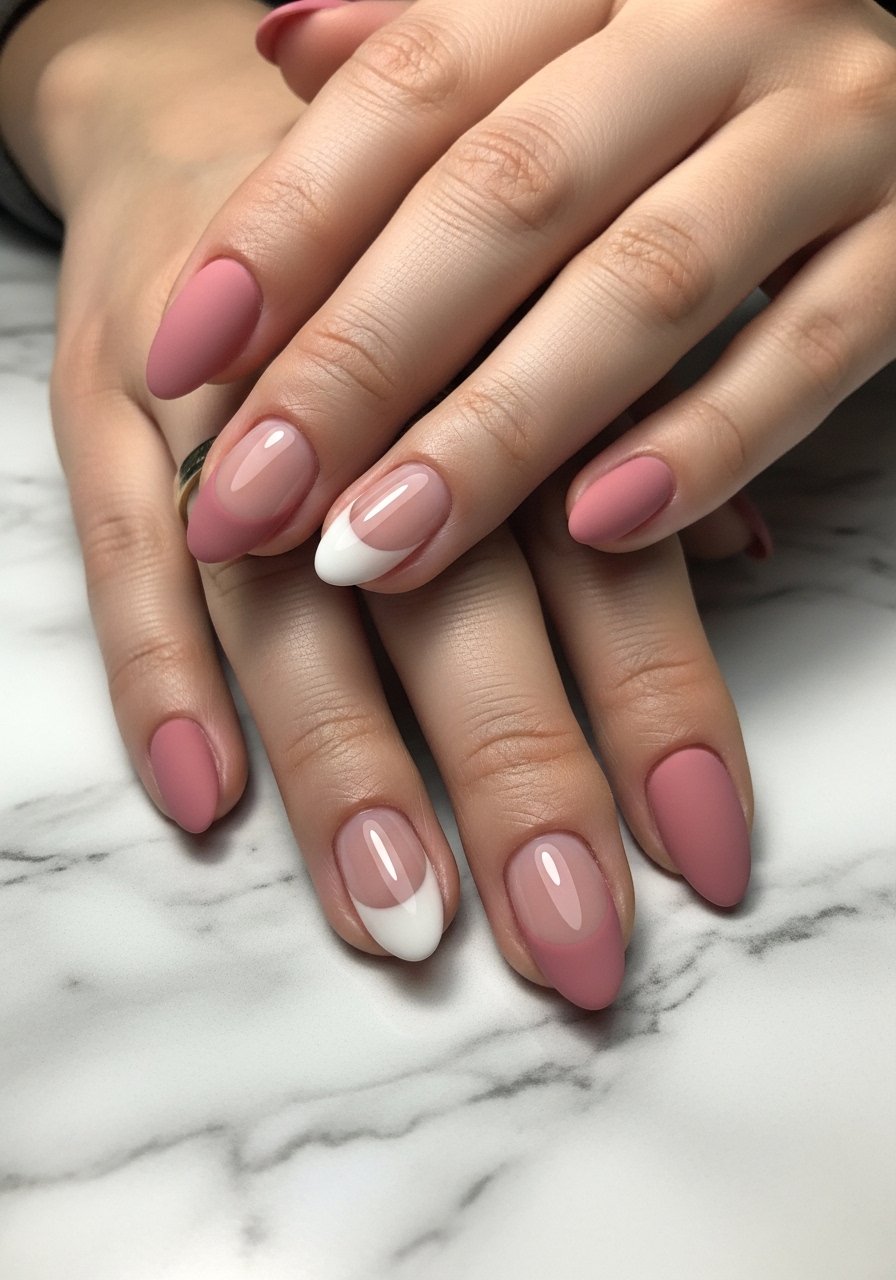
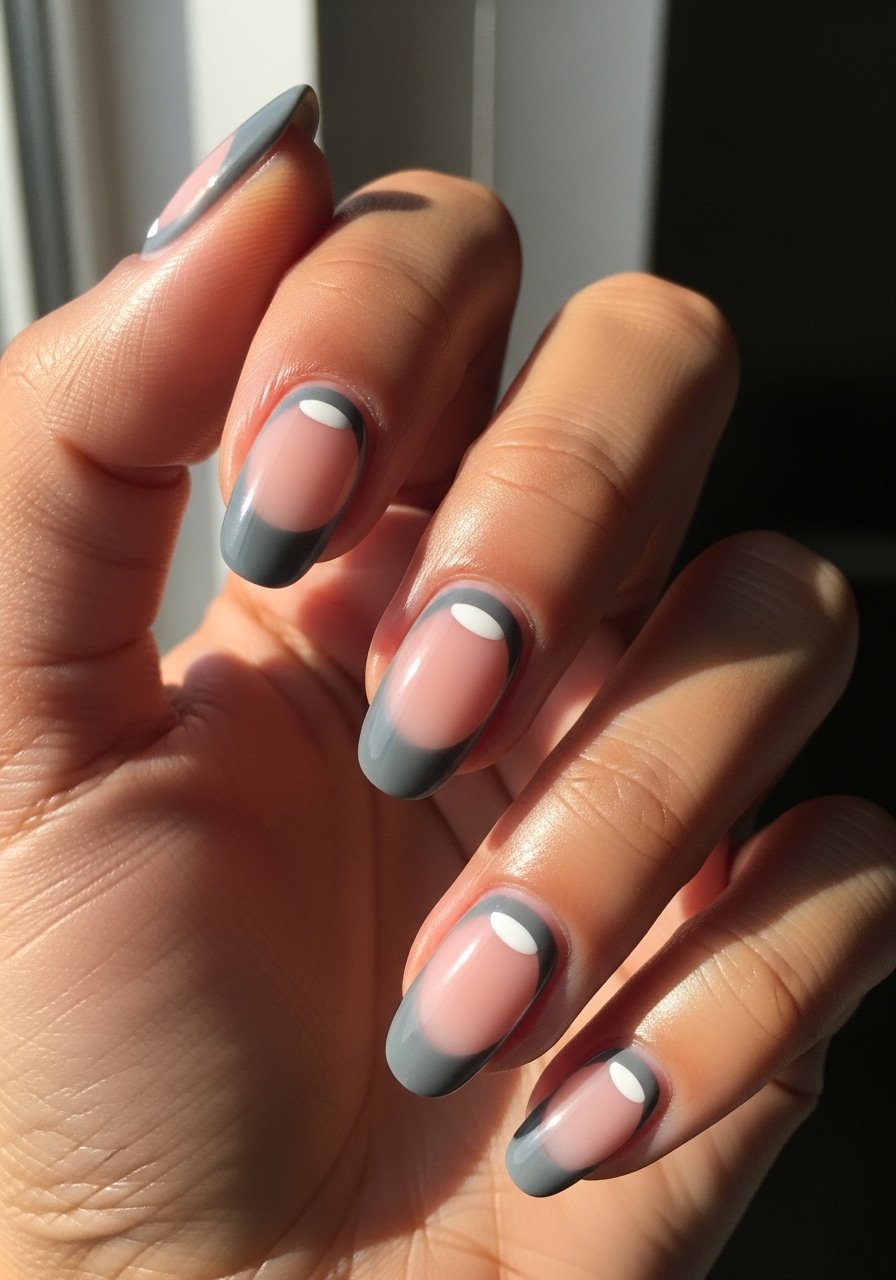
3. Matte-Gloss Half Moon Combo
Style/Vibe: Playful contrast
Best For: Short to medium nails / office or brunch
Skill: Beginner to intermediate
This look flips the classic half moon by leaving the base glossy and the rest matte. File to a soft almond, paint two thin coats of a dusty rose matte polish, then add glossy crescents at the cuticles with a small dotting tool. The glossy base catches light and makes short nails read longer. Use a matte top coat over the rose and a thin glossy top coat just on the moons. Try matte top coat and a small nail striping brush.
Mistake to Avoid: Brushing glossy top coat over the whole nail, which erases the intended contrast.
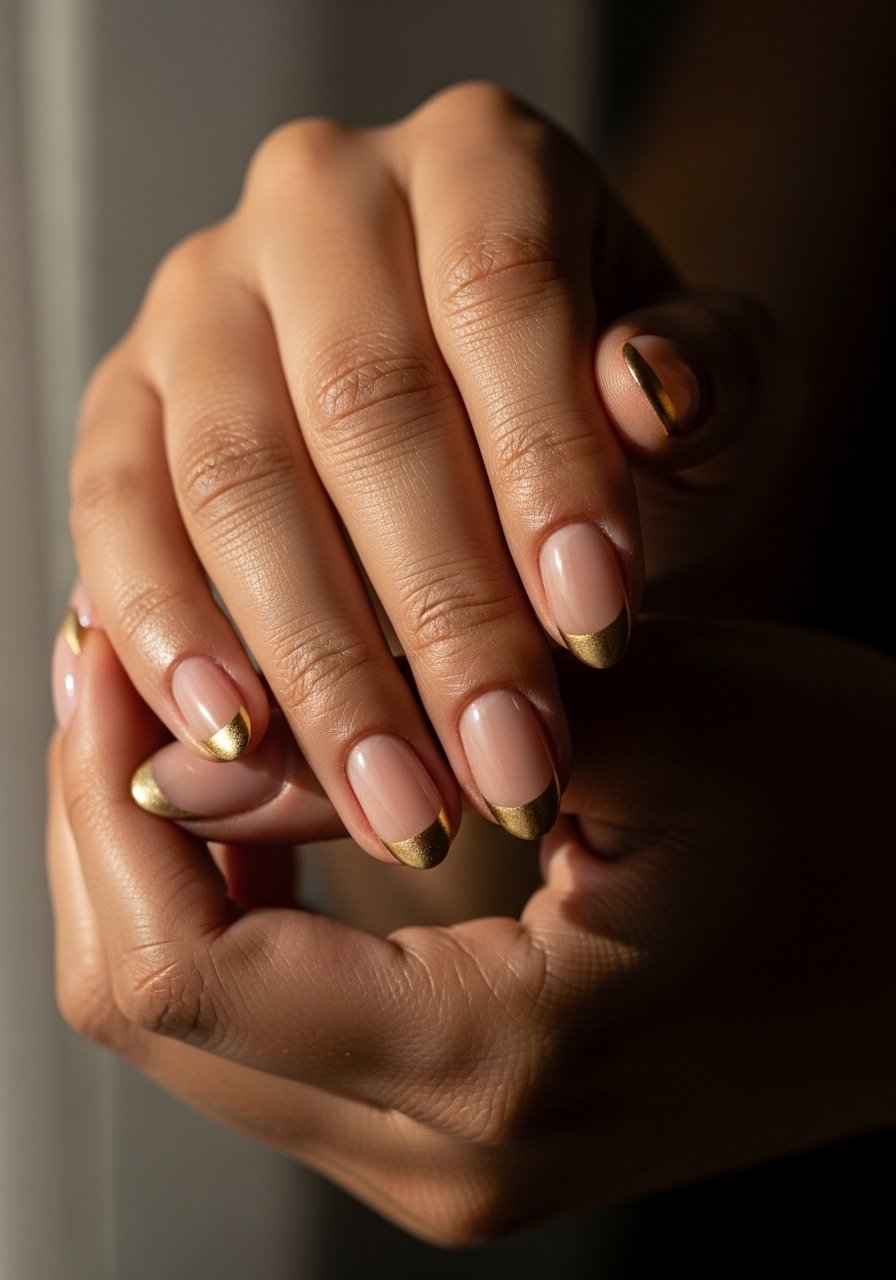
4. Tiny French With Metallic Edge
Style/Vibe: Minimal luxe
Best For: Medium-length nails / date nights
Skill: Intermediate
A micro French keeps the silhouette clean while adding a metallic wink for sunset dinners. Paint a sheer nude base at 60 percent opacity. Then use a tiny brush to trace a 1 to 2 millimeter gold line at the tip. The key is restraint, it reads modern rather than costumey. One coat of metallic paint is enough, cured 30 to 45 seconds. Finish with a glossy top coat focused on the tip area. I like pairing this with nail dehydrator before application so the line adheres smoothly.
Mistake to Avoid: Making the metallic line too thick, which turns the micro French into a stark stripe.
5. Sea Glass Pastel With Matte Finish
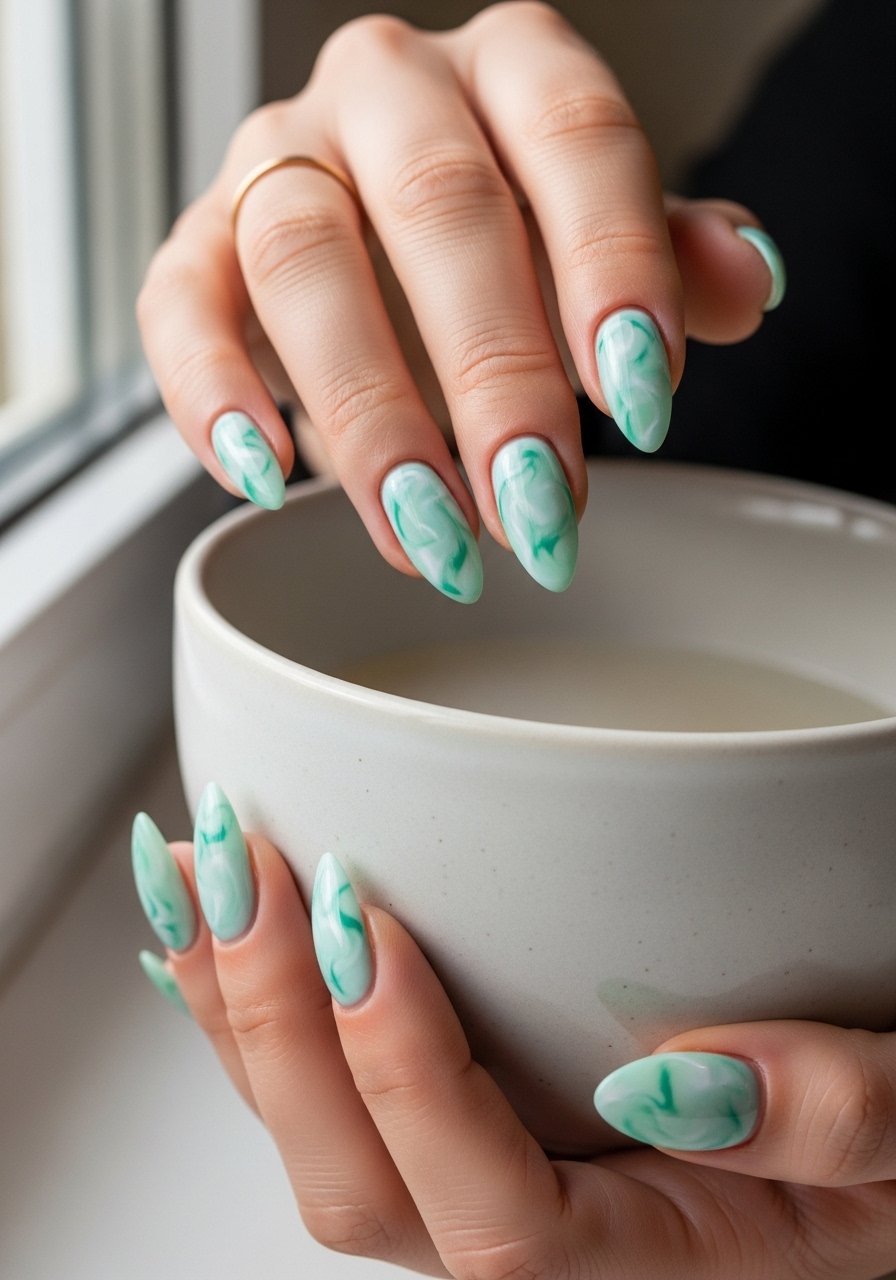
Style/Vibe: Beachy soft
Best For: Long nails / vacation looks
Skill: Intermediate
Use two pastel gel shades blended with a tiny touch of white to create a sea glass marbled look. Work in thin layers and cure each layer 45 to 60 seconds so the colors merge without muddying. A matte top coat gives the glassed effect of weathered sea pieces. For at-home marbling, a pearl or shimmery base applied with a 70 percent white mix helps the colors read like sea glass. Try nail polish remover pot for easy cleanup of the marbling brush strokes.
Mistake to Avoid: Overworking the marble, which turns soft swirls into a muddled blob.
6. Short Almond With Negative Space Accent
Style/Vibe: Clean graphic
Best For: Short nails / low-maintenance wear
Skill: Beginner
This is one of the gaps most articles skip, almond style for short natural nails. Keep the base 80 percent sheer so the negative space reads crisp. Use thin guides or a small brush to paint triangular accents at the side or base, leaving 3 to 4 millimeters of bare nail. The visual lengthens a short almond in photos and real life. Finish with a glossy top coat only on painted areas to keep the natural shine intact. I use a tiny striping brush and a base coat ridge filler.
Mistake to Avoid: Filling the negative space completely, which removes the elongating effect.
7. Sugar Texture Pastel Tips
Style/Vibe: Soft textured play
Best For: Medium-length nails / summer parties
Skill: Intermediate
The sugar texture is a summer favorite because it reads playful and soft in photos. Apply a glossy pastel base and cure. Then apply a fine sugar-effect powder to the tip while the top layer is tacky, press lightly and cure 30 seconds. Two thin layers of powder give a raised grain without bulk. Seal the smooth base with a glossy top coat but leave the sugar tip untouched so it keeps the tactile finish. Try sugar-effect nail powder for the tip and a base coat that adheres to powders.
Mistake to Avoid: Rubbing the sugar tip when it is still tacky, which flattens the texture and makes it uneven.
Before the rest of the list, these are the products doing most of the work.
Nail Summer Essentials To Keep Nearby
- Preparation: nail file (~$5-10). A good 180/240 file protects the thin almond tip.
- Base and Adhesion: nail dehydrator (~$6-12). Prevents lifting on hot days.
- Polish: gel polish warm nude (~$10-20). The shade I reach for.
- Sealers: quick-dry top coat (~$8-15). Saves time and chips.
- Tools: nail striping brush (~$6-12). For micro French and lines.
- Finish: matte top coat (~$7-14). Use for half-moon and sea-glass looks.
- Aftercare: cuticle oil (~$5-12). Keeps the skin around the almond tip hydrated.
8. Protective Gloss With Neon Mini Accent
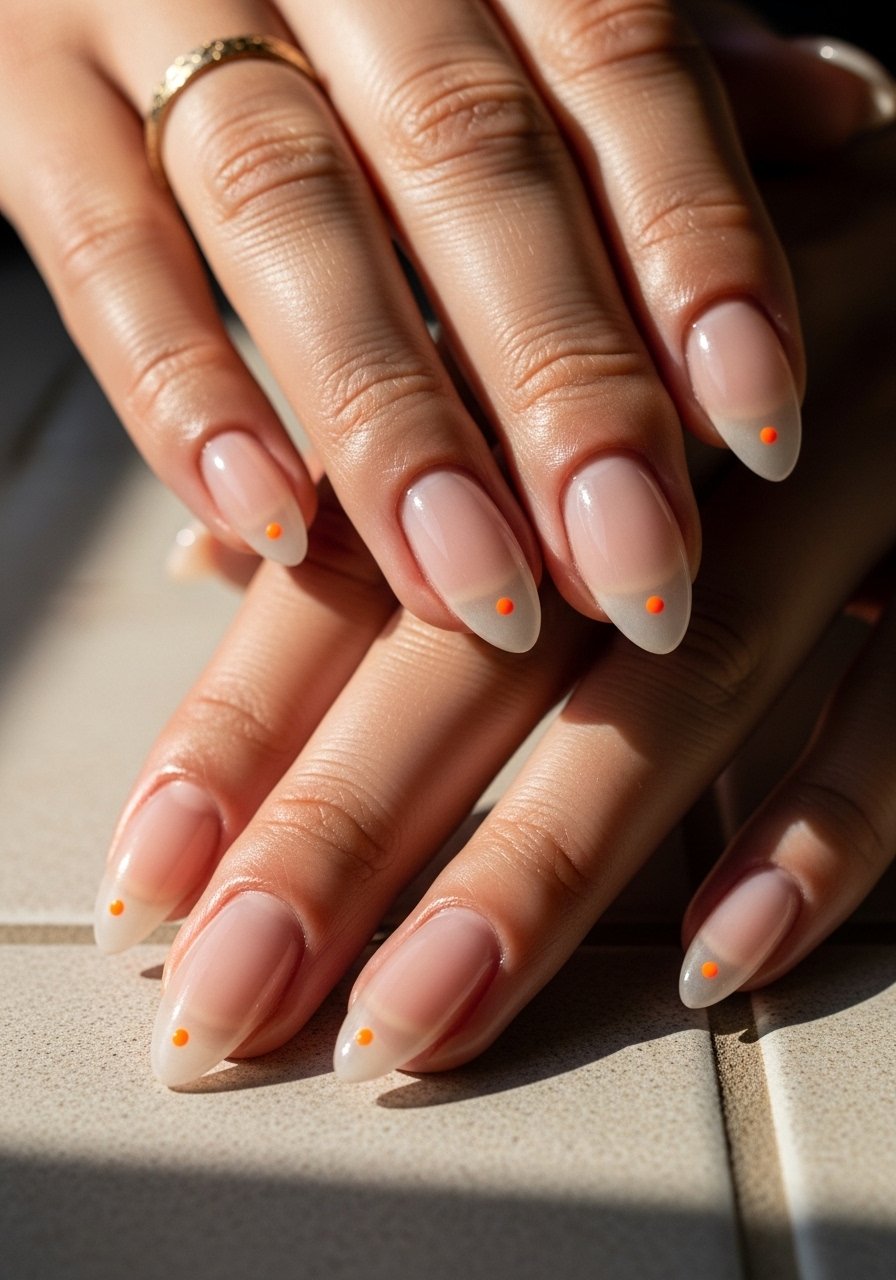
Style/Vibe: Low-key with a pop
Best For: Medium to long nails / outdoor activities
Skill: Beginner
One gap most trend pieces ignore is durability for outdoor summer life. Start with a saturated base, then add a single neon accent dot near the free edge corner on one or two fingers. Finish with two thin layers of a protective glossy top coat cured fully, 60 seconds per layer under LED. The neon reads playful in bright light but does not compromise the whole look. For protection, I recommend an LED lamp like led nail lamp and a reliable quick-dry top coat.
Mistake to Avoid: Using a single thick top coat layer, which leaves uncured spots and increases chipping.
9. Sheer Base With Floating Foil Accent
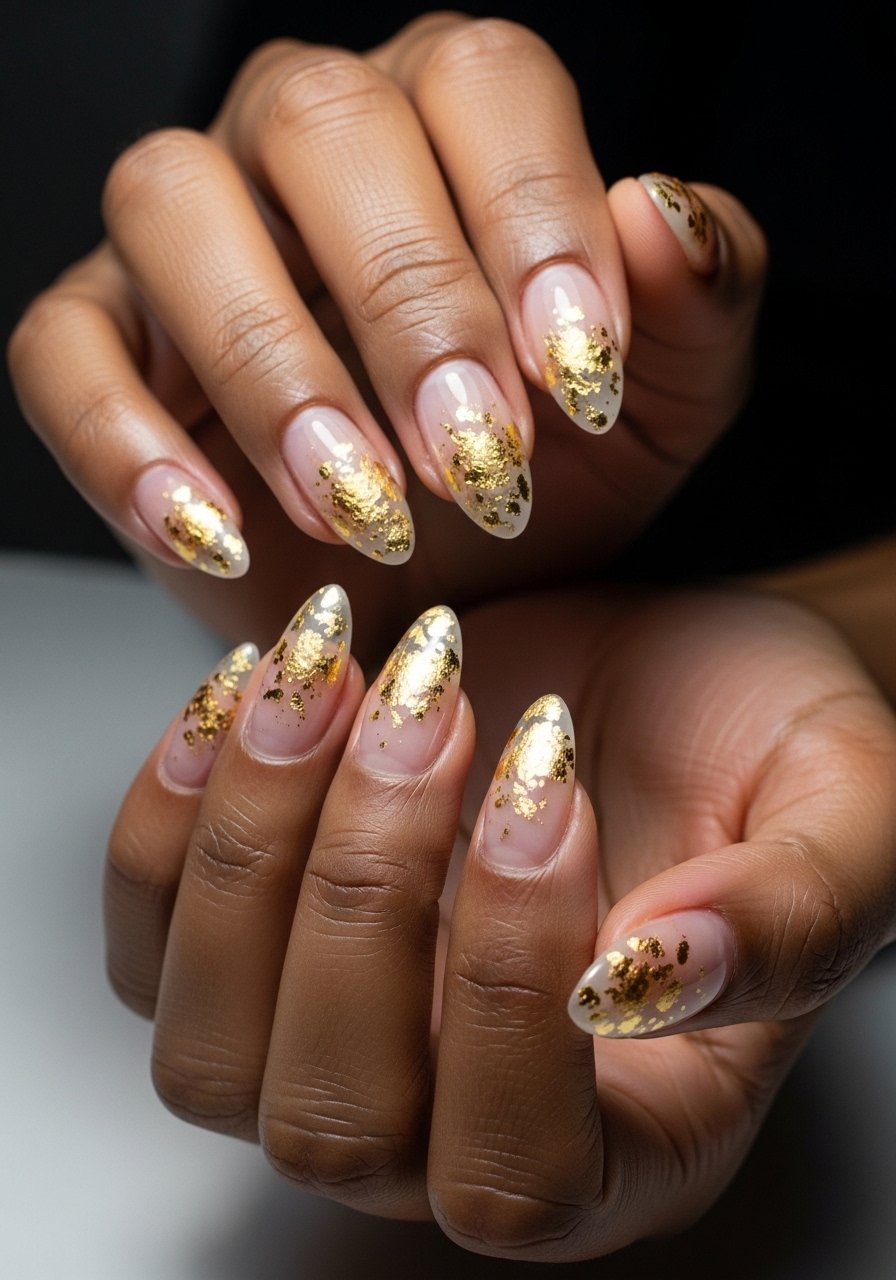
Style/Vibe: Artful minimalism
Best For: Medium-length nails / special occasions
Skill: Intermediate
Floating foil gives an airy, editorial feel without bulk. Lay down a 70 percent translucent base, place tiny foil shards on the tacky layer using tweezers, then seal with two thin coils of top coat around the foil, cured 45 seconds each. The irregular placement keeps the foil from reading like a sticker and gives a breezy summer mood. Use pearl top coat if you want a hint of shimmer overall.
Mistake to Avoid: Pressing foil flat to the nail bed, which makes the pieces look pasted on rather than floating.
Summer Almond Mani Habits
Thin coats beat one thick coat every time. Three thin layers of quick-dry top coat look smoother and last longer than one gloopy layer.
Bring a cuticle oil to the pool or beach bag. A quick rub into the cuticle zone after swimming stops peeling and keeps the almond silhouette clean.
If you paint at home, cure each thin coat for the LED lamp time recommended by the brand, and wipe the tacky layer with a lint-free wipe dipped in alcohol. LED nail lamp choices vary, but a 48-watt unit speeds the process and reduces heat spikes.
Most people remove gel at home by soaking in remover wraps. Use a soft file first to thin the top coat, then wrap for 10 to 15 minutes. nail polish remover pot speeds removal and is kinder to the nail plate.
