
I spent months snapping pin-perfect manicure images and then watching them chip the next day, because I kept trying to pile on detail instead of fixing the base. The moment I stopped overloading the bead and learned one steady-let-it-set move, my photos matched reality more often. These are the acrylic looks I actually screenshot, copy, and get to last-week results with a little practice.
If you like clean salon looks that survive a week of typing and grocery runs, these ideas are for you. They range from beginner sculpted nudes to an advanced layered chrome, most doable at home with a modest toolset and one practice session. Time varies, expect 40 to 75 minutes depending on length and detail.
1. Natural Sculpt With Soft Smile Line

Style/Vibe: Natural sculpt, soft finish
Best For: Long nails / everyday wear
Skill: Beginner
When I first learned sculpting, the secret was a consistent bead size, roughly a 3 mm bead for the apex area, and placing it with the brush angled so the powder melts, not slumps. The result is a soft smile line that reads like grown-out natural length, not a fake overlay. This suits someone who wants an elegant look for work or a weekend date, and it is forgiving if you are still learning. For supplies try an acrylic powder in neutral nude and a quality #8 acrylic brush.
Mistake to Avoid: Using one giant bead to cover the whole nail instead of two smaller beads, which causes lumps and weak tips.
2. Micro French Crescent, Minimalist Edge

Style/Vibe: Minimalist French
Best For: Short nails / neat office mani
Skill: Intermediate
The micro French reads modern because the white crescent is just 1.5 to 2 mm at the free edge. I learned to map the arc with a dot of monomer, then sweep a tiny bead of white powder across it for a crisp smile. It creates a cleaner photo than a thick white band and saves removal time. This style suits someone who keeps nails short but wants a polished look. Use a low-odor white acrylic powder for crisp lines and a thin liner brush for control.
Mistake to Avoid: Making the white too thick, which looks bulky in photos and peels sooner.
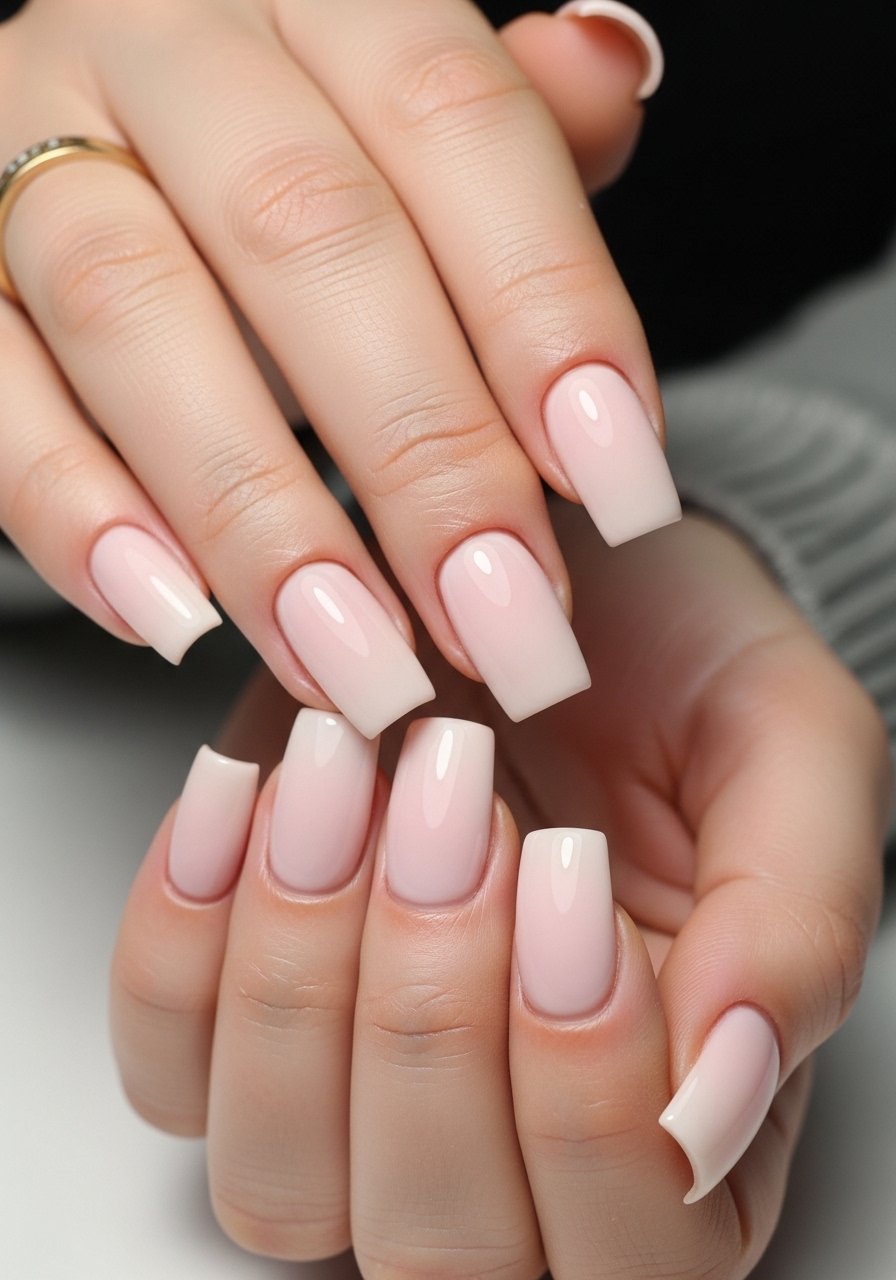
3. Sheer Blush Ombre for Soft-Glow Photos

Style/Vibe: Sheer ombre, soft glow
Best For: Medium length / special events
Skill: Intermediate
Ombre with acrylic is about controlled blending. I use three beads, smallest at the cuticle, largest mid-nail, then drag lightly toward the edge with a barely wet brush so the blush thins to a veil. A 2:1 ratio of base bead to top bead kept my fade even in photos. This look reads like skin-enhancing color on camera, good for brides or anyone who wants a subtle rosy finish. Pair with a creamy sheer-pink acrylic powder and a medium synthetic brush.
Mistake to Avoid: Overworking the beads until they dry, which leaves streaks and matte patches.
4. Negative-Space Geometric Accents
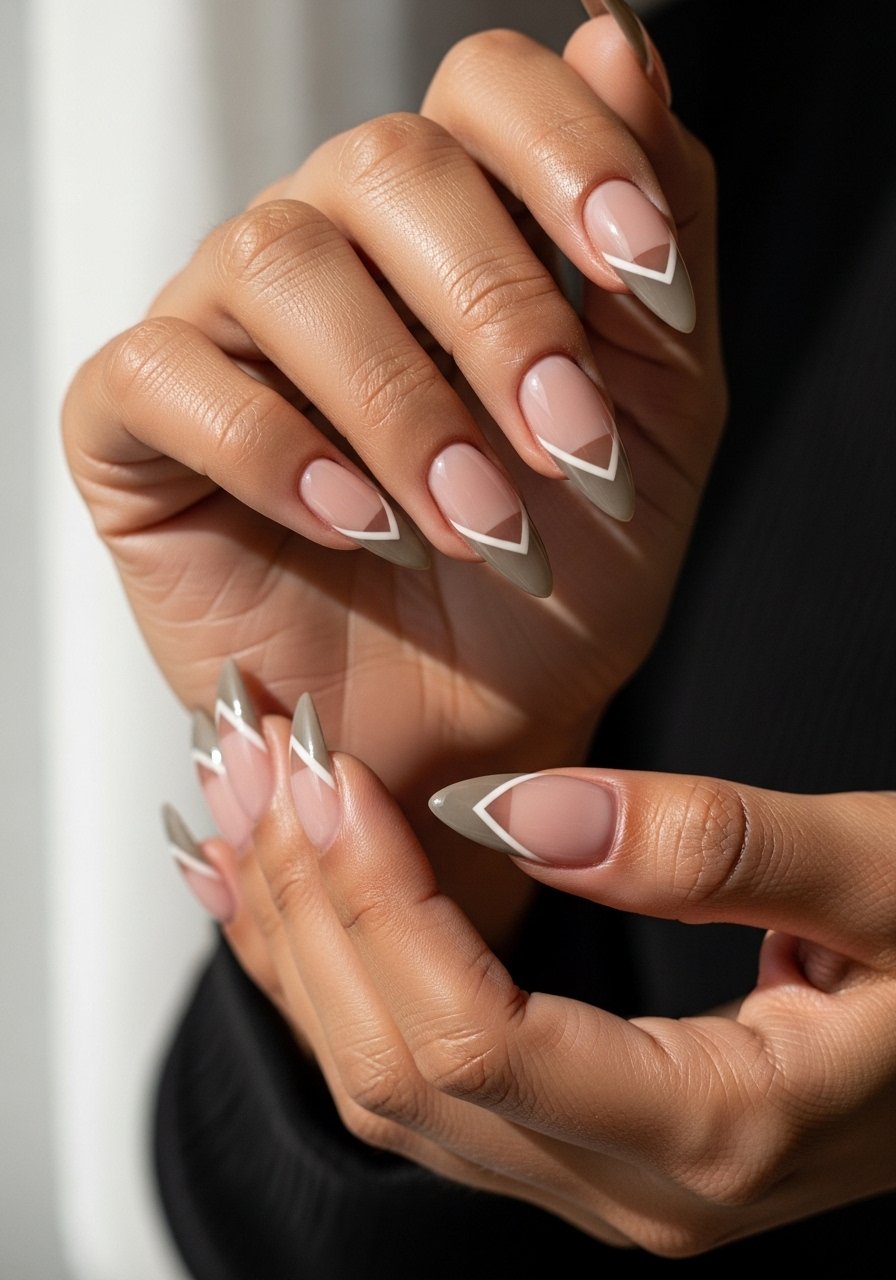
Style/Vibe: Graphic negative-space
Best For: Long nails / fashion-forward looks
Skill: Advanced
Negative-space geometry is photogenic because the contrast reads sharp even at arm's length. My trick is to lay down thin masking with a micro strip and apply two thin acrylic layers over it, 1.5 to 2 mm bead for base. Remove the mask before curing the surface has set but not hardened. The result is crisp edges and a flat, camera-friendly shine. This is a higher-skill look but perfect for someone who wants a bold, modern mani.
Mistake to Avoid: Peeling off the tape after the acrylic fully cures, which lifts the edges and ruins the line.
5. Chrome Fade Over Clear Sculpt
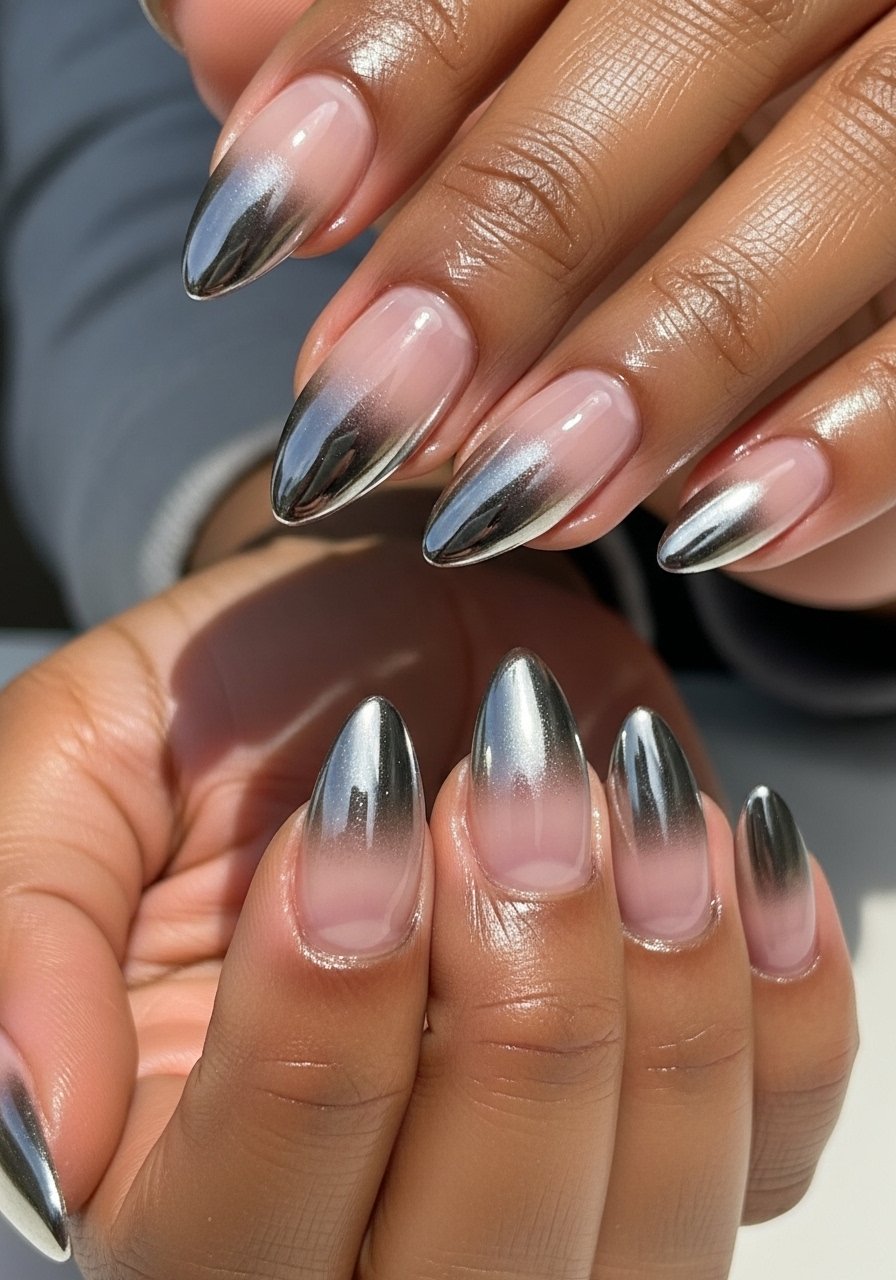
Style/Vibe: Chrome gradient, reflective finish
Best For: Medium length / night out
Skill: Intermediate
A chrome fade looks more expensive than it is when you start with a clean clear acrylic sculpt. After sealing with a tack-free top coat, rub chrome powder from the cuticle outward in light passes to create an ombre metallic. I learned from a tech who works at a salon downtown that shorter strokes create better gradients and avoid streaks. For at-home kits, try a fine chrome powder and a sponge applicator.
Mistake to Avoid: Applying chrome on a wet tack layer, which causes patchy reflection and streaks.
6. Encapsulated Glitter Flakes, Dimensional Without Bulk
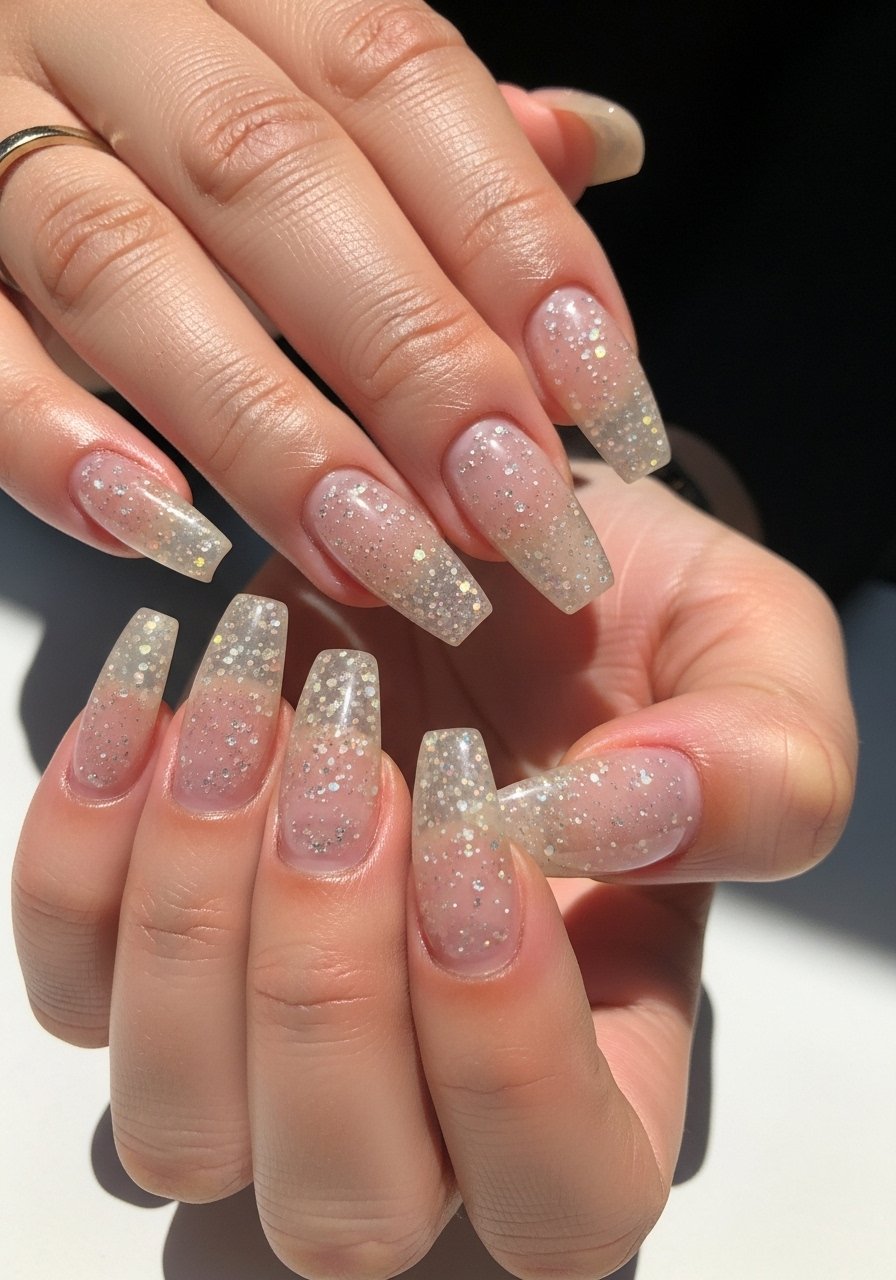
Style/Vibe: Encapsulated sparkle
Best For: Long nails / party looks
Skill: Intermediate
Encapsulation is about layering so the surface stays smooth. Scatter small flakes over a damp base bead, then encapsulate with a clear acrylic layer of about 2 to 2.5 mm to keep the surface level. That thickness looks three-dimensional in photos while keeping the nail snag-free. I like tiny iridescent flakes because they read glittery in pictures without feeling heavy in real life. Use a thin clear acrylic powder and a light touch when embedding.
Mistake to Avoid: Piling glitter on top instead of encapsulating, which creates rough texture and chips faster.
7. Matte Luxe With Gloss Accent Tip

Style/Vibe: Matte with glossy contrast
Best For: Medium nails / editorial shots
Skill: Beginner
Matte finishes photograph differently so balance is key. I start with a glossy cured top coat for durability, then buff lightly and apply a thin matte top coat, leaving a slim glossy tip before the matte sets. The contrast reads editorially and shows up beautifully in flat-lay photos. This is an accessible look if you want something modern without complex sculpting. Try a durable matte top coat and a quick-dry glossy topcoat for the tip accents.
Mistake to Avoid: Using two heavy matte layers, which can look dusty and hide the nail shape.
Before the rest of the list, these are the products doing most of the work.
Acrylic Mani Essentials
Tools & Basics:
- Honestly the best first pick for practice, acrylic liquid monomer (~$8-15). I used this for controlled beads.
- Neutral nude acrylic powder (~$10-18). Great for natural sculpting.
Application & Finish:
- #8 acrylic brush (~$6-14). One good brush means fewer mistakes.
- Clear acrylic powder (~$8-16). For encapsulation and strength.
Effects & Extras:
- Chrome powder set (~$7-12). For metallic fades.
- Matte top coat (~$6-12). For the luxe matte looks.
- Nail forms (~$6-10). My go-to for sculpting length without tips.
8. Short Sculpted Almond, Everyday Chic

Style/Vibe: Short sculpt, everyday chic
Best For: Short nails / low-maintenance wear
Skill: Beginner
Short nails can still read elegant on camera. Use smaller beads, around 2 to 2.5 mm, and sculpt the apex closer to the free edge to mimic natural curvature. A lot of people think short means quick, but deliberate bead control gives a professional silhouette without length. I often finish with a hard gel top coat for extra longevity when someone types a lot. For a gentle base, try a beige acrylic powder.
Mistake to Avoid: Over-thinning the free edge when shortening the bead, which makes nails weak and prone to breakage.
9. Press-On Hybrid: Salon Look, Zero Chair Time
Style/Vibe: Press-on hybrid, polished
Best For: Temporary wear / quick changes
Skill: Beginner
A press-on hybrid combines a sculpted press-on base with a thin layer of acrylic over it to blend edges. I tried this after someone recommended it for travel, and it held through a weekend without lifting. Stick the pre-shaped press-on, add a 1.5 mm clear overlay to meld the join, buff, and finish. It reads like a salon set in photos and is great for testers who want a no-commitment change. Try a set of press-on nails and a small clear overlay powder.
Mistake to Avoid: Skipping edge blending between the press-on and natural nail, which makes the set obvious and prone to lift.
10. Tiny Hand-Painted Florals for Close-Ups

Style/Vibe: Hand-painted detail
Best For: Long nails / editorial close-ups
Skill: Advanced
Small florals read delicate in macro shots but require a thin acrylic paint or gel and a 0.5 mm liner. I learned to paint over fully cured base and seal with two thin top coats, because a single thick coat dulled the detail in photos. This is a time investment but worth it when you want close-up imagery that looks handcrafted. Use a fine nail art brush set and a pigmented white acrylic paint.
Mistake to Avoid: Painting on an uncured base, which causes bleeding and fuzzy lines.
11. Sculpted C-curve for Strong Photo Angles

Style/Vibe: Sculpted C-curve, structural
Best For: Long nails / dramatic photos
Skill: Advanced
A pronounced C-curve is what photographers notice when nails are shot from the side. It requires placing the apex slightly more centrally and building a 2.5 to 3 mm bridge in the center before smoothing. I tested this across four nail lengths and found the C-curve reads most dramatic at longer lengths. The structural build adds sturdiness and gives a profile that looks custom and editorial. Use a firm acrylic powder for structure and a sturdy brush that holds shape.
Mistake to Avoid: Filing the underside too flat, which kills the curve and weakens the apex.
Screenshot-Ready Mani Habits
Thin coats beat one thick coat every time. Three thin layers of a quick-dry top coat look smoother and last longer than one gloopy layer.
Grab a #8 acrylic brush for around $10. One good brush keeps bead shapes consistent and saves filing time.
When you are blending colors, let the first bead set for about 12 to 18 seconds before next placement, not until fully hard. A tiny silicone slip solution helps the powders merge without thinning the structure.
Most people push back cuticles too aggressively. Use a gentle cuticle pusher to avoid nail bed damage, which shows up in close-up photos.
If you plan to chrome or powders, seal with a tack-free glossy coat first. A good tack-free top coat will keep powders reflective and prevent smudging.
