
The Pinterest nail I tried once had perfect rust swirls and zero lift in the photos. My real-life mani bubbled, peeled at the free edge, and looked flat under office lights. After a few salons and one tech who works at a salon downtown showed me what actually holds up, I stopped chasing the exact photo and started chasing the technique instead. These are the acrylic autumn ideas that survive real life, not just the grid.
These looks skew budget-friendly to salon-level. Most are achievable with a 30- to 60-minute appointment or a single evening at home if you already have a basic acrylic kit. Expect some lift-free wins for short and medium lengths, and a couple more dramatic options that need longer tips. I mention cure times, thin coat counts, and which bits to skip if you want quick upkeep.
1. Rust Ombre With Tiny Gold Flakes
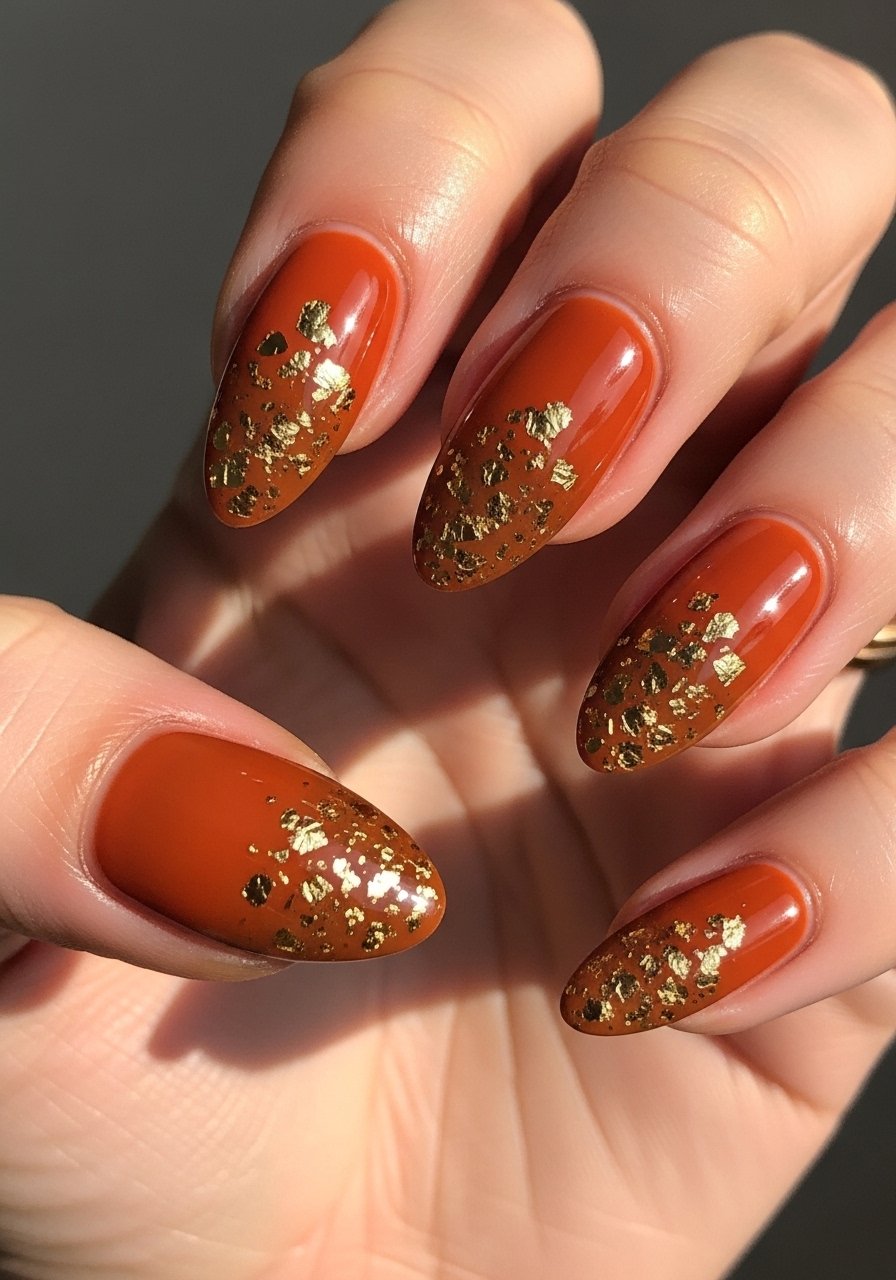
Style/Vibe: Autumn Gradient
Best For: Medium nails, everyday wear
Skill: Intermediate
The soft rust ombre reads like wearing a wool sweater on your nails. What makes this work is two thin color passes, each cured 30 to 45 seconds under an LED lamp, then a single sparse application of gold foil so the nails do not look busy. It feels warm and wearable for work or a weekend coffee run. For at-home kits try peel-off base coat and a fine foil set like nail transfer foil.
Mistake to Avoid: Rubbing the foil into wet polish, which smudges the gradient and ruins the clean edge.
2. Matte Mustard Accent Nail
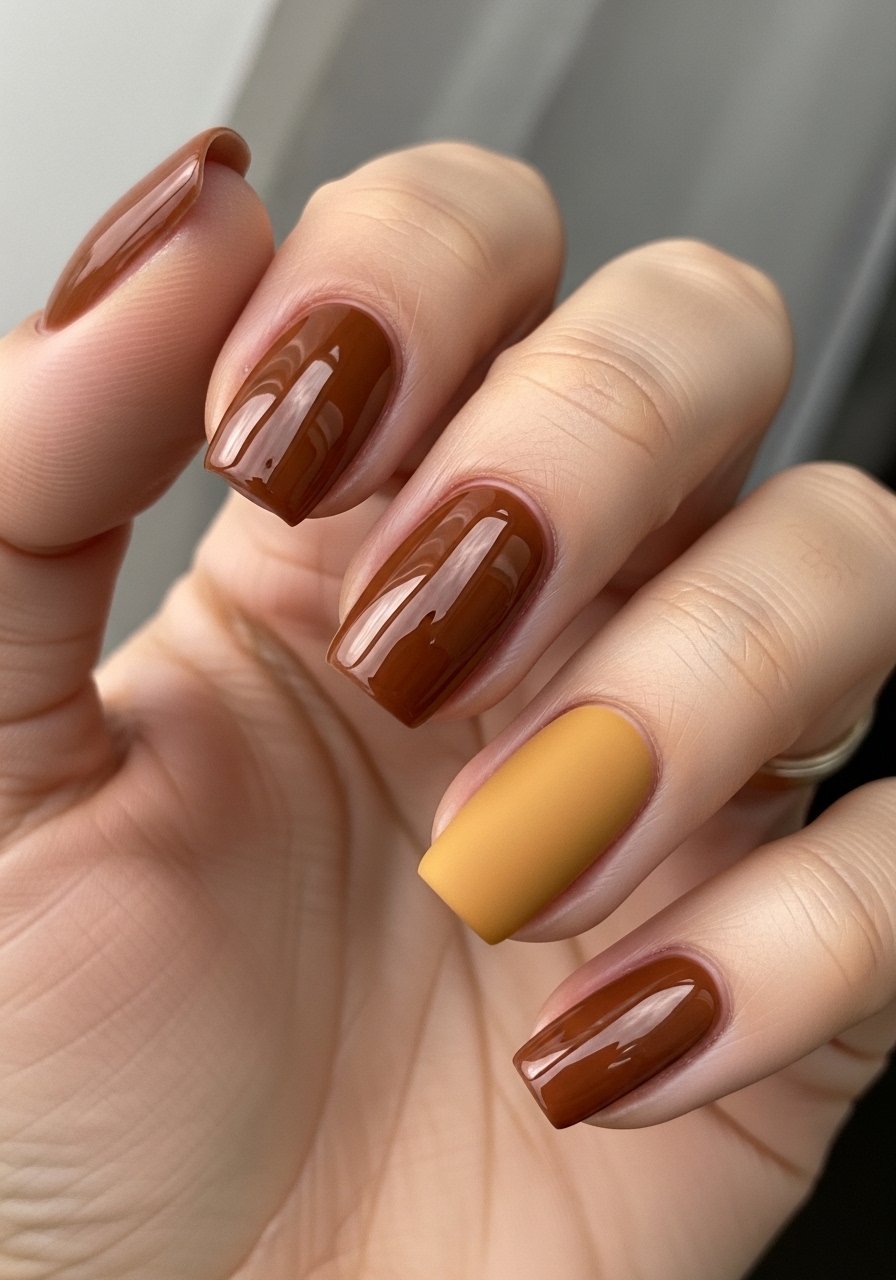
Style/Vibe: Retro Modern
Best For: Short nails, smart casual outfits
Skill: Beginner
Matte mustard is a quiet statement that works on short nails because the flat finish recedes visually. Apply two thin coats of color, let each dry, then lock it with a matte top coat cured for 30 seconds. I pair it with a glossy brown on neighboring nails to balance the look. Try mustard cream polish and a reliable matte top coat.
Mistake to Avoid: Using thick layers of matte top coat, which pills and looks textured instead of smooth.
3. Press-On Plaid For a Quick Switch
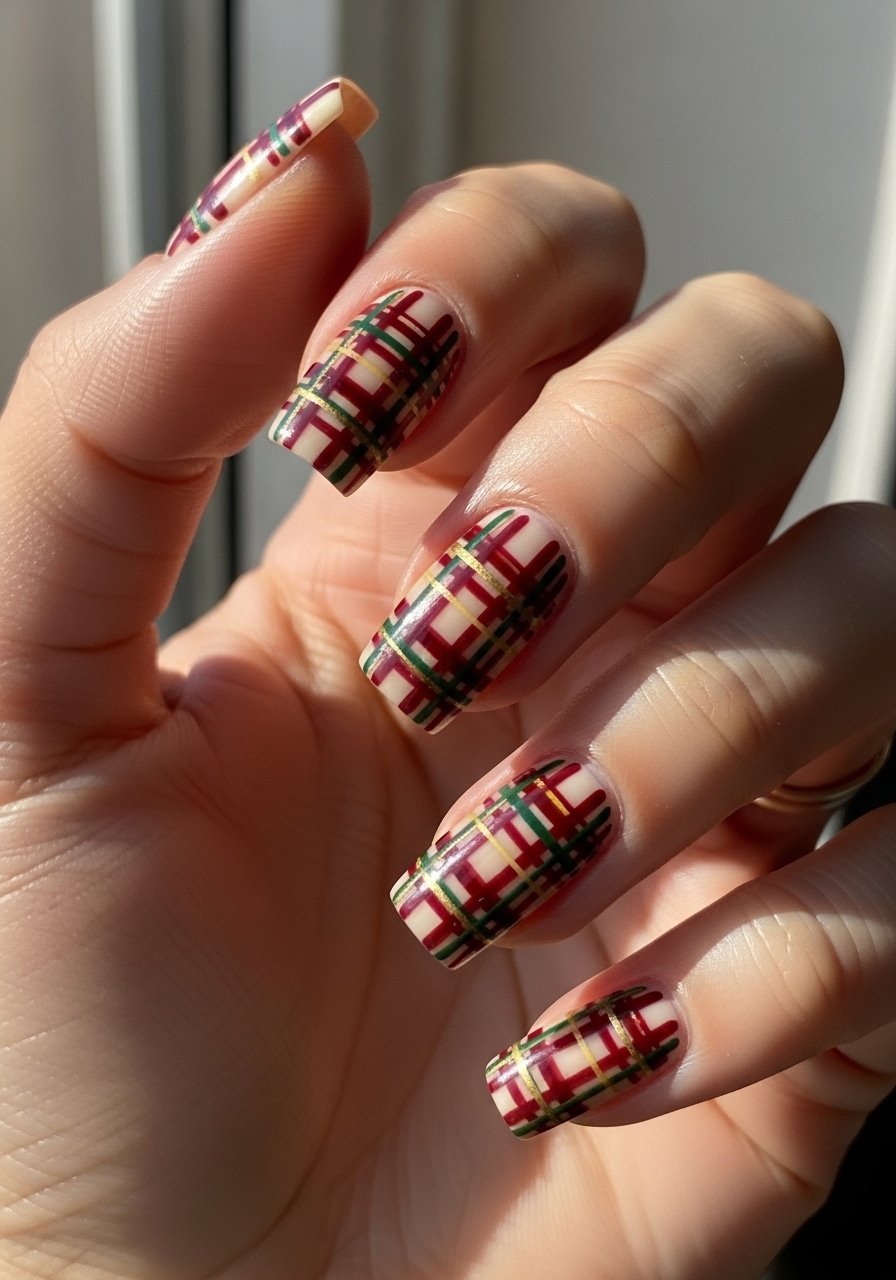
Style/Vibe: Cozy Plaid
Best For: Short to medium nails, weekend events
Skill: Beginner
If you want the look without salon time, a good set of press-on acrylics with pre-printed plaid gives instant impact. Peel-on options with edge glue hold for five to seven days if you file the fit and apply nail adhesive to the center and free edge. For removal use a gentle acetone soak and finish with cuticle oil. I like these press-on plaid nails and nail adhesive tabs.
Mistake to Avoid: Gluing only the cuticle end, which causes popping at the tip within a day.
4. Almond Espresso With Sheer Taupe
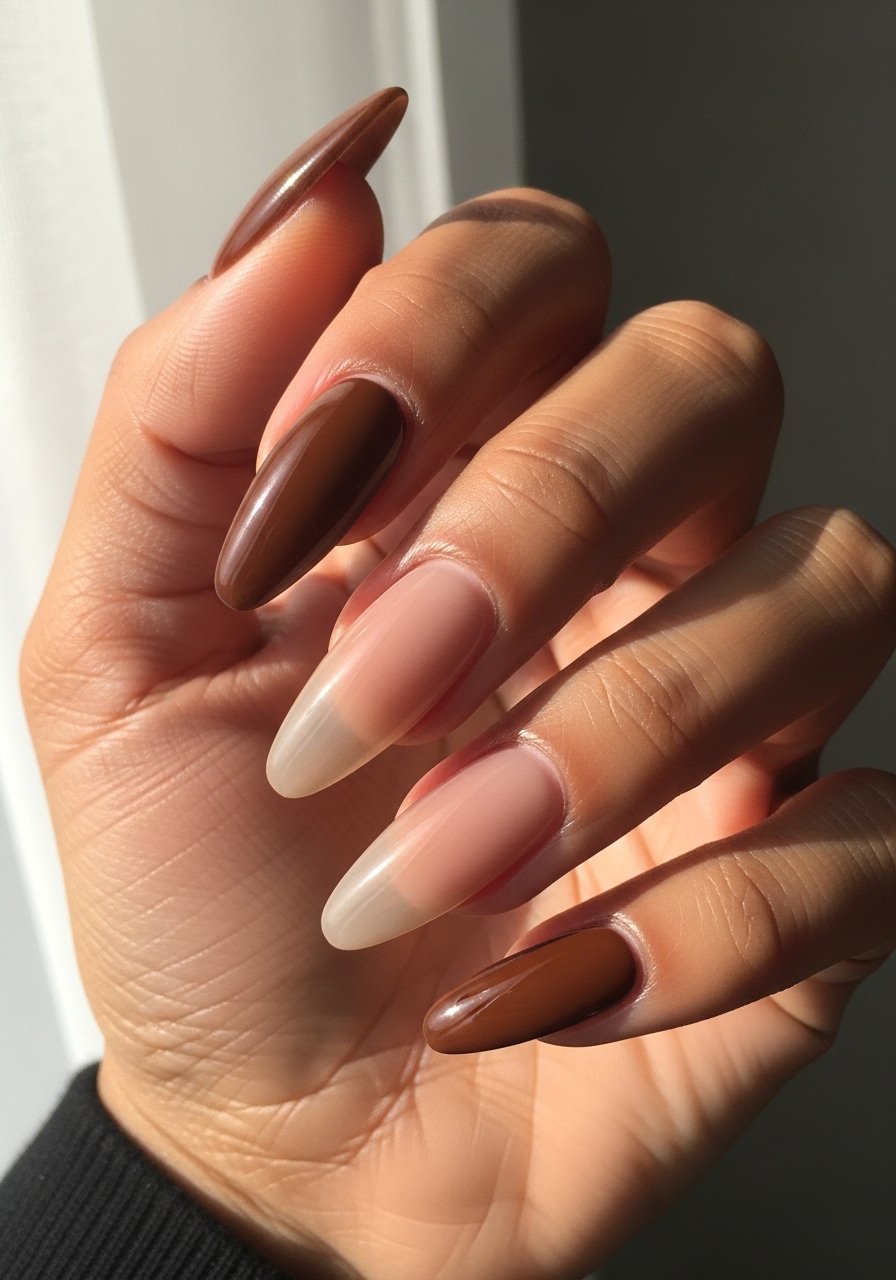
Style/Vibe: Minimal Contrast
Best For: Long nails, office to evening
Skill: Intermediate
Deep espresso paired with sheer taupe keeps a mani grounded. The trick is a crisp line where the colors meet, created by curing the base color for 15 seconds before masking and applying the second color in two thin passes. For color payoffs use a pigmented espresso gel polish and a buildable sheer taupe polish.
Mistake to Avoid: Painting both colors wet and trying to drag a line, which creates a ragged border.
5. Leaf Stamp Accent Over Neutral Base
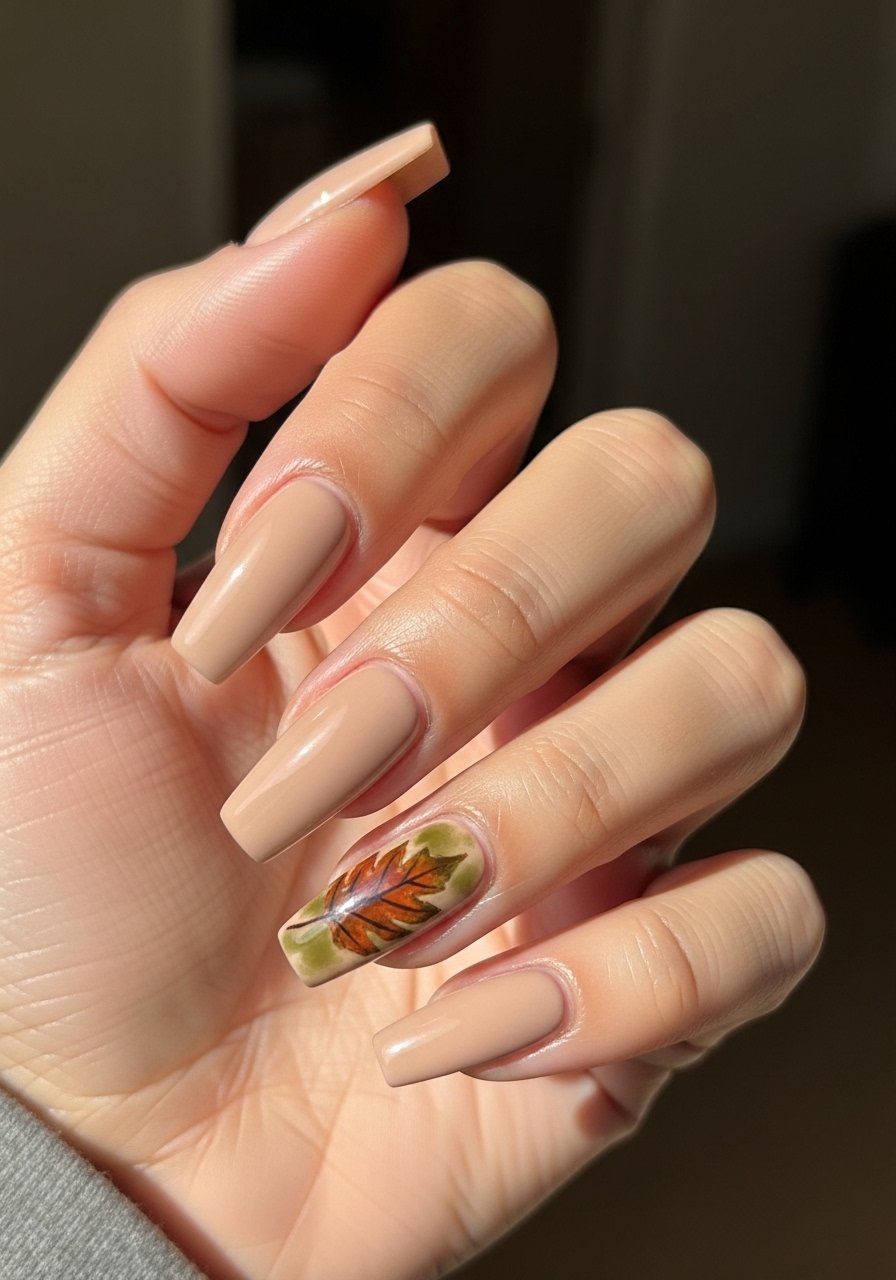
Style/Vibe: Subtle Flora
Best For: Medium nails, seasonal dinners
Skill: Beginner
Stamping gives a delicate, handmade look without freehand skill. Use a neutral beige base cured fully, then pick up a rust-and-olive combo from a stamping plate and press once. One thin top coat seals the design. Stamping is forgiving, so it fits beginners and people doing manicures at home. I use nail stamping kit and a sticky stamp cleaner.
Mistake to Avoid: Trying to stamp over tacky polish, which drags the image.
6. Textured Suede Finish With Tiny Beads
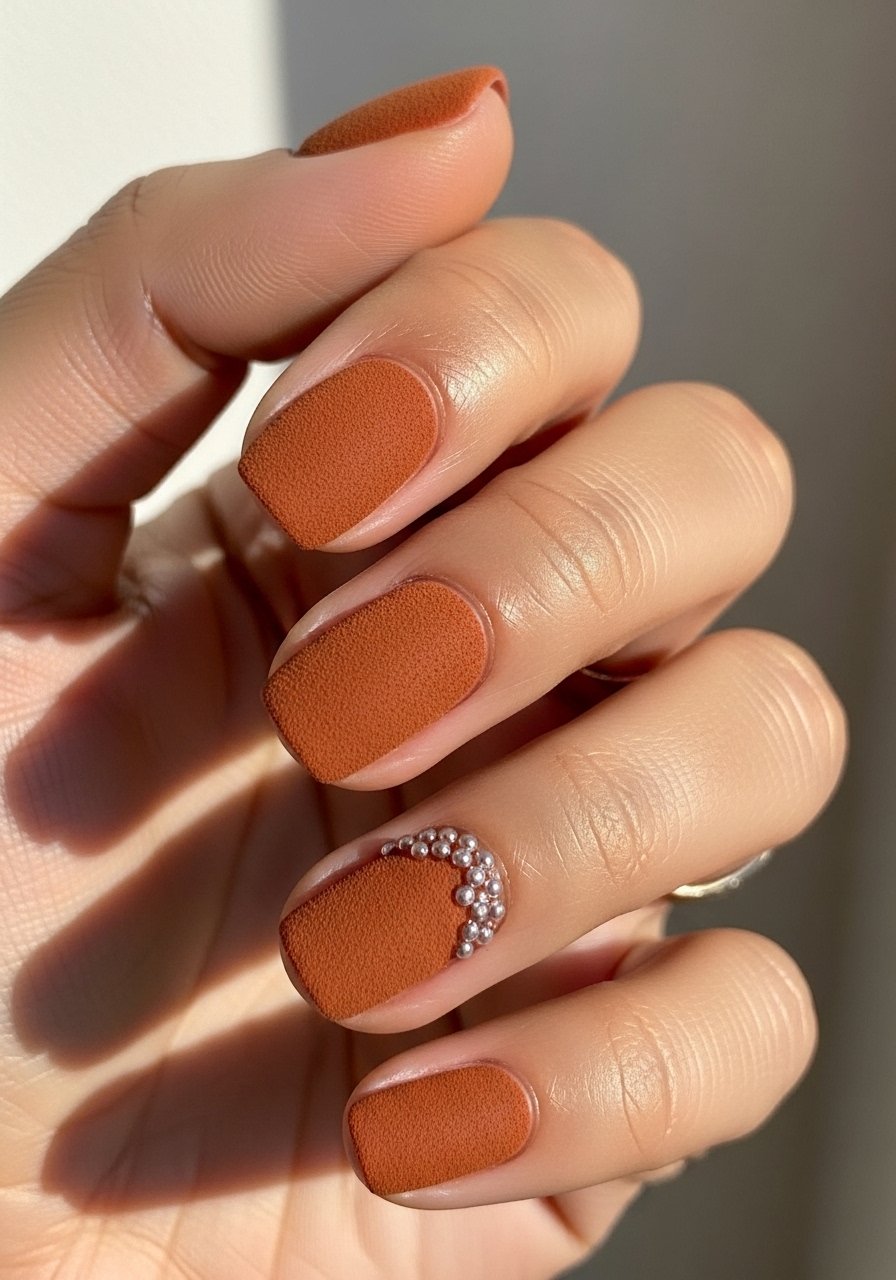
Style/Vibe: Textured Neutral
Best For: Short nails, tactile lovers
Skill: Intermediate
Suede textures read high-design because they invite touch. Create this by using a matte textured powder dabbed into a tacky top layer, then add a small bead cluster near the cuticle for a point of interest. It wears well when beads are glued with builder gel and cured 60 seconds. Try textured nail powder and mini nail beads.
Mistake to Avoid: Overloading beads, which makes them fall off quickly and look clunky.
7. Negative Space Maple Outline
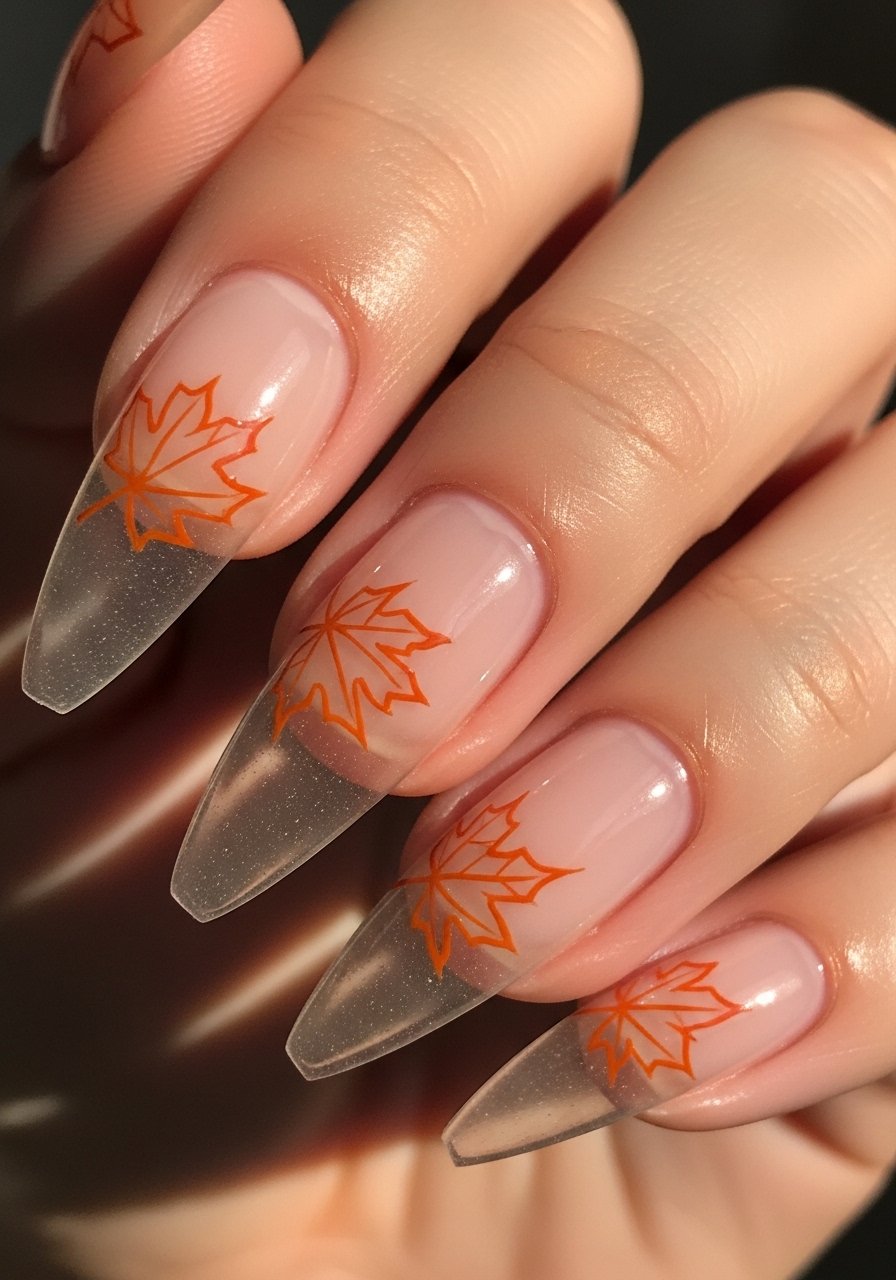
Style/Vibe: Graphic Minimal
Best For: Medium to long nails, creative crowd
Skill: Advanced
Negative space keeps a mani light while making a statement. The cleanest negative space needs masking or a fine brush to outline the maple leaf shape, then two thin fills of color only inside the outline. Cure each fill for 30 to 45 seconds under LED. This looks delicate but lasts when you keep coats thin. Use a fine liner brush and an orange gel polish.
Mistake to Avoid: Filling the negative area with thick color, which loses the crisp outline effect.
If any of these ideas have you ready to actually try something, here are the products doing most of the work.
Fall Acrylic Starter Picks
Tools & Prep:
- LED nail lamp (~$25-50), fast curing and compact.
- Nail file set (~$8-15), one coarse and one fine.
- cuticle oil (~$6-12), for daily maintenance.
Polish & Finish:
- matte top coat (~$8-14), evens out texture.
- gloss top coat (~$8-14), for shiny accents.
- builder gel (~$12-25), for added strength.
Decor & Extras:
- gold nail foil set (~$6-12), for small metallic accents.
- nail stamping kit (~$10-20), for repeatable leaf patterns.
- press-on nail set (~$9-20), for instant looks.
- mini nail beads (~$5-10), for delicate clusters.
8. Burnt Sienna French With Thin Line
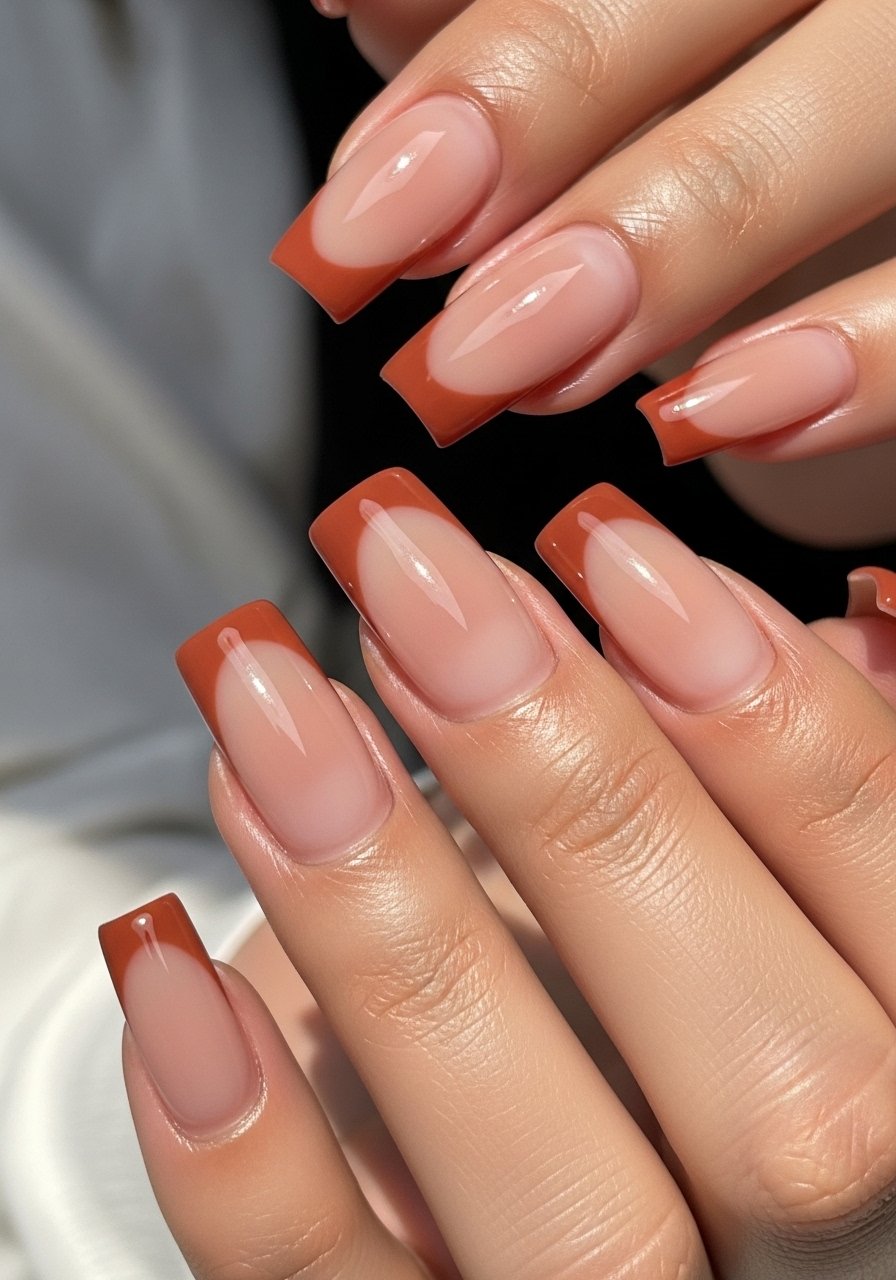
Style/Vibe: Modern French
Best For: Medium nails, office days and evenings
Skill: Beginner
A thin colored French tip reads modern and tidy. Use a striping brush and paint one thin line along the free edge, then add a second pass if needed. Two thin coats of the tip color usually do the trick. It feels polished without being fussy and is forgiving on medium lengths. Pair with a durable quick-dry top coat.
Mistake to Avoid: Painting thick tips in one go, which makes the tip look bulky and chips faster.
9. Speckled Neutral Like Fallen Leaves
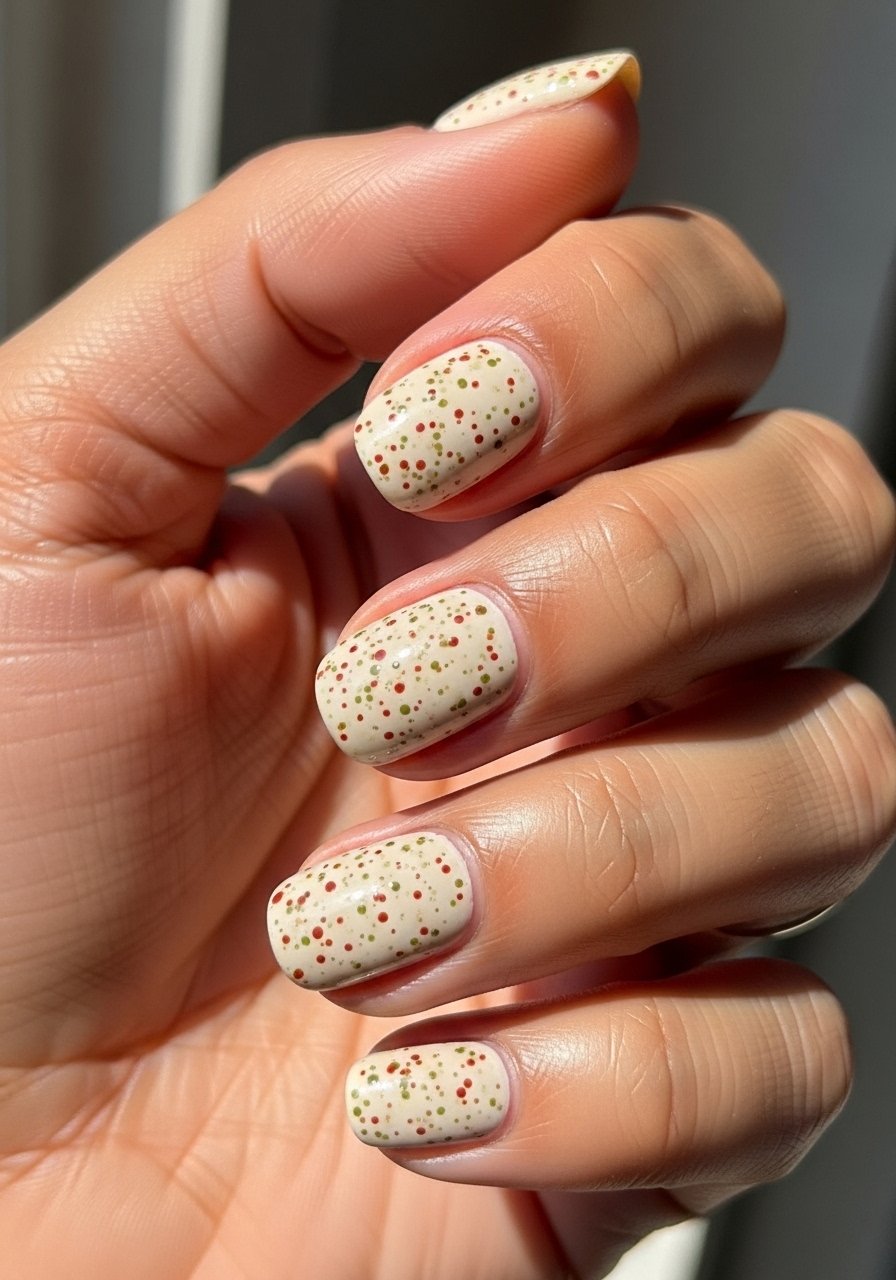
Style/Vibe: Casual Speckle
Best For: Short nails, low-maintenance wear
Skill: Beginner
Speckled nails mimic leaf litter and hide small chips well. Make speckles with a toothbrush or a dotting tool in two colors, then seal with a glossy top coat. It is fast and forgiving for people who use their hands a lot. Try a neutral base polish and split your speckle colors between rust and moss green like a light two-to-one ratio for a natural look.
Mistake to Avoid: Overcrowding the speckles, which reads messy rather than intentional.
10. Deep Berry Gloss With High Shine
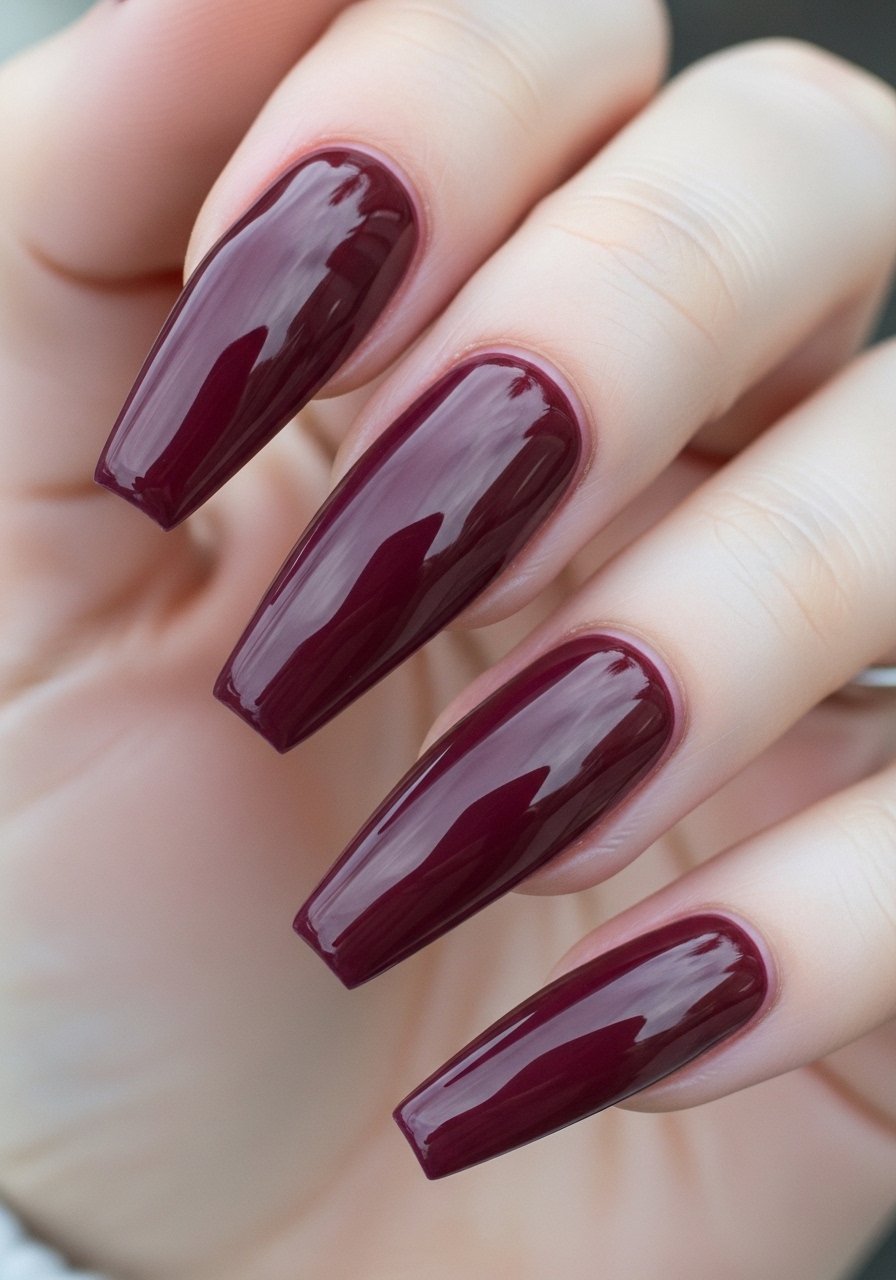
Style/Vibe: Juice-Box Berry
Best For: Long nails, date nights or events
Skill: Intermediate
High-shine berry nails are classic autumn. The secret is buffing the cured color lightly, then applying one thin coat of a high-gloss top coat cured fully for a reflective finish. If you want extra depth, a quick second glossy pass improves mirror effect. Use a richly pigmented berry nail polish and a high-gloss top coat.
Mistake to Avoid: Skipping the light buffing step, which leaves the gloss dull and uneven.
11. Olive Green Marble Accent
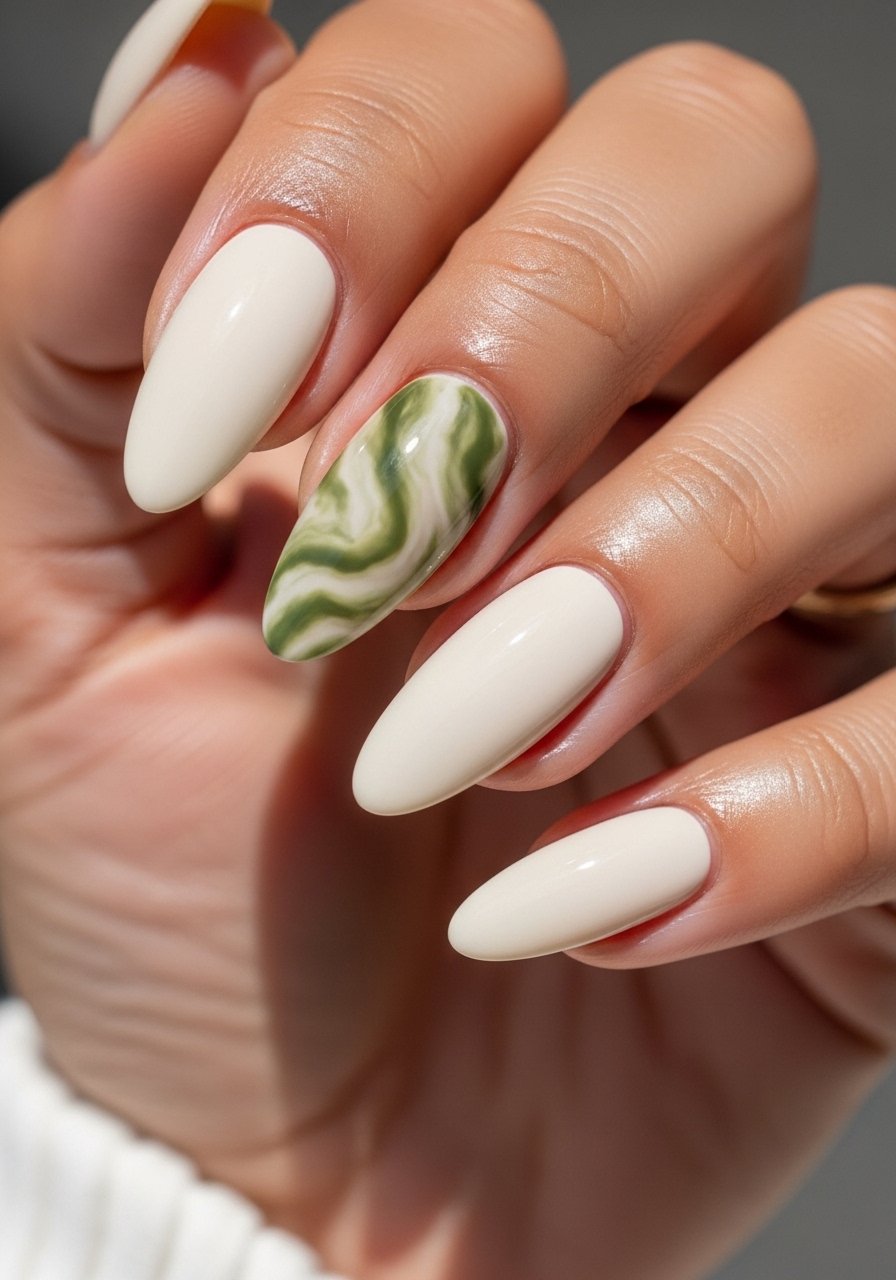
Style/Vibe: Earth Marble
Best For: Medium nails, creative professionals
Skill: Advanced
Marble looks luxe but it is achievable by dragging a fine brush through two wet shades, blending quickly and curing in short bursts. Use a thin amount of white and olive, then lift the brush for veins. Seal with a gloss top coat to keep the marble depth. For tools pick a small detail brush and a deep olive polish.
Mistake to Avoid: Overmixing the colors, which creates mud instead of veins.
12. Cinnamon Sugar Glitter Fade
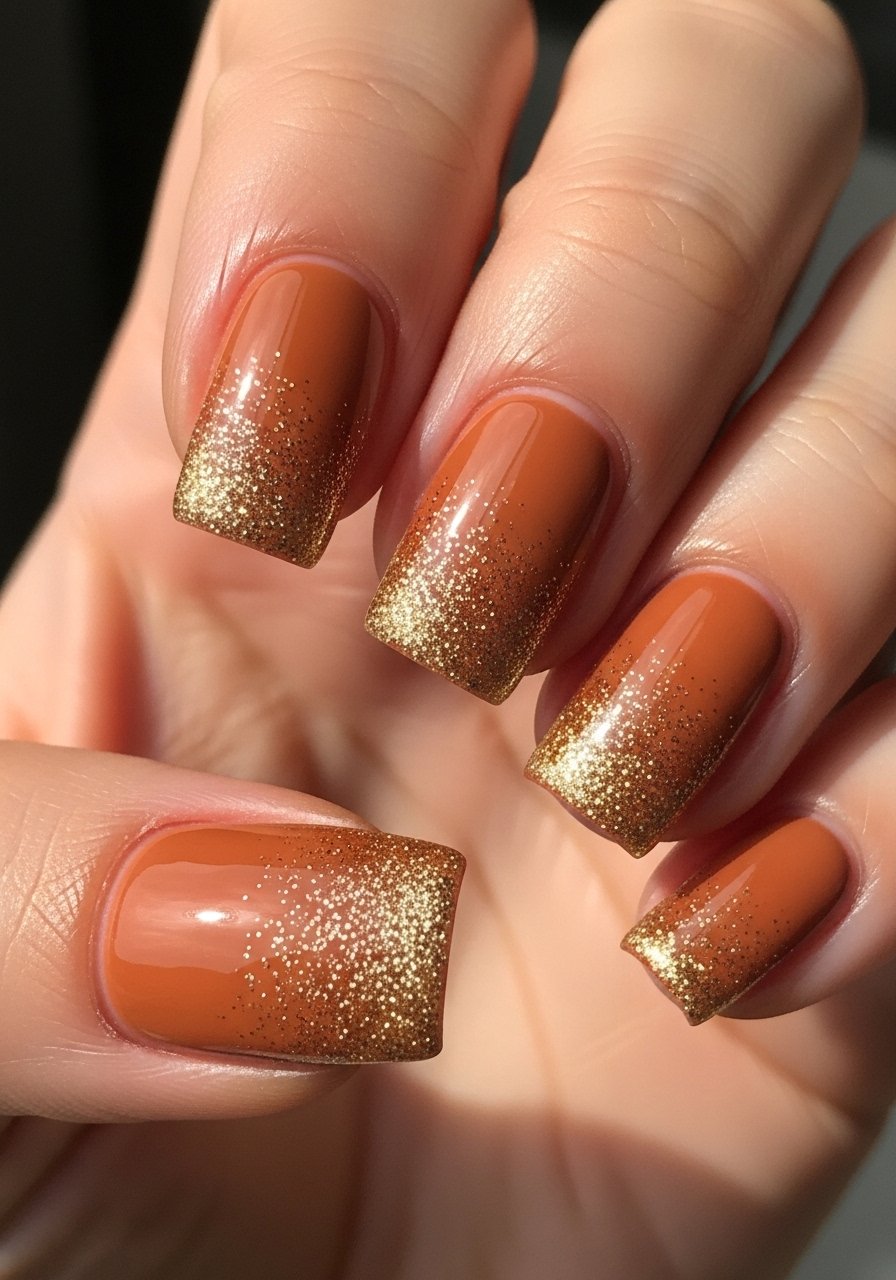
Style/Vibe: Cozy Sparkle
Best For: Short nails, festive daytime events
Skill: Beginner
A glitter fade is party-ready but not over the top when you keep the glitter fine and concentrated near the cuticle. Pat the glitter into a slightly tacky base and then seal with two thin top coat layers to prevent roughness. I use a light dusting ratio of roughly one part glitter to three parts base color for control. Use a fine warm glitter.
Mistake to Avoid: Applying chunky glitter in one pass, which makes the surface bumpy and prone to catching.
13. Two-Tone Leather Look With Stitch Lines
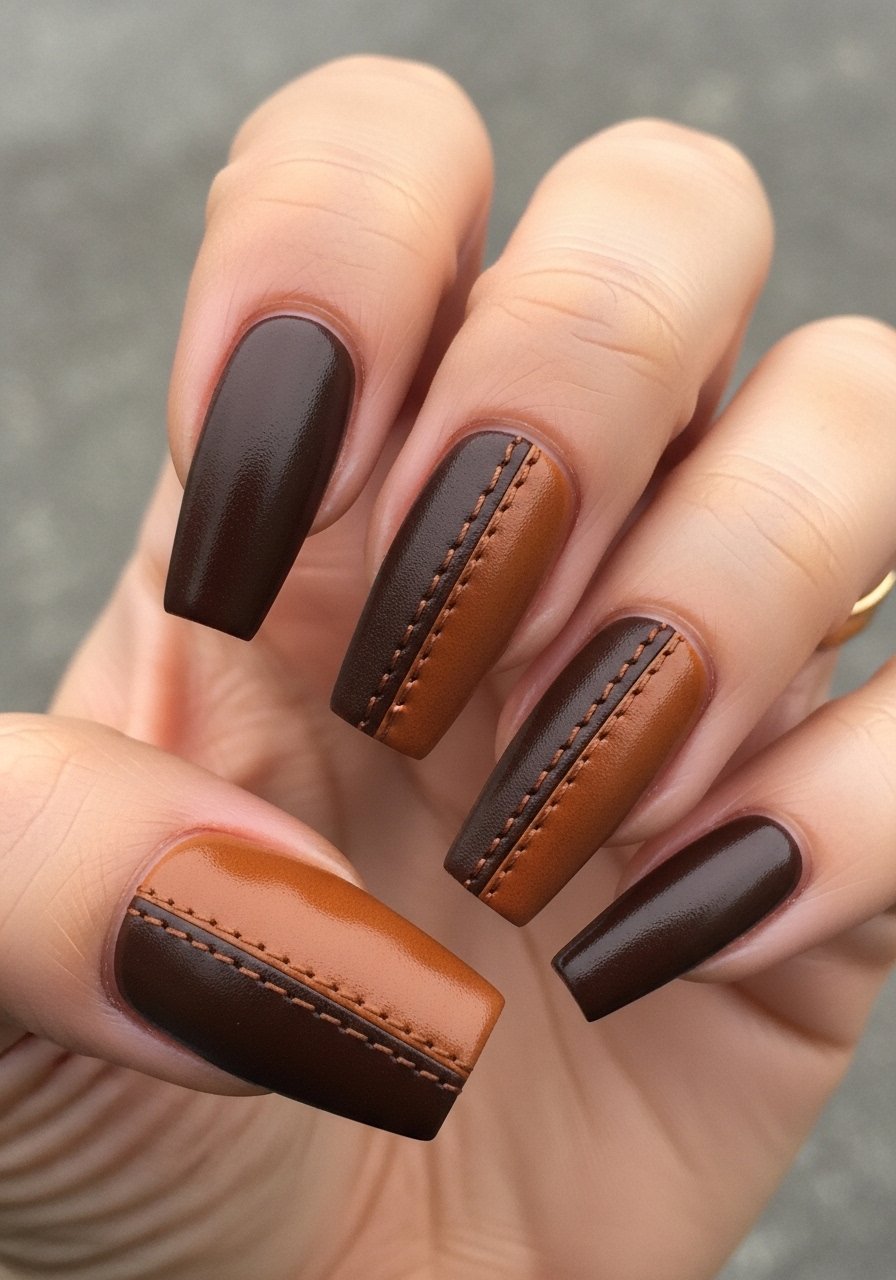
Style/Vibe: Crafted Leather
Best For: Medium to long nails, fashion-forward wearers
Skill: Advanced
The leather effect uses matte finishes and tiny painted stitch lines to sell the look. After creating the two-tone panels, add micro-stitching with a liner brush in a contrasting shade, then top with a satin finish. Small stitches in a repeating five-dot pattern read like real seam work. I use a satin top coat for the final texture.
Mistake to Avoid: Making stitch lines too thick, which reads cartoonish rather than crafted.
14. Candlelight Chrome Accent
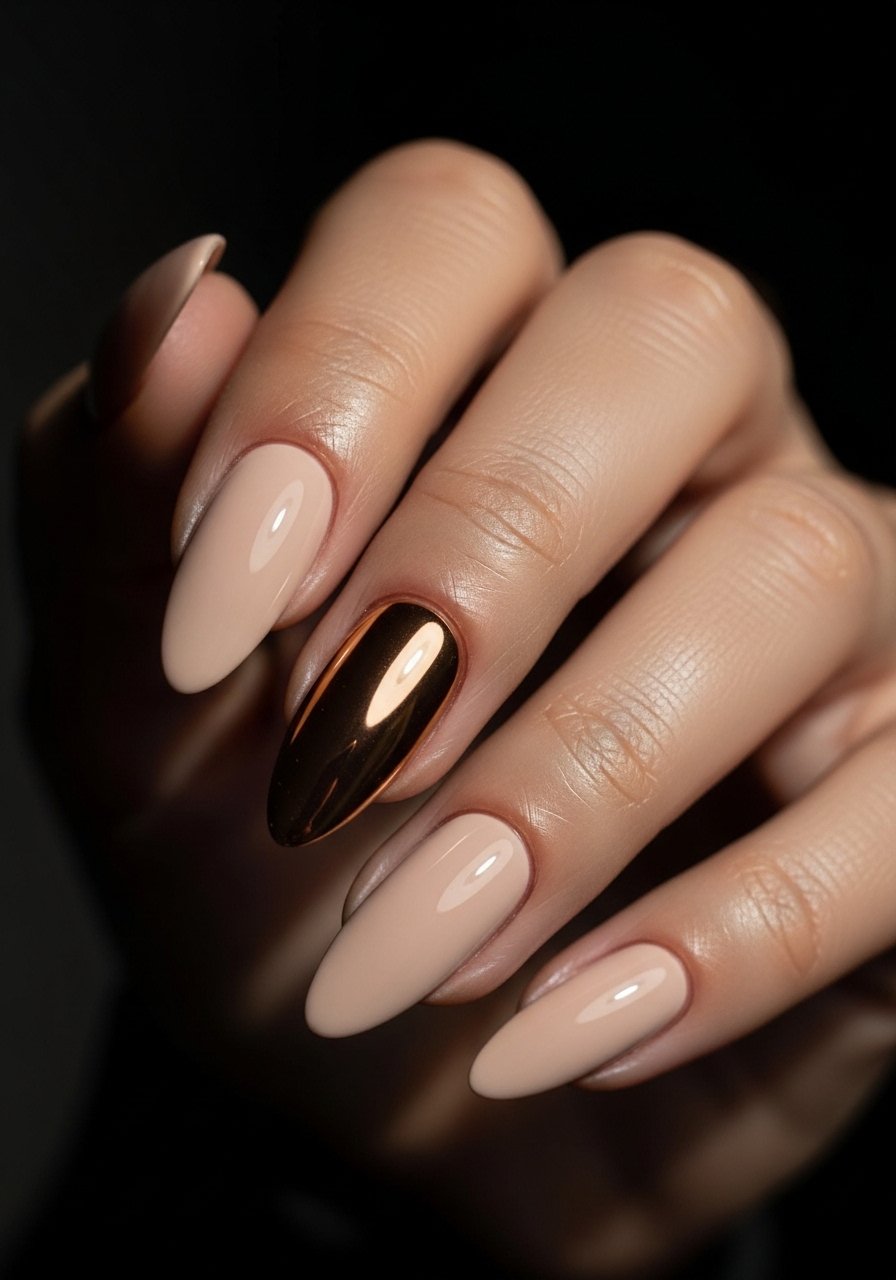
Style/Vibe: Warm Chrome
Best For: Medium nails, evening wear
Skill: Intermediate
Warm chrome feels like candlelight on your nails. Apply a neutral base, then buff slightly and rub chrome powder into the tack layer until you get a mirror effect. Seal with two thin glossy coats to prevent dulling. A little chrome goes a long way so use it as an accent rather than all-over. Try warm chrome powder.
Mistake to Avoid: Overbuffing the base, which removes adhesion and causes powders to flake.
15. Removable Acrylic Tips For Parties
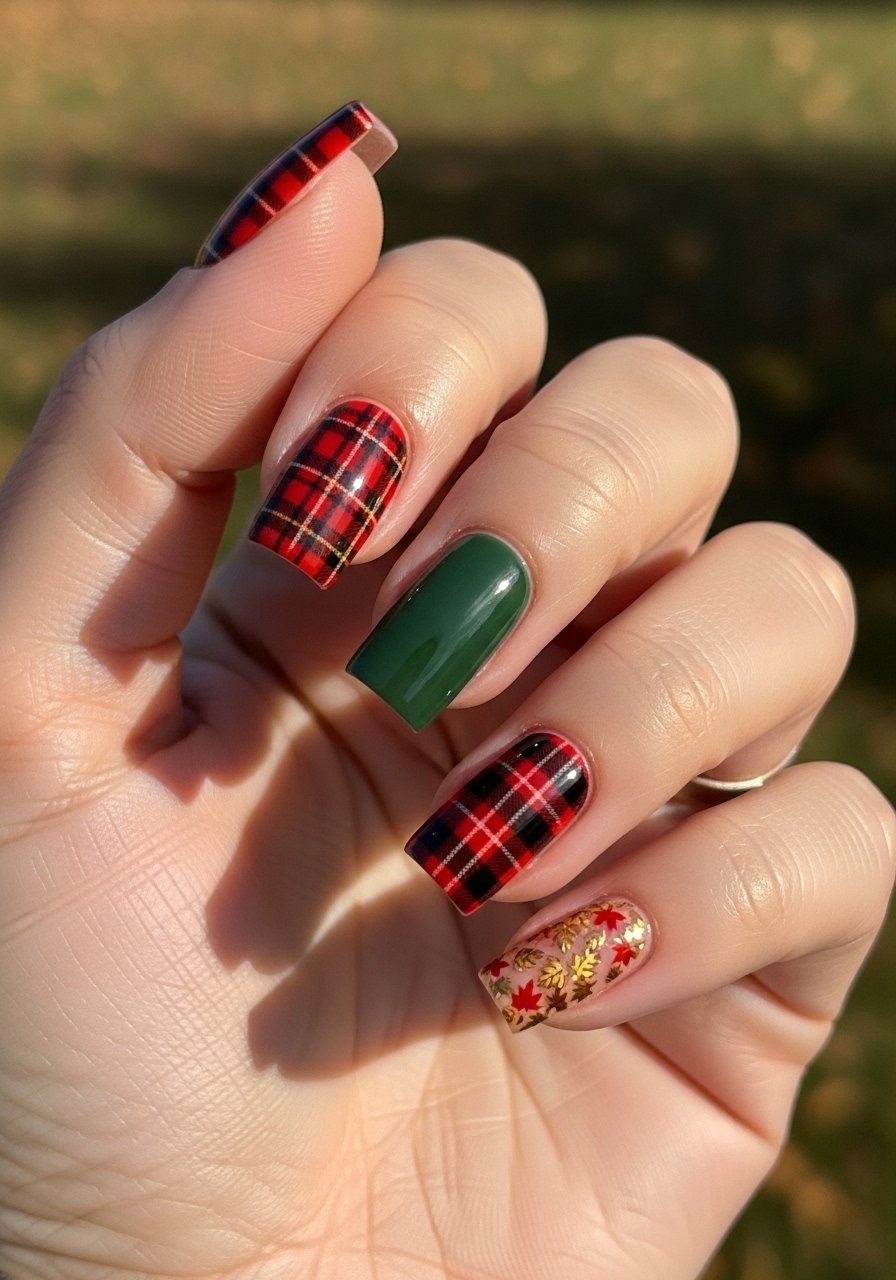
Style/Vibe: Party Ready
Best For: Short events, noncommittal wearers
Skill: Beginner
Removable acrylic tips are a great gap-filler between salon visits or when you want a bold look for one night. Use tips that adhere with tabs, not permanent glue, and trim to fit. Practice a single application before an event so you know your removal method. I keep a spare set in my bag. Look for removable acrylic tips and cushioned adhesive tabs.
Mistake to Avoid: Wearing removable tips to sleep, which increases lift and risk of loss.
Mani Maintenance Moves for Fall
Thin coats beat one thick coat every time. Three thin layers of a quick-dry top coat look smoother and last longer than one gloopy layer.
Keep a small bottle of cuticle oil by your desk. Daily oiling around the nail base prevents dryness and reduces lifting at the cuticle over time.
If you are doing decals, press them into a slightly tacky layer, not fully wet polish. A nail tacky base helps decals sit flat and avoids bubbling.
Everyone files too aggressively at the free edge. File in one direction with a fine grit nail file and stop at the natural smile line to prevent stress fractures.
For a quick repair kit keep nail glue and a spare matching polish in your bag. Small dabs and a touch-up coat buy you days while you wait for a salon appointment.