
When my sister walked in and said, "Save the sparkle for the cake, pick soft bows instead," I realized the tiny details made the whole mani feel like the party. I had been leaning hard into bling and bright tips until one small comment nudged everything calmer and more useful for a room full of new parents and busy guests.
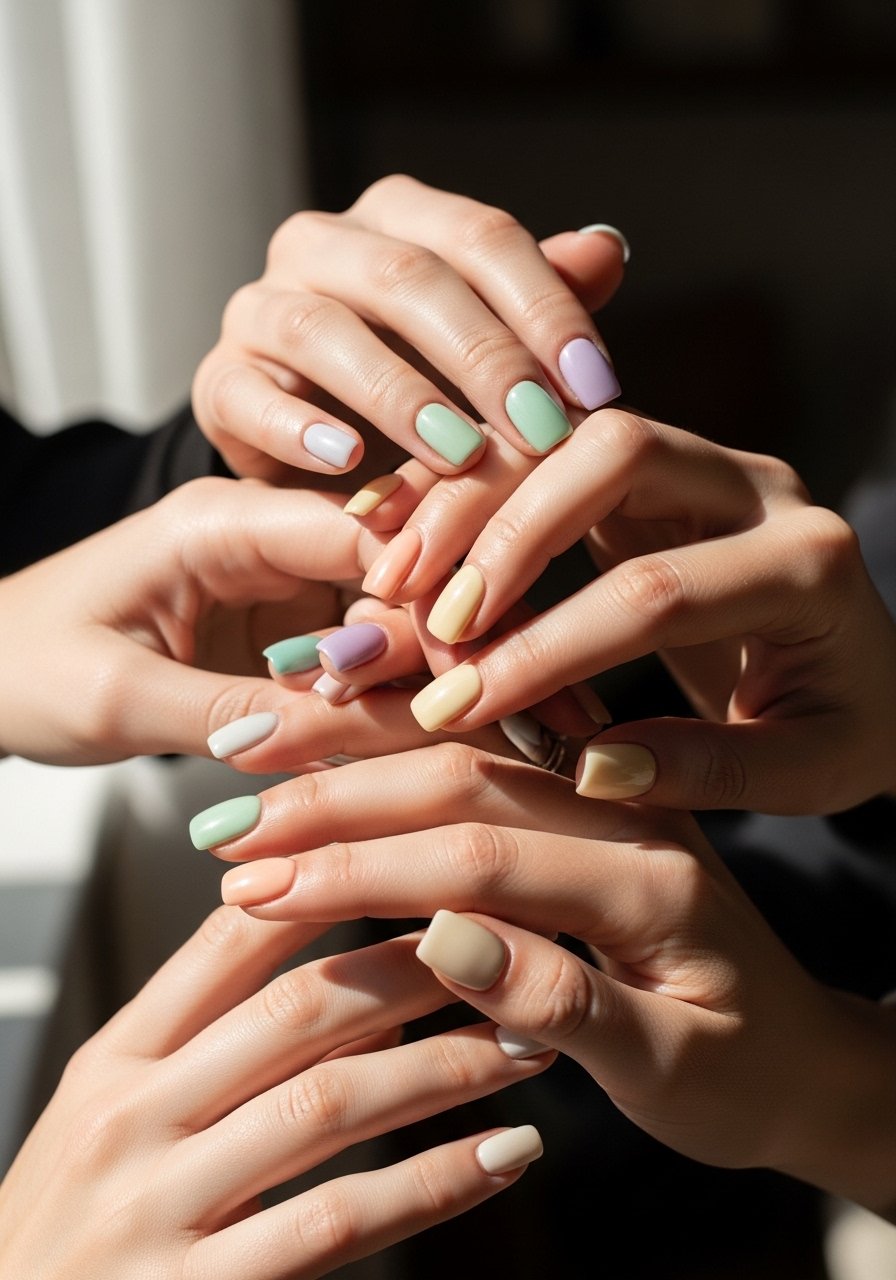
These ideas are for people who want a photo-ready mani for a baby shower without spending hours or hiring a pro. Most looks are beginner to intermediate, budget friendly, and designed to work on short or medium nails. Expect some options that use press-ons for guests, a few that need a basic UV lamp, and a handful that are purely quick at-home gel tricks.
1. Pastel Ombre With Tiny Bow Accent

A soft ombre reads like a celebration without shouting, and adding a single tiny bow keeps the theme baby shower obvious without feeling matchy. Use a pastel gel set and a fine sponge or a soft brush for blending, then add a tiny bow charm sealed under a glossy top coat. I like pairing a starter pastel gel polish set with a UV LED lamp if you plan to cure at home. This fits medium almond nails and photos cleanly.
Style/Vibe: Soft pastel celebration
Best For: Medium nails, host or guest
Skill: Intermediate
Mistake to Avoid: Applying thick ombre strokes that puddle and never cure flat.
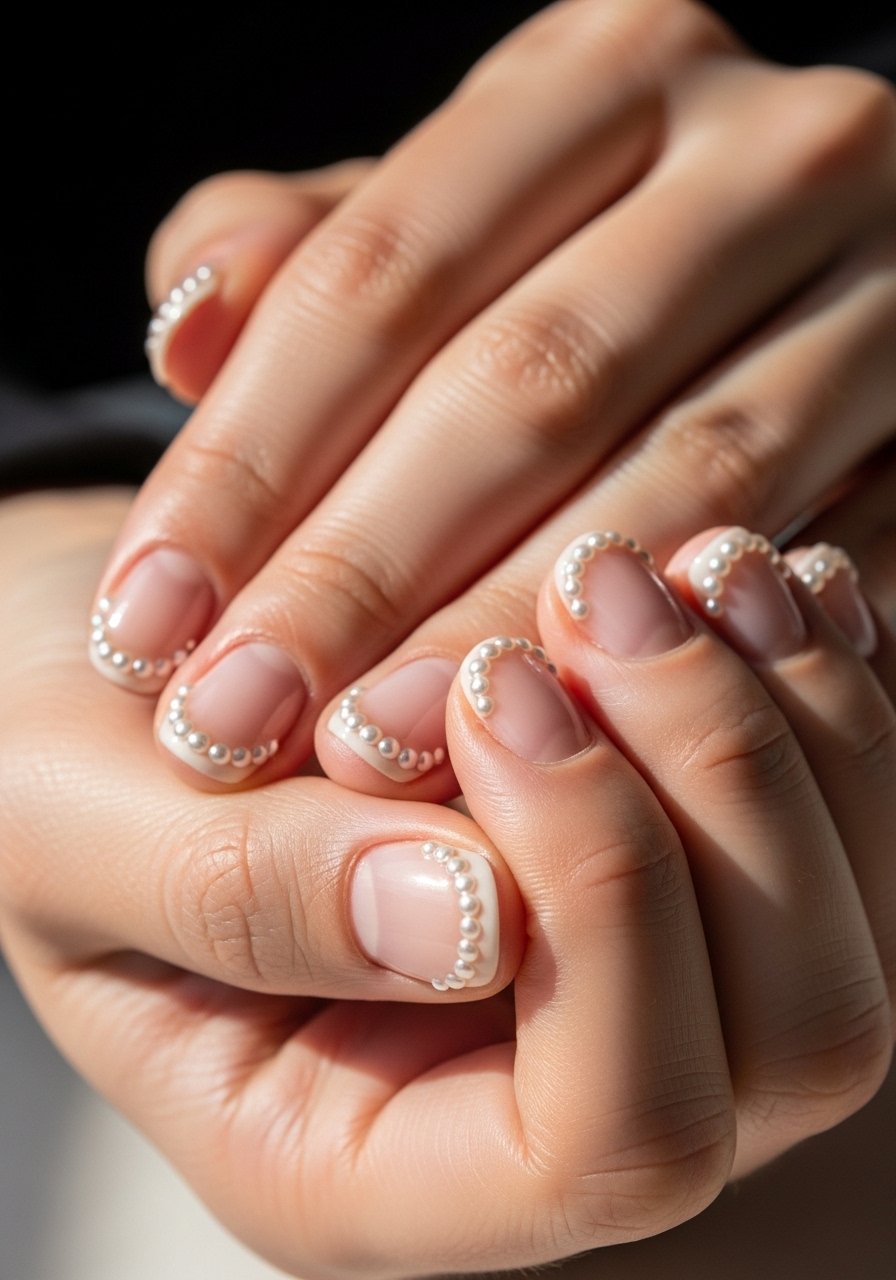
2. Sheer Blush With Pearl Cluster
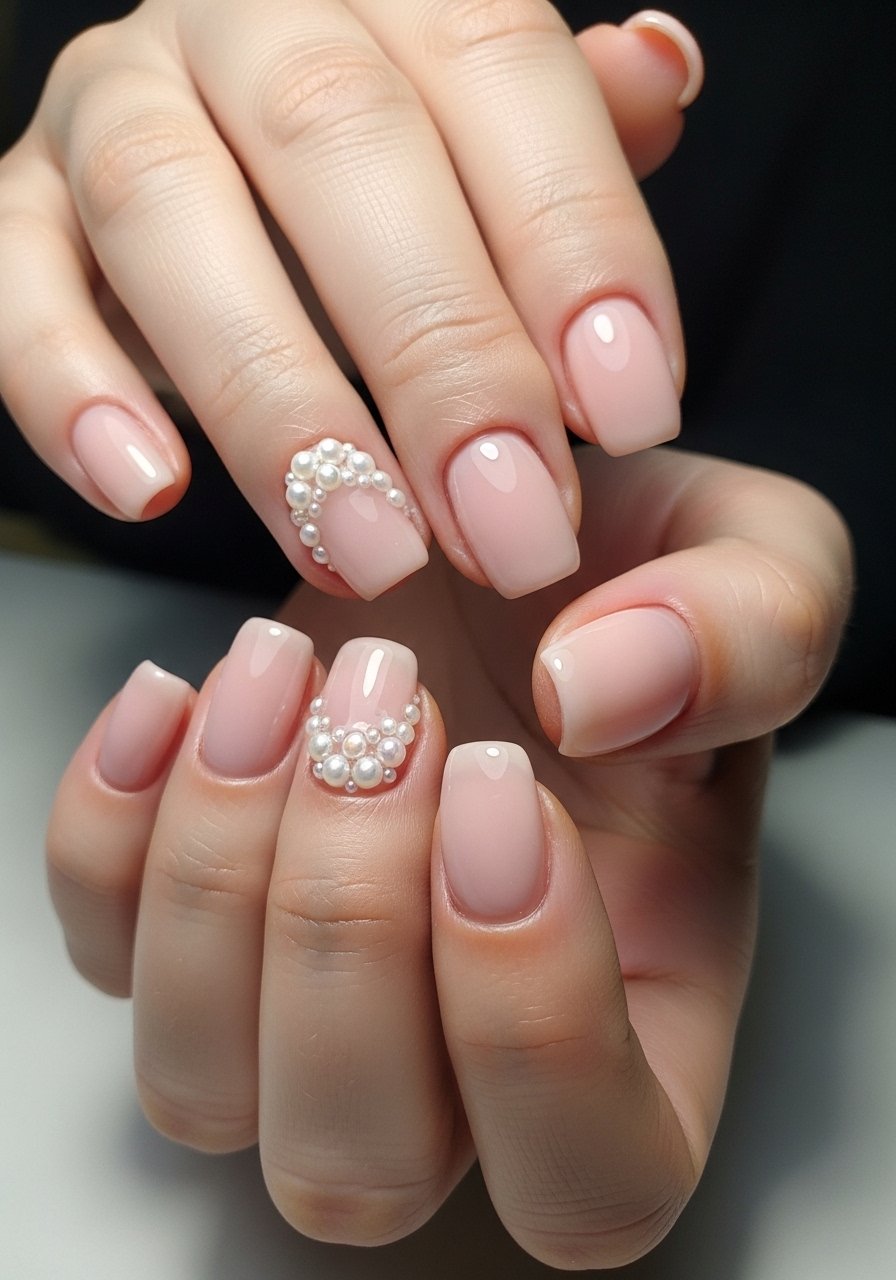
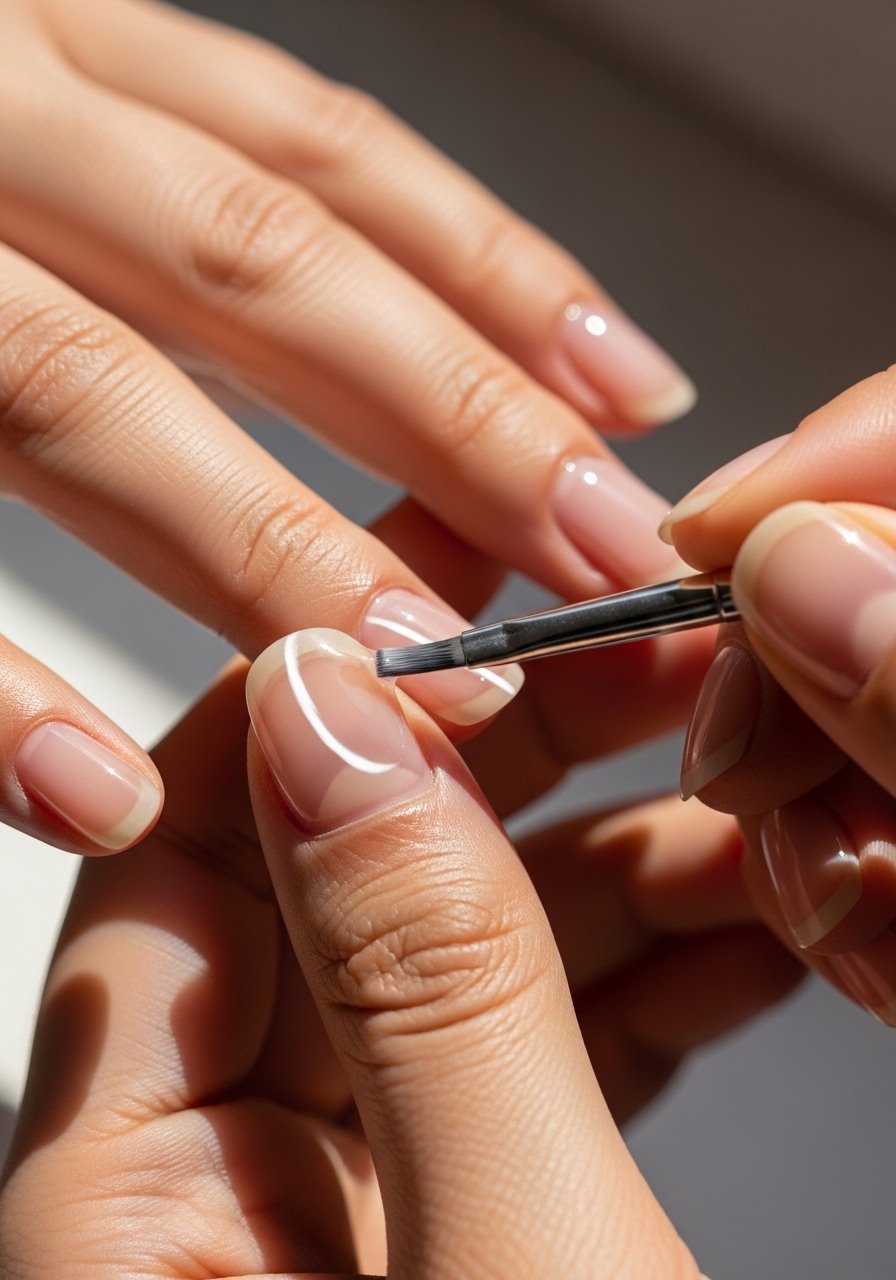
A sheer blush base makes every skin tone look polished, and a small pearl cluster keeps the look delicate and event-appropriate. Use thin layers of builder gel for strength on short nails, place pearls while the gel is tacky, and seal with a thin top coat. Try a small nail pearl set for mixed sizes and a reliable clear builder gel. This is quick for a salon visit or easy at home.
Style/Vibe: Elegant minimal
Best For: Short nails, wearable for photos
Skill: Beginner
Mistake to Avoid: Gluing pearls on top of a cured surface so they pop off by the end of the party.
3. Gender-Neutral Confetti Tips
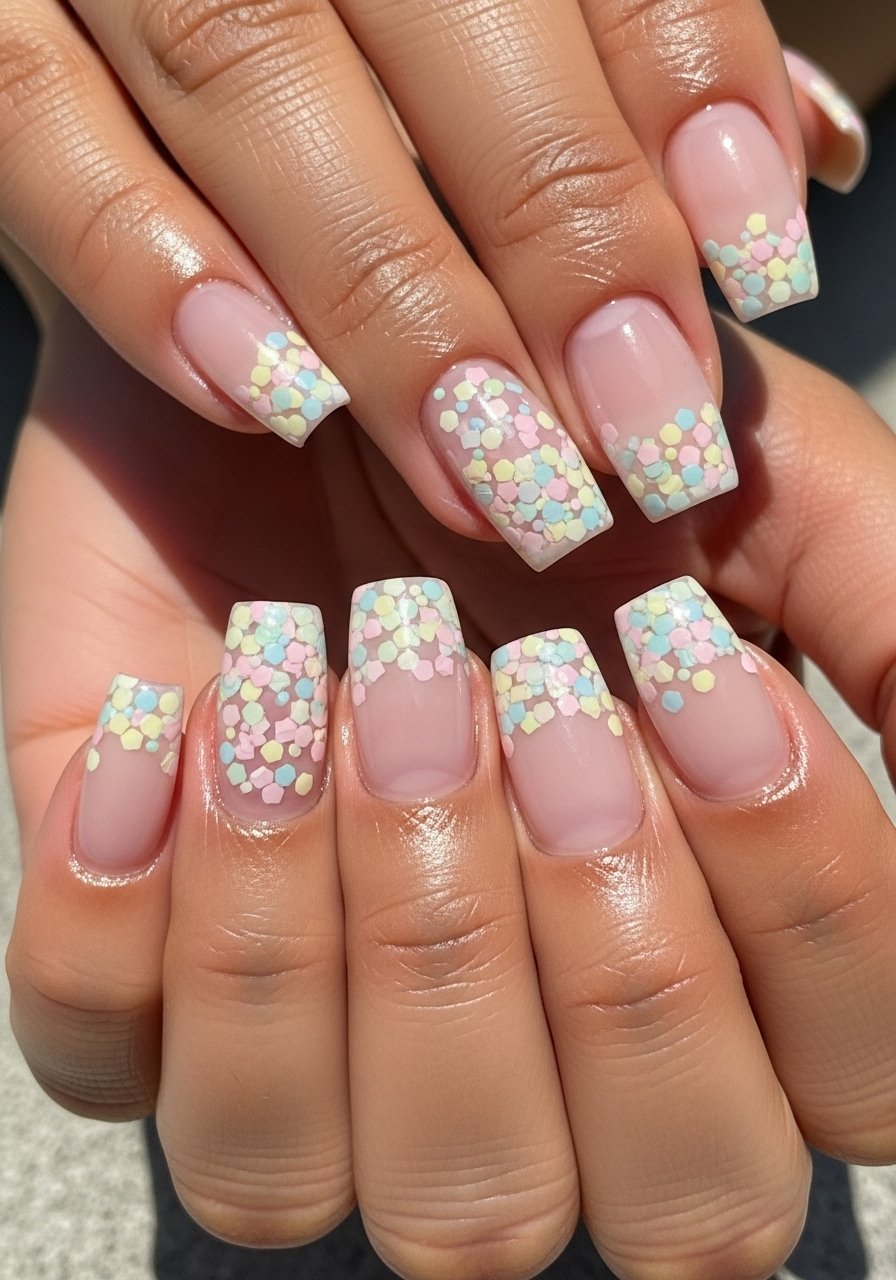
Confetti tips read celebratory and are easy to edit to any palette. Paint sheer nude, drag microglitter into the tip, then seal. For a softer finish, encapsulate confetti in a thin layer of builder gel rather than layering glitter on top. A fine microglitter mix and a small angled brush make placement quick. This style works well for guests who want a party look without full art.
Style/Vibe: Playful yet grown-up
Best For: Medium nails, guest mani
Skill: Beginner
Mistake to Avoid: Using large glitter pieces that make tips bulky and prone to catching.
4. Tiny Animal Motifs for Gender Reveal Vibes
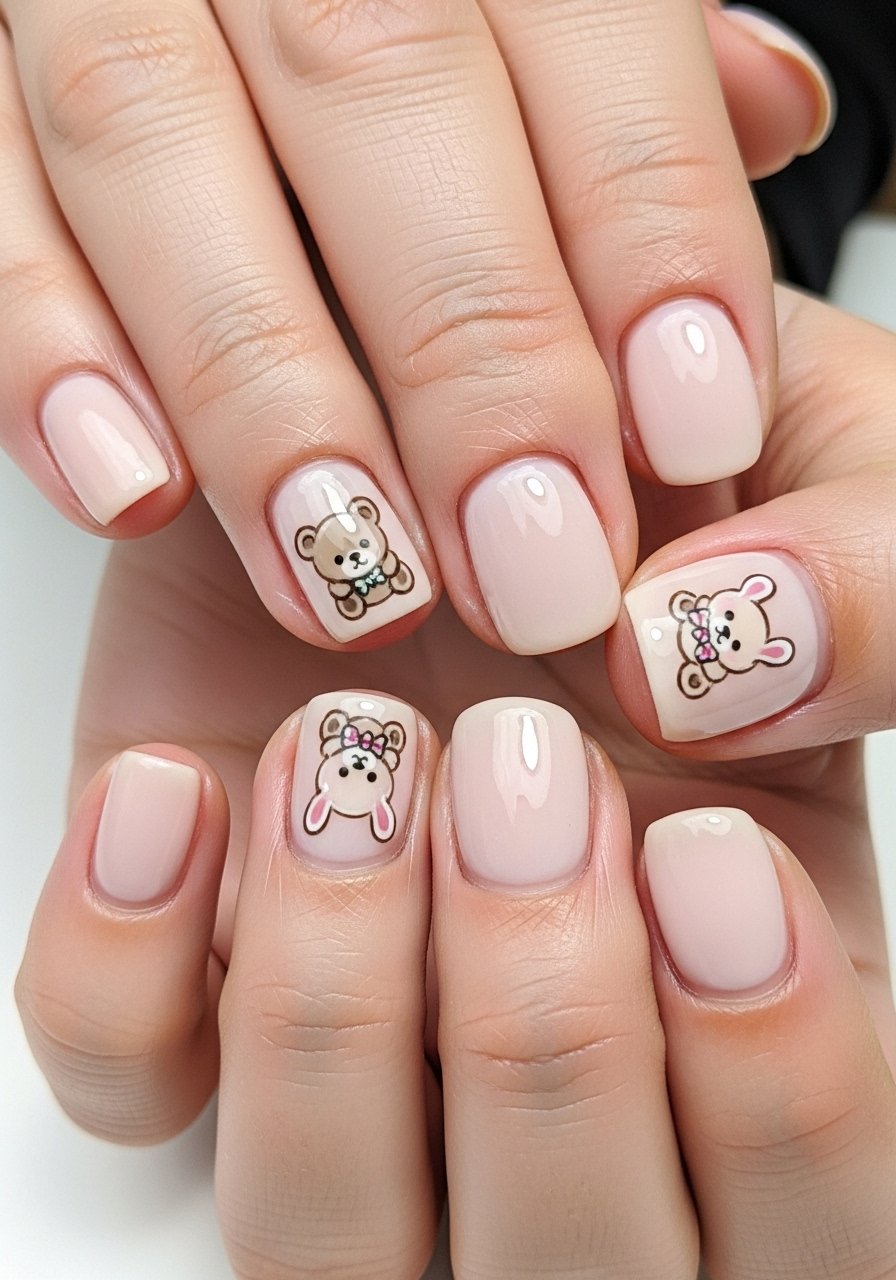
Tiny hand-painted motifs like a bear, rattle, or bunny give a thematic nod without being overdone. Use a fine detail brush or water decals for consistent results. I used a tiny dotting tool and a thin gel liner to keep lines crisp. A pocket nail art brush set and a sheet of water decals give you options for speed or hand paint. Best for short nails where the motifs still read.
Style/Vibe: Cute minimal
Best For: Short nails, reveal-themed looks
Skill: Intermediate
Mistake to Avoid: Painting motifs too large so they look cramped on short nails.
5. Matte Powder Blue With Glossy Heart
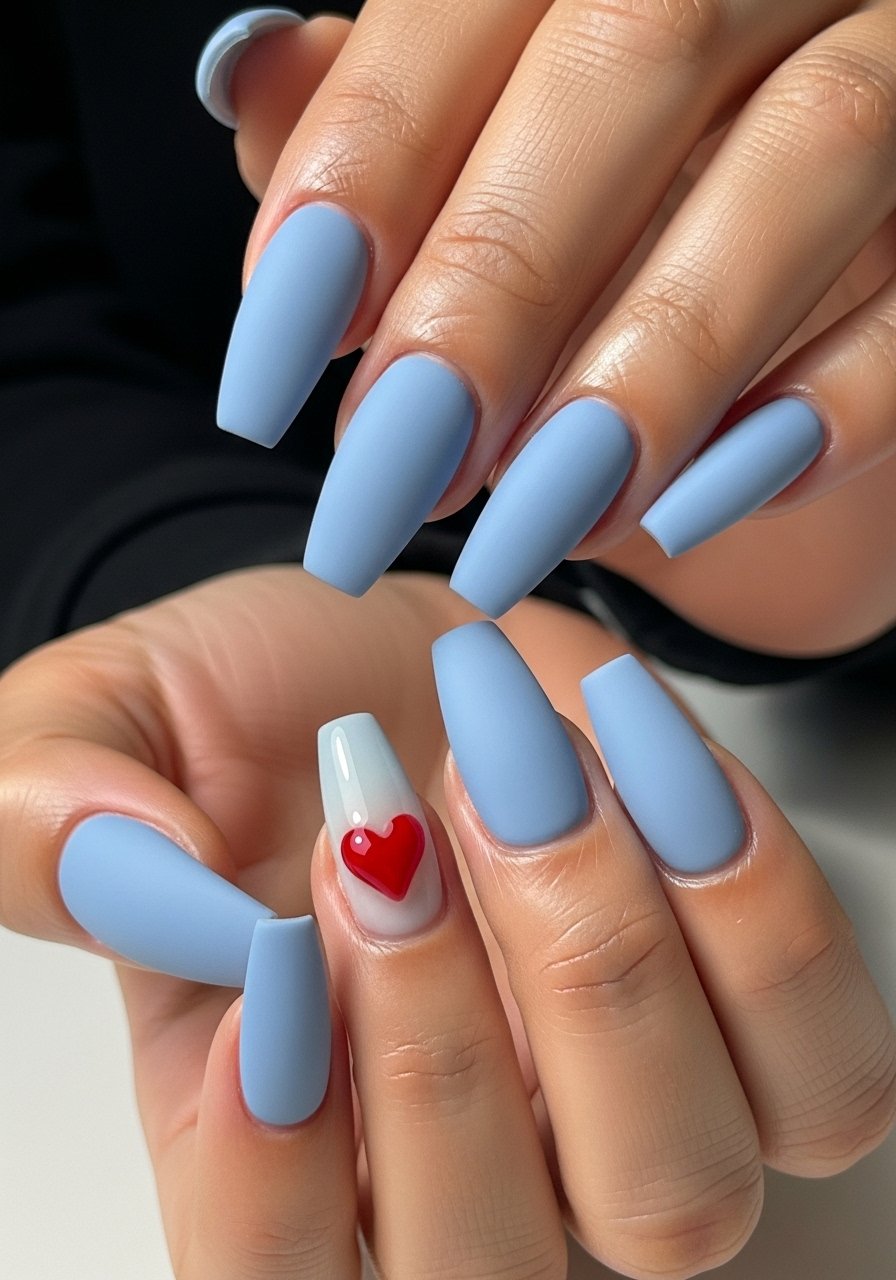
The contrast between a matte finish and one glossy heart is subtle and photo-friendly. Apply a matte top coat over powder-blue gel, then paint or stamp a tiny heart and cure under glossy top coat on just that nail. A matte top coat and a nail stamping kit can speed this up. This look is modern and fits medium to long nails, depending on how bold you want the heart to read.
Style/Vibe: Modern delicate
Best For: Medium to long nails, photo details
Skill: Beginner
Mistake to Avoid: Applying matte top coat over the entire hand before adding the glossy heart so it will not stick.
6. Blush Smile-Line French With a Twist
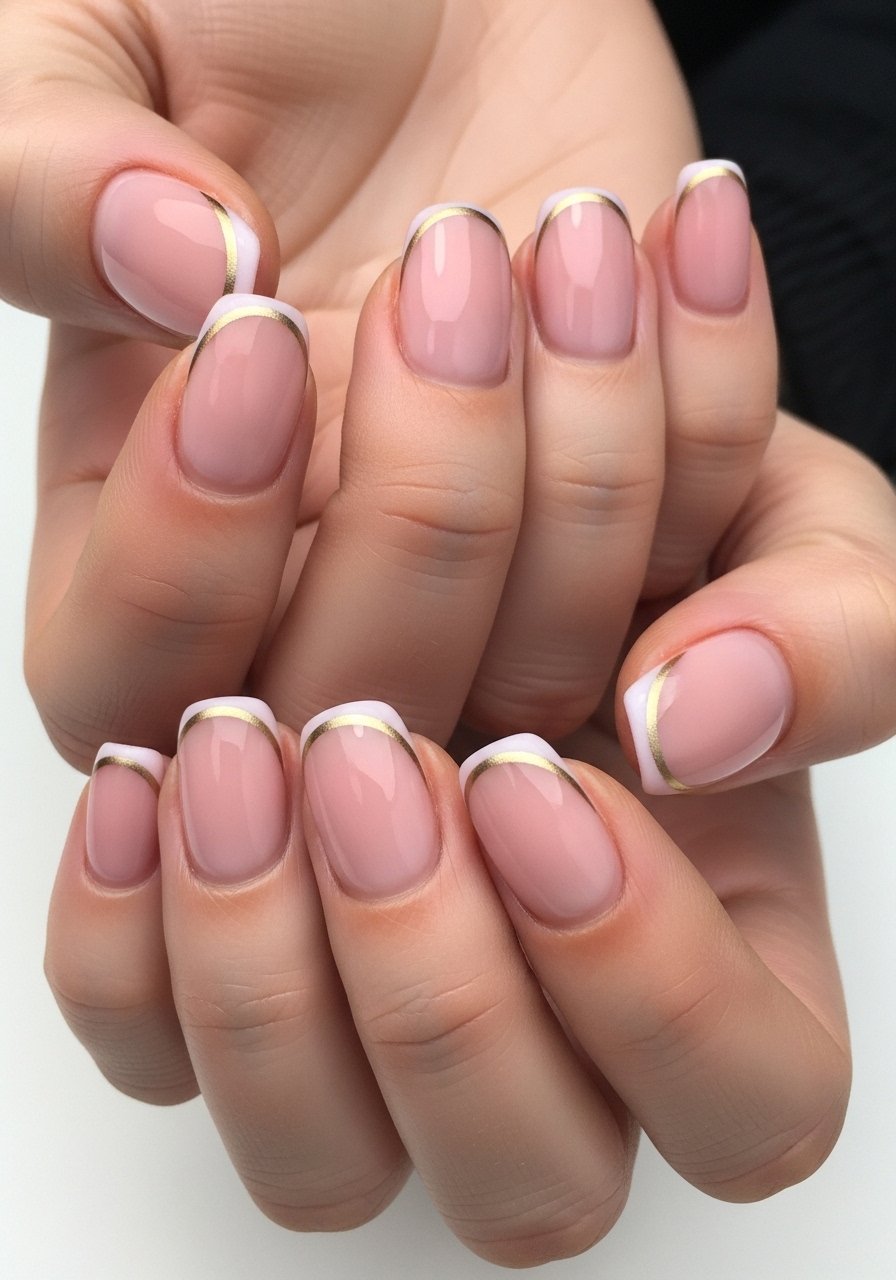
A soft smile-line French in blush keeps the mani classic while a thin metallic line adds a hint of celebration. Use smile-line guides or freehand with a thin brush. Seal the metallic line under top coat for longevity. I like a soft blush gel polish paired with a thin striping brush for control. This is low-fuss and flattering for most nail lengths.
Style/Vibe: Classic with a detail
Best For: All nail lengths, low-key hosts
Skill: Beginner
Mistake to Avoid: Drawing the smile line too low, which shortens the nail visually.
7. Mini Floral Accent on One Nail
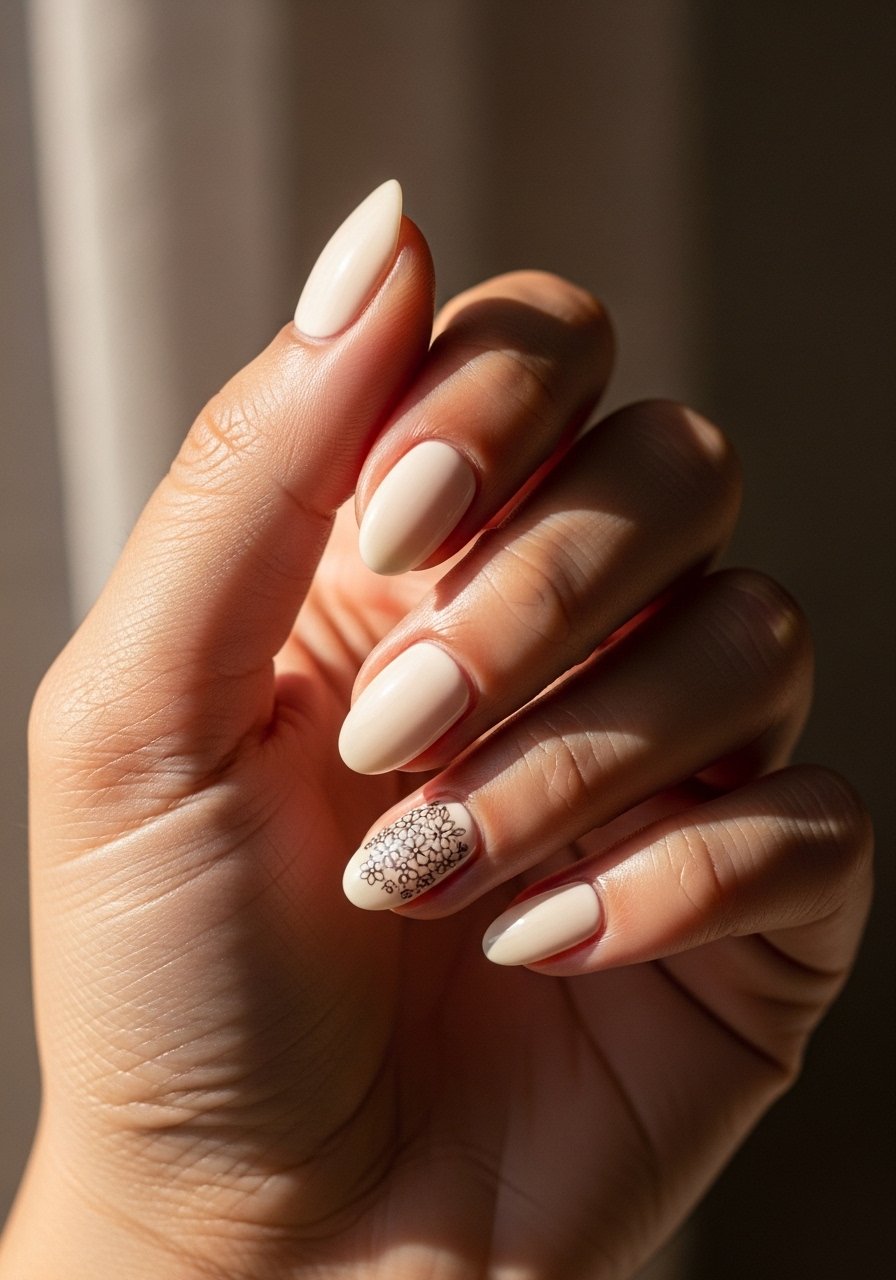
A single floral accent reads like intentional styling and avoids overdoing patterns across all nails. Paint a cream base, then dot tiny flowers with a thin brush or press on a small floral decal. Keep clusters small so they read at selfie distance. A compact floral decal pack and a detail dotting tool are the easiest path. This fits short or medium nails and photographs well.
Style/Vibe: Subtle floral
Best For: Short to medium nails, daytime showers
Skill: Beginner
Mistake to Avoid: Crowding the entire nail with flowers so the design loses its focal point.
If any of these ideas have you ready to shop, here are the tools and polishes I actually use.
Baby Shower Mani Essentials
Polishes & Gels:
- Pastel gel polish set (~$18-30). A quick way to get a cohesive palette.
- Clear builder gel (~$12-22). Adds strength on short nails.
Tools & Hardware:
- UV LED nail lamp (~$20-40). Small and portable for at-home curing.
- Nail art brush set (~$8-15). Fine brushes for tiny bows and motifs.
- Dotting tool set (~$6-12). Great for confetti placement.
Embellishments:
- Nail pearl charms (~$6-12). Mixed sizes for clusters.
- Baby water decals (~$5-10). Fast, consistent motifs.
- High-quality press-on kit (~$15-30). Handy for guests or a quick host mani.
8. Mini Polka Dot Cloud Nails
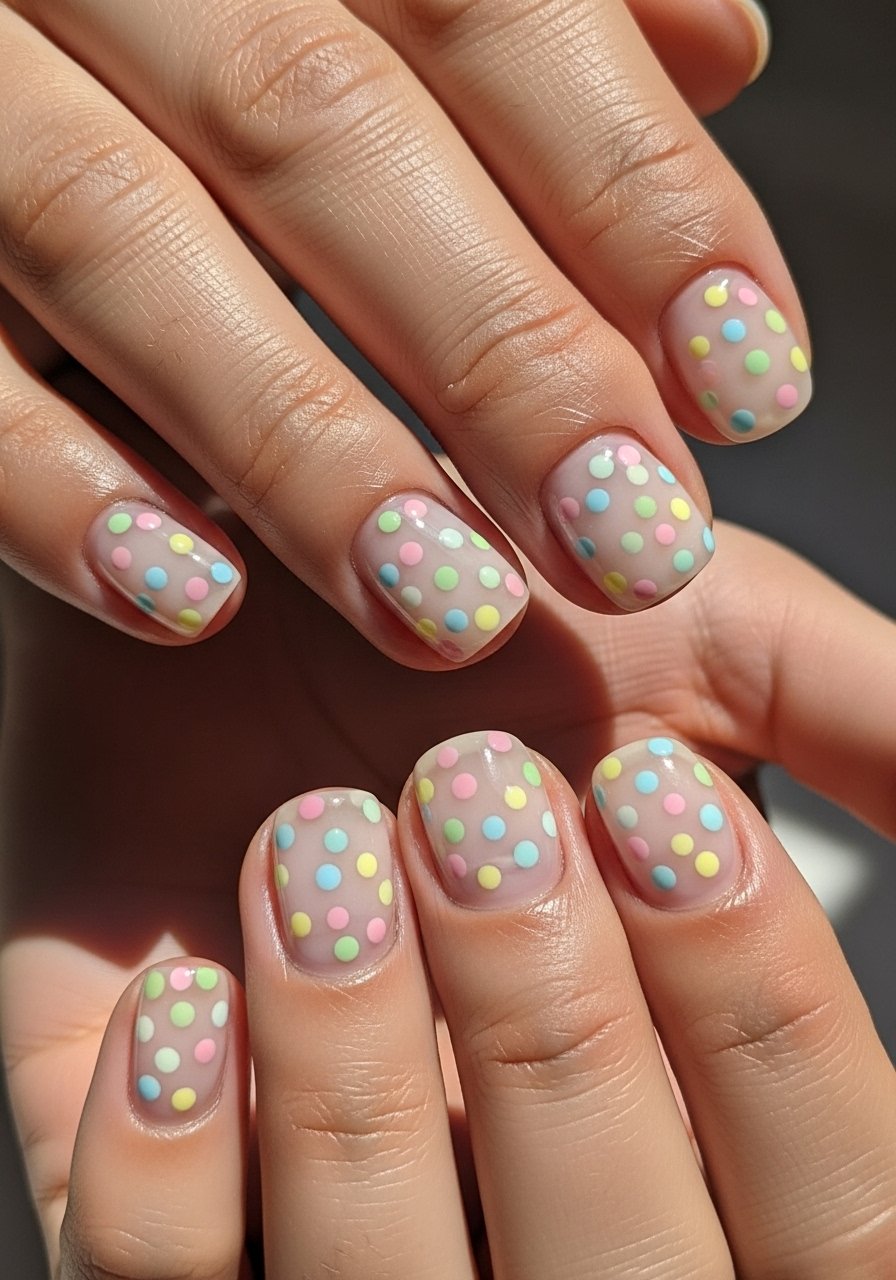
Polka dots keyed in soft pastel look playful and clean. Start with a sheer white or blue base so dots read soft, then use a small dotting tool to place dots in varying sizes. Keep the pattern sparse for a modern effect. A small dotting tool and a duo of pastel gels are all you need. This is a quick guest-friendly mani that works on short nails or press-ons.
Style/Vibe: Playful minimal
Best For: Short nails, guest mani
Skill: Beginner
Mistake to Avoid: Lining dots up too evenly so they look mechanical rather than organic.
9. Clear Jelly Tips With Tiny Bottle Charm

Clear jelly tips are on-trend and feel light beside celebratory outfits. Add one tiny baby bottle charm on an accent nail to keep the theme. Use thin builder gel to sculpt a smooth tip then adhere charm and seal. A set of clear builder tips and a pack of nail charms make this an easy salon-adjacent look at home.
Style/Vibe: Modern party-ready
Best For: Medium nails, trend-forward hosts
Skill: Intermediate
Mistake to Avoid: Using bulky charms that catch on fabrics or baby wraps.
10. Tone-on-Tone Microglitter Fade
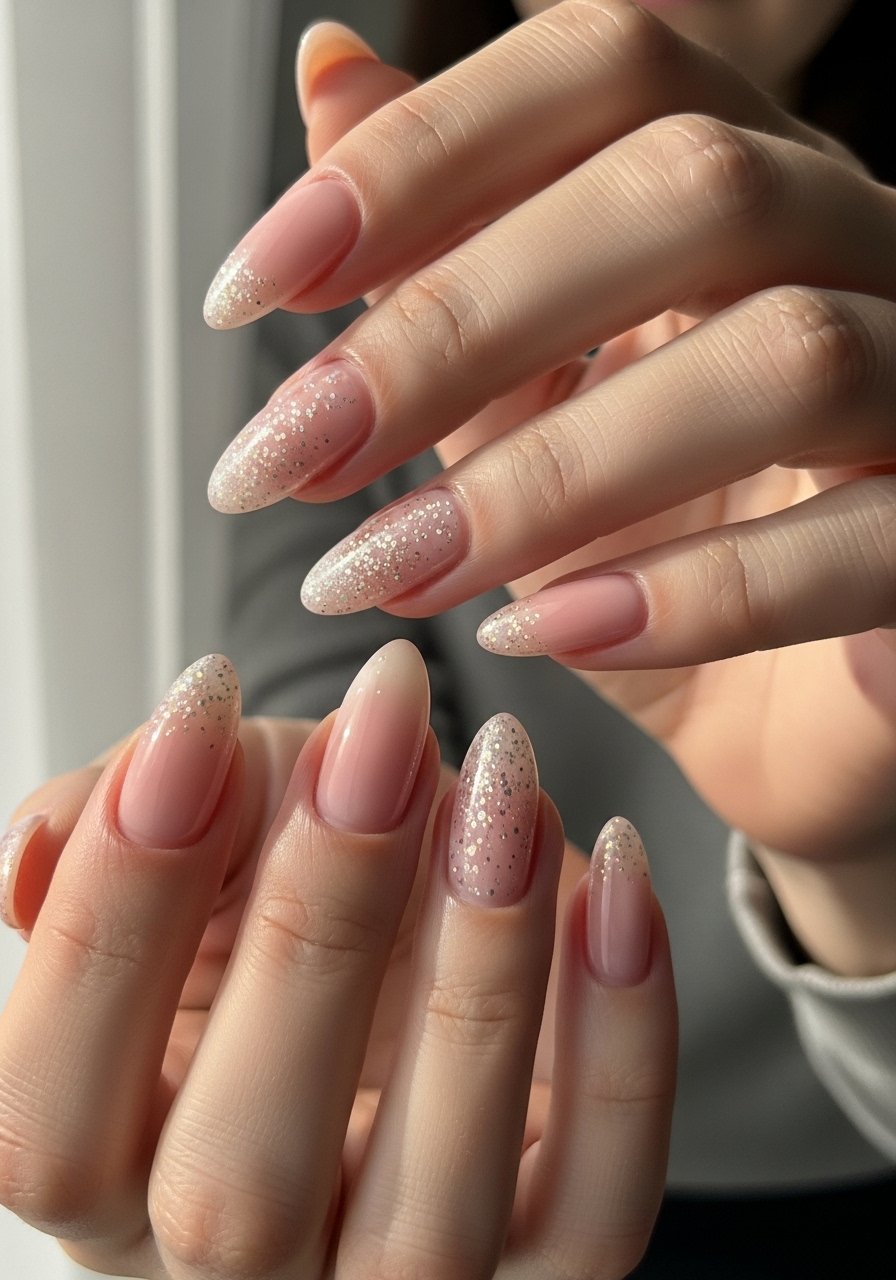
A microglitter fade reads subtle in photos because the sparkle is close to the cuticle instead of all-over. Use a small brush to drag glitter outward, then cure and top coat. Choose a glitter that matches your base to keep it tonal. A microglitter gel with a gel top coat gives lasting shine. This works on medium nails and stays understated.
Style/Vibe: Subtle sparkle
Best For: Medium nails, daytime events
Skill: Beginner
Mistake to Avoid: Loading glitter in a single clump by not feathering it outward.
11. Crescent Pearl Line at the Cuticle
A neat crescent of tiny pearls along the cuticle is an elevated twist on negative space. Work on one nail at a time so pearls sit in the tacky layer before curing. Use the smallest beads for a delicate look. A cuticle caviar bead set and precision tweezers save time. This is great for short nails because the crescent follows the natural shape.
Style/Vibe: Refined detail
Best For: Short nails, subtle glam
Skill: Intermediate
Mistake to Avoid: Placing large beads that push polish upward and create bumps.
12. Pastel Satin Finish for Short Nails
A satin finish on pastels feels soft in photos and is very forgiving with short nails. Apply two thin coats of pastel gel, cure, then buff lightly and finish with a satin top coat. Satin hides tiny surface flaws and reduces glare in pictures. Try a satin top coat and a couple of pastel gels. This is an excellent choice for quick at-home manis on short nail beds.
Style/Vibe: Soft modern
Best For: Short nails, casual showers
Skill: Beginner
Mistake to Avoid: Over-buffing after curing which thins the gel and weakens the nail.
13. Press-On Party Pack for Guests
If you are hosting, a box of press-ons in a few sizes is a lifesaver for guests who arrive unplanned. Choose press-ons with a full coverage option and an easy adhesive. Pack a small kit with buffer, nail glue, and a couple of styles. A reliable press-on nails kit and nail glue will keep guests happy. This is low-skill and gives everyone a photo-ready mani fast.
Style/Vibe: Convenient chic
Best For: Hosts, guest needs
Skill: Beginner
Mistake to Avoid: Bringing press-ons without multiple sizes so they end up popping off during the party.
14. Tiny Lettering for Initials or Date
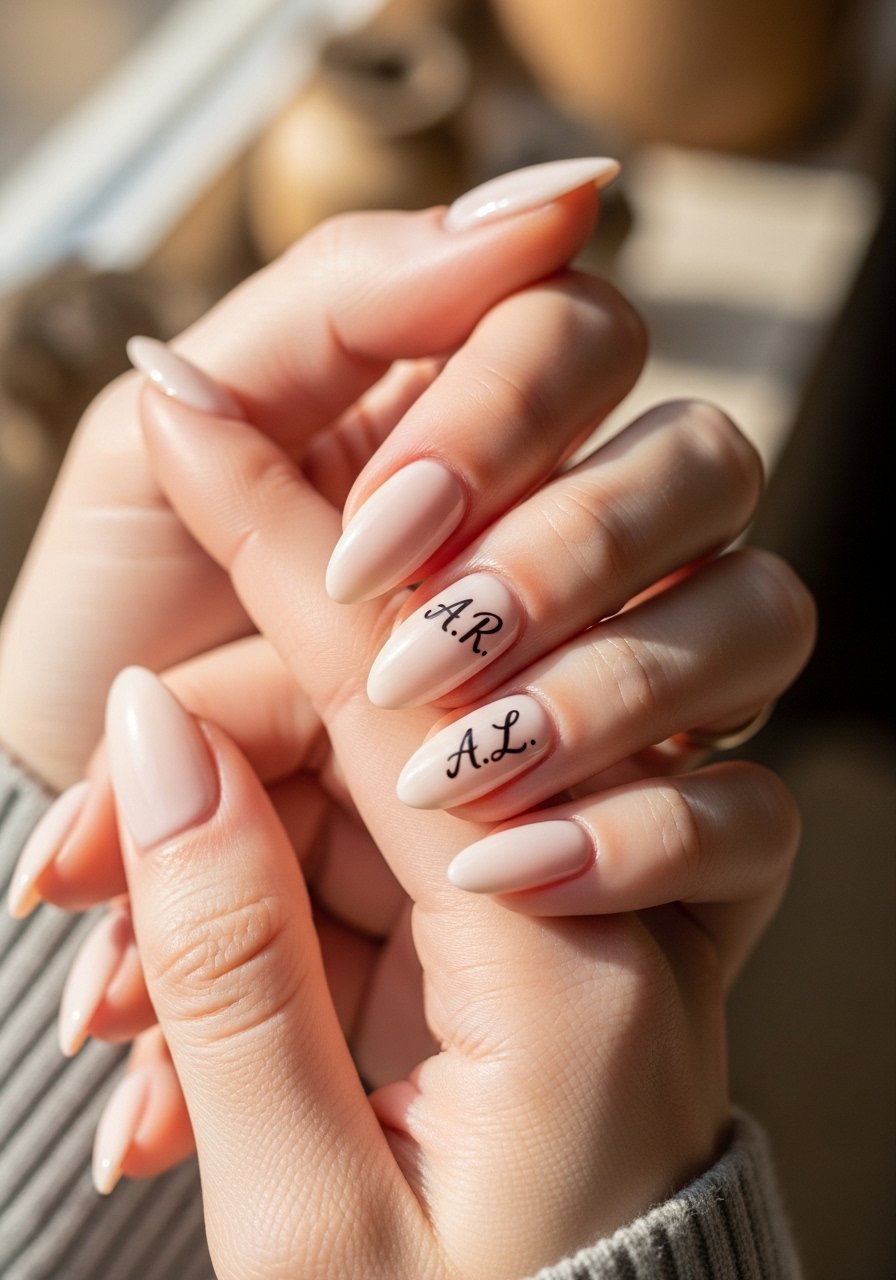
A single tiny initial or date painted on an accent nail feels personal and subtle. Use a gel liner and a steady hand or a stamping plate for crisp letters. Keep letters to one or two characters so they read in photos. A nail stamping kit and a fine gel liner give consistent results. This is a small way to honor the moment without overcommitting to heavy art.
Style/Vibe: Personal and tidy
Best For: Medium nails, keepsake detail
Skill: Intermediate
Mistake to Avoid: Trying to write long words that become illegible at manicure scale.
15. Party-Day Quick-Dry Top Coat Trick
On the day of the shower, a quick-dry top coat over fully cured gel polish can speed touch-ups for guests and hosts. Apply two thin coats and give nails a short flash under a lamp if you have it. A good quick-dry top coat prevents smudges during photos and is handy when wrapping gifts or arranging trays. This trick works for all lengths and is the difference between a manic that survives a busy morning and one that does not.
Style/Vibe: Practical last-step
Best For: All nail lengths, day-of touch-ups
Skill: Beginner
Mistake to Avoid: Using a quick-dry product over uncured gel polish which traps tackiness rather than sealing.
Mani-Day Shortcuts for Showers
Thin coats beat one thick coat every time. Three thin layers of a quick-dry top coat look smoother and last longer than one heavy layer.
Grab nail glue for press-ons. Keep a small packet in your clutch so guests can pop on a set and be photo ready in five minutes.
If you do hand-painted details, rest your painting hand on a small towel to steady it. A detail brush set costs about $8 and makes tiny bows or initials possible without shaking.
Most people try to cram larger decals into one nail. Use two or three tiny details across different nails instead. A small floral decal pack stretches farther and reads cleaner in photos.
Keep a bottle of cuticle oil nearby for the hosts. A quick drop and a rub makes hands look fresher on camera. Cuticle oil is the easiest last-minute glow.
