
I kept hanging tiny prints too close together and wondering why the bathroom still felt like a rental. The exact moment it clicked was when I swapped a cluster of postage-stamp frames for one properly sized piece, and the whole sink area finally read as intentional. After trying this in three rentals, I learned that scale, moisture-proofing, and a few cheap hardware swaps do more than expensive tiles.
These ideas are for people who want a modern look without gutting the room, for renters and homeowners on a midrange budget, and for anyone comfortable with a screwdriver and an hour of patience. Expect projects that are mostly plug-and-play, some that need tile anchors, and a couple that are renter-friendly. I tested most of these on ceramic and subway tile, and they worked each time.
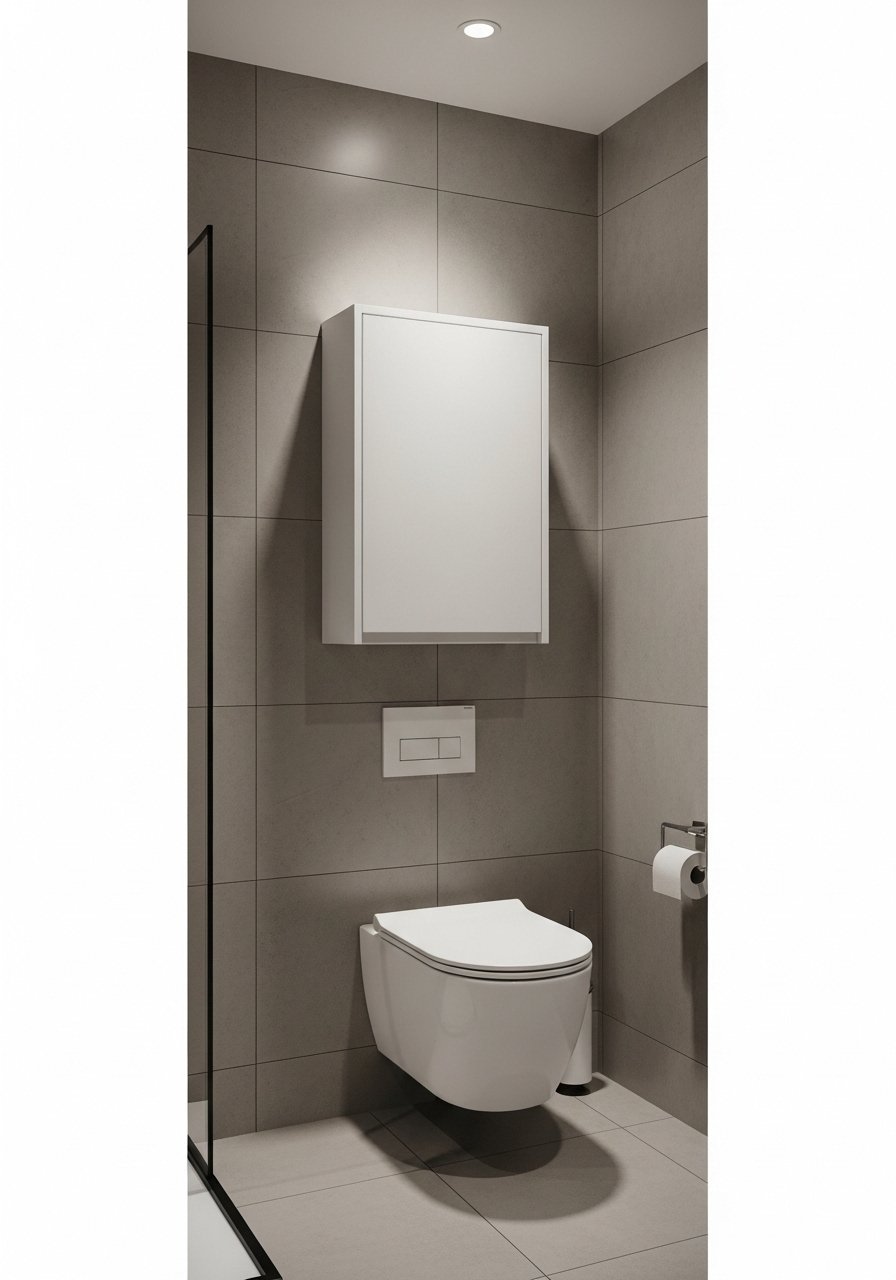
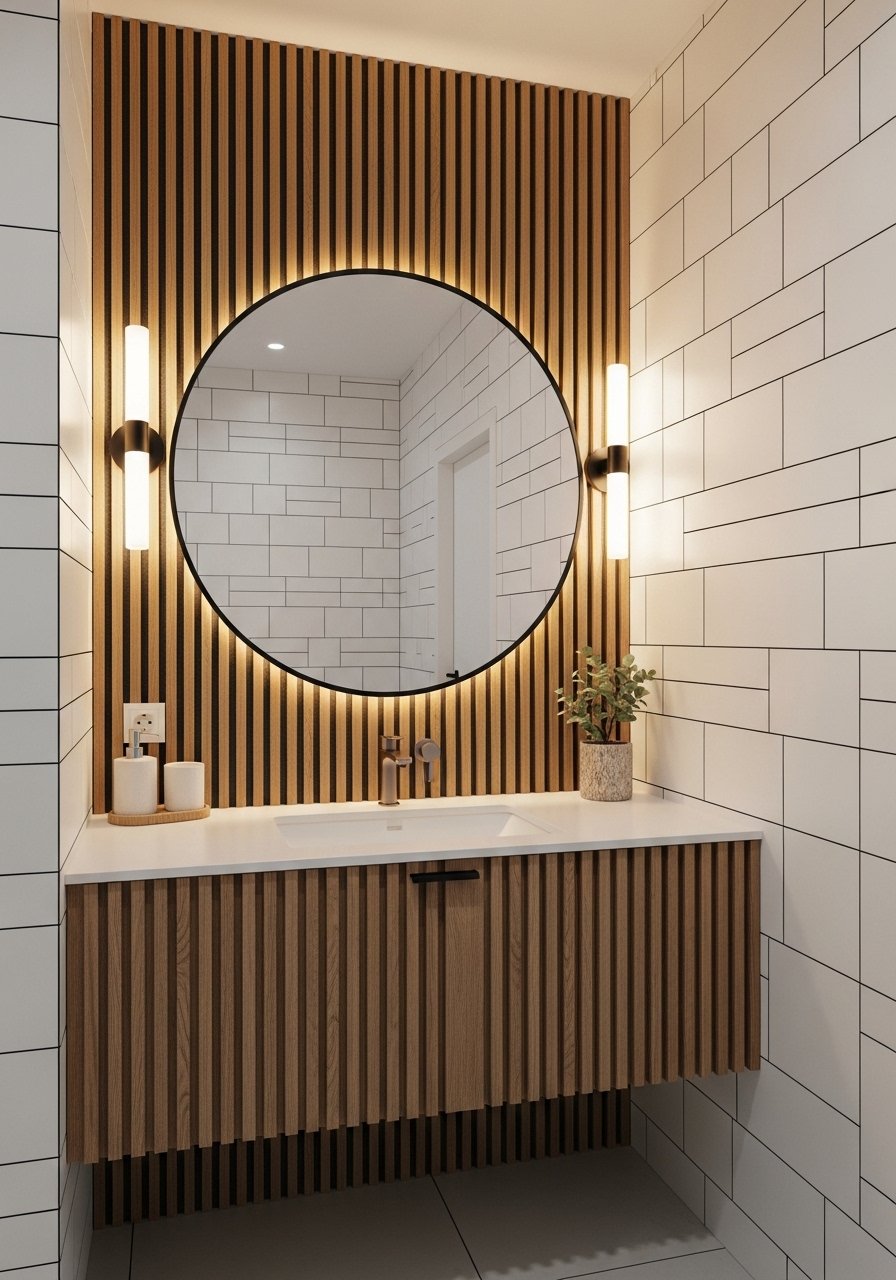
1. Oversized Round Mirror For Soft Focus
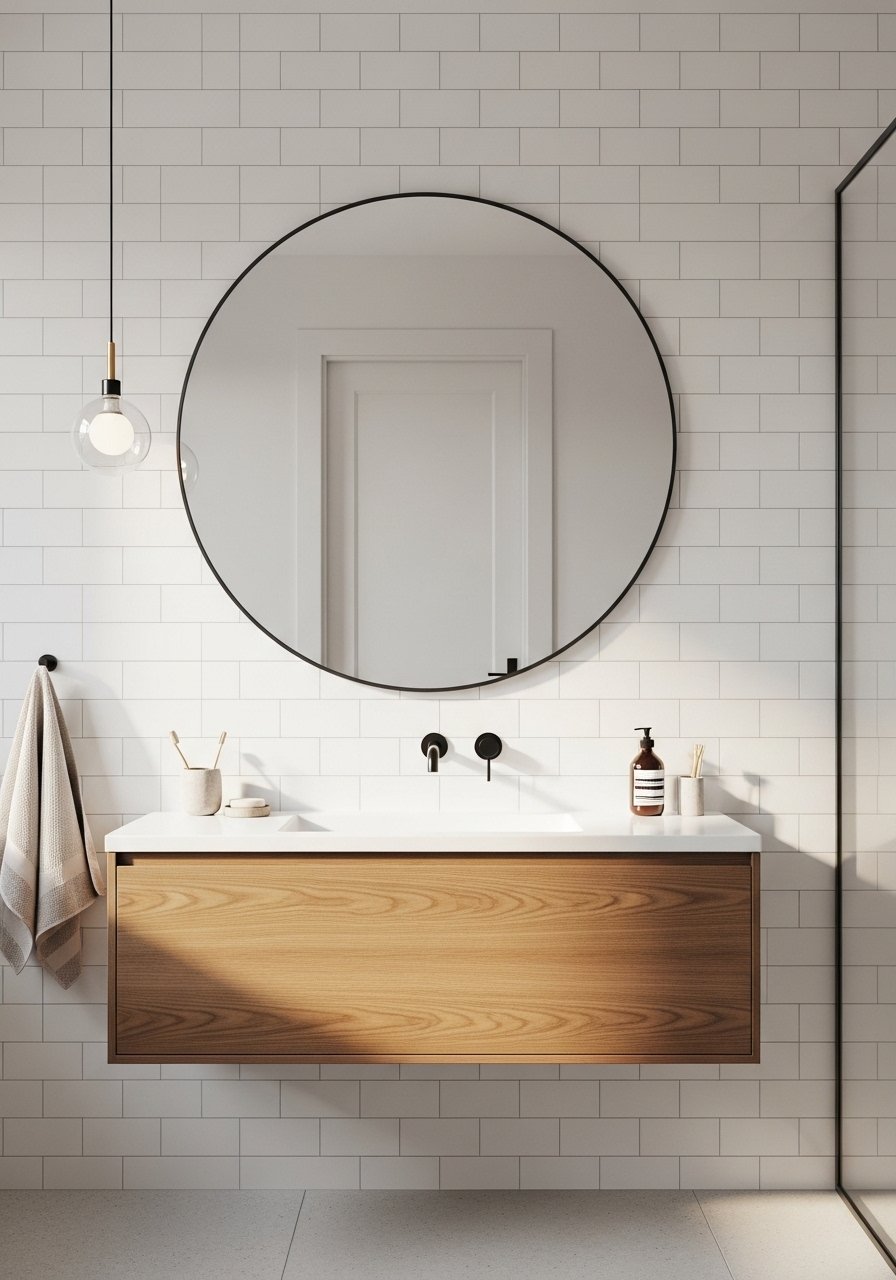
The easiest way to make a small bathroom feel wider is a single large round mirror. I use a 30 to 36 inch diameter for average vanities because the curve catches light and hides tile grout that feels busy. Pick a rust-resistant frame for humidity, like a metal or sealed wood option, and hang it so the bottom edge sits 6 to 8 inches above the vanity top. For renters, a mirror that mounts on two screws with anchors is a simple swap. Try a metal framed round mirror for a modern look and heavy-duty drywall anchors if you need extra support.
One detail people miss is leaving breathing room around the mirror, do not cram it against lights or cabinets.
Mistake to Avoid: Hanging a mirror that is too small for the vanity and calling it a focal point.
2. Waterproof Gallery Prints On One Statement Wall
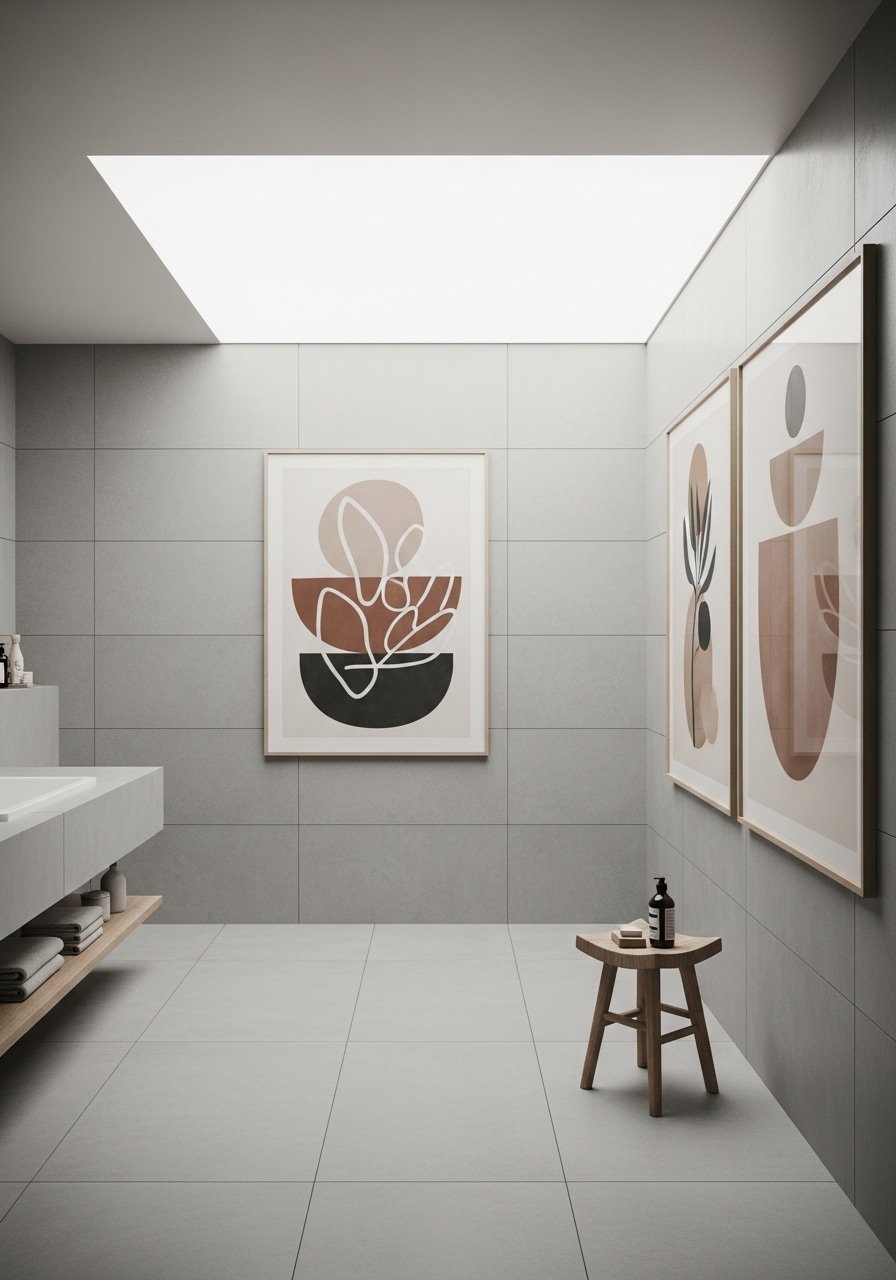
Instead of a tight cluster of small frames, go for three large waterproof prints in identical frames across one wall to feel modern and calm. I use 16×20 framed waterproof prints, spaced about 6 inches apart, which follows a simple 1:3 proportion rule I learned from measuring my vanity width. Waterproof prints survive steam and occasional splashes without warping. This setup reads like art, not clutter, and suits renters who can use removable, heavy-duty adhesive hooks. I link to a set of waterproof art prints and removable heavy-duty hooks.
A common oversight is using paper prints in cheap frames that fog or buckle from moisture.
Mistake to Avoid: Buying non-waterproof prints for a steamy bathroom.
3. Slim Floating Ledge For Plants And Trinkets
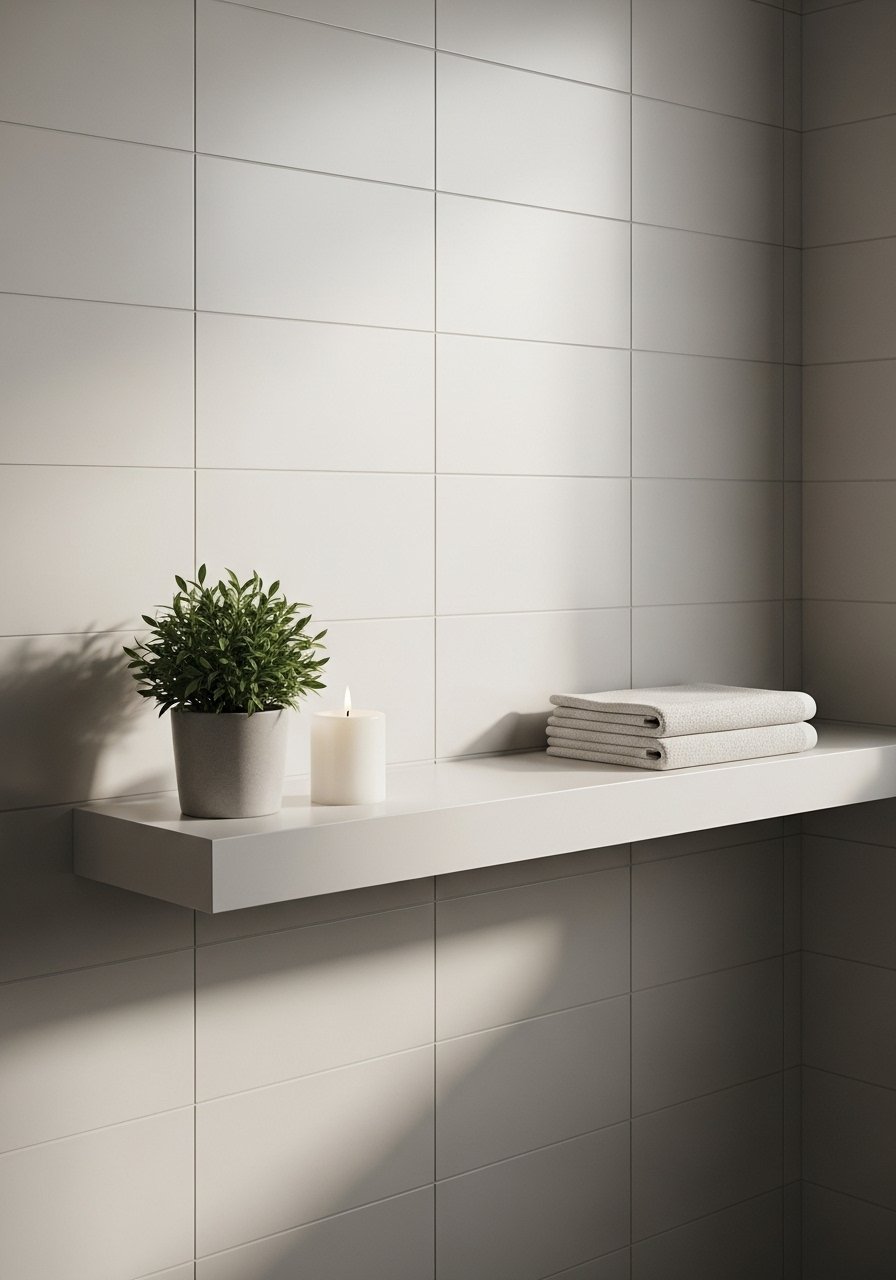
A 4 to 6 inch deep floating ledge gives you a place for a fern, a candle, and one framed photo without stealing visual space. I prefer a 24 to 36 inch length over the toilet or beside the mirror to balance vertical elements. Use a moisture-resistant finish and silicone behind objects to stop slipping. This is a low-skill install with concealed brackets and it reads modern, lived-in, and warm. Pair it with a small planter like a ceramic wall planter and mounting screws for tile.
People forget to leave clearance above the ledge for towels or switches, which looks cramped.
Mistake to Avoid: Mounting the ledge too low so it collides with faucets or light switches.
4. Recessed Shelf Styling With Textured Baskets
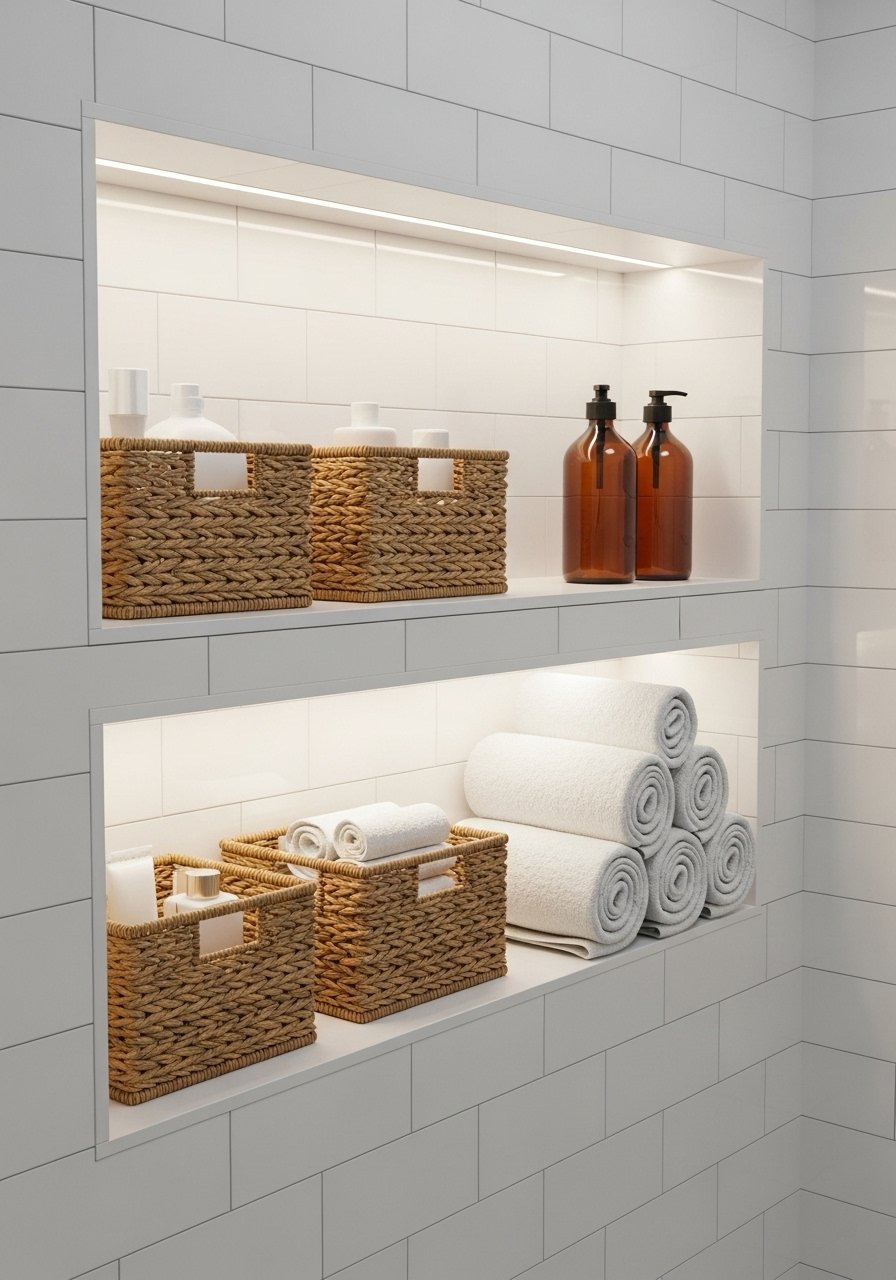
If you have a recessed niche or can add a shallow shelf, style it with two textured baskets and coordinated bottles for a tidy, spa-like feel. I aim for baskets that leave 1 inch of wall visible on each side so the niche framing reads intentional. Use waterproof baskets or lined trays so damp towels do not mold, and keep daily items in identical amber pump bottles for cohesion. For a quick upgrade, try waterproof woven baskets and amber pump bottles.
A slip is using open fabric baskets that trap moisture and never dry.
Mistake to Avoid: Choosing unlined baskets that hold moisture and smell over time.
5. Tile-Friendly Floating Cabinet For Hidden Storage
A shallow floating cabinet, about 10 to 12 inches deep, hides clutter while keeping the wall visually light. I use one with a push-to-open mechanism to avoid handles that catch towels. When installing on tile, mark the stud locations and use a tile bit for pilot holes to avoid cracking. The look suits minimal modern styles and busy households since it hides aerosol cans and extra soap. Consider a slim floating wall cabinet and tile drill bits for a safer install.
Many people try to hang a heavy cabinet on tile without the right anchors and end up with cracked tile.
Mistake to Avoid: Skipping the correct tile anchors and expecting the cabinet to stay put.
6. Textured Accent Panel Behind the Vanity
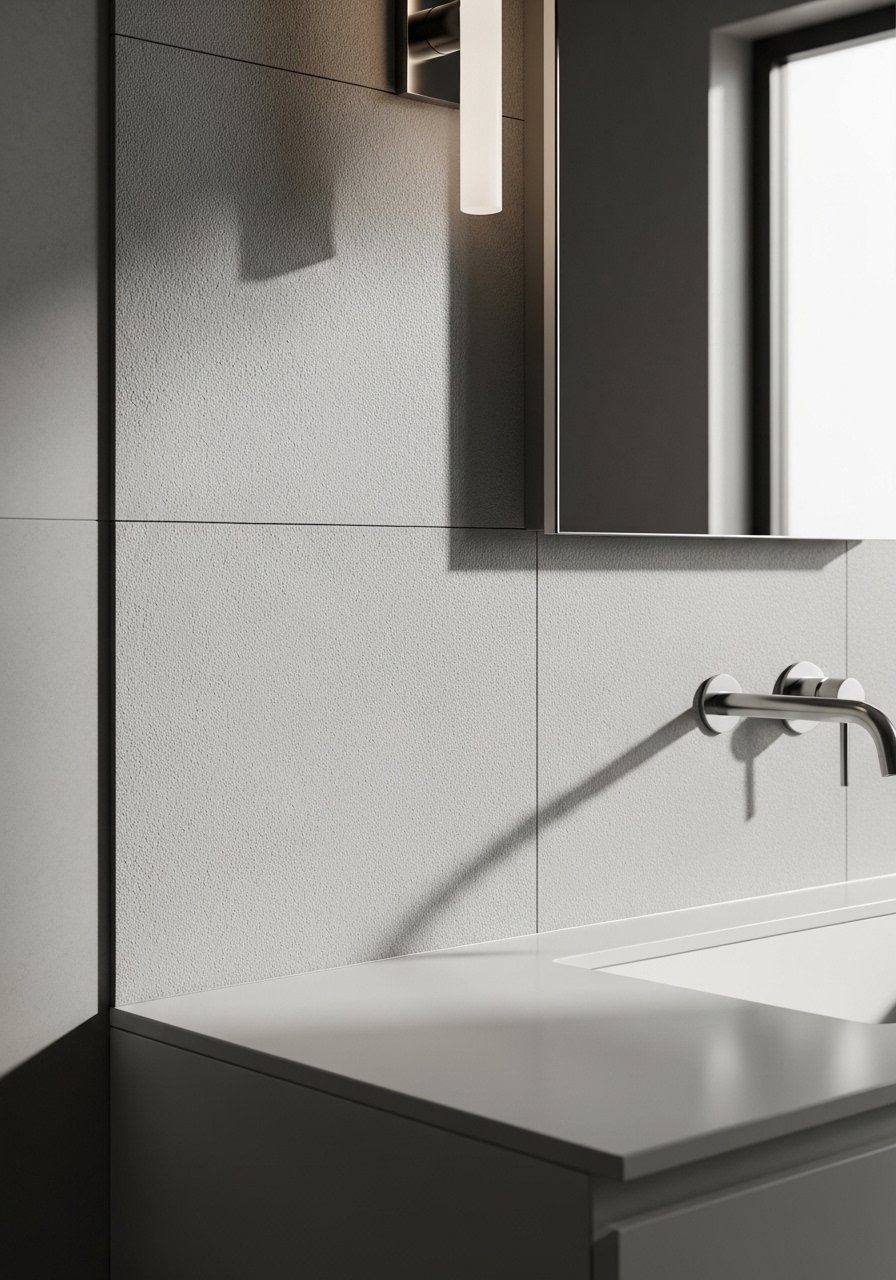
Instead of repainting, install a single textured accent panel, like matte stone-look or waterproof wood slats, behind the vanity to add depth. I cut panels to cover the width of the vanity, leaving a 2 inch reveal on each side for framing. The texture absorbs glare from LEDs and gives a warm backdrop for mirrors and sconces. This is medium skill but cost-effective compared with tile replacement. Try waterproof wall panels and a construction adhesive suitable for bathrooms.
People often pick panels that are too busy; subtle texture reads better with modern fixtures.
Mistake to Avoid: Choosing overly ornate panels that compete with fixtures and mirrors.
7. Collapsible Hook Rail For Towels And Visual Interest
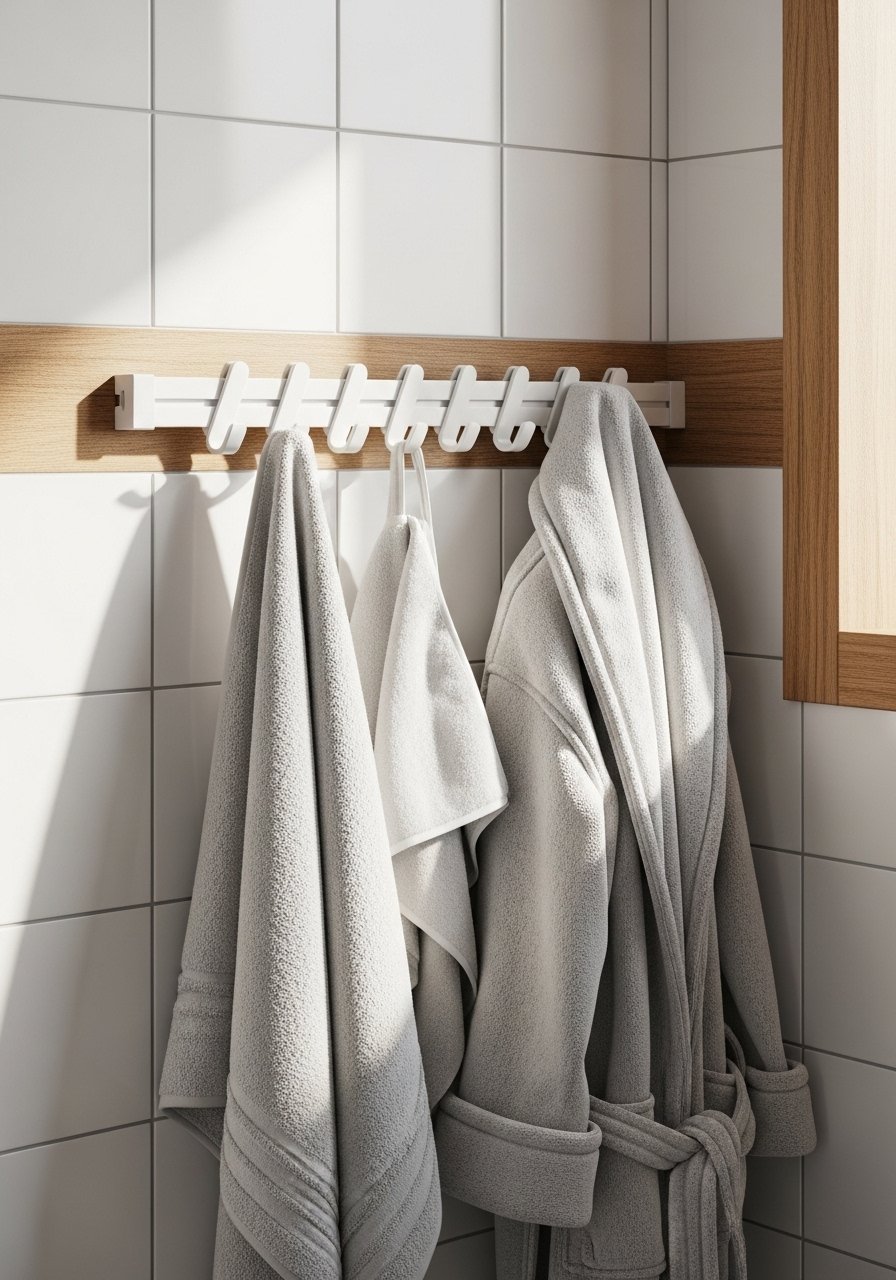
A slim horizontal hook rail with fold-down hooks provides function and a modern line across the wall. Use a rail roughly the width of your vanity or towel area, usually 18 to 30 inches, mounted 48 to 52 inches from the floor for easy reach. I like rails with matte finishes so they read as design elements rather than utility. This solution is ideal for small bathrooms and renters because it is reversible and saves floor space. Consider a matte hook rail and rust-resistant screws.
A mistake is using a rail that sits too high, which makes towels awkward to reach.
Mistake to Avoid: Placing the rail so towels hit the vanity rather than hanging freely.
If you want the exact items I used for most of these looks, this short list covers the essentials.
Bathroom Wall Basics To Buy
Hardware & Mounting:
- Heavy-duty drywall anchors (~$8-15). Use these for mirrors and ledges.
- Tile drill bits (~$12-25). Necessary when drilling into ceramic.
Shelving & Storage:
- Slim floating wall cabinet (~$60-130). Hides clutter without bulk.
- Floating ledge shelf (~$20-45). For plants and small decor.
Art & Mirrors:
- Metal framed round mirror (~$70-150). Opt for rust-resistant finishes.
- Waterproof art prints (~$25-60). For steamy rooms.
8. Magnetic Mirror Panels For Swappable Looks
I started with magnetic strips because I change art with the seasons and it keeps the wall fresh. Install a thin magnetic panel behind a mirror or overtile using waterproof adhesive. The system lets you swap printed panels or mirrors without rehanging hardware, which is great for renters or people who like seasonal shifts. I pair a magnetic backing with inexpensive laminated prints and a magnetic mirror kit for easy swaps.
Most people still rehang frames when a swap would take under two minutes with magnets.
Mistake to Avoid: Using weak magnets that cannot hold heavier frames near damp areas.
9. Vertical Wooden Slats For Warmth
Vertical wooden slats add height and warmth and are surprisingly renter-friendly if installed on a single removable panel. I space slats about 1.5 inches apart for rhythm, and stain them in a matte finish so they read modern rather than rustic. Use sealed, moisture-resistant wood or composite slats and keep them out of direct shower spray. This suits someone who wants a warm, modern look on a modest budget. Try wood slat panels and waterproof sealant.
A common error is choosing untreated wood that warps within months in humid bathrooms.
Mistake to Avoid: Leaving slats unfinished and exposed to constant steam.
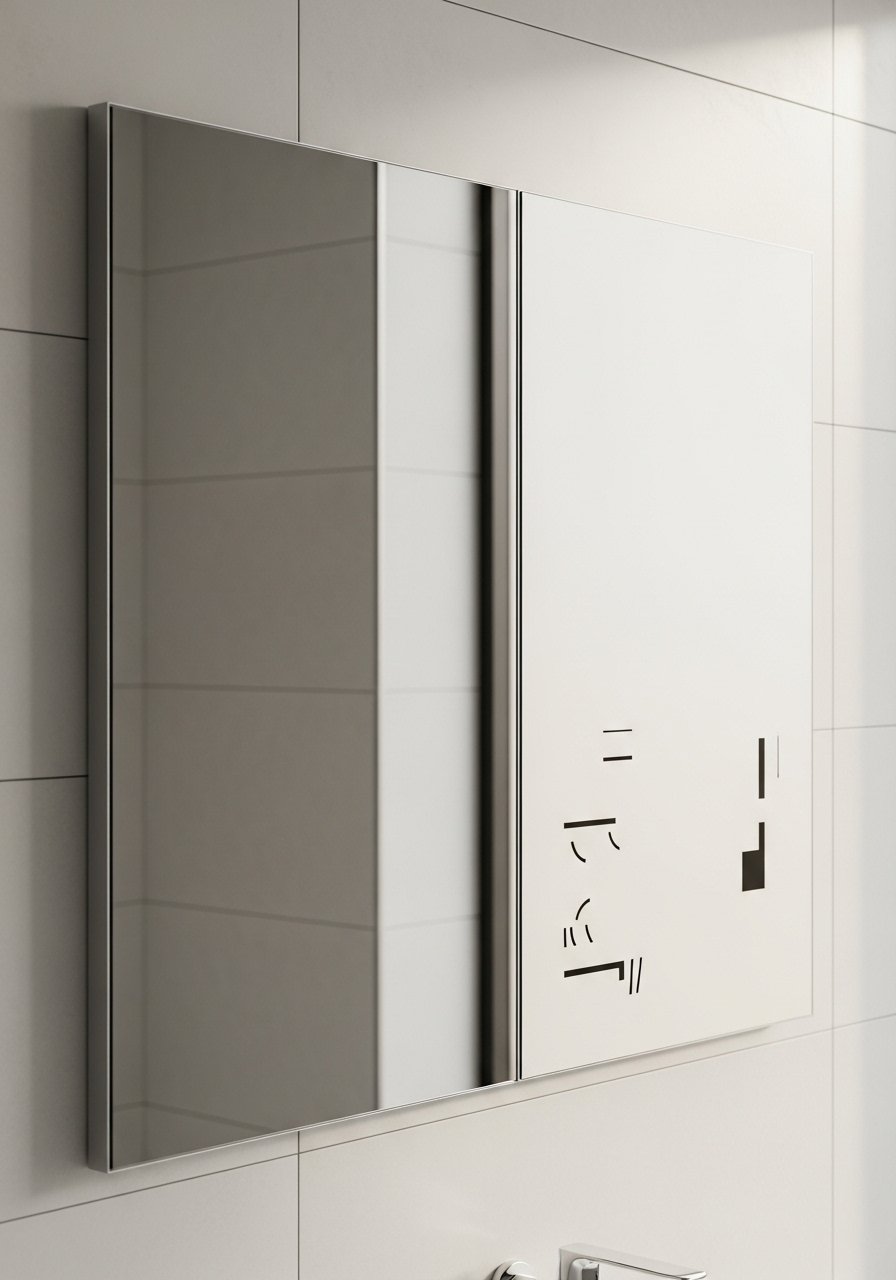
10. Framed Mirror With Built-In LED Accent
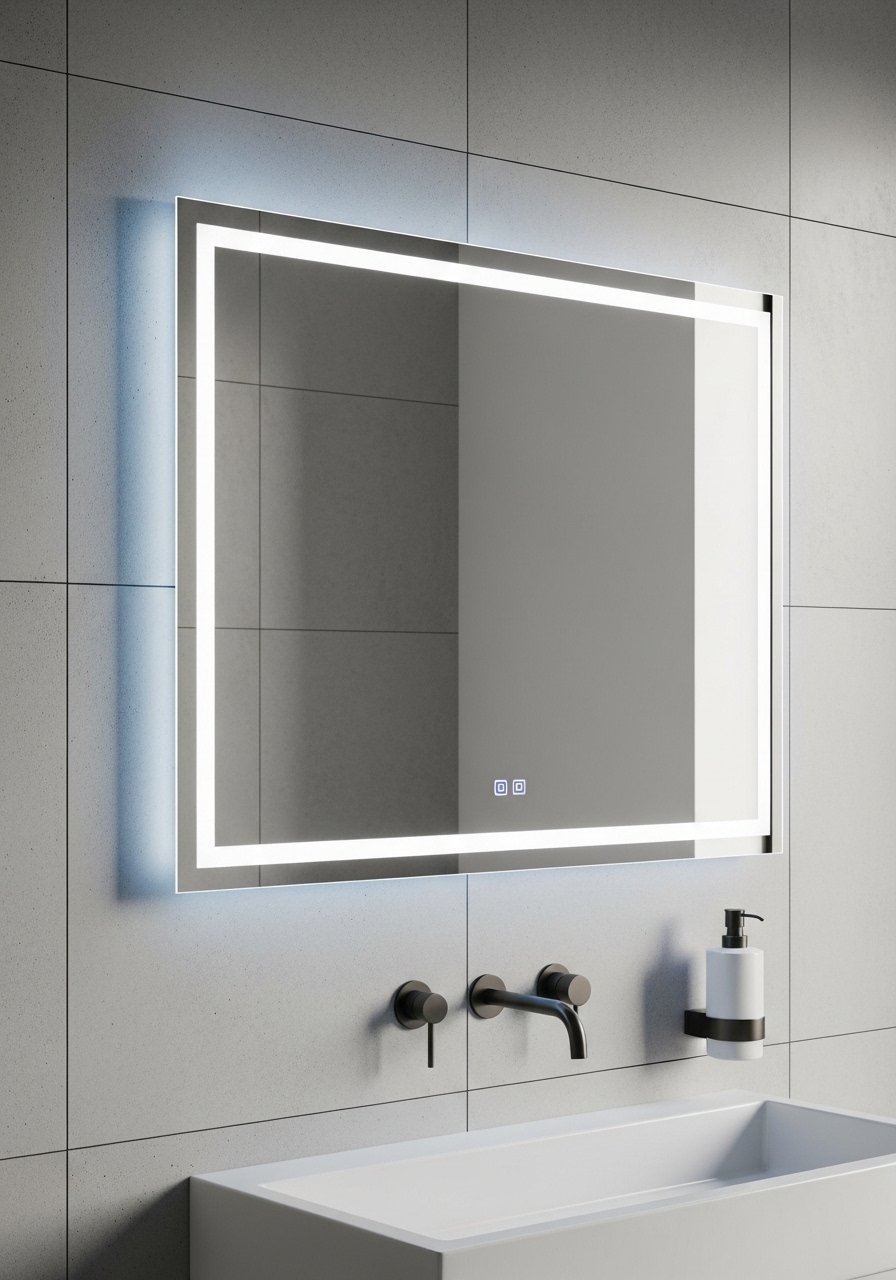
A mirror with integrated LED backlighting adds a soft halo and eliminates the need for extra wall sconces. I pick LEDs with a dimmer so the light reads warm in the morning and cooler when you need task light. Choose a mirror with an IP rating suitable for bathroom use and mount using the manufacturer bracket to avoid custom drilling. This approach is slightly higher budget but cuts down on extra wiring. Look at LED backlit mirrors and a compatible dimmer switch.
People assume LEDs are always cold light, buy the wrong color temperature, and end up with harsh reflections.
Mistake to Avoid: Selecting the wrong color temperature and skipping a dimmer.
11. Peel-and-Stick Tile-Effect Panels For a Statement Strip

For a weekend project, apply peel-and-stick tile-effect panels as a vertical strip behind a mirror or along a shower return to create a focal line. I use panels about 6 inches wide and stack them vertically, leaving a 1 inch margin at top and bottom for a framed effect. Pick PVC-based, waterproof panels rated for steam. This is budget-friendly and reversible, so it works for renters who want a bold statement. Try peel-and-stick tile panels and a smoothing tool.
A classic mistake is aligning panels without planning the seam placement, which reads DIY instead of intentional.
Mistake to Avoid: Starting the strip too close to corners or fixtures so seams end up awkward.
Hanging Habits For Bathroom Walls
Thin coats beat one thick coat every time. If you are painting before hanging, two thin coats of a mildew-resistant paint hold better than one heavy layer. Use mildew-resistant paint for longevity.
Grab removable heavy-duty hooks for gallery walls in rentals. They can support decent weight and keep you from drilling every time you want to move art.
Measure twice and mark once. A simple laser level saves the headache of crooked frames and keeps spacing at clean 6 to 8 inch intervals.
Most people use cotton for drying small plants. Swap to ceramic wall planters with drainage trays so moisture never touches the wall finish.
If you have tile, use tile drill bits and a slow speed. It takes longer but avoids cracks and expensive repairs.
