
Pinterest had me convinced black acrylics would read like studio editorials the first time I sat in a chair. My nails looked fine in photos and dull in person. After a handful of touch-ups, a tech who works at a salon downtown showed me a couple of tiny practical swaps that actually made the photos match real life.
These eleven looks are for people who want a range from quiet and wearable to small-statement, all doable in a single appointment or at-home fill session if you know what to ask for. Most are acrylic-forward with notes on how to adapt to short or medium lengths, plus one or two budget picks per idea. Expect simple cure times, two thin coats most places, and a couple of salon tricks I learned across four clients I tested.
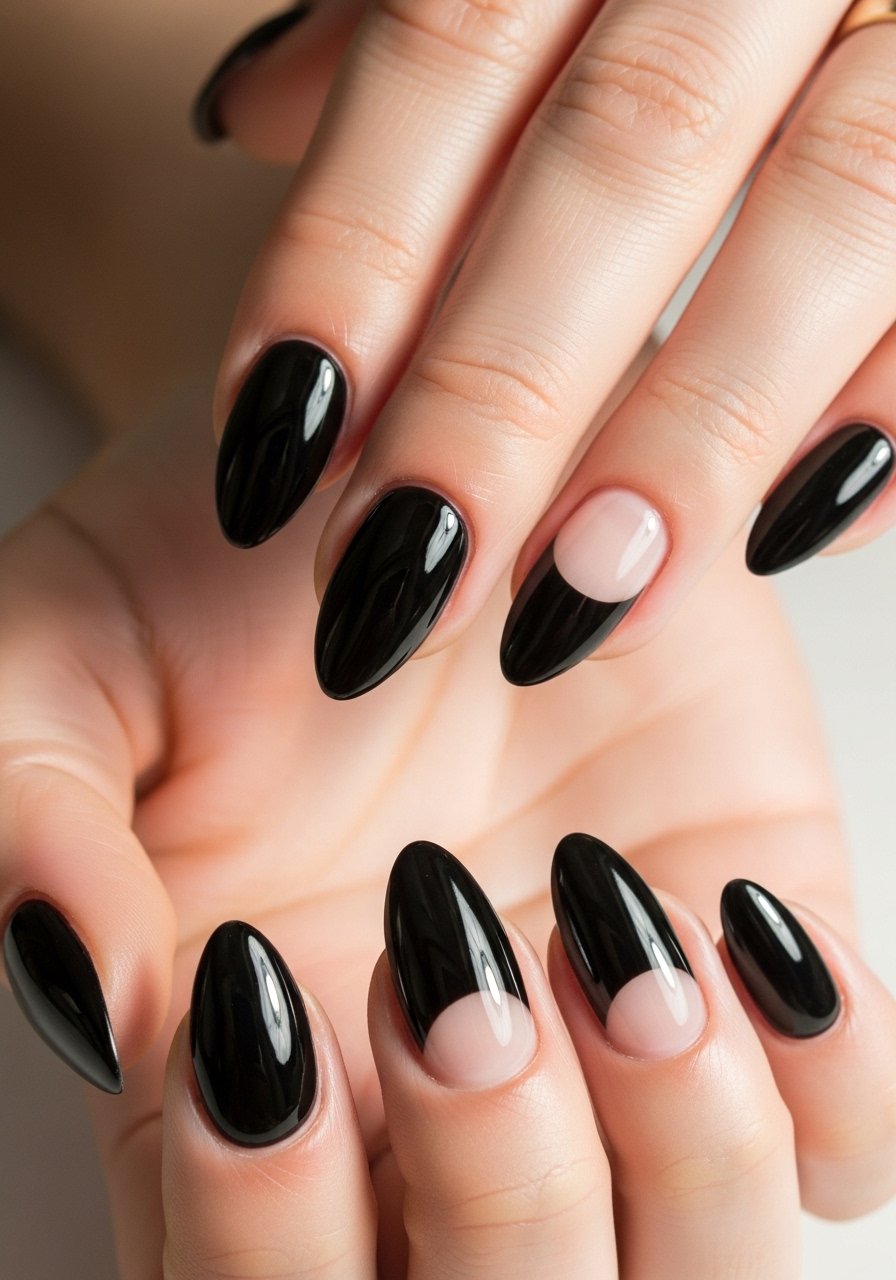
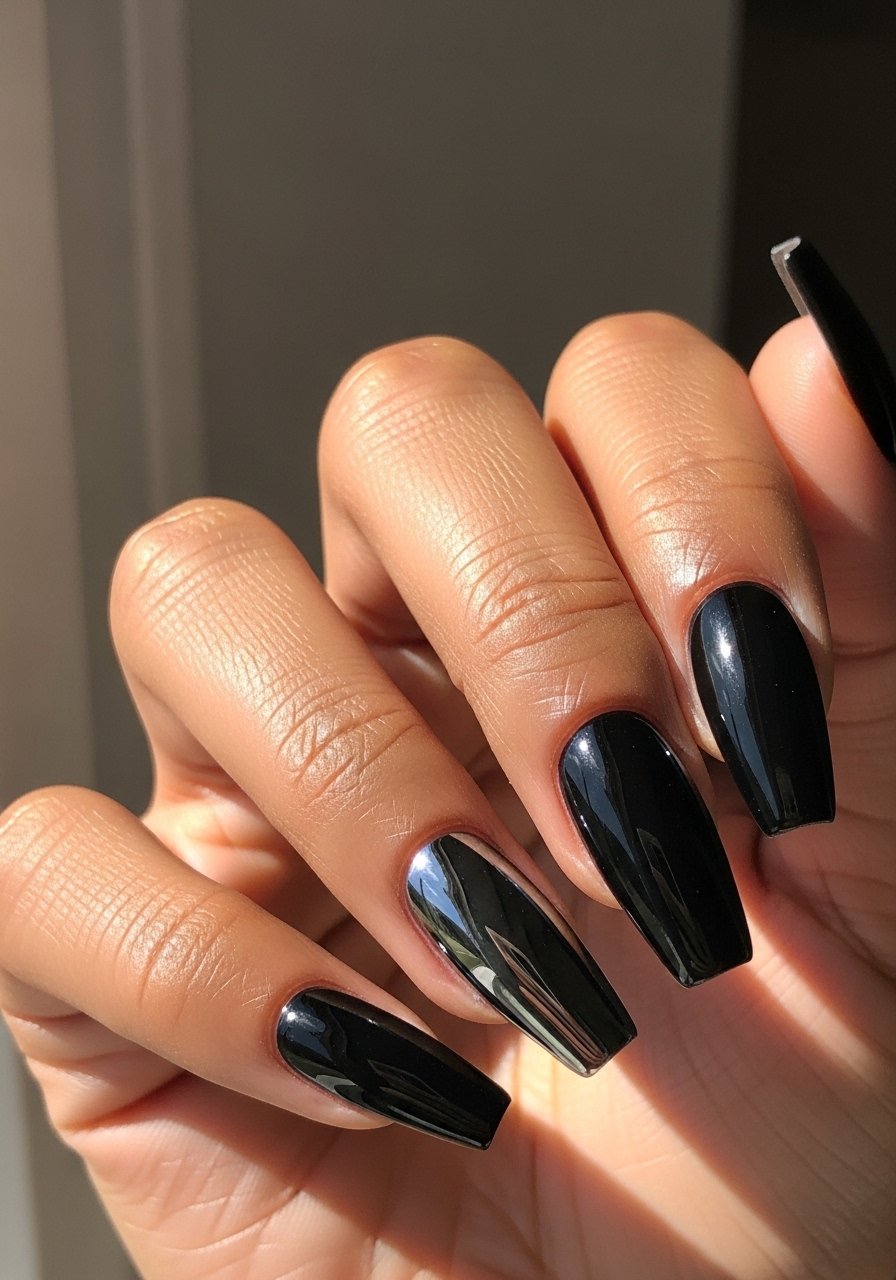
1. Glossy All-Black Coffin
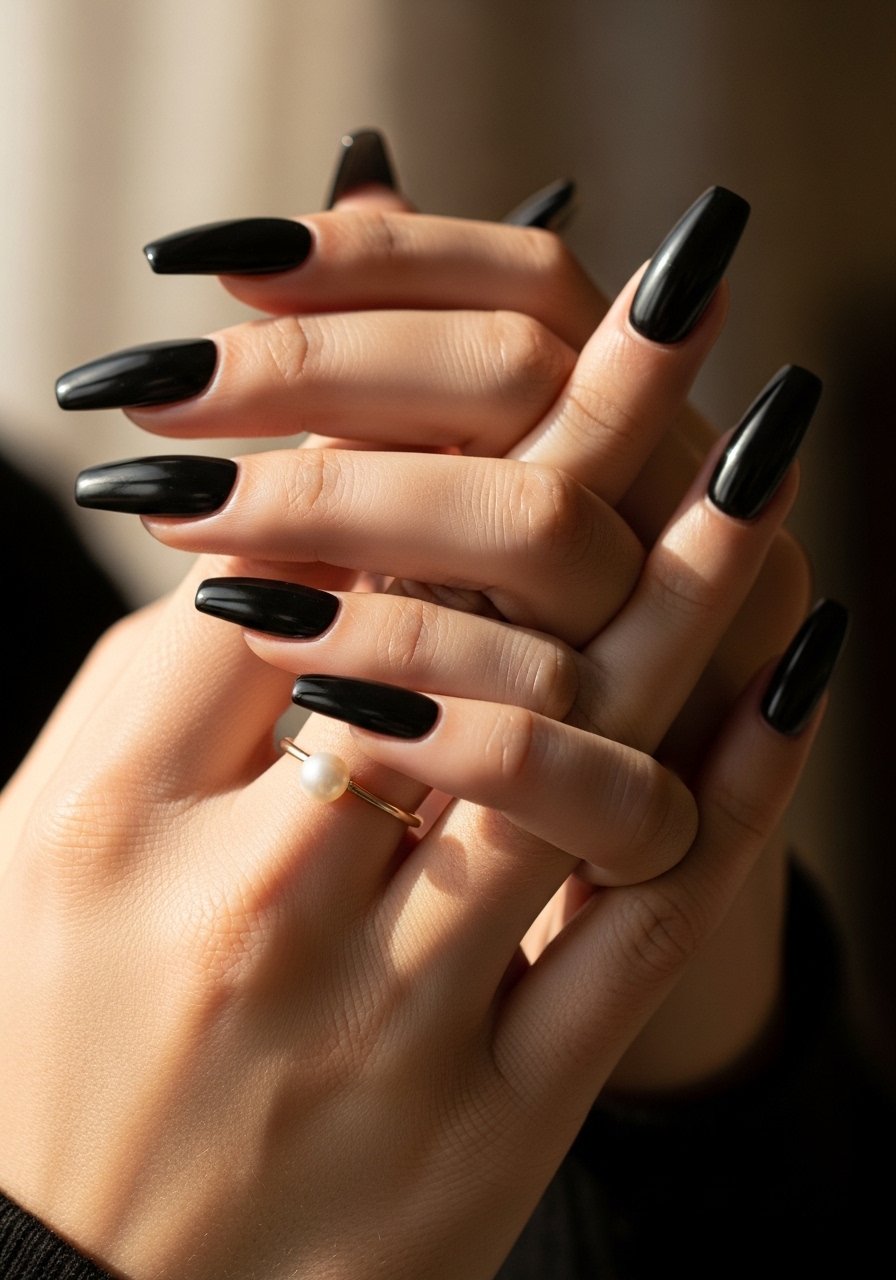
The one-color glossy coffin reads sharp because the surface is mirror-smooth, so light pools instead of scattering. Ask for thin application, two coats of pigmented black acrylic powder layered over a sculpted form, and 30 seconds under an LED lamp per gel seal for a salon finish. This is the easiest look to keep tidy between fills, and it fits anyone who wants a clean, polished vibe. Pair it with a hydrating cuticle oil like cuticle oil for daily maintenance.
Style/Vibe: Classic Gloss
Best For: Long or medium nails, everyday wear
Skill: Beginner
Mistake to Avoid: Applying one thick coat to hide streaks, instead use two thin coats and a fine-grain buffer before sealing.
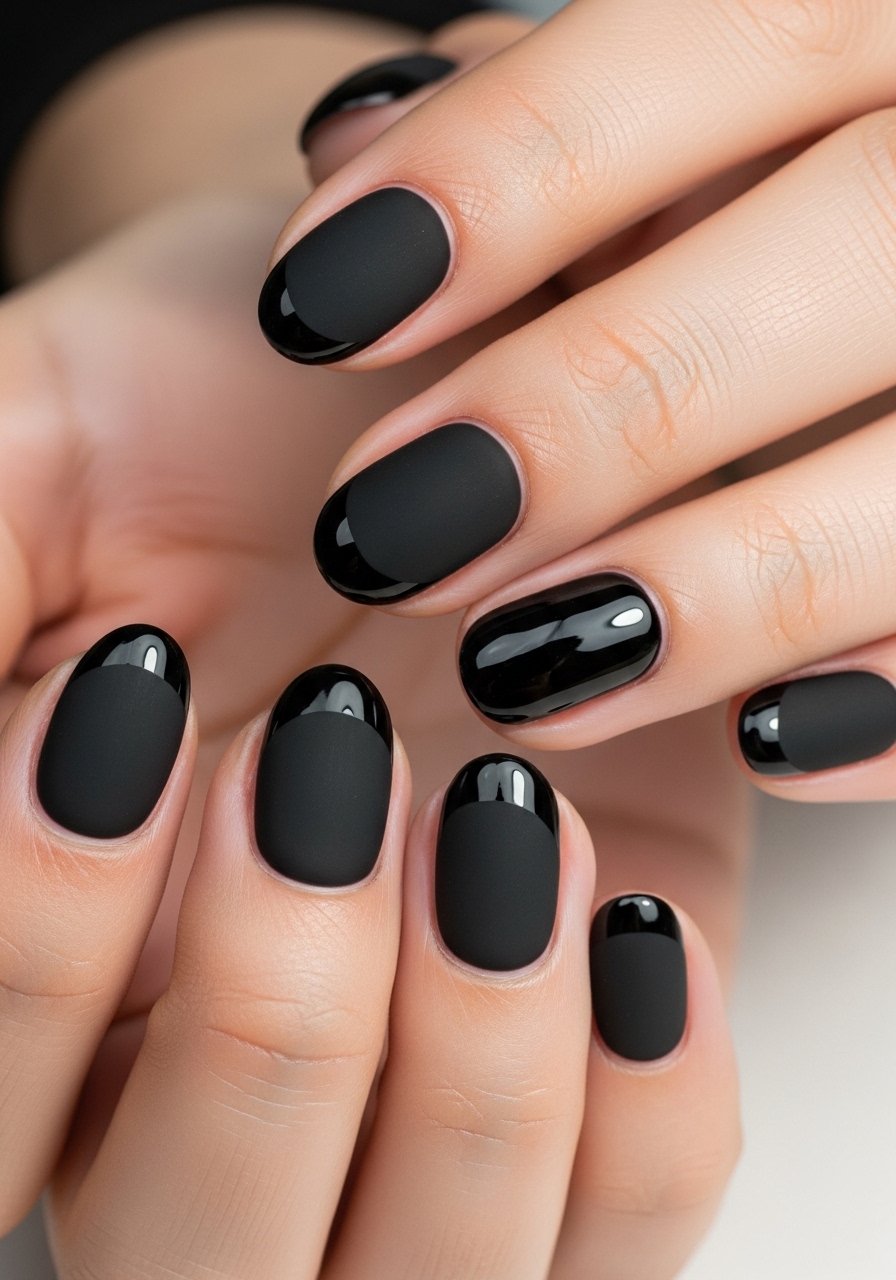
2. Matte Black With Gloss Tips
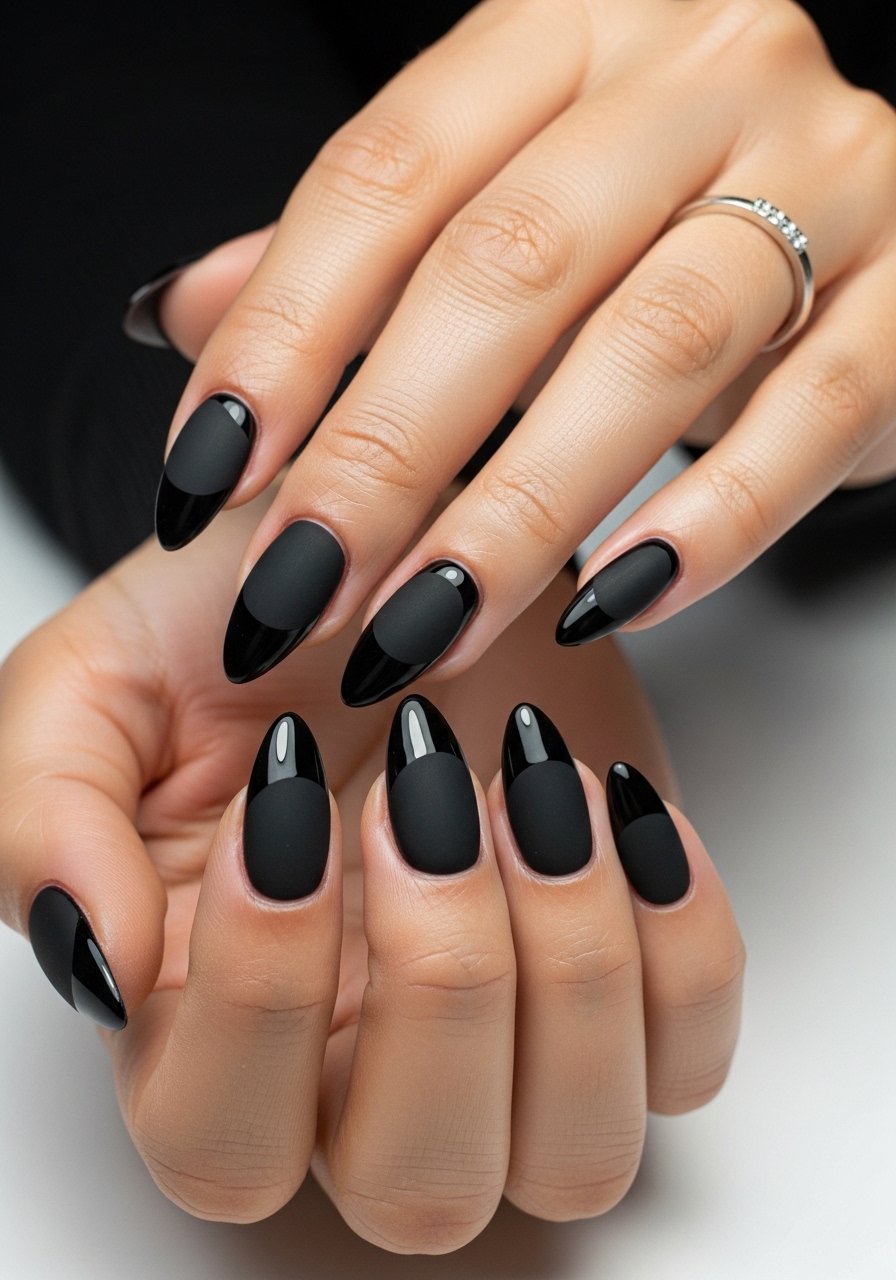
The contrast between matte and gloss makes a simple mani read editorial. The trick is a 70:30 ratio, meaning matte base first, then a thin glossy tip about 2 to 3 millimeters wide. That small glossy strip catches light and looks intentional in photos. This style adapts to short nails by narrowing the glossy stripe. Use a matte top coat like matte top coat and finish tips with a high-gloss gel cured 30 seconds to prevent feathering.
Style/Vibe: Modern Contrast
Best For: Short to medium nails, casual or office
Skill: Beginner
Mistake to Avoid: Trying to buff the matte into the gloss, which dulls the glossy tip edge. Keep each finish separate and cure between layers.
3. Micro French With Studded Cuticles
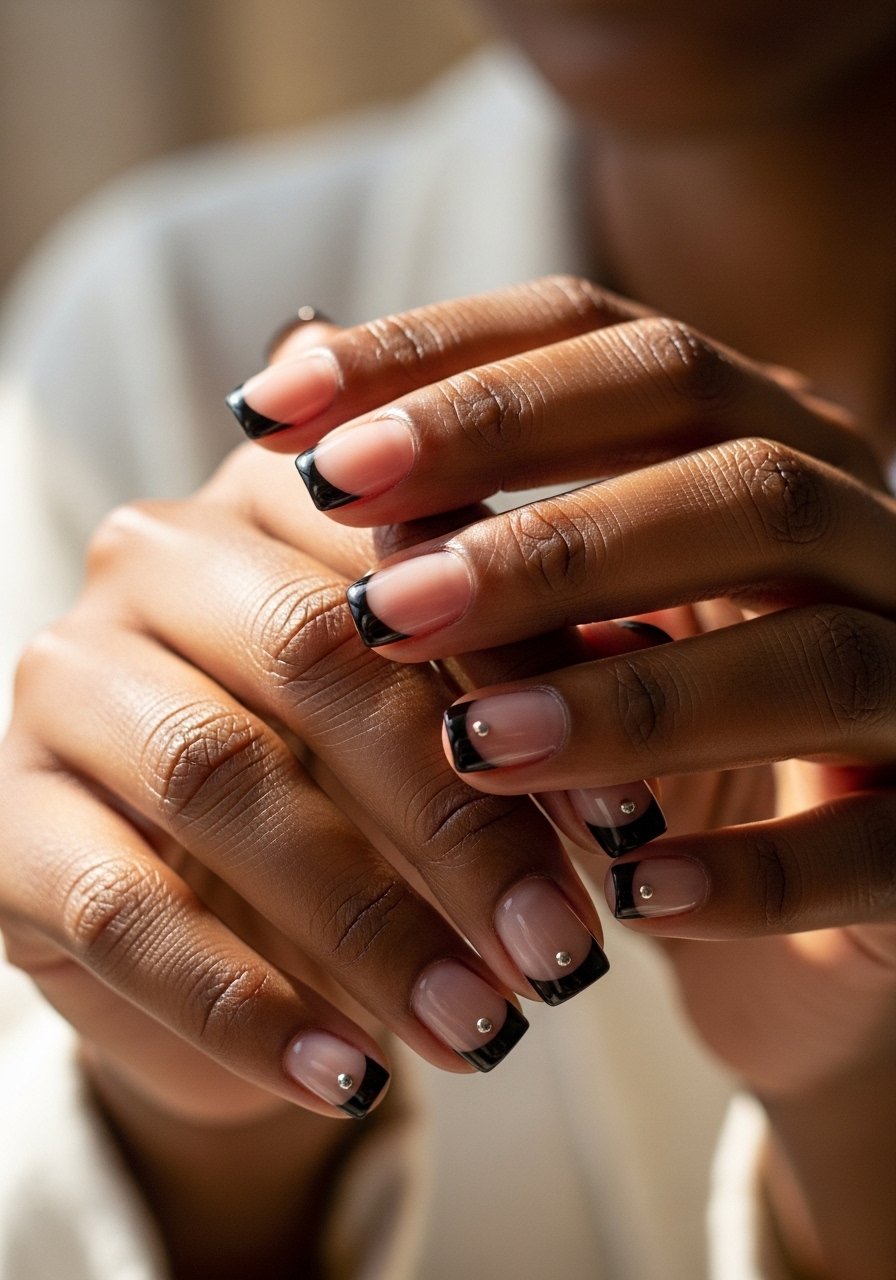
This is French cleaned up for people who need low maintenance. Micro tips are 1 to 2 millimeters and last longer than thick tips, so they survive chips better. Add a single 2 to 3 millimeter stud at the cuticle for a hint of jewelry. Salon techs often press the stud into the uncured gel and cure 15 to 20 seconds, which keeps it from lifting. Try a small rhinestone kit like nail rhinestone kit if you want to DIY.
Style/Vibe: Understated Edge
Best For: Short nails, hands-on jobs
Skill: Intermediate
Mistake to Avoid: Glueing studs on top of fully cured top coat, which makes them pop off quickly.
4. Negative Space Geometric
Negative space keeps black from feeling heavy and gives the eye places to rest. Use a 1:1 ratio of painted area to bare acrylic for balance across the hand. Tape or vinyl guides make the crisp lines possible in about 15 minutes per hand. This is a slightly more advanced salon job but worth it if you want a sculptural look that photographs well without heavy gloss.
Style/Vibe: Architectural Minimal
Best For: Medium to long nails, statement looks
Skill: Advanced
Mistake to Avoid: Freehanding thin negative lines without guides, which results in uneven spacing and sloppy photos.
5. Sheer Black Ombre
Sheer ombre reads polished and less severe than opaque black, so it is easier to wear day to day. Use three thin layers, each blended with a small brush, and cure 20 to 30 seconds between passes to lock the gradient. It photographs well because the translucency catches depth. This is a go-to if you like black but do not want a solid, heavy color.
Style/Vibe: Soft Gradient
Best For: Long nails, evenings and events
Skill: Intermediate
Mistake to Avoid: Applying thick blobs of powder at once. Layer and blend with a small brush for a smooth fade.
6. Reverse Moon Accent
Swap the French for a reverse moon in the cuticle area to make nails look longer. Keep moons about 2 to 3 millimeters wide and paint the rest in glossy black. The crescent shape creates an optical lift, especially on short nails. It takes under 10 minutes per nail with a steady hand or guides and one thin gel layer to seal.
Style/Vibe: Retro Modern
Best For: Short to medium nails, flattering for short nail beds
Skill: Beginner
Mistake to Avoid: Making the moon too large, which shortens the appearance of the nail instead of elongating it.
7. Black Marble Accent Nail
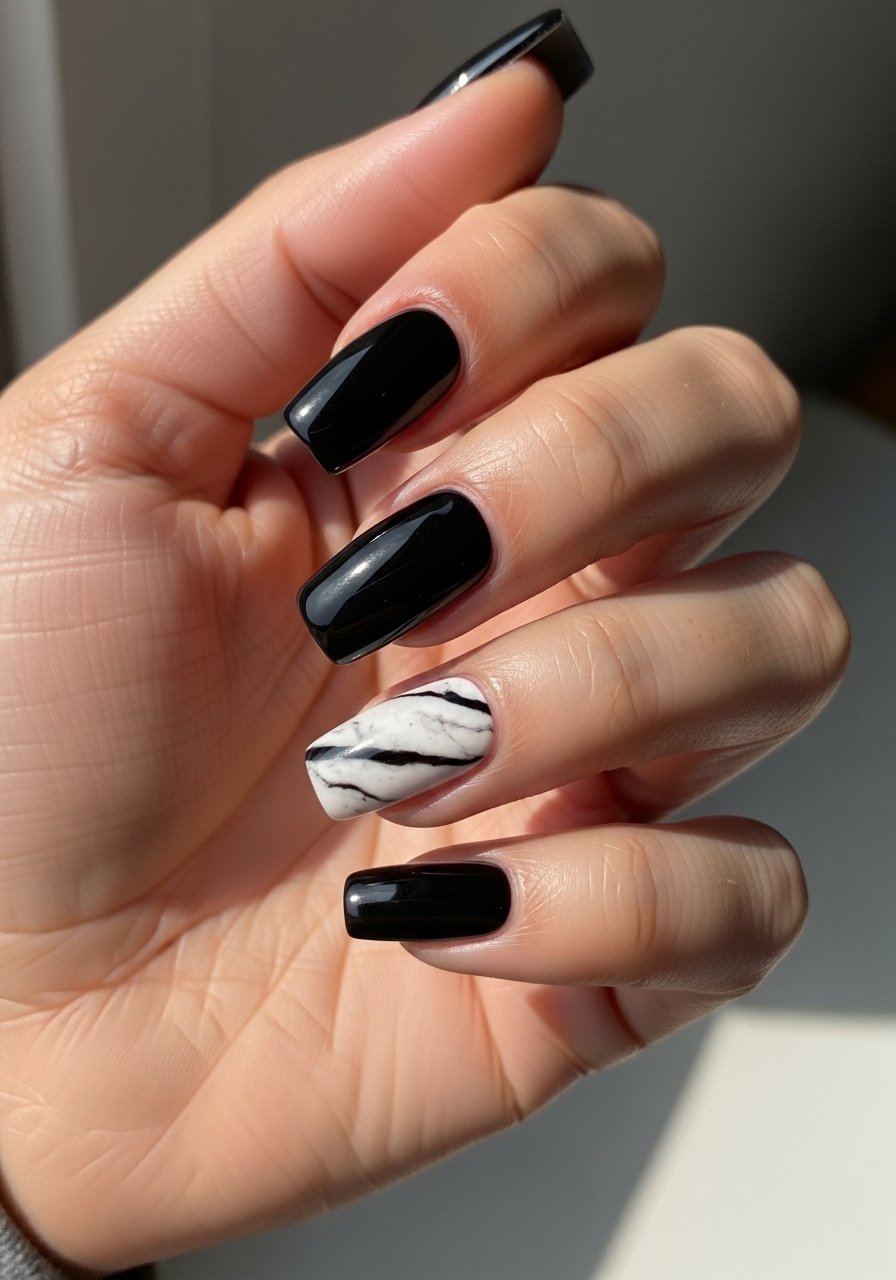
A single marble nail reads luxe without being fussy. Create the veins with a 0.5 millimeter liner brush and one drop of white gel into still-wet black, then swirl gently. Top with a glossy seal and cure 30 seconds. This pairs well with matte or glossy neighbors and is a gap many other lists skip, because it looks custom even when done in a single salon session.
Style/Vibe: Luxe Accent
Best For: Medium nails, date nights or casual glamour
Skill: Intermediate
Mistake to Avoid: Overworking the swirl, which turns veins muddy instead of crisp.
If any of these ideas have you ready to actually try something, here are the items I reach for most.
Black Acrylic Essentials
Tools & Basics:
- Acrylic nail kit (~$25-45), everything from forms to monomer for practice.
- LED nail lamp (~$20-40), pick a 30 to 60 second cure option.
- Nail forms (~$8-15), reusable paper forms for shaping.
Finishes & Extras:
- Matte top coat (~$6-12), for that velvety base.
- Glossy top coat gel (~$8-20) for mirror shine.
- Nail rhinestone kit (~$7-15) for subtle cuticle bling.
- Cuticle oil pen (~$5-10) because it keeps acrylics looking fresh between fills.
8. Gloss-Over Matte Tips
Flip the matte and glossy placement by painting a glossy half-moon at the tip over a matte base. The reflected light at the edge reads like a micro French and is very forgiving of growth. Two thin passes of the gloss, each cured 20 seconds, keeps the edge from lifting. This look adapts to all lengths and is a neat way to introduce contrast without full gloss.
Style/Vibe: Subtle Flip
Best For: Short nails, low-maintenance wearers
Skill: Beginner
Mistake to Avoid: Rushing the cure for the glossy half-moon, which causes bubbling and lifting.
9. Black Chrome Accent
Chrome powder on a black base deepens the shine and gives a metallic shimmer that photographs like liquid. Apply over a cured glossy black base and buff in with a silicone tool for a 20 to 30 second finish, then top coat and cure. Chrome wears best as an accent on one or two nails because full-hand chrome can show scratches more readily.
Style/Vibe: Metallic Edge
Best For: Medium nails, nights out
Skill: Intermediate
Mistake to Avoid: Applying chrome to a matte base, which prevents the powder from bonding and creates patchiness.
10. Micro-Stripe Minimalism
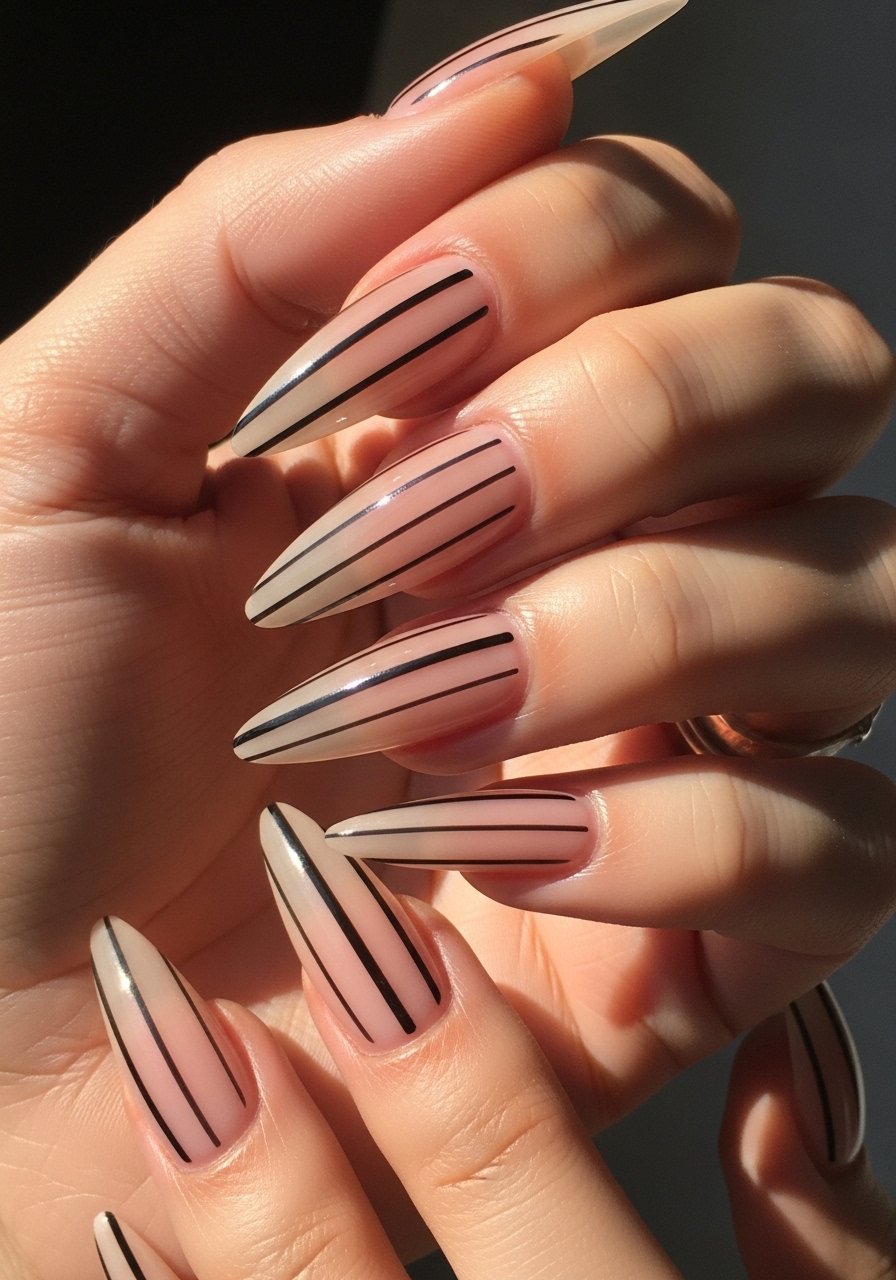
Thin parallel stripes, spaced about 1.5 to 2 millimeters apart, read modern and graphic without being loud. Use a 0.3 millimeter striper brush and steady hand or striping tape. This look photographs well because the negative space balances the black lines. It is great on long nails, but narrow the stripe spacing on shorter nails to keep proportions right.
Style/Vibe: Graphic Minimal
Best For: Long nails, creative professionals
Skill: Advanced
Mistake to Avoid: Making stripes too thick, which turns the design into heavy bars instead of delicate lines.
11. Textured Velvet Black
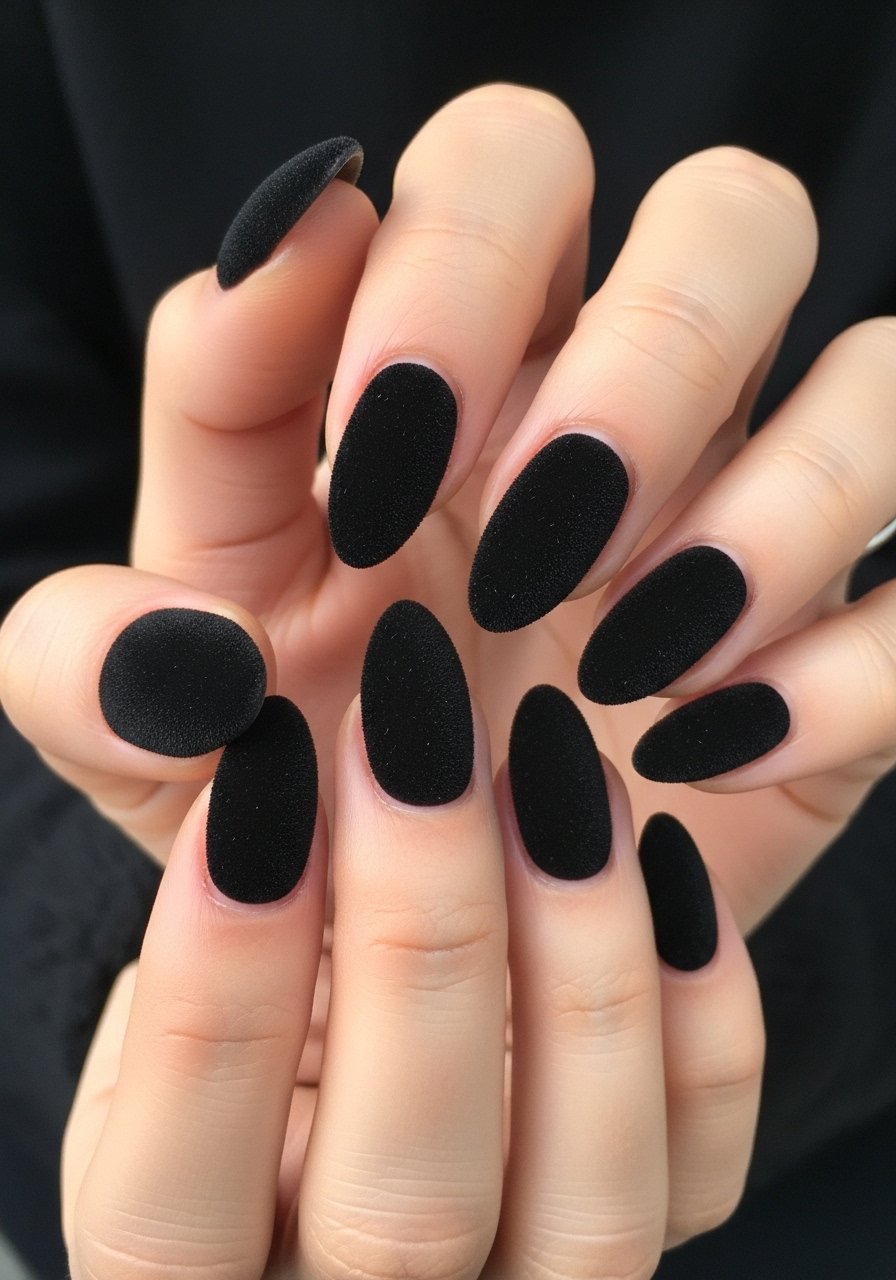
Velvet finishes add depth without gloss. The textured powder is applied over a tacky layer and sealed with a light mist of no-wipe top coat in a 1:3 dilution to avoid losing texture. This is one of the gaps I noticed other lists skip, because it looks high-end but can be achieved in a single salon visit and stays interesting between fills.
Style/Vibe: Tactile Matte
Best For: Medium nails, seasonal interest
Skill: Intermediate
Mistake to Avoid: Using a heavy top coat, which flattens the texture. Use a light seal and spot-cure.
How To Keep Black Shine
Thin coats beat one thick coat every time. Three thin layers of a pigmented black acrylic and a glossy top coat cure smoother and chip less than one heavy layer. Use an LED lamp set to 30 seconds per layer for most gels.
Grab cuticle oil and use it twice a day. Hydrated cuticles make acrylic edges sit flush and prevent lifting at the sidewalls.
I always keep a small mini top coat in my bag for quick touch-ups. A thin coat over small chips keeps photos looking clean between salon visits.
Most people getting their nails done these days are asking for gel, not acrylic. If you prefer acrylic look and strength, tell your tech you want acrylic with gel polish seal, it gives the longevity of acrylic with the shine of gel.
