
A pinned photo that looked like glassy almond nails lived on my board for months, until my first attempt bubbled and peeled by day three. I kept trying to copy the exact shape and polish routine, and the results never matched. After swapping techniques, listening to a tech who works at a salon downtown, and actually measuring my free edge extensions, I finally stopped wasting product and screenshots.
These picks are for someone who wants salon-looking almond shape without a full acrylic set. Expect intermediate skill, a low-to-mid budget depending on lamp and gel choices, and about 45 to 75 minutes per hand when you include shaping and thin-layer curing. Most looks here use a 1.5 to 2 millimeter free edge as a visual rule, and I note where a simpler two-step version works for beginners.
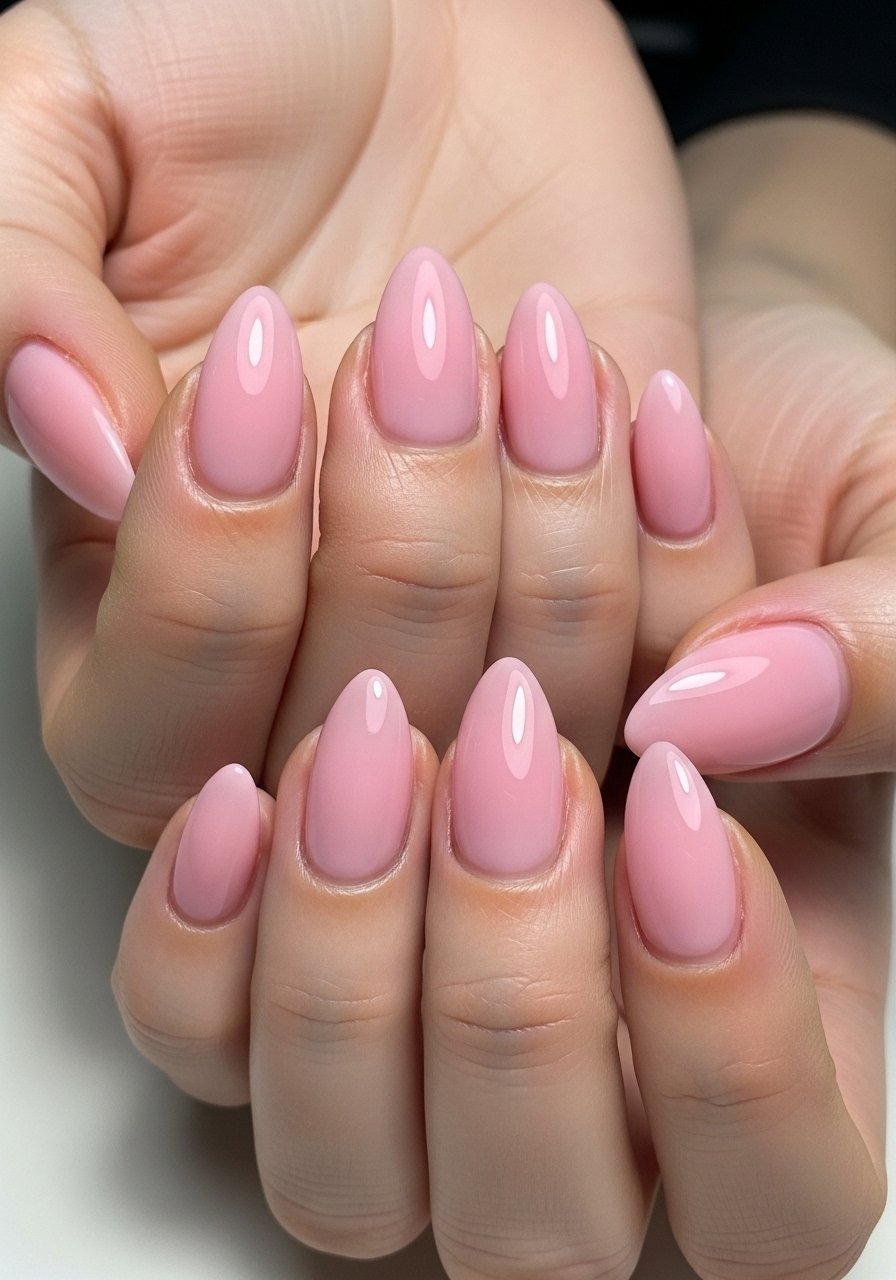
1. Glassy Clear Builder Gel Overlay

Style/Vibe: Clean glass overlay
Best For: Medium to long natural nails, everyday wear
Skill: Intermediate
A clear builder gel overlay does exactly what it says, it gives a smooth, glossy domed surface that reads like a salon overlay in photos. The trick is thin even passes, two 60-second cures under a 48W LED, and a targeted apex about 1.2 to 1.5 millimeters to keep the profile strong without looking bulky. I use a lightweight clear builder like clear builder gel for the first layer, then a second feathered layer for shine. This is the go-to when you want the almond silhouette without color work.
Mistake to Avoid: Applying one thick blob of gel to try to build shape in a single pass.
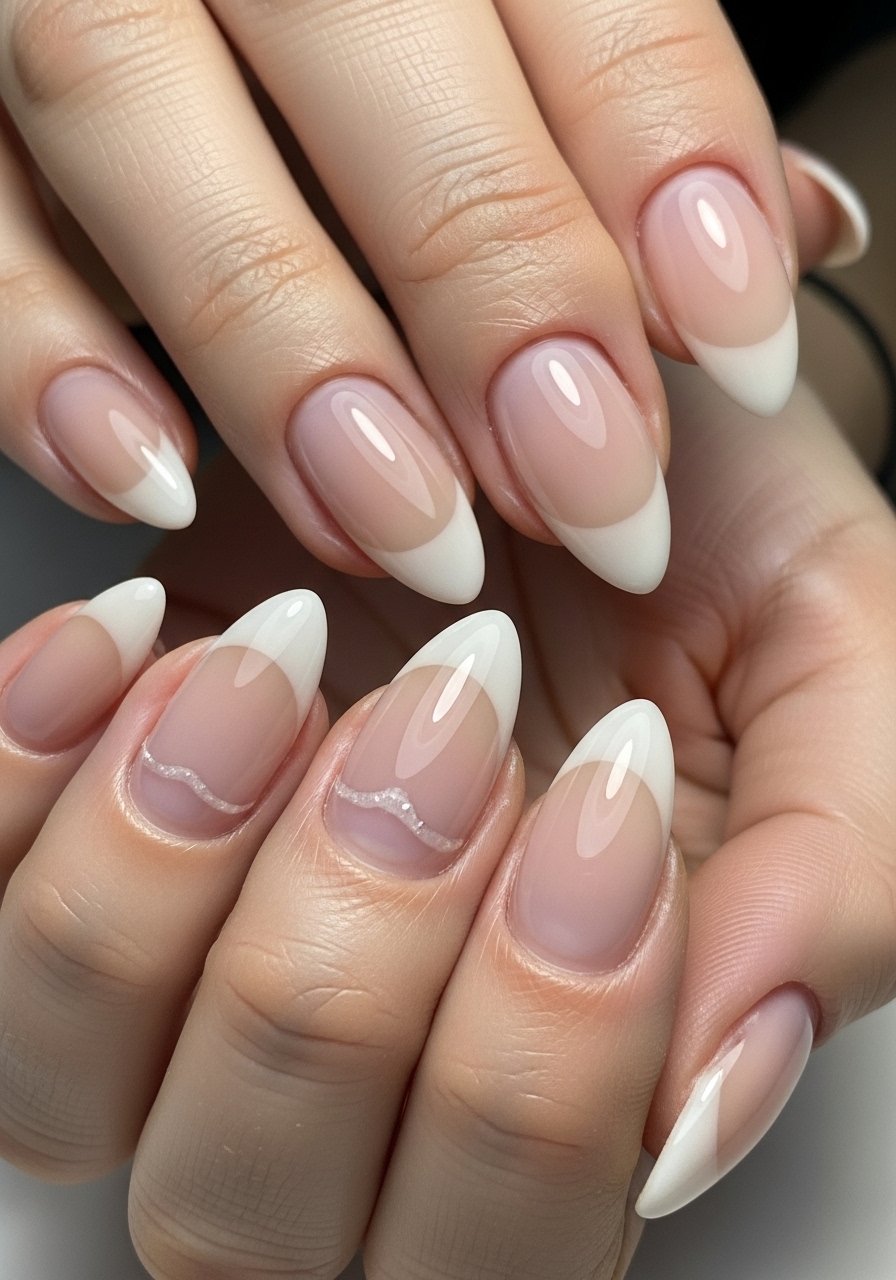
2. Soft French With Builder Gel Smile
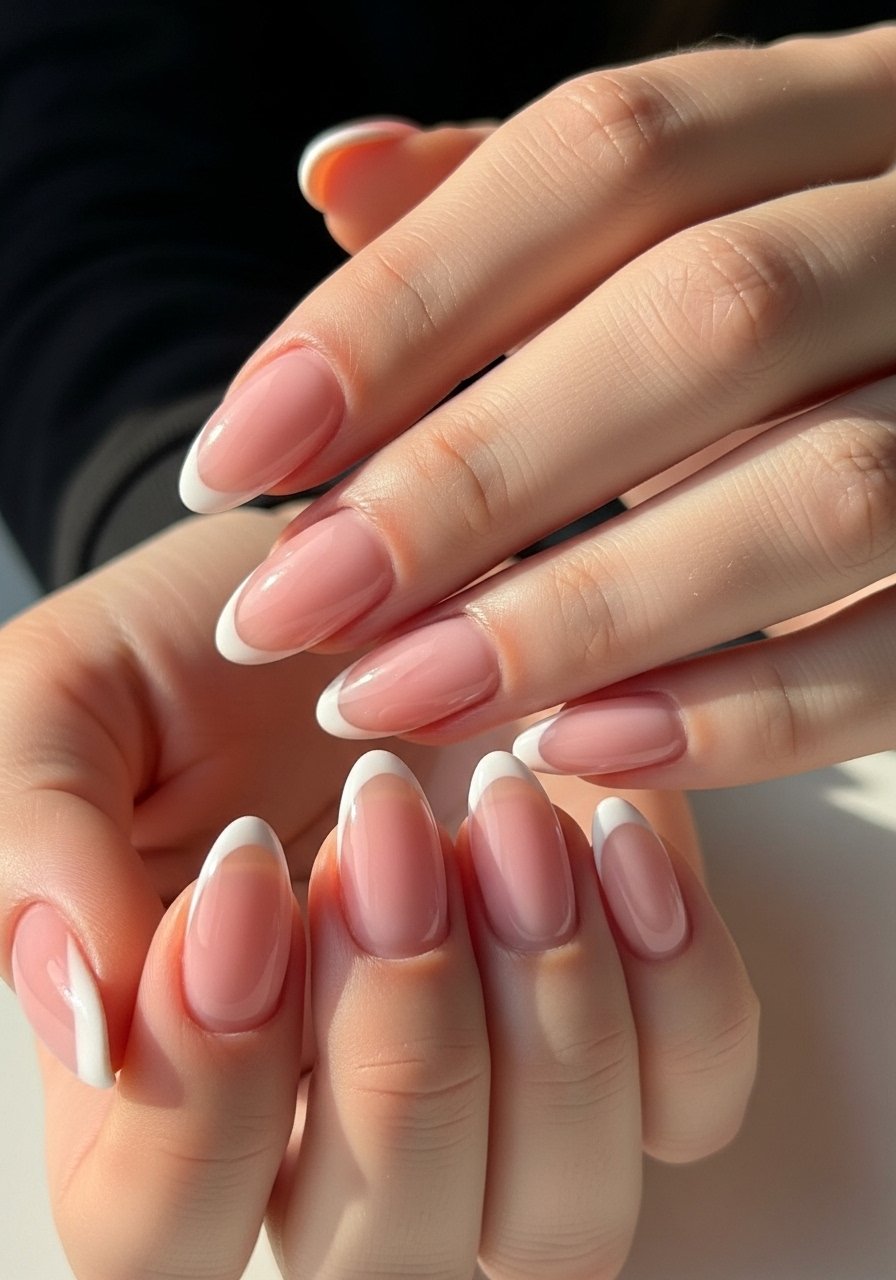
Style/Vibe: Subtle French with structure
Best For: Short to medium nails, work-friendly events
Skill: Beginner to intermediate
A soft French made with builder gel holds a cleaner smile line longer than polish. Start with a 70 percent sheer pink builder for the base, cure, then paint the smile line with a dense brush and a slightly thicker white builder gel, curing at 60 seconds again. The visual result is a lifted, clean smile line that lasts through typing and light chores. I pair it with a thin top layer to seal. For a budget pick try sheer builder gel.
Mistake to Avoid: Skipping a cured base before adding the smile line, which leads to bleeding or uneven edges.
3. Sculpted Almond With Short Extension
Style/Vibe: Sculpted short almond
Best For: Short natural nails, practical wear
Skill: Intermediate
Sculpting a short almond with builder gel gives you the almond silhouette without a long free edge. I use forms and add just 1.5 to 2 millimeters of extension, focusing the apex toward the center. After curing, I lightly file the sidewalls to create a tapered almond rather than a sharp point. A matte top coat over builder gel creates a lived-in finish that hides tiny filing marks. Try a reliable form set like nail forms if you are sculpting at home.
Mistake to Avoid: Overextending the free edge when your natural nail bed is short, which causes premature lifting.
4. Ombre Builder Gel Almond
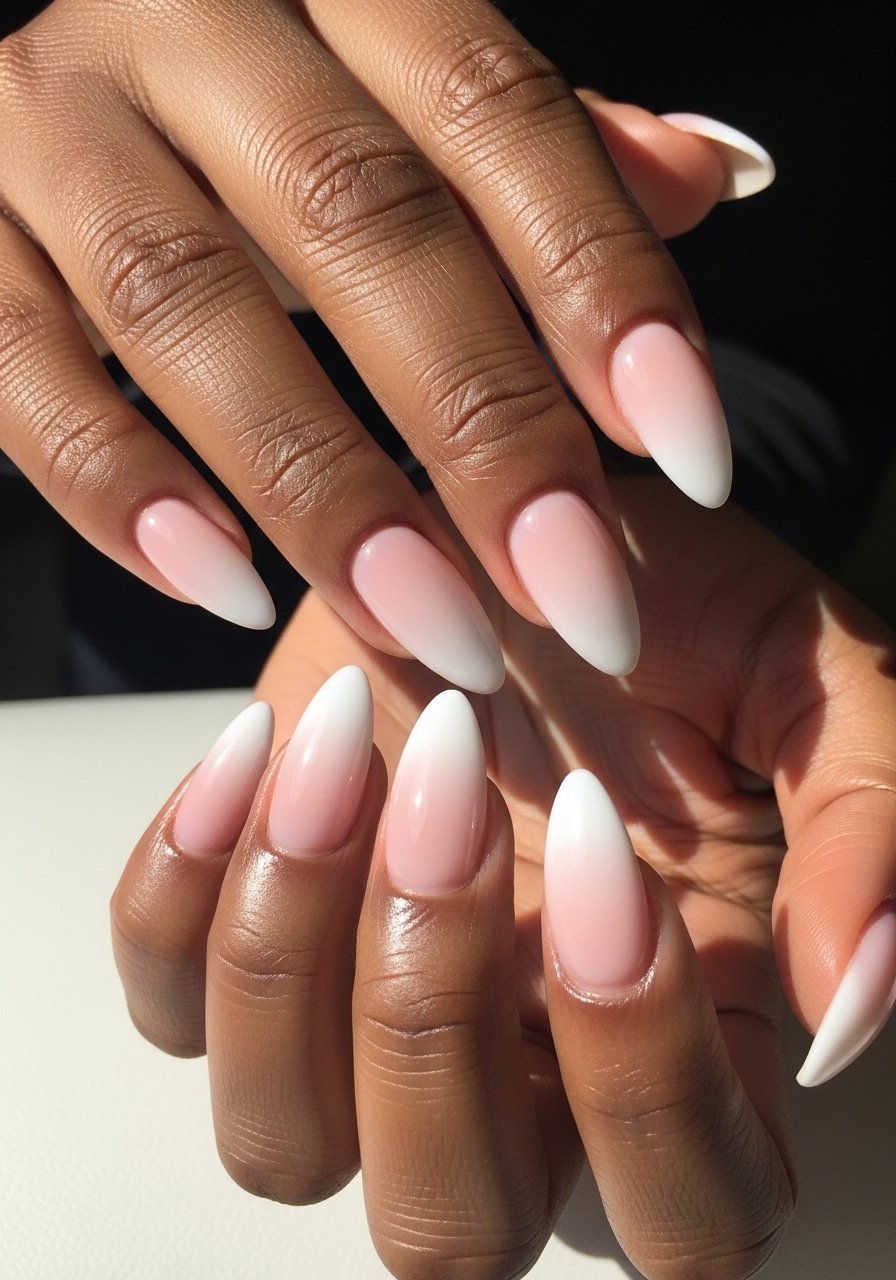
Style/Vibe: Soft ombre gradient
Best For: Medium to long nails, bridal or photos
Skill: Advanced
A builder gel ombre is a two-step layering process. Blend sheer pink and white builder gel on the brush then sweep from cuticle to tip for a seamless fade. I use a 70/30 mixing rule on the brush and cure in short 30-second bursts to allow gentle blending without running. The result photographs beautifully, with a durable structure beneath the color. Use a thin final clear layer to smooth and then cure for 60 seconds.
Mistake to Avoid: Trying to blend with fully cured layers, which gives a harsh line instead of a gradient.
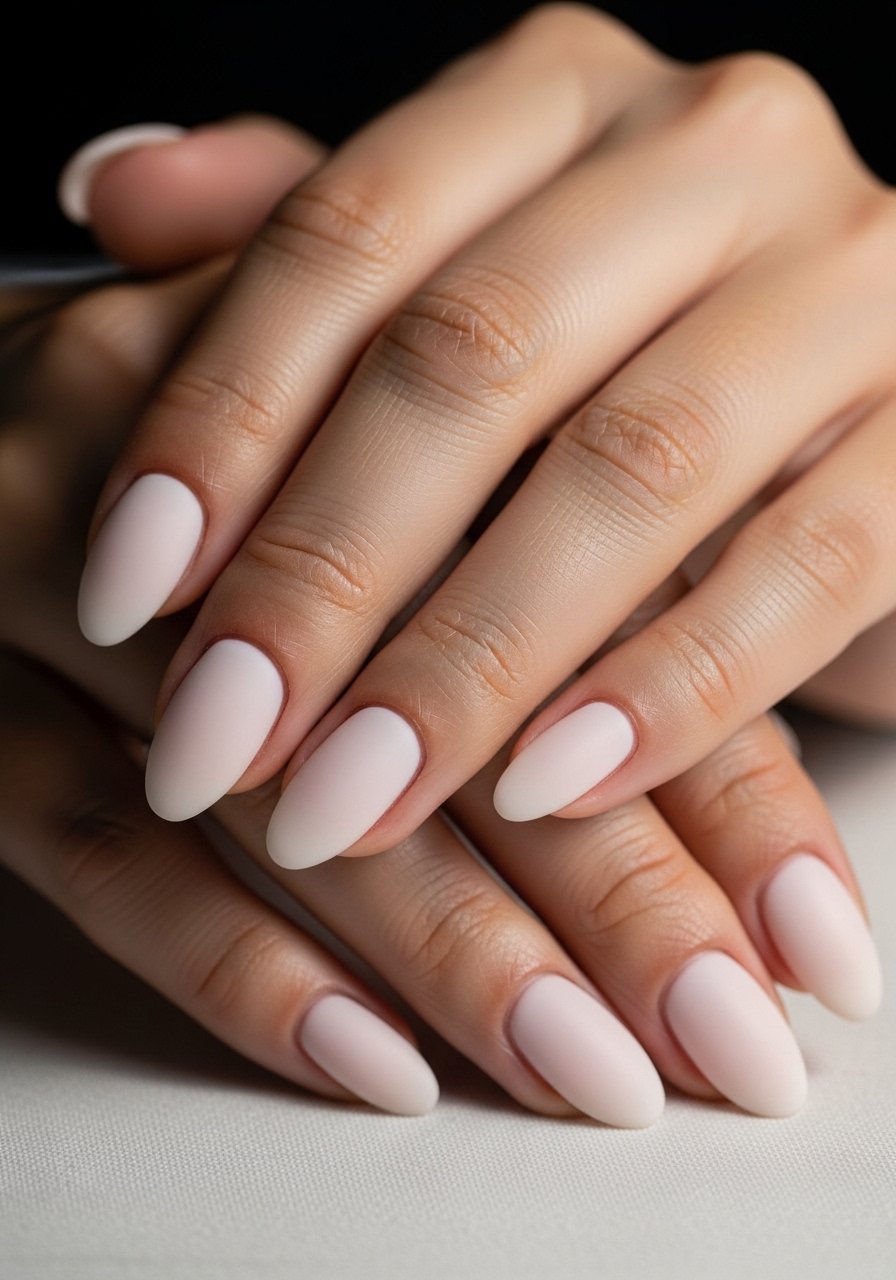
5. Matte Almond With Gloss Tip

Style/Vibe: Textured contrast
Best For: Medium nails, casual to dressed-up looks
Skill: Intermediate
Matte base with a glossy tip reads modern and intentional. Apply builder gel in a matte finish or buff down a glossy cure and then spot-cure the tip with a gloss top coat for contrast. I usually do two thin matte layers then a single gloss pass at the tip, curing each step. It is a cheap way to get a two-texture effect without extra length. For a long-wearing matte try matte top coat.
Mistake to Avoid: Applying matte top coat over a not-fully-cured gel, which causes patchy dull spots.
6. Sculpted Negative Space Almond
Style/Vibe: Graphic negative space
Best For: Long nails, statement style
Skill: Advanced
Negative space with builder gel keeps the structure while leaving skin exposed for a modern look. Use thin masks of builder gel for your shapes, cure, then build structure around them. I create edges at 1 millimeter thickness for the open areas so the piece is strong but looks airy. This works well when you want a bold, photo-ready hand without extra polish layers. A tiny striping brush helps, and I keep curing short for control.
Mistake to Avoid: Freehanding large open areas without reinforcing surrounding gel, which leads to breakage at the void edges.
7. Jelly Builder Gel Tint
Style/Vibe: Sheer jelly tint
Best For: Medium nails, low-effort glow
Skill: Beginner
Jelly builder gel gives a glassy, stained look that is forgiving in application. One to two thin layers of tinted builder produce a depth that looks polished rather than painted. I like using a single thin coat cured for 60 seconds, then a second for strength. It photographs like an inner glow and is perfect for those who dislike opaque colors but want a long-lasting finish. Try a jelly tint like sheer tint builder gel.
Mistake to Avoid: Applying tint too thick, which causes wrinkling during cure.
If any of these ideas have you ready to actually try something, here are the products doing most of the work.
Starter Kit For Builder Gel Almonds
Tools & Lamps:
- 48W LED nail lamp (~$25-40), for consistent curing across brands.
- Nail forms (~$8-15), necessary for short sculpted almonds.
- Thin gel brush (~$6-12), for precise apex and smile lines.
Gels & Finishes:
- Clear builder gel (~$12-20), the base for overlays.
- Sheer pink builder gel (~$10-18), for natural bases and ombres.
- Matte top coat (~$8-14), for texture contrast.
- Gloss top coat (~$8-15), seals and shines.
- Builder gel remover wraps (~$6-12), if you plan to remove at home.
- Cuticle oil (~$4-12), finish every set with this.
8. Pearl-Infused Builder Gel Almonds
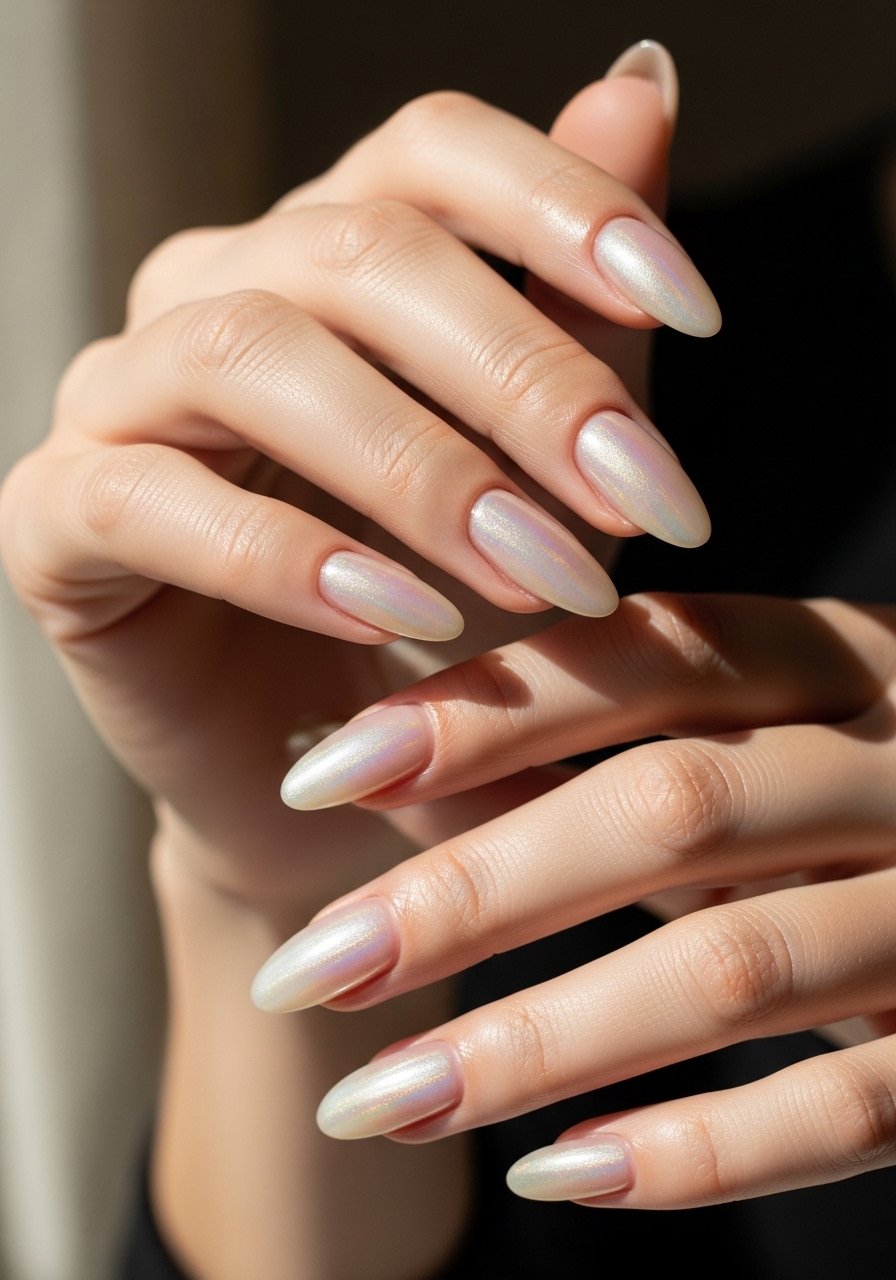
Style/Vibe: Soft pearl shimmer
Best For: Photos, evening events
Skill: Intermediate
Mix a pinch of pearl pigment into clear builder gel at roughly a pea-sized ratio to a thumb-sized clear gel puddle for a delicate shimmer. Apply thinly so light scatters across the dome rather than puddling. Cure in 60-second bursts to lock shimmer in place. The outcome reads slightly luminous in photos without being glittery. A small jar of pearl pigment like micro pearl powder goes a long way.
Mistake to Avoid: Adding too much pigment at once, which creates an opaque, gritty finish.
9. Sculpted Stiletto-to-Almond Hybrid

Style/Vibe: Edge without extreme point
Best For: Long nails, editorial looks
Skill: Advanced
This hybrid gives a sharp silhouette that still reads wearable. Build a slightly raised center apex, then file sidewalls into a softer curve to avoid the fragile stiletto point. I aim for a 1.8 millimeter peak for height then file to a rounded tip for strength. Use a medium grit file, then a fine for smoothing. A flexible builder gel helps avoid snapping at the tip.
Mistake to Avoid: Leaving a raw sharp point after cure, which breaks quickly in daily use.
10. Encapsulated Dried Flower Almonds
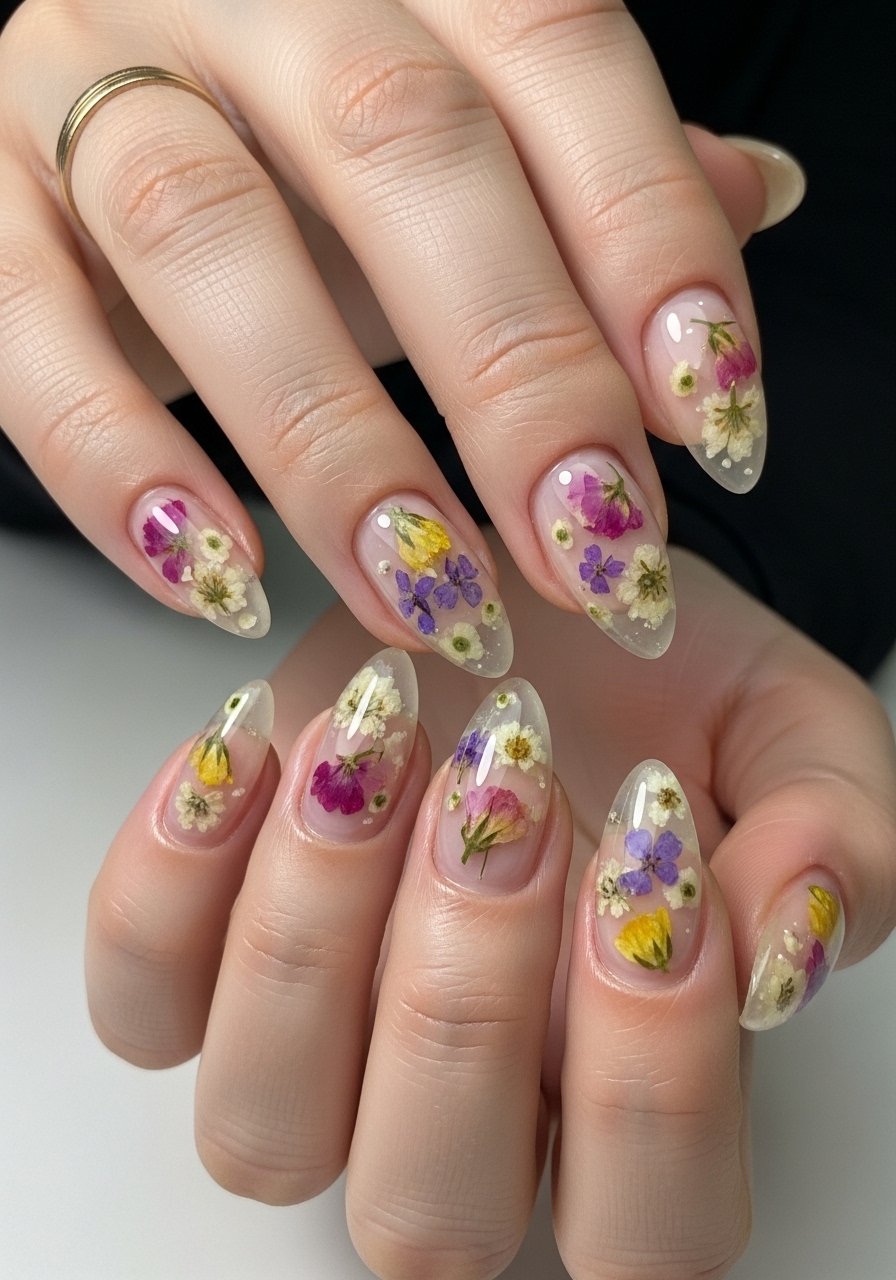
Style/Vibe: Tiny encapsulation detail
Best For: Medium nails, special occasions
Skill: Intermediate
Encapsulating small pressed flowers in builder gel creates a layered, dimensional look. Use tiny pieces, press them on a cured tacky layer, then encapsulate with a thin clear builder. Cure each layer for 60 seconds and finish with a glossy top. Keep pieces flat and close to the apex to avoid catching. I like using tweezers and a small brush to tuck petals in.
Mistake to Avoid: Trapping air bubbles under flower pieces by not flattening them before encapsulation.
11. Foil Accent Almonds

Style/Vibe: Metallic accents
Best For: Medium nails, date nights or parties
Skill: Beginner to intermediate
Gold or silver foil applied over a tacky builder layer and then encapsulated in a clear top layer gives a luxe vibe without bulk. I tear foil into small pieces, press them into the tacky surface, then seal with a thin clear layer. The result looks high-end in photos and holds well through daily tasks. Try a starter foil kit like nail foil pack.
Mistake to Avoid: Using foil pieces that are too large which cause lifting along the free edge.
12. Sculpted Marble Almonds
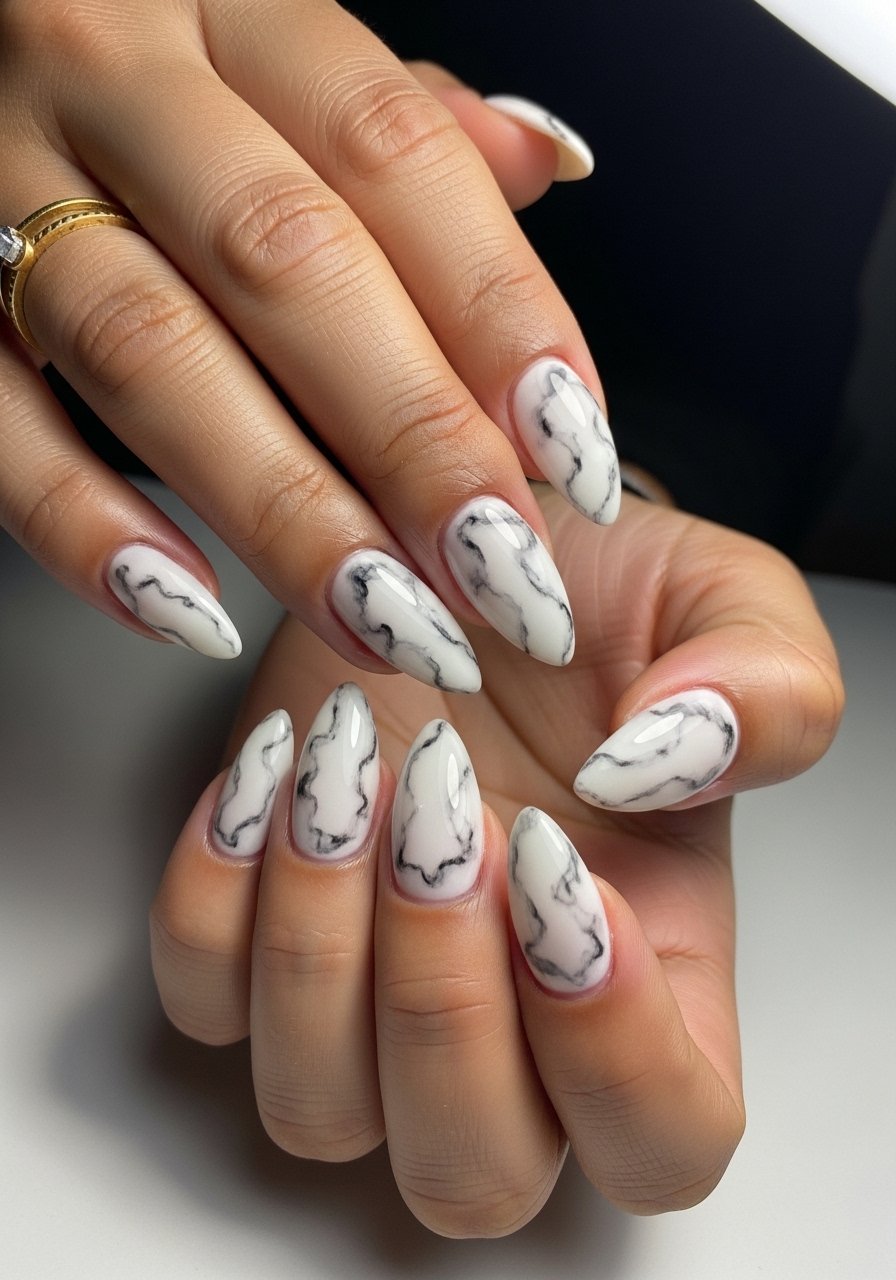
Style/Vibe: Subtle marble veins
Best For: Long nails, editorial or refined looks
Skill: Advanced
Marble in builder gel needs a light hand. Use a mostly clear base, then drag micro lines of gray builder with a fine brush and soften by dipping the brush in a little clear builder to feather edges. Cure in quick 15 to 20-second pulses to hold the pattern without it spreading. The visual is layered and sophisticated, and it photographs with depth rather than flat swirls.
Mistake to Avoid: Overworking the marble while uncured, which muddies the veins.
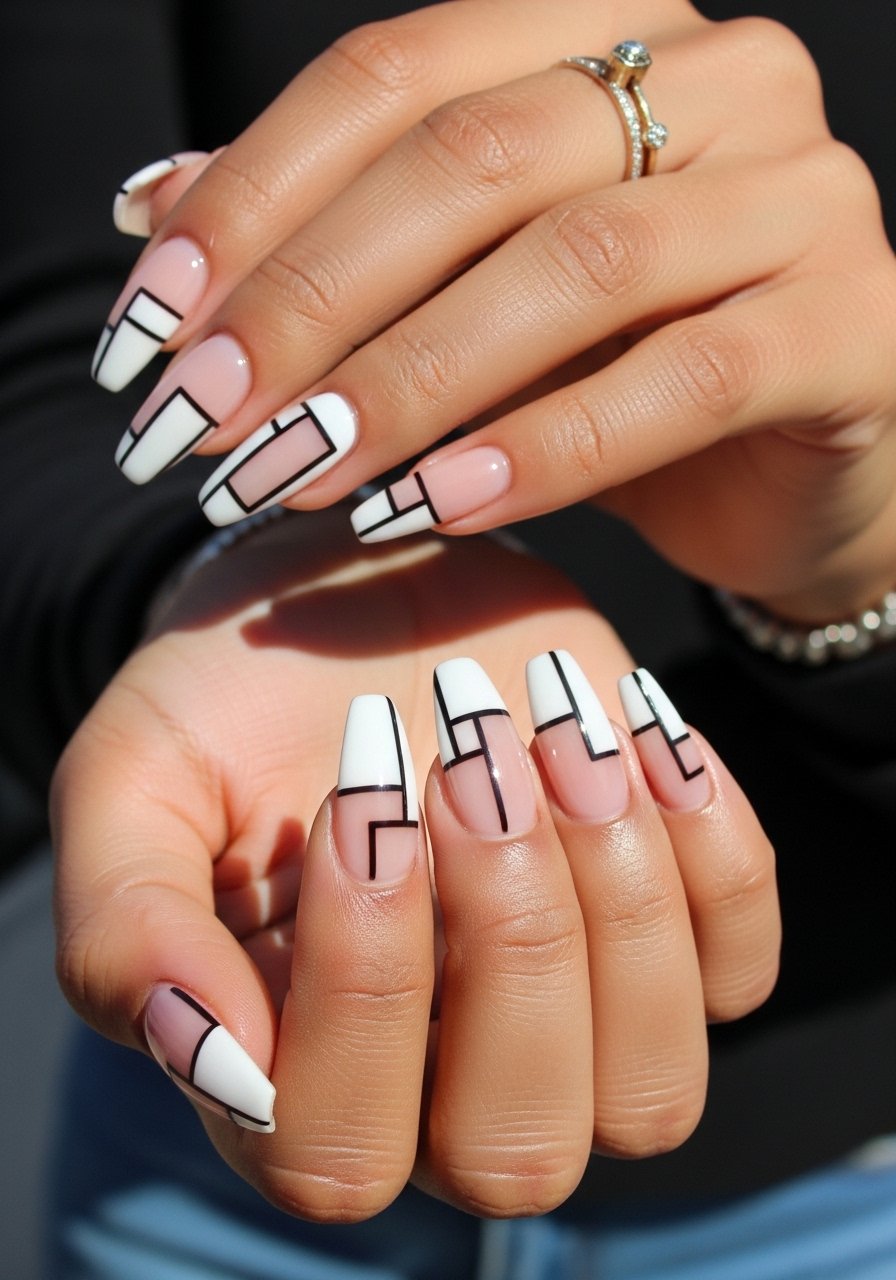
13. Color-Blocked Almonds With Builder Gel
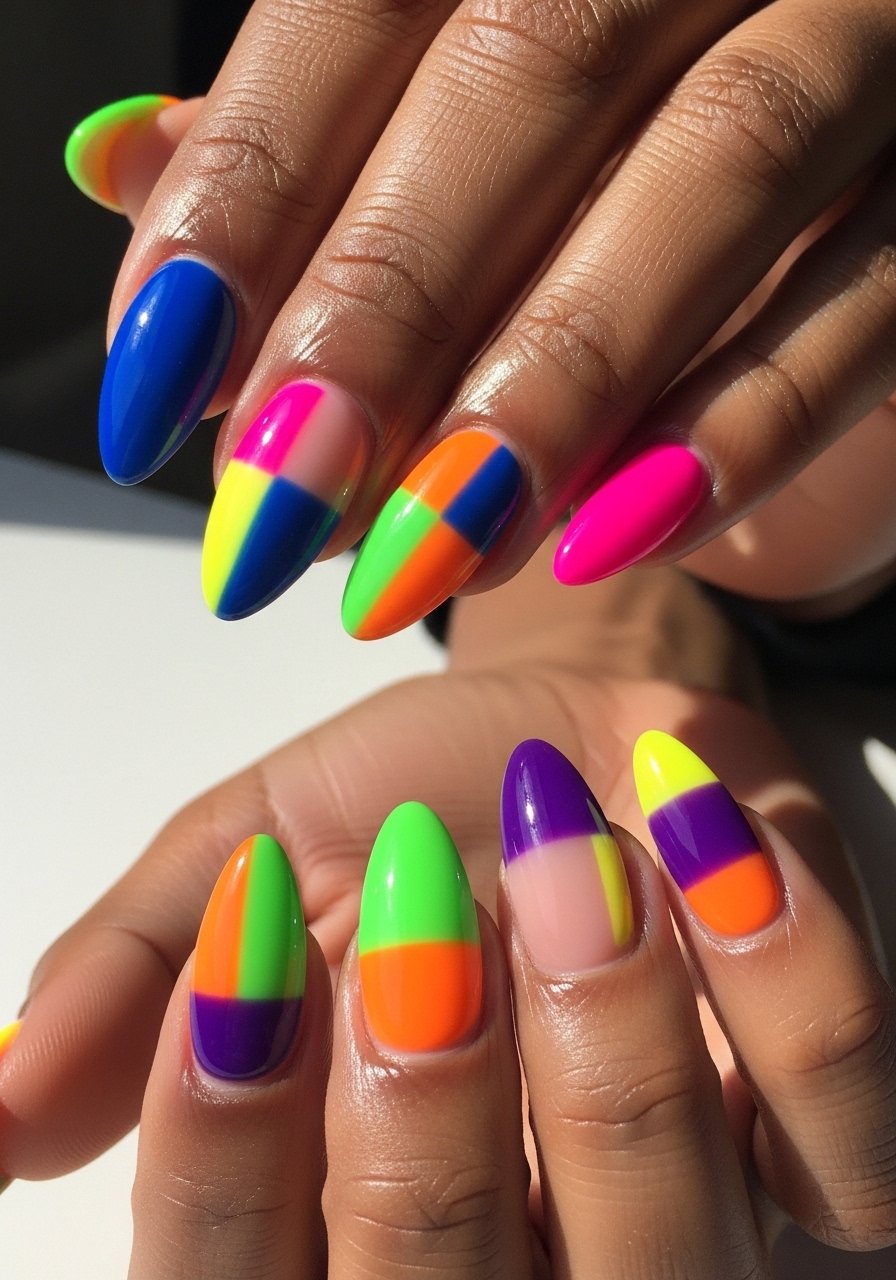
Style/Vibe: Graphic color blocks
Best For: Medium nails, playful looks
Skill: Intermediate
Color blocking with builder gel produces crisp sections that last. Pre-plan your blocks, cure a base, then use striping tape or a fine brush to isolate areas. I cure each color in place for 30 to 45 seconds to avoid mixing then seal with a full clear layer. This is a good weekend DIY when you want bright shapes that do not chip after a day.
Mistake to Avoid: Applying colors wet-on-wet without barriers, which causes colors to bleed together.
14. Reverse French Almonds With Builder Gel

Style/Vibe: Color-at-cuticle reverse French
Best For: Medium to long nails, modern twist on a classic
Skill: Beginner
Reverse French is forgiving and looks intentional even when slightly imperfect. Paint a small crescent of colored builder gel at the proximal area, cure, then fill the rest with a sheer base. The small colored crescent pops in photos but is low-maintenance. A slim brush makes those crescents quick and neat. Try a small pot of colored builder like color builder gel.
Mistake to Avoid: Making the crescent too large, which shortens the visual nail bed.
15. Refillable Builder Gel Almonds For Longevity
Style/Vibe: Refillable maintenance look
Best For: Anyone planning regular refills, durable wear
Skill: Intermediate
If you plan to keep the same set long term, build with refill-friendly technique. Keep sidewalls thin, maintain a shallow apex, and leave a tiny setback from the cuticle to make refills neat. When refilling, add new gel only to the grown-out area and blend with micro strokes. This approach saves time and product in the long run and keeps shape consistent across appointments. A quality refill file like nail file set helps.
Mistake to Avoid: Overfiling into the apex during fill, which weakens the nail structure.
Almond Builder Gel Habits
Thin coats beat one thick coat every time. Three thin layers of a clear builder gel cured between passes look smoother and last longer than one gloopy layer.
Grab cuticle oil. I use it right after every set and during fills, it keeps the skin around the nail from drying and masks tiny grow-out seams.
Measure your free edge when sculpting, do not guess. A reliable digital caliper costs under $20 and saves hours of reshaping later, try a small digital caliper.
Curable gels are brand-specific for cure times. Keep a timer and note your lamp and gel pairing. A lamp with a consistent 48W output like 48W LED nail lamp reduces surprises.
Most people getting their nails done these days are asking for gel, not acrylic. Keep that in mind when you choose products and practice fills rather than full removals.
