
I kept asking for denser dots until a fresh tattoo settled into a muddy blur, then an artist sketched a version with wider spacing and suddenly the arm read like texture, not noise. That mistake taught me to think of dot work as rhythm, not coverage, and to ask about needle groupings and spacing before booking. It changed how I plan placement, pain tolerance, and aftercare.
These ideas are practical dot work options for people who want arm tattoos that age well, fit different visibility needs, and range from quick sessions to multi-visit sleeves. I pulled these from sketches and conversations across five shops I have visited, and they assume budget options plus a couple of artist-level choices. Expect notes on pain, session time, and how each look heals so you can plan touch ups or coverable placement.
1. Sparse Constellation Trail
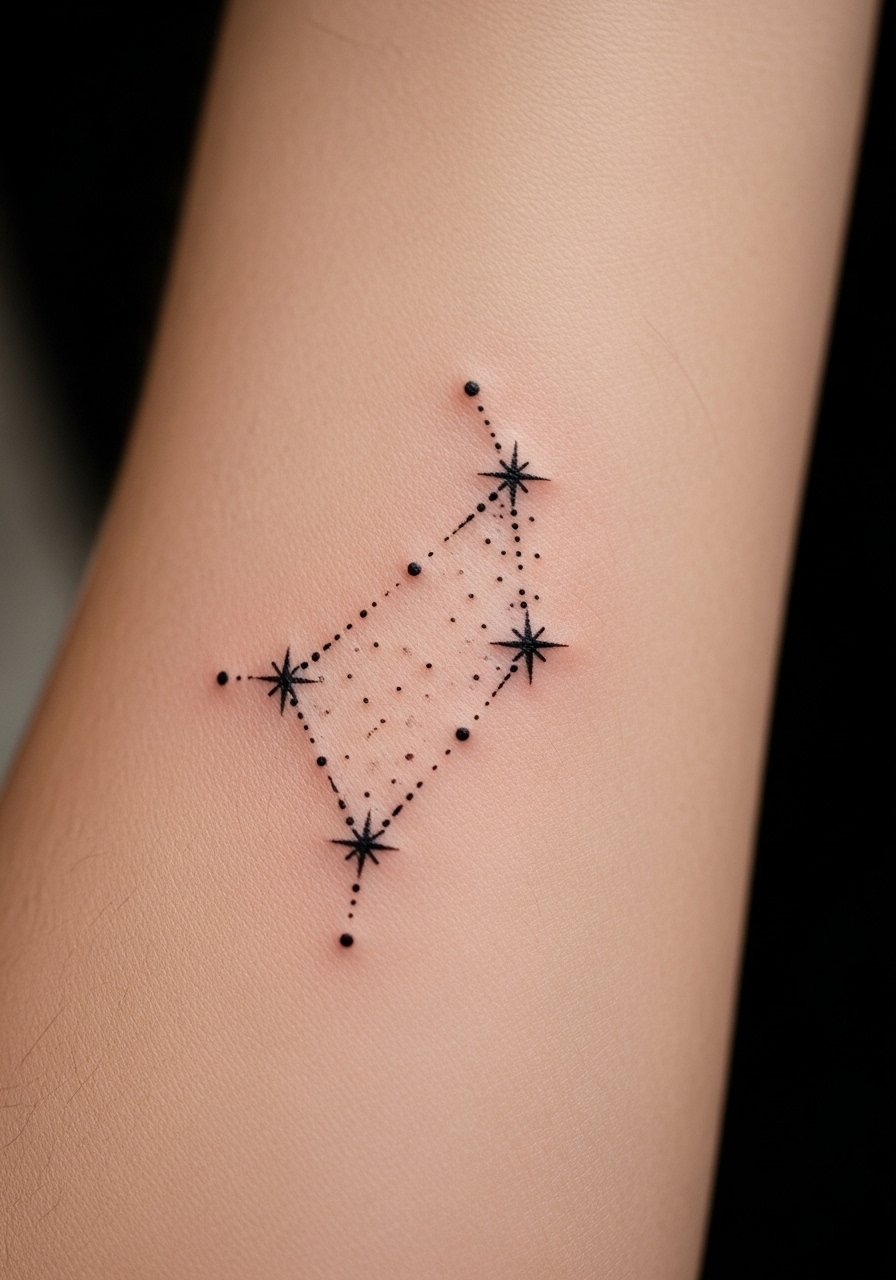
Style/Technique: Minimal dot constellation
Pain Level: 3/10
Session Time: 20 to 40 minutes
Best For: Inner forearm, first-timers, discreet work
This is tiny single dots placed 2 to 4 millimeters apart to suggest stars and faint connections, which reads clean from six feet and delicate up close. It creates a quiet, personal result that is low-cost and usually a single short session. Ask for a single-needle configuration and a light hand so dots sit on skin rather than sink in. Pair it with a gentle fragrance-free healing ointment for the first week.
Mistake to Avoid: Asking the artist to pack dots too closely, which causes bleeding and a muddy look.
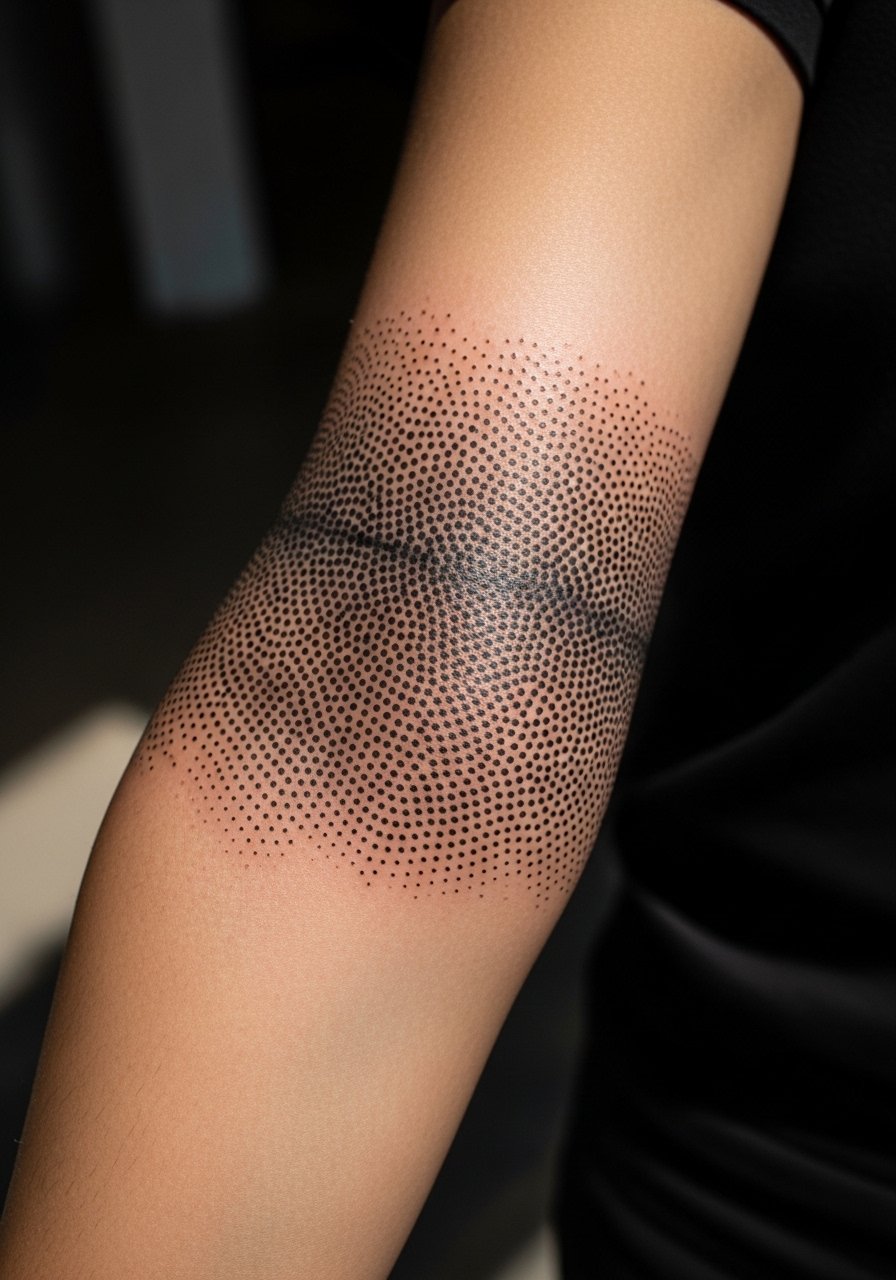
2. Geometric Band With Stipple Gradient
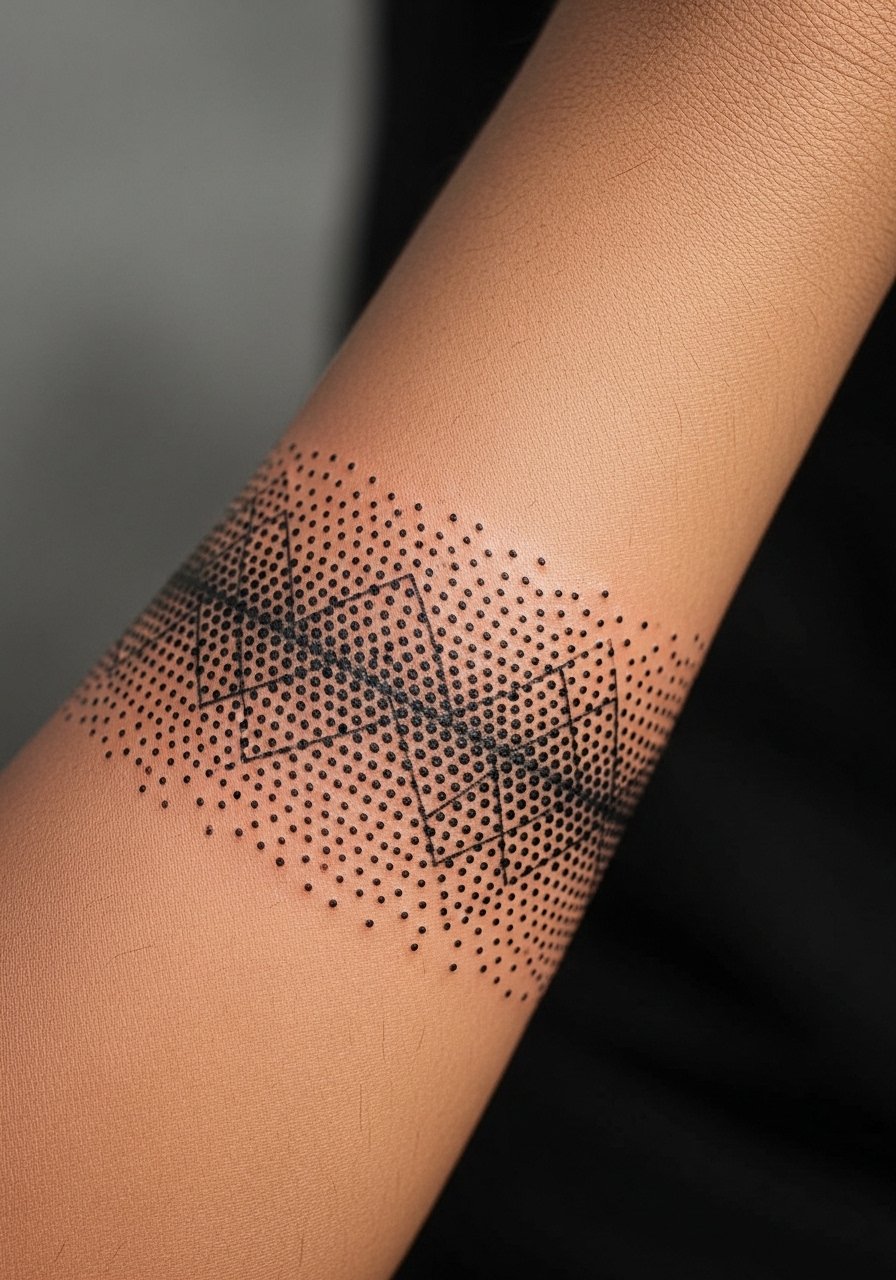
Style/Technique: Geometric band with stippling
Pain Level: 5/10
Session Time: 1 to 2 hours
Best For: Outer forearm, people who want a mid-sized piece
This cuff uses dense stippling on one edge that fades into negative space, giving depth without heavy black. What makes it work visually is a 3 to 1 dot density ratio that creates a soft shadow. It reads bold from a distance but stays delicate in close-up. Budget wise, expect a longer session or two short ones. Bring a stretchable bandage for the first night if your artist recommends covering.
Mistake to Avoid: Requesting a uniform dot density, which flattens the design and loses the gradient effect.
3. Mandala Quarter Sleeve With Negative Space
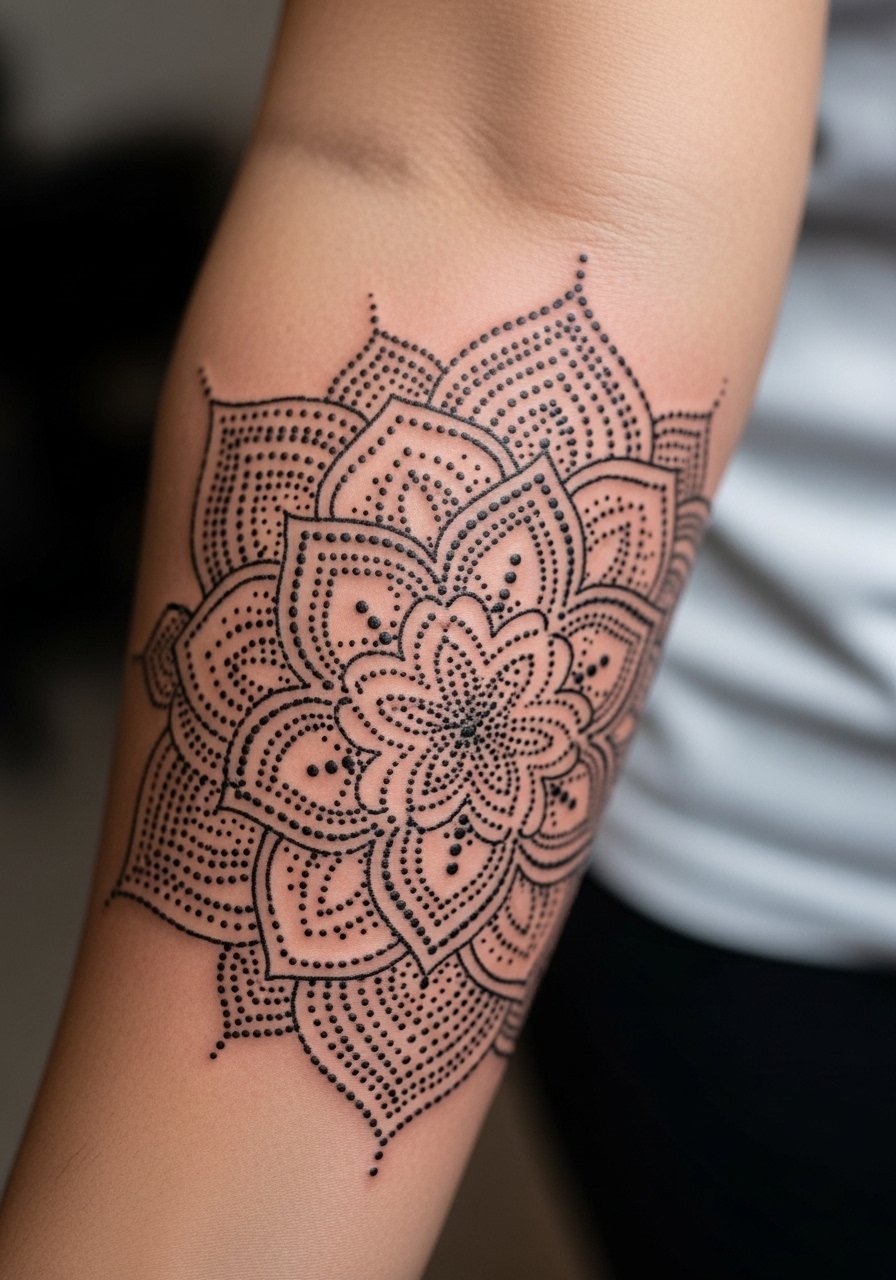
Style/Technique: Mandala dotwork with negative space
Pain Level: 6/10
Session Time: 2 to 4 hours
Best For: Outer forearm to elbow, people comfortable with multi-hour sessions
A mandala that leans on empty pockets beats extra shading, because the negative space preserves contrast as the tattoo ages. Artists often map dot spacing in a radial 1:2 expansion so inner dots are tighter and outer dots breathe. It feels meditative to look at and fits someone who wants a decorative, semi-visible piece. Use a mild antibacterial soap during healing to avoid scabbing problems.
Mistake to Avoid: Filling every gap, which makes the design dense and harder to touch up later.
4. Botanical Sprig With Fine-Line Pairing
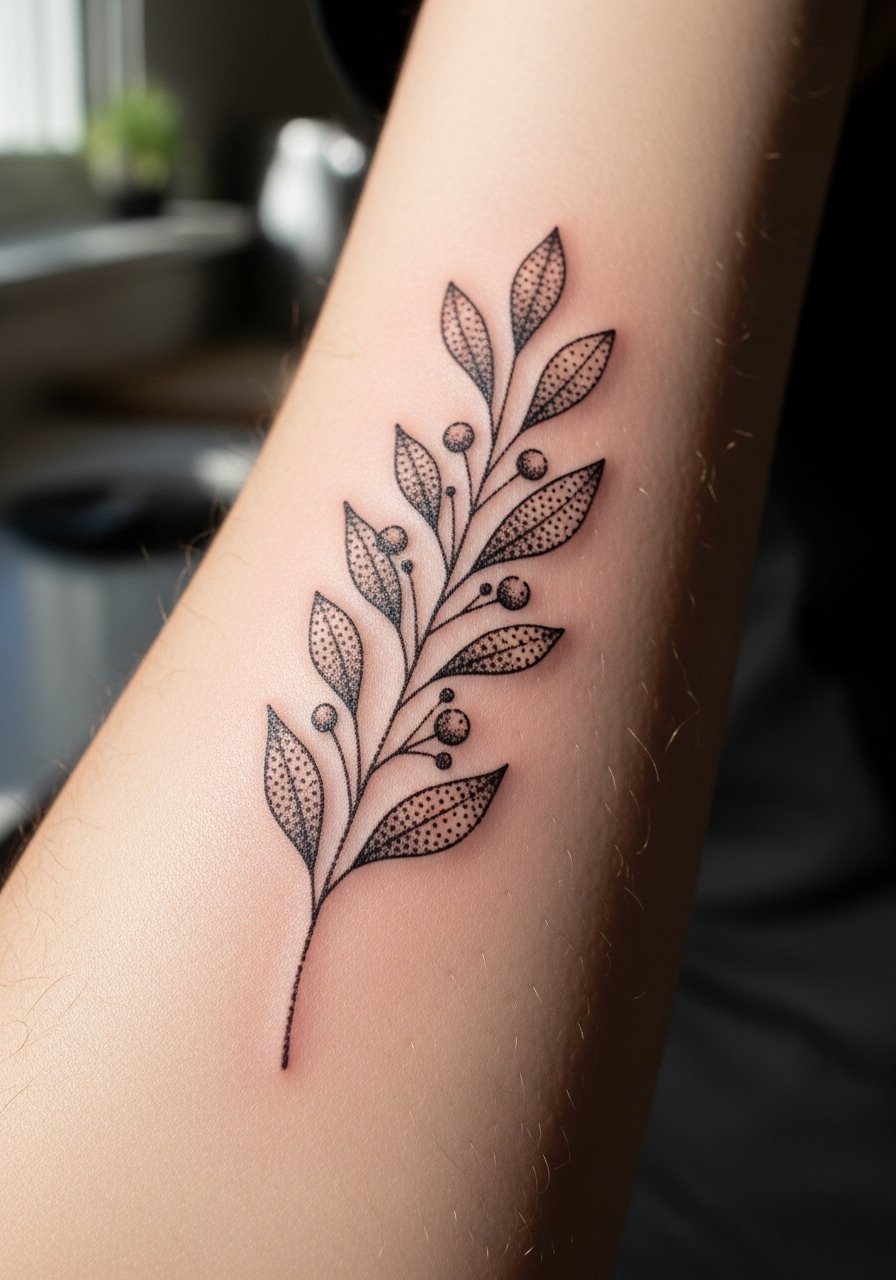
Style/Technique: Dot shaded botanical with fine-line
Pain Level: 4/10
Session Time: 45 minutes to 1.5 hours
Best For: Inner forearm, people who want organic shapes and low visibility
This mixes single-line stems with clustered dot shading around leaves, which keeps the motif airy and modern. It works because the dots follow leaf veins, creating dimension without heavy fill. Matching line weight to dot size is key, so ask your artist about a 3RL or single needle for the lines. I like keeping a small tube of healing balm on hand for tender spots.
Mistake to Avoid: Putting dots on top of thin lines too soon, which can blur the crispness of the fine work.
5. Shadowed Portrait Accent With Stippling
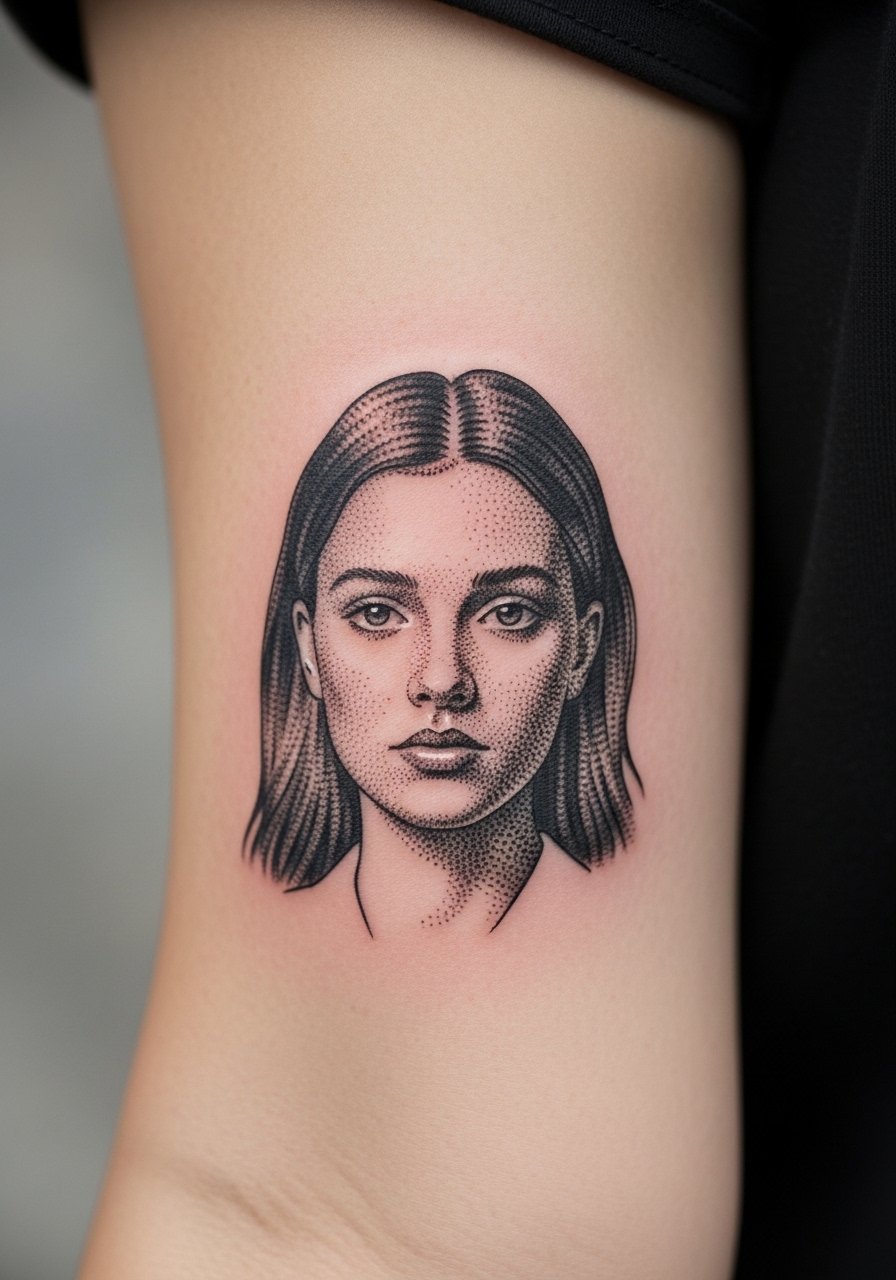
Style/Technique: Micro portrait accents with stippling
Pain Level: 7/10
Session Time: 1.5 to 3 hours
Best For: Upper forearm, people who want a subtle portrait element
Using dots to build portrait shadows makes small faces readable without heavy black. The trick is starting dots at 1 millimeter spacing in shadow pockets and expanding outward. It feels intimate and aged well when artists keep highlights free of dots. For aftercare, I use a tube of broad-spectrum sunscreen once healed to protect fine shading.
Mistake to Avoid: Overworking the portrait with heavy dot packing, which flattens facial planes.
6. Work-Coverable Dot Cuff
Style/Technique: Thin coverable cuff
Pain Level: 3/10
Session Time: 30 to 60 minutes
Best For: Inner wrist to lower forearm, people needing discreet options
A narrow cuff sits just where a watch or sleeve can hide it. The design uses repeating dot bands at varied spacing so the pattern reads like texture when covered and intentional when visible. It is low budget and quick. If you need to hide it for work, a tattoo cover sleeve works temporarily.
Mistake to Avoid: Picking a cuff so wide it becomes hard to conceal under shirts or bracelets.
7. Scar Camouflage Dot Field
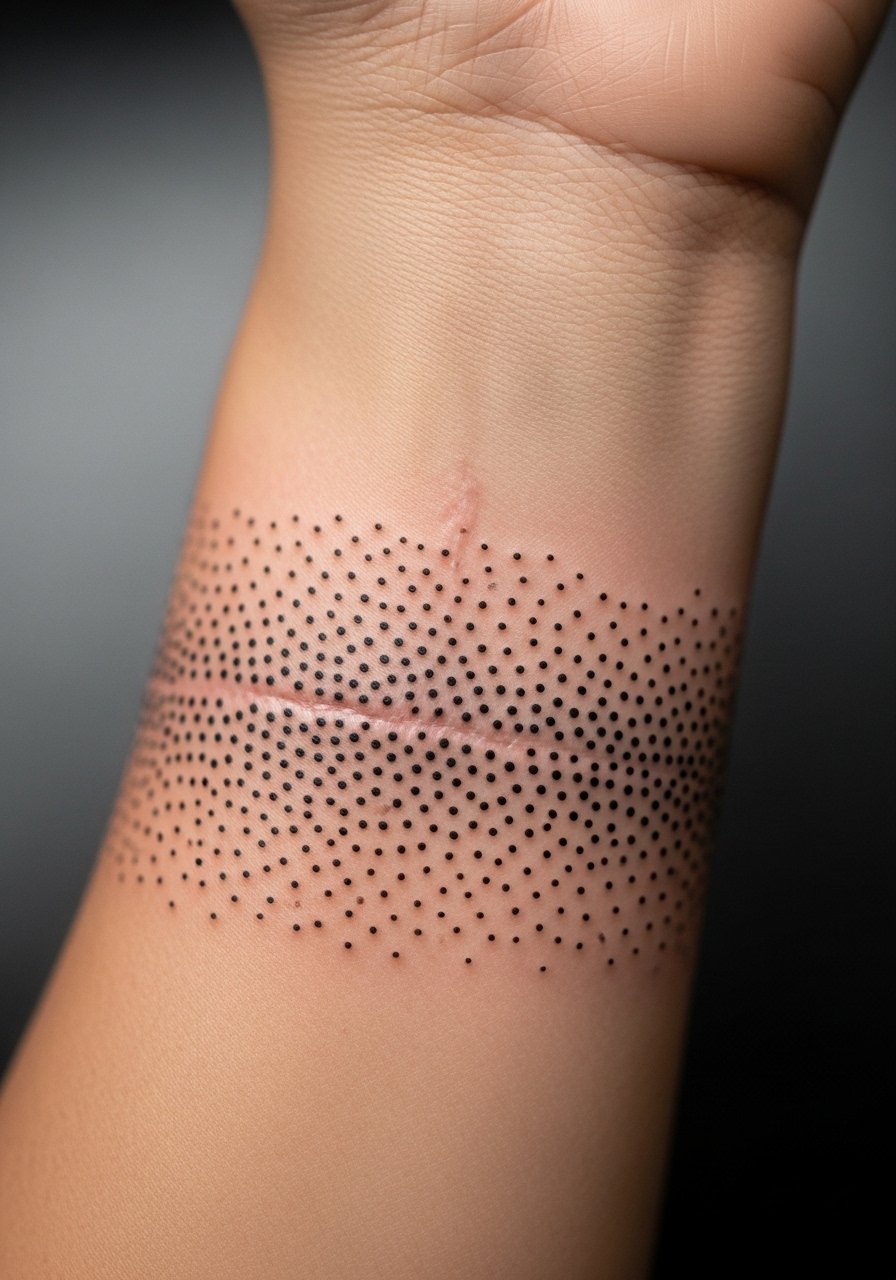
Style/Technique: Scar camouflage stippling
Pain Level: 6/10
Session Time: 1 to 2 hours
Best For: Areas with light scarring, people wanting to minimize scar contrast
This is a gap I saw artists miss often, a dot field that intentionally follows scar texture to mask contrast. The artist uses lighter dot pressure over raised tissue and denser dots in surrounding skin, creating an optical blend. Try silicone gel sheets before tattooing to flatten the scar and a session spaced once the scar is mature. I keep silicone scar sheets in my cabinet for prep.
Mistake to Avoid: Tattooing over immature scars, which can distort ink and cause uneven healing.
Arm Dot Work Essentials
If you want to try any of these looks, this is what I reach for when booking and healing.
Aftercare & Prep:
- Fragrance-free healing ointment (~$8-15). My go-to for week one.
- Antibacterial soap (~$6-12). Use twice daily.
- Tattoo sunscreen (~$12-20). For healed work, every outing.
Tools & Extras:
- Transfer stencil paper (~$8-15). For artists and at-home prep.
- Stretchable bandage (~$6-12). Useful first-night cover.
- Silicone scar sheets (~$12-25). For scar smoothing pre-tattoo.
- Disposable nitrile gloves (~$10-20). Keep them on hand for touch ups or clean care.
- Tattoo cover sleeve (~$8-15). Quick concealment for events.
- Healing balm pads (~$10-18). For spot care after showers.
8. Floral Mandala Peeking From Sleeve
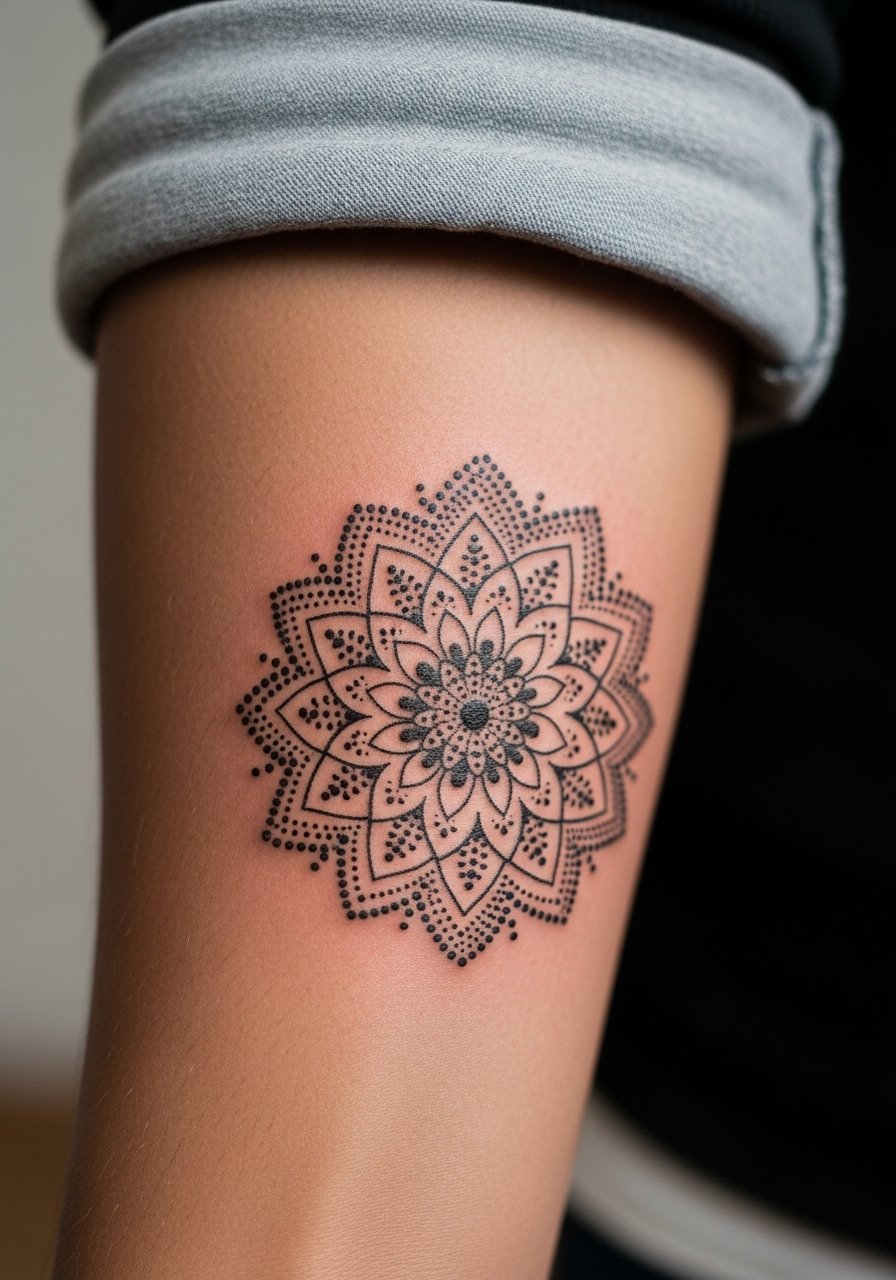
Style/Technique: Partial mandala floral
Pain Level: 5/10
Session Time: 1 to 2 hours
Best For: People who want intermittent visibility and a decorative statement
A mandala that peeks from a rolled sleeve uses negative space at the edge so it looks complete when partially shown. It makes the arm feel decorative without committing to full visibility. The visual trick is a crisp outer edge of spaced dots at 3 to 5 millimeters. For mid-budget care, a simple healing balm keeps edges soft during touch ups.
Mistake to Avoid: Designing an edge that cuts off awkwardly at the sleeve line, which looks unfinished when partially revealed.
9. Animal Motif With Gradient Stippling
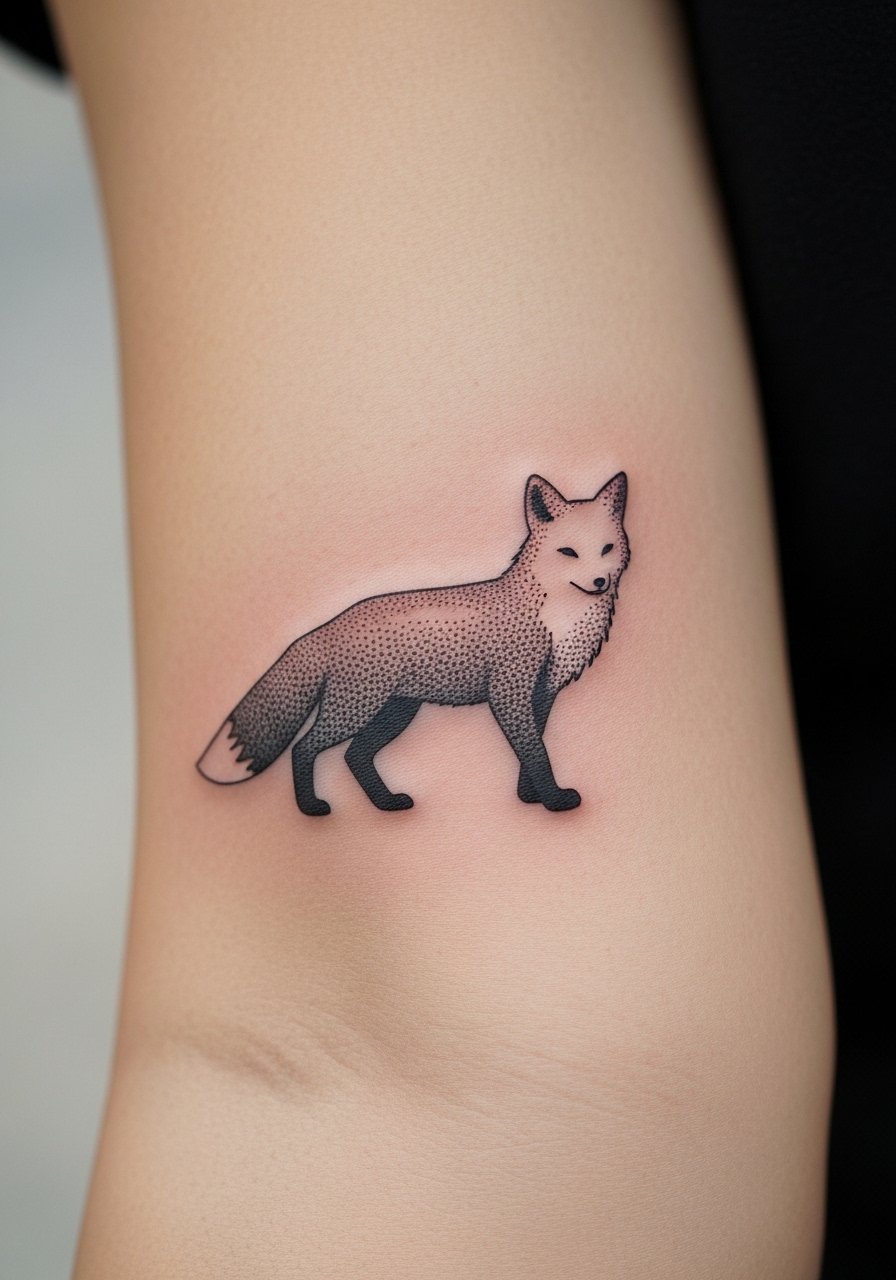
Style/Technique: Stipple shaded animal motif
Pain Level: 6/10
Session Time: 1 to 2 hours
Best For: People who want figurative imagery without heavy blackwork
Using dots to build form gives animals a soft, vintage look. Start dots tight in shadowed areas and expand outward; a 1 to 5 millimeter expansion produces believable depth. It feels slightly textured like an illustration rather than a sticker. If you plan a detailed outline, pack a small tube of fragrance-free healing ointment to prevent scab pull.
Mistake to Avoid: Relying on outline alone for definition, which makes the motif appear flat once healed.
10. White Ink Highlights Over Dots

Style/Technique: Dotwork with white ink highlights
Pain Level: 5/10
Session Time: 1 to 1.5 hours
Best For: People wanting subtle pop and texture contrast
Adding tiny white highlights on top of dots can lift a pattern and suggest reflected light. White ink behaves differently through healing and often fades faster, so consider a touch-up plan. It creates a refined finish for someone willing to maintain it. I recommend a mineral-based sunscreen after healing to slow white ink fade.
Mistake to Avoid: Expecting white ink to stay bright without regular sun protection and occasional refresh sessions.
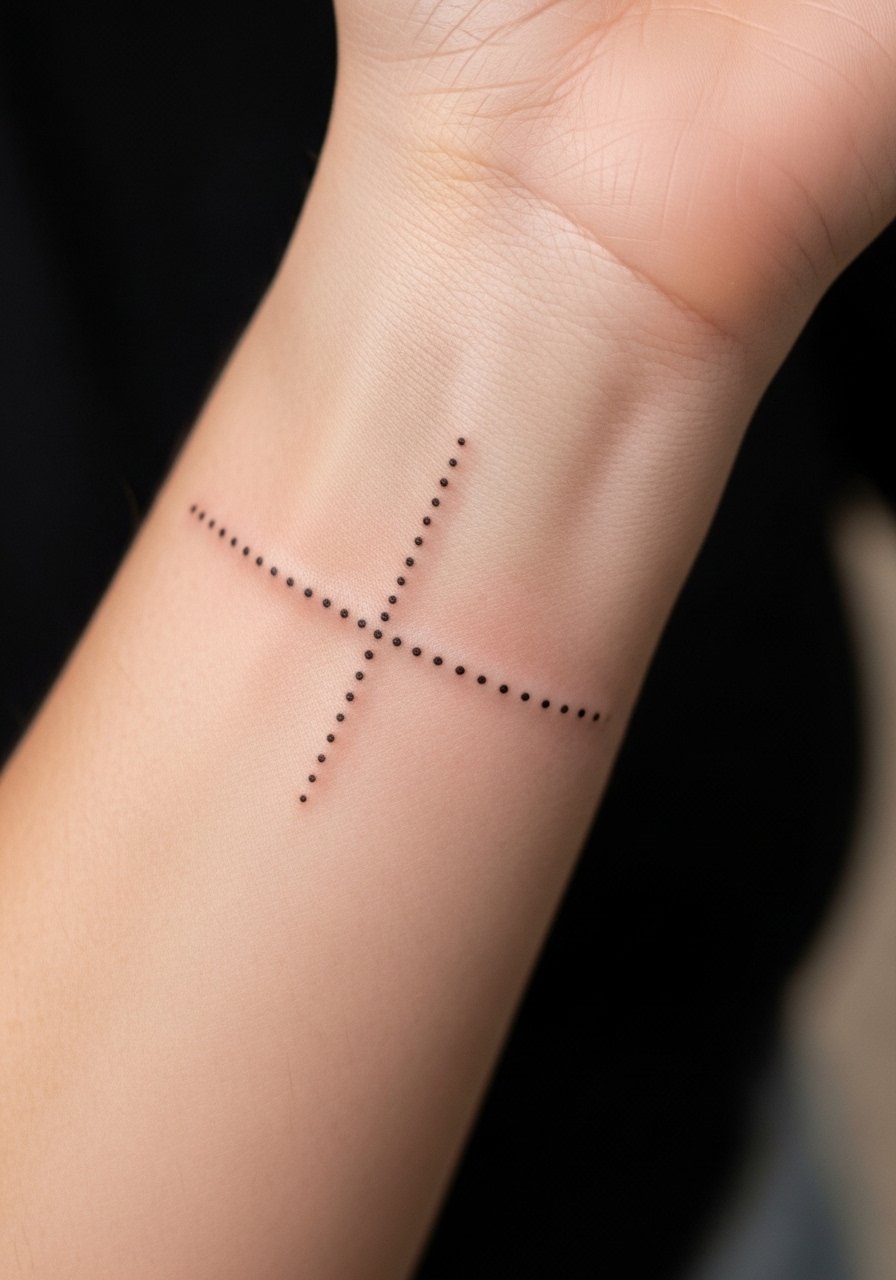
11. Coordinate or Map Dot Line
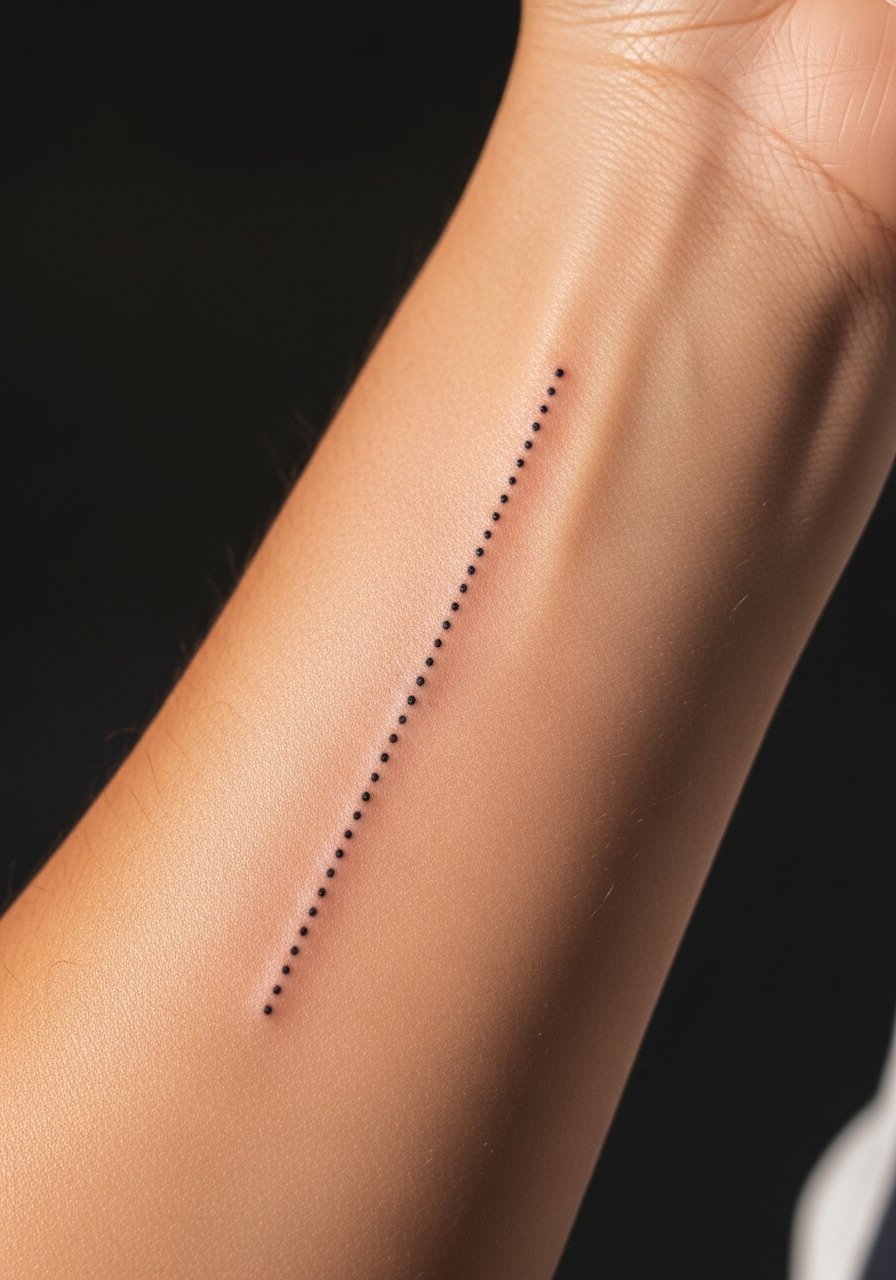
Style/Technique: Dot line coordinates
Pain Level: 2/10
Session Time: 15 to 30 minutes
Best For: People who want personal symbolism and minimalist placement
Dots forming a coordinate line or tiny map create a quiet statement that is easy to place and quick to do. The design works because human eyes read the rhythm of dots as a continuous line from a distance. It suits someone who wants meaning over show. Keep a small healing balm for first-aid on high-movement spots like the outer forearm.
Mistake to Avoid: Choosing complex coordinates with too many signs, which makes the design noisy at small scale.
12. Layered Texture Bands
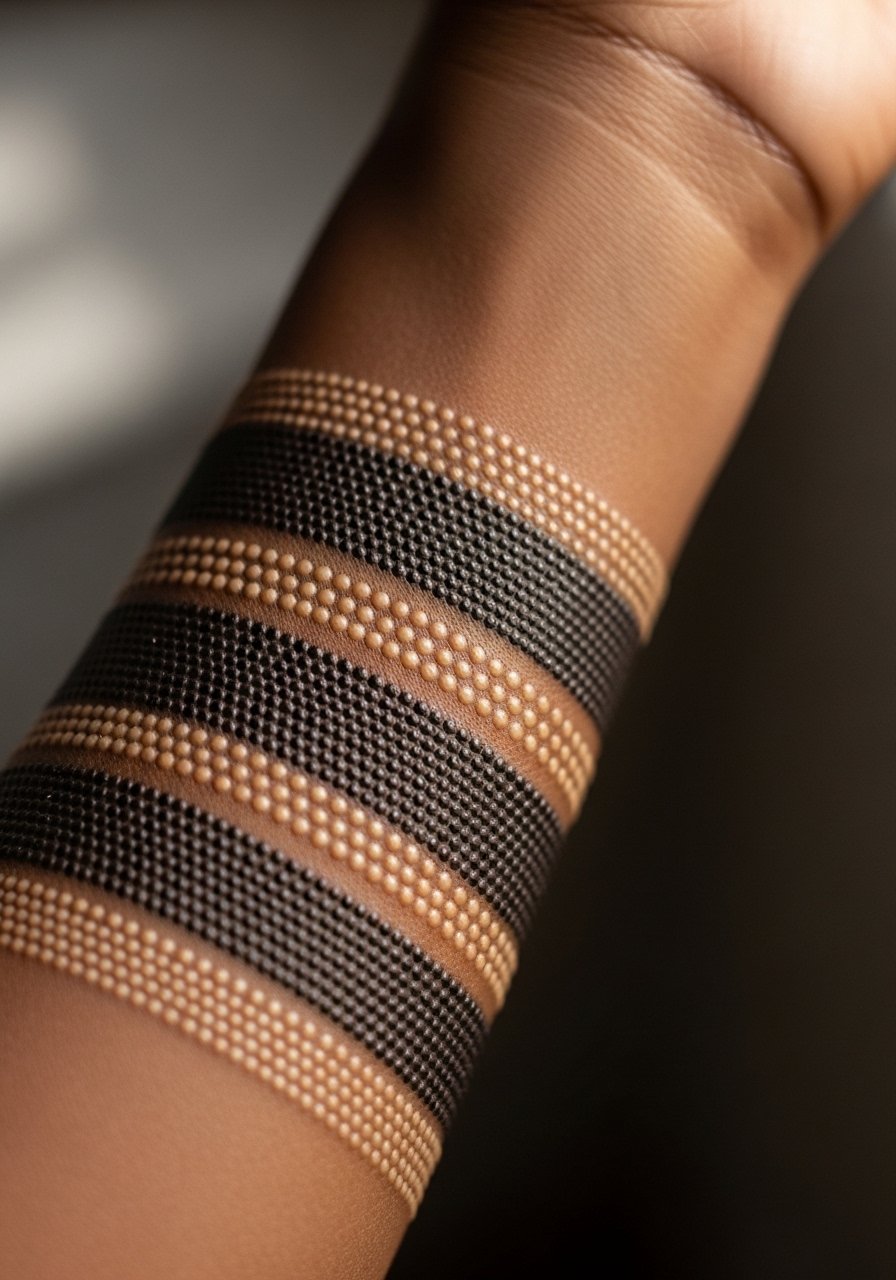
Style/Technique: Stacked texture bands
Pain Level: 4/10
Session Time: 1 to 2 hours
Best For: People who like pattern play and sleeve starters
Stacking bands of different dot textures creates a tattoo that reads like woven fabric. Alternating tight stipple, open dots, and thin line separators gives variety and ages predictably because the negative space is intentional. It is beginner-friendly and budget flexible. For at-home care, a pack of antibacterial soap and ointment covers most needs.
Mistake to Avoid: Repeating the same dot spacing across bands, which makes the stack monotonous.
13. Transition Sleeve Combining Dot Work And Blackwork
Style/Technique: Dot to blackwork transition
Pain Level: 7/10
Session Time: 2 to 5 hours
Best For: People building half or full sleeves who want contrast
This is a stronger gap many artists avoid, a planned transition from dense black blocks into airy dot gradients so the sleeve reads cohesive. The success depends on a mapped gradient that uses dot density to soften the edge of blackwork over 1 to 2 inches. It looks intentional and modern but requires an artist good at both techniques. Bring a long session mentality and a stretchable bandage for multi-hour comfort.
Mistake to Avoid: Placing abrupt black edges next to light stippling without a planned gradient, which looks chopped.
Dot Work Healing Habits
Thin coats beat one thick coat. For aftercare, apply a thin layer of healing balm two to three times a day. Thick smears trap moisture and encourage scabbing.
Grab fragrance-free healing ointment for the first five days. It soothes and prevents the itch that makes people pick at dots during peeling.
Expect a dot work piece to look heavier while fresh, not like the final result. Let it fully heal for six to eight weeks before judging contrast and scheduling touch ups, and use a broad-spectrum sunscreen afterward to protect fine shading.
What most people do wrong is sweating into a fresh piece. Sleep in a clean shirt and avoid long workouts for the first four days, and keep disposable nitrile gloves on hand if you need to apply ointment while out.
If your design draws from spiritual or cultural motifs, talk with your artist about meaning and placement. Respectful adaptation avoids accidental appropriation and keeps the piece visually honest.
