
I kept trying to cram big, detailed roses into the same arm and every photo looked cluttered, like stickers in a scrapbook. The switch that finally worked was removing half the petals, spacing stems so skin reads through, and letting the negative space carry the composition. Minimalist flower sleeves are about rhythm, not crowding, and I learned that by failing the dense route a few times until simplicity actually read as intentional.
These 13 ideas are for people who want a sleeve that reads clean and wearable, not a heavyweight cover-up. Expect mostly single-needle and fine-line work that heals into crisp lines, budget-friendly sessions that can be split into 1 to 3 short visits, and designs meant to be easy to cover for work when needed. Across five shops I have visited, tattooists recommended leaving at least 30 percent skin between elements for longevity, so most of these are beginner-friendly but ask your artist about line weight and spacing.
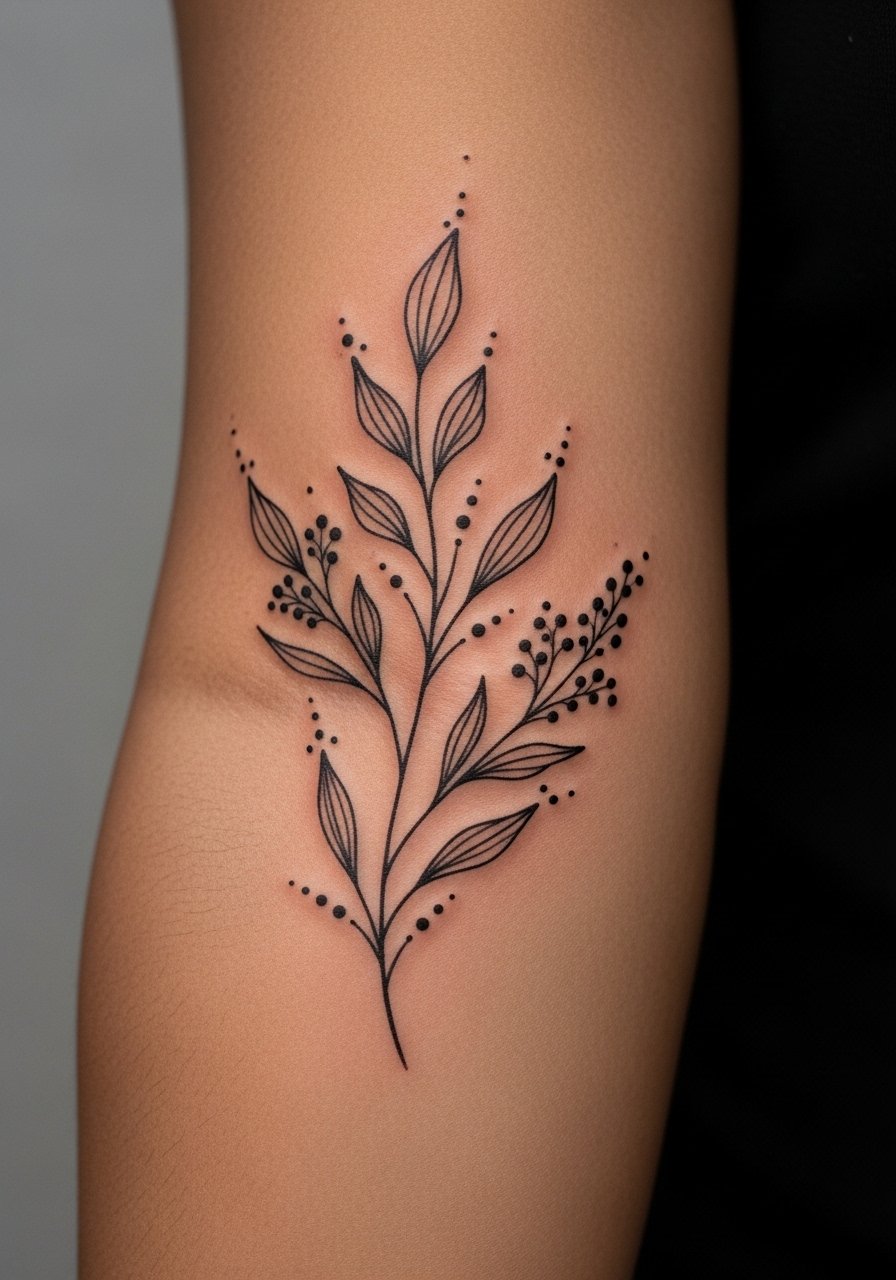
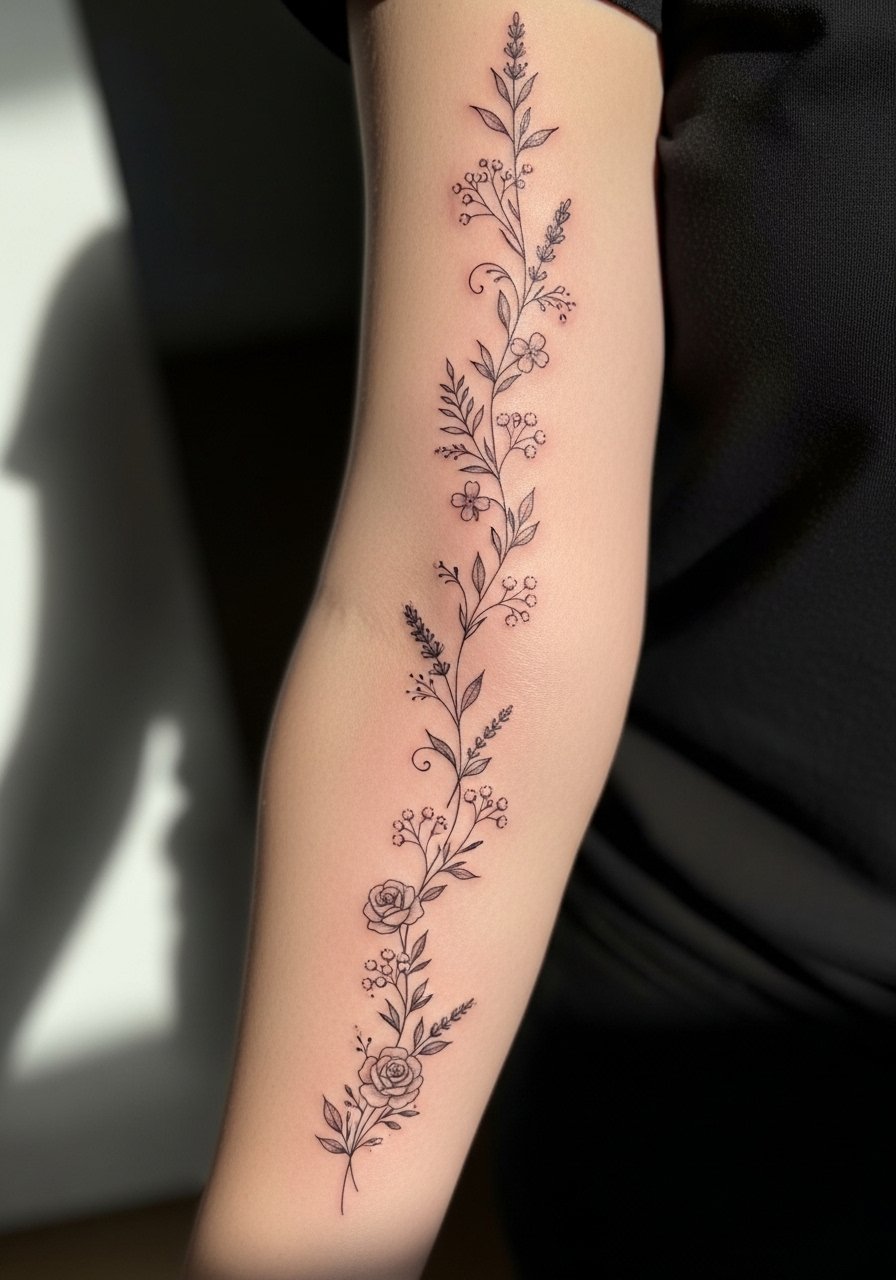
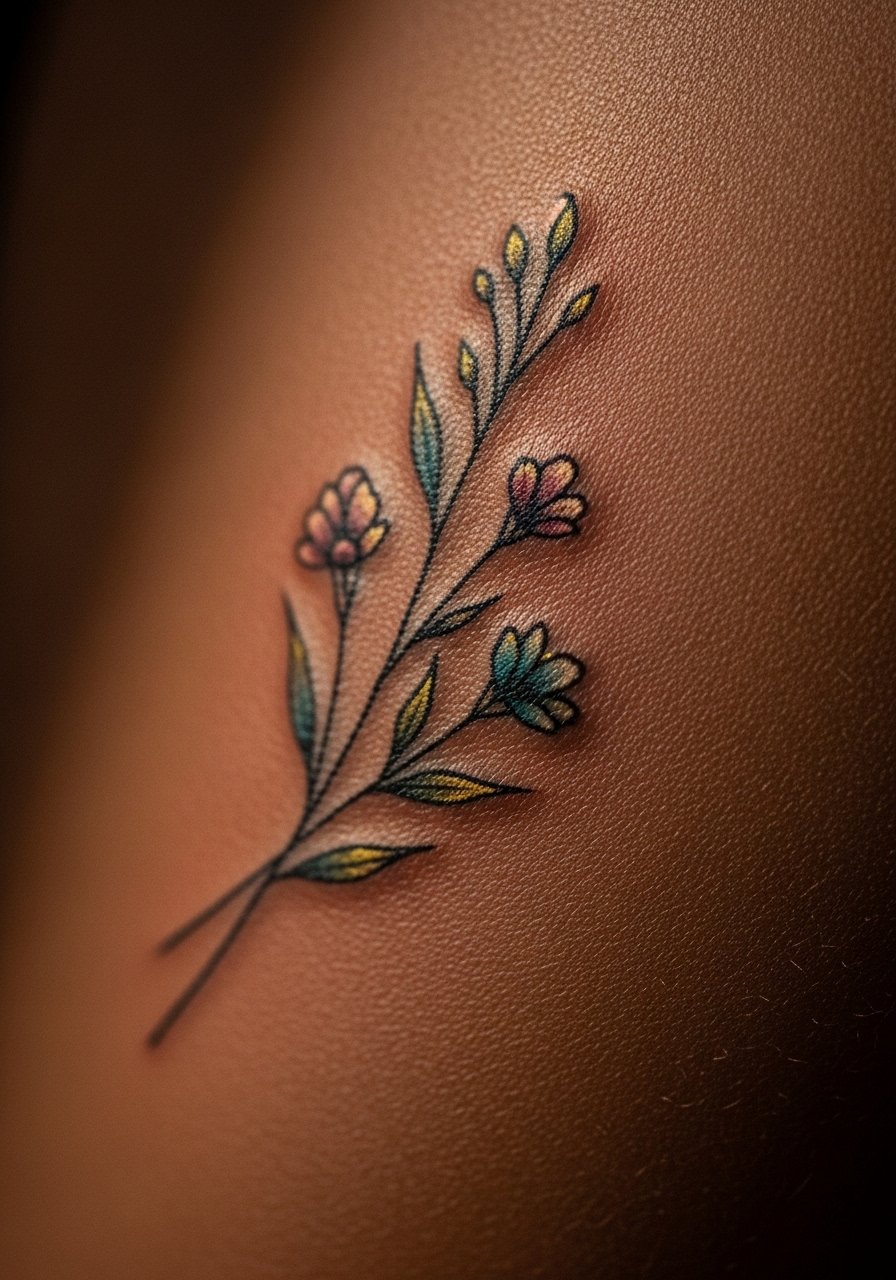
1. Fine-Line Single-Needle Vine Sleeve
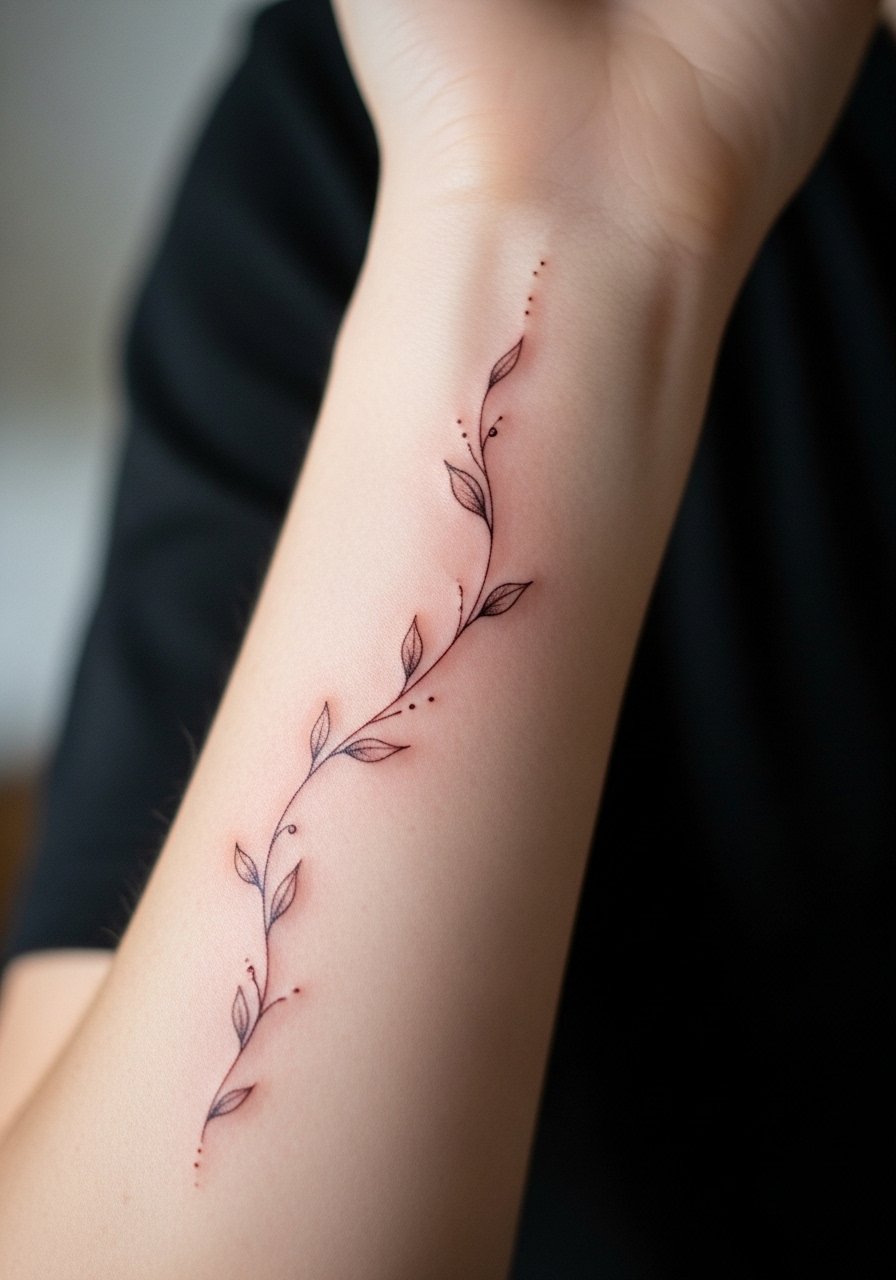
Style/Technique: Fine-line single-needle
Pain Level: 4/10
Session Time: 1 to 2 hours
Best For: Visible forearm sleeves, first-time sleeve builders
A single-needle vine is a classic minimalist move, thin stems and tiny leaves spaced like musical rests. It works visually because the thin line creates movement without weight, so the arm looks elongated and calm. Go for 0.25 to 0.35 mm line work and leave 1 to 1.5 cm between leaf clusters so the skin breathes. Perfect for people who want low-saturation ink that reads subtle at a glance. Bring a reference photo and budget for touch-ups in the first year. I used a tiny aftercare balm like tattoo aftercare balm during healing to keep lines soft.
A common mistake is packing leaves too close together, which makes the whole vine look muddled once healed.
Mistake to Avoid: Crowding leaves so the vine loses its airy spacing when healed.
2. Sparse Daisy Chain Around Arm
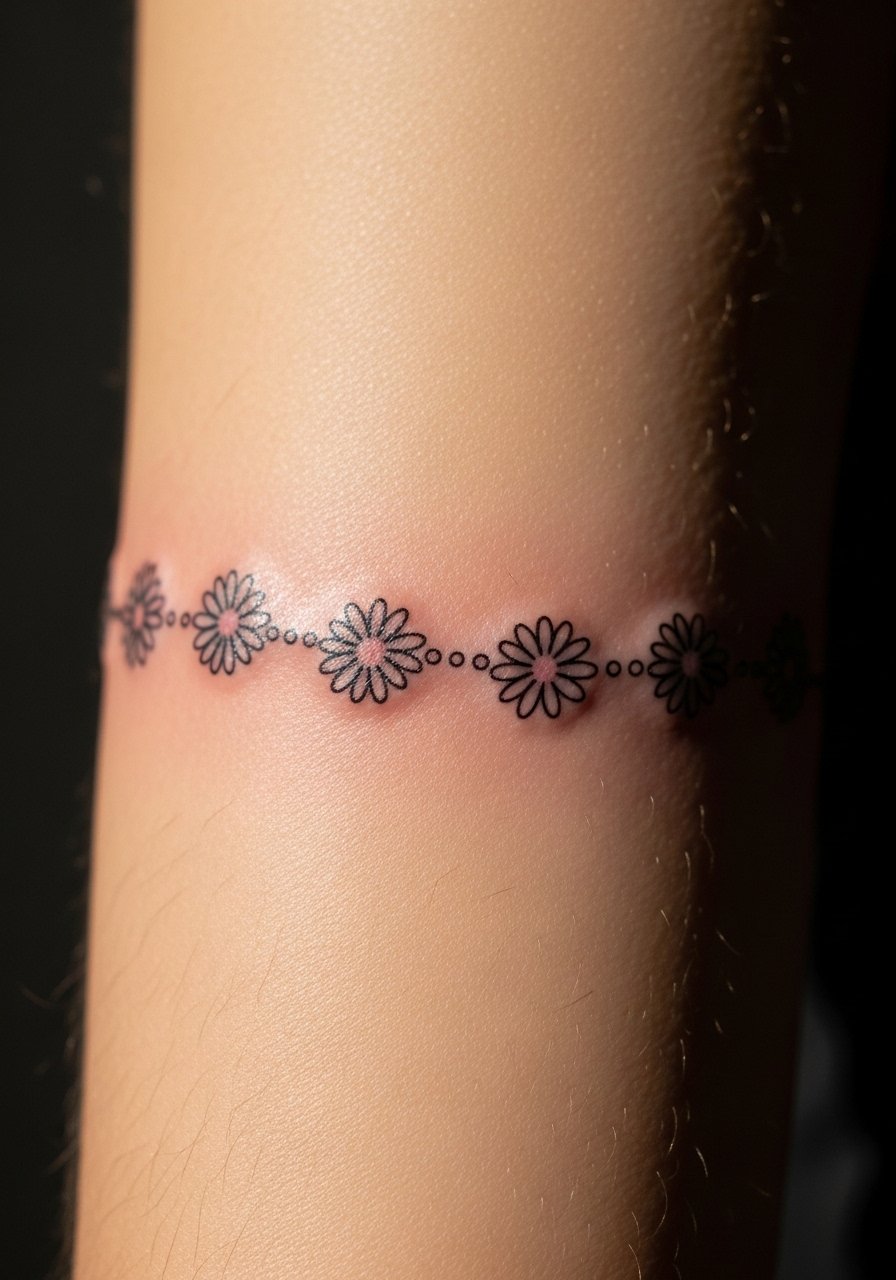
Style/Technique: Minimal outline daisies, spaced chain
Pain Level: 3/10
Session Time: 1 to 1.5 hours
Best For: Wraparound bands, coverable upper-arm work
A daisy chain uses repeating small blooms with open centers and short stems. Visually it makes a subtle band that reads like jewelry. I ask artists to keep each flower at 6 to 10 mm across so the chain breathes and still reads as a connected motif from a distance. This is quick, budget-friendly, and fits people who want something that can be sleeved under a shirt. For healing, a mild green soap is handy, try antibacterial green soap for gentle cleansing. Expect a crisp healed outline if lines are kept thin.
A common mistake is making flowers too large, which turns the wrap into a busy ring instead of a delicate band.
Mistake to Avoid: Scaling each blossom too big so the chain loses its minimalist effect.
3. Tiny Buds With Negative Space
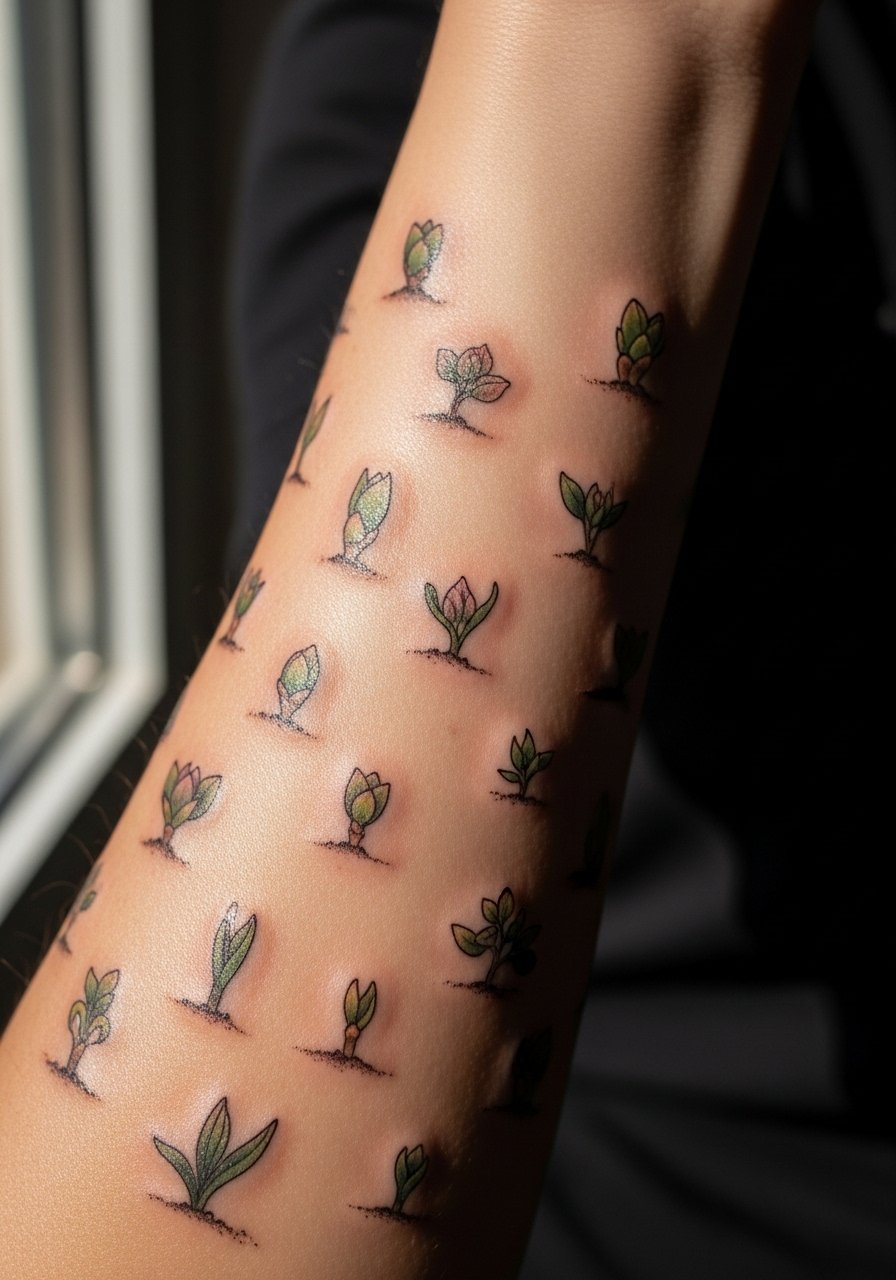
Style/Technique: Micro-bud placement, negative-space layout
Pain Level: 2/10
Session Time: 45 minutes to 1 hour per area
Best For: Subtle sleeves, people who want lots of skin showing
Micro buds are little closed blooms placed in a staggered rhythm. The thing that makes them read minimalist is the negative space between marks, not the number of marks. I tell artists to aim for clusters with 0.8 to 1.2 cm spacing so the eye reads pattern rather than patch. This is low-cost per session and easy to extend later. A tiny dab of a healing ointment like fragrance-free healing ointment during the first 48 hours keeps scabbing thin.
A common mistake is filling gaps with micro shading, which erases the air that makes the buds delicate.
Mistake to Avoid: Adding shading into the gaps and losing the breathy negative space.
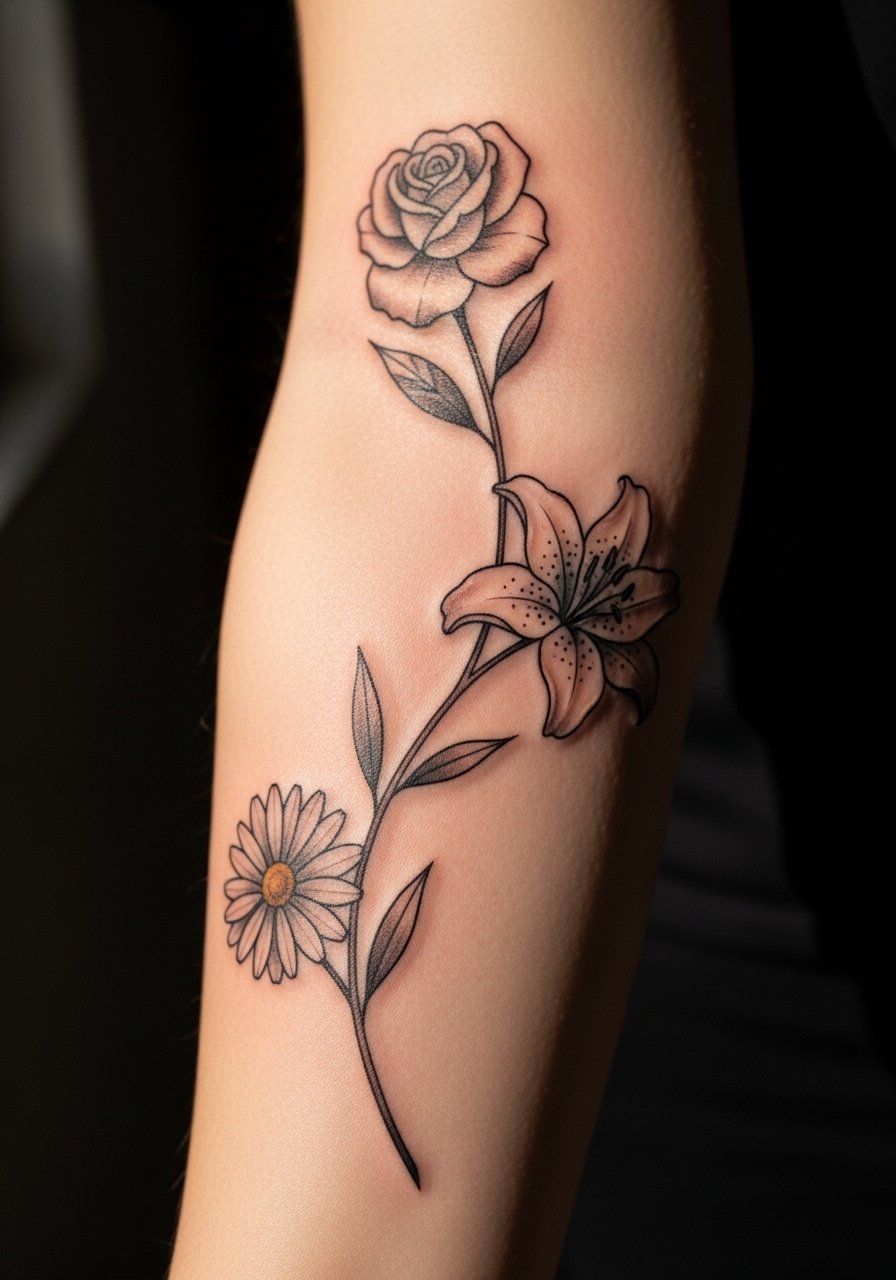
4. Delicate Rose Outline Stack
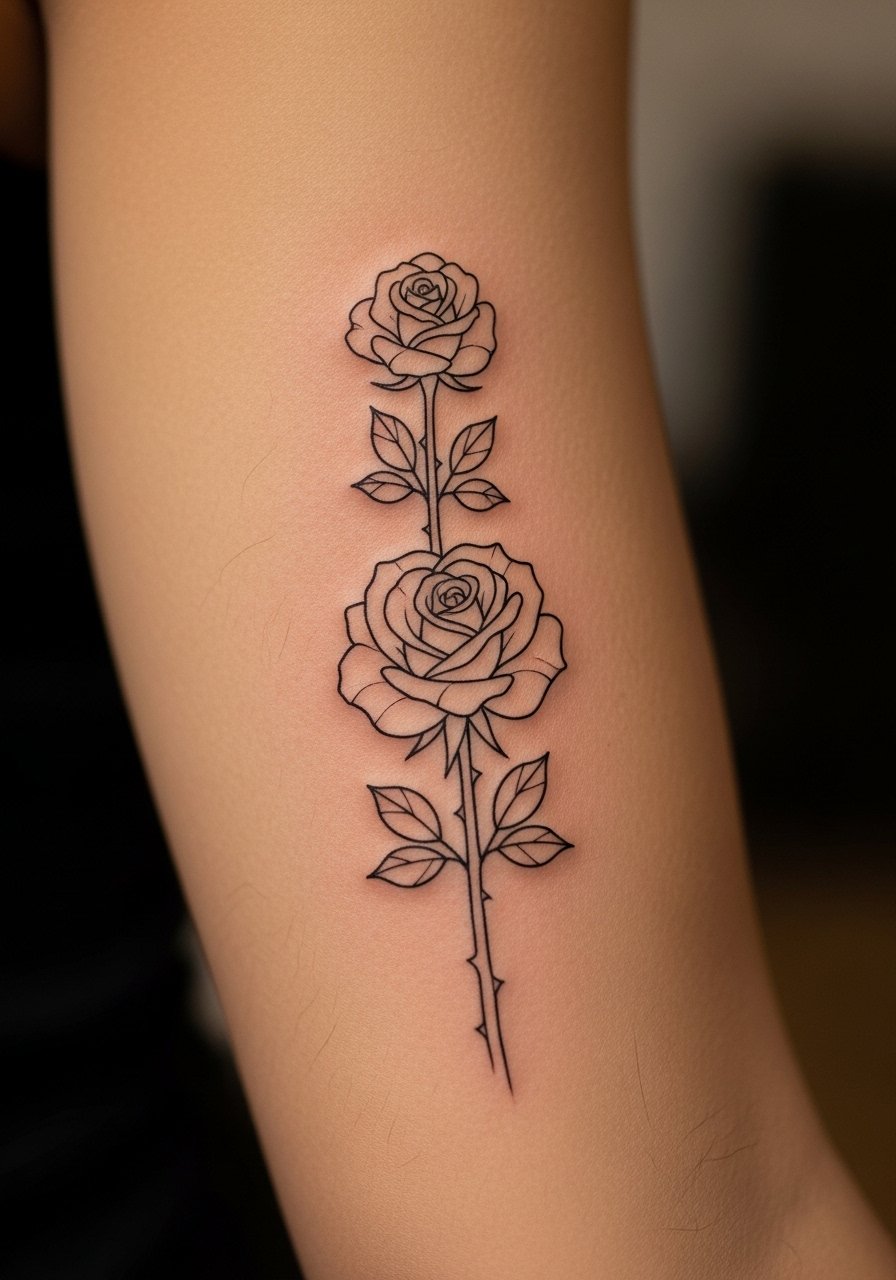
Style/Technique: Outline roses, stacked composition
Pain Level: 5/10
Session Time: 1.5 to 2.5 hours
Best For: Upper-arm sleeves, floral focal points
Outlines of roses, sketched and stacked, give structure without heavy fill. The visual trick is varying petal openness so the stack reads like a bouquet from any angle. Ask for petals drawn with alternating open and closed loops to avoid repetition. This look feels intentional and slightly formal, so it suits people who want a statement focal point without saturation. Budget for a longer session, and plan a small touch-up after six months. Bring a moisturizing, non-comedogenic lotion like unscented skin moisturizer for post-healing care.
A common mistake is insisting on heavy black fill inside petals, which turns a light stack into a blocky patch.
Mistake to Avoid: Requesting solid fills that remove the outlined delicacy.
5. Botanical Dots And Linework Mix
Style/Technique: Linework with stipple accents
Pain Level: 4/10
Session Time: 1 to 2 hours
Best For: Textured sleeves that stay minimal
Combining single lines with tiny dot clusters adds texture while keeping the palette minimal. The dots act like punctuation marks between stems. I usually tell the artist to use dot clusters of 2 to 4 dots spaced 2 mm apart, which gives an organic grain that photographs well. This suits people who want subtle texture without shading. A fine-point aftercare product like tattoo-friendly salve helps dots heal without smudging.
A common mistake is asking for dense stippling, which complicates the clean look and ages unevenly.
Mistake to Avoid: Overusing stipple so the design becomes visually heavy.
6. Continuous Stem Connector
Style/Technique: Continuous line connector, flow-focused
Pain Level: 4/10
Session Time: 1 to 2 hours
Best For: Sleeves that need compositional flow
A continuous stem ties small clusters into a sleeve without adding bulk. The functional win is the sleeve reads cohesive whether you show the whole arm or just a patch. I ask for a stem thickness that stays under 0.4 mm so the connector reads subtle. This technique is useful if you plan to extend the sleeve later since new elements can clip onto the stem. Low skill barrier for the client, but pick an artist comfortable with flowing single-line motifs. Keep a gentle cleanser like hypoallergenic soap bar in your aftercare kit.
A common mistake is making the stem too rigid, which makes the sleeve feel staged rather than natural.
Mistake to Avoid: Drawing stiff stems that break the organic flow of the sleeve.
7. Mini Realism Wildflower Cluster
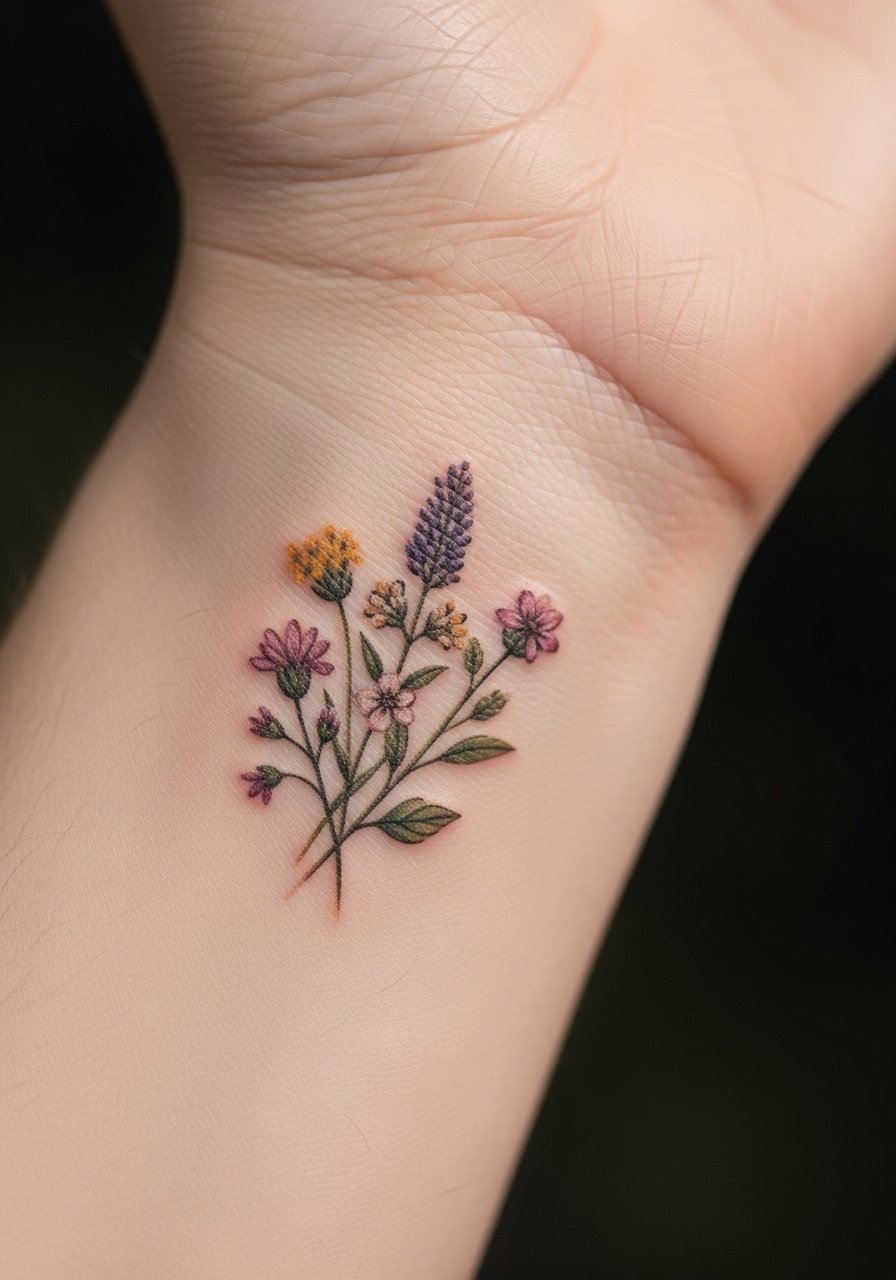
Style/Technique: Micro-realism cluster
Pain Level: 5/10
Session Time: 1 to 3 hours depending on detail
Best For: People who want realism at a small scale
Micro realism uses fine shading on tiny blooms to suggest depth without heavy ink. It reads very delicate if the artist uses soft dot-work and avoids bold outlines. Expect to book slightly longer sessions if you want petal texture indicated. This suits people who want a naturalistic look but not a dramatic blackwork piece. An ultrafine brush in your aftercare routine is overkill, but a clean, soft cloth and gentle healing balm keep details crisp while healing.
A common mistake is requesting full photorealism at a 1 cm scale, which loses detail when healed.
Mistake to Avoid: Expecting photo-level detail in micro scale, which often blurs when healed.
If any of these ideas have you ready to shop for aftercare and essentials, here are the tried-and-true items I keep on hand.
Essentials For Minimal Flower Sleeves
Aftercare & Cleaning:
- tattoo aftercare balm (~$8-18), lightweight and fragrance-free.
- antibacterial green soap (~$6-12), for initial gentle washes.
- unscented skin moisturizer (~$10-20), keep this after peeling.
Prep & Protection:
- disposable vinyl gloves (~$8-15), useful for applying ointment cleanly.
- clear film bandage (~$10-20), if your artist recommends covering fresh work.
Reference & Care Tools:
- portable mirror (~$12-25), to check angles while healing.
- soft cotton pillowcase (~$12-25), sleep on clean fabric to reduce irritation.
- tattoo-friendly salve (~$7-15), for targeted touch-ups during healing.
8. Wrapped Around Elbow Petal Band
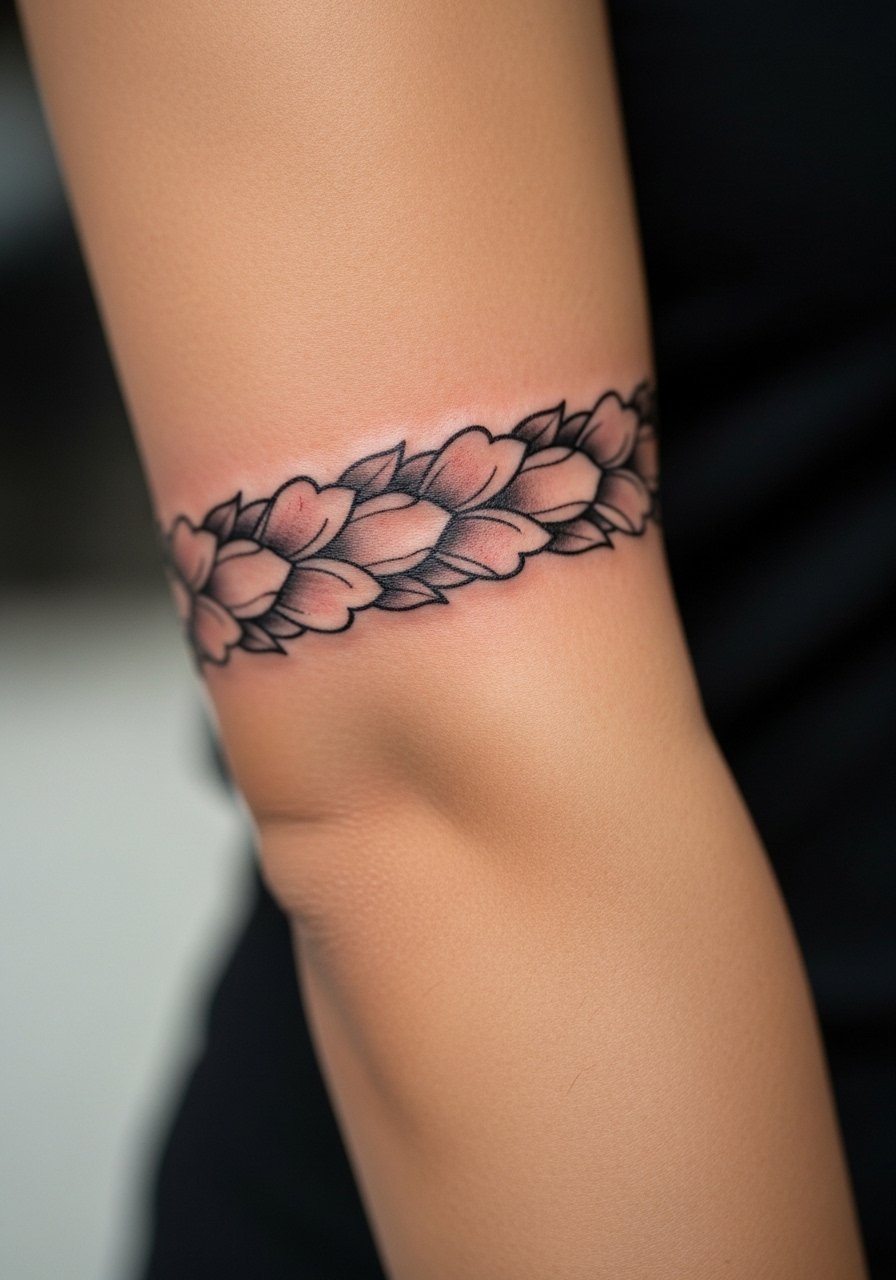
Style/Technique: Petal band, joint-friendly layout
Pain Level: 6/10
Session Time: 1 to 2 hours, may need repositioning
Best For: Elbow accents, sleeves that cross joints
The elbow is a tricky canvas because movement and thicker skin change how ink settles. A petal band wraps across the crease with small breaks so lines do not sit directly in the fold. Ask for 2 to 3 mm gaps where the elbow bends so the design does not blur. This creates a striking bracelet effect that is still minimalist. Expect slightly more discomfort and longer healing. Use a thin film dressing when bending a lot and keep the area moisturized with fragrance-free healing ointment.
A common mistake is placing continuous heavy lines across the fold, which can lead to distortion.
Mistake to Avoid: Running solid bands directly through the crease so the tattoo distorts with movement.
9. Shoulder-to-Wrist Micro Bouquet
Style/Technique: Distributed bouquet clusters, connective stems
Pain Level: 5/10
Session Time: 2 to 4 hours split across sessions
Best For: Full illusion sleeves without heavy saturation
Scattering several tiny bouquets from shoulder to wrist gives the impression of a full sleeve while keeping most skin visible. The trick is pacing the clusters, placing denser clusters at natural sightlines like the outer arm and looser ones near the inner arm. This is great for people who want the sleeve look without committing to solid black. It is higher budget because you may need multiple sessions, but each session can be short. Keep a soft, unscented lotion on hand like unscented skin moisturizer for ongoing care.
A common mistake is flattening cluster sizes so the whole arm reads the same, which removes visual stops.
Mistake to Avoid: Making every bouquet identical so the sleeve lacks focal rhythm.
10. Watercolor Wash Without Fill
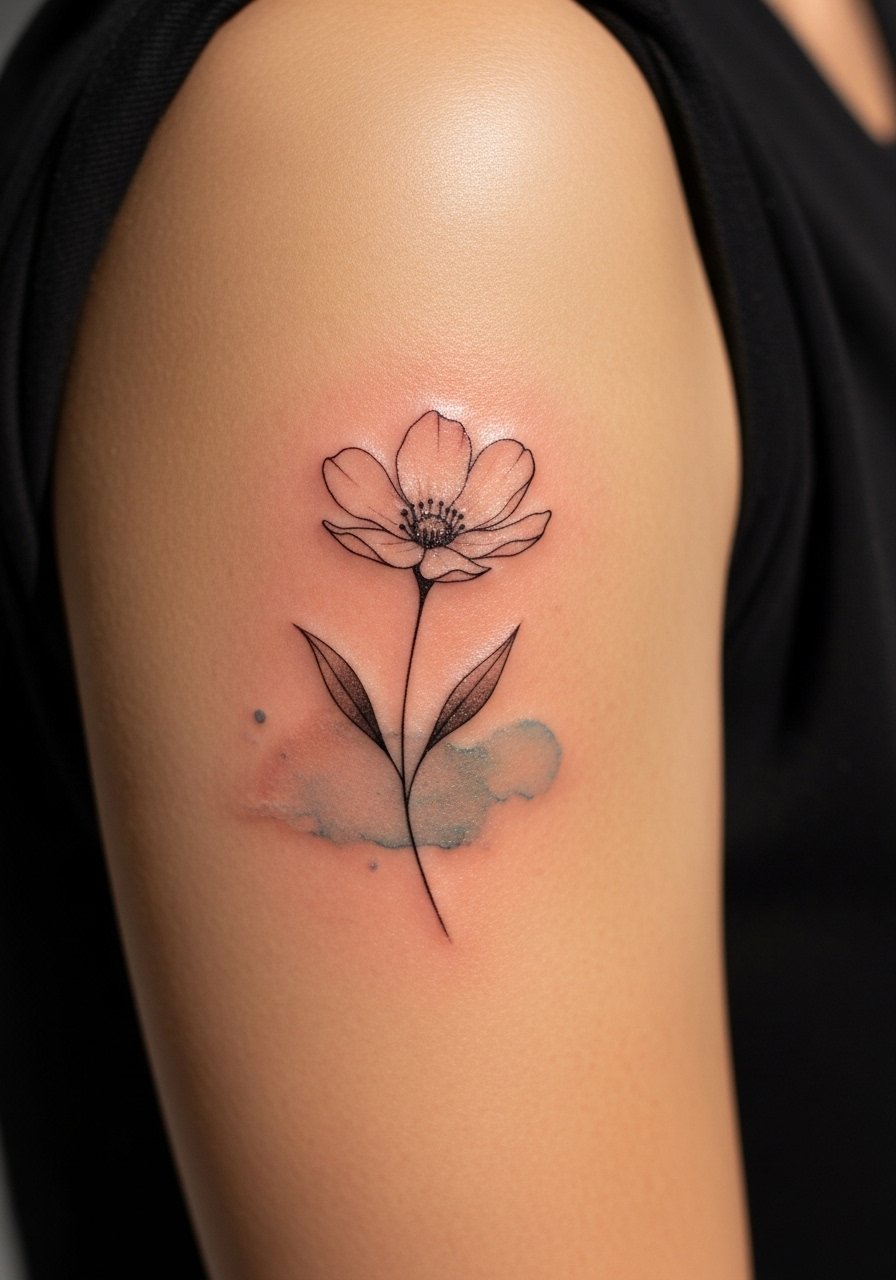
Style/Technique: Light wash, minimal outline anchor
Pain Level: 5/10
Session Time: 1 to 2 hours
Best For: People who want color without heavy saturation
A soft wash behind a line flower can suggest color while keeping the design airy. Ask for diluted pigments and a stippled application so the wash heals patchy by design rather than blotchy. Use sparing color, like a pale wash of botanical green or soft rose, and avoid heavy fills that age unevenly. This works for people who want a subtle hint of color and are okay with occasional touch-ups. During healing, use a recovery balm like gentle healing balm to keep pigment from drying hard.
A common mistake is asking for saturated watercolor that looks soft in photos but cakes on skin when healed.
Mistake to Avoid: Requesting heavy watercolor fills that will fade into uneven patches.
11. Geometric Framing With Single Flowers
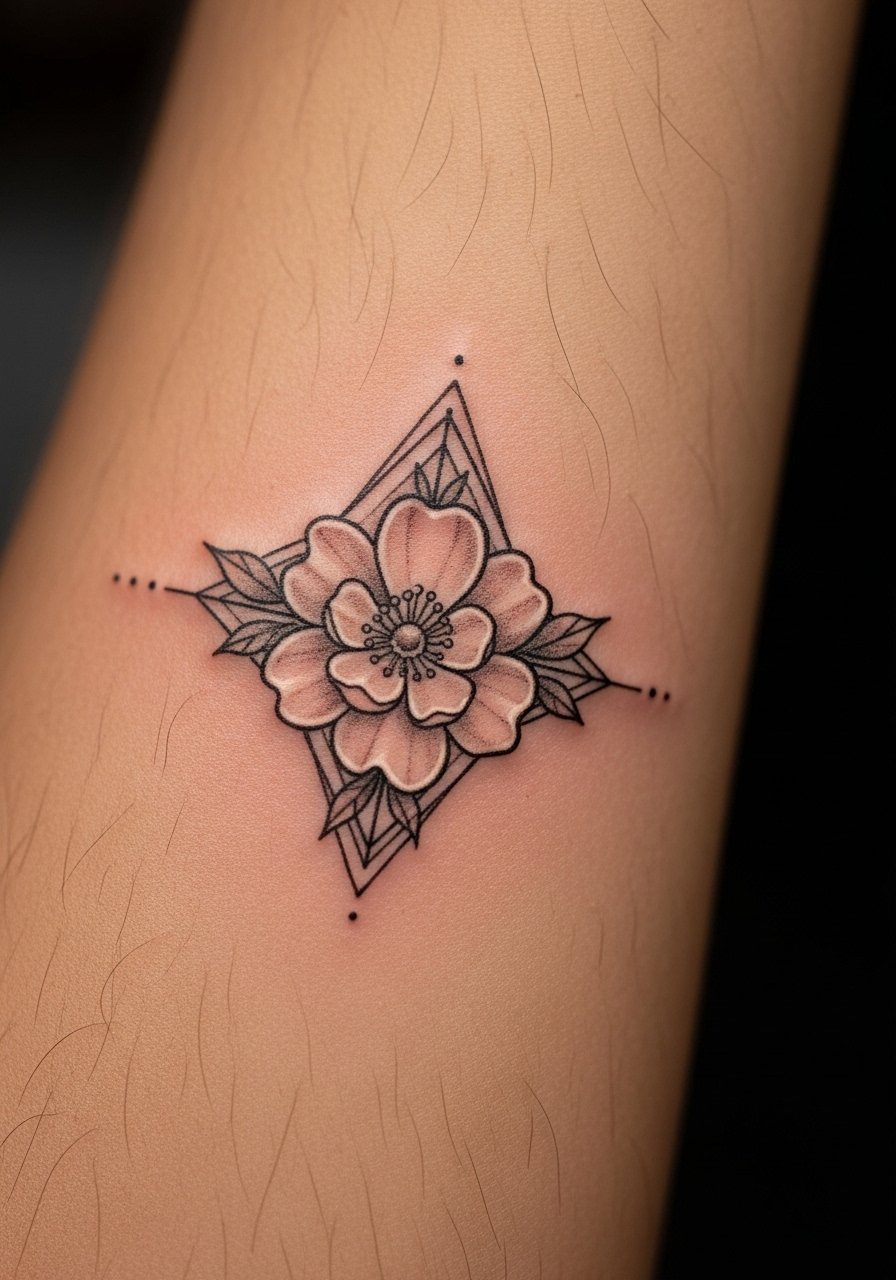
Style/Technique: Geometric framing, single-flower anchors
Pain Level: 4/10
Session Time: 1 to 1.5 hours
Best For: Modern minimalists, people who want structure
Thin geometric frames around one or two small flowers add a modern twist. The geometric lines should stay under 0.4 mm so the flowers remain the focus. This pairing reads clean and architectural, and it suits people who want structure without bold blocks. If you have a busy job, frames make it easier to crop or extend the design later. A simple aftercare routine with antibacterial green soap keeps the thin lines clear during the first week.
A common mistake is requesting thick geometric bands that overpower the floral centerpiece.
Mistake to Avoid: Choosing heavy geometric lines that dominate rather than complement.
12. Fine Script Names With Tiny Flowers
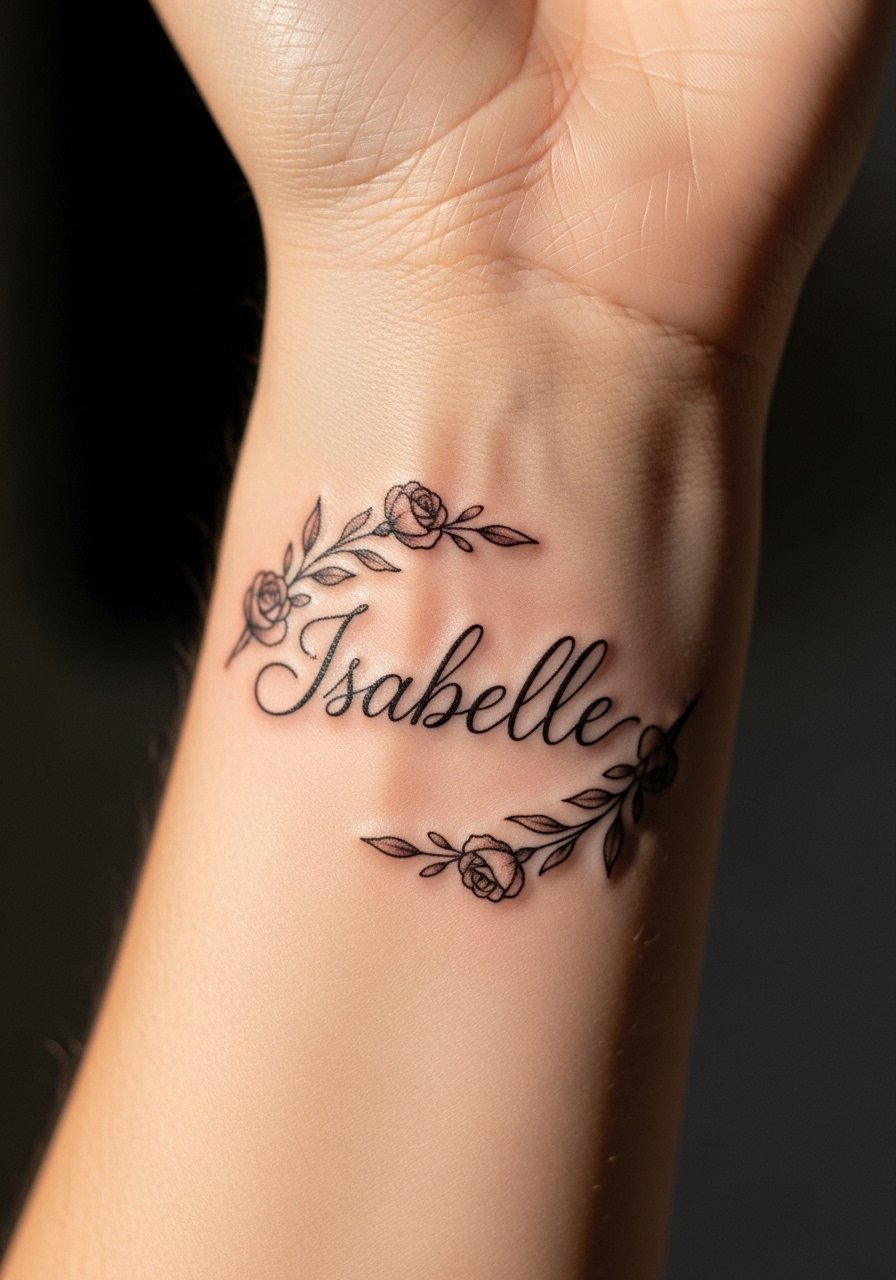
Style/Technique: Fine script paired with micro flowers
Pain Level: 3/10
Session Time: 30 to 60 minutes
Best For: Personal pieces, wrist and inner arm placements
A name in thin script accented by one or two tiny flowers feels intentional and understated. Keep script height tight, around 4 to 6 mm letter height, so the floral accents do not overwhelm the name. This is a quick, budget-friendly option and excellent for people who want meaningful text without bold lettering. Aftercare should avoid stretching the skin in that area while the letters settle. A portable mirror and a small tube of unscented skin moisturizer are handy.
A common mistake is picking a heavy font which competes with the flowers and makes the wrist look crowded.
Mistake to Avoid: Using thick script that fights for attention with the floral accents.
13. Match-Your-Skin Tone Ink Palette
Style/Technique: Tone-matched ink selection, subtle contrast
Pain Level: 4/10
Session Time: 1 to 2 hours
Best For: People with diverse skin tones who want subtlety
Choosing ink that complements your skin tone keeps minimalist flowers readable without high contrast. For darker skin, slightly warmer or muted blacks and deep browns can hold better over time. For fair skin, cooler black or soft gray works. Ask your artist about pigment dilution ratios so lines heal with the intended softness, and expect slightly more time on color matching during the consultation. A quality, broad-spectrum sunscreen for healed tattoos, like tattoo-safe sunscreen, preserves tone when you go outside.
A common mistake is defaulting to stark black on every skin tone, which can read harsh rather than integrated.
Mistake to Avoid: Choosing very high-contrast black without considering how it will age on your skin tone.
Sleeve Care That Keeps Lines Sharp
Thin coats beat one thick coat every time. Three thin applications of tattoo aftercare balm keep scabs thin and lines visible, while slathering can cause heavier scabbing and ink loss.
Grab antibacterial green soap for everyday washes. Clean with gentle pressure for the first two weeks and pat dry with a fresh cotton towel rather than rubbing.
I always check how a design photographs on my arm after peeling. Keep a portable mirror like portable makeup mirror to spot areas that might need a small touch-up.
Most people underestimate sun exposure. Apply tattoo-safe sunscreen to healed work whenever you are outside to slow fading and keep fine lines crisp.
If you are planning a sleeve, space sessions. Book short sessions rather than trying one long marathon to let ink settle between passes, and use unscented skin moisturizer during the downtime to support healing.
