
I kept buffing the nail until the chrome dulled, then blamed the powder. It took one salon tech to point out I was over-sanding the surface and using a thick top coat that trapped tiny bubbles. Once I started with two thin gel layers, cured each for 30 seconds, and pressed micro-powder on with a soft sponge, the mirror finish finally read like metal in photos and still looked wearable in real life.
These looks are for people who want high-reflective gold finishing without full salon time, about beginner to intermediate skill, and mostly budget friendly. Expect 20 to 50 minutes per set depending on length and detail. I worked on short, medium, and long nails so notes on length and removal are included below.
1. Full Mirror Gold Almond
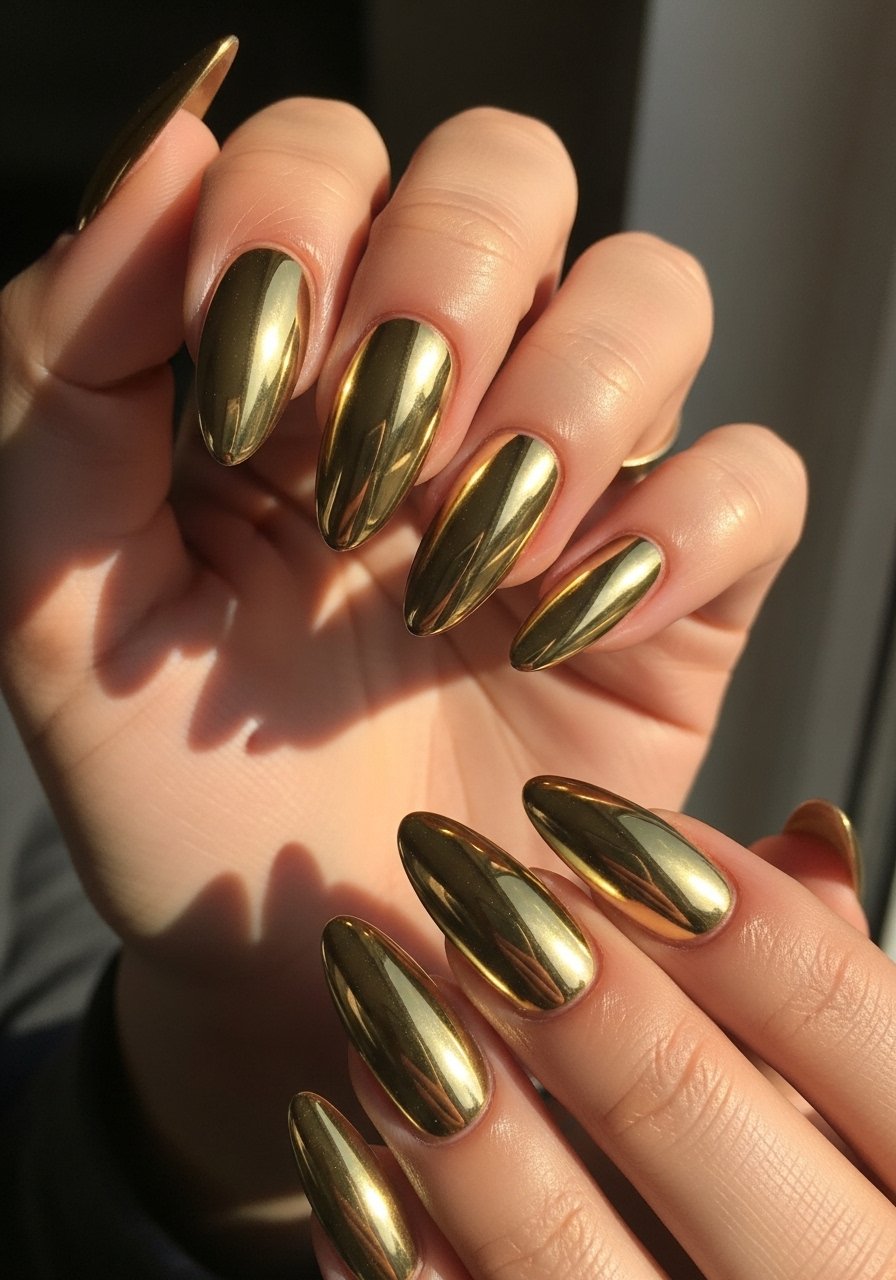
A true mirror chrome needs a perfectly even base. I paint two thin coats of a black gel base and cure each for 30 seconds under an LED lamp, then rub in microfine gold chrome powder with a soft sponge until the surface reflects. Finish with a no-wipe gel top coat cured for 60 seconds to lock the shine. The result reads ultra-polished in photos, but in person you notice brushstroke-free depth and fine dimension. This suits evening events and anyone comfortable with longer nails. Try microfine gold chrome powder for the powder step and a no-wipe gel top coat to finish.
Style/Vibe: Full mirror chrome
Best For: Long almond, special occasions
Skill: Intermediate
Mistake to Avoid: Applying one thick base coat then powder. It traps texture and ruins the mirror effect.
2. Subtle Foil-and-Chrome Short Squares
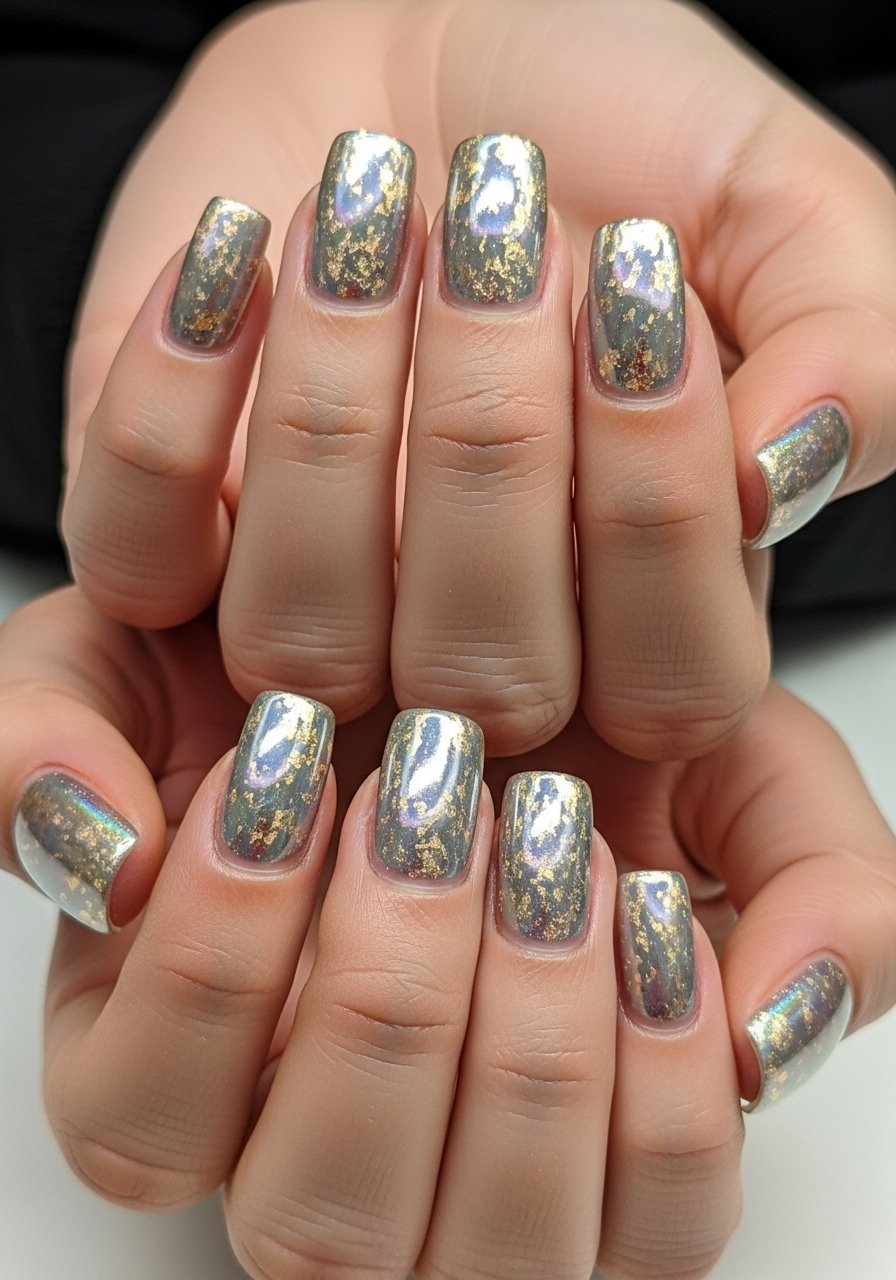
If you like chrome with texture, press a few irregular gold foil pieces onto a single cured base coat, cure, then buff a very light layer of chrome powder over the whole nail so the foil peeks through like veins of metal. Use a gel with medium opacity so the foil shows without needing heavy layers. This creates a lived-in luxe look that works on short nails and feels low maintenance for everyday wear. Pair with a gel polish in sheer nude and a nail art foil set.
Style/Vibe: Textured chrome with foil
Best For: Short square, everyday wearable
Skill: Beginner
Mistake to Avoid: Over-pressing foil so it lifts under the top coat.
3. Negative Space Chrome French Tips
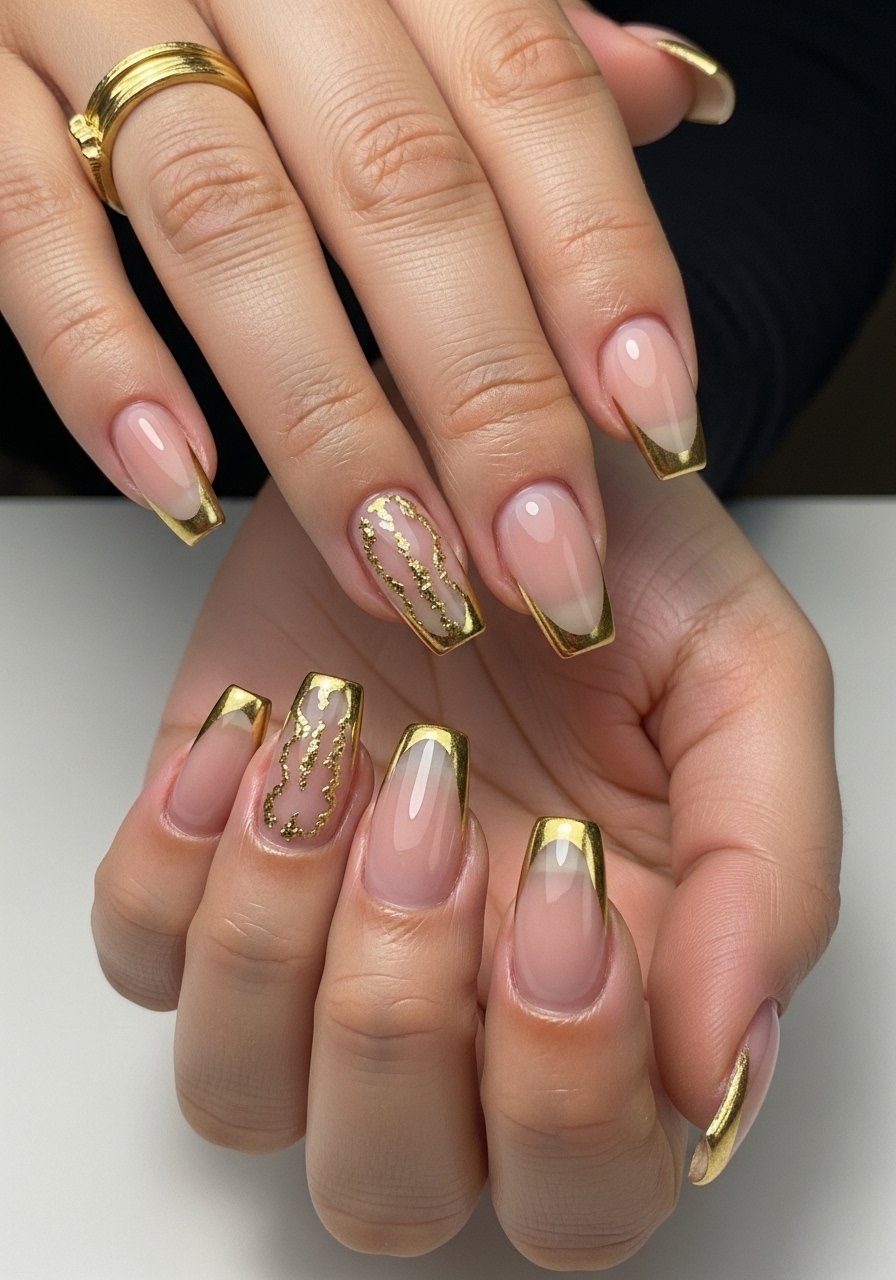
A modern French uses negative space to make chrome feel less precious. Paint a sheer builder gel leaving a 2 to 3 millimeter gap at the base, cure, then freehand thin chrome tips with a micro brush and press a small amount of powder. Cure under LED for 30 seconds and finish with a glossy top coat. The look photographs clean and still shows nail growth less obviously than a full chrome. Great for office wear or someone easing into chrome. I like a fine detail nail art brush for the tips.
Style/Vibe: Negative space French
Best For: Medium coffin, office or daytime
Skill: Intermediate
Mistake to Avoid: Painting thick tips that look heavy instead of thin, reflective edges.
4. Matte Chrome Accent Nail
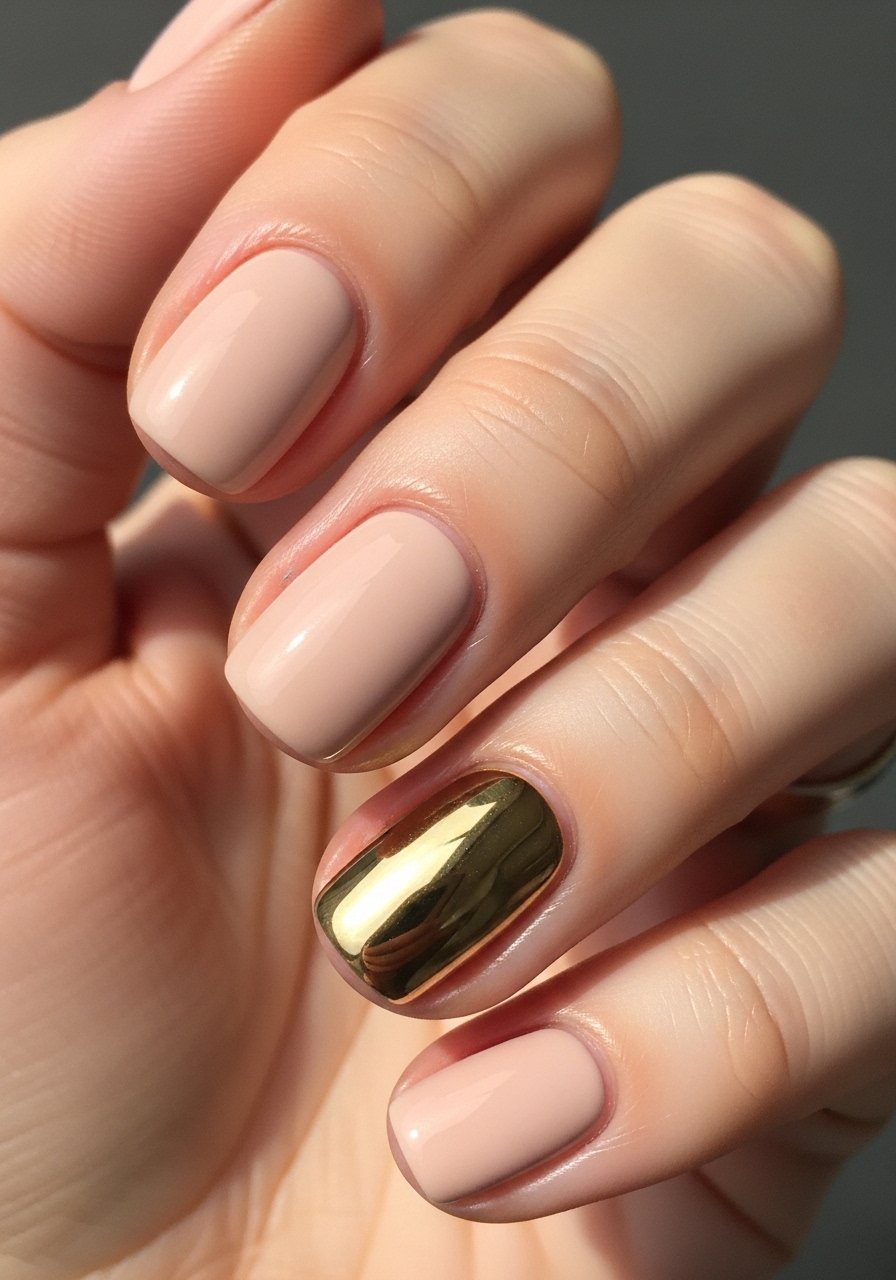
Matte plus chrome creates a contrast that reads modern and playful. Paint three to four nails with a matte nude gel and cure. On the accent nail, apply black or deep brown gel base, cure, buff in chrome powder, then seal with a glossy no-wipe top coat. For the matte nails use a matte top coat cured 30 seconds. This pairing fits short to medium lengths and is a quick way to add drama without full-on shine. Use a matte top coat gel for the flat nails.
Style/Vibe: Matte and chrome contrast
Best For: Short rounded, low-key statement
Skill: Beginner
Mistake to Avoid: Applying matte top coat over chrome; it dulls the mirror effect and flakes.
5. Rose Gold Ombre Chrome
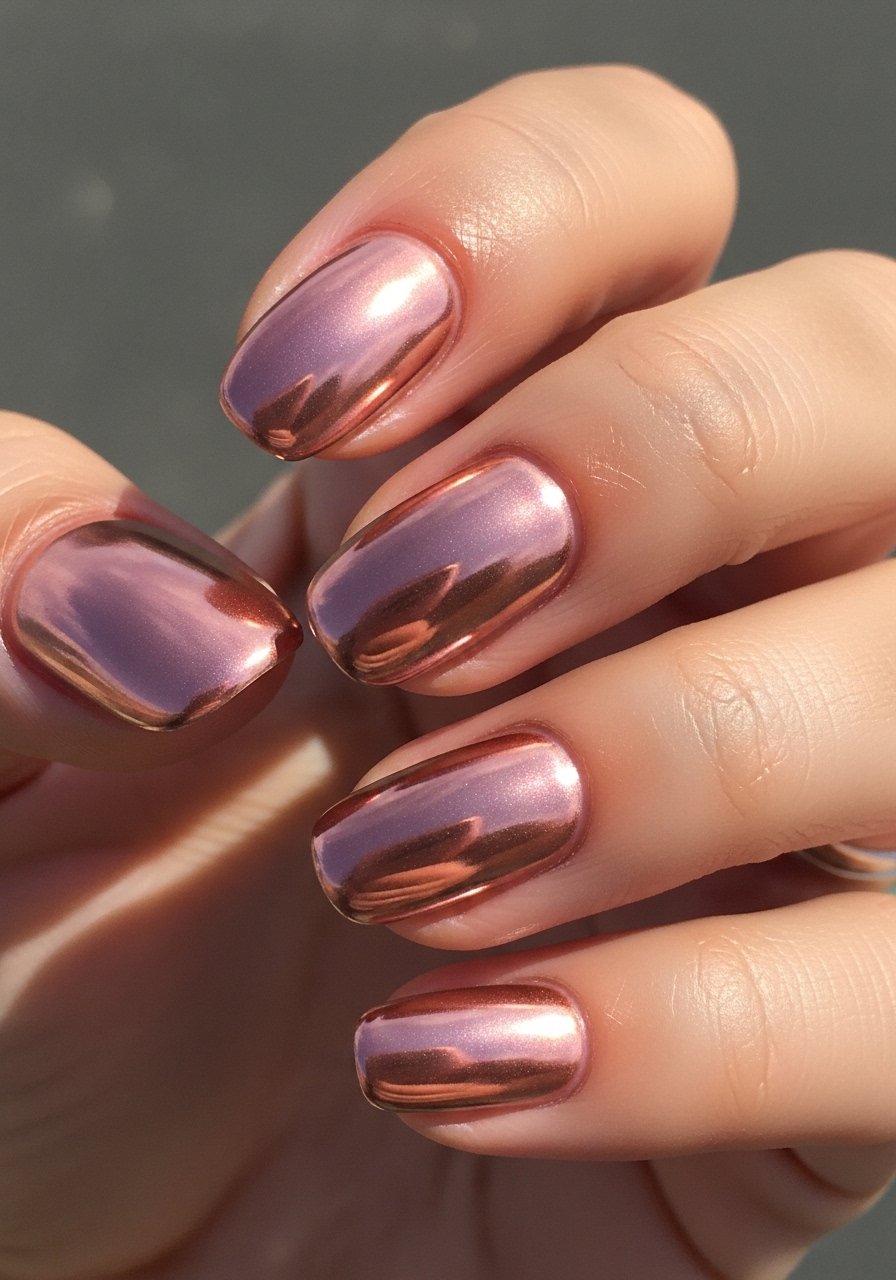
For this ombre, mix a tiny pinch of rose-tinted chrome powder into clear gel to tint the base. Paint a sheer nude base, cure, then apply rose-gold powder at the cuticle and blend outward with a soft sponge to create a fade. Two passes with light pressure give a soft gradient without streaks. Cure between passes for 30 seconds, then seal with a glossy top coat. The effect feels warm and is flattering on many skin tones. Try rose gold chrome powder for the tint.
Style/Vibe: Subtle rose gold ombre
Best For: Medium rounded, brides or daytime events
Skill: Intermediate
Mistake to Avoid: Loading the sponge with too much powder at once and creating a hard line.
6. Chunky Chrome Glitter Base
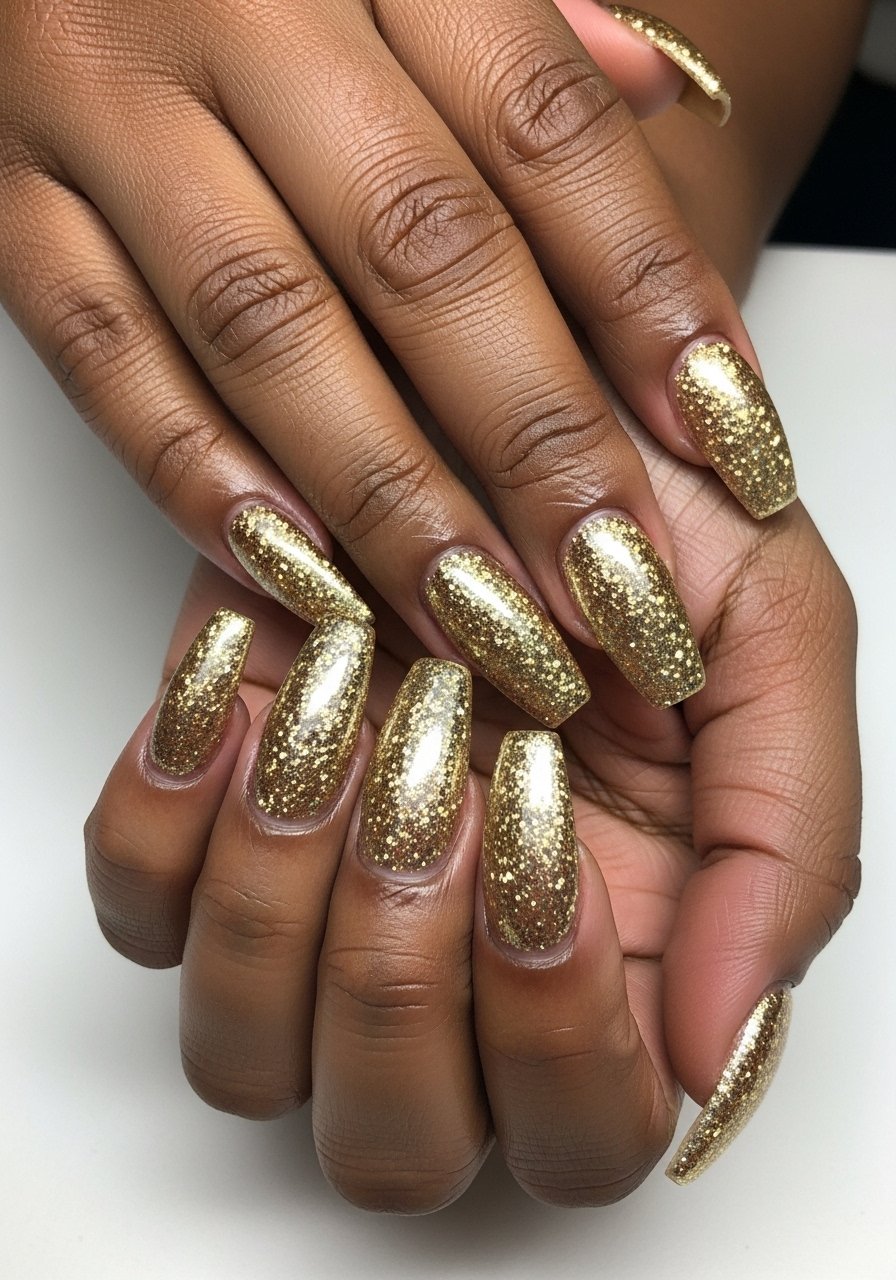
Start with a dense gold glitter gel as a base, cure fully, and then lightly rub chrome powder to add reflective shine on top. The glitter gives texture so the chrome reads multi-dimensional instead of a flat mirror. Because the base is chunky, use a flexible gel top coat to prevent chipping and cure 60 seconds. This option reads party-ready and holds up well under lights. Use a chunky gold glitter gel and a flexible gel top coat.
Style/Vibe: Textured glitter chrome
Best For: Long coffin, parties and nights out
Skill: Intermediate
Mistake to Avoid: Skipping a flexible top coat, which can lead to micro-cracks over chunky texture.
7. Chrome Marble Swirl
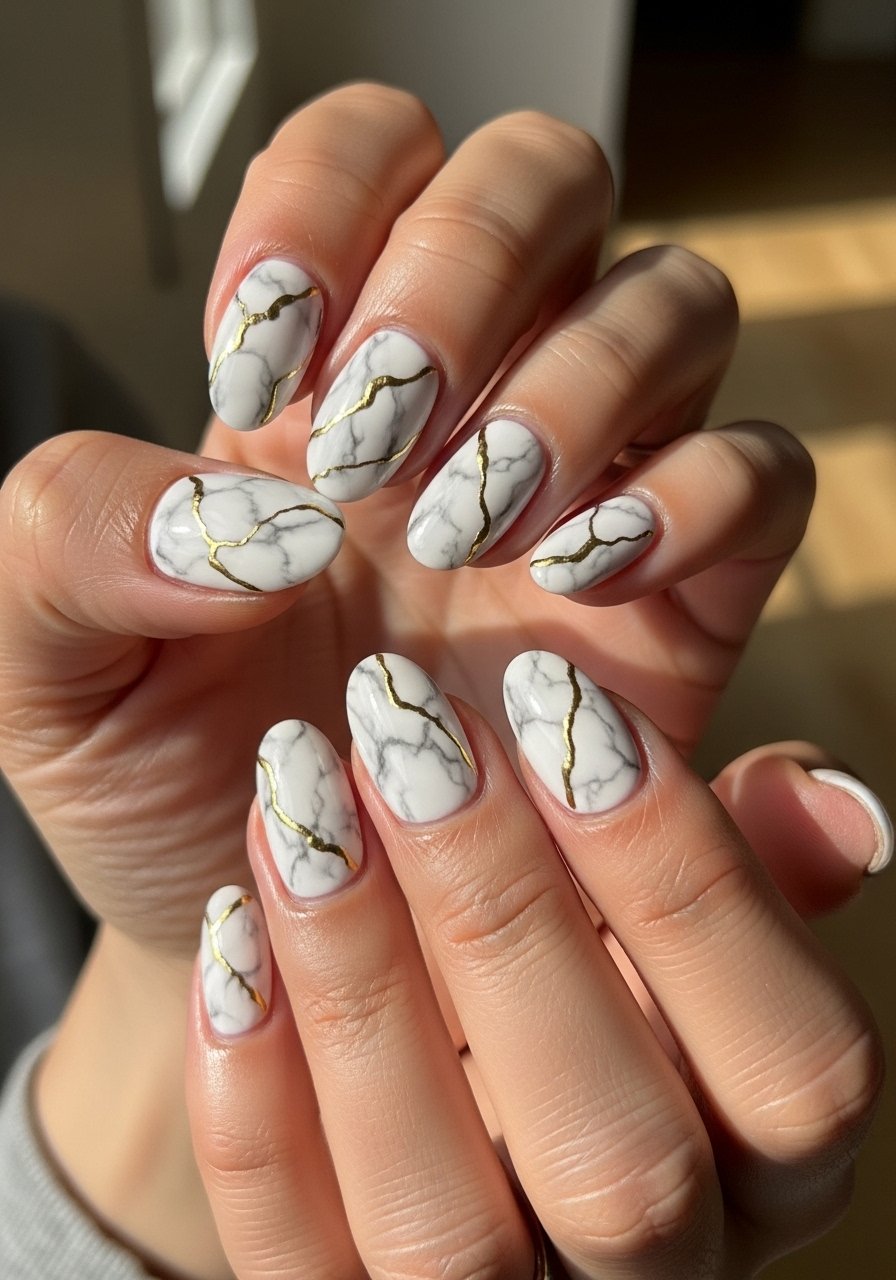
Marble plus chrome reads editorial. Paint a semi-sheer white base, then use a thin brush to add grey veins. Before sealing, pick out tiny areas of the veins with gold chrome to highlight them, pressing with a cotton swab. Cure each thin layer 30 seconds. The reflective gold lifts the marble and keeps the look modern. This is a higher-skill option but works in medium length and photographs with depth. I learned the trick from a tech who works at a salon downtown and swears by low-pressure powder application. Use a thin detail brush.
Style/Vibe: Marble with chrome highlights
Best For: Medium oval, editorial or photos
Skill: Advanced
Mistake to Avoid: Pressing chrome too aggressively, which blurs the marble veins.
If you want to try one of these looks at home, start with a small kit so you can practice the powder pressure and curing steps.
Chrome Essentials for Gel Manis
Tools:
- LED nail lamp (~$25-50), reliable cure times make all the difference.
- No-wipe gel top coat (~$8-20), necessary for mirror shine.
Chrome & Powders:
- Microfine gold chrome powder (~$6-15), soft applicator pickup works best.
- Rose gold chrome powder (~$6-15), for warm fades.
Prep & Detail:
- Peel-off base coat (~$6-12), useful if you plan short-term chrome.
- Fine nail buffer block (~$4-10), light buffing only.
- Detail nail art brush (~$5-12), for tips and veins.
8. Half-Moon Reverse Chrome
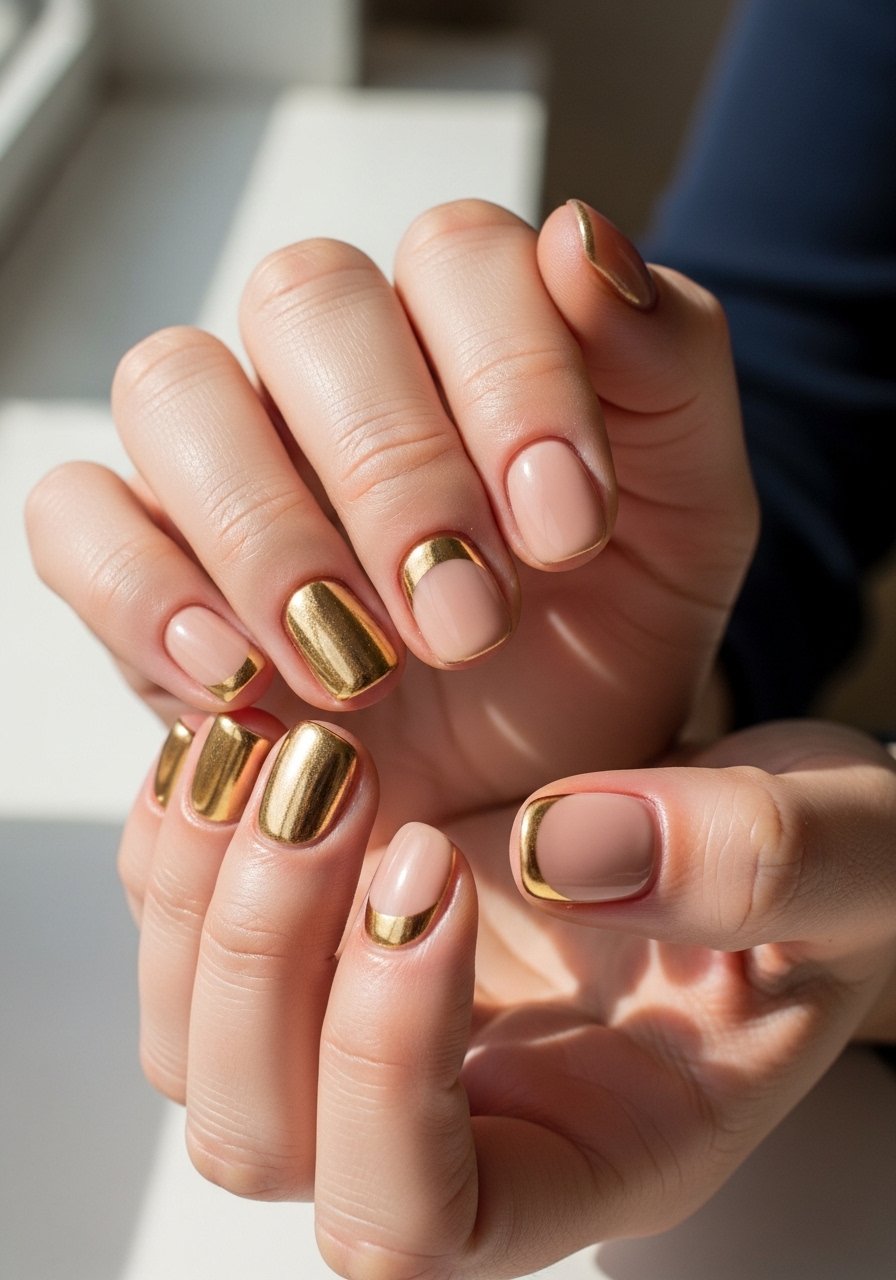
Reverse half-moons are low-maintenance and forgiving of growth. Paint a thin layer of builder gel leaving the cuticle crescent exposed, cure, then fill that crescent with chrome by dabbing powder on a small brush. Seal with a thin no-wipe top coat. Because the chrome sits low on the nail, chips around the edge are less visible as the nail grows. This is ideal for short rounds and those who want a chic look with minimal upkeep. Try a peel-off base coat if you want temporary wear.
Style/Vibe: Reverse half-moon chrome
Best For: Short round, low-maintenance wear
Skill: Beginner
Mistake to Avoid: Overfilling the lunula area and creating a bulky base.
9. Chromed Edge Floating Tip
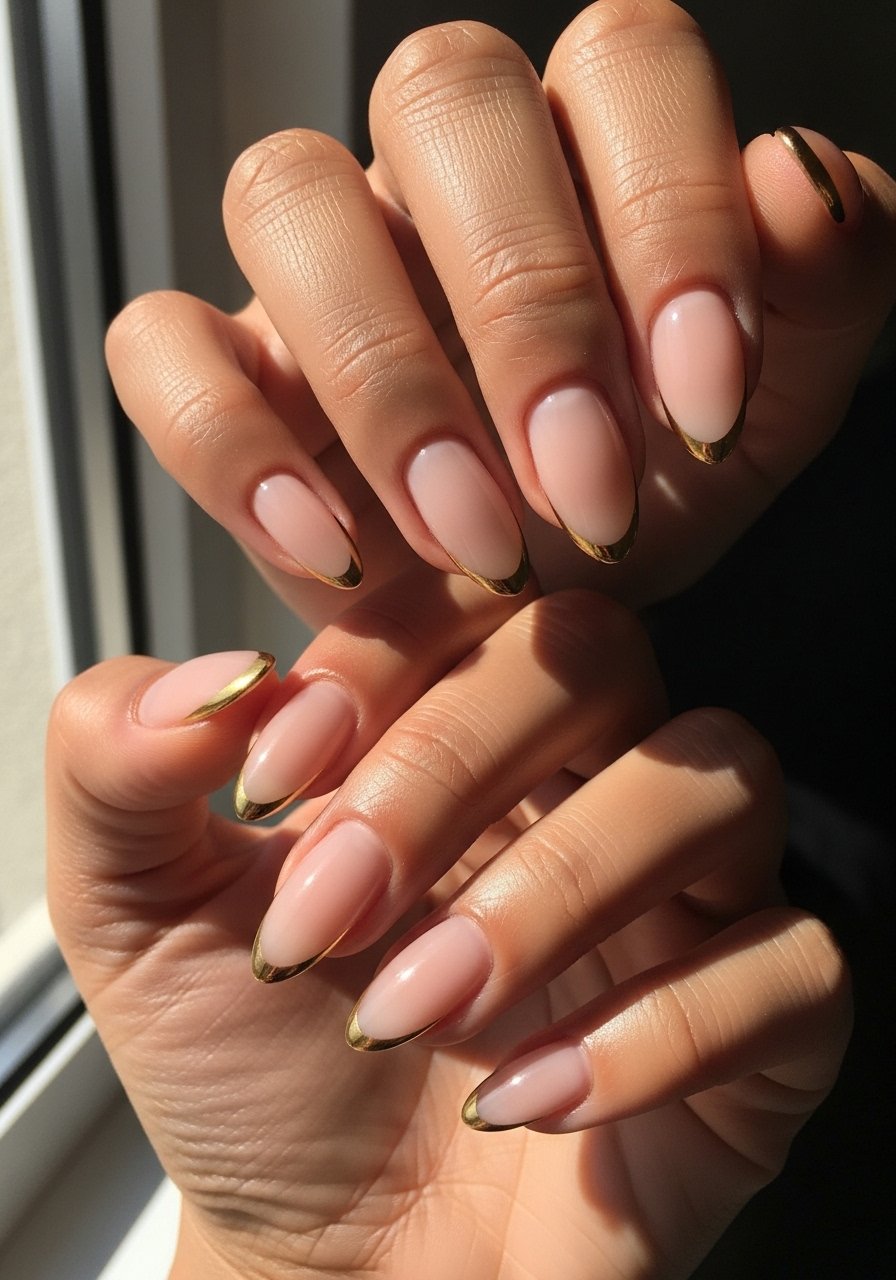
A thin metallic edge looks modern and makes nails appear longer without extensions. Use a toothpick or ultra-fine brush to apply a strip of gel at the very tip, cure 30 seconds, then press chrome powder to the thin edge only. Seal with a glossy top coat cured 60 seconds. The precise line reads editorial in photos and is subtle in person. It works on medium lengths and is forgiving if the line is not perfectly straight. For control, use a nano detail brush set.
Style/Vibe: Floating chrome edge
Best For: Medium almond, elongating effect
Skill: Intermediate
Mistake to Avoid: Drawing a thick border that shortens the nail visually.
10. Satin Chrome with Metallic Striping
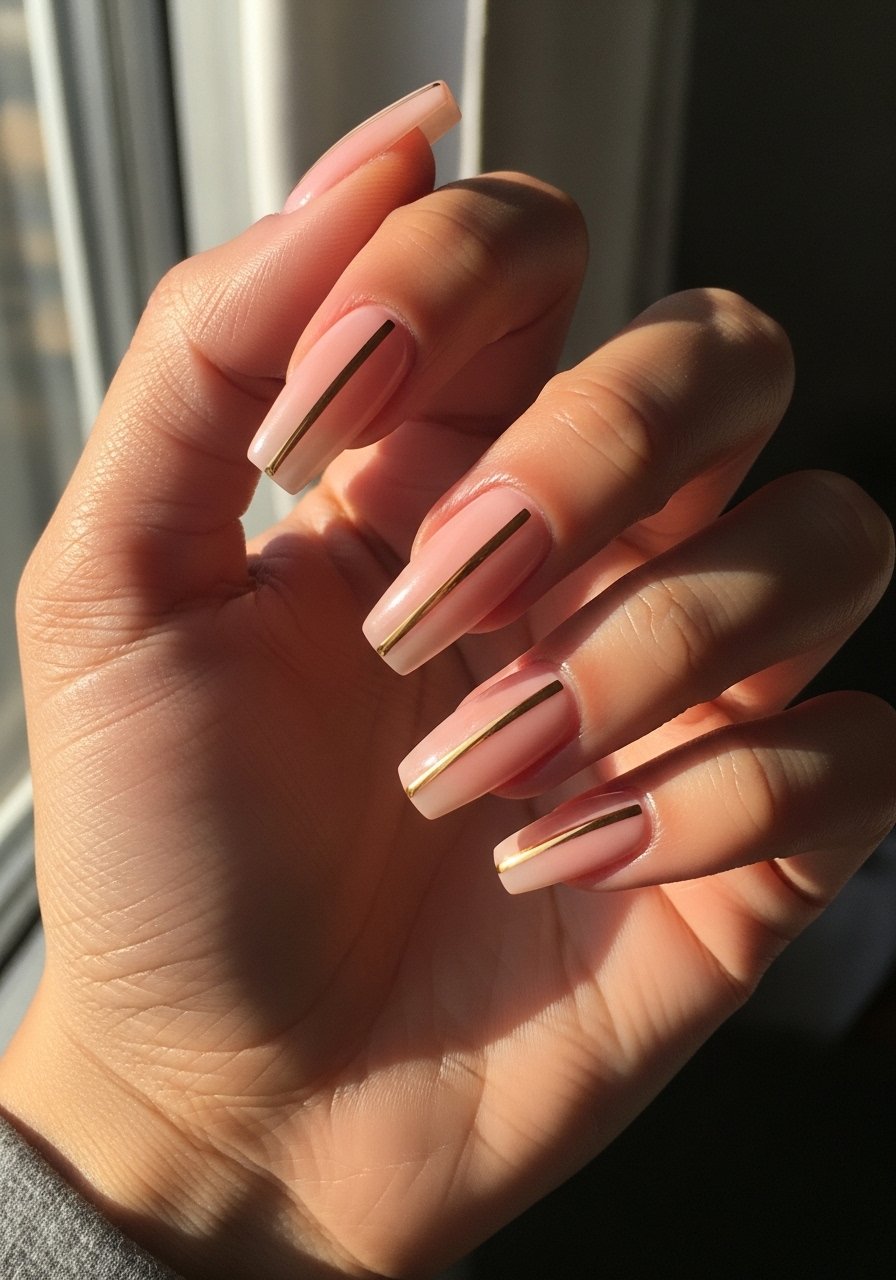
Satin finishes soften mirror shine and read chic. Apply chrome as usual, then buff lightly with a super-soft brush to take down extreme shine. Add metallic striping down the center with a micro brush and a tiny amount of chrome powder pressed onto a dot of gel. Seal the stripes with a thin top coat and the rest with a matte top coat, or use a semi-matte top coat for a soft sheen. This look suits fashion-forward long nails. Use a satin top coat to keep the finish consistent.
Style/Vibe: Satin chrome with metallic lines
Best For: Long coffin, editorial styling
Skill: Advanced
Mistake to Avoid: Using too much pressure when buffing satin, which removes chrome entirely.
11. Peel-Off Chrome for Short-Term Wear
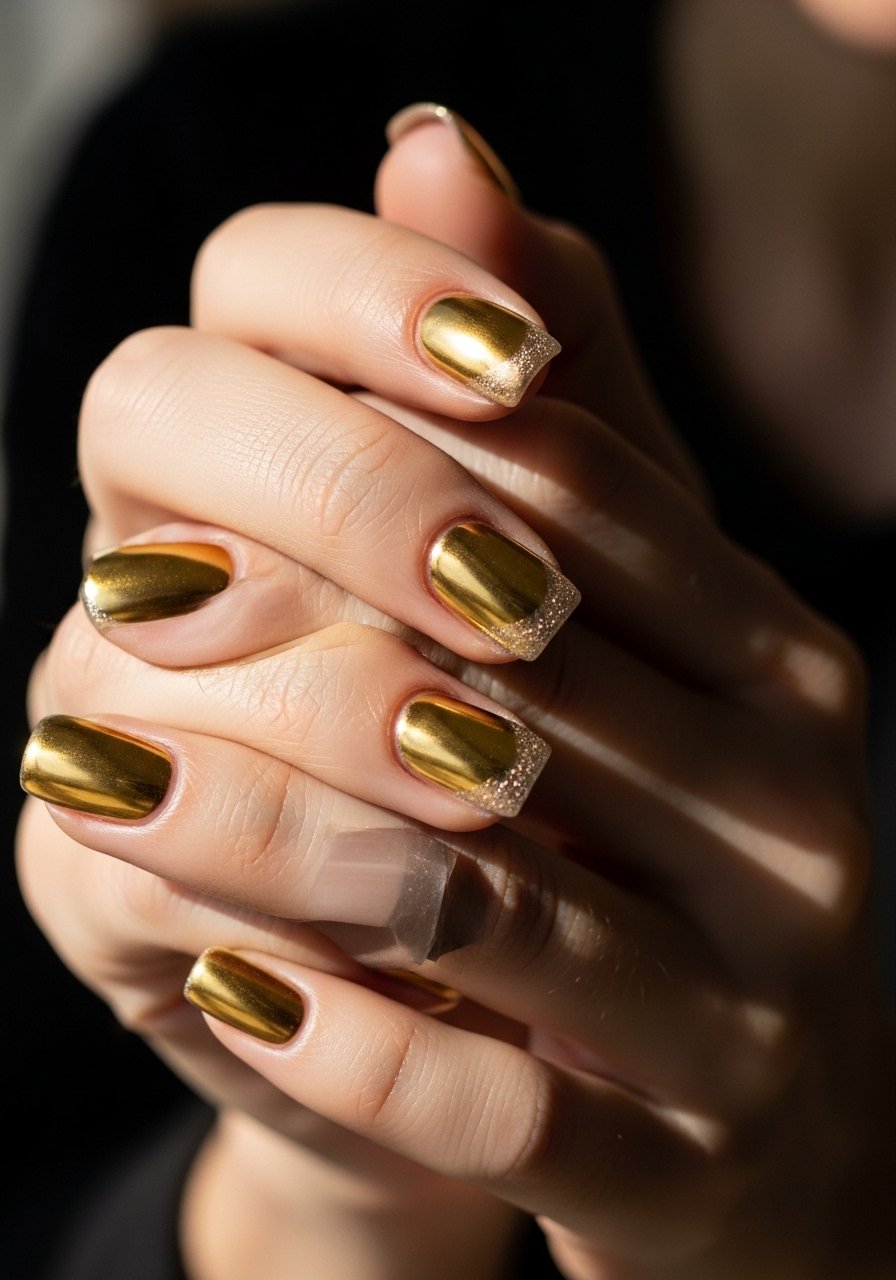
If you want chrome for a weekend or event, use a peel-off base coat under the chrome so removal is easy. Apply two thin gel layers over the peel-off base, cure each 30 seconds, press chrome powder, and finish with a no-wipe top coat. The chrome looks identical to a permanent set but comes off in one piece when you lift at the edge. This is perfect for someone testing chrome on short nails or avoiding acetone. I recommend a peel-off base coat and a gentle cuticle pusher to lift the edge.
Style/Vibe: Temporary peel-off chrome
Best For: Short square, weekend wear
Skill: Beginner
Mistake to Avoid: Applying peel-off base too thick and causing premature lifting.
Chrome Mani Shortcuts
Thin coats beat one thick coat every time. Three thin layers of base color cured 30 seconds each create a smoother mirror surface than one heavy layer, and chrome lays flatter.
Grab a no-wipe gel top coat. Pressing chrome into a sealed tack layer makes the shine last through light wear.
Most people buff aggressively. Instead, use a fine buffer only to level high ridges, then wipe with alcohol. Over-buffing removes the adhesion you need for chrome powder.
Keep a micro sponge applicator set on hand. Tap off excess powder and press with light circular motions for the most consistent mirror finish.
When testing a new powder, apply it to a single accent nail first. That way you learn the right pressure and cure times without committing to a full hand.