
I kept asking artists for "gothic florals" and getting tiny sprigs that blurred into a gray smudge after a year. The moment I stopped chasing fineline photos and started talking about contrast, line weight, and how I sleep on my arm, everything aged better. These are the floral arm ideas I actually saved to my folder after learning the hard way.
These eleven designs are meant for someone who wants moody, wearable arm work without rebuilding their whole wardrobe. Expect studio-level sessions, mid-range budget for custom line work, and design notes that make coverable pieces look intentional. I pulled these together across five shops I have visited, and each idea includes placement, session time, and aftercare details you can use when booking.
1. Bold Black Rose Cluster
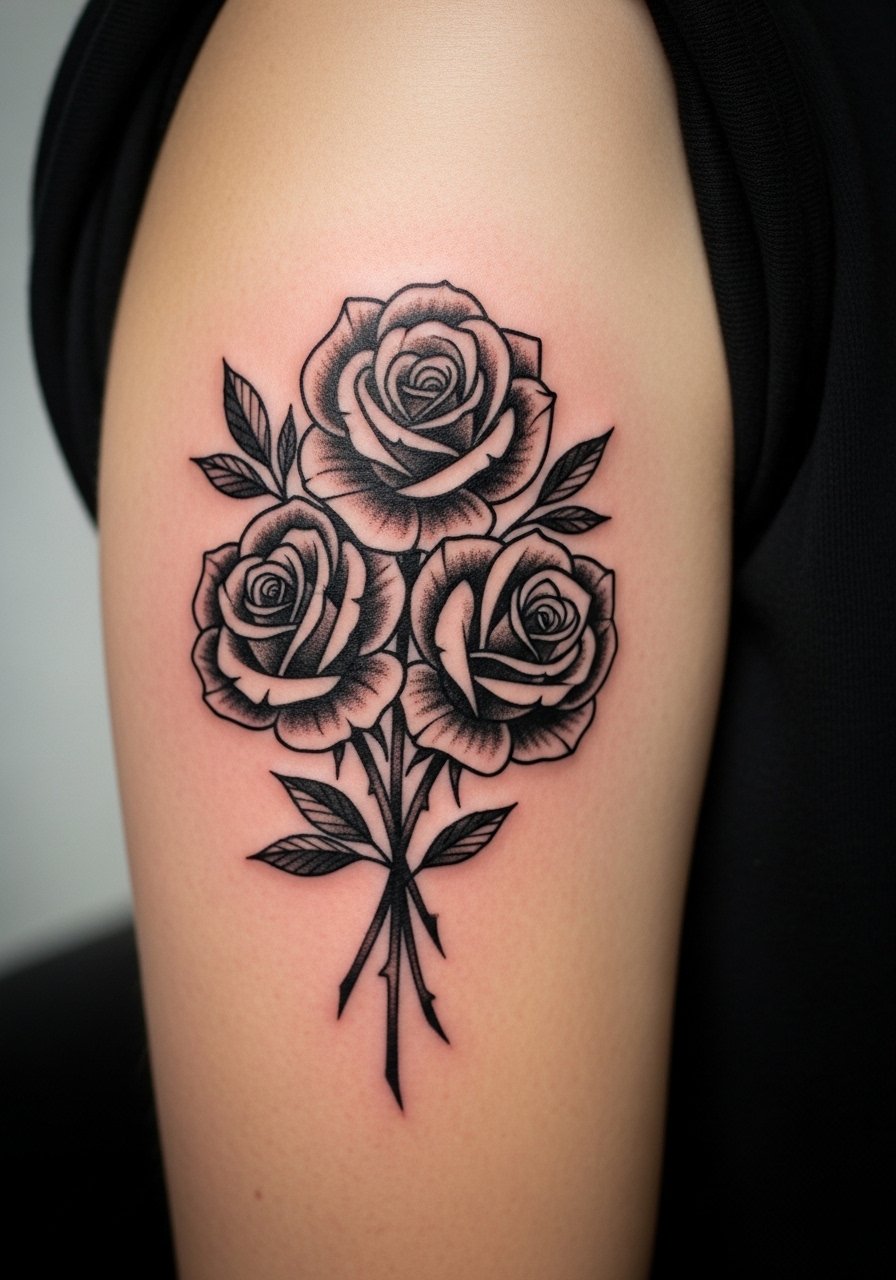
Start here if you want the roses readable from a distance. The trick is bold outer contours with thinner inner detail. Visually this reads gothic because 70 percent of the value is held by solid black petals, while 3RL micro lines add petal veins. It creates a weighty, wearable sleeve starter that suits medium to large arm canvases and covers poorly healed florals well. Budget tip, ask for layered sessions so the artist inks heavy fills first, then comes back for 3RL detail. Pair with a fragrance-free aftercare balm I trust to keep blackwork rich.
Style/Technique: Blackwork Rose Cluster
Pain Level: 5/10
Session Time: 2 to 4 hours
Best For: Outer upper arm, cover-up projects, readers who wear long sleeves to work
Mistake to Avoid: Asking for tiny, all-fine-line roses that have no bold anchor for aging.
2. Victorian Lace Floral Band

If you like detail but need something that stays crisp, a banded lace floral uses tight negative space and slightly thicker frame lines. Visually it gives that gothic Victorian vibe without relying on heavy black fills. It feels feminine and architectural at once, and it suits narrow forearms because the pattern reads as a band rather than scattered pieces. Ask your artist for a 2:1 line-weight rule, where outline lines are twice as thick as inner decorative lines. For a budget option, get a single-session outline and a follow-up shading pass.
Style/Technique: Ornamental Lace Band
Pain Level: 4/10
Session Time: 1.5 to 3 hours
Best For: Mid-forearm band, readers who want visible but coverable work
Mistake to Avoid: Filling every tiny eave with detail, which causes the design to blur once the skin shifts.
3. Thorned Vine Wrap
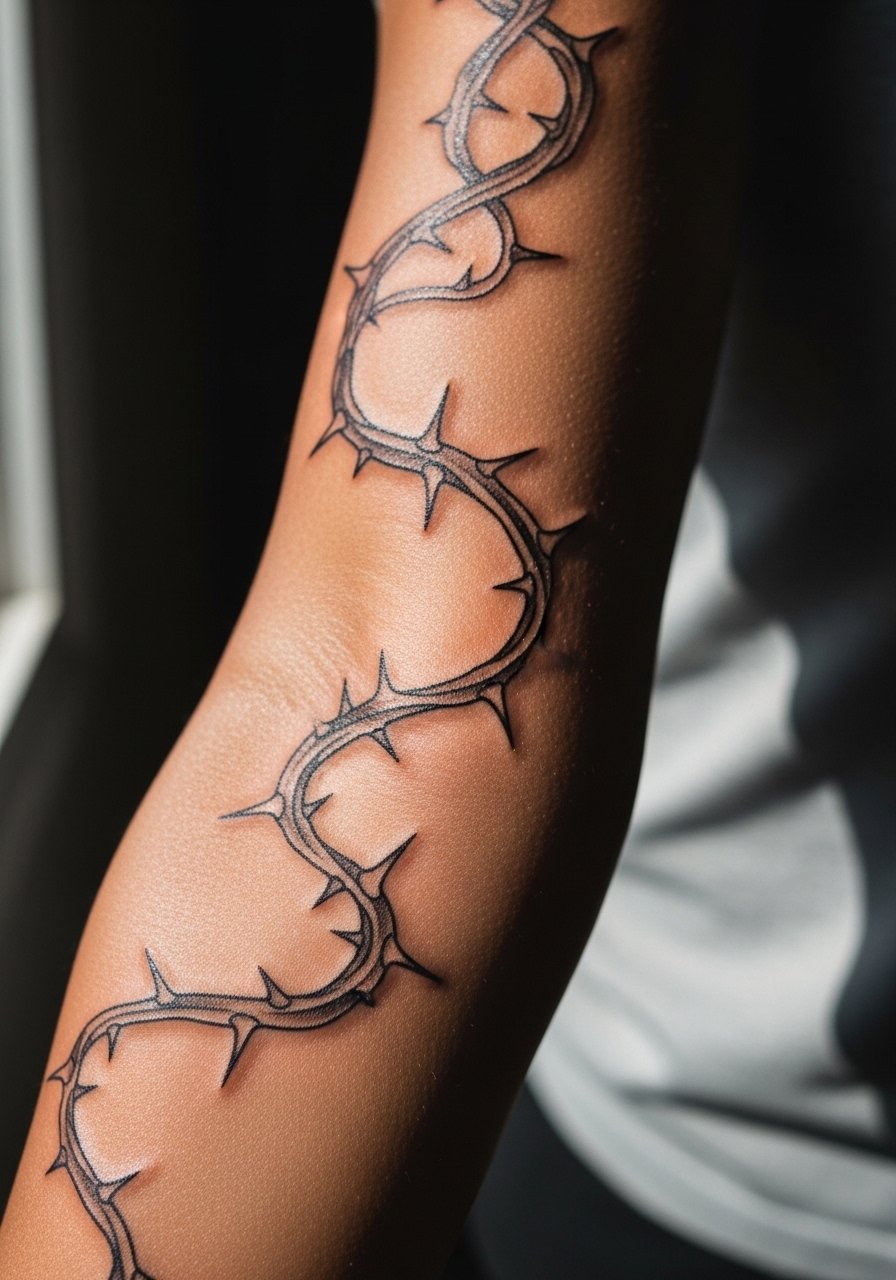
A thorned vine works when you want motion and edge. What makes it read gothic is the contrast between thin stem lines and chunky thorns. Ask for 1mm spacing in stipple shading along the vine so the shadow reads without filling the negative space entirely. The result is a slinky, slightly aggressive piece that follows musculature and looks deliberate under sleeves or on show. This is a great choice for someone who hates crowded compositions and wants a single visual element to age with them.
Style/Technique: Flowing Thorn Vine
Pain Level: 3/10
Session Time: 1 to 2 hours
Best For: Inner forearm, people who prefer elongated designs
Mistake to Avoid: Letting the vine overlap tattoos with similar line weight, which makes the composition compete.
4. Gothic Bouquet with Skull Accent
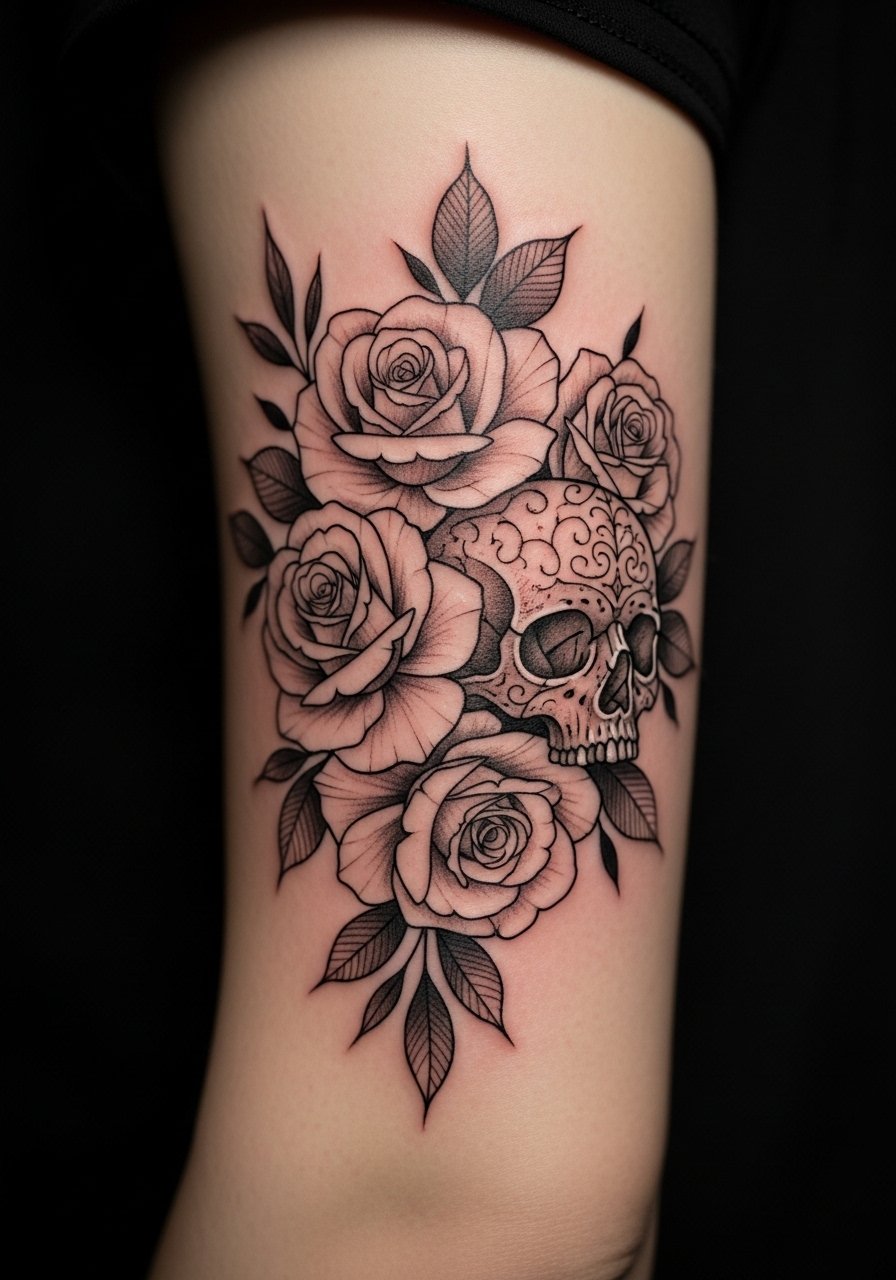
This is the theatrical option, two themes balanced in one piece. The skull gives the floral work narrative and helps the whole cluster read gothic instead of just dark. Visually, the skull should sit on a lower value plane, shaded with dotwork at 2mm density, so the roses keep prominence. This fits people who want statement pieces and do not need something easy to hide. If you are thinking coverability, place the skull toward the outside so you can drape clothing over the inner arm when needed.
Style/Technique: Botanical Memento Bouquet
Pain Level: 6/10
Session Time: 2.5 to 5 hours
Best For: Outer bicep or upper arm, statement wearers
Mistake to Avoid: Requesting heavy skull fill that visually swallows the floral detail.
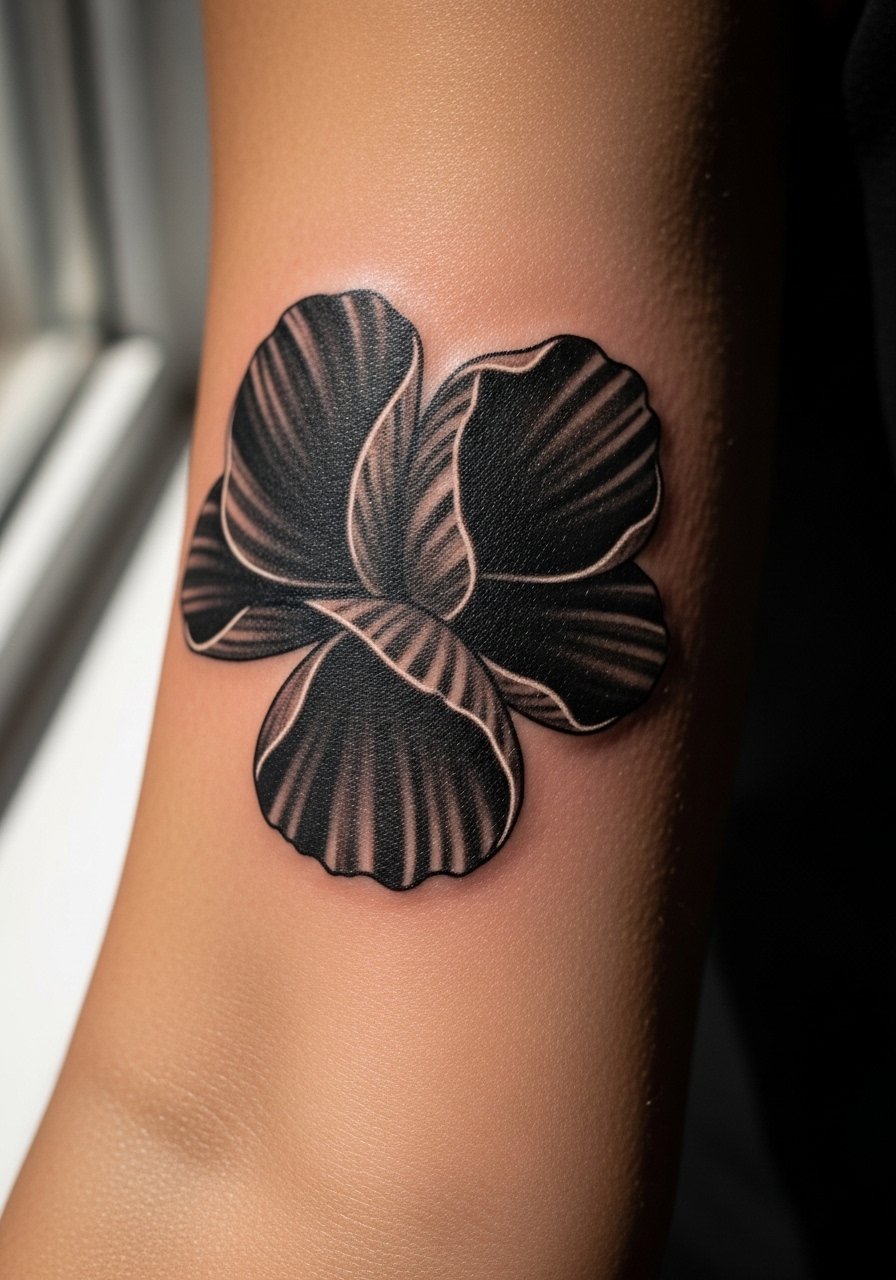
5. Negative Space Lilies

Negative space lilies are a smart swap for someone who likes gothic shapes but works in a conservative job. The artist tattoos the background black and leaves the flower as skin tone, so the lilies stay crisp as the piece ages. The visual result is high contrast and surprisingly elegant. Technique note, ask for at least 2mm of surrounding black to prevent the lily edges from softening over time. This design suits medium pain tolerance and short session windows.
Style/Technique: Negative Space Floral
Pain Level: 4/10
Session Time: 1 to 2 hours
Best For: Outer forearm, work-visible but easily covered with sleeves
Mistake to Avoid: Requesting hairline negative edges that blend into healed skin tone.
6. White Ink Highlights on Black Petals
White ink can add that wet shine look to gothic pieces, but it ages differently. Used sparingly as highlights over dense black petals, it reads like enamel and lifts the tattoo off the skin. Ask for thin white accents, not full white fills. Expect touch-ups after a year or two. This approach is best for collectors who are ready for maintenance and want a slightly elevated finish. It pairs well with the rose cluster from idea 1 if you want contrast within a sleeve.
Style/Technique: Blackwork with White Highlights
Pain Level: 5/10
Session Time: 1 to 2 hours plus touch-ups
Best For: Outer forearm or upper arm, people open to maintenance
Mistake to Avoid: Requesting large white areas that will fade to patchy patches over time.
7. Peony Cluster in Greywash
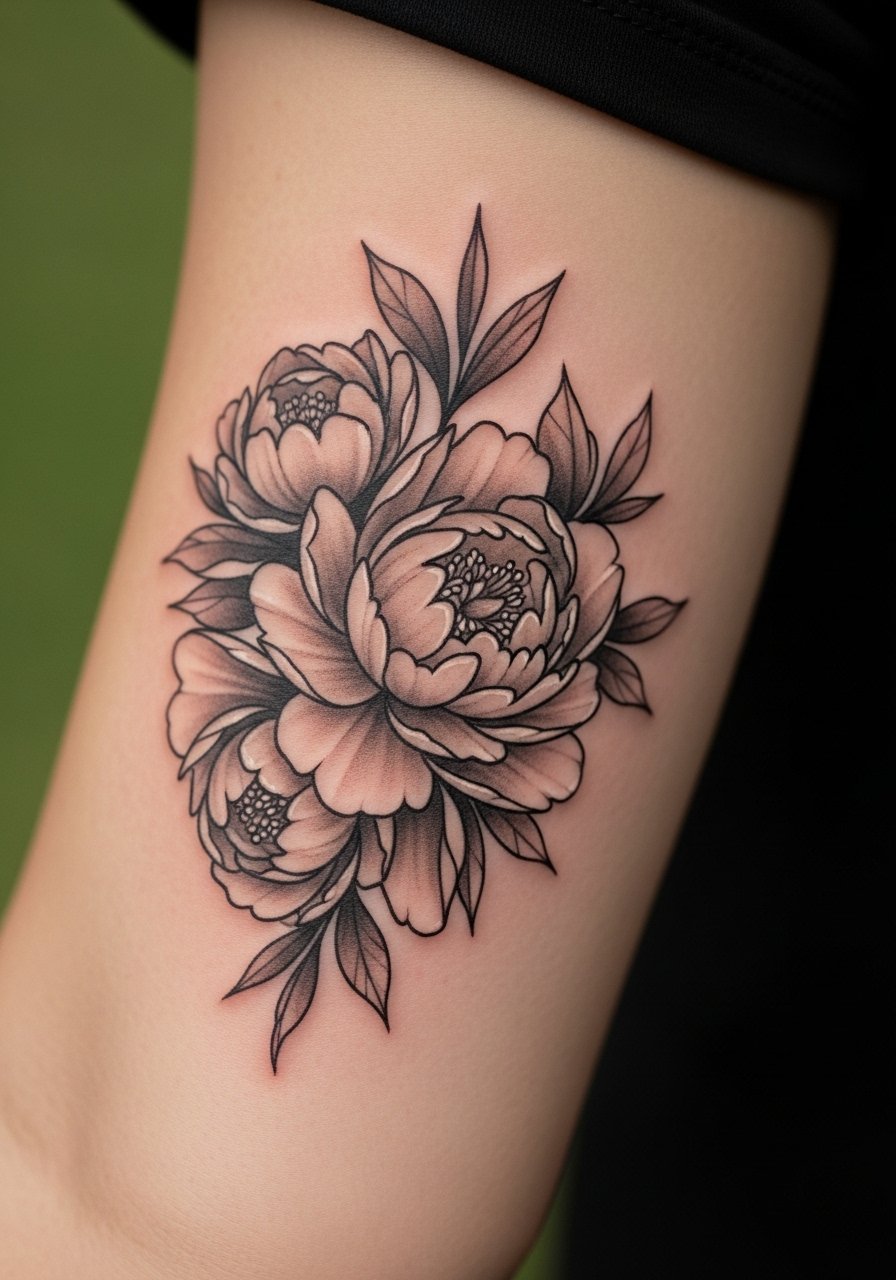
Peonies in greywash bring volume and a softer gothic feel. The technique uses layered grey values, with a 60:40 shading ratio that keeps shadows deep without going full black. This creates a textured, vintage look that works for both visible and coverable placements. It suits people who want the floral shape but prefer softer edges over the heavy black look. For budget reasons, plan shading across two shorter sessions rather than one marathon day.
Style/Technique: Greywash Peony Cluster
Pain Level: 5/10
Session Time: 2 to 3 hours split into sessions
Best For: Outer forearm, people wanting a softer gothic edge
Mistake to Avoid: Asking for one-pass heavy shading that heals patchy instead of layered depth.
If any of these designs have you saving screenshots, these are the items I actually recommend before booking.
Gothic Arm Aftercare Picks
Aftercare Essentials:
- fragrance-free aftercare balm (~$8-18). Gentle on fresh ink and keeps blackwork bold.
- antibacterial tattoo soap (~$6-12). Use for the first week during washing.
Studio Tools I Ask For:
- stencil transfer gel (~$10-20). Helps artists get placement right.
- numbing cream (~$12-25). Optional for long sessions.
Comfort & Maintenance:
- long-sleeve cotton shirt (~$15-30). Wear after sessions to avoid sun.
- sunblock stick (~$8-16). Protect healed pieces from UV fading.
8. Single Stem Minimalist
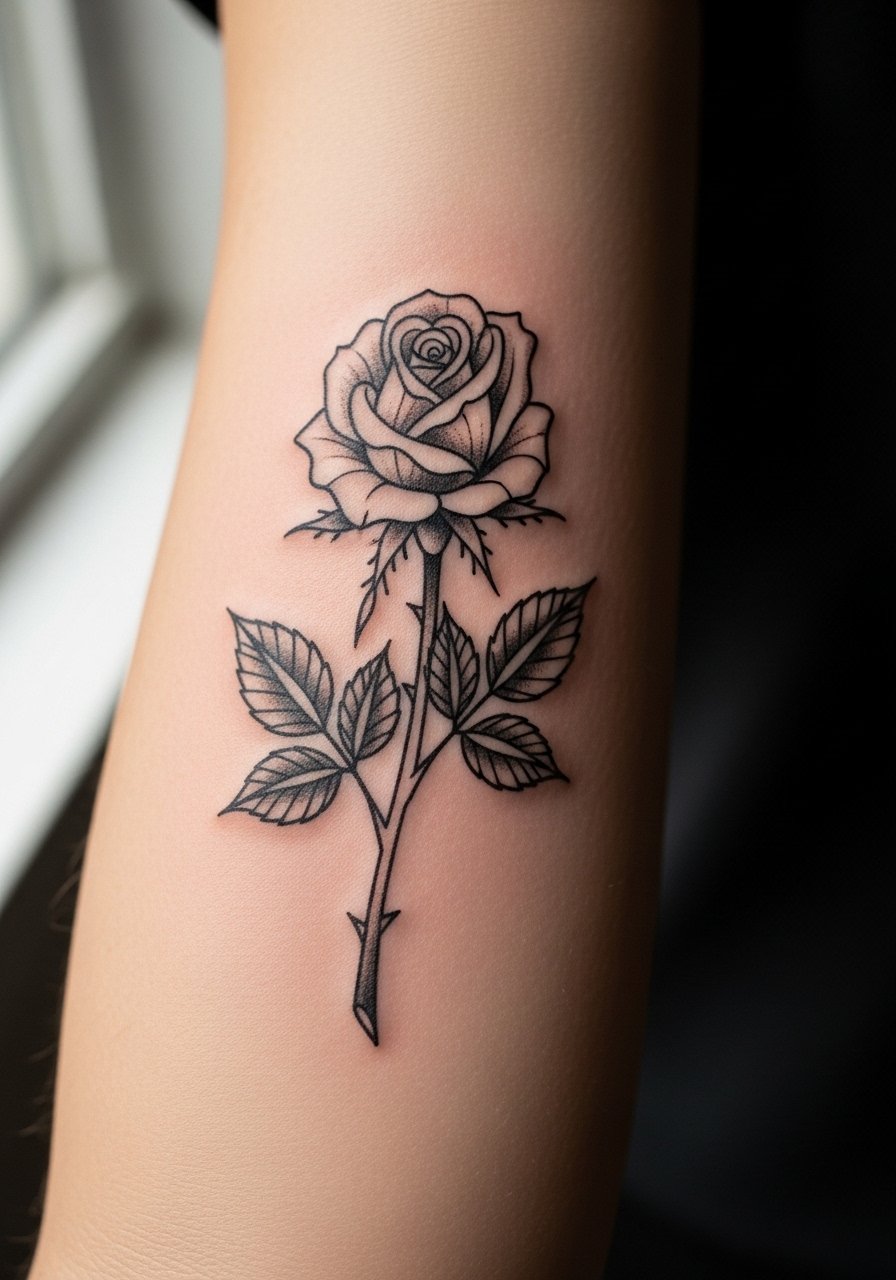
There is power in restraint. A single gothic stem with a black petal and a few thorns reads intentional and modern. It suits someone who wants an arm tattoo that is subtle but thematically on point. Use 3RL for the stem lines and 5RS for petal cross-hatching to keep the piece clean. This is low budget and low time, usually one short session, and it ages well because fewer lines mean fewer potential blur points.
Style/Technique: Minimal Gothic Stem
Pain Level: 2/10
Session Time: 0.5 to 1 hour
Best For: Inner forearm, first-timers, minimalists
Mistake to Avoid: Asking for too many tiny interior lines that turn into a gray mass as it heals.
9. Sleeve Starter Panel
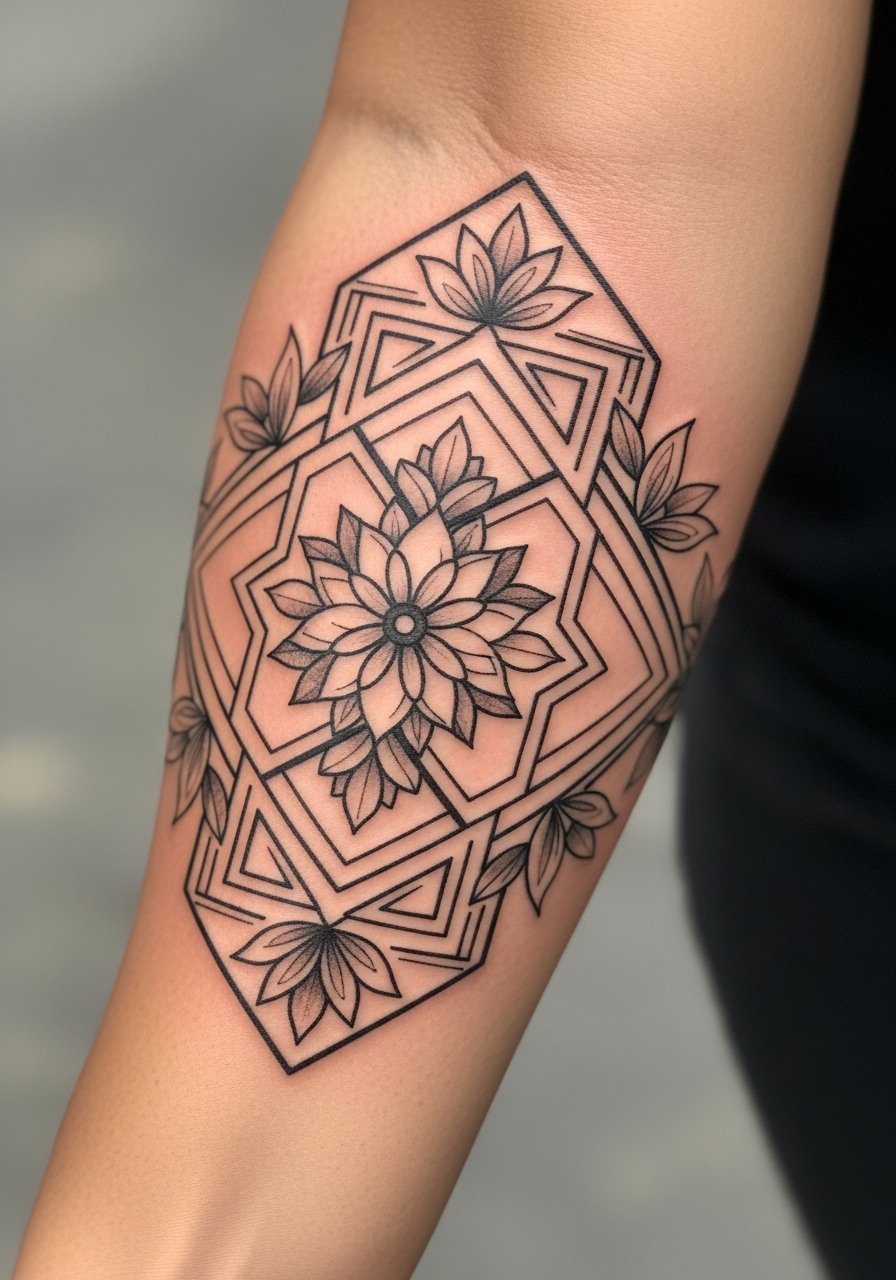
If you are starting a sleeve, choose a high-contrast panel that can anchor future work. A panel with gothic florals, a bold silhouette, and a framed border gives future artists something to weave into. The rule I use is 3:1 anchor to detail, meaning three elements of dense black for every one area of micro detail. It creates a scaffold for future fills and helps avoid the patchy look sleeves sometimes get when stitched together by different artists.
Style/Technique: Anchor Panel Sleeve Starter
Pain Level: 6/10
Session Time: 2 to 5 hours
Best For: Outer forearm sleeve starters, collectors building a full arm
Mistake to Avoid: Getting a light, floaty panel that cannot visually connect to denser pieces later.
10. Cover-Up Floral Relief
Gothic florals make excellent cover-ups because petals and leaves can hide dark spots. The technique is to plan the petals to fall over the old ink and use heavy black in the areas that need most coverage. Ask for an initial consult photo mapping with contrast overlays so your artist can mark which petals require solid fill. This is a higher-skill move, so budget accordingly and expect at least one follow-up session for refinements.
Style/Technique: Strategic Cover-Up Flowering
Pain Level: 6/10
Session Time: 2 to 4 hours plus touch-ups
Best For: Upper arm cover-ups, people replacing older work
Mistake to Avoid: Picking a design with too much open white space over dark ink that still shows through.
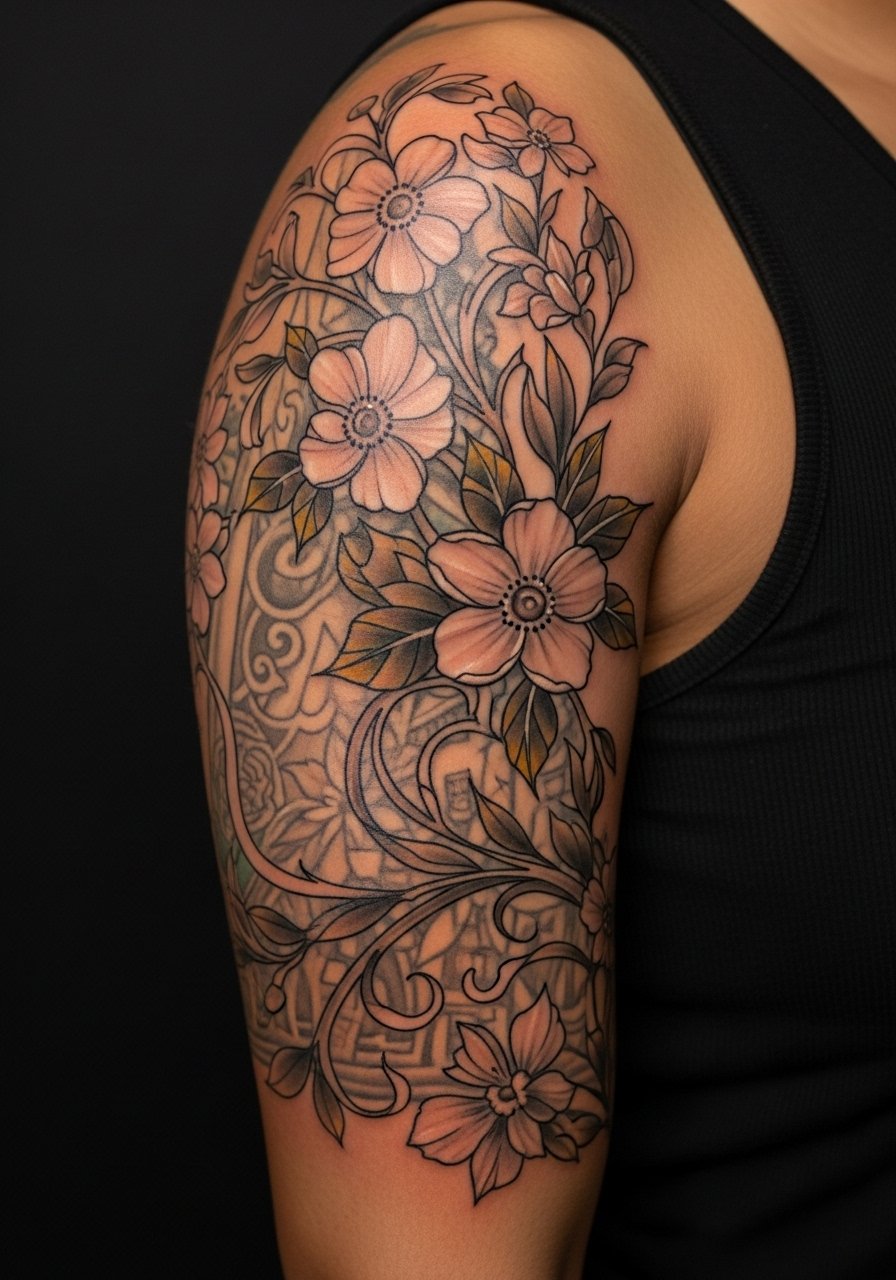
11. Gothic Botanical Sleeve Finishers
This is the finishing pass that makes disparate pieces feel cohesive. Tiny gothic blooms, small thorns, and stipple shadows bridge gaps between larger tattoos. The technique is spacing control, keeping at least 4mm clear around each large element so the finishers add rhythm without clutter. It is ideal for people who have built sleeves over time and now want the whole arm to read as one story. Expect multiple short sessions to dot in the small fillers and keep the artist’s rhythm consistent.
Style/Technique: Gap-Filling Botanical Finish
Pain Level: 3/10
Session Time: Multiple short sessions of 30 to 90 minutes
Best For: People completing sleeves, clients with mixed-era tattoos
Mistake to Avoid: Letting an artist crowd finishers too close to main pieces, which makes the arm look busy.
Aftercare and Long-Term Habits
Thin coats beat one thick coat every time. Applying a thin layer of a fragrance-free aftercare balm twice a day for two weeks prevents over-moisturizing and reduces scabbing risk, which protects line clarity. Grab fragrance-free aftercare balm to keep your ink even.
Start sessions with a fresh, well-rested body and hydrate. A small snack and water before a long appointment make a bigger difference than a numbing cream will. I recommend a quick reusable water bottle nearby.
Most people mess up sun protection. Keep healed arm work out of direct sun and reapply a sunscreen stick whenever your sleeve comes off for more than ten minutes.
