
I almost threw out a tiny rose sketch because it felt too fragile against the chunky script I wanted, then I let a tattooist translate the drawing into one single, confident line and it became the piece people stop to ask about. That moment taught me more about scale, ink weight, and placement than any mood board ever did. Across five shops I have visited, artists kept pointing to the same few choices that make fine-line gothic florals work long term.
These picks are for people who want small to medium blackwork blooms that read dark and delicate, not full-on heavy blackwork sleeves. Expect most pieces to fit one or at most two sessions, budget from flash pricing to a modest custom hourly rate, and plan for gentle aftercare. If you need a workplace-coverable option or a version that ages into soft grey rather than a blurred smudge, these ideas will point you to the right placement and products.
1. Single-Needle Rose On Inner Wrist
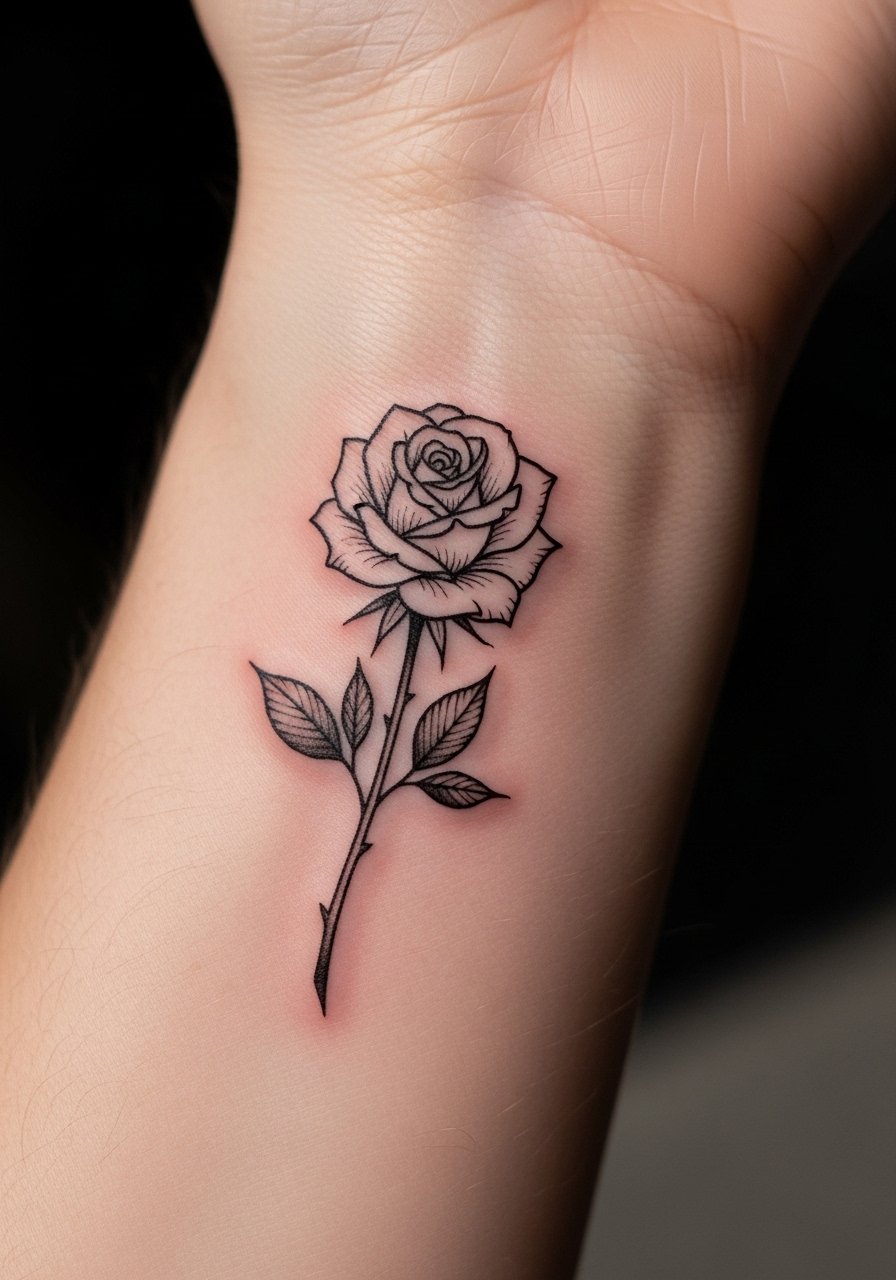
Style/Technique: Single-needle fine line rose
Pain Level: 4/10
Session Time: 30 minutes to 1 hour
Best For: Inner wrist, people who want visible but coverable pieces
A single-needle rose relies on one consistent line weight, usually with a 3RL or single 0.25mm size needle for crisp petals. Visually it reads elegant and spare, and on the inner wrist it folds with the arm so movement gives the petals life. This suits someone who wants a daytime visible piece but can cover it with a watch or bracelet for work. For aftercare I trust a gentle fragrance-free soap followed by a thin layer of tattoo aftercare balm. Expect lines to soften slightly in the first month, so ask your artist for a hairline edge rather than a planed solid line.
Mistake to Avoid: Asking for thicker lines to mimic the photo, which can blur faster on the wrist.
2. Creeping Ivy Wrap Around A Finger
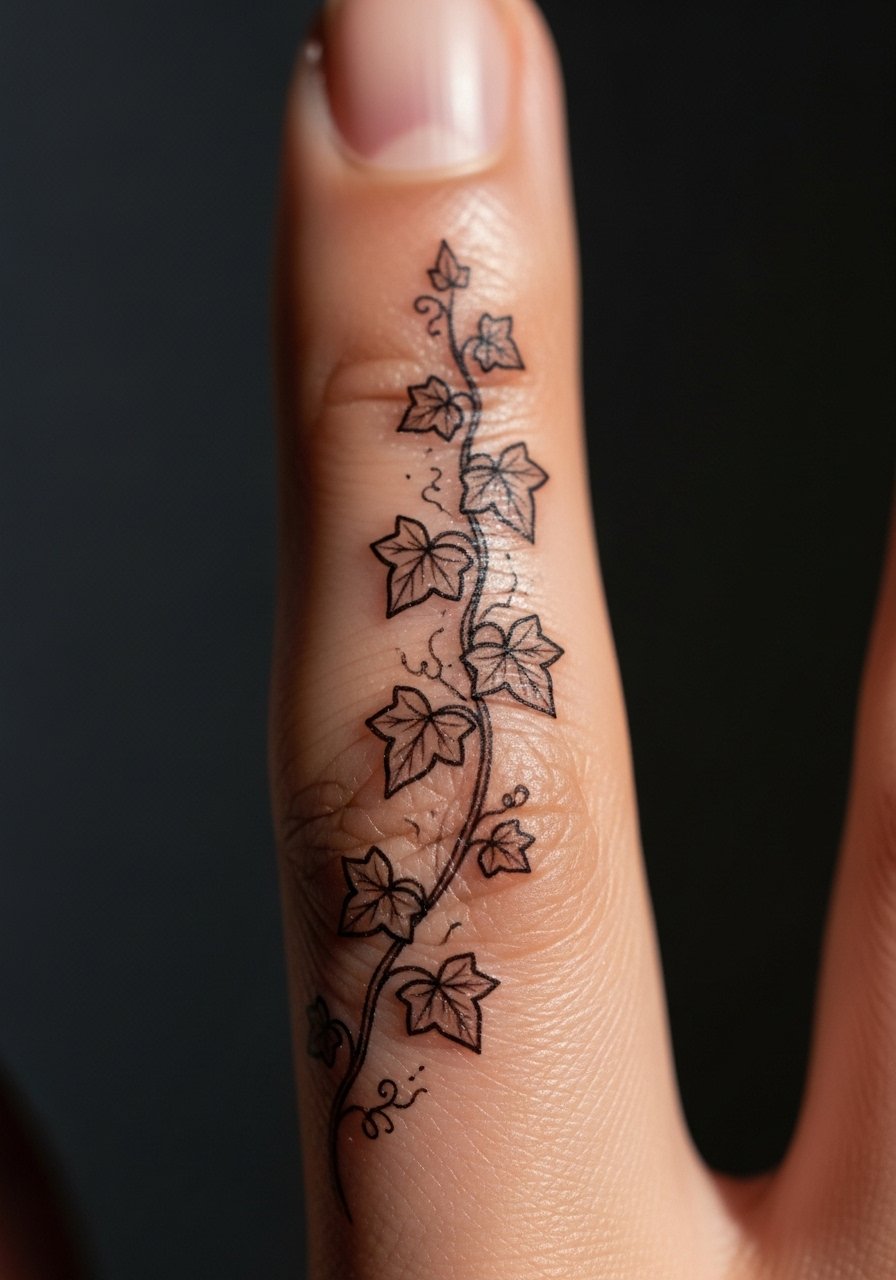
Style/Technique: Micro-wrap fine line with negative space
Pain Level: 2/10
Session Time: 20 to 40 minutes
Best For: Finger band, petite placements, people who like jewelry-like tattoos
A finger ivy works because the negative space between leaves keeps the design readable even as the skin sheds. Use thinner stems, around 0.2 to 0.3mm, so the leaves read as distinct shapes rather than a smear. This is a budget-friendly flash option, but be honest about finger longevity. Fingers wear differently, and the design will need touch-ups more often. Carrying a small tube of healing ointment helps during the first two weeks. For cultural-sensitivity, ivy is neutral but avoid stylizing it to mimic region-specific motifs without permission.
Mistake to Avoid: Choosing a fully shaded leaf, which fills in and looks muddy on fingers.
3. Thorned Peony Along The Collarbone
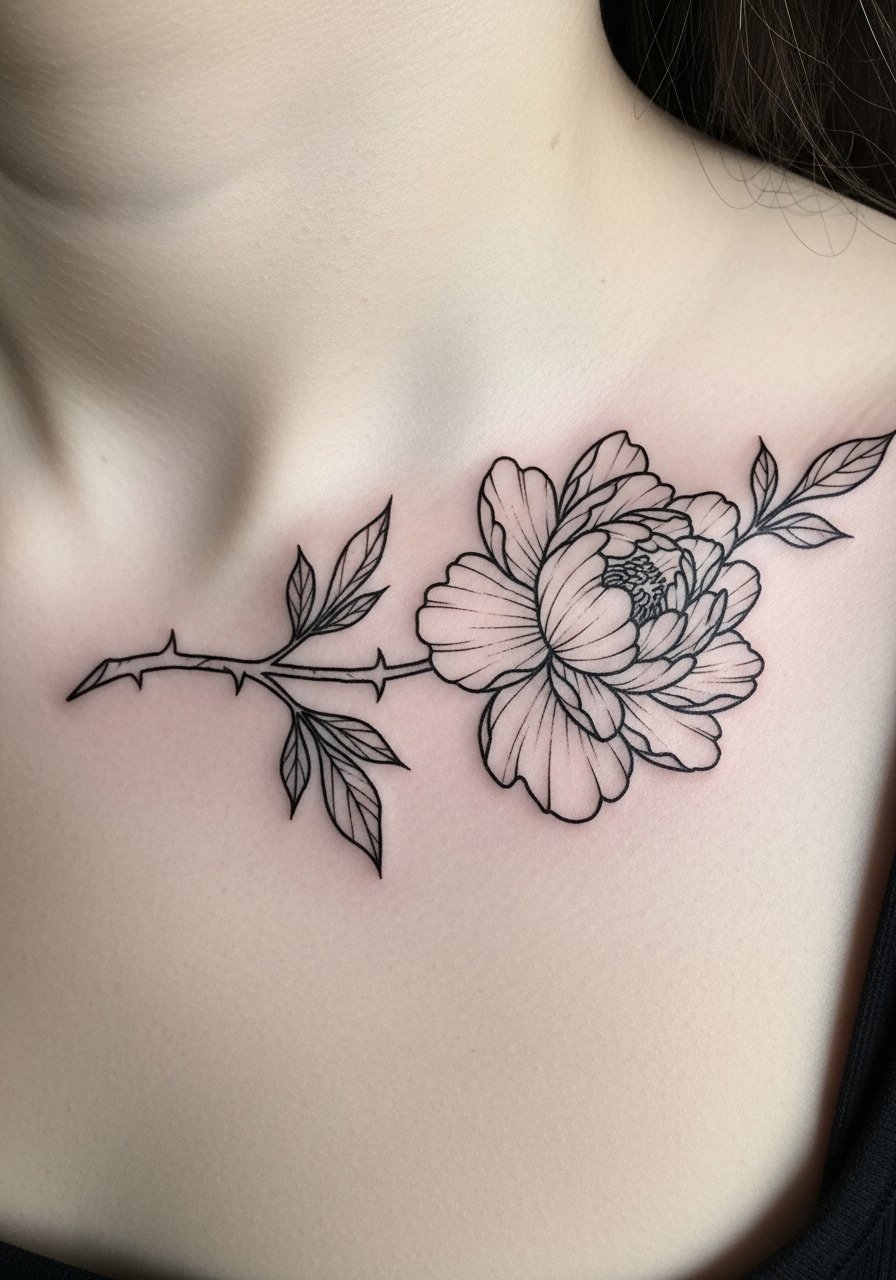
Style/Technique: Fine-line botanical with thorn detailing
Pain Level: 5/10
Session Time: 1 to 1.5 hours
Best For: Collarbone, people who like statement but coverable pieces
A thorned peony reads gothic because of the contrast between soft petals and harsh spines. Place it to follow the collarbone curve for a natural flow. The trick is spacing petal lines about 2 to 3mm apart so highlights remain when healed. This placement is great for layering into future chest pieces, and it photographs well. Use a light application of alcohol-free skin prep wipes before the session if you have dry or flaky skin to improve stencil adhesion.
Mistake to Avoid: Asking for dense black fills inside petals, which removes the lightness that makes the peony feel fine-line.
4. Tiny Anemone Behind The Ear
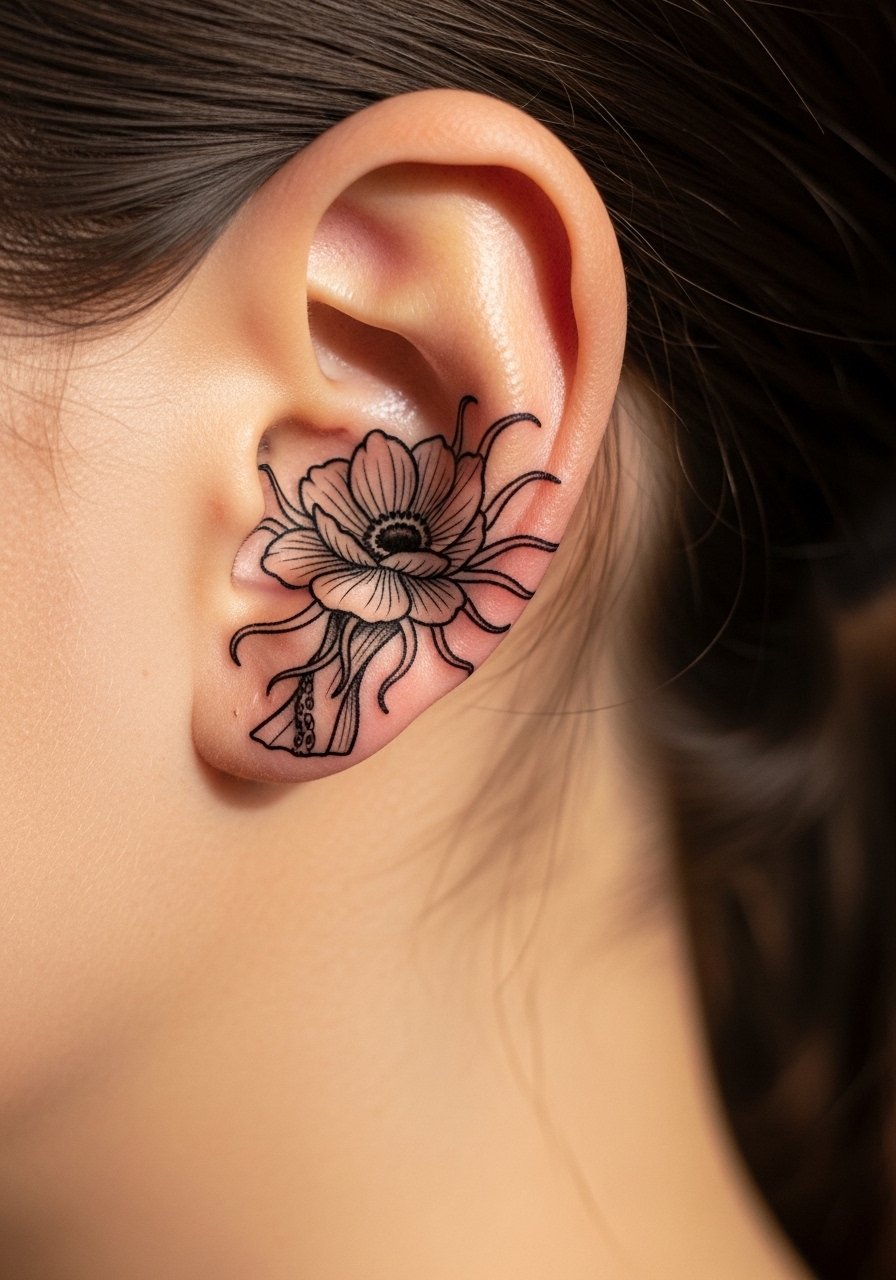
Style/Technique: Mini fine-line bloom
Pain Level: 3/10
Session Time: 15 to 30 minutes
Best For: Behind the ear, subtle accents, first-time small tattoos
Mini anemones are about silhouette and center detail. The placement behind the ear keeps the piece slightly private while giving a gothic edge when hair is tucked. Small dots in the center use dotwork rather than solid discs, which helps the piece age cleaner. This is a low-cost session and a good starter tattoo for people testing how fine lines settle on their skin. Carry a compact bandage for the first day if your pillow rubs the area.
Mistake to Avoid: Packing too much dotwork into the center, which can clump during healing.
5. Fern And Ink-Drip On The Rib
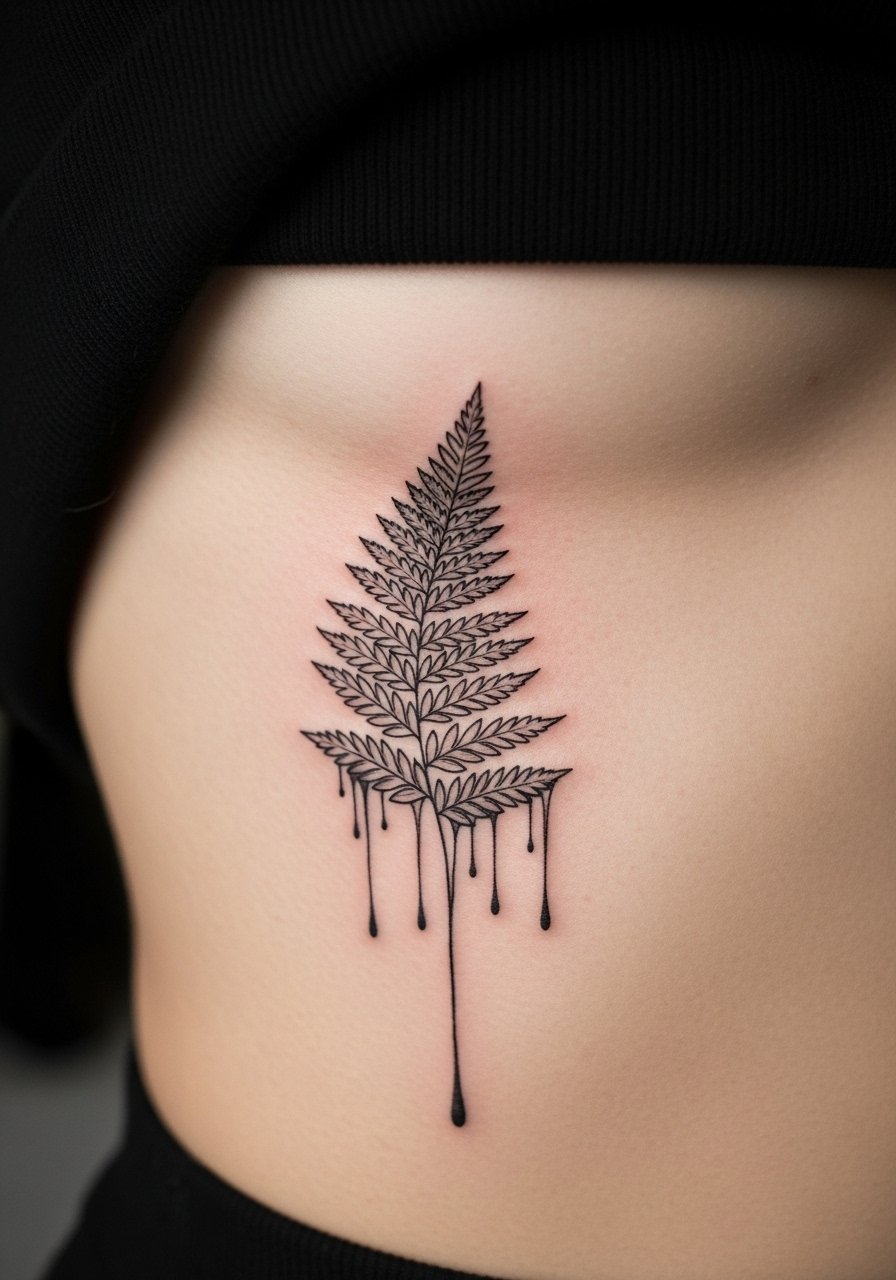
Style/Technique: Fine-line botanical with light blackwork drip
Pain Level: 7/10
Session Time: 1.5 to 2 hours
Best For: Ribcage, people okay with higher pain for dramatic placement
The rib gives vertical space for a fern with a little ink-drip flourish at the base. That drip is purely stylistic and should be sized so it reads like an intentional mark, not a blob. If you have higher porosity skin, lines can spread more, so ask for slightly tighter spacing between fronds. Pack a comfy shirt for aftercare to avoid rubbing. I use a thin layer of fragrance-free healing balm as directed by the artist.
Mistake to Avoid: Requesting heavy drips that become indistinct as the skin moves.
6. Mini Bouquet On The Back Of The Hand

Style/Technique: Mixed-flower micro bouquet, fine-line cluster
Pain Level: 5/10
Session Time: 40 minutes to 1 hour
Best For: Hand top, people who like statement small pieces and visible detail
A hand bouquet reads bold because even small stems frame the knuckles and veins. Use compact composition with stems at different angles to avoid one flat plane. Hands age fast and need touch-ups, so discuss a maintenance plan with your artist. Keep sunscreen on healed hands to prevent early fading. I recommend carrying a travel-size tattoo sunscreen for daily protection.
Mistake to Avoid: Placing the bouquet across knuckles where movement breaks line continuity.
7. Thistle And Barbed Line Ankle Piece
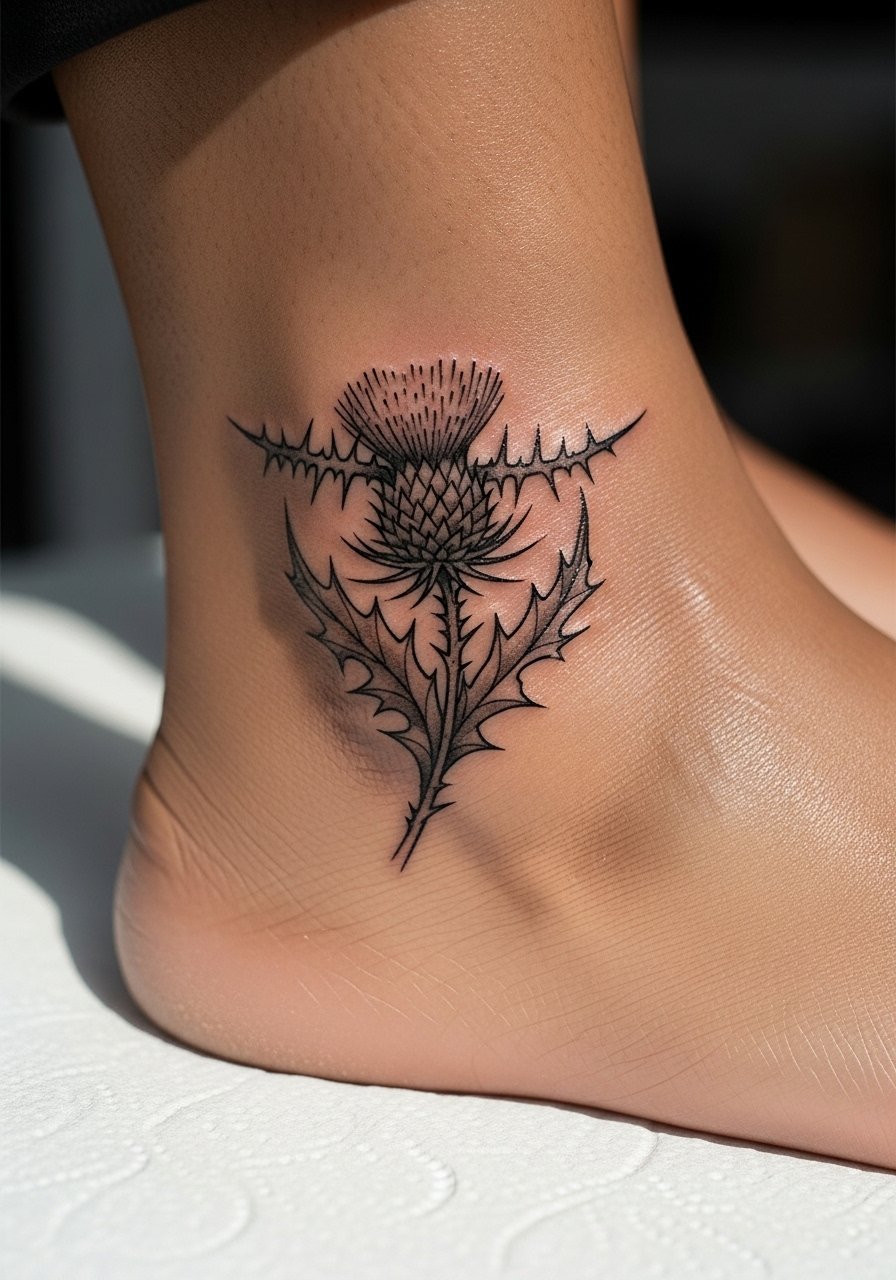
Style/Technique: Gothic botanical with accent linework
Pain Level: 3/10
Session Time: 30 to 45 minutes
Best For: Ankle, people who want a subtle gothic accent that pairs with jewelry
A thistle reads gothic by nature, and a light barbed accent gives an edge without heavy fill. On the ankle, position the stem to fall naturally with shoe lines. Because ankles rub against socks, expect slightly slower healing. Use a breathable bandage and swap to open-air care when directed. For people in conservative workplaces, an ankle piece is easily coverable.
Mistake to Avoid: Asking for barbing that wraps fully around the limb, which can cause rubbing and blur.
If any of these ideas have you ready to actually try something, here is everything worth picking up.
Supplies For Fine Gothic Florals
Aftercare basics:
- Fragrance-free soap (~$6-12), gentle cleansing for first two weeks
- Tattoo aftercare balm (~$8-18), thin layers during healing
Protection & prep:
- Tattoo sunscreen (~$12-20), for healed work
- Alcohol-free skin wipes (~$6-15), quick pre-session clean
Extras worth having:
- Compact bandages (~$5-10), protect at night
- Healing ointment (~$5-12), for scab care
- Hypoallergenic pillowcase (~$20-35), reduces friction while sleeping
8. Wilted Sunflower Forearm Panel
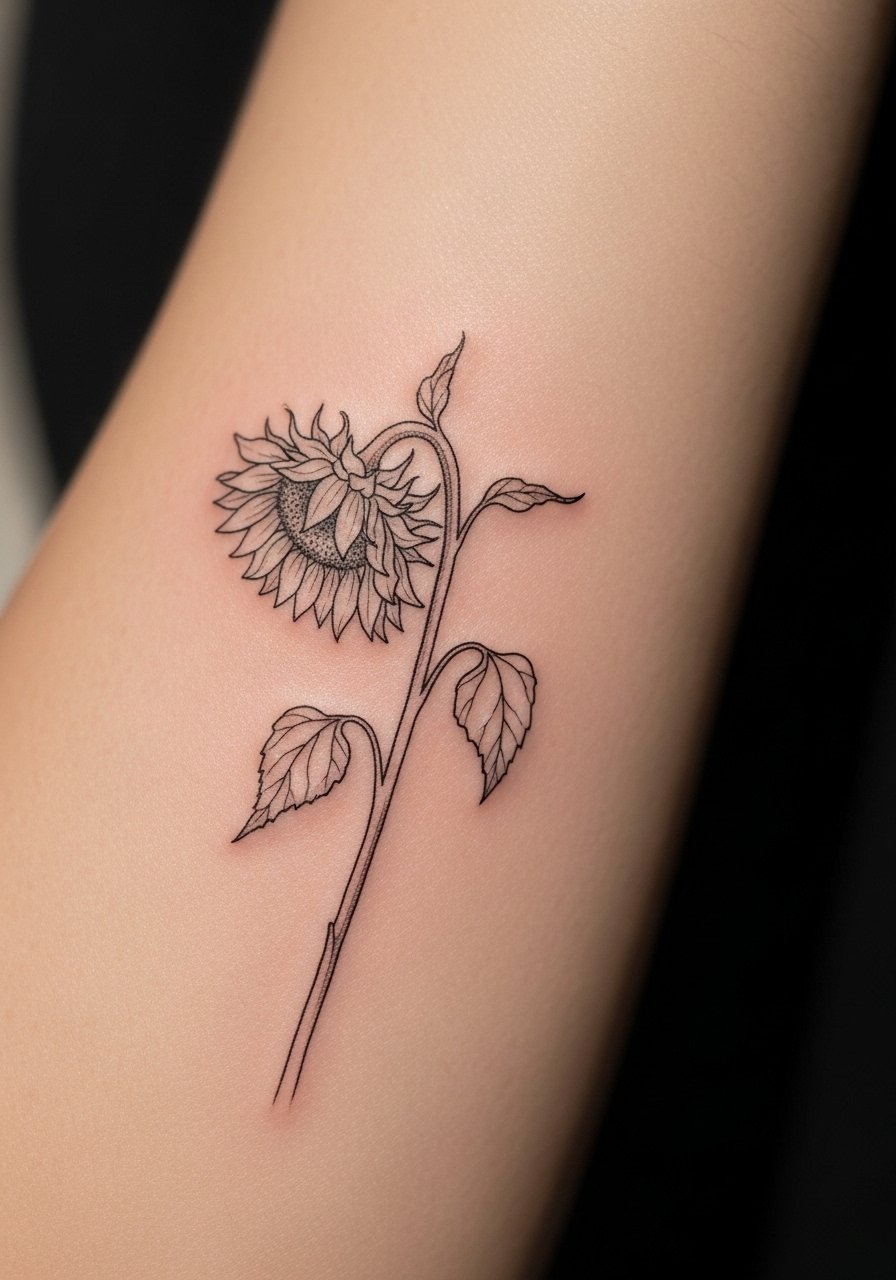
Style/Technique: Fine-line floral with subtle shading dots
Pain Level: 4/10
Session Time: 1 to 1.5 hours
Best For: Outer forearm, people who want a moody bloom that ages with character
A wilted sunflower flips the usual sunny read into something gothic by tilting the petals and adding dotwork shadow. Use tiny 3RL dots spaced about 1.5 to 2mm for shadow instead of solid shading. This creates texture that holds better on the forearm. It pairs well with sleeve starters and photographs with directional light. For people with oilier skin, be ready for slightly thicker healed lines, so the artist may adjust needle depth.
Mistake to Avoid: Filling shadows with solid black, which removes the delicate petal definition.
9. Symmetrical Mirror Blossoms On Collarbones
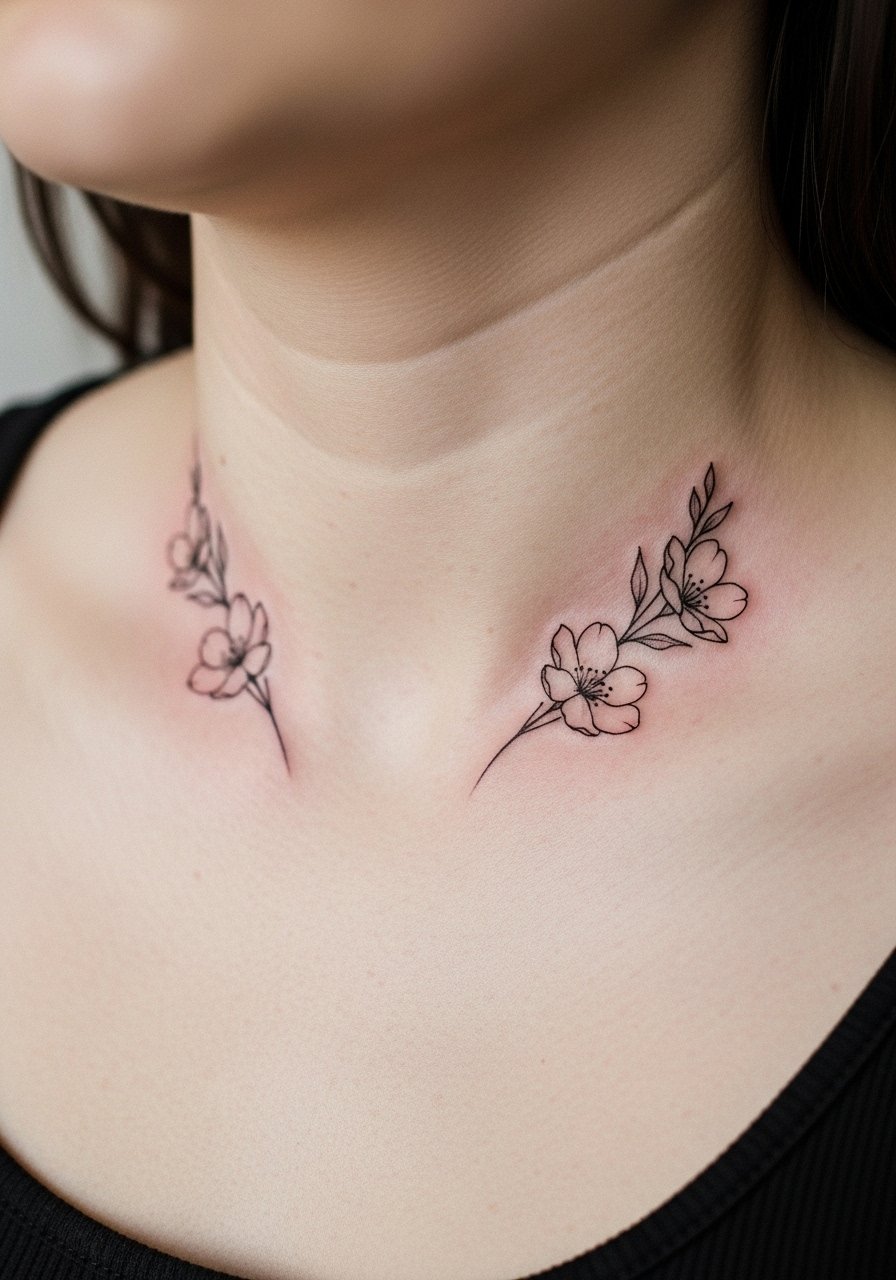
Style/Technique: Mirrored fine-line botanical symmetry
Pain Level: 5/10
Session Time: 1 to 1.5 hours total, may be split
Best For: Collarbone symmetry seekers, people who want balanced neck/chest accents
Mirrored blooms need precise stencil placement. Ask your artist to photograph stencils and check symmetry with your posture held as you will stand normally. Small rotations in placement can make a design read lopsided in photos. The result is elegant and intentionally gothic if stems angle toward the sternum. For sessions split across days, document stencil placement with a reference photo for continuity.
Mistake to Avoid: Assuming mirror placement will be identical without checking stencils while standing.
10. White-Ink Highlighted Black Rose Behind Shoulder
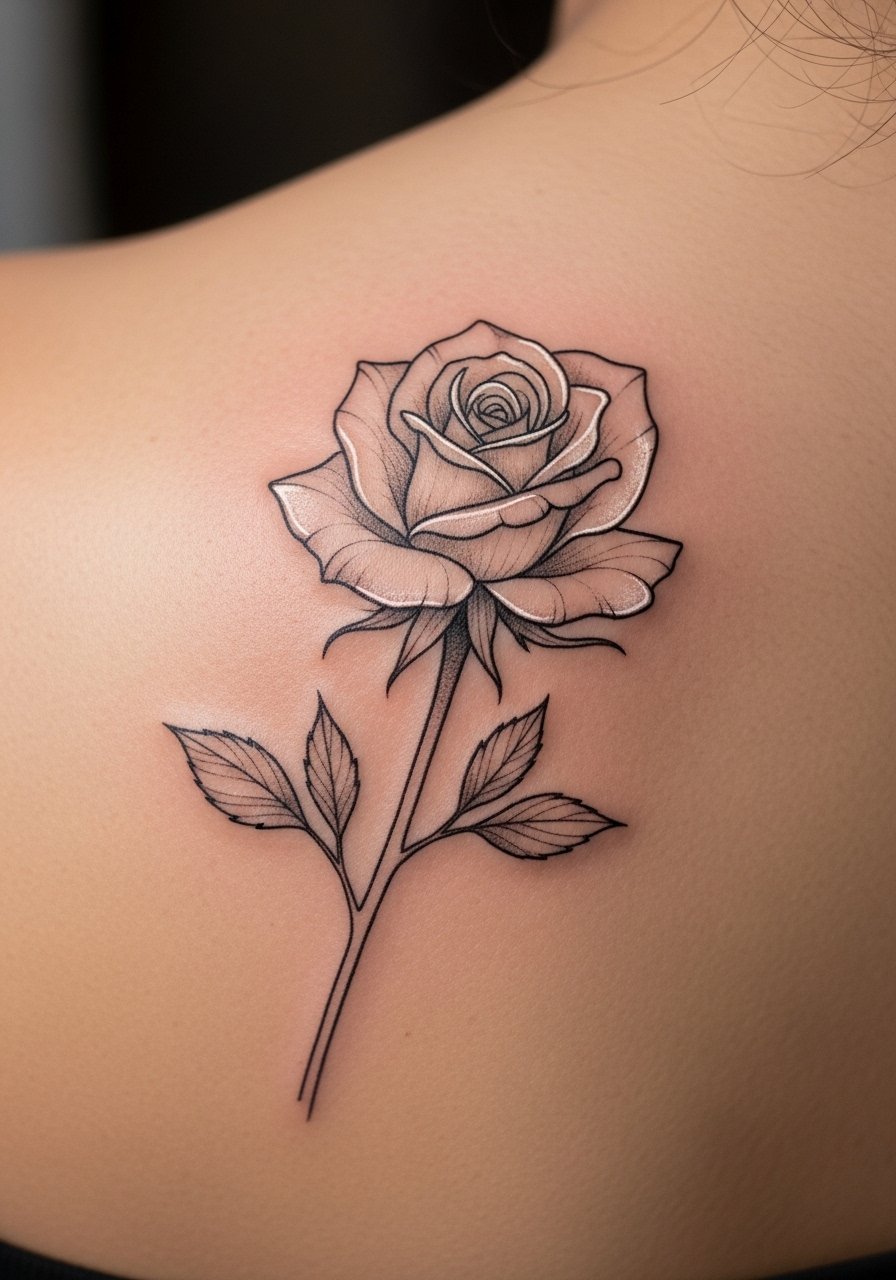
Style/Technique: Fine-line blackwork with sparing white highlights
Pain Level: 4/10
Session Time: 45 minutes to 1.25 hours
Best For: Upper shoulder, people who want subtle contrast in healed pieces
White ink can brighten fine-line pieces, but it behaves differently by skin tone and may fade faster. Use it sparingly, as small white tints inside petals add that gothic wet-ink look without dominating. The shoulder is forgiving for white because it sees less sun than forearms. Ask your artist for a healed simulation so you can imagine how the white will soften. Protect with a tattoo sunscreen once healed.
Mistake to Avoid: Requesting heavy white coverage, which often disappears into the skin or scars.
11. Starter Sleeve Stem That Leaves Room To Grow
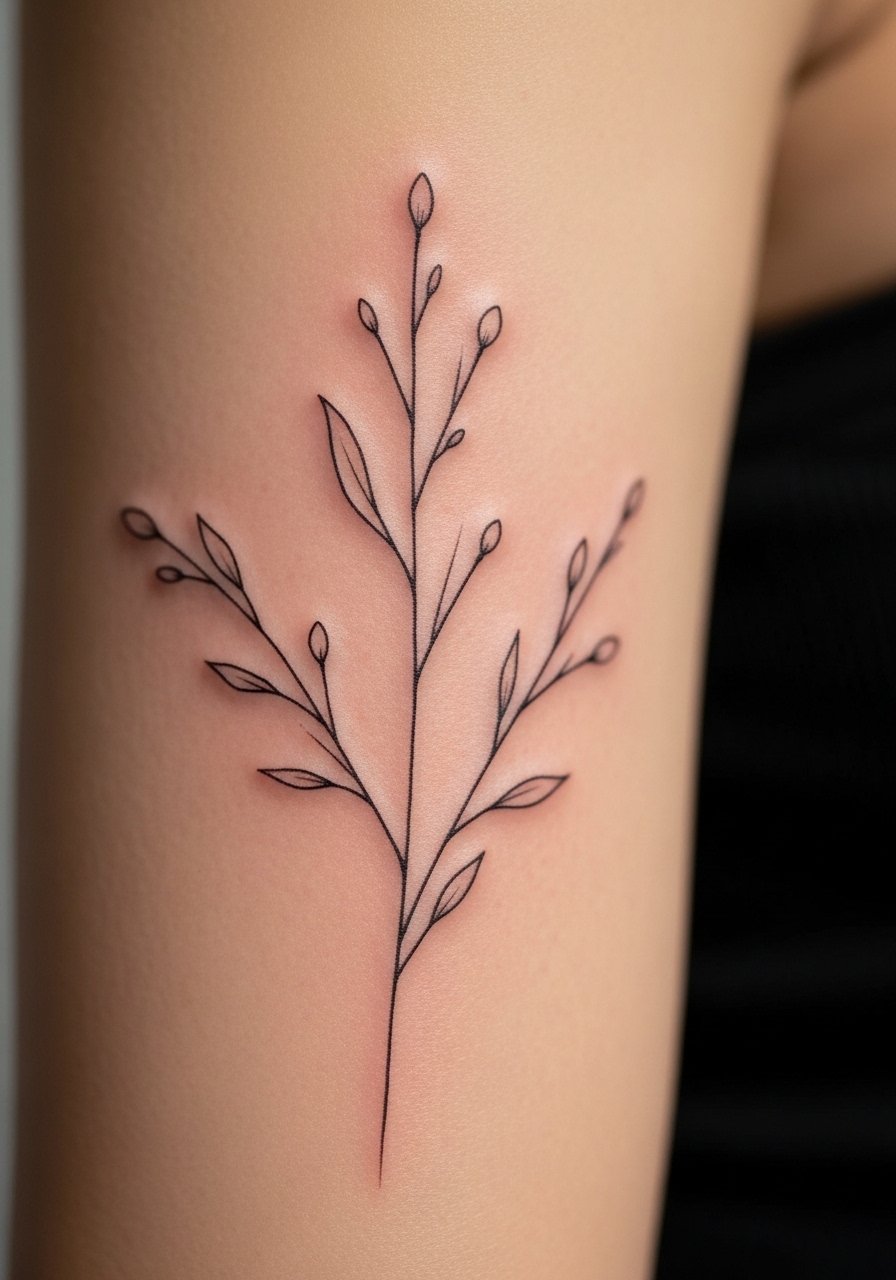
Style/Technique: Fine-line sleeve starter with negative space planning
Pain Level: 6/10
Session Time: 1.5 to 3 hours initial anchor session
Best For: Upper arm, people planning larger gothic floral work over time
Design a starter stem that allows future blooms to be added without overcrowding. The rule I learned is to leave at least 8 to 12mm of clear skin between future bloom placements so artists can add depth without jamming. This approach saves money and keeps the sleeve readable as it fills in. Use a lightweight aftercare balm during the first month and schedule touch-ups after three months if edges soften.
Mistake to Avoid: Filling the area fully in the first session, which limits future composition options.
Gothic Floral Aftercare Moves
Pack a gentle cleanser and balm. Use a fragrance-free soap for cleansing twice a day, then a pea-sized amount of tattoo aftercare balm to keep scabs thin.
Cover up in the sun. After healing, apply tattoo sunscreen daily to prevent black ink from turning dull.
Swap tight clothes for loose ones. In week one wear breathable fabrics and avoid friction. A hypoallergenic pillowcase reduces overnight irritation.
Plan for touch-ups. Fine-line work sometimes needs a small session at six to twelve months. Talk to your artist about a maintenance timeline and carry a compact healing ointment for spot care.
Photograph stencils. Take photos of stencil placement before the needle touches skin so future sessions match the original axis. A simple phone tripod helps keep angles consistent.
