
I kept cutting my bangs an inch shorter than the photo, watching them curl up like a bad mood and wondering why my stylist laughed when I asked for "just a little." It took three regrowth cycles and one stylist who trimmed by eye, not by Instagram, to learn that bang length, layering angle, and where the first layer starts change everything. If you have medium hair and bangs, a few small measurements and the right products will stop the weekly panic trim.
Across four hair textures I have styled, these nine cuts are realistic for morning life, not just photos. They are mostly low-to-medium cost, doable at a trusted salon or with a confident home trim, and range from heat-free options to styles that need a flat iron for shine. If you want something easy to grow out, look at the grow-out friendly picks. If your hair is fine, I flag the runs that need volumizing products. I also include porosity notes so you can place oils and leave-ins where they absorb best.
1. Wispy Curtain Bangs With Feathered Layers
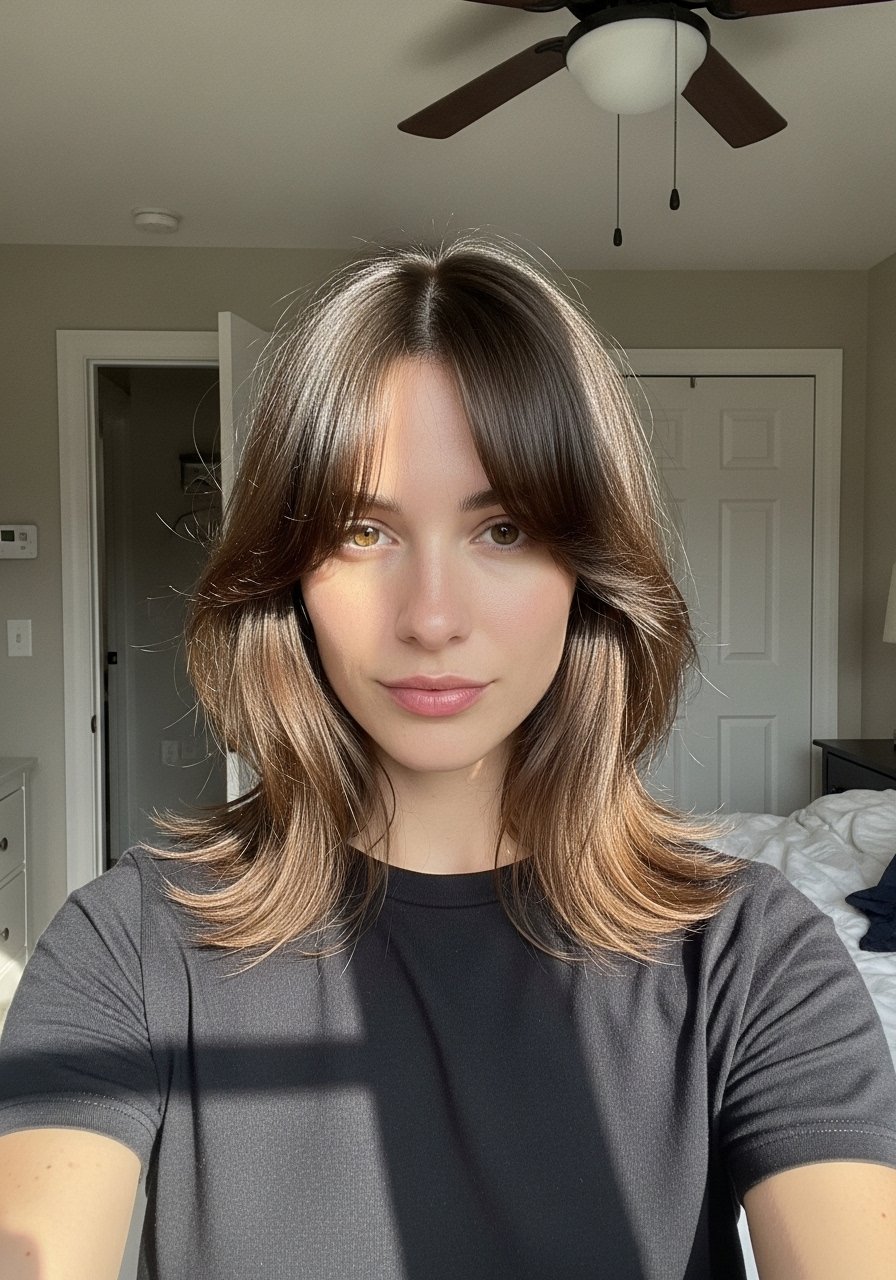
Most curtain bangs work because they create a soft triangular frame for the face. I ask for a 3:1 layering ratio, meaning three shorter face-framing layers to every longer back layer, so the bangs blend instead of sitting on top. This gives a lived-in finish that looks relaxed when air-dried. Works well for straight, wavy, and loosely curly hair. For styling, I use a few sprays of sea-salt styling spray at the roots and a dime-sized smoothing balm on porous ends. If you want a quick dry method, twist bangs into a clip while the rest air-dries.
Mistake to Avoid: Cutting the bangs blunt across at eyebrow level, which makes them heavy and hard to blend into the layers.
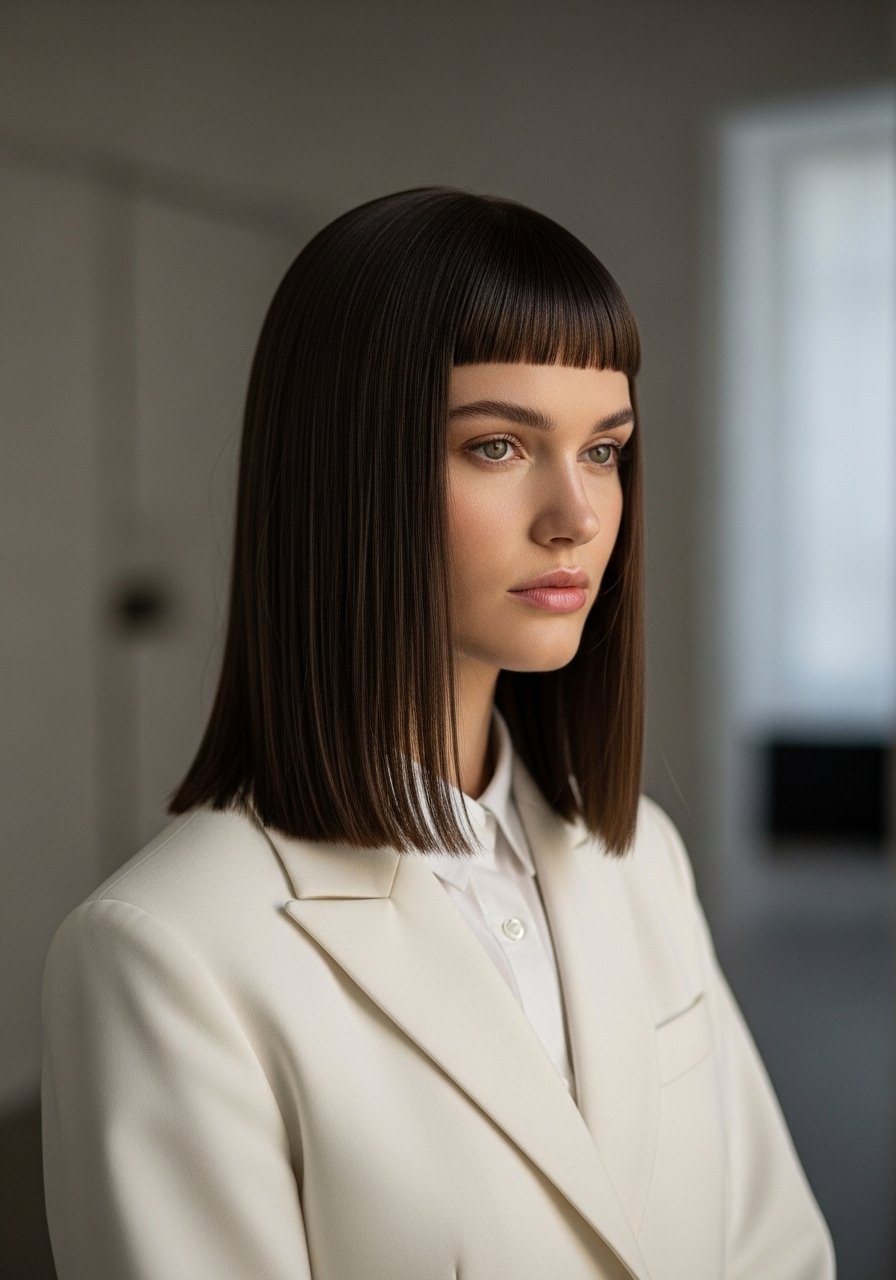
2. Blunt Bangs Over Choppy Shoulder Layers
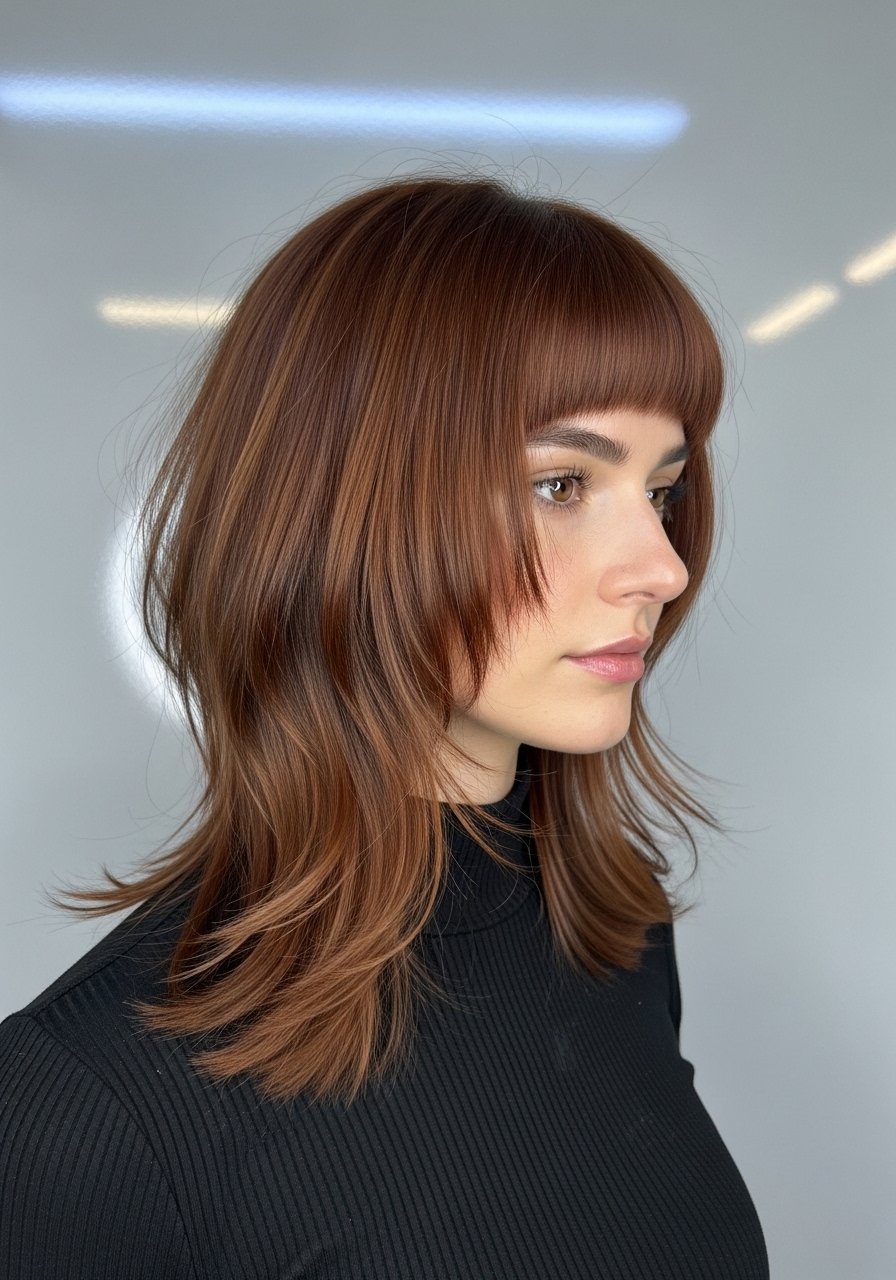
Blunt bangs read bold next to choppy layers because the contrast creates movement. Ask for a slight graduation, two to three tapered layers behind the blunt edge, so the weight of the bangs does not flatten the crown. This is a good fit for fine to medium hair when you want density at the front. Use a ceramic flat iron on low heat and finish with a light-hold hairspray. I keep a travel-size thermal-protectant spray in my kit for quick touchups.
Mistake to Avoid: Using heavy creams on blunt bangs, which make them look greasy and clumped by midday.
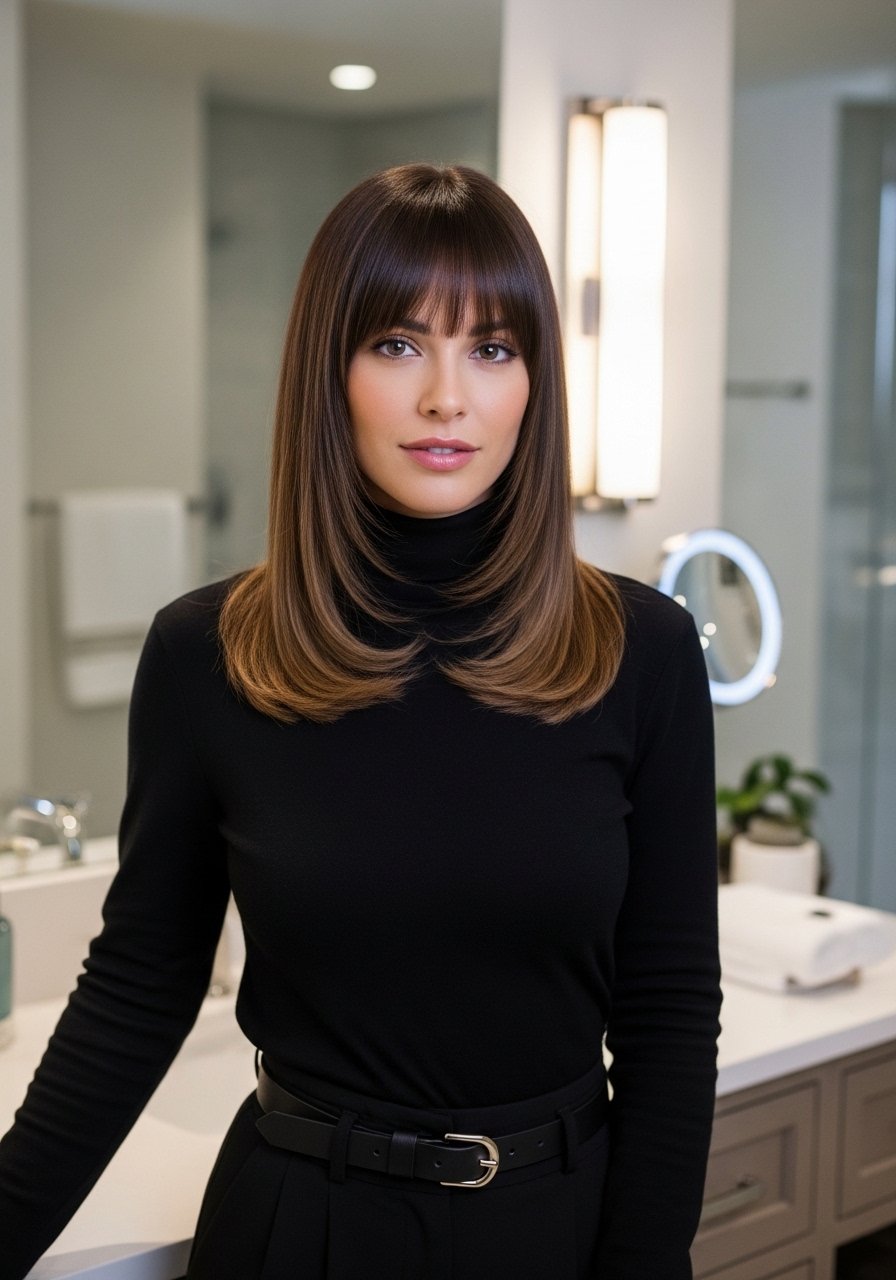
3. Soft Face-Framing Layers With Side Bangs
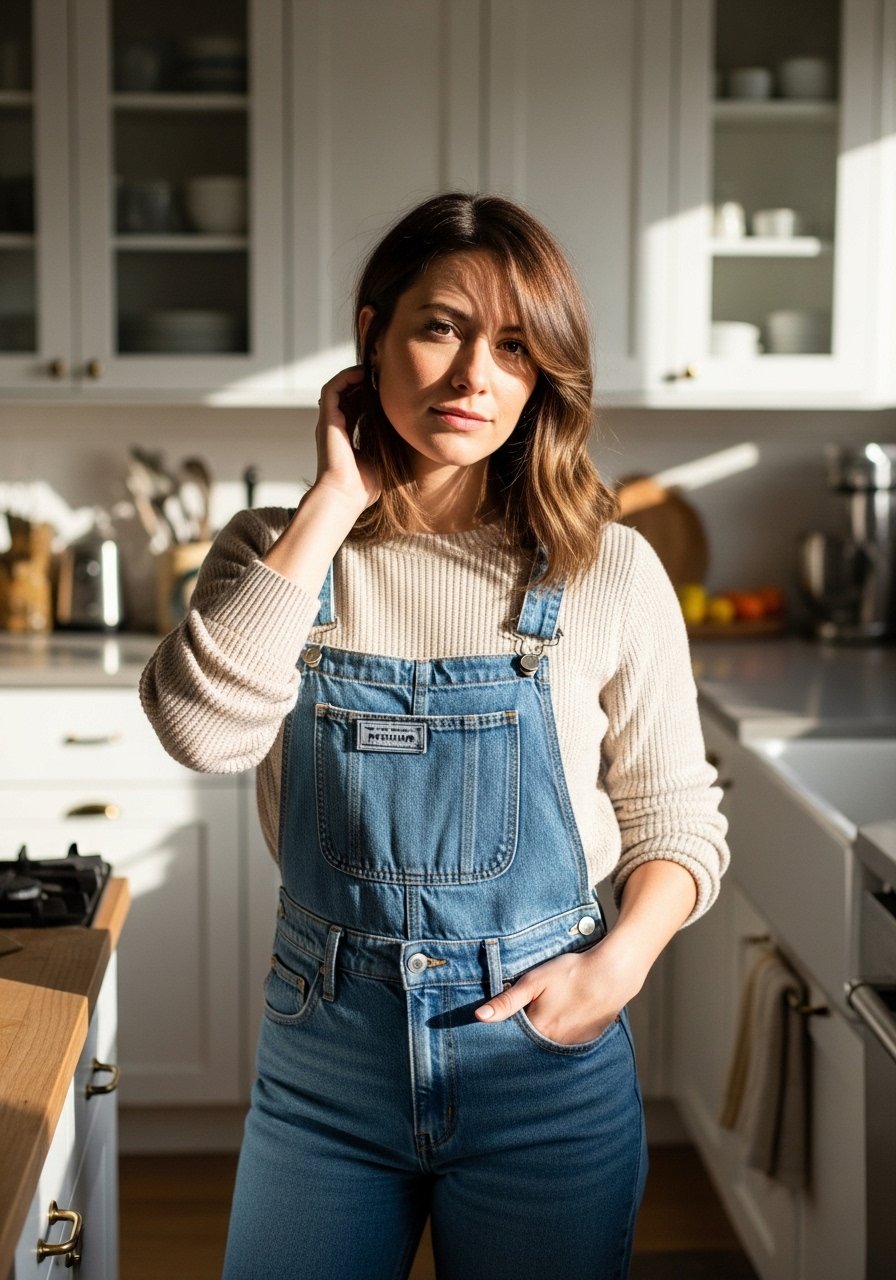
The side bang is forgiving because it starts longer at the midline and angles down across the cheek. I usually request a 45-degree point cut on the outer edge so the piece blends into layers at about two inches from the face. The result is warmth and an elongating line, good for round faces or anyone who wants a softer look. For texture, a pea-size of lightweight leave-in serum on mid-lengths keeps porosity under control. I recommend the lightweight leave-in spray for frizz-prone hair.
Mistake to Avoid: Starting the side bang too close to the center part, which makes the face framing look off-balance.
4. Textured Lob With Curtain Fringe
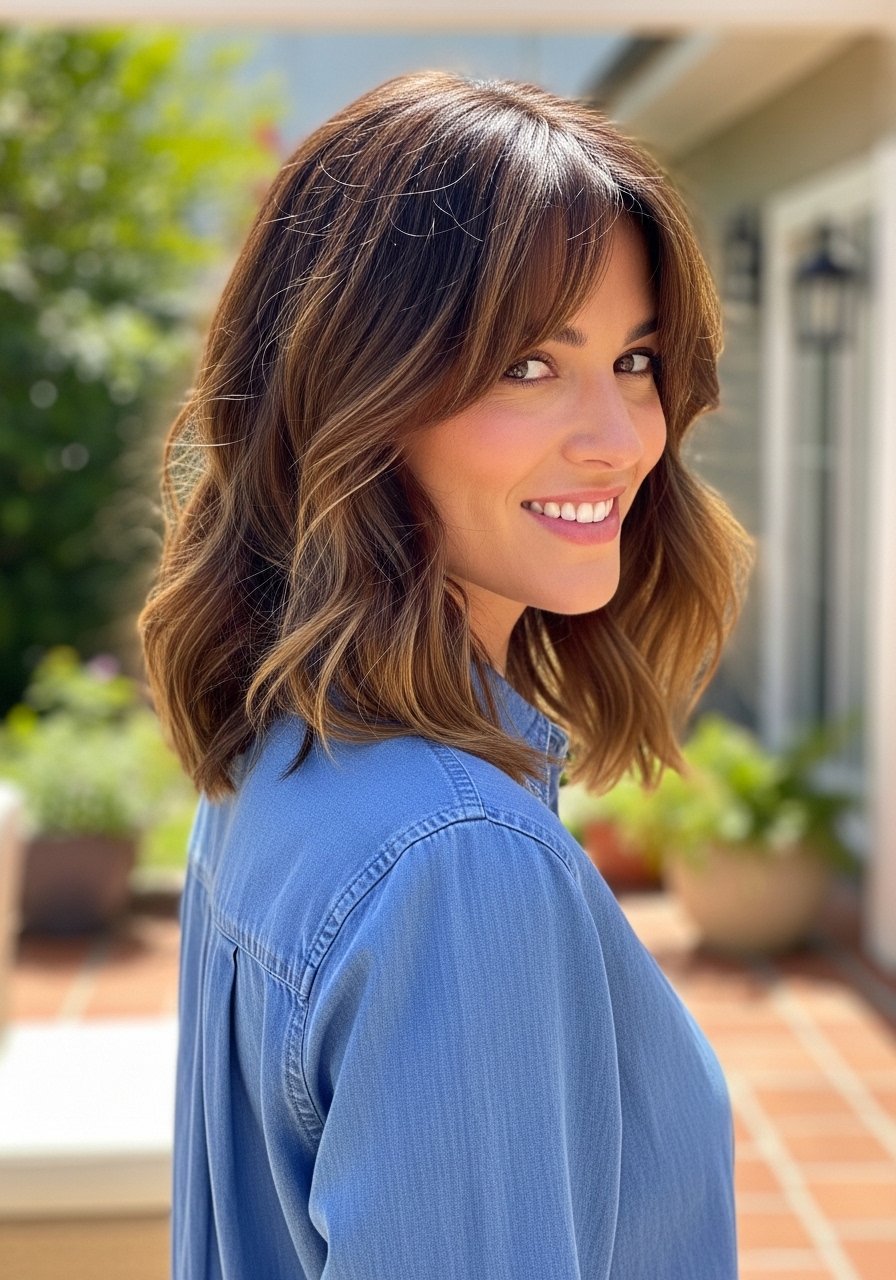
A textured lob with a curtain fringe reads pulled together without feeling styled. The trick is short internal layers, about 1 to 1.5 inches, cut toward the face so the fringe flares open. That internal texturing prevents the fringe from lying flat and creates a soft curtain when you move. This is a low-maintenance lunch-to-evening look if you use a light texturizing spray at the crown. I like a two-spray approach, one at the roots and one through the ends, rather than heavy product at once.
Mistake to Avoid: Over-thinning the ends of the fringe, which makes it look wispy and limp instead of structured.
5. Grow-Out Friendly Long Bangs With Layers

If you are nervous about committing, ask for long bangs that hit past the cheekbone and layering that begins at the ear. The idea is to plan a 6-to-12-month grow-out with guide layers so the bangs can be pinned back and blend as they lengthen. I map growth by finger widths during the cut, so a 1.5-inch guide tells the stylist where to angle the first blend. Use non-heat methods like smoothing with a round brush while damp for evenings. A pair of small sectioning clips helps you train the part without daily trimming.
Mistake to Avoid: Cutting bangs to the nose or too short when you want an easy grow-out plan, which forces constant maintenance.
6. Curtain Bangs For Curly And Wavy Hair

Curly curtain bangs need to be cut dry to respect curl shrinkage. I shape the bangs so the longest curl rests at the brow when the hair is stretched out. A useful rule is to leave 25 to 30 percent extra length on wet cuts for curl and porosity reasons. For styling, a light gel finger-scrunched into the bangs keeps definition without crunch. I sometimes suggest plopping for 10 minutes and then airing the fringe to avoid heat. For product, try a low-sticky curl cream like this curl-defining cream.
Mistake to Avoid: Cutting curly bangs wet and to final length, which results in shockingly short curls after drying.
7. Blunt Lob With Micro Bangs
Micro bangs are short and confident, best paired with a blunt lob so the eye line stays clean. Ask for a 1:2 layering ratio, meaning minimal internal layering to keep the lob blunt while the bangs sit structured. This style suits oval and long faces; if you are petite, keep the lob length above the collarbone to avoid overwhelming. For daily care I smooth the fringe with a tiny amount of serum and restyle with a flat iron on low. I carry a compact travel flat iron for touchups.
Mistake to Avoid: Letting the fringe grow unevenly without a monthly tidy, which makes micro bangs look ragged.
If any of these ideas have you ready to actually try something, here is everything worth picking up.
Bang-Ready Tools And Products
Styling Tools:
- Honest favorite: wide-tooth comb (~$6-12). Gentle on wet hair and avoids breakage.
- For sleek finishes: ceramic-flat-iron (~$30-80). Low heat settings help fine hair.
- For quick clips: sectioning-hair-clips (~$8-15). Useful for pinning bangs during grow-out.
Products:
- For texture: sea-salt-spray (~$10-18).
- For curl control: curl-defining-cream (~$12-22).
- For hydration: lightweight-leave-in-spray (~$10-20).
- For heat protection: thermal-protectant-spray (~$8-18).
8. Shaggy Layers With Curtain Bangs And Volume

Shaggy layers are about controlled chaos. Ask for shorter layers at the crown, around 1 to 1.5 inches, to create lift, and longer face-framing pieces to soften. The curtain bangs should be cut with a slight point rather than blunt so they feather into the shag. If your hair is fine, use a root-lifting spray applied in a 2-to-3-spray pattern, then rough-dry upside down for ten minutes. For wavy hair, scrunch in a dime-sized mousse while damp. I once brought this cut to life with only a boar-bristle brush and root-lifting spray.
Mistake to Avoid: Cutting the crown layers too long, which kills the volume that defines a shag.
9. Sleek Layered Cut With Blunt Fringe For Fine Hair
Fine hair benefits from fewer internal layers and more surface shaping. For this look I request subtle face-framing layers, about one inch, with the rest kept blunt for density. The fringe should be cut to skim the lashes when damp, remembering that fine hair rarely shrinks a lot. A small amount of lightweight oil on the ends keeps the silhouette clean. For polish, I run a small-tooth comb through the fringe after a spritz of light-hold-hairspray and gently press with a flat iron on low.
Mistake to Avoid: Over-layering fine hair, which thins the ends and makes the fringe disappear.
Curtain Bang Care Habits
Keep trims small and frequent. Micro trims every 4 to 6 weeks keep bangs at the intended length. Try a pair of sectioning-hair-clips to separate the fringe during trims.
A little product goes a long way. Three light sprays of sea-salt-spray distributed root to ends gives texture without weight.
If you have porous ends, place oils only on the last two inches. A drop of lightweight hair oil seals frayed tips without flattening the bangs.
Train bangs overnight by wrapping them with a soft cloth and secure with a clip. A microfiber-hair-turban helps reduce frizz while you sleep.
