
I kept filing the corners until my nails looked like peas, and that was the moment I stopped listening to every tutorial that says "round is safer." The real fix was a tiny inward curve at the tip, a thinner top coat, and a method a tech who works at a salon downtown showed me that keeps ovals from snagging and looks like a natural elongation.
These ideas are for anyone who likes an oval silhouette but wants variety, from short practical ovals to longer, evening-ready shapes. Expect a mix of quick at-home tweaks and salon techniques, budget options plus one or two splurge tools. I mention cure times and the small details that actually change how long a mani lasts, and most looks work with natural, gel, or acrylic methods depending on how patient you are.
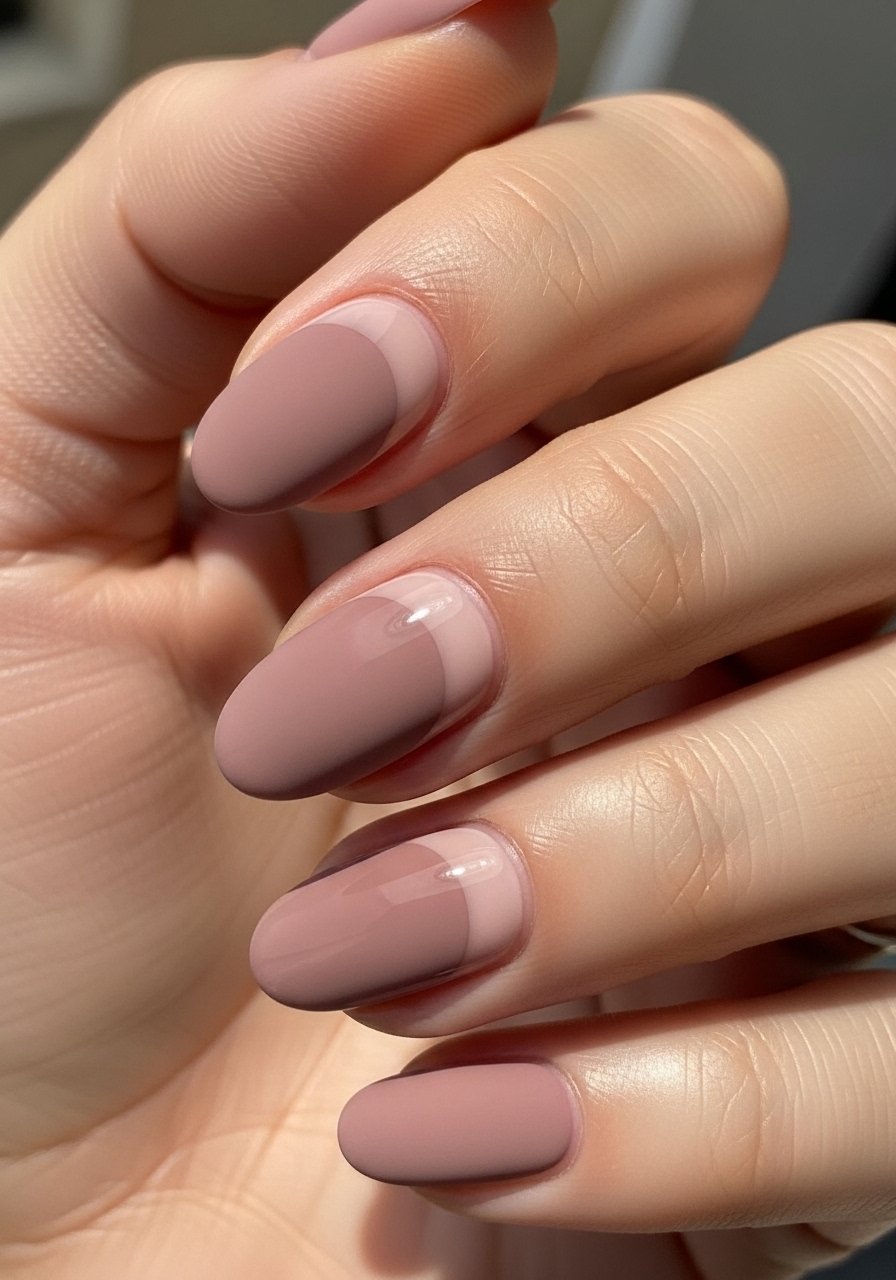
1. Sheer Rose Wash With Tiny Glitter Flare

Style/Vibe: Soft, modern
Best For: Short to medium nails, everyday wear
Skill: Beginner
A single thin wash of a sheer rose polish reads polished but not precious. Two thin coats, each cured or dried fully, make the color translucent and forgiving of growth. For a tiny twist, mix one drop of loose micro-glitter into 10 drops of clear top coat and brush just along the free edge for a sliver of sparkle that hides chips. Use a fast-dry top coat and wipe off excess around the cuticle before curing to avoid lumps. This is an easy upgrade if you want something that reads salon-made without the time.
Mistake to Avoid: Loading the brush with glitter and painting the whole nail, which makes the mani thick and dull.
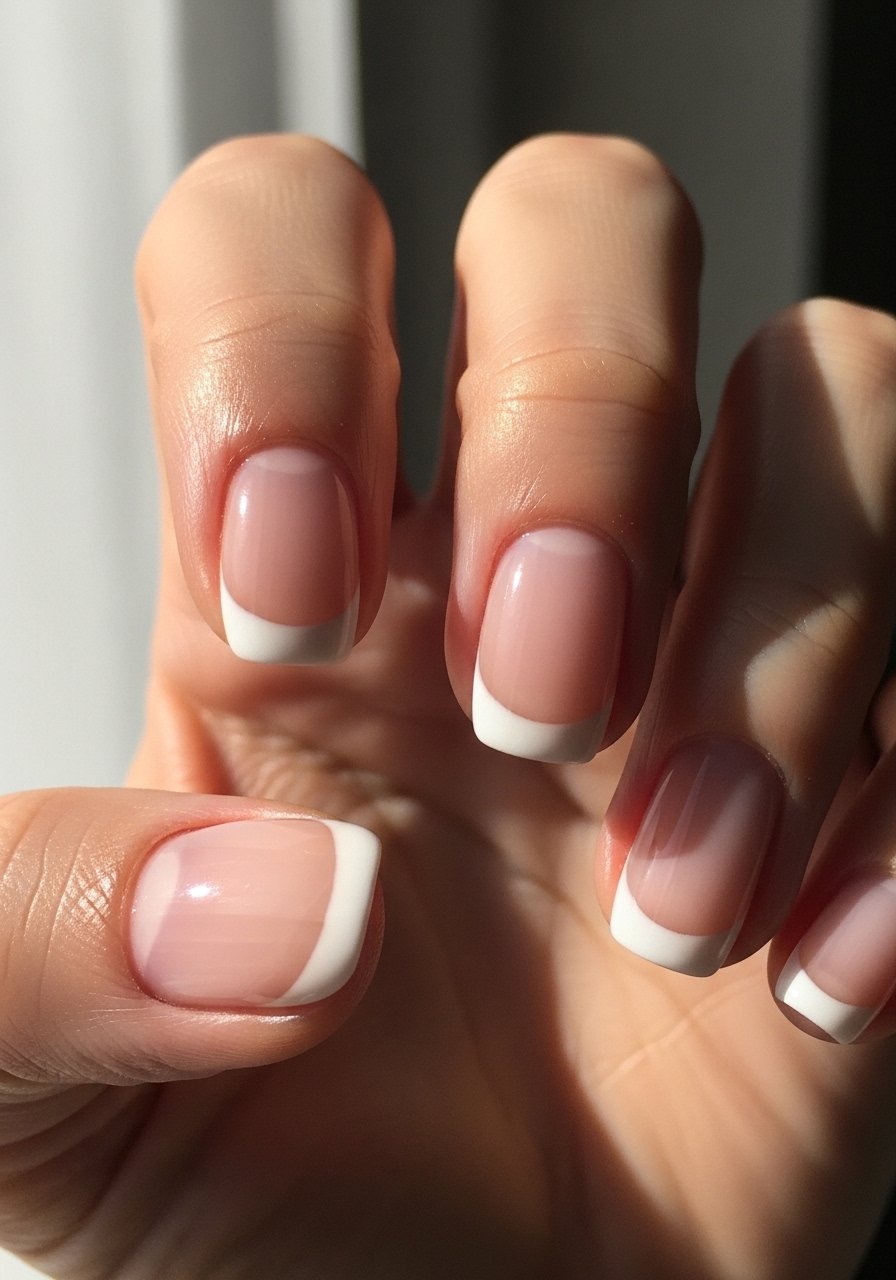
2. Soft French With Rounded Smile Line
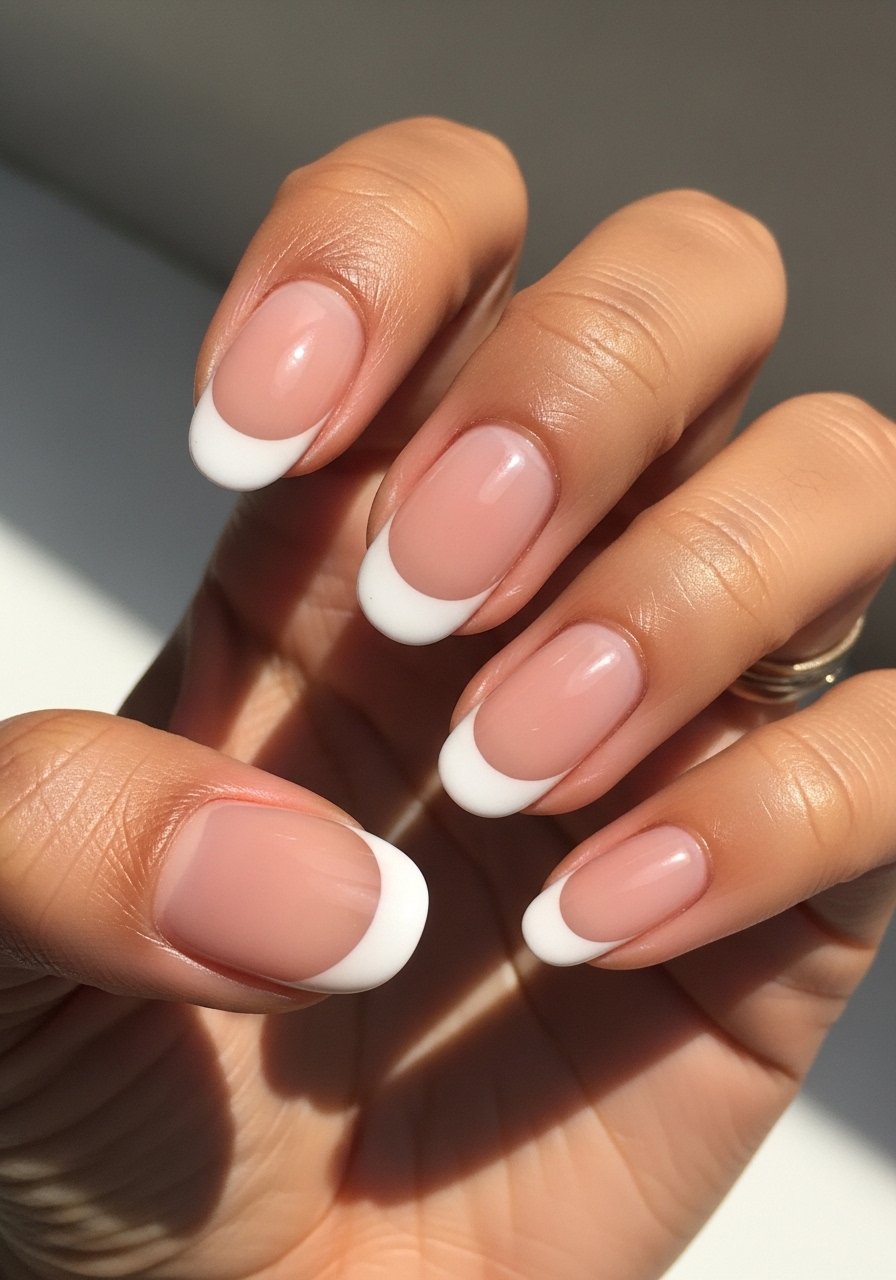
Style/Vibe: Timeless, clean
Best For: Medium nails, office and events
Skill: Intermediate
A French tip drawn to follow the natural cuticle curve makes oval shapes look longer. Keep the white thin, and leave about 1 millimeter gap from the cuticle for a natural look. If you struggle freehand, use a slim striping brush and paint the smile line in two short strokes, then connect them. For gel, cure 60 seconds per coat under LED. This fits anyone who wants a classic with a softer edge, and it layers well under a matte top coat for a modern finish.
Mistake to Avoid: Painting a straight white line across the tip, which shortens and boxes the oval.
3. Satin Almond Glow With Sheer Chrome Tip
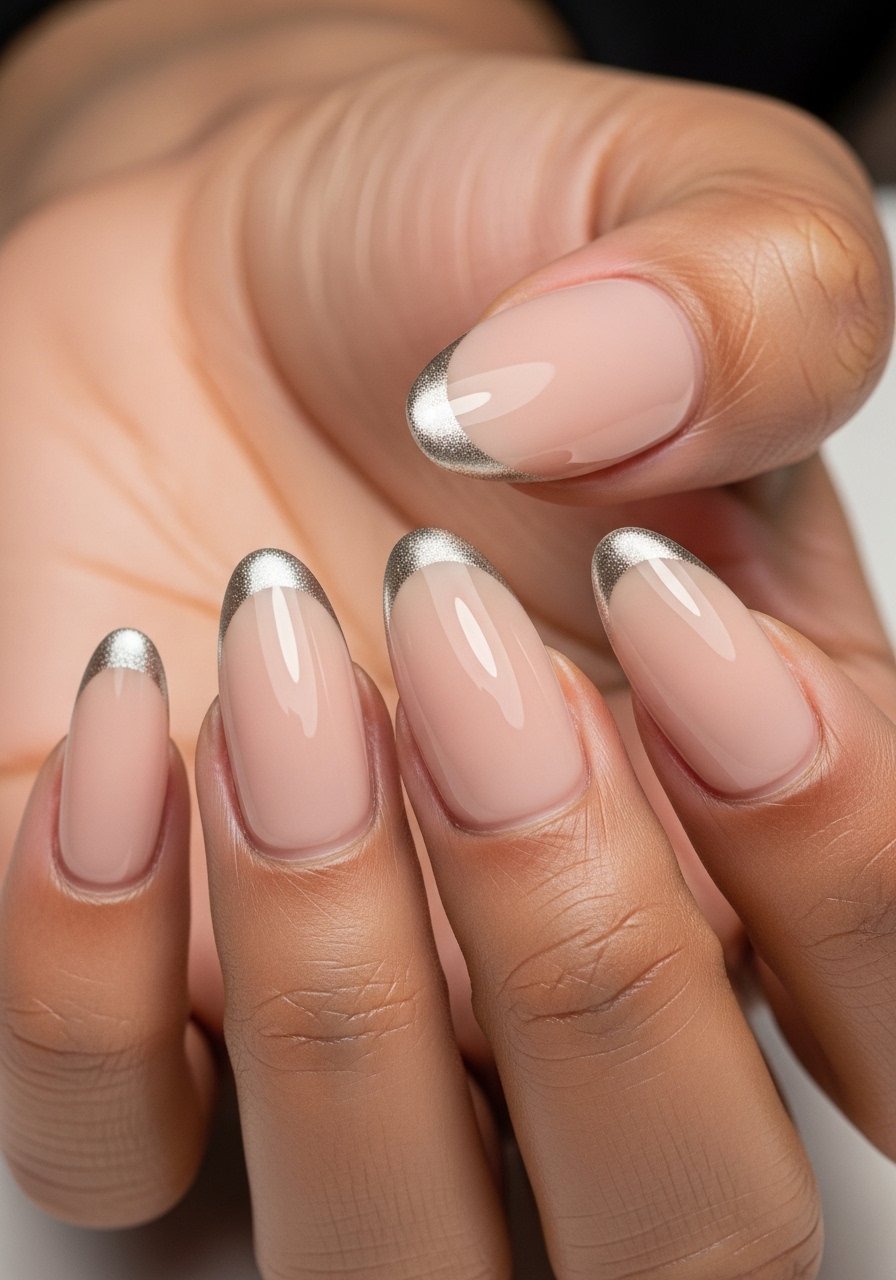
Style/Vibe: Elegant, soft-glow
Best For: Long nails, evenings
Skill: Advanced
Satin finishes hide small ridges while keeping shape definition. Start with a ridge-filling base, two thin coats of color, then buff lightly before applying a sheer chrome to the tip using a small sponge. For gel users, cure each thin layer 60 seconds under LED and finish with a non-wipe satin top coat. The chrome-to-nude ratio should be about 20 percent chrome at the free edge to keep it wearable. This is a good option if you like length but not high shine.
Mistake to Avoid: Rubbing chrome directly onto an oily surface, which makes it patchy.
4. Negative Space Crescent For Fast Grow-Out
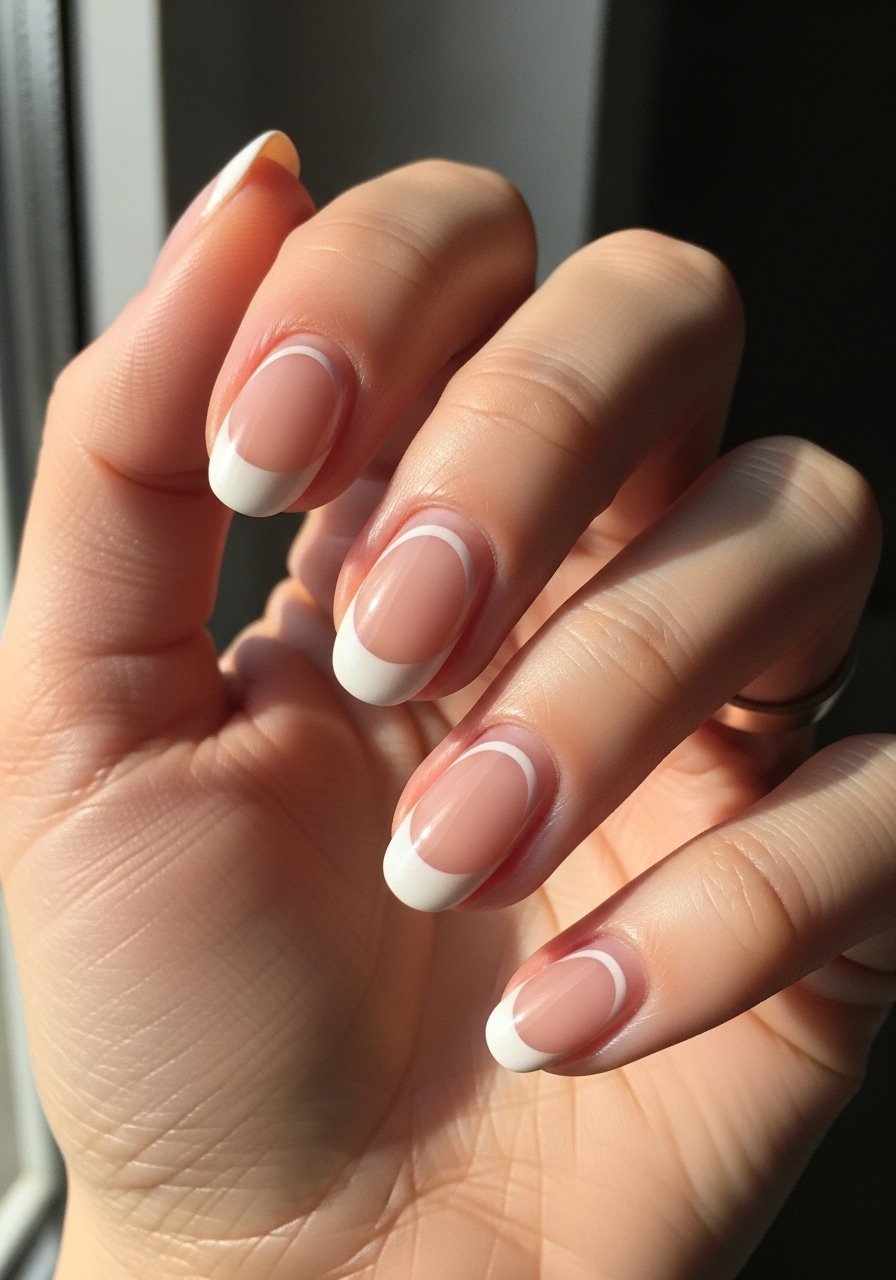
Style/Vibe: Modern, low-maintenance
Best For: Short to medium nails, busy lifestyles
Skill: Beginner
Negative space works great on ovals because the cuticle crescent distracts from regrowth. Paint the tip and leave the lunula clear, or use a very thin striping brush to define a crescent. For longevity, keep color layers thin and seal edges well. This is a practical option if you hate frequent fills, and it plays nicely with both regular polish and gel. It also pairs well with any of the glints or stripes from the other ideas.
Mistake to Avoid: Flooding the crescent with polish, which removes the deliberate negative space.
5. Hand-Painted Fine-Line Florals
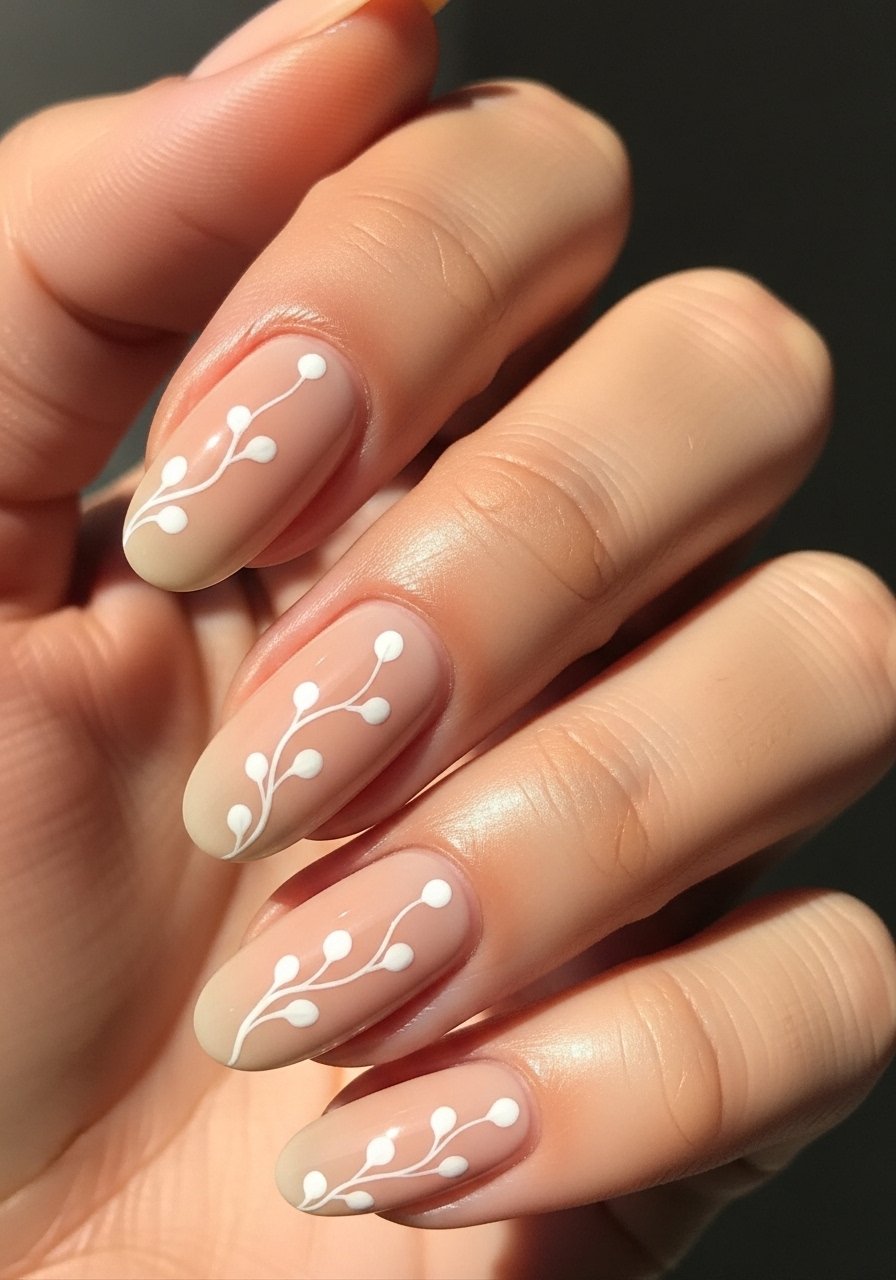
Style/Vibe: Feminine, delicate
Best For: Medium nails, special occasions
Skill: Advanced
Tiny florals make ovals feel handcrafted without bulky embellishments. Use a 0.5 millimeter detail brush and a thinned gel paint or acrylic paint diluted 10 to 15 percent with clear gel to keep lines crisp. Cure 30 to 60 seconds for gel paint strokes so they do not drag. This design works best on a neutral base that lets the lines breathe, and it reads upscale even on short nails if you scale the motifs down.
Mistake to Avoid: Pressing the brush flat, which blots the petals and ruins the line work.
6. Soft Matte With Glossy Accent Moon
Style/Vibe: Contemporary, tactile
Best For: Medium nails, daytime to evening
Skill: Intermediate
Matte and gloss contrast gives oval nails dimensional interest without length. Apply a matte top coat over the full nail, cure, then paint a small glossy half-moon at the base and cure again. Use a peel-free matte for longer wear. This doubles as a disguise for surface texture, which is great for nails that show ridges. The technique is quick and suitable for at-home attempts if you have both finishes.
Mistake to Avoid: Applying matte top coat over glossy accents, which dulls the effect.
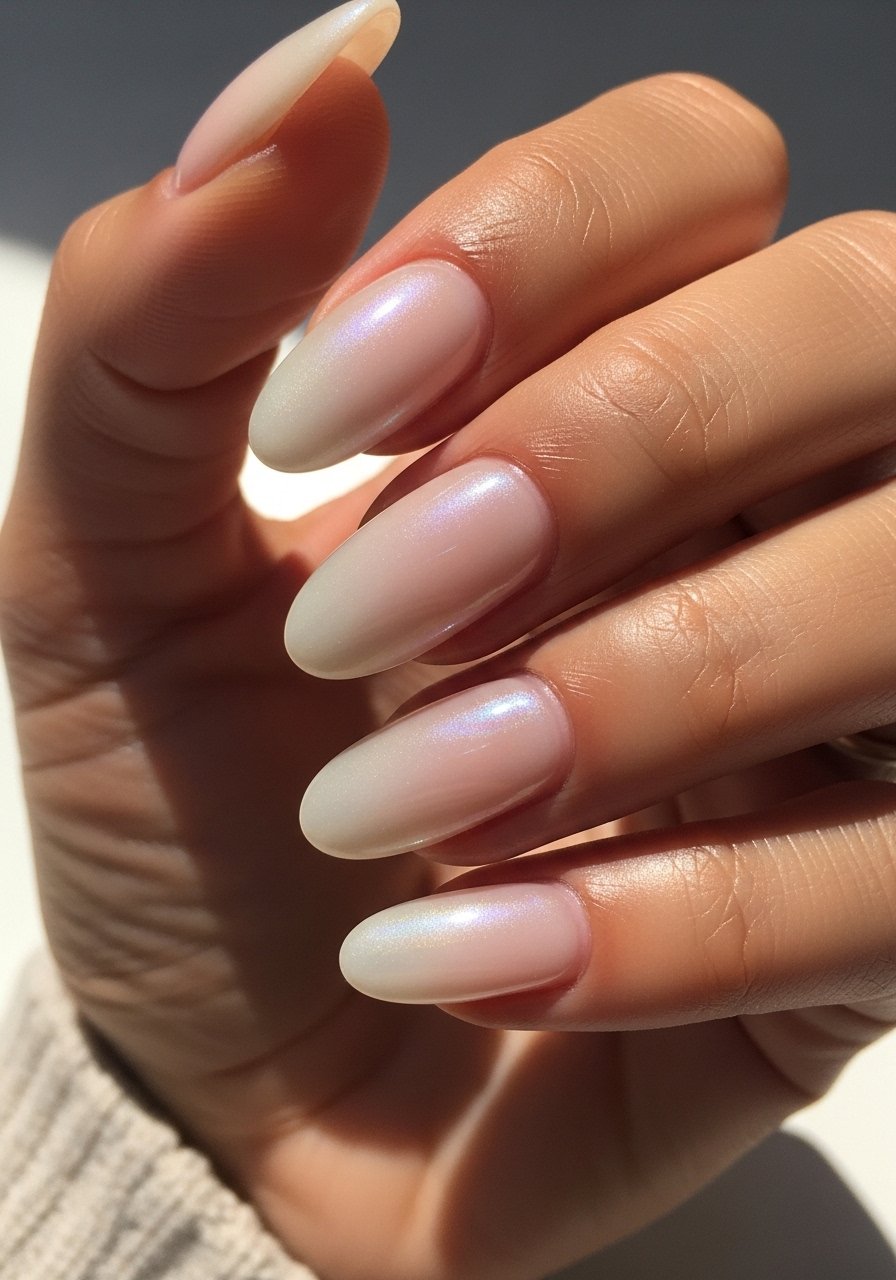
7. Pearl Gradient That Hides Tip Wear
Style/Vibe: Subtle, luxe
Best For: Long nails, formal events
Skill: Intermediate
A soft pearl gradient reduces the visual contrast between natural growth and polished tip. Sponge two thin coats of shimmer into the tip, blending toward the middle. For best results use a micro-sponge and work in 3 to 4 light dabs rather than one heavy swipe. Gel users should cure each thin layer for 60 seconds. This technique masks tip wear and looks intentional as the nail grows out.
Mistake to Avoid: Overloading the sponge with product, which creates noticeable streaks.
If any of these ideas have you ready to actually try something, here are the go-to items I reach for when creating these looks.
Oval Mani Shopping List
Tools & Basics:
- Glass nail file (~$6-12). Use light one-direction strokes to preserve the oval curve.
- Fine detail nail brush (~$8-15). Essential for florals and smile lines.
Polish & Gel:
- Sheer nude polish (~$8-18). A forgiving base for many of these looks.
- Quick-dry top coat (~$6-14). Thin layers help prevent chips.
Finish & Extras:
- Matte top coat (~$7-12). For contrast accents.
- Loose micro-glitter (~$4-10). Add a pinch to clear top coat for subtle sparkle.
- LED nail lamp (~$25-60). Speeds up cure times for gel finishes.
- Cuticle oil pen (~$5-12). Keeps the lunula visible and the mani clean.
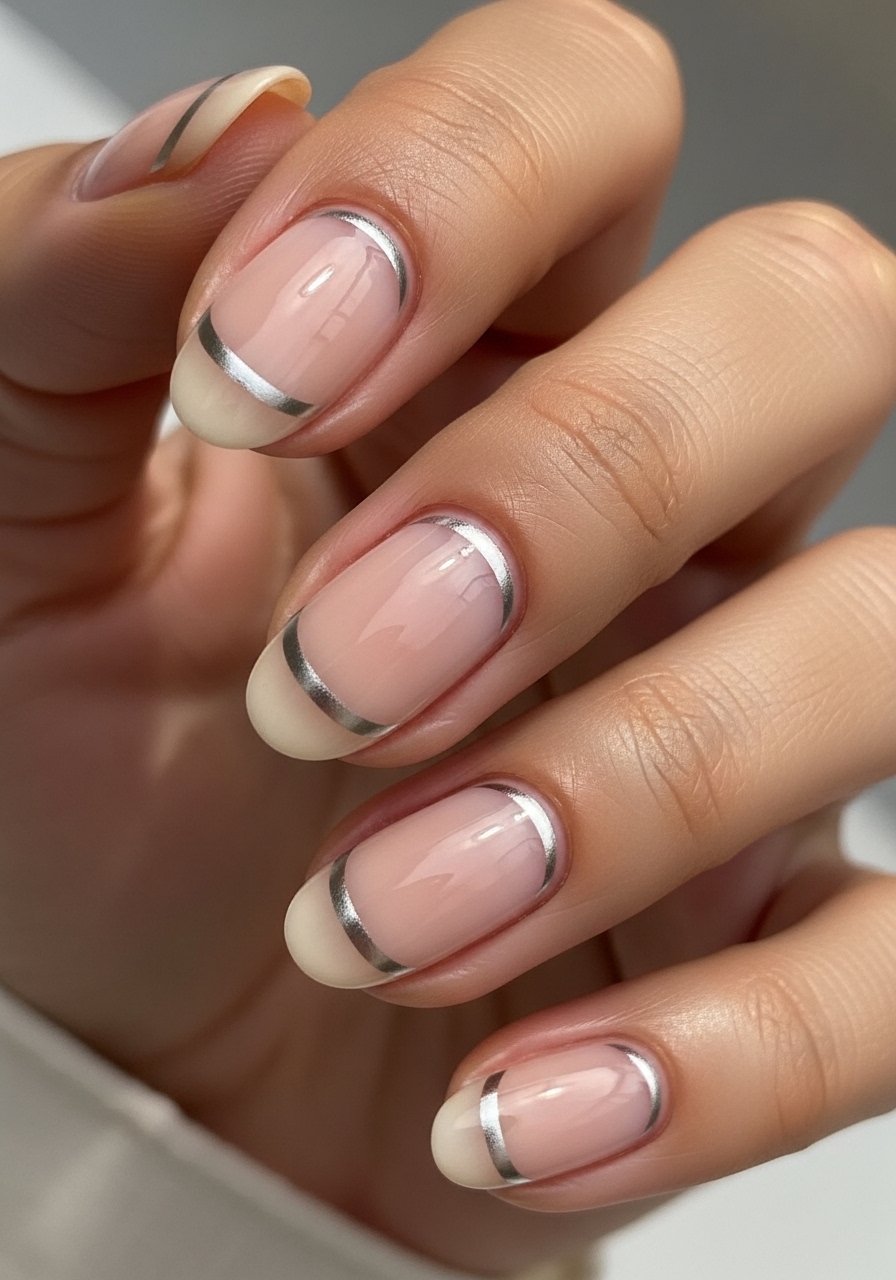
8. Micro-French With Metallic Lining
Style/Vibe: Sleek, precise
Best For: Medium nails, minimalists
Skill: Intermediate
A micro-French uses a hair-thin metallic line to subtly frame the oval. Use a striping brush dipped in metallic polish, and aim for a line under 1 millimeter thick. On gels cure each thin metallic pass for 30 to 60 seconds depending on the product. This small detail makes oval nails feel intentional and modern without changing overall length. It pairs well over sheer or opaque bases.
Mistake to Avoid: Dragging the brush from cuticle to tip, which creates a shaky line.
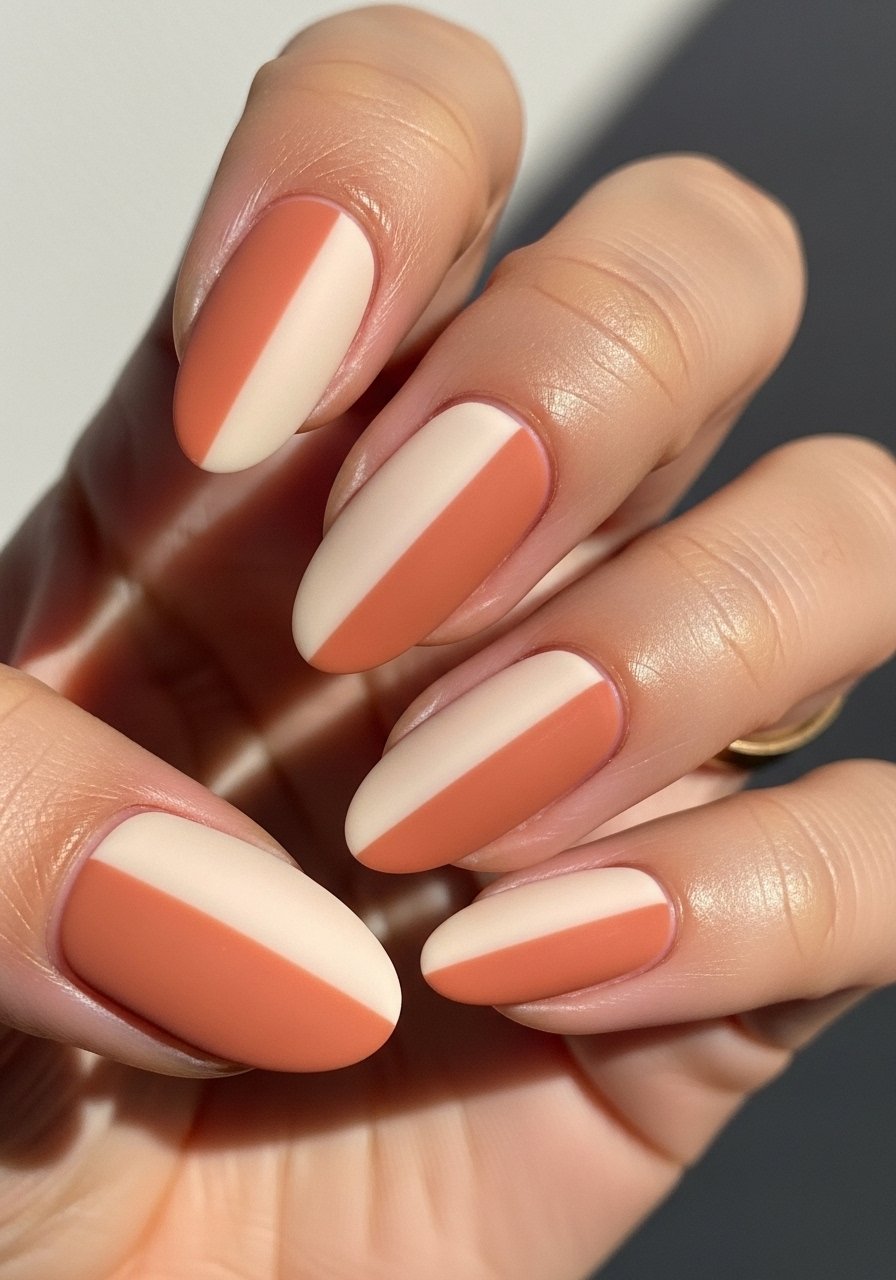
9. Two-Tone Vertical Color Block
Style/Vibe: Graphic, playful
Best For: Medium nails, creative looks
Skill: Intermediate
Vertical color blocking visually lengthens ovals, especially when the darker shade sits at the cuticle side. Use tape or a thin brush for the dividing line and seal with a glossy top coat. Two thin coats per color keep the surface smooth. This works with regular polish if you allow full dry time between masks. It is an accessible way to make ovals more dynamic without lengthening.
Mistake to Avoid: Rushing the tape removal, which lifts polish edges.
10. Textured Linen Effect For Practical Hands
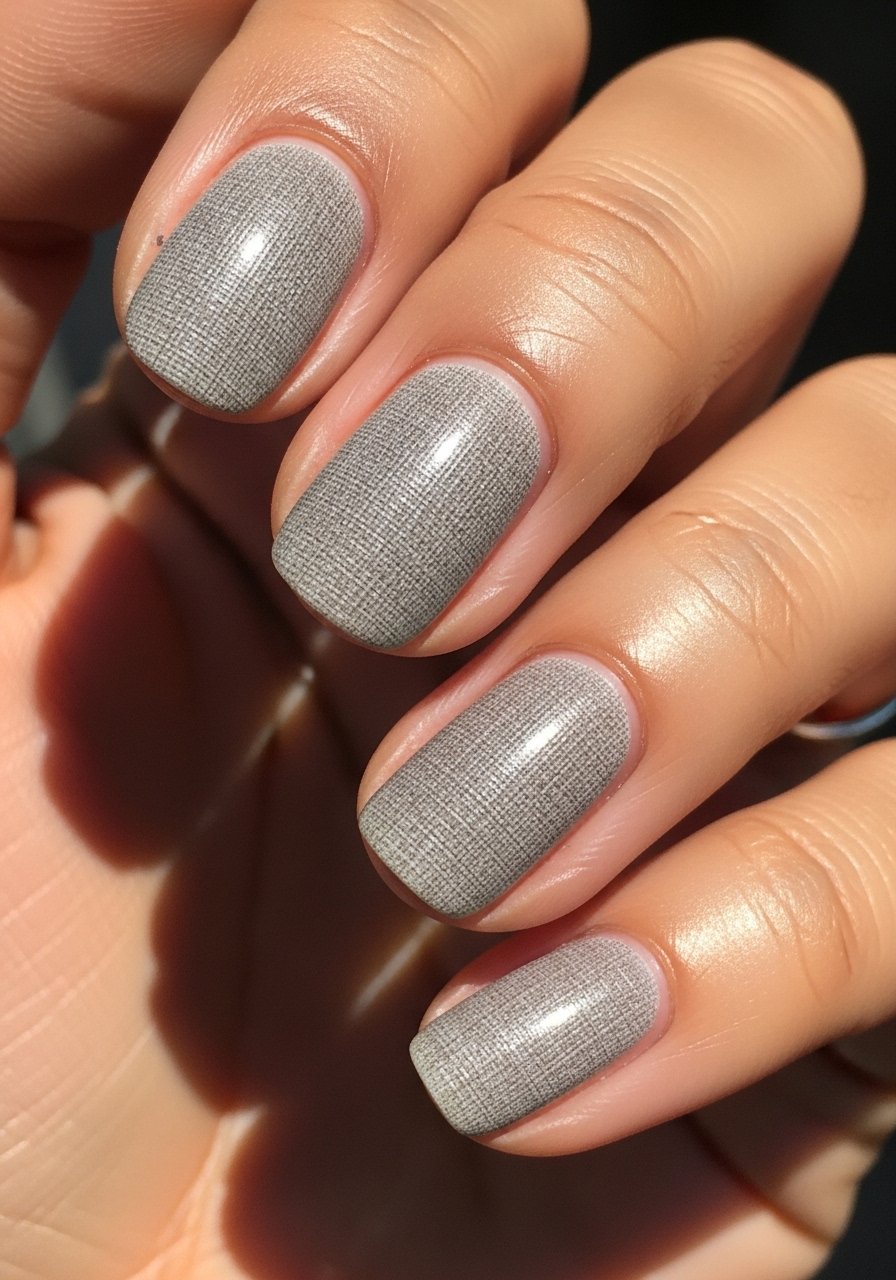
Style/Vibe: Lived-in, tactile
Best For: Short nails, hands that work a lot
Skill: Beginner
A linen texture hides small chips and looks intentional on shorter ovals. Apply a base, then dab a slightly thicker top coat with a stippling brush to create a fabric-like surface before it fully sets. Seal with a thin final top coat after the texture cures. This finish is forgiving for folks who type a lot or use their hands often, because small abrasions blend into the texture.
Mistake to Avoid: Overworking the texture, which turns it into a clumpy surface.
11. Tiny Gem Cluster Near Cuticle
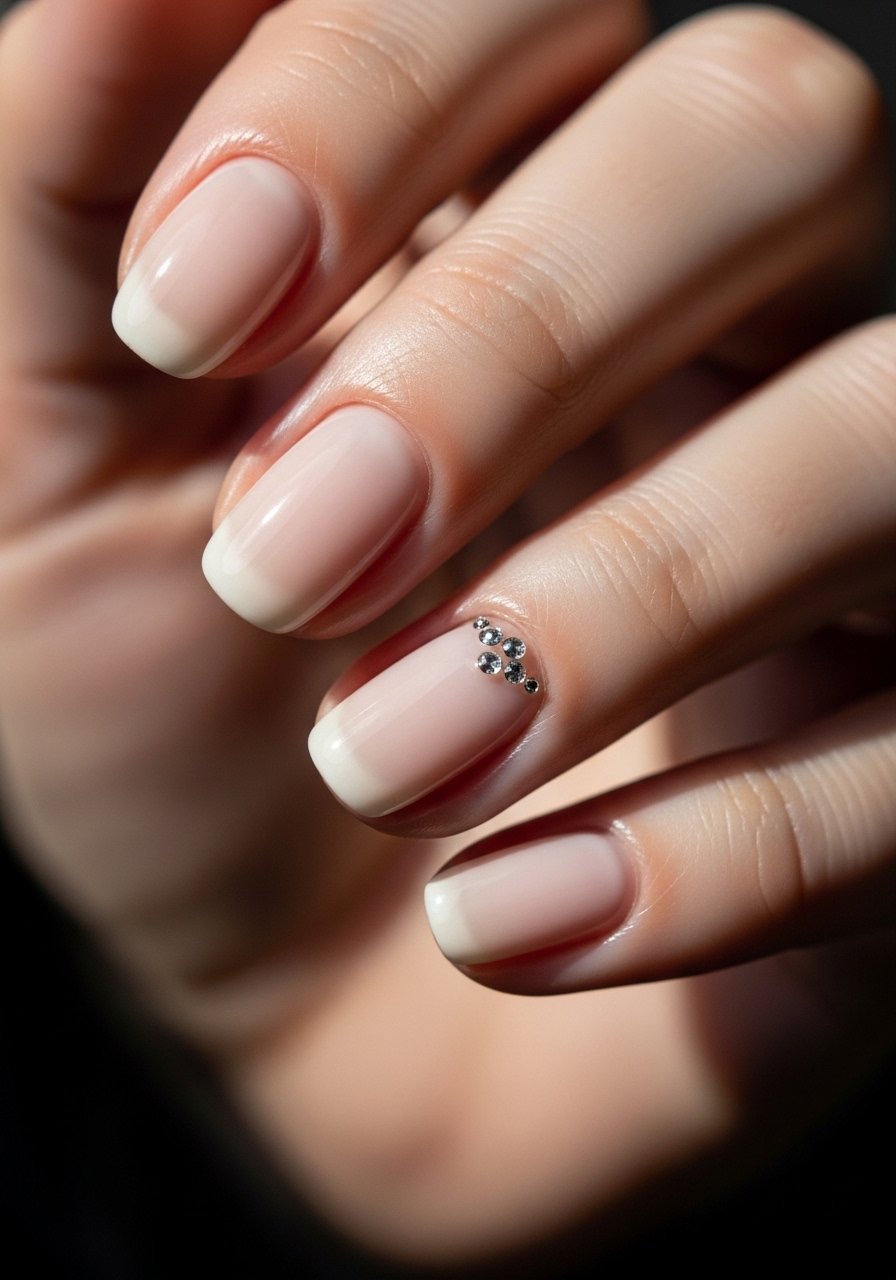
Style/Vibe: Subtle, luxe
Best For: Medium nails, event looks
Skill: Intermediate
A single gem cluster reads expensive without feeling overdone. Use gel adhesive and cure 60 seconds to lock gems in place. Keep clusters to one or two nails to avoid a heavy look. This approach is great for people who want some bling but still need nails that work for daily tasks. The cluster placed near the cuticle also masks lift beginning at the base.
Mistake to Avoid: Using regular nail glue without sealing, which leads to early gem loss.
12. Thin Ombre With Soft Tip Highlight
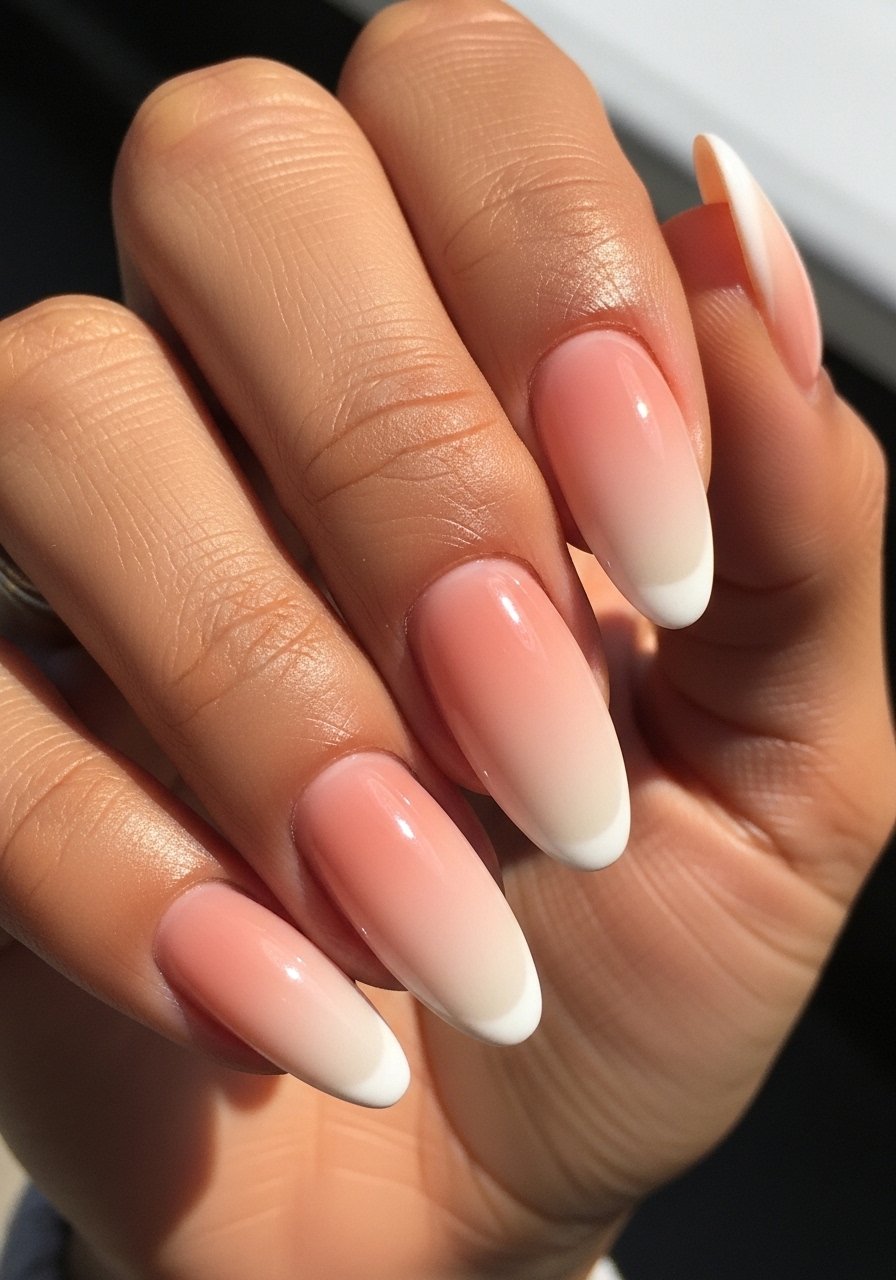
Style/Vibe: Airbrushed, soft
Best For: Long nails, photos and weddings
Skill: Advanced
Thin ombre looks like it was airbrushed when executed with micro-sponge dabs and feathered blending. Keep the graduated color change subtle and end with a micro-highlight at the tip to mimic natural light catch. For gel, thin layers cure 60 seconds. Plan on 45 to 60 minutes in a salon for this to keep the blend smooth. It is worth it for events and photographs.
Mistake to Avoid: Applying heavy passes that create a visible line rather than a gradient.
13. Keyboard-Friendly Short Oval With Reinforced Free Edge
Style/Vibe: Practical, durable
Best For: Short nails, heavy keyboard users
Skill: Beginner
If you use your hands constantly, a reinforced free edge is the unsung hero. Apply a thin band of sheer builder gel or two extra coats of clear top coat along the tip and cure each thin pass for 60 seconds under LED. Keep the band no wider than 1.5 millimeters to avoid visible bulk. This simple reinforcement prevents snags and chips while keeping the oval profile intact.
Mistake to Avoid: Applying too much product to the tip, which makes the nail feel bulky and catch-prone.
Oval Shape Maintenance Moves
Thin coats beat one thick coat every time. Three thin layers of quick-dry top coat look smoother and last longer than one thick gloopy layer.
Grab cuticle oil and apply nightly. It keeps the lunula clean, slows lifting, and makes even cheap polishes look better as they age.
If you file, file one direction with a glass nail file and aim for a slight inward curve at the free edge. That tiny curve is what makes an oval resist snags.
Most at-home gel cures are 60 seconds under LED. Invest in a small LED lamp and cure thin coats only, or the layers will be soft in the middle and chip quickly.
Keep a fine detail brush on hand. It makes all the fine lines and tiny accents from these ideas actually achievable at home without frustration.
