
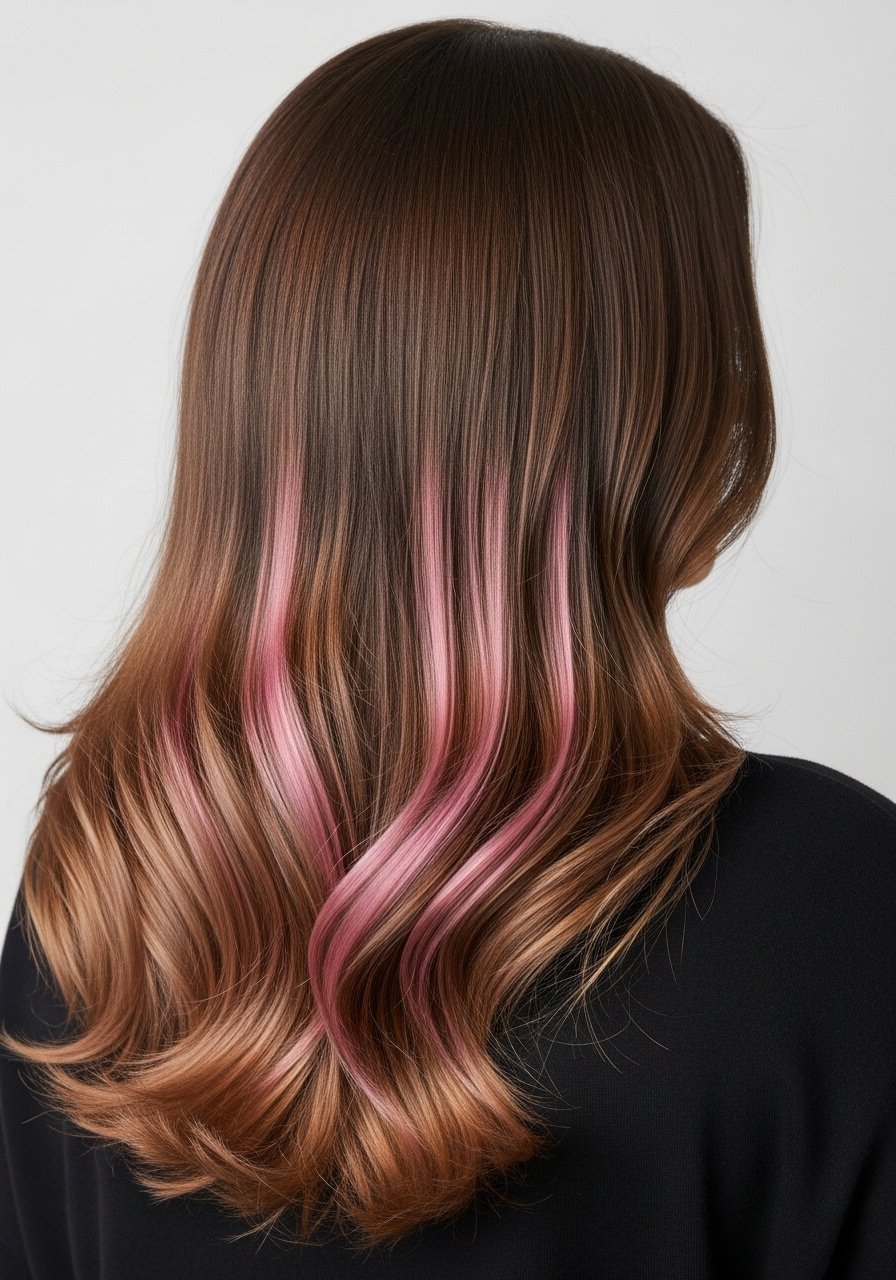
I kept pulling a single thick slice of pink through my hair and wondering why it looked painted on, not like the soft, lived-in pieces I loved in photos. After a week of color bleed and an awkward grow-out line I started taking 3 millimeter slices, feathering the root, and diluting the deposit with conditioner for softer edges. That one change made screenshots stop feeling staged and start feeling wearable.
These looks are for someone who wants playful color without daily fuss, and most of them are salon-friendly but doable at home with basic tools. I tested versions across four hair textures I have styled, so notes on porosity and heat-free options are included. Expect low to medium upkeep, a mix of semi-permanent and temporary products, and techniques that keep the pink where you want it, not all through your pillow.
1. Narrow Rose Money Piece
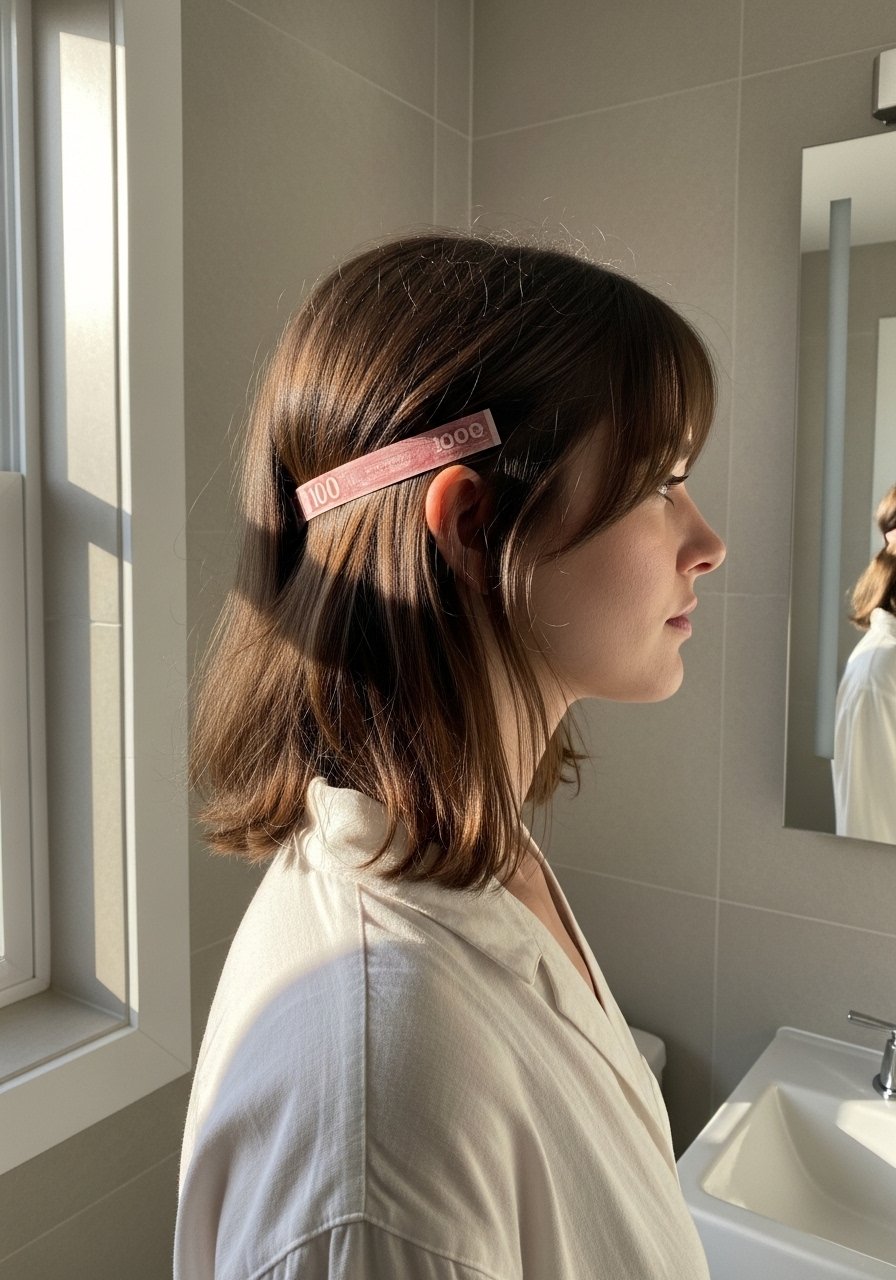
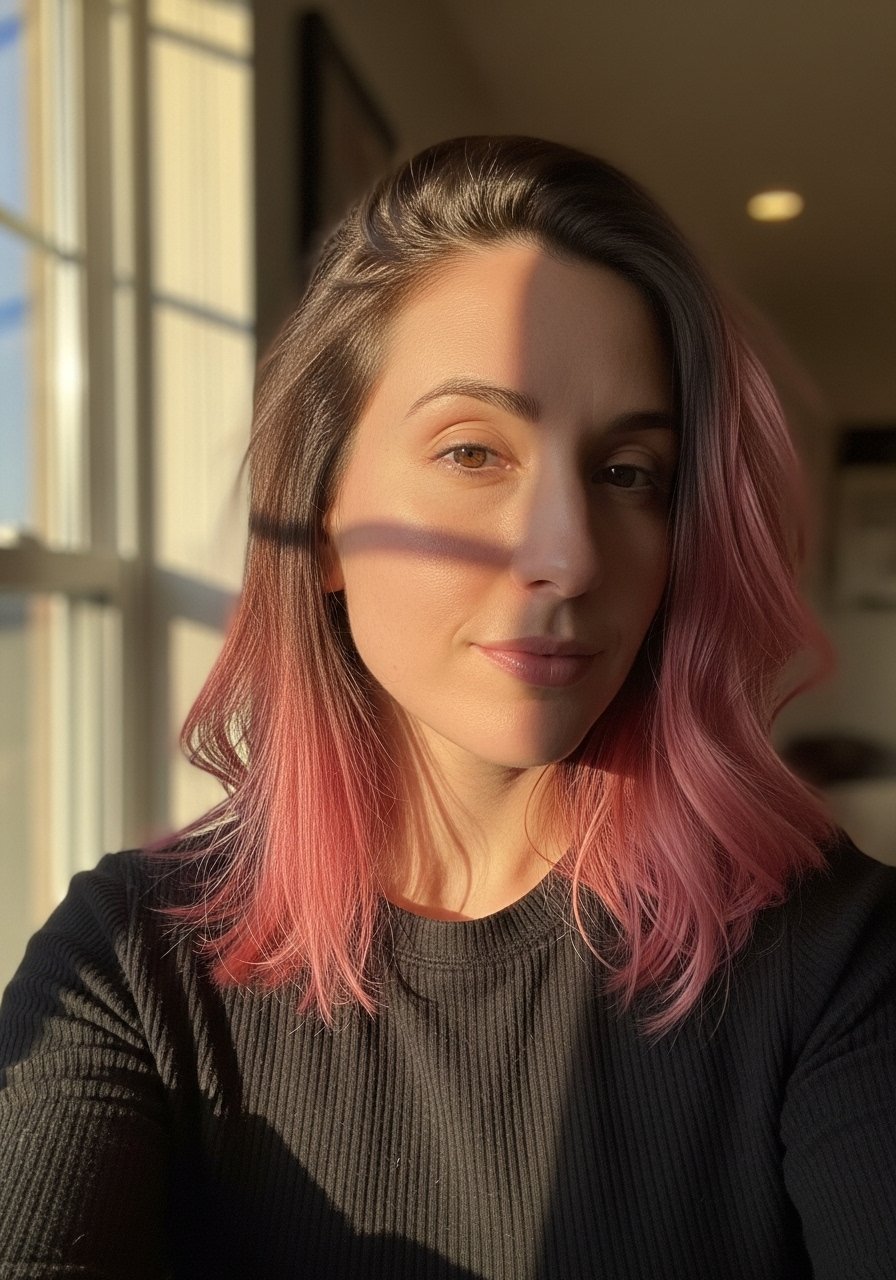
The narrow money piece frames the face without committing to a chunky streak. What makes it work is the thin slice and feathered root, which blends into brown rather than cutting a hard line. I pull 3mm slices, backcomb the root to soften the application, and use a semi-permanent salon-grade pink dye so the color fades evenly. It reads soft in photos and still shows in selfies. Works well for straight and wavy hair, beginner-friendly, twenty minutes in processing for most dyes. Pair with a color-depositing conditioner once a week to refresh tone.
Mistake to Avoid: Applying a thick slab at the hairline so the pink reads like a sticker.
2. Hidden Peekaboo Underlight

This is for people who want pink only when they move, not every time. Place the pink on the underside of the hair in panels starting 2 to 3 inches back from the face, so braids and updos reveal a flash. The technique uses wider sections, but keep each foiled panel thin enough to lift evenly. It is low-commitment and perfect if your workplace is conservative. For curly hair, pick larger panels so the color reads through texture. Use a temporary color wax the first time to test the placement before bleaching or tinting.
Mistake to Avoid: Putting the color too close to the front so it shows in every low bun.
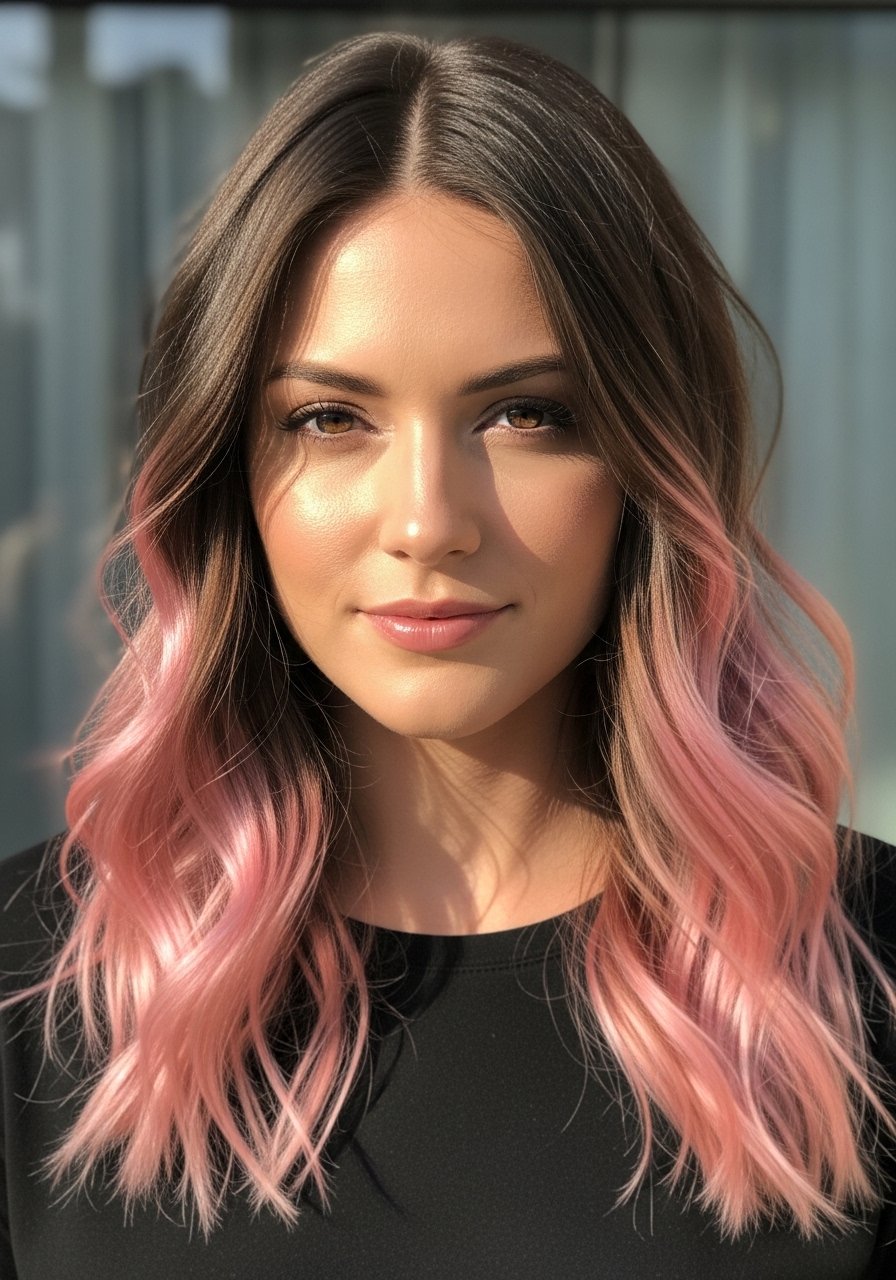
3. Painted-On Blended Balayage Pink
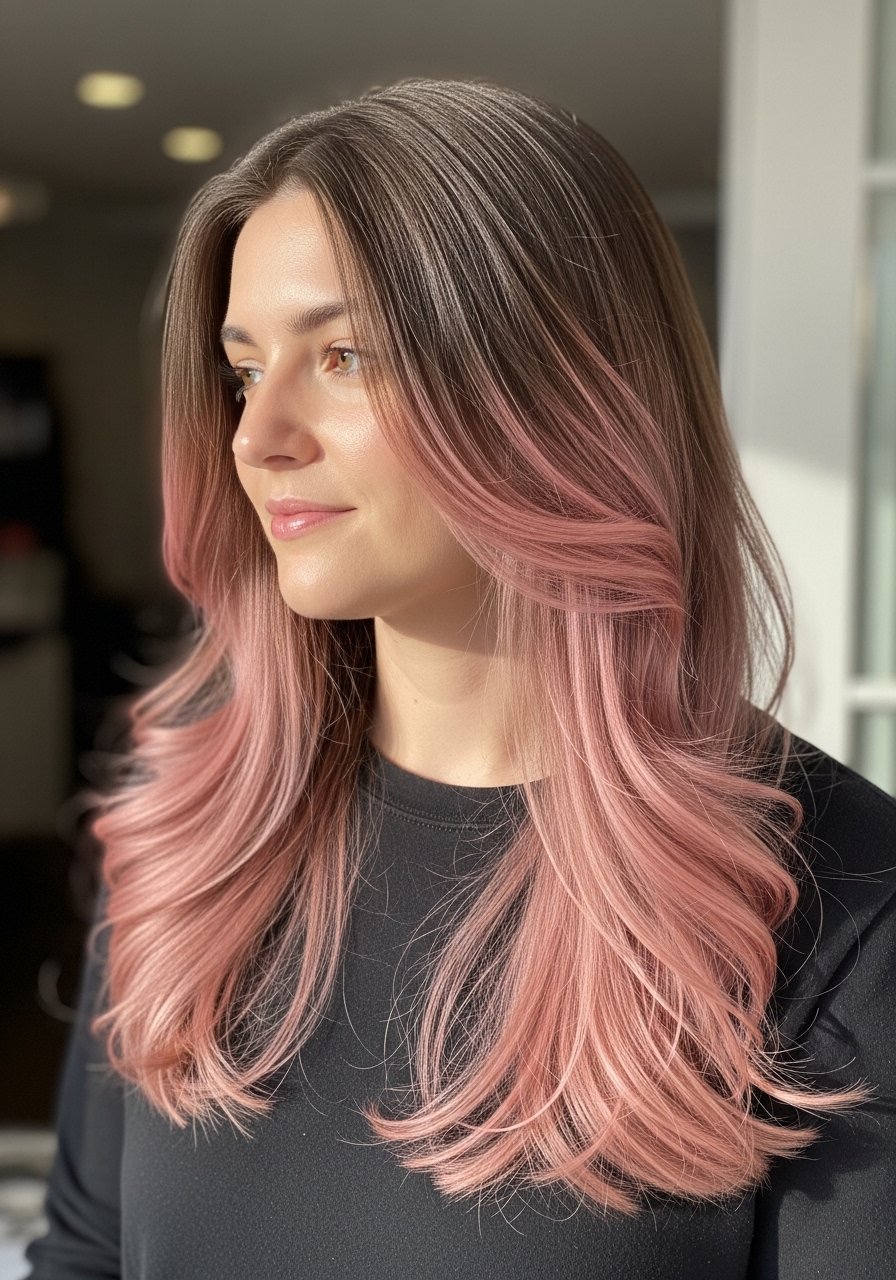
This balayage approach reads natural because the pink is painted on in graduated strokes rather than packed into foils. I use a 1 to 2 mixing ratio of dye to clear glaze for patience with saturation and a softer deposit. Work in thin horizontal slices, paint lighter at the root area, and feather downward for a sun-kissed fade. It creates a soft mood in photos and holds up well on medium porosity hair. This is slightly higher-skill, so take your time, and consider a gloss at the end for shine.
Mistake to Avoid: Loading the brush with undiluted dye which makes the transition obvious.
4. Chunky Barrette-Friendly Streaks
Chunky streaks read bold and playful when styled with hair accessories. Place one or two 6 to 10 millimeter slabs on either side so the clips catch them. This works well for medium to thick hair because the contrast is intentional. Use a semi-permanent fuchsia or cotton-candy pink, or try temporary color wax for festival looks. Styling time is short, cleanup minimal, and the pieces grow out in an obvious way which some people prefer. Try a sulfate-free shampoo to stop early fading.
Mistake to Avoid: Bleaching a thin slice and expecting high saturation on coarse, resistant hair without longer processing.
5. Micro-Frosting Pastel Baby Lights
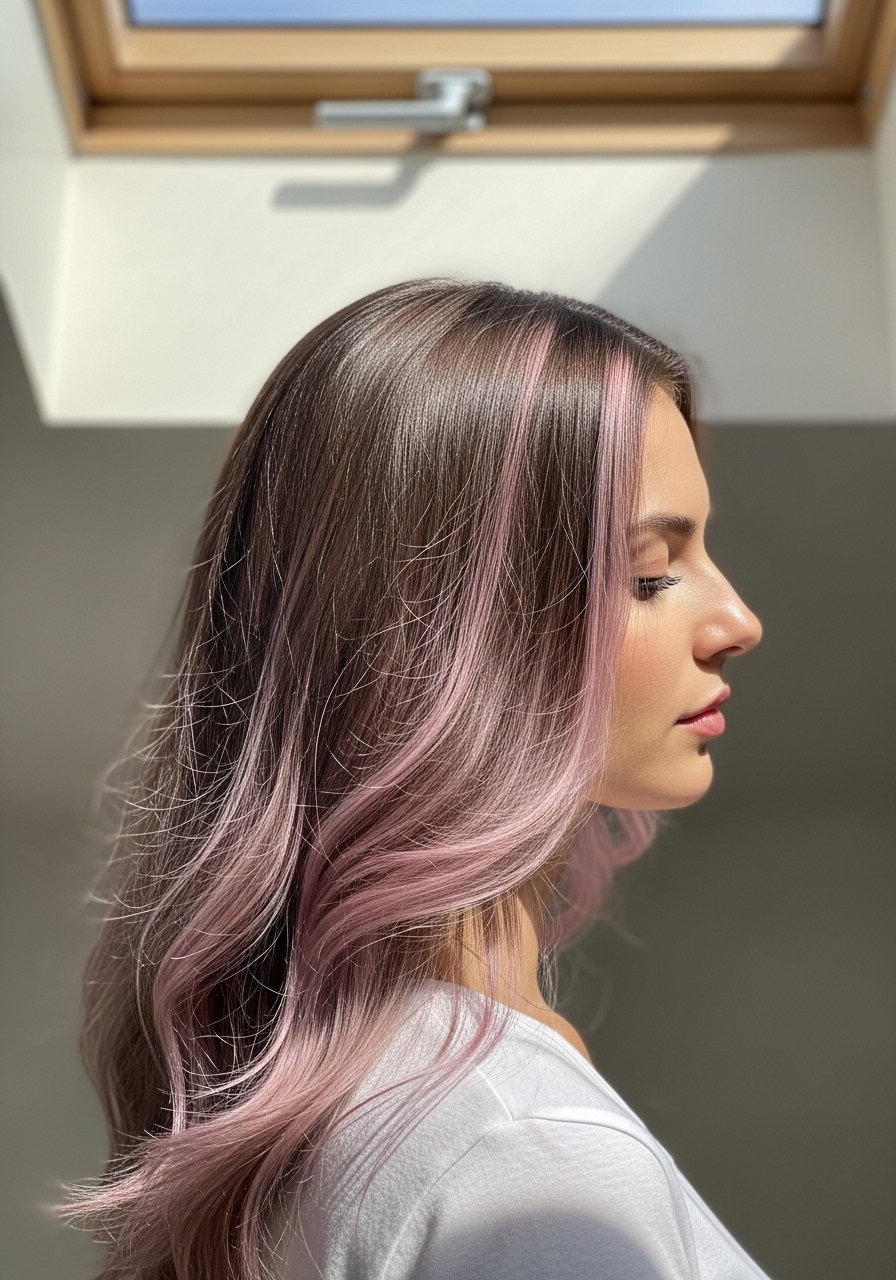
Micro-frosting is tiny baby lights in 1 to 2 millimeter slices spaced evenly across the crown. The result is a whisper of pink that softens brown rather than overpowering it. Technically you foil many thin slices and keep processing time short to avoid brassiness. Dilute pastel dyes with conditioner in a 1 to 3 ratio for a dusty finish that photographs delicate. This is higher-skill and salon-preferred, but it gives long wear because the color blends with the base. Great on fine hair because the highlights add texture and dimension.
Mistake to Avoid: Pulling thick slices which ruins the micro, blended effect.
6. Root-Smudge With Pink Ends
Root-smudging keeps the brown at the scalp and places pink where it matters, on the lengths and ends. Use a brush to paint the root with warm brown glaze, smudge slightly into the mid-lengths, and apply pink only to the lower third. This reduces regrowth lines and makes the color easier to maintain. For higher-porosity hair, pre-treat with a protein filler for more even uptake. It reads lived-in in pictures and saves salon visits. Heat-free styling shows the smudge more naturally.
Mistake to Avoid: Bleaching all the way to the root which creates a stark regrowth line.
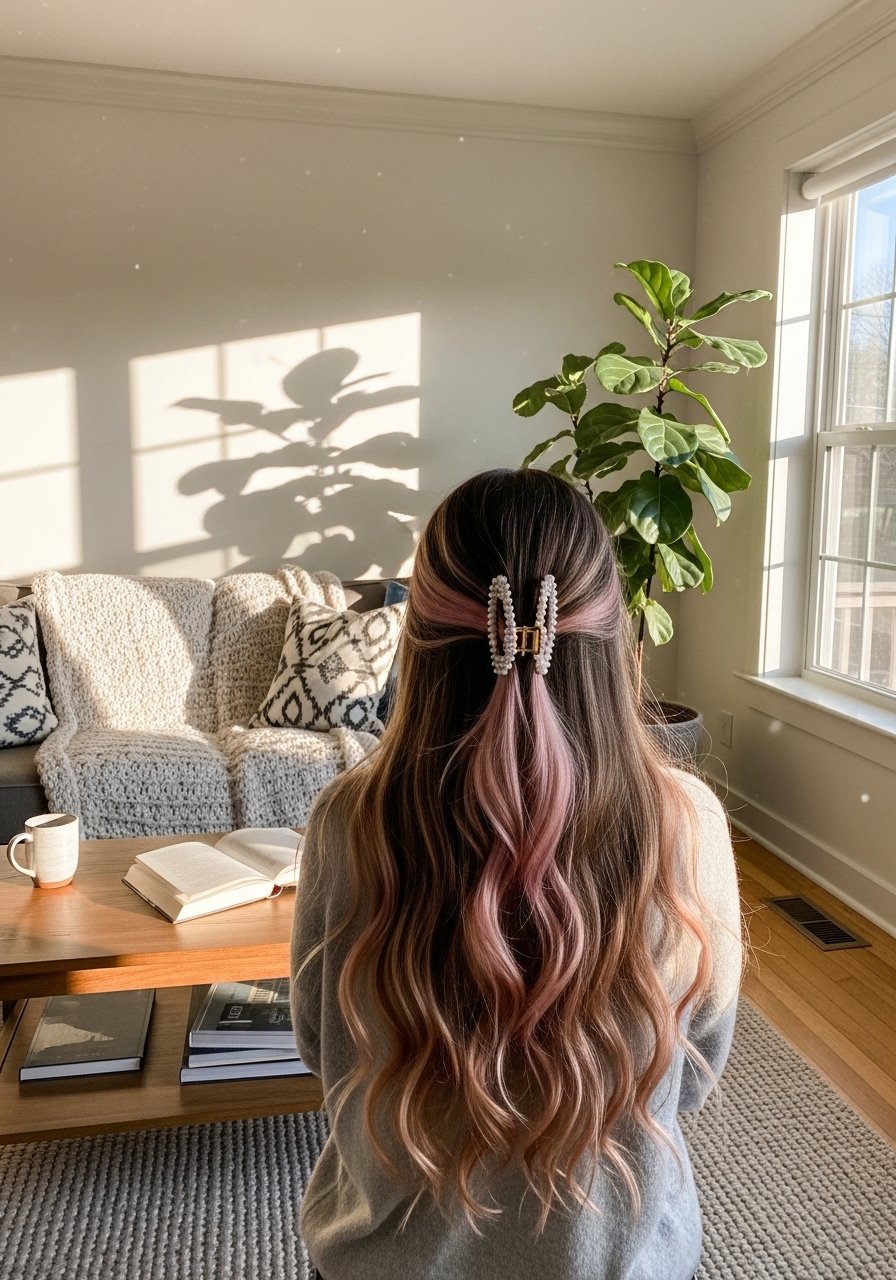
7. Lived-In Rose Ombré
The rose ombré is for anyone who wants a slow fade to pink. Start the transition mid-length with a backcombed, feathered hand-painted blend so the lightest part sits at the ends. Use a diluted glaze to deposit color for ten minutes and check tone often. This reads natural in portraits and is very forgiving as it grows out. It pairs well with routine glossing and a color-safe mask every other wash. Low maintenance, and good for first-timers who want a seasonal change.
Mistake to Avoid: Hard line at the break point between brown and pink.
If any of these ideas have you ready to try something, here are the actual products I reach for when I want pink that behaves.
Pink Highlight Starter Kit
Lightening & Dye:
- salon-grade pink dye (~$10-20), easy for semi-permanent deposits.
- bleach powder (~$12-25) for spot lifts when needed.
Tools & Application:
- color application brush and bowl (~$8-15).
- sectioning clips (~$6-12).
Finish & Care:
- color-depositing conditioner (~$15-25) to refresh tone.
- sulfate-free shampoo (~$8-18).
- glossing glaze (~$12-22) for a shiny, sealed finish.
- heat protectant spray (~$7-20).
8. Curtain Money Pieces With Soft Fringe
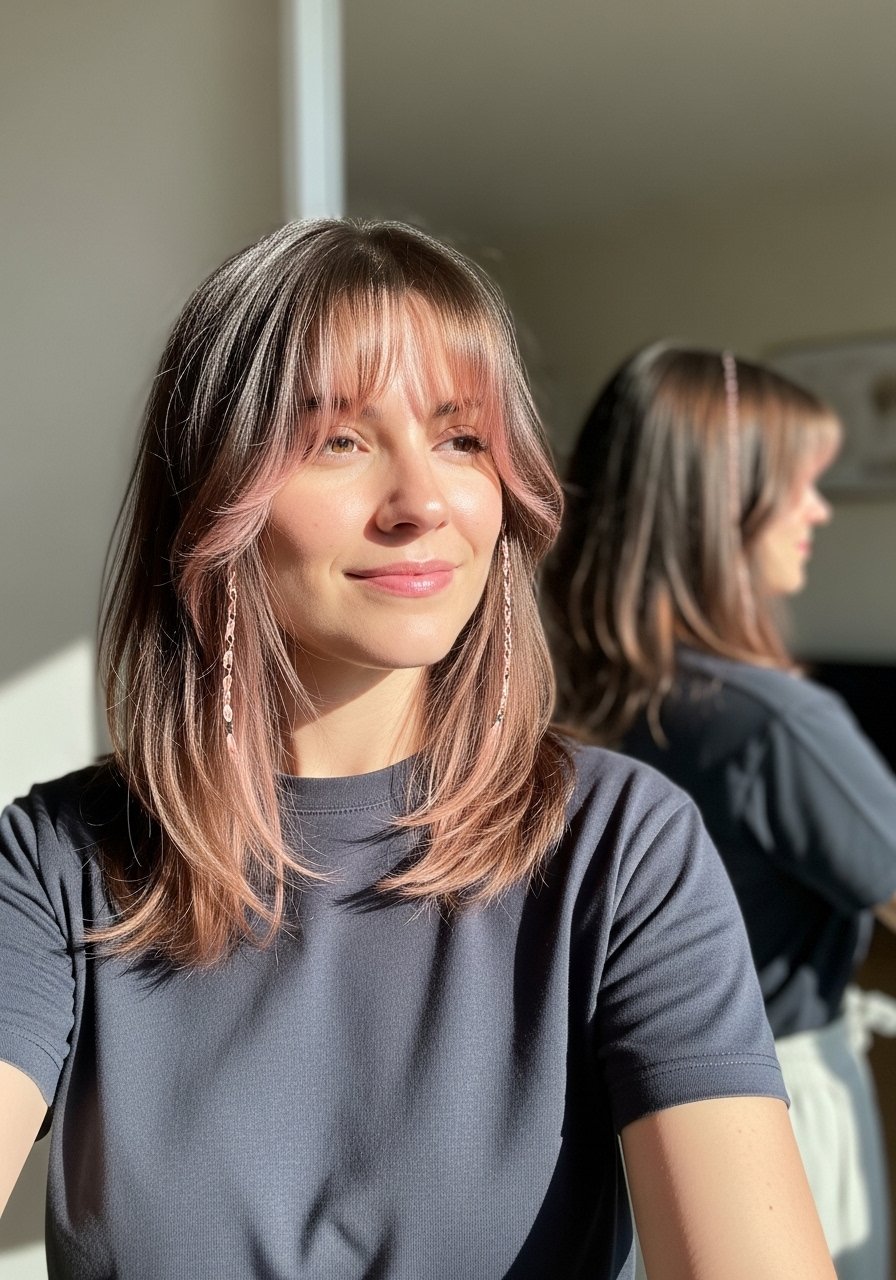
Pairing curtain bangs with money pieces makes the pink feel integrated rather than an add-on. Place two slightly wider 4 to 5 millimeter pieces just outside the hairline so they tuck into the fringe. This creates movement in photos and frames the face softly. For fine hair, keep the slices thinner so the bangs do not look sparse. Use a demi-permanent dye for lower upkeep and refresh the roots with a root-smudge glaze if needed. Works well if you frequently change parting.
Mistake to Avoid: Making the money pieces too narrow next to heavy bangs so they disappear.
9. Braided Fuchsia Accent
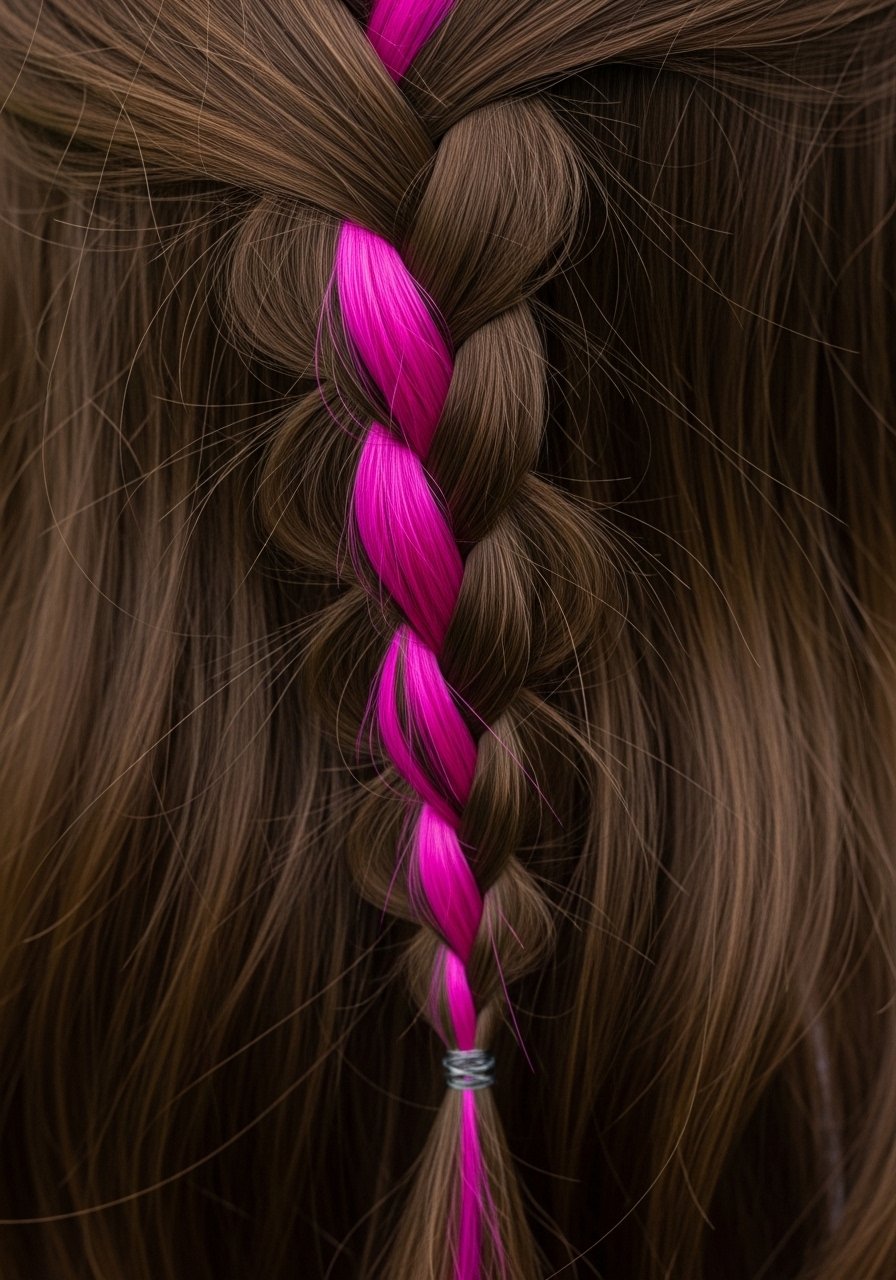
Bright fuchsia woven into braids pops in action shots and is forgiving while growing out. Tint a 6 to 8 millimeter section and braid it with adjacent natural hair so the color reads in streaks rather than blocks. Temporary color wax or a direct-deposit dye is ideal if you want weekend-only color. This is an easy way to test a saturated hue before committing to bleach. On curls, stretch the braid before coloring to avoid uneven saturation.
Mistake to Avoid: Coloring only the finished braid and not the root area so the color slips out quickly.
10. Satin-Pink Gloss Over Brown
A pink gloss is a great low-commitment route. Mix a small amount of pink deposit with clear gloss in a 1 to 1 ratio, apply mid-lengths to ends, and process for ten minutes. It imparts a sheer rose veil and adds shine, and it is perfect for anyone avoiding bleach. Glosses sit better on medium-porosity hair, so add a pre-gloss conditioning step for very porous strands. This is a quick salon or at-home refresh between more involved services.
Mistake to Avoid: Leaving gloss on too long which overstains warm bases in unexpected patches.
11. Temporary Pink Chalk For Play
Temporary hair chalk or color spray is the fastest way to get pink for a night or shoot. Use chalk on dry hair, seal with a light hairspray, and expect transfer on light fabrics. It gives instant payoff with zero bleach and is ideal for people who want to see how a tone photographs before committing. Pick colors that match your skin undertone and rinse with cool water immediately after use. This method is beginner-friendly and perfect for festival looks.
Mistake to Avoid: Applying chalk to wet hair which mutes pigment and causes clumping.
Keeping Pink Highlights Fresh
Thin coats beat one thick coat every time. Three thin layers of color-depositing conditioner look smoother and refresh tone without over-saturating.
Grab sulfate-free shampoo for daily washing. It helps preserve pink longer and prevents early fading.
If your hair is porous, dilute pigment with conditioner in a 1 to 2 ratio before applying. A moisturizing mask every other week seals cuticles and evens color uptake across textures.
Everyone overcooks dye when nervous. Set a timer and check color earlier. Try a small strand test with gloss glaze to avoid surprise saturation.
