
I kept choosing puzzle-piece stencils that were too big, then wondering why the design looked clumsy on my forearm instead of intentional. After a few touch-ups and one very patient artist, I learned that scale, line weight, and where the pieces sit with muscles make or break a tiny forearm tattoo.
These ideas are for people who want wearable forearm pieces that read like jewelry, not stickers. Most are single-session or two short sessions, budget friendly when you choose a smaller size, and friendly for first-timers who plan around work visibility. I learned these moves across five shops I have visited, so expect practical notes on healing and touch-ups, plus product links if you want to prep or care for a fresh piece.
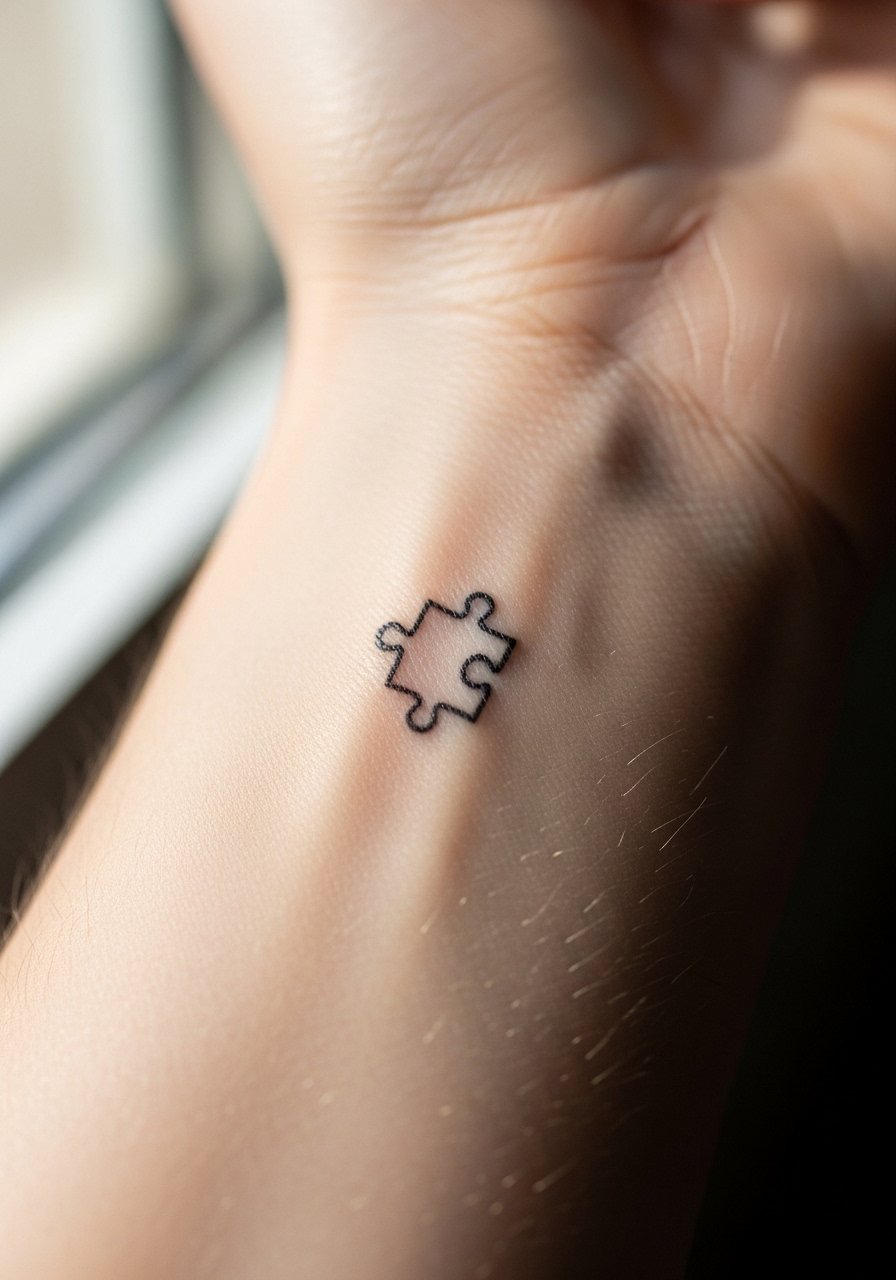
1. Tiny Single Piece Near Wrist
Style/Technique: Minimal single-line
Pain Level: 3/10
Session Time: 30 minutes to 1 hour
Best For: Visible wrist placement, first-timers
A one-inch puzzle piece near the wrist reads clean and deliberate. It works because the negative space around it makes the simple outline look intentional, even at small scale. I usually ask artists for a 0.8 to 1 mm line weight so it ages predictably. This is great for someone on a tight budget who still wants crisp detail. Use a gentle aftercare balm like tattoo-aftercare-balm to keep scabbing minimal.
Mistake to Avoid: Picking a line weight that is too fine, which will blur within a year.
2. Interlocking Thin Line Stack

Style/Technique: Fine-line interlock
Pain Level: 4/10
Session Time: 45 minutes to 1.5 hours
Best For: Repeat patterns along the inner forearm
This pairs two or three micro pieces stacked along the forearm, each about 0.8 to 1 inch tall. The thin-line look feels modern and works with short sleeves. I tell clients to space pieces roughly 0.25 inches apart so they still read individually when the arm bends. For stencil prep, try a transfer paper like tattoo-transfer-paper to test placement at home. This is a low-cost, low-commit design that photographs well.
Mistake to Avoid: Letting the stencil sit crooked on the arm, which ruins the stacked rhythm.
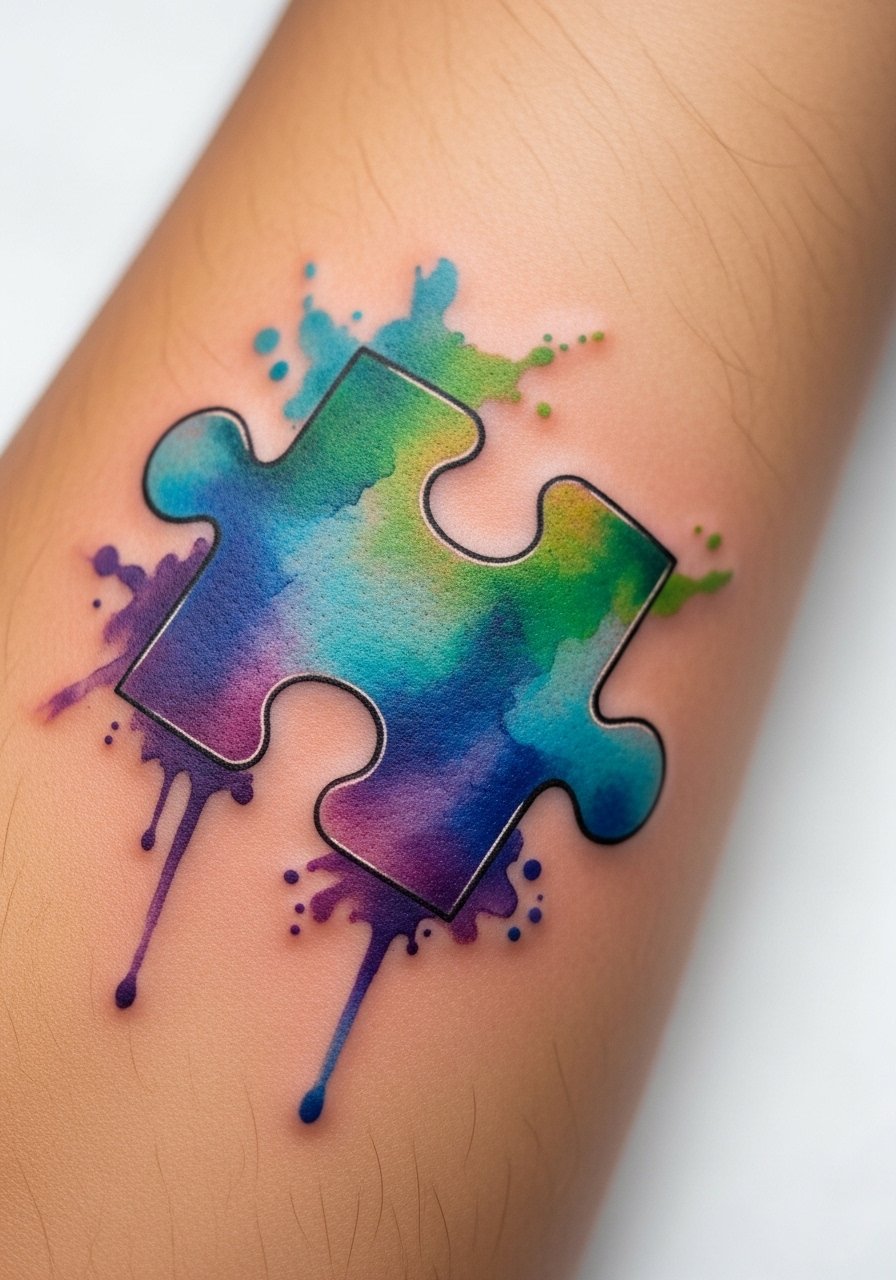
3. Watercolor Fade Puzzle
Style/Technique: Watercolor wash
Pain Level: 4/10
Session Time: 1 to 2 hours
Best For: Creative placements and pastel color lovers
A soft watercolor fill inside a puzzle outline gives a painterly feel. I request the artist keep color saturation light, about 30 to 50 percent opacity, so it ages like a faded brushstroke instead of a block. This design looks lively, like a small painting on skin, and suits medium skill artists more than trainees. Protect the colors with a fragrance-free sunscreen like tattoo-sunscreen once healed.
Mistake to Avoid: Choosing neon pigments for a watercolor fill, which often migrate and age harshly.
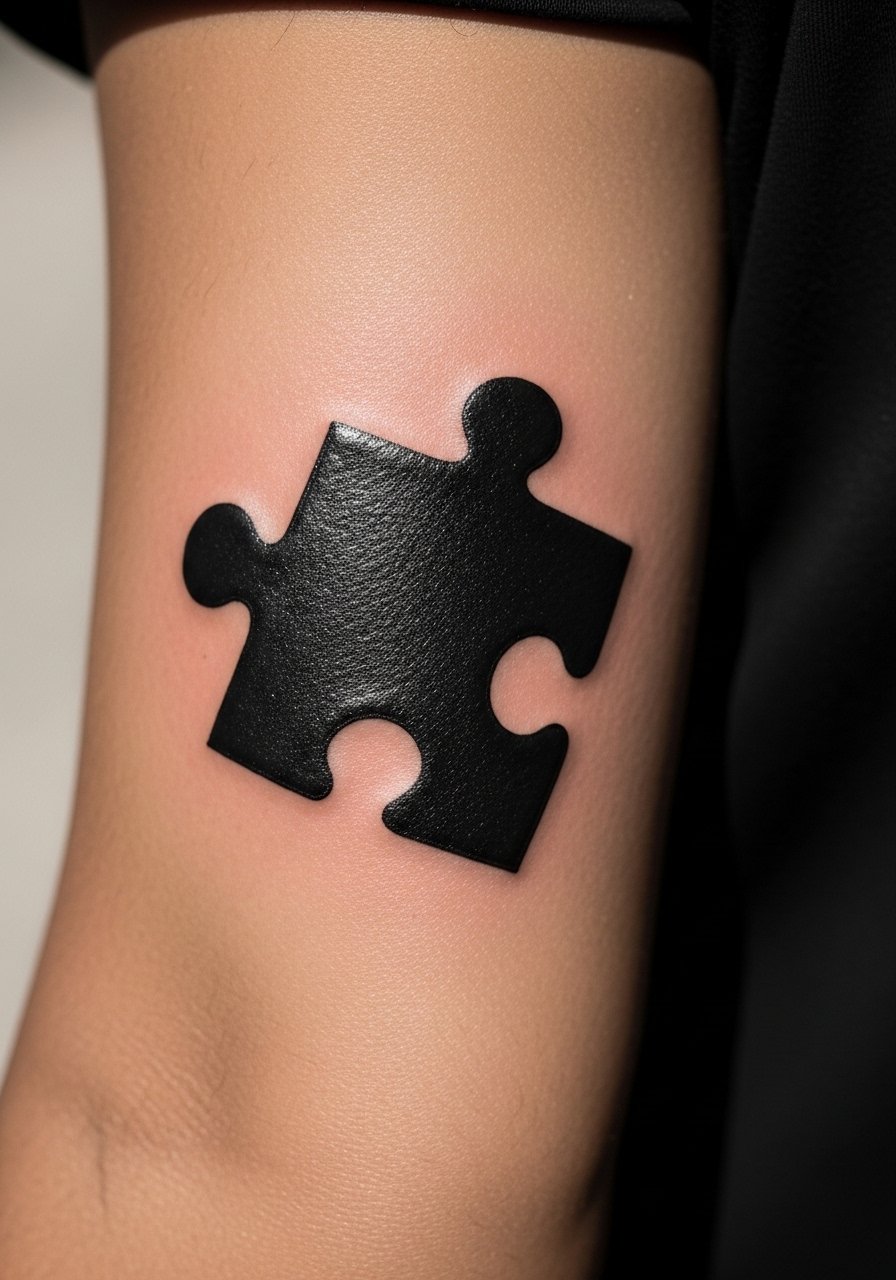
4. Bold Blackwork Puzzle
Style/Technique: Solid black fill
Pain Level: 5/10
Session Time: 1 to 2 hours
Best For: High-contrast looks, coverable with long sleeves
Solid black puzzle pieces read graphic at a distance. For forearm use, a 1.5-inch filled piece creates a striking focal point that pairs with simple jewelry. I often ask for a slightly tapered edge so the piece sits against the forearm contour and does not look like it is floating. Aftercare with a gentle, unscented soap like fragrance-free-hand-soap keeps the black looking rich during healing.
Mistake to Avoid: Overfilling with too many layers in one session, which can cause excess scabbing and ink loss.
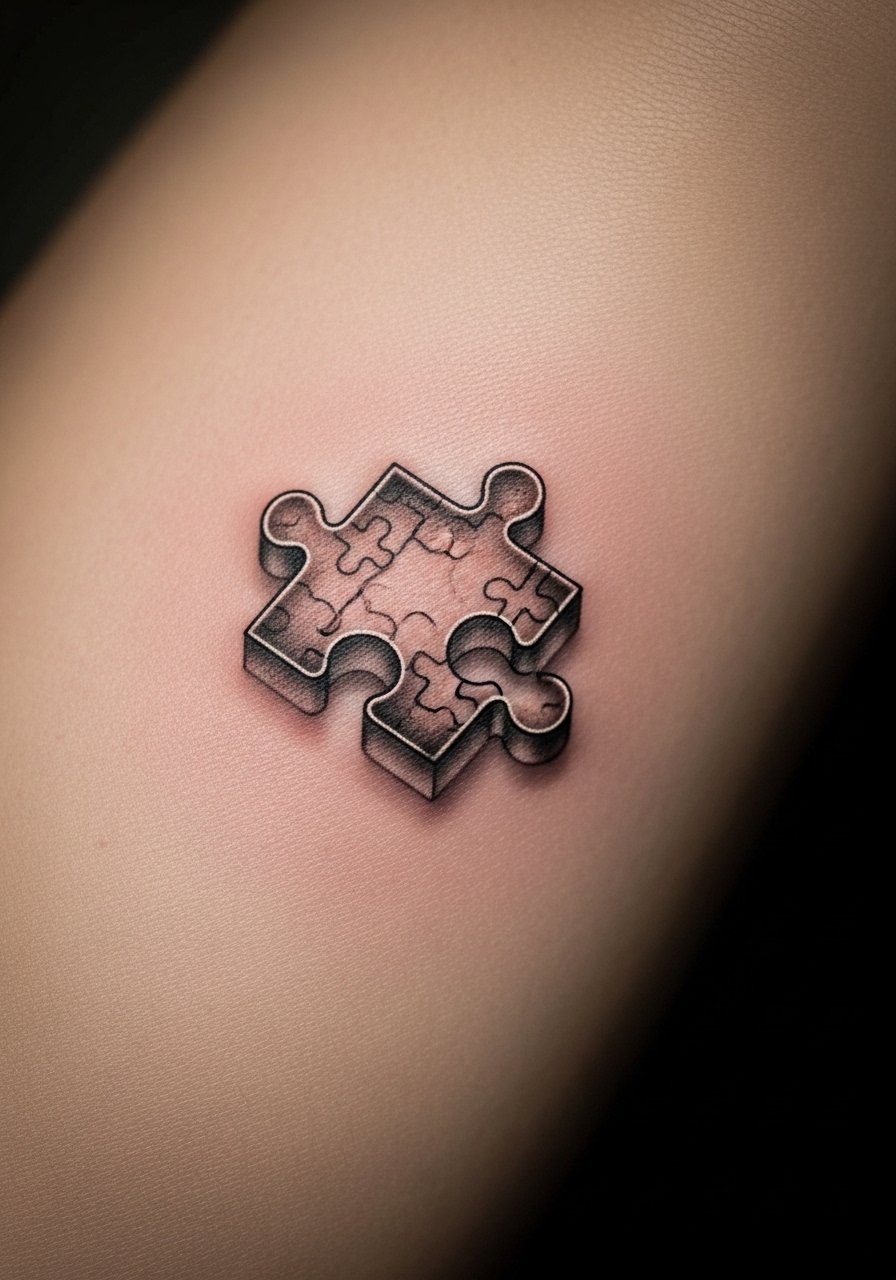
5. Micro Realism Textured Piece
Style/Technique: Micro realism shading
Pain Level: 5/10
Session Time: 1 to 2 hours
Best For: Fine-detail lovers, visible forearm art
A textured micro-realism piece uses tiny dotwork and gentle shading to suggest depth within a single small puzzle. It gives the feel of a carved token instead of a flat sticker. I recommend artists use needle groups that keep dots tight so texture survives touch-ups. Protect the detail during healing with a breathable bandage like non-stick-sterile-gauze for the first 24 hours.
Mistake to Avoid: Asking for hyperdetail at too small a scale, which will blur within a few years.
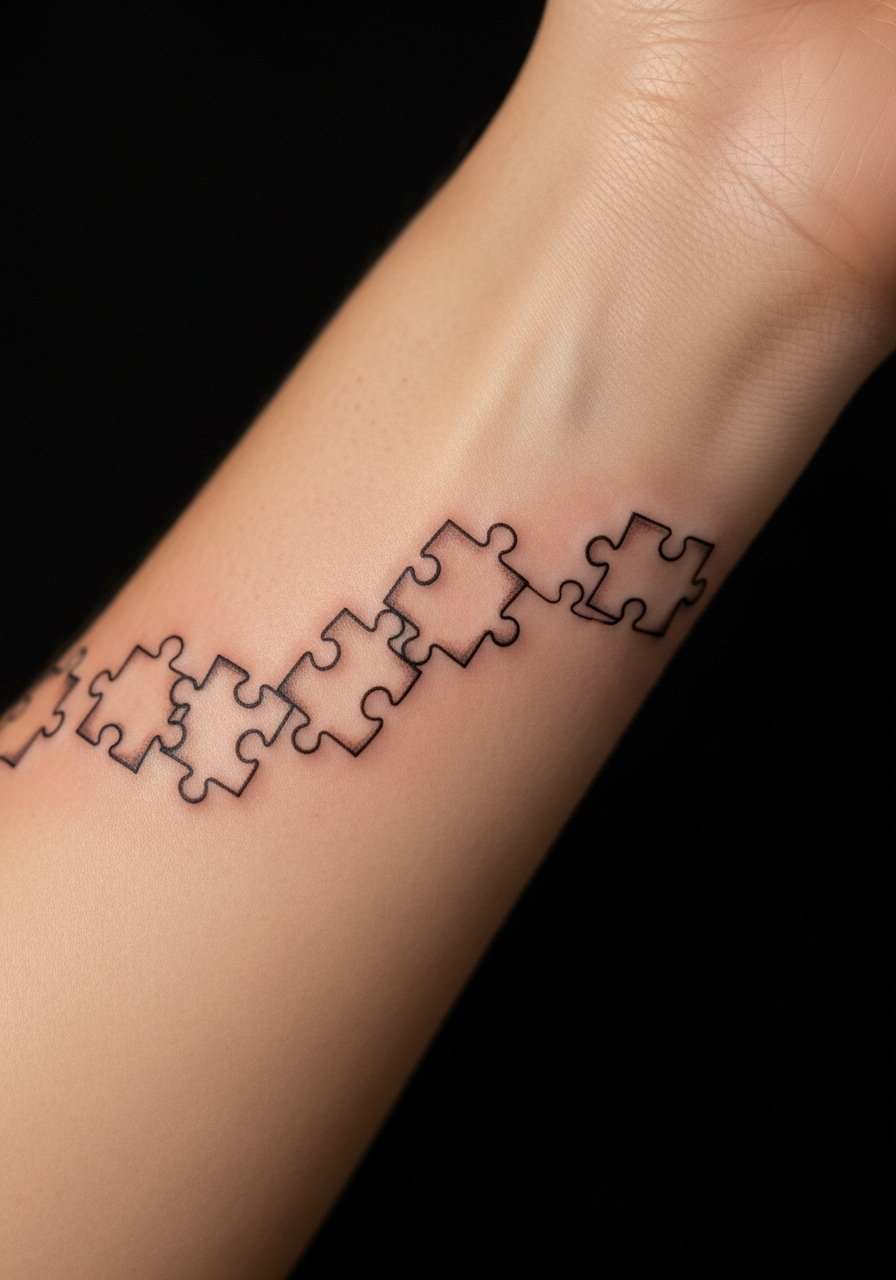
6. Chain of Pieces Around Forearm
Style/Technique: Repeating motif wrap
Pain Level: 4/10
Session Time: 1.5 to 3 hours
Best For: Arm-wrap visual, mid-length sleeves
A string of six to eight tiny puzzles wrapping halfway around the forearm reads like a bracelet. Keep each piece roughly 0.6 to 0.8 inches for balance. The continuity works because your eye follows the rhythm, and it holds up if you rotate your sleeve frequently. Use a lightweight balm like soothing-tattoo-ointment during the peel phase to prevent sticky build-up.
Mistake to Avoid: Making pieces too large so the wrap reads as a solid band instead of discrete shapes.
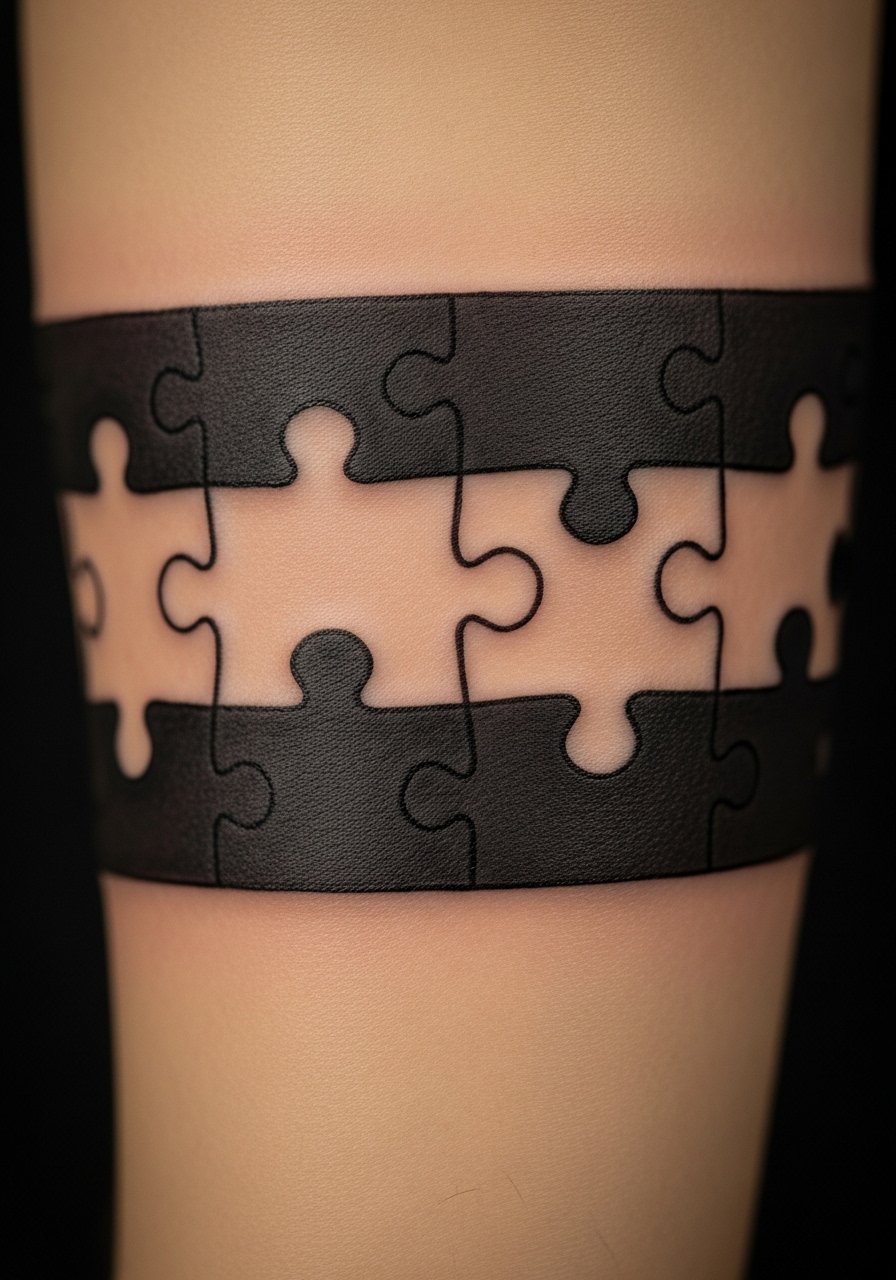
7. Negative Space Puzzle Band
Style/Technique: Negative-space shading
Pain Level: 5/10
Session Time: 1.5 to 2.5 hours
Best For: Modern, geometric forearm bands
A shaded band with the puzzle shapes left uninked gives a graphic, modern look that reads from a distance. The trick is keeping the shaded band about 1.25 to 1.75 inches wide so the negative pieces are clear. This is a neat gap competitor articles miss, it looks deliberate and disguises small skin marks. Prep with a printout to check width, and protect the area with antibacterial-skin-wash during the first week.
Mistake to Avoid: Making the shaded band too thin, which makes the negative pieces illegible.
If you want the basic products in one place before the rest of the ideas, here are the essentials I reach for every time.
Forearm Tattoo Essentials
Aftercare:
- Tattoo aftercare balm (~$10-18), a gentle balm I reapply after the first 24 hours.
- Fragrance-free hand soap (~$6-12), for twice-daily clean washes.
Prep Tools:
- Tattoo transfer paper (~$8-15), to test placement on your arm.
- Disposable razors (~$5-10), for a clean shave before the session.
Protection & Extras:
- Non-stick sterile gauze (~$7-12) for first-24-hour coverage.
- Tattoo sunscreen SPF 50 (~$10-20) to preserve color after healing.
- Hypoallergenic bandages (~$6-12), for sensitive skin during peeling.
- Aloe vera gel (~$6-10), if your artist approves for soothing the area.
- Comfort grip armrest pillow (~$15-25) to make longer sessions easier.
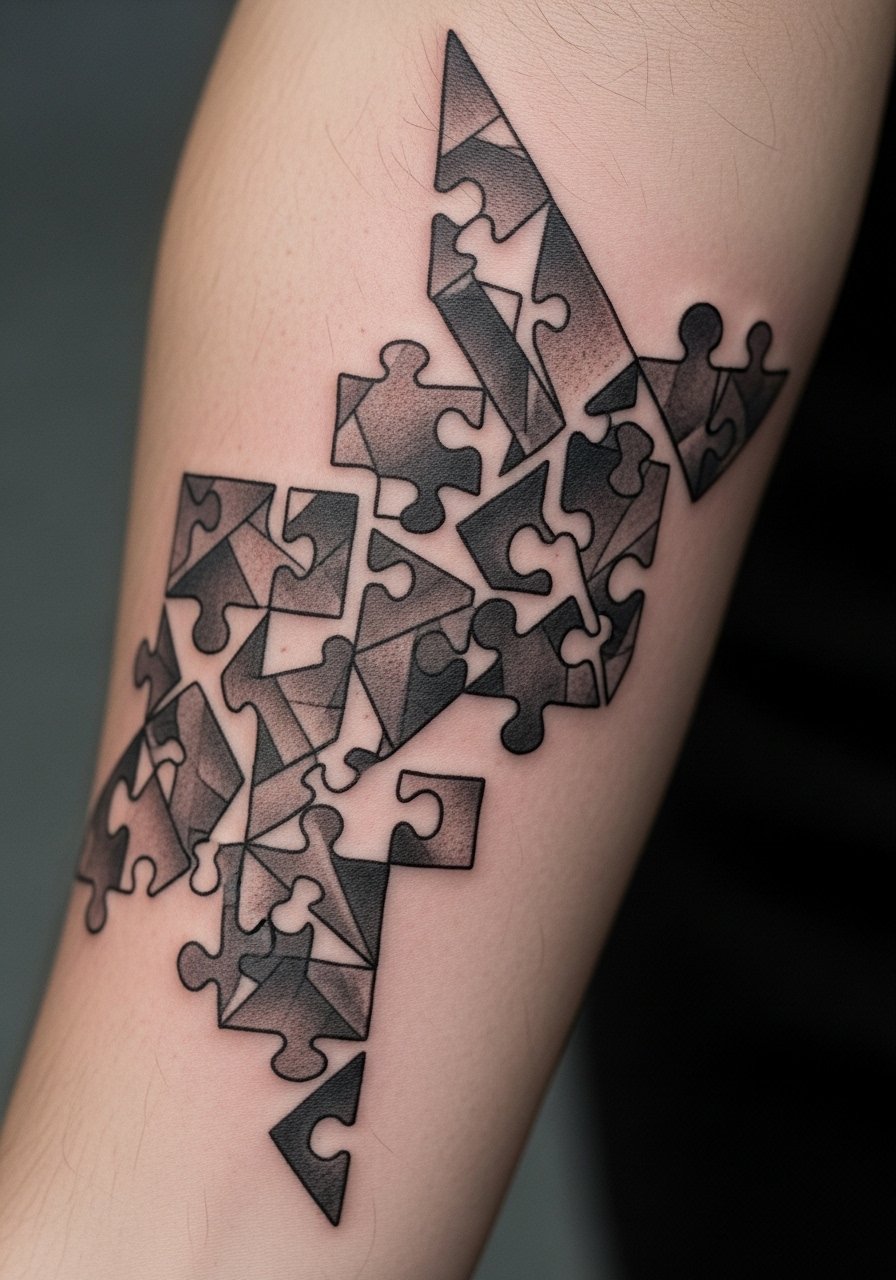
8. Geometric Fragment Collage
Style/Technique: Geometric mix
Pain Level: 4/10
Session Time: 1 to 2 hours
Best For: Graphic forearm panels, smart-casual wardrobes
Mixing small geometric puzzle fragments with straight-line accents creates a modern collage. Use measured spacing, about 0.2 to 0.4 inches, to keep the composition airy. It reads as intentional art rather than random pieces. This works well for someone who wants a contemporary look without heavy shading. I often practice placement with temporary tattoos or a stencil from tattoo-transfer-paper.
Mistake to Avoid: Letting pieces cluster too tightly so the design loses its geometric intent.
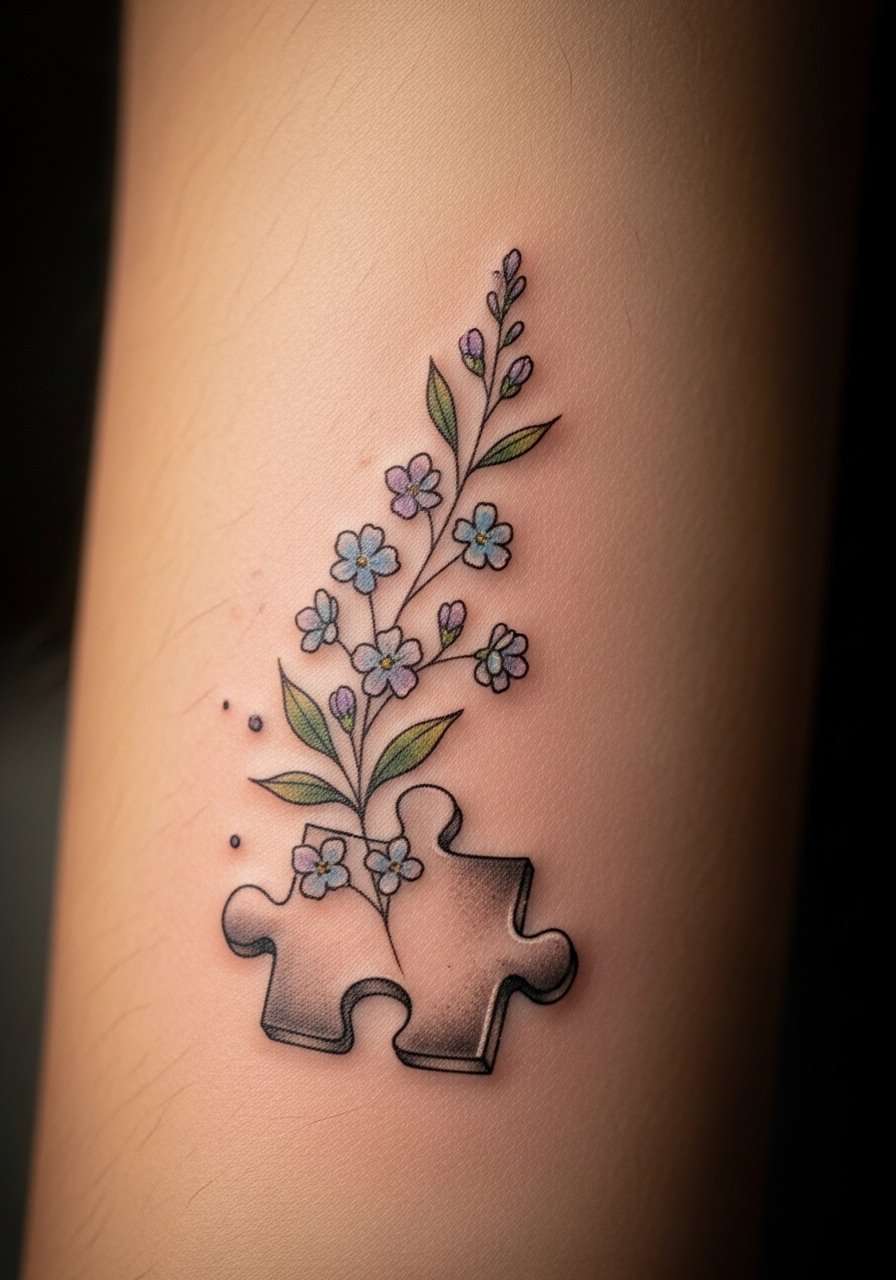
9. Floral Puzzle Merge
Style/Technique: Botanical integration
Pain Level: 4/10
Session Time: 1 to 2 hours
Best For: Feminine, soft placements near the inner forearm
A puzzle piece whose edge dissolves into blossoms or leaves makes the symbol feel organic and personal. Keep the botanical details small, about 0.2 to 0.4 inches across, to avoid competing with the puzzle outline. This pairing suits someone who wants symbolism without looking literal. For delicate linework, request a single fine liner needle and protect the piece with non-stick-sterile-gauze during the first day.
Mistake to Avoid: Asking for overly dense floral detail that obscures the puzzle shape.
10. Cover-Up Puzzle Layer
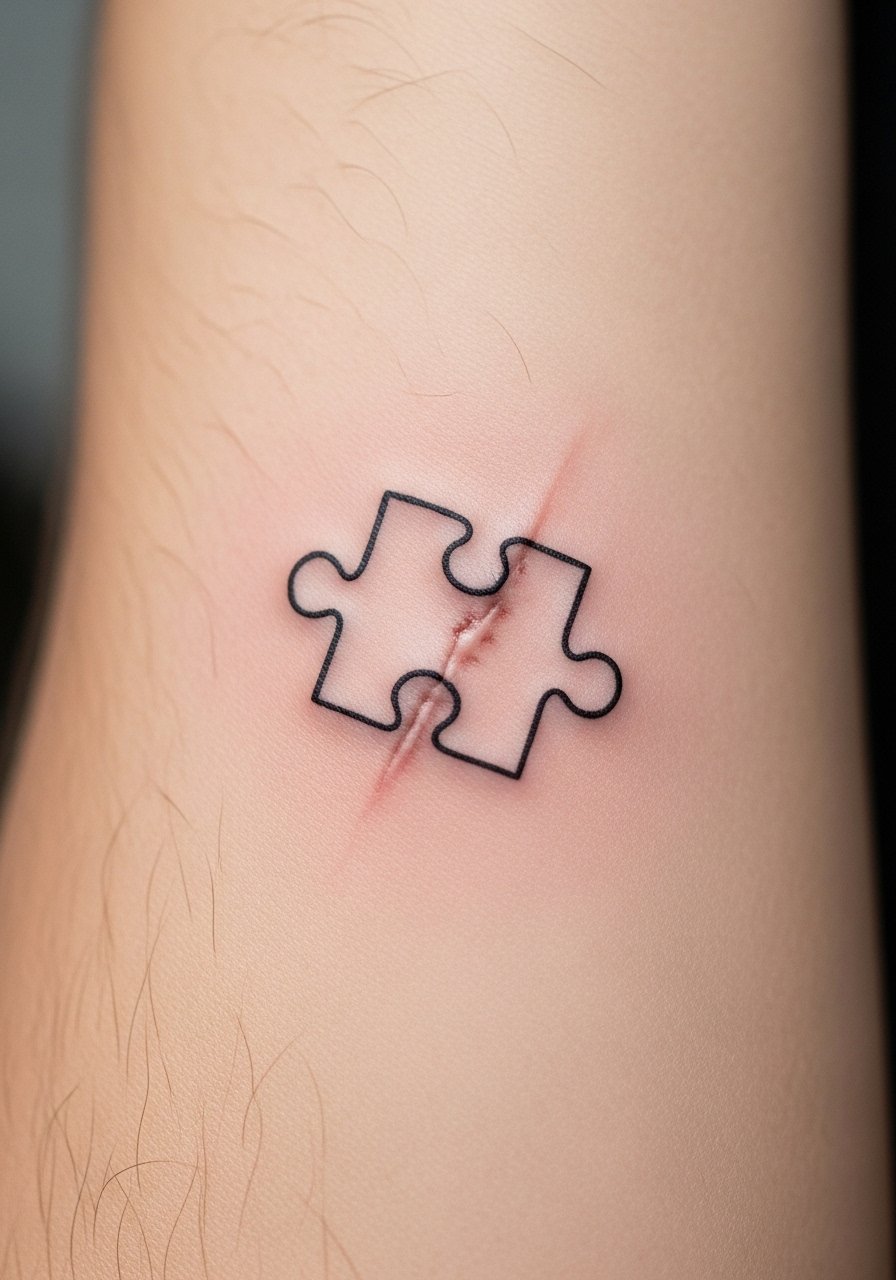
Style/Technique: Scar camouflage
Pain Level: 4/10
Session Time: 1 to 2 hours
Best For: Scarred areas, partial cover-ups
Using a puzzle piece to partially cover a scar is a smart choice, since the jagged edges can mask irregular textures. Match the piece size to the scar length and use shading to smooth transitions. This is one of the gaps many competitor lists skip, and it works especially well on forearms where the skin texture varies. For prep, a silicone gel for scars can help the skin before tattooing if your artist recommends it.
Mistake to Avoid: Trying to cover an active or raised scar too soon, which affects ink retention.
11. Matching Pair Across Both Forearms
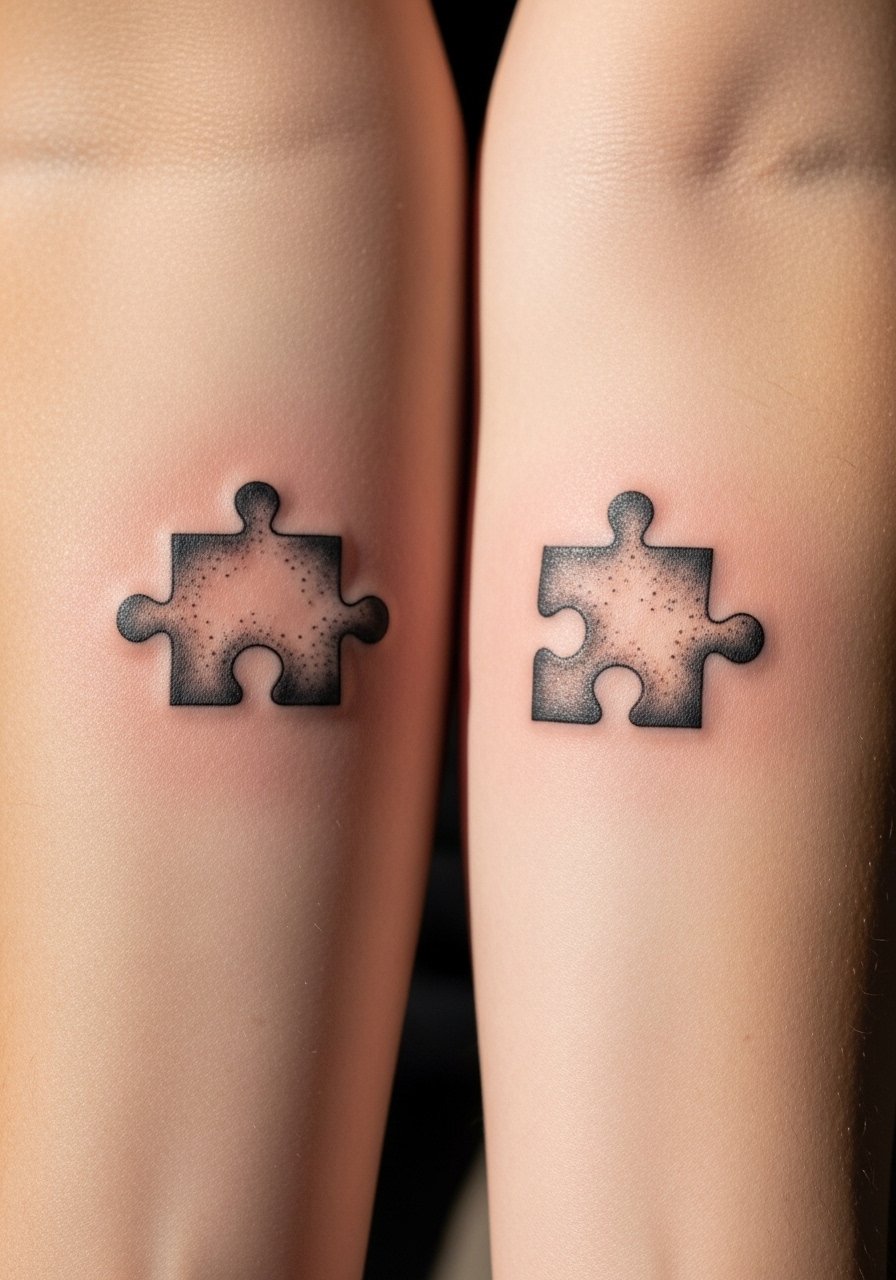
Style/Technique: Mirrored placement
Pain Level: 3 to 4/10
Session Time: 30 minutes to 1.5 hours per arm
Best For: Symmetry lovers, subtle matching tattoos
A matching pair, with one piece on each forearm, feels intentional and balanced. Keep each piece identical in size and mirror the placement relative to the wrist joint so they read as a pair. This is low-commitment and good for couples or friends who want matching motifs. Test the placement with tattoo-transfer-paper to be sure both arms align.
Mistake to Avoid: Getting one piece slightly rotated from the other, which ruins the mirrored effect.
12. Puzzle With Tiny Script Tag
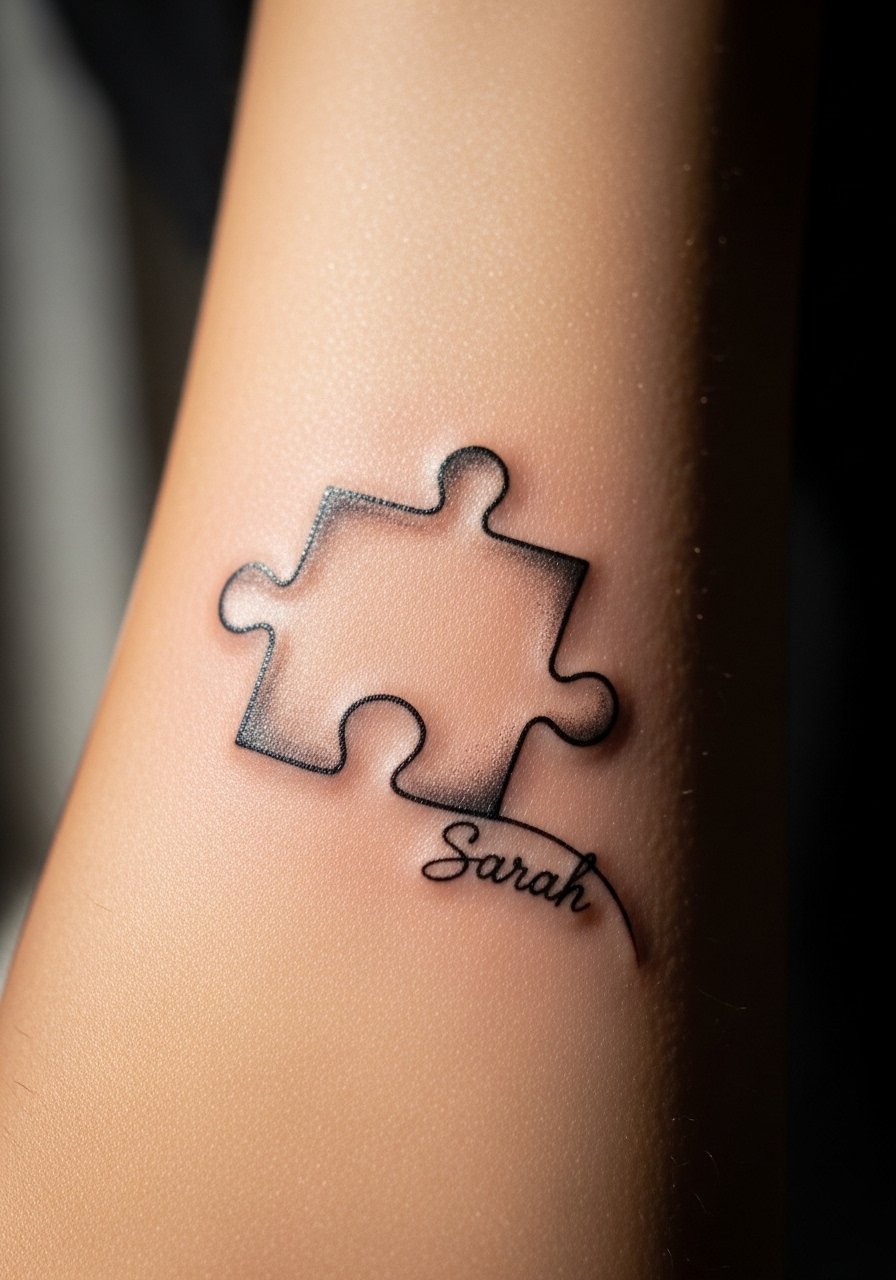
Style/Technique: Micro script integration
Pain Level: 3 to 5/10
Session Time: 45 minutes to 1.5 hours
Best For: Personal messages, subtle memorials
Tucking a small script word along a piece edge personalizes the symbol without overwhelming it. Keep script at 4 to 6 point size equivalent in tattoo terms, and use a steady single-line needle to preserve legibility. This suits someone who wants a name or single word included. For aftercare, a thin balm layer from tattoo-aftercare-balm helps prevent ink migration during healing.
Mistake to Avoid: Requesting overly ornate lettering that becomes unreadable at small scale.
13. Partial Puzzle Sleeve Accent
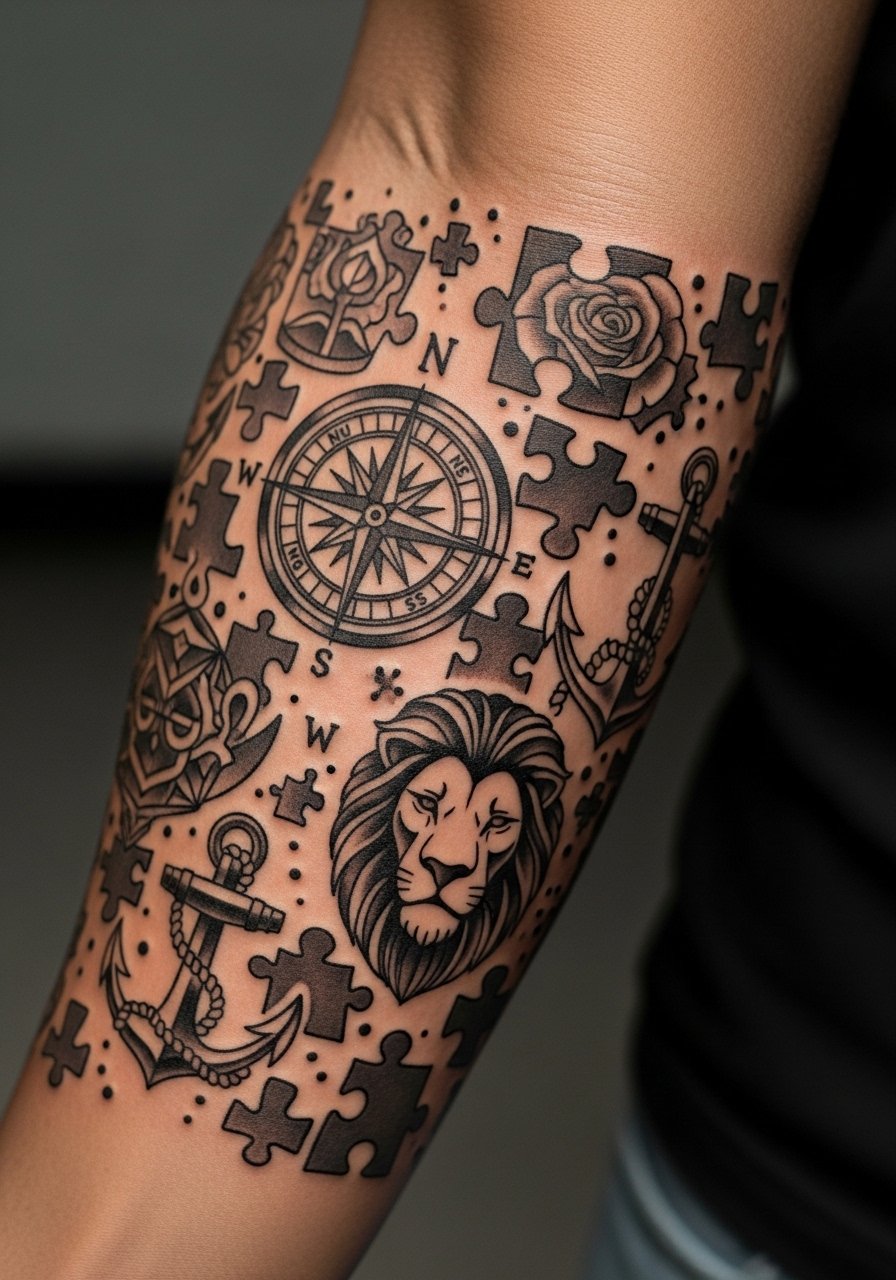
Style/Technique: Accent filler
Pain Level: 5 to 6/10
Session Time: Multiple sessions, 2 to 4 hours total
Best For: Partial sleeves and mixed-theme arms
If you already have other forearm tattoos, use small puzzle pieces as negative fillers to unify the composition. Place pieces where the arm naturally bends to maintain flow. Artists usually size these at 0.5 to 1 inch so they bridge gaps without competing. This approach is great for people building a sleeve over time and suits varied budgets since you can add pieces session by session.
Mistake to Avoid: Using oversized pieces that compete with main motifs and upset the sleeve balance.
14. 3D Shadowed Puzzle
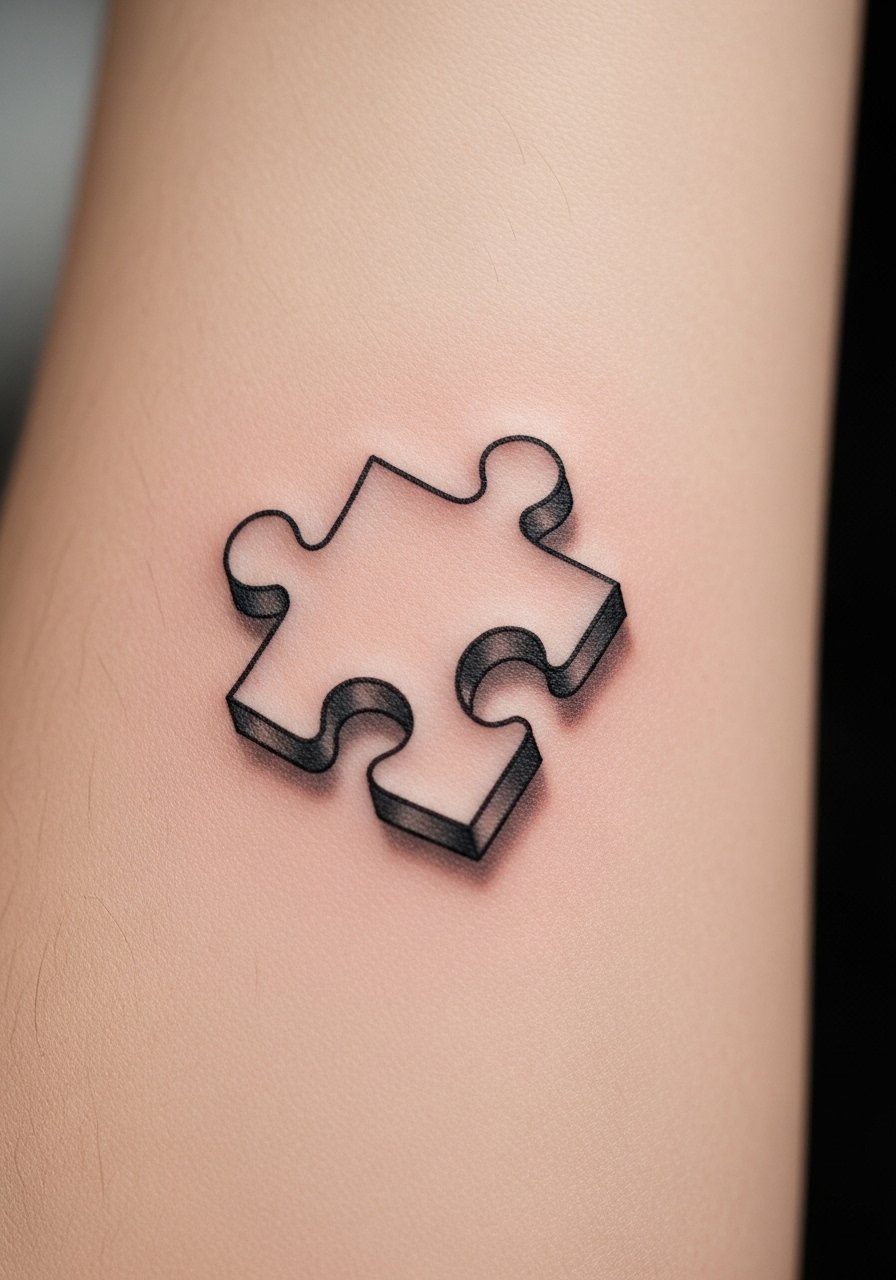
Style/Technique: Drop shadow realism
Pain Level: 5/10
Session Time: 1 to 2 hours
Best For: Standout single pieces, modern realism
A thin drop shadow gives the illusion the piece sits above the skin. Keep shadow opacity around 20 to 35 percent so the effect is believable not heavy. This style reads like a small prop on the arm and photographs well. Ask your artist to mock up shadow direction with the same light source you use daily, such as overhead office lighting, so it feels natural.
Mistake to Avoid: Making the shadow too dark or the wrong angle, which makes the piece look pasted on.
15. Glow-In-The-Dark Outline Piece
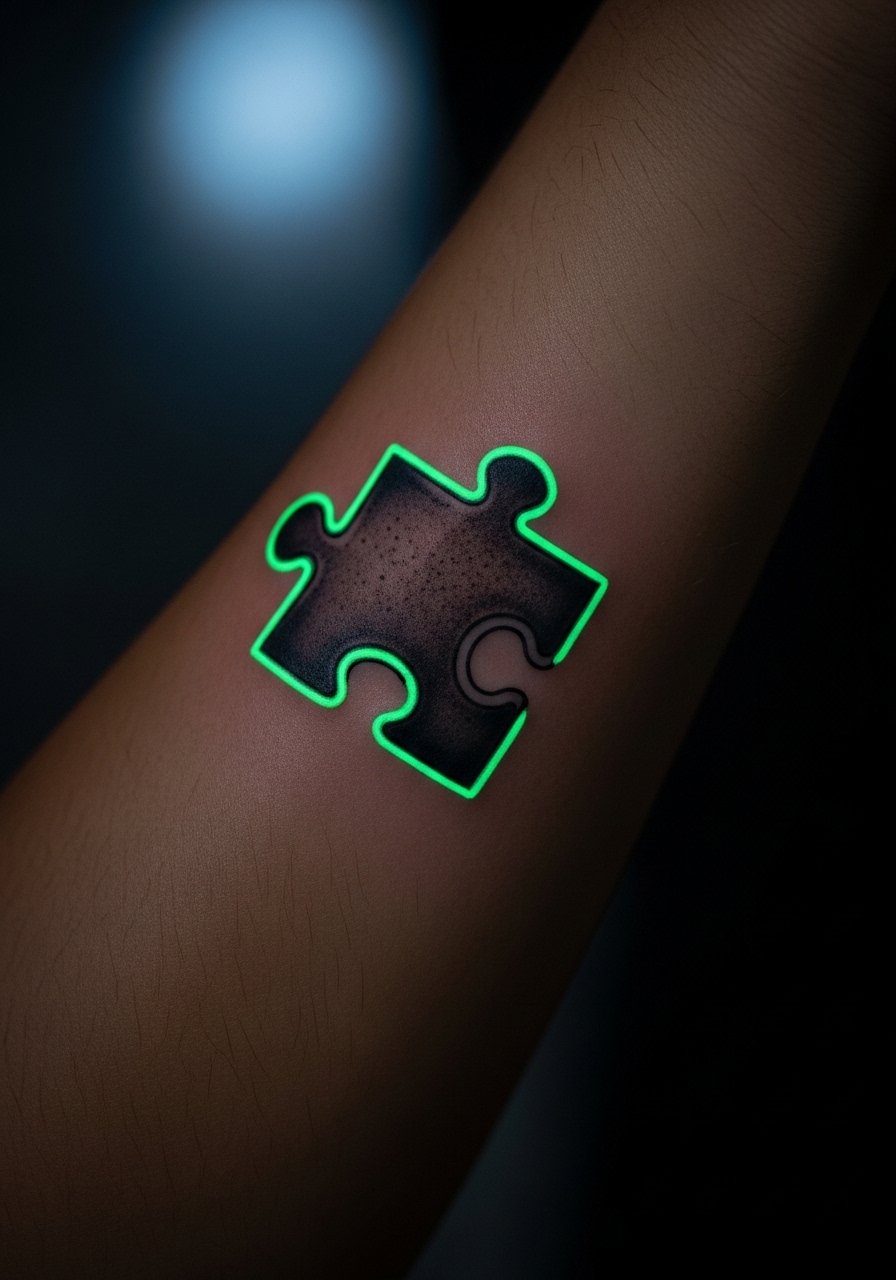
Style/Technique: UV/photoluminescent outline
Pain Level: 4/10
Session Time: 1 to 2 hours
Best For: Night events, creative shows
A fine external outline in UV-reactive or photoluminescent ink adds a playful night element. Keep the glow line thin, about 0.5 mm, so it reads subtle in daylight and pops under black light. Use this sparingly to avoid heavier fading issues associated with specialty inks. Ask the artist about aging and touch-up needs, and consider the work-visible note if your job has strict policies.
Mistake to Avoid: Expecting the glow to be as bright as neon. It is subtle and requires touch-ups.
Forearm Tattoo Aftercare Tricks
Thin layers work better. Apply a light coat of tattoo-aftercare-balm twice daily, not a thick paste, to avoid suffocating the skin.
Grab non-stick sterile gauze for the first 24 hours. It helps with sticking without pulling new ink when you remove it.
Test placement with transfer paper before the session. Tattoo transfer paper costs little and saves regret.
If you travel after a fresh piece, pack an unscented soap and balm. Fragrance-free hand soap and a pocket balm keep the routine simple.
