
I kept rubbing my thumb over the mirror chrome and watching streaks appear, convinced the powder was at fault, until a tech at the salon pointed out my base layers were too thick. Once I learned to cure thinner layers and press the powder at a 90 degree angle, the nails stopped looking like photos and started looking like the real thing. That tiny change saved more than one manicure disaster.
These picks lean salon-level but are doable at home with a small kit. Most looks are gel-friendly, many work on short or medium natural nails, and the time ranges from a quick 20-minute touch-up to a full hour-long mani. If budget is tight, pick one chrome powder and a reliable no-wipe top coat and build from there.
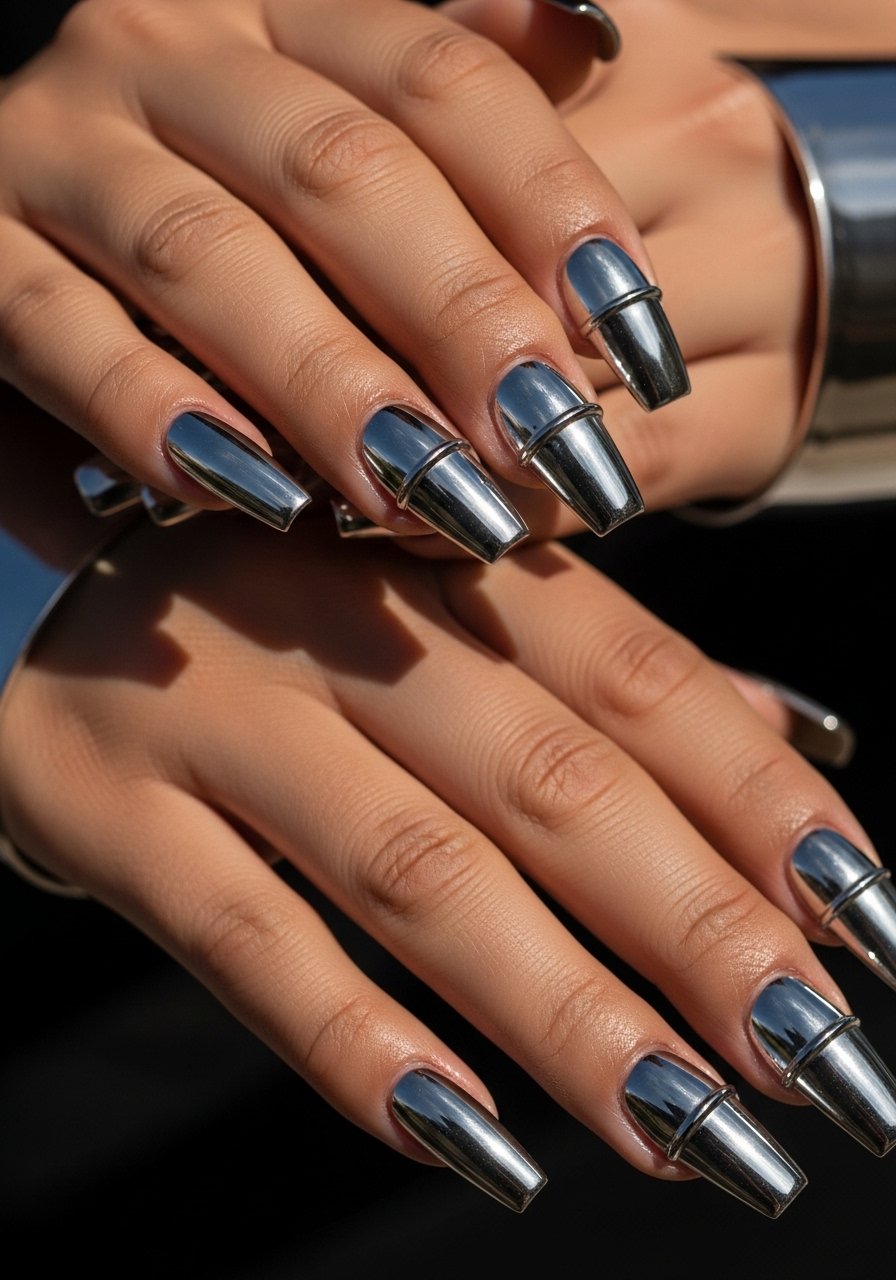
1. Full Mirror Chrome Over Black Gel
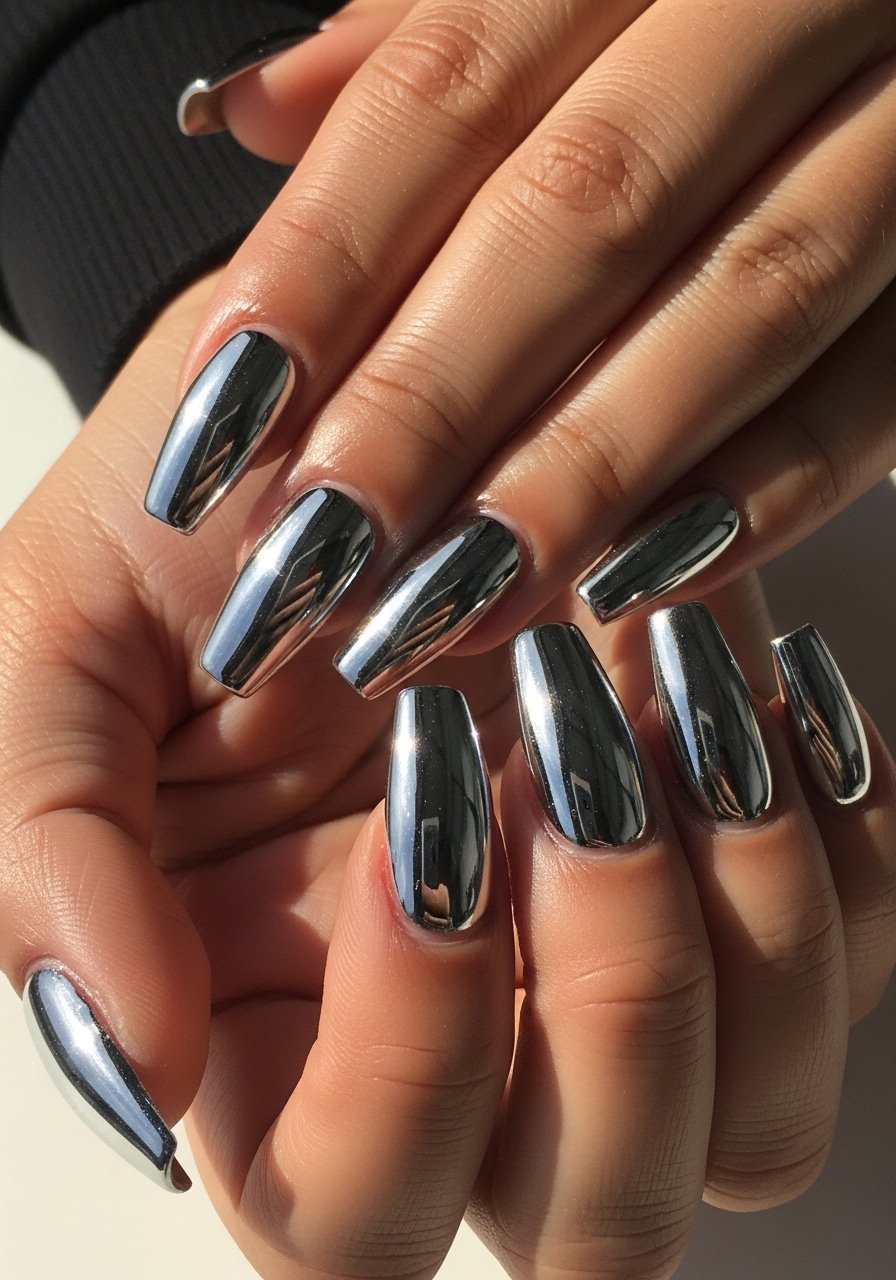
The visual trick is contrast, black under chrome makes the mirror effect read like metal in photos and real life. Use two thin coats of a pigmented black gel, cure 60 seconds under LED, then press silver chrome powder into the sticky layer with a soft silicone applicator for 8 to 12 seconds. Finish with a no-wipe top coat cured 60 seconds. This suits long shapes and glossy lovers, and it reads expensive even on a budget. Try silver chrome powder for a true mirror effect.
Mistake to Avoid: Applying chrome to a fully cured surface, which gives a dusty, uneven finish.
Style/Vibe: Full Mirror
Best For: Long or medium nails, evening looks
Skill: Intermediate
2. Short Square Chrome Accent Nail
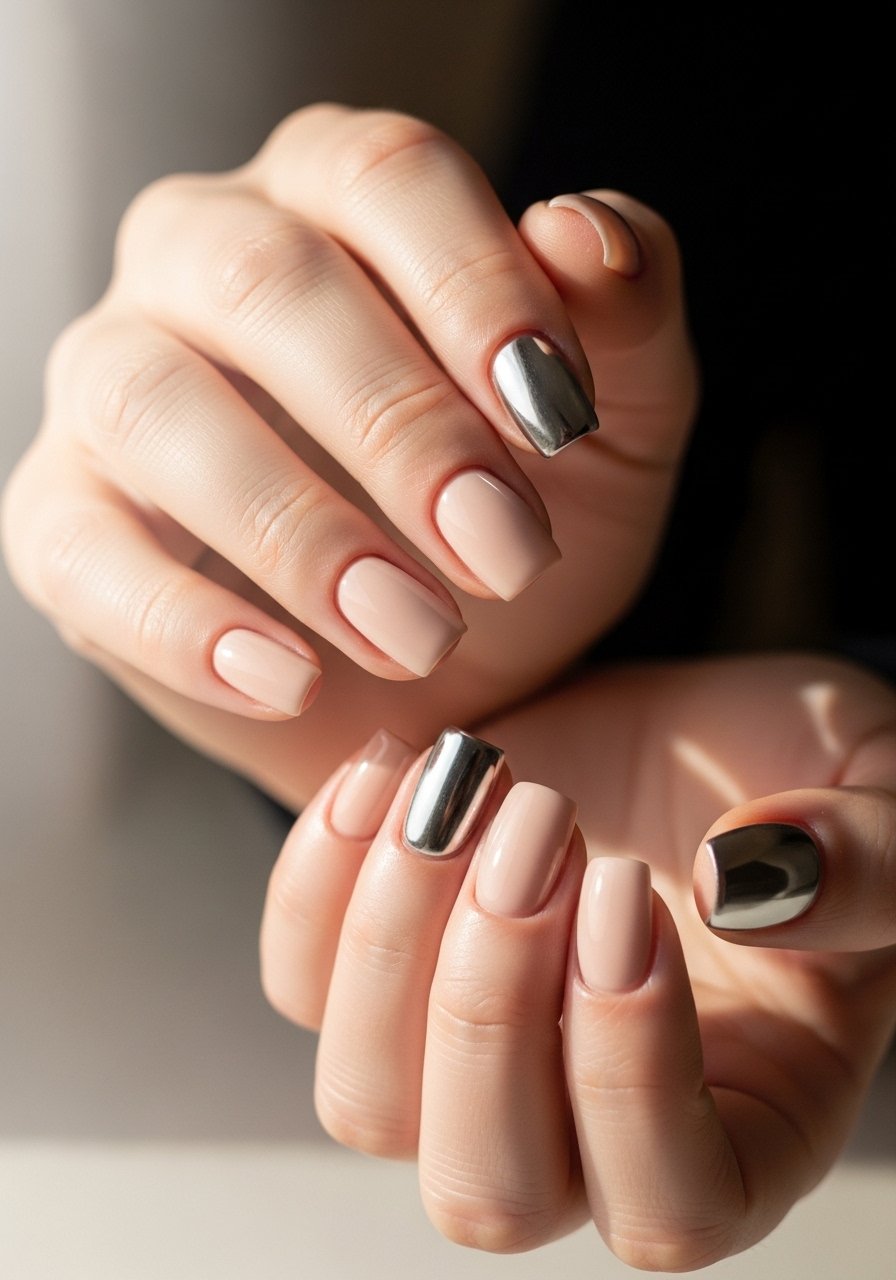
A single chrome accent makes a short mani feel intentional, not over the top. Paint three fingers with sheer nude gel and cure. For the accent, use a sticky-base coat, press chrome powder for 6 to 8 seconds, then seal. This is quick, beginner friendly, and low cost. I like keeping the accent on the ring finger because it balances wedding rings in photos. Pick a neutral base like sheer nude gel polish.
Mistake to Avoid: Rubbing chrome into the cuticle area, which causes lifting and early chips.
Style/Vibe: Minimal Accent
Best For: Short nails, everyday wear
Skill: Beginner
3. Matte Chrome Half Moon
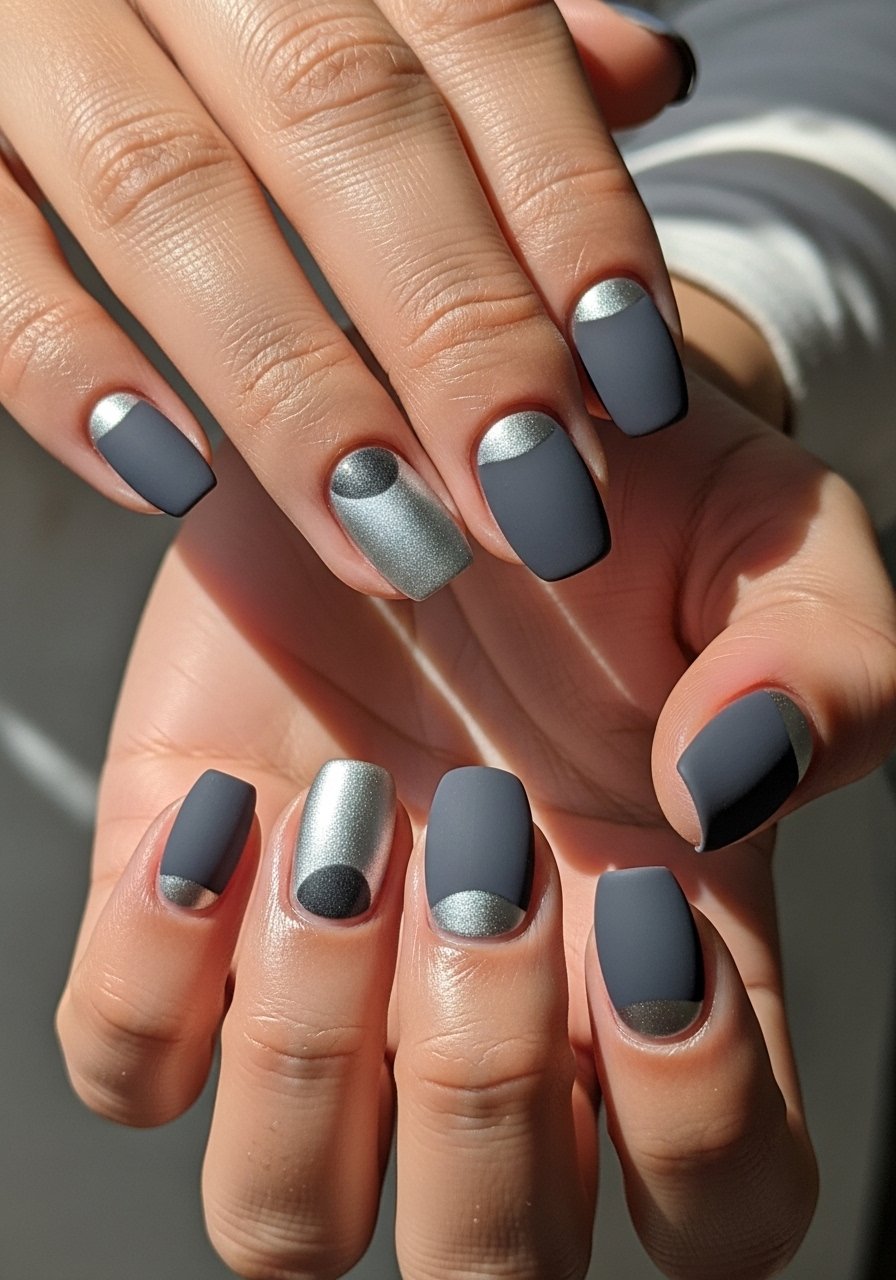
Matte top coat over chrome creates a silvery frost that photographs differently than glossy chrome. Paint a deep gray base, cure, mask the cuticle with a round sticker, press chrome into the exposed crescent, remove sticker, then apply a matte top coat. The contrast between frosted chrome and matte color reads modern and subdued, great for office-friendly sparkle. Use matte top coat to lock it in.
Mistake to Avoid: Using too much matte product, which dulls the chrome into a flat gray.
Style/Vibe: Frosted Modern
Best For: Medium nails, work-friendly sparkle
Skill: Intermediate
4. Gradient Mirror Tip
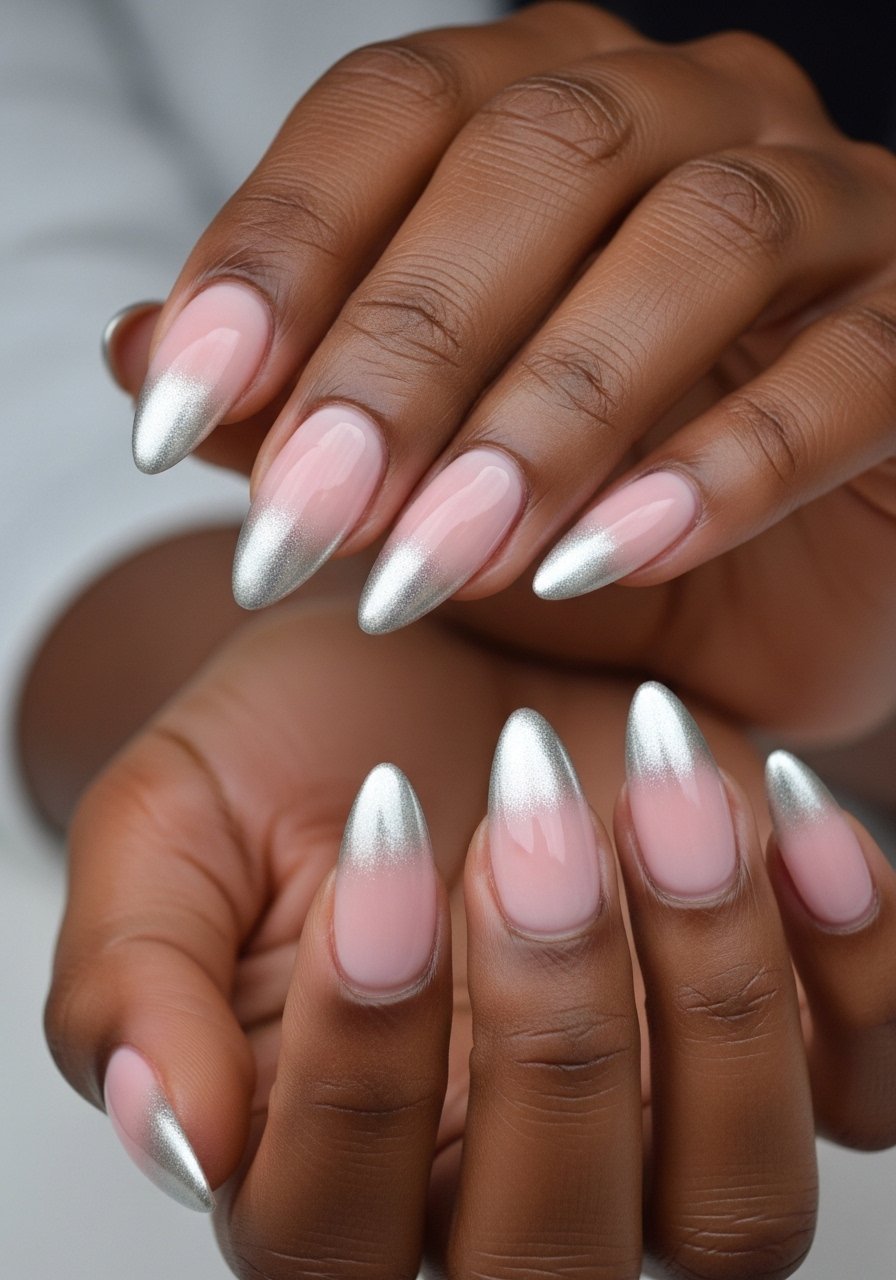
A chrome gradient looks like liquid metal flowing into the nail, useful for photo-ready manicures. Start with a pale pink base, cure. Use a small fluffy brush to press chrome powder only at the tips, then feather inward with light taps to create a fade. Cure under LED, then finish with a gloss top coat. This technique is time efficient and makes long nails feel editorial without much extra effort. Try fine chrome powder set for smoother blends.
Mistake to Avoid: Trying to gradient with one heavy application, which creates hard lines instead of a fade.
Style/Vibe: Gradient Edge
Best For: Long nails, photoshoots
Skill: Advanced
5. Chrome French With Negative Space
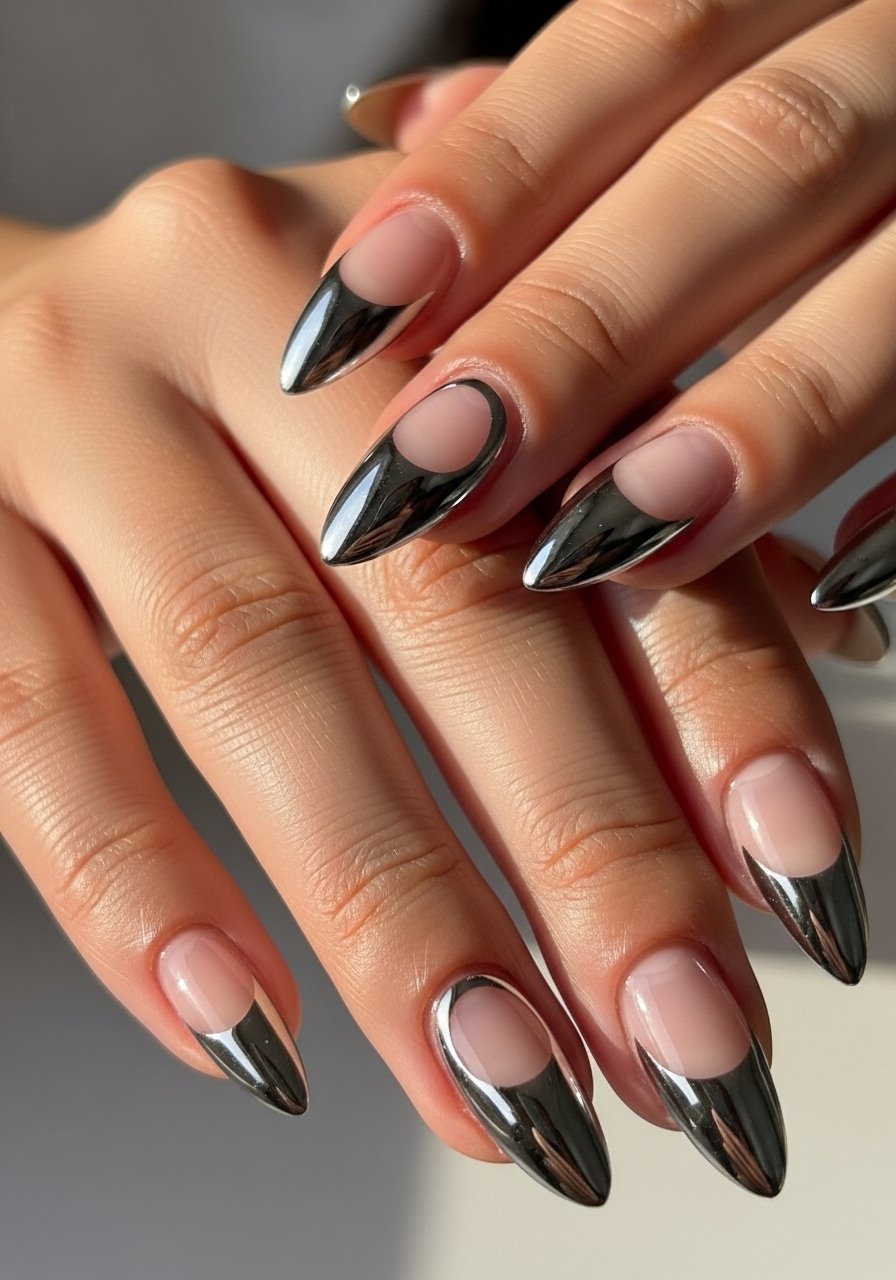
Swap the classic white tip for chrome and leave a crisp negative space at the lunula for a modern French. Use striping tape or a thin nail brush to mask the negative space before applying chrome at the tip. The result is sharp and clean, ideal for someone who wants that manicure-but-not-too-much look. It only needs basic tools and one chrome powder. I used striping tape to keep the lines crisp.
Mistake to Avoid: Cutting the negative space too large, which makes the design read unbalanced.
Style/Vibe: Modern French
Best For: Medium nails, polished casual outfits
Skill: Intermediate
6. Chrome Marble Accent
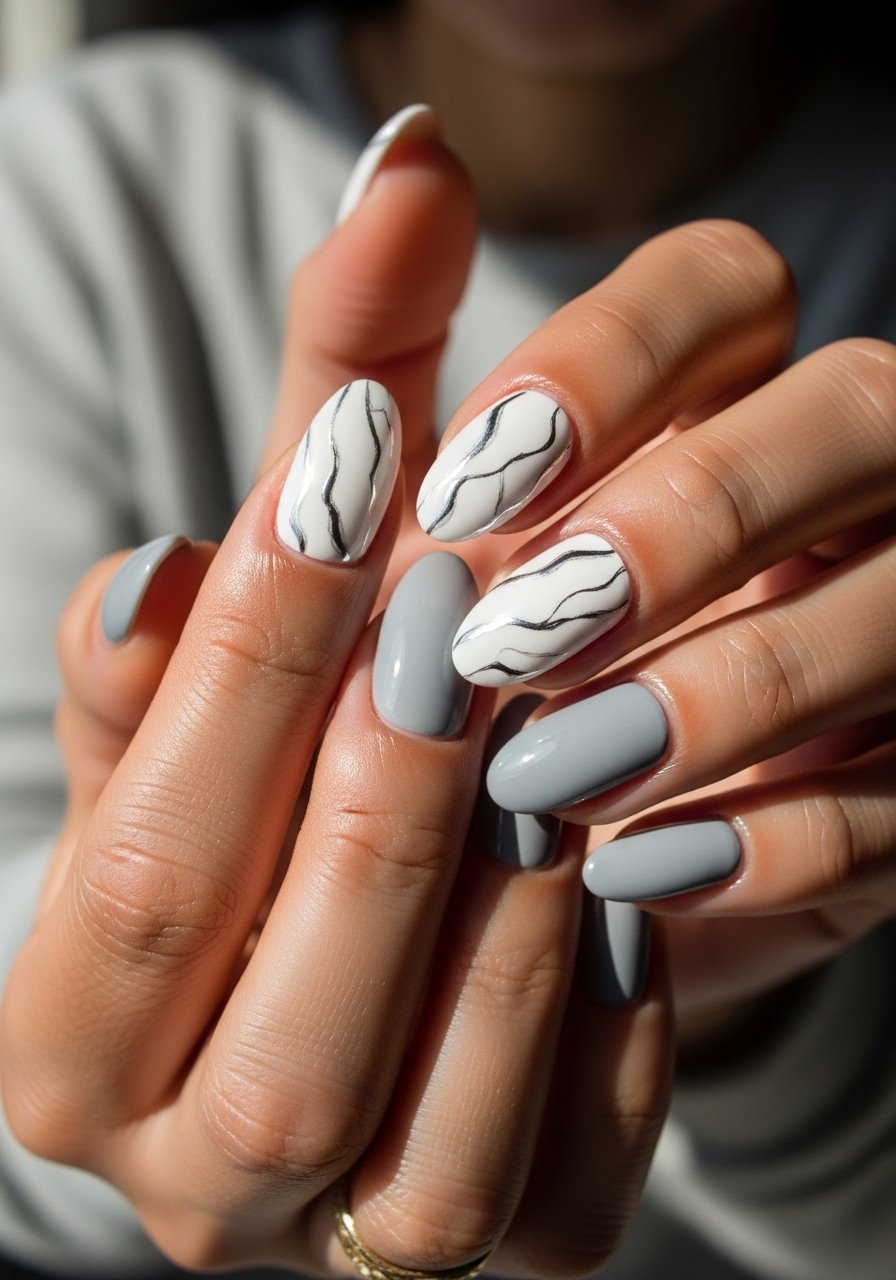
Chrome makes stunning marble veins without complicated water marbling. Paint a white base, then use a thin brush to drag tiny silver chrome strokes through a diluted gray gel. Press chrome powder lightly into the wet strokes for metallic veins, cure, then topcoat. It creates a luxe graphic look that works for special events and weddings, and it avoids the mess of traditional marbling. For thin brushes, try this detail nail art brush set.
Mistake to Avoid: Overworking the veins until they look muddy rather than veined.
Style/Vibe: Luxe Accented Marble
Best For: Medium nails, special occasions
Skill: Advanced
7. Chrome Over Textured Polish
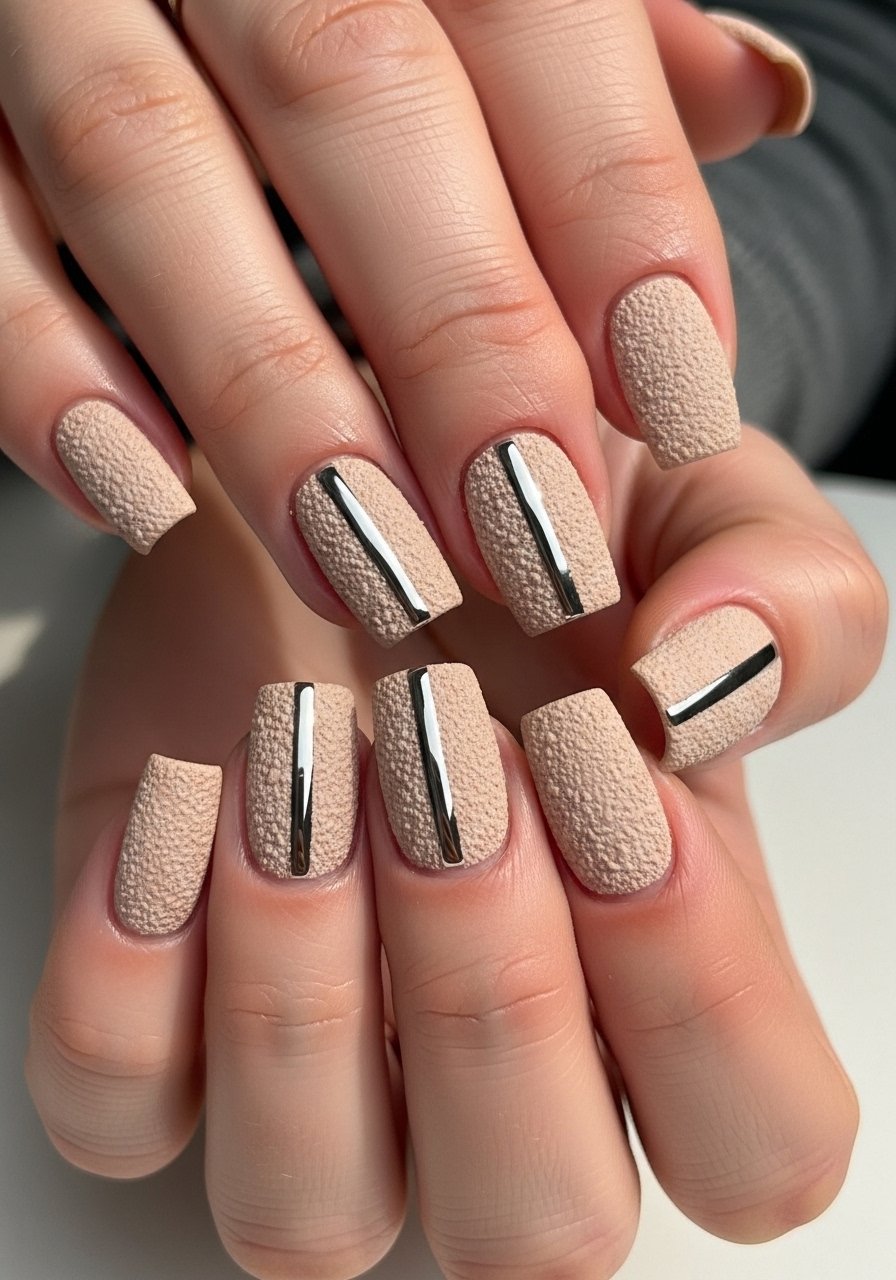
Textured polish gives a tactile base, and a chrome stripe adds contrast without covering the grit. Apply textured polish and fully cure. Use striping tape down the center, press chrome, then remove tape and seal with a thin gloss strip only over the chrome stripe so the texture remains. It reads editorial and is kid-friendly since the texture hides small chips. I like combining a sand finish with a metallic center for subtle edge. Use textured nail polish.
Mistake to Avoid: Sealing the entire textured surface with glossy top coat, which removes the tactile finish.
Style/Vibe: Textured Center Stripe
Best For: Medium nails, playful everyday looks
Skill: Intermediate
If any of these looks have you ready to try chrome at home, here are the products I reach for most.
Chrome Mani Starter Picks
Base & Top Coats:
- no-wipe top coat (~$10-18), reliable glossy seal for chrome
- sticky base gel (~$8-15), the tack layer chrome needs
Tools & Powders:
- silver chrome powder (~$6-12), the core product for mirror finishes
- fine chrome powder set (~$12-20), for gradients and mixing
Application Tools:
- silicone powder applicator (~$5-10), presses without streaks
- detail nail art brush set (~$7-15), for veins and lines
- nail striping tape (~$4-8), for crisp negative space and stripes
Hardware:
- 48w led nail lamp (~$25-40), cures thin layers fast
- nail file buffer set (~$6-12), for prep and smoothing
8. Foil-Lined Chrome Cuff
A foil strip gives a crisp metallic band that contrasts with chrome powder. Paint the nail, cure, then lay a thin line of foil adhesive, press metallic foil, and blend chrome powder on top to soften edges. The cuff reads structured and is great for people who like jewelry-inspired nails. This technique uses foil and powder together for depth, which salon articles often skip. Use nail foil transfer sheets.
Mistake to Avoid: Applying foil to an uncured surface, which causes bubbling and lifting.
Style/Vibe: Metallic Band
Best For: Long nails, statement moments
Skill: Intermediate
9. Chrome Ombre With Builder Gel Base

For durability on longer nails, build a thin structure with builder gel, cure, then add color and chrome. The builder gel prevents lifting and creates a smooth canvas that keeps chrome reflective. This is the secret pros use when clients want mirror chrome that lasts three weeks. If you are doing extensions, this step is worth the time. Try builder gel clear for the base layer.
Mistake to Avoid: Using builder gel too thickly, which causes a bulbous look at the free edge.
Style/Vibe: Reinforced Ombre
Best For: Long nails, people needing extra strength
Skill: Advanced
10. Subtle Chrome Lining for Short Nails
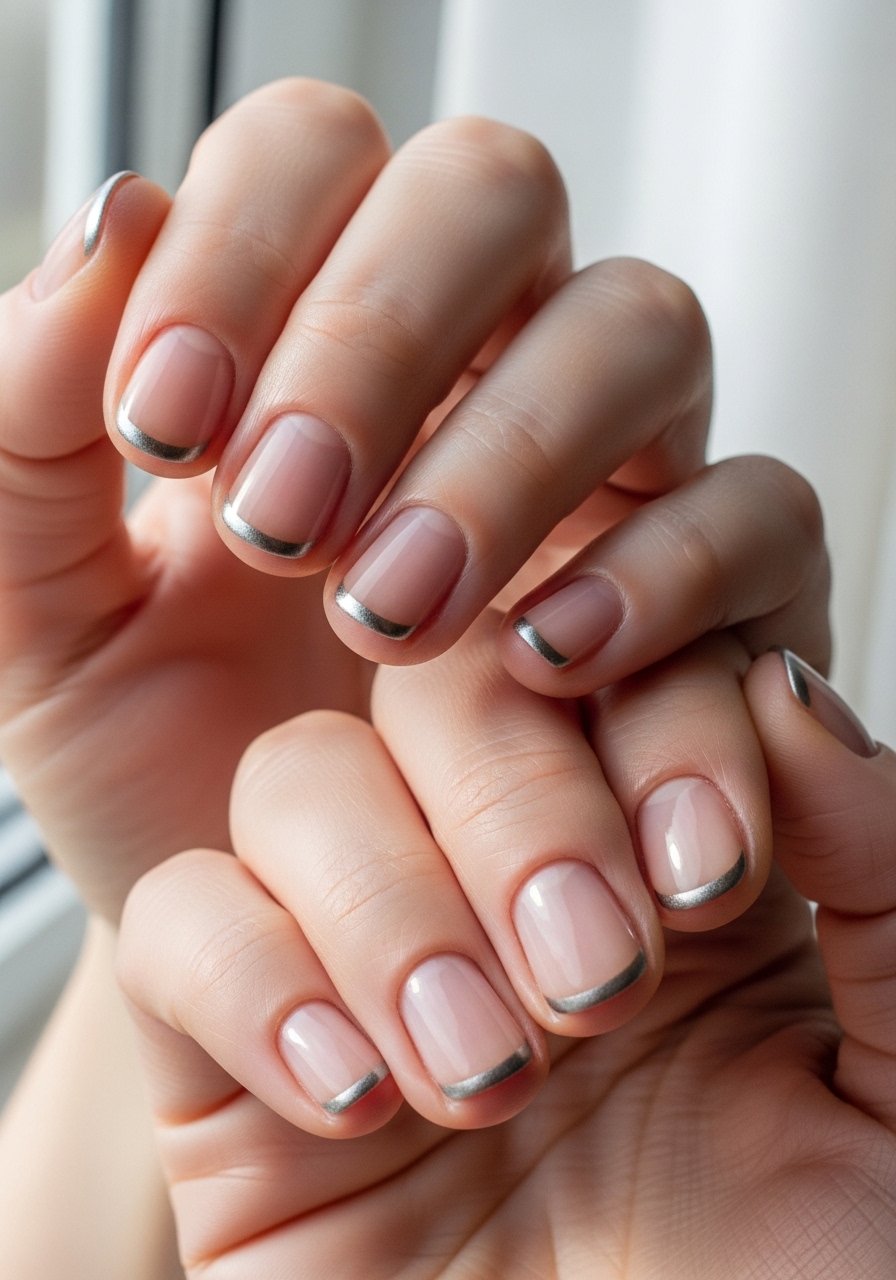
A thin chrome line at the free edge visually lengthens short nails without adding bulk. Use a striping brush dipped lightly in chrome powder mixed with clear gel to paint a hairline at the tip, cure, then topcoat. It takes less than 10 minutes once you get the motion down, and it is forgiving for beginners. This is one of the competitor-missed approaches that works especially well on natural nails. I often reach for striping brush set for this.
Mistake to Avoid: Pressing too hard with the brush, which creates a thick, clumsy line.
Style/Vibe: Minimal Lengthening
Best For: Short nails, subtle enhancement
Skill: Beginner
11. Chrome Embedded in Clear Jelly Nails

Jelly nails with suspended chrome flakes feel playful and three-dimensional. Apply a thin clear builder layer, sprinkle chrome flakes in controlled clusters, encapsulate with another builder layer, then file and seal. The layers create depth and protect flakes from rubbing off. This is more time consuming but worth it for a durable, tactile finish that photos well. For flakes, try silver chrome flakes.
Mistake to Avoid: Using too many flakes per nail, which causes lumps under the top coat.
Style/Vibe: Suspended Chrome
Best For: Medium nails, creative looks
Skill: Advanced
12. Chrome Cuticle Foil Accent
Tiny chrome crescents at the cuticle are delicate and unexpected. Paint a soft neutral base, cure, then use a micro spatula to place a thin foil crescent at the lunula and press chrome on top. It reads like jewelry and is low commitment because it is small. This approach is helpful for people who want metallic detail but not full coverage. Use micro spatula nail tool.
Mistake to Avoid: Making the chrome crescent too wide, which looks like a chip rather than an accent.
Style/Vibe: Delicate Lunula
Best For: Medium nails, refined accents
Skill: Intermediate
13. Chrome With Tonal Color Block
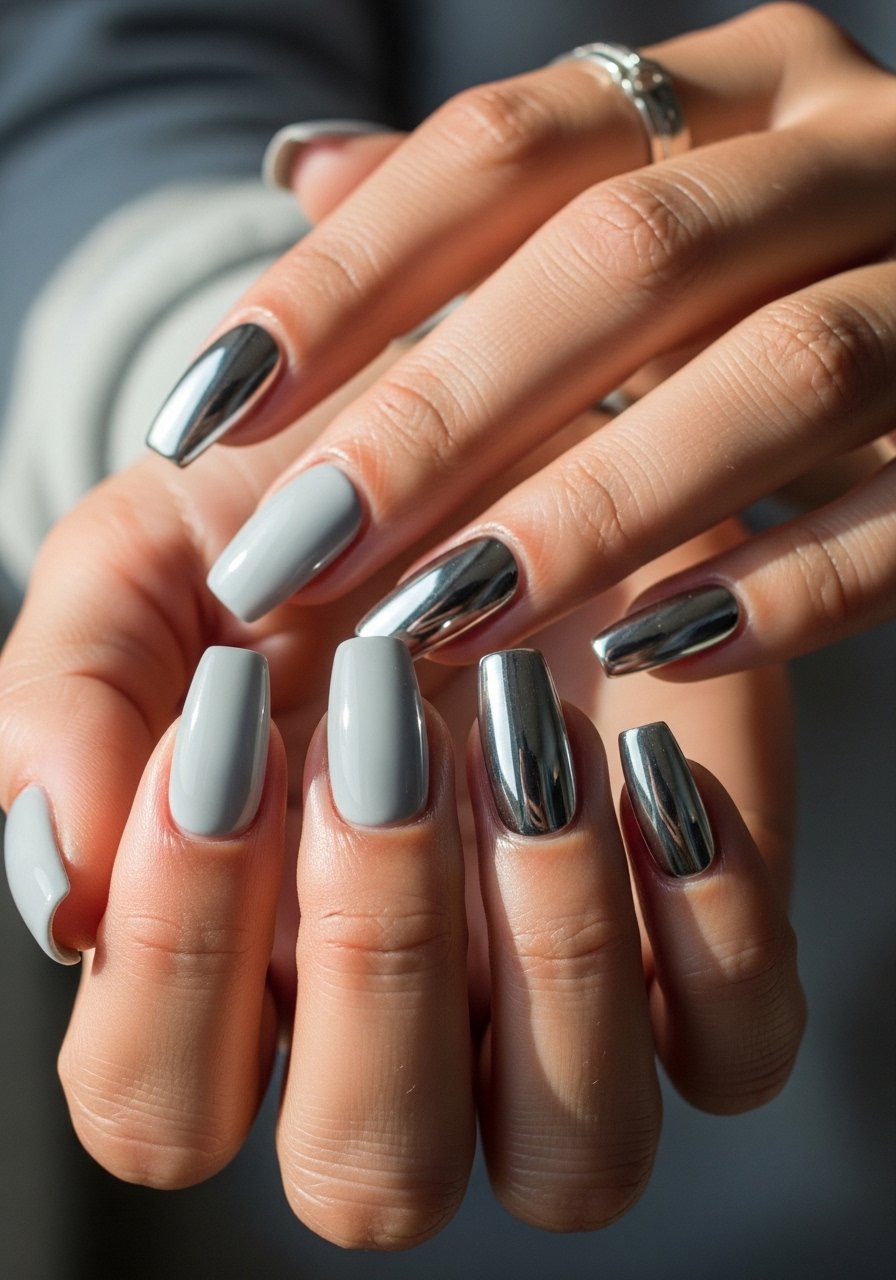
Color blocking with chrome yields a graphic effect without being loud. Paint two tonal panels, cure, then apply chrome to one panel only and seal. The key is clean, straight borders, which you get with tape shields or a steady hand. This is great for someone who likes bold composition and pairs well with minimal jewelry. Try nail art tape to keep edges sharp.
Mistake to Avoid: Overlapping the panels until colors mix, which muddies the graphic.
Style/Vibe: Graphic Panels
Best For: Medium nails, modern wardrobes
Skill: Advanced
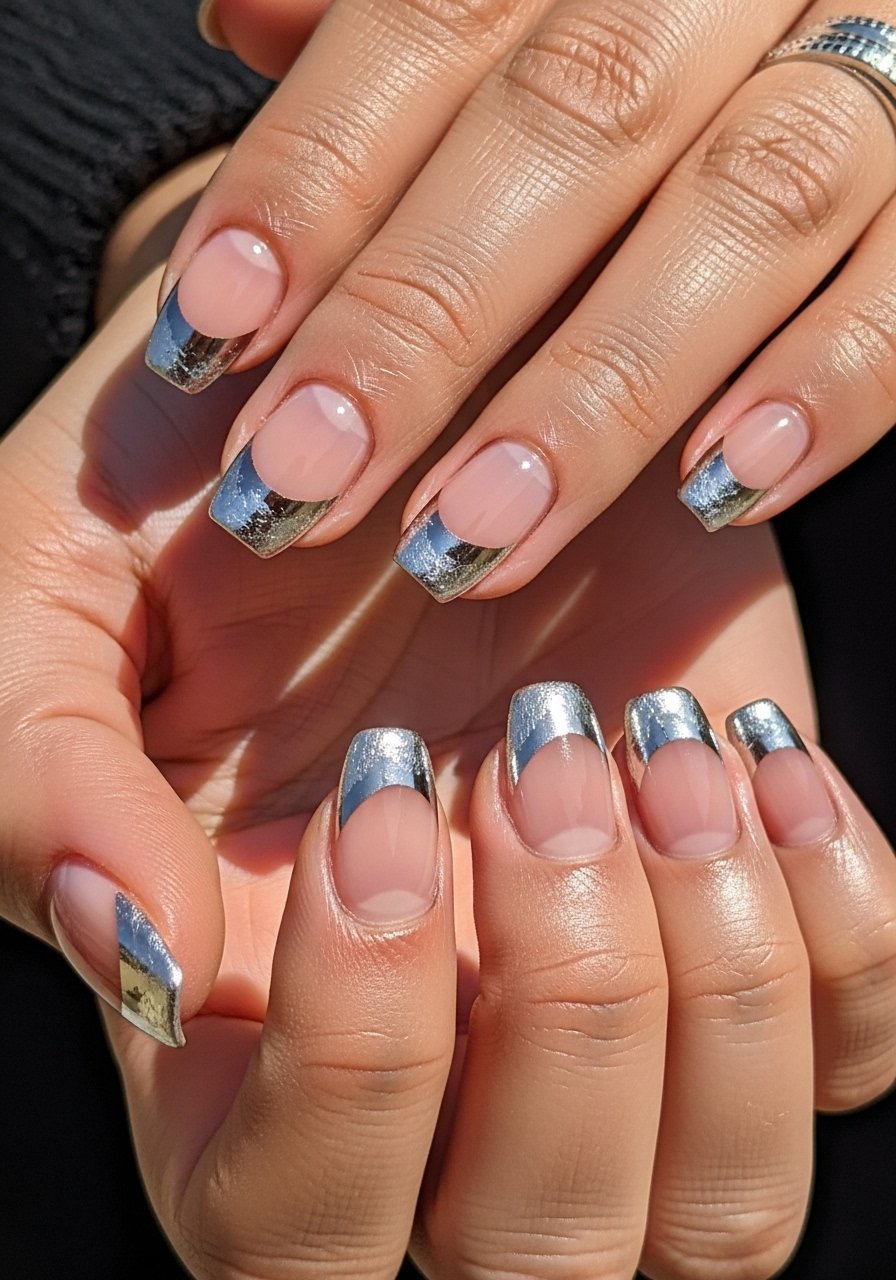
14. Chrome Sliced French With Metallic Tips

A sliced French uses thin chrome tips that slice across the nail in a curve. Use ultra-thin striping tape to map your curve, press chrome on the tip section, then remove tape and seal. The motion is precise and gives a manicure with edge but still wearable. This one photographs well on accessories and pairs with evening outfits. I used ultra-thin striping tape to plan curves.
Mistake to Avoid: Curing before removing tape, which lifts chrome and ruins the curve.
Style/Vibe: Curved French
Best For: Long nails, night looks
Skill: Advanced
15. Quick At-Home Chrome Fix
For last-minute shine, use a sticky polish and a tiny bit of chrome powder applied with a fingertip or silicone applicator. Press for 6 seconds, dust off excess, and seal with a quick-dry top coat. It is not as durable as a full salon process, but it is the fastest way to take a mani from plain to eye-catching in under 10 minutes. Keep a small mirror chrome kit in your bag for emergencies. For quick-dry, try quick-dry top coat.
Mistake to Avoid: Skipping cleanup of powder from skin, which makes the whole hand look messy.
Style/Vibe: Fast Touch-Up
Best For: Short nails, on-the-go fixes
Skill: Beginner
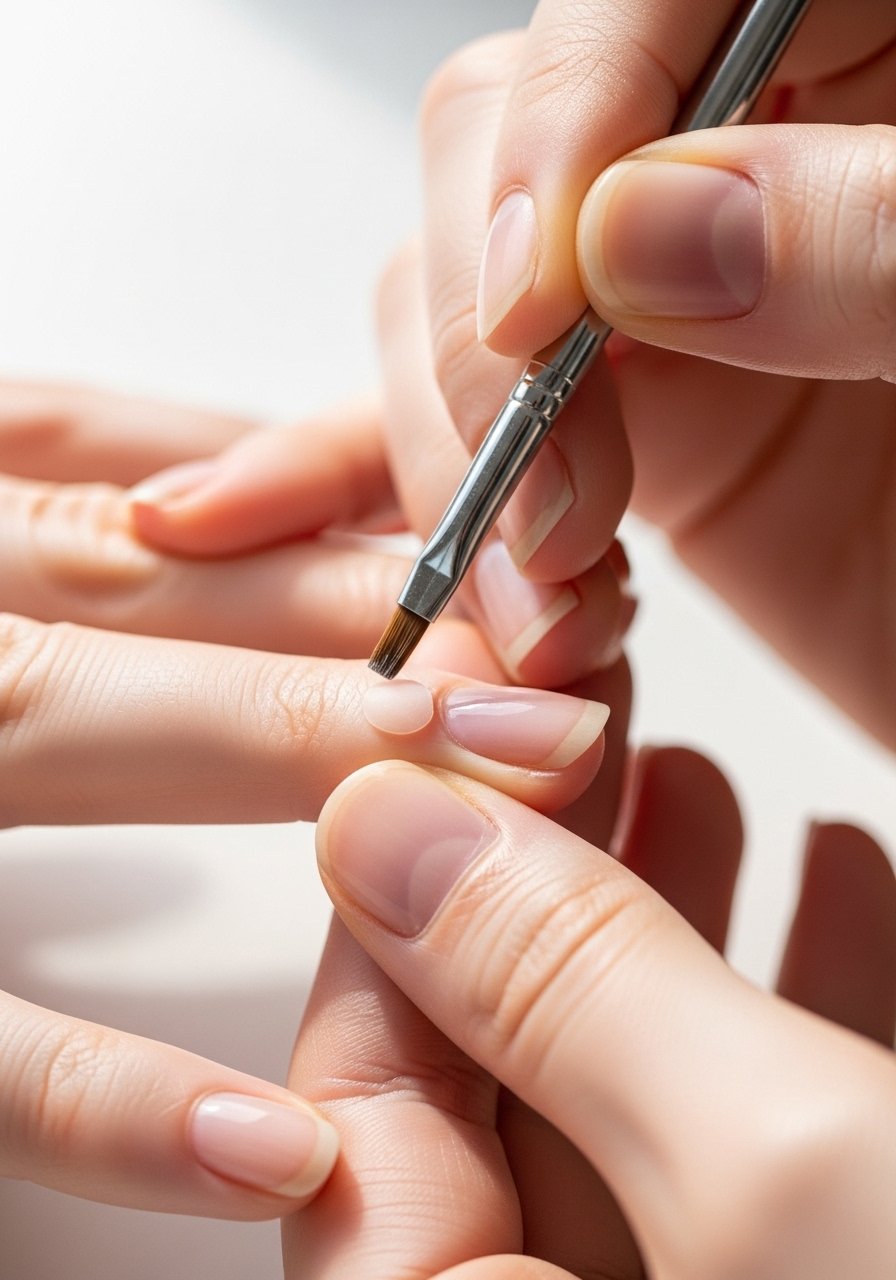
Chrome Application Habits
Thin coats beat one thick coat every time. Three thin layers of no-wipe top coat look smoother and last longer than one gloopy layer.
Press powder with a soft silicone applicator at roughly a 90 degree angle for 8 to 12 seconds. Silicone powder applicator costs about $7 and is the tool that stops streaks.
Most people dab chrome on and rush to seal it. Cure the base tack for a full 60 seconds under a 48W LED, then apply chrome and topcoat, and you will see fewer chips. 48w led nail lamp is worth the small investment.
