
I kept trying to paint a neat tip freehand and ended up filing the whole thing off the next day, so I finally stopped pretending a steady hand would save me and learned a set of tiny habits that actually stick. The change was small, but my manis lasted longer and looked cleaner in photos.
These nine ideas are for people who want tidy, wearable gel manis without complicated art or salon-level time. Expect low to medium skill moves that work on short to medium nails, most costing under $30 a polish and taking 20 to 45 minutes including cure time. You will see quick swaps for dated trends and a couple of salon tricks a tech who works at a salon downtown showed me, plus things competitors often skip when they favor flashy art over real-life wear.
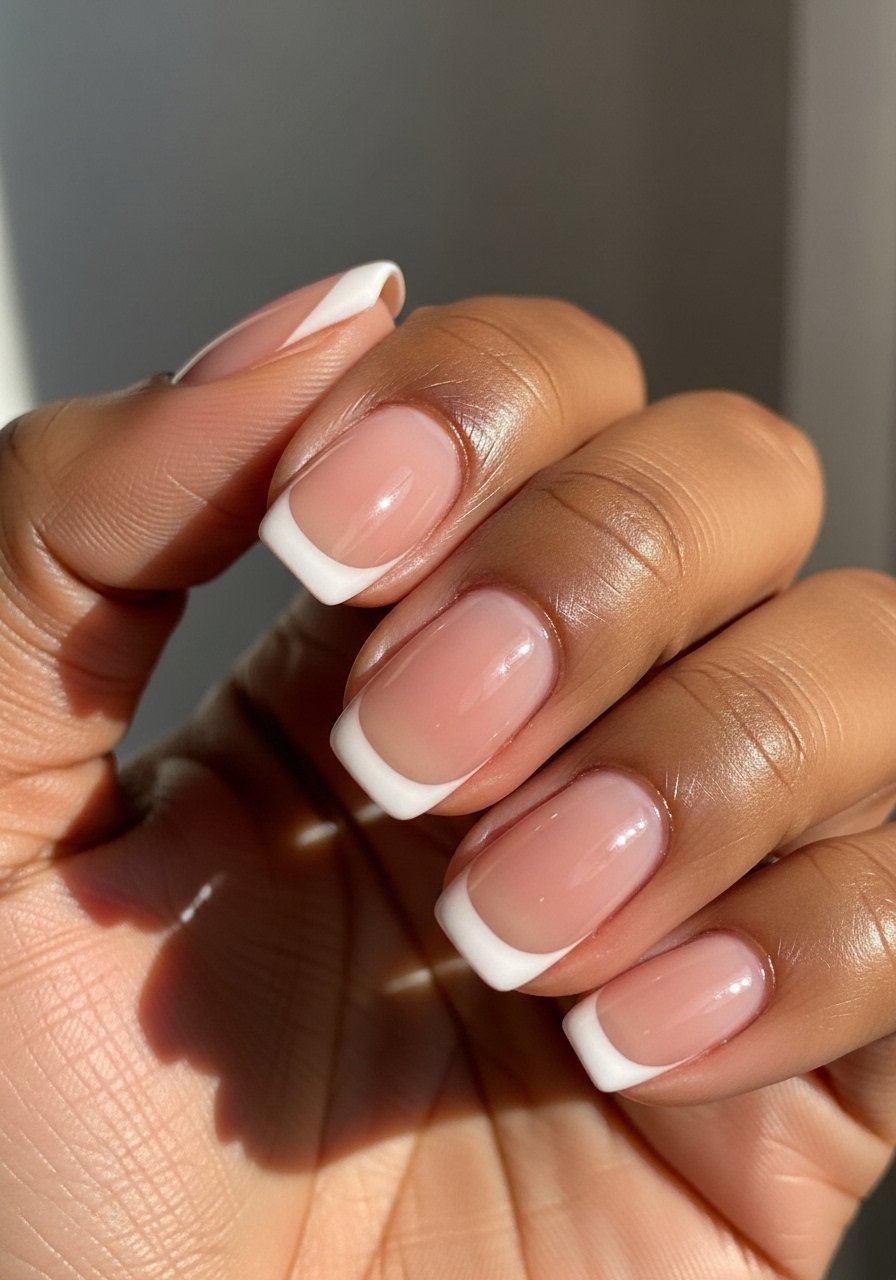
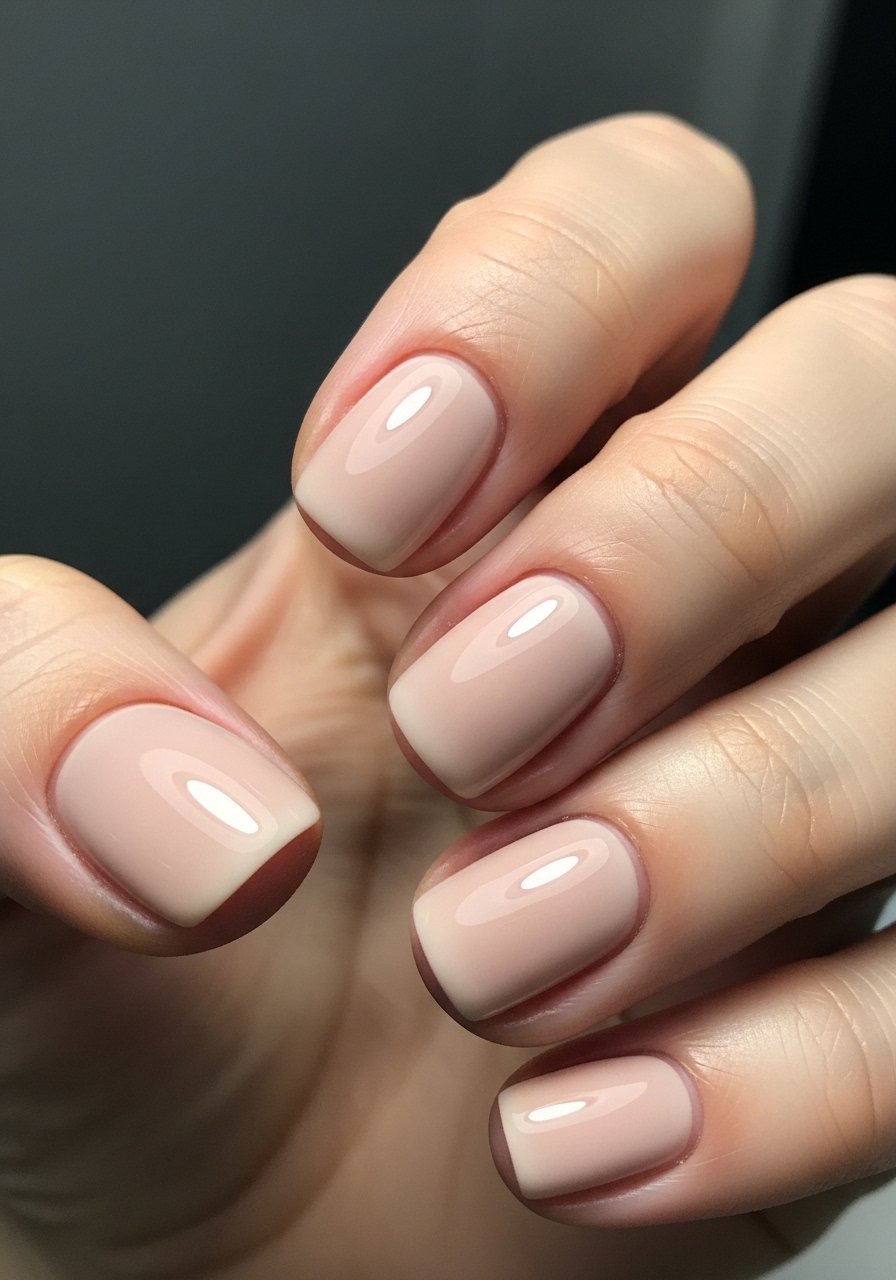
1. Sheer Nude With A High-Gloss Tip
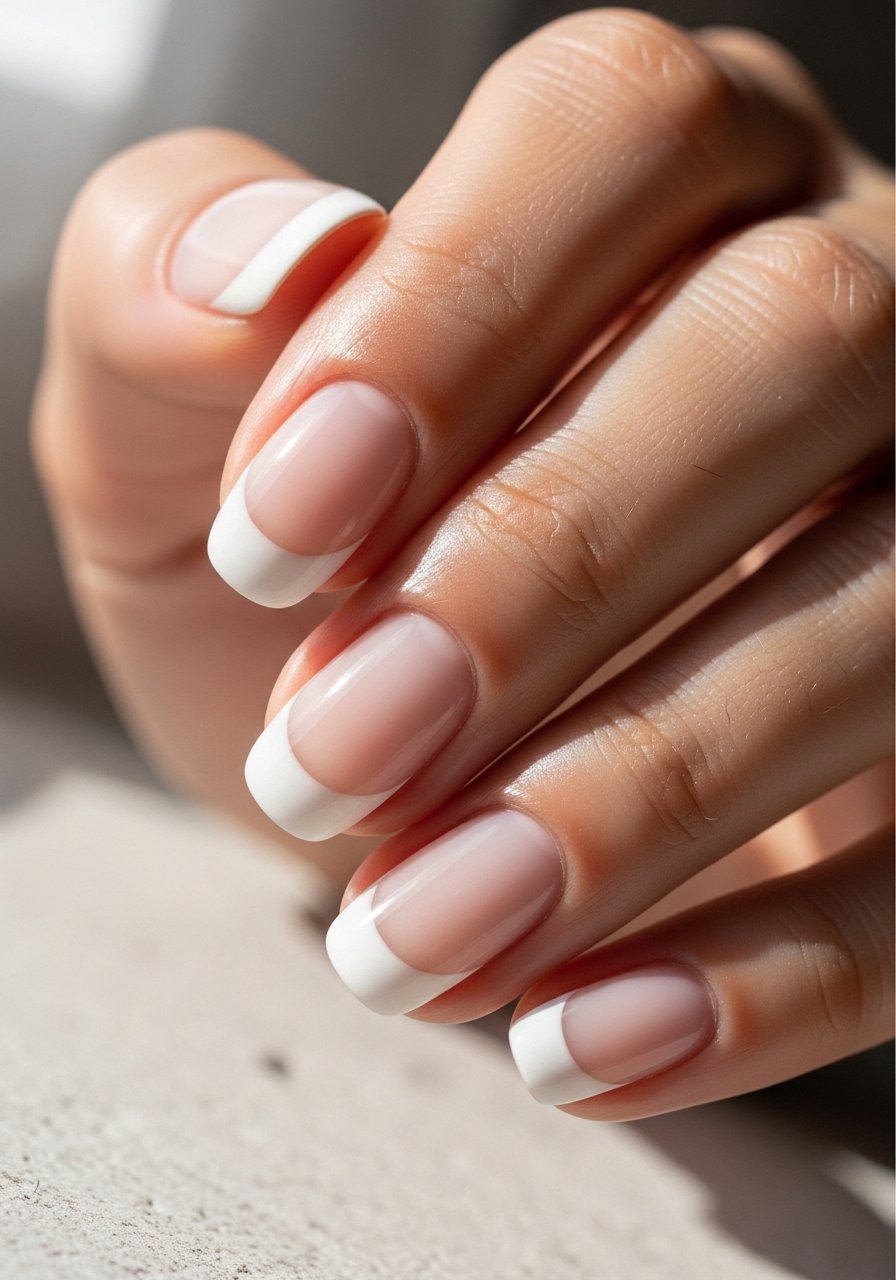
This is a tidy modern take on a classic. Paint two thin coats of a sheer nude gel, cure 60 seconds per coat under an LED lamp, then add a tiny crescent of white at the free edge and seal with a high-gloss top coat cured a full 60 seconds. It reads polished without looking painted-on because the translucent base still shows the nail line. Works on short and medium nails, perfect for office weeks and weekends. For an easy product pick try an LED nail lamp and a reliable sheer nude gel polish.
Mistake to Avoid: Painting thick base coats that lift at the cuticle, start with barely-there layers instead.
Style/Vibe: Clean Classic
Best For: Short to medium nails, everyday wear
Skill: Beginner
2. Soft Matte Pastel Block
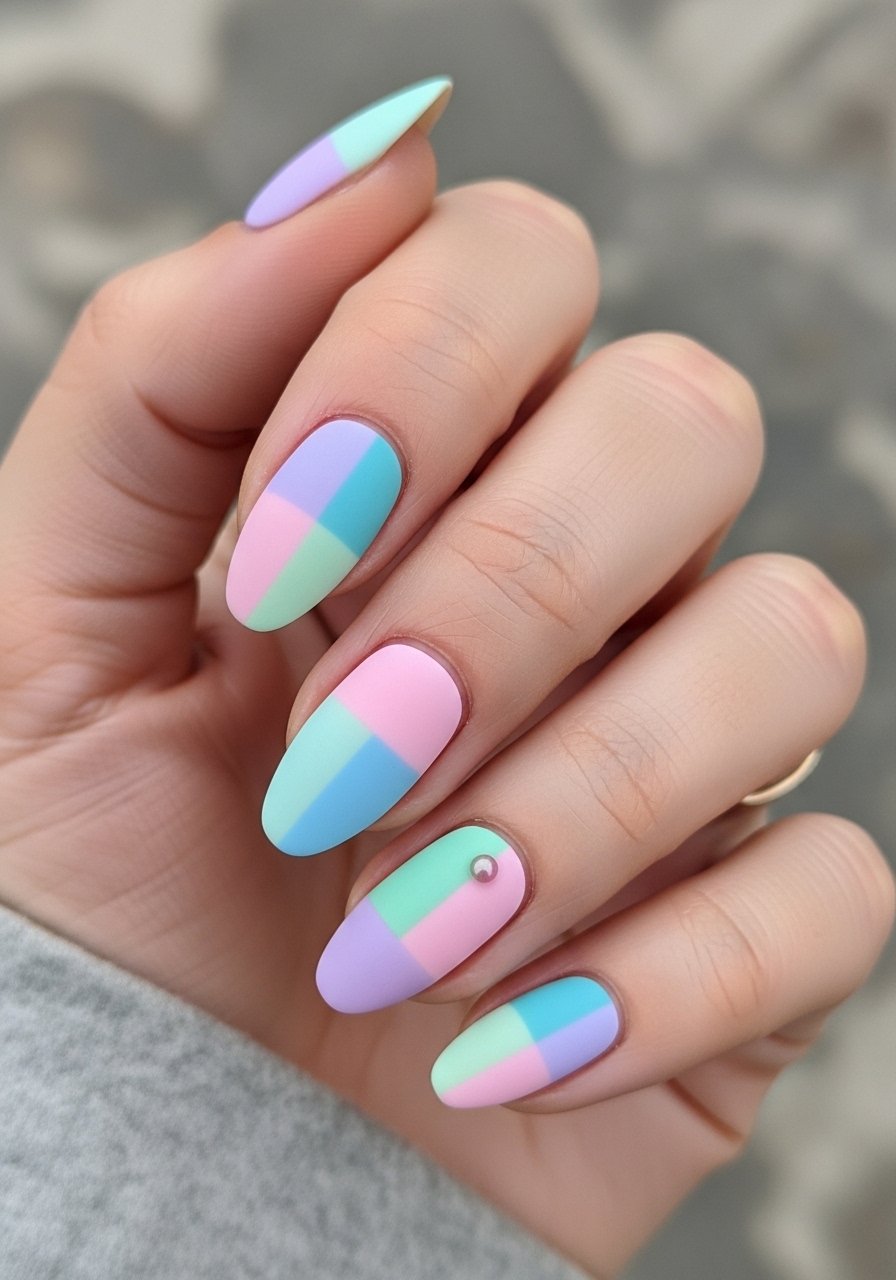
Swap the full-gloss finish for matte to make pastel shades feel more grown-up. Apply two thin coats of a pastel gel color, cure each coat, then buff the surface gently with a 240-grit file before using a matte top coat cured for 30 to 60 seconds. The slight buffing softens shine so the matte top coat sits evenly. This is a low-fuss look for spring and for anyone who hates high shine. Try a matte gel top coat that cures under LED lights and a pastel gel polish.
Mistake to Avoid: Applying a matte coat over thick glossy layers, which traps imperfections.
Style/Vibe: Soft Modern
Best For: Medium nails, casual events
Skill: Beginner
3. Tiny Accent Dot On A Clean Base
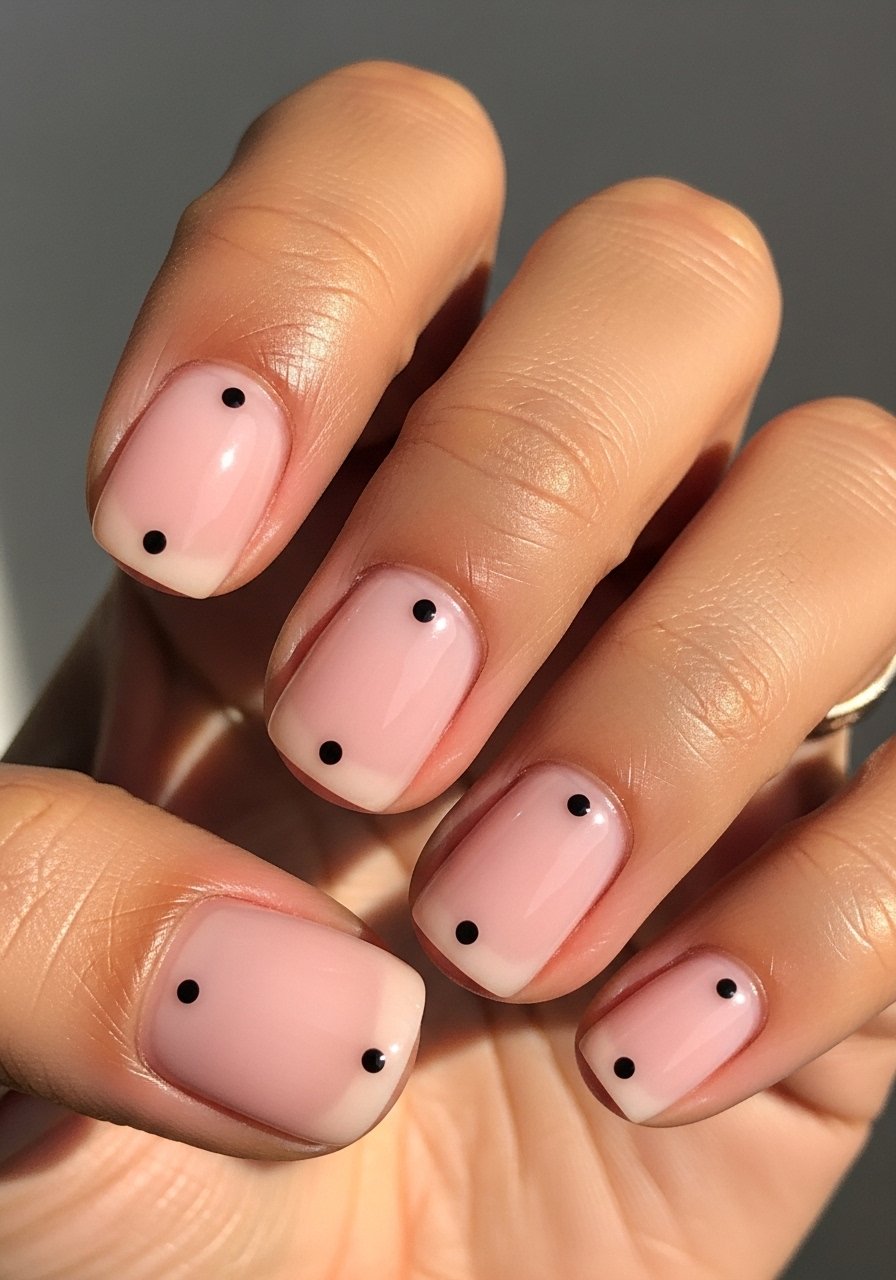
A single dot adds personality without fuss. Paint two thin base coats and cure, then use a dotting tool or a fine brush to place a single contrast dot near the cuticle or center. Cure and finish with a glossy top coat. It reads deliberate and neat because the rest of the nail is intentionally plain. This is great for short nails and quick touch-ups between salon visits. I use a small dotting tool for uniform size and a quick-dry top coat to seal it fast.
Mistake to Avoid: Making the dot too large, which turns minimal into messy.
Style/Vibe: Minimal Accent
Best For: Short nails, busy schedules
Skill: Beginner
4. Negative Space Diagonal Line
Negative space adds graphic interest while keeping upkeep low because chips are less visible against bare nail. Paint a sheer or neutral base, then use a thin striping brush or tape to leave a diagonal strip of natural nail showing. Cure, remove tape cleanly, then finish with top coat. This is a salon-look you can do at home in under 20 minutes once you practice tape placement. Pick up some nail striping tape and a steady striping brush to get crisp lines.
Mistake to Avoid: Removing tape while polish is tacky, which smudges the edge.
Style/Vibe: Graphic Minimal
Best For: Medium nails, photo-ready looks
Skill: Intermediate
5. Clean Short Squoval White Tip
This is the short-nail solution for the French without the fuss. Keep the white tip thin, about 10 to 15 percent of the free edge, then blend slightly with a soft brush before curing so it does not look harsh. Use a builder gel on very short nails to add a tiny lift before painting so the white edge sits flush and lasts. A slim smile line reads tidy in photos and survives everyday typing. Try a builder gel and a smooth white gel polish.
Mistake to Avoid: Making thick, high white tips that snag and peel.
Style/Vibe: Polished Minimal
Best For: Short nails, professional settings
Skill: Intermediate
6. Sheer Jelly Color Fade
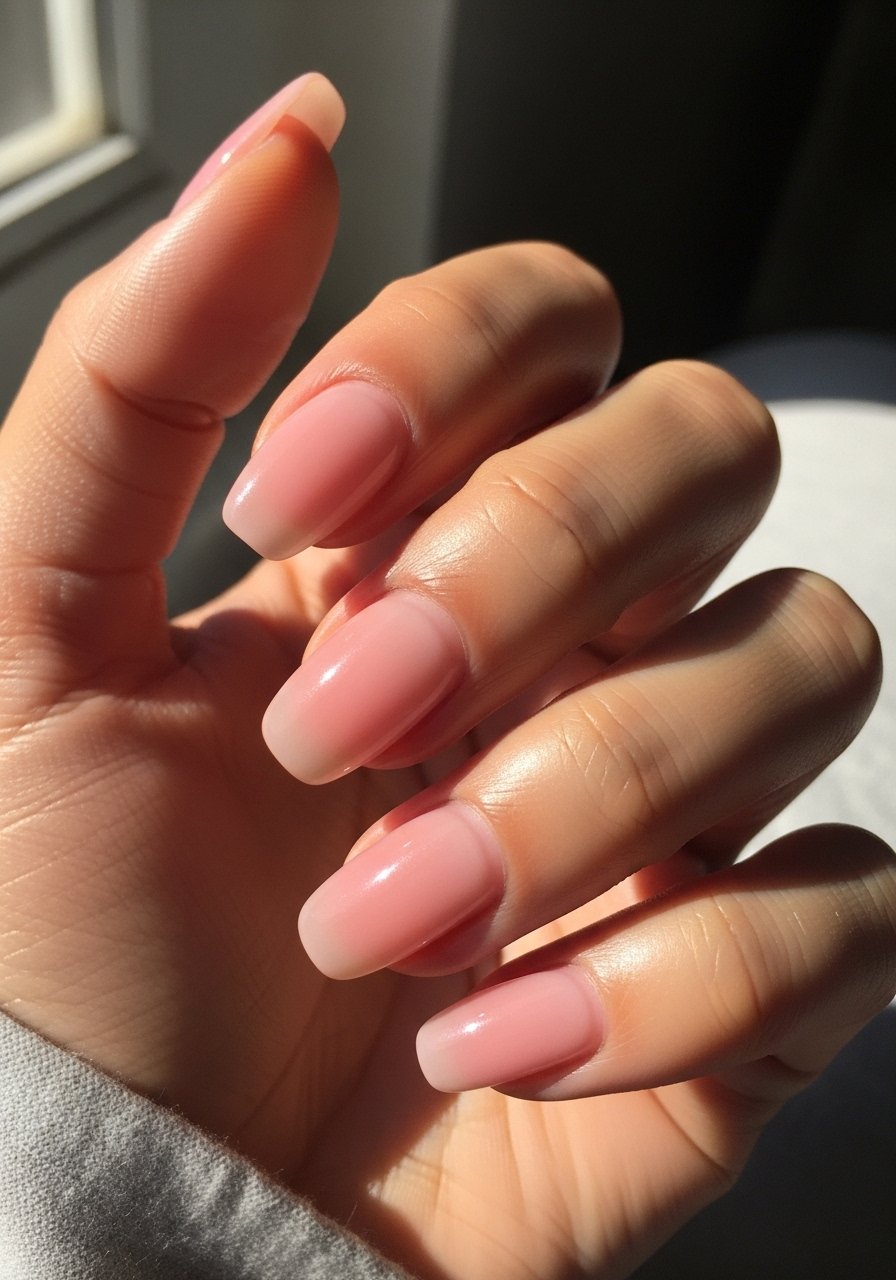
Jelly polishes give depth while being forgiving about regrowth because the color is translucent. Apply two thin jelly coats, curing between each, then do a light third coat focused at the center for depth and cure. Finish with a glossy top coat. This look feels fresh and youthful and is excellent for medium-length nails. The trick is thin layers, each cured fully so the color does not pool. Try a jelly gel polish and a reliable gloss top coat.
Mistake to Avoid: Slopping on thick jelly coats that never cure evenly.
Style/Vibe: Soft Color
Best For: Medium nails, weekend looks
Skill: Beginner
7. Satin Nude With Micro-Glitter Fade
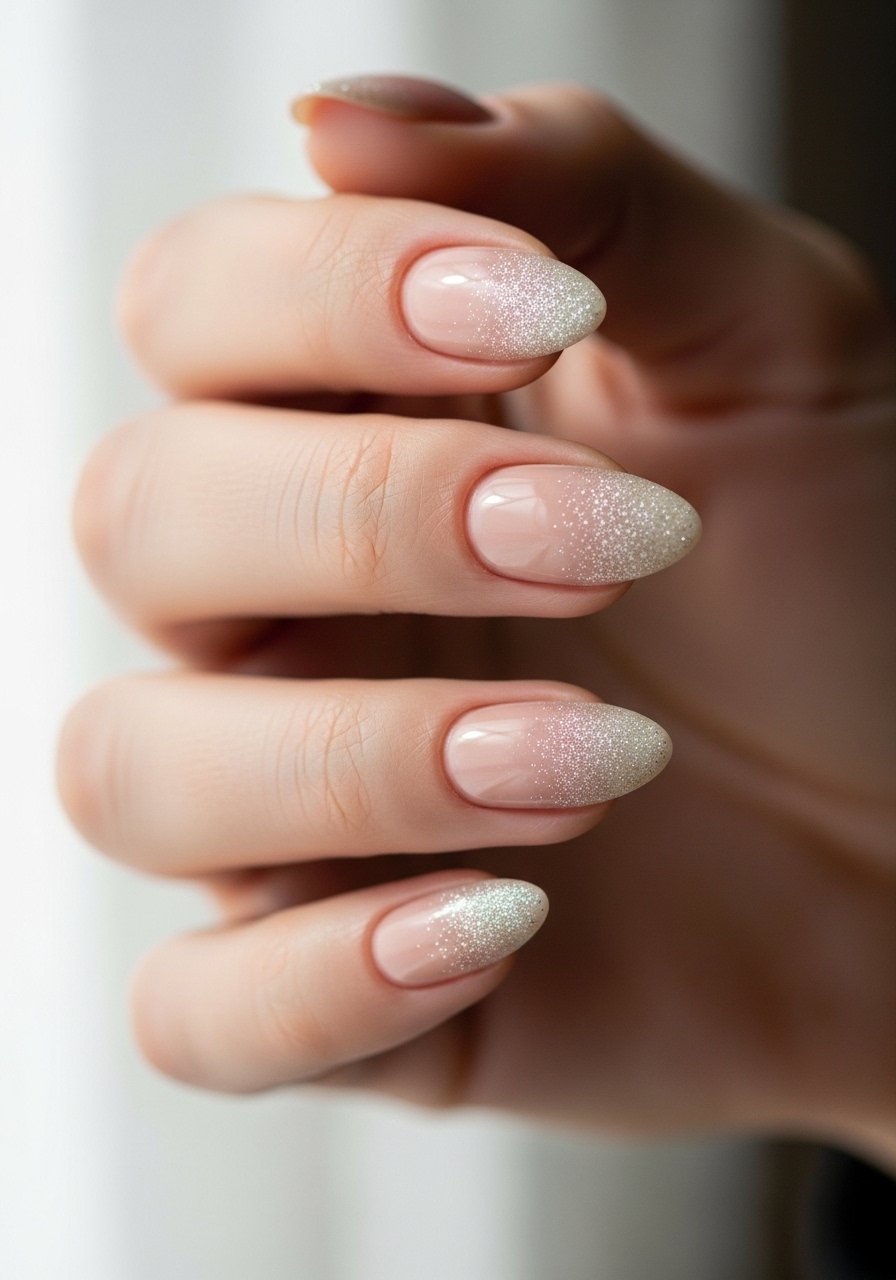
A tiny glitter fade at the free edge brightens a neutral base without glitter getting everywhere. Apply a satin nude base, cure, then tap a small amount of ultra-fine glitter gel at the tip and drag slightly toward the center before curing. Finish with a satin top coat for a soft sheen that hides minor chips. This is one of those things salons do that reads upscale but is quick at home when you have a micro-glitter gel. I found this technique after rotating the same nude mani for a full season and wanting subtle sparkle. Use a micro-glitter gel.
Mistake to Avoid: Using chunky glitter, which shows wear immediately.
Style/Vibe: Soft Glam
Best For: Medium nails, special events
Skill: Intermediate
If any of these ideas have you ready to actually try one at home, here are the products doing most of the work.
Simple Gel Mani Essentials
Tools:
- LED nail lamp (~$25-60). Reliable curing is nonnegotiable.
- Fine striping brush (~$6-12). For thin lines and tiny accents.
- Dotting tool set (~$8-15). Consistent dots, every time.
Polish Staples:
- Sheer nude gel polish (~$10-18). The base for many looks.
- Quick-dry top coat (~$8-16). Seals and smooths.
- Builder gel (~$12-25). For short nails needing structure.
Extras:
- Nail striping tape (~$4-10). For crisp negative space.
- Matte gel top coat (~$9-14). For muted finishes.
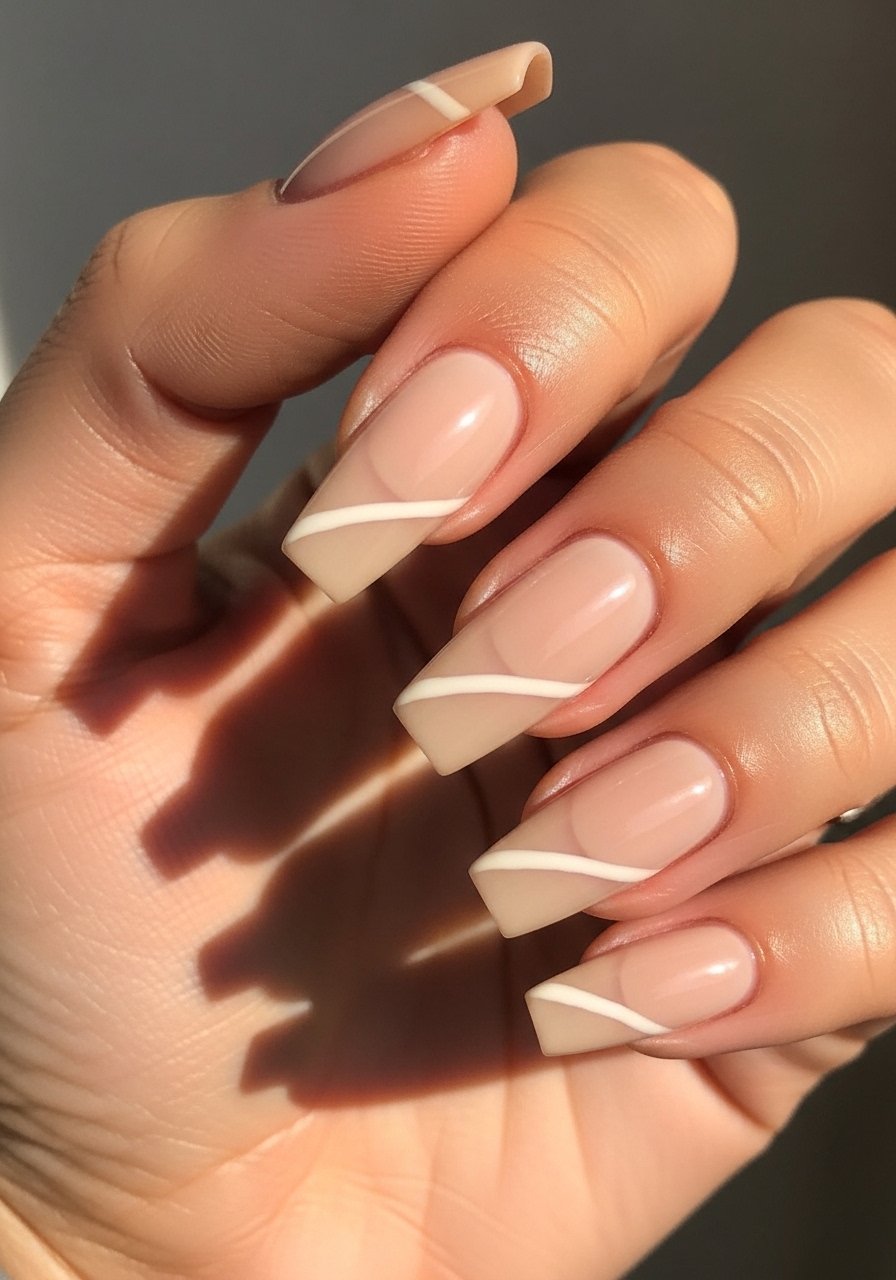
8. Neutral Thin French With Micro-Smile
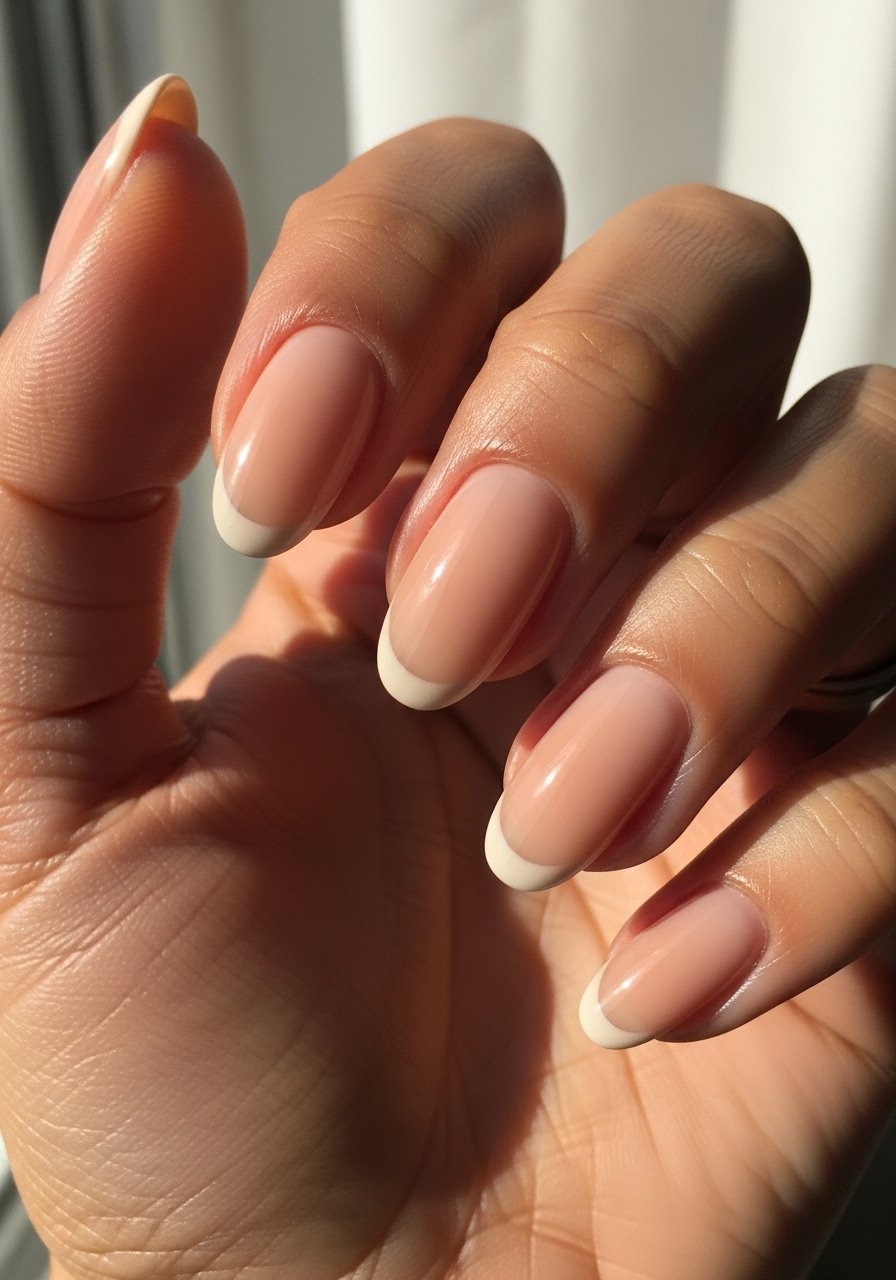
A micro-smile French reads elegant because it avoids the blunt white line. Use a thin brush and paint a smile line that is only 1 to 2 millimeters wide at the center, then feather slightly toward the corners before curing. Finish with a glossy top coat cured fully. This is a subtle upgrade for anyone who wants a hint of white without the French manicure look. A small detail brush makes the difference.
Mistake to Avoid: Drawing a thick smile line to hide shaky strokes, which reads heavy.
Style/Vibe: Refined Neutral
Best For: Medium nails, photos and events
Skill: Intermediate
9. No-Prep Peelable Gel For Fast Changes
If you change color often, use a peelable gel base to skip acetone soaks and speed removals. Apply a thin peelable base, two thin color coats, cure each, then top with a gentle top coat. Lifespan is shorter than a full soak-off gel but removal is friction-free and salon-safe for natural nails. This is a smart option for someone who likes to swap looks weekly. Try a peelable gel base and an easy-off gentle remover pad.
Mistake to Avoid: Applying peelable base too thick, which causes premature lifting.
Style/Vibe: Quick-Change Friendly
Best For: Short nails, frequent changers
Skill: Beginner
Tiny Tricks To Keep Gel Alive
Thin coats beat one thick coat every time. Three thin layers of a gel polish cured properly look smoother and last longer than one gloopy layer.
Use a cuticle oil pen daily. A quick oil at bedtime softens the skin and prevents chips that start at the cuticle.
Most people try to peel off chips. Try a gentle soak with a soak-off solution instead and reapply seal only where needed.
Keep a glass nail file in your bag for tidy edge fixes, not for reshaping a whole tip in public.
