
I kept filing my almond into a point and wondering why my nails broke at the first coffee run. One small change in how I measure length and how I build the base made them stop snapping and start looking like a real manicure, not a weekend experiment gone wrong.
These nine ideas are for anyone who likes a soft, wearable almond silhouette, from keyboard-heavy days to weekend photos. Expect a mix of salon-level finishes and easy DIY swaps that fit into a 30- to 60-minute at-home refresh. Budget notes are in each idea, and I include gel, natural, and short-length options so you can pick what suits your day-to-day.
1. Classic Soft Pink Gloss Almond
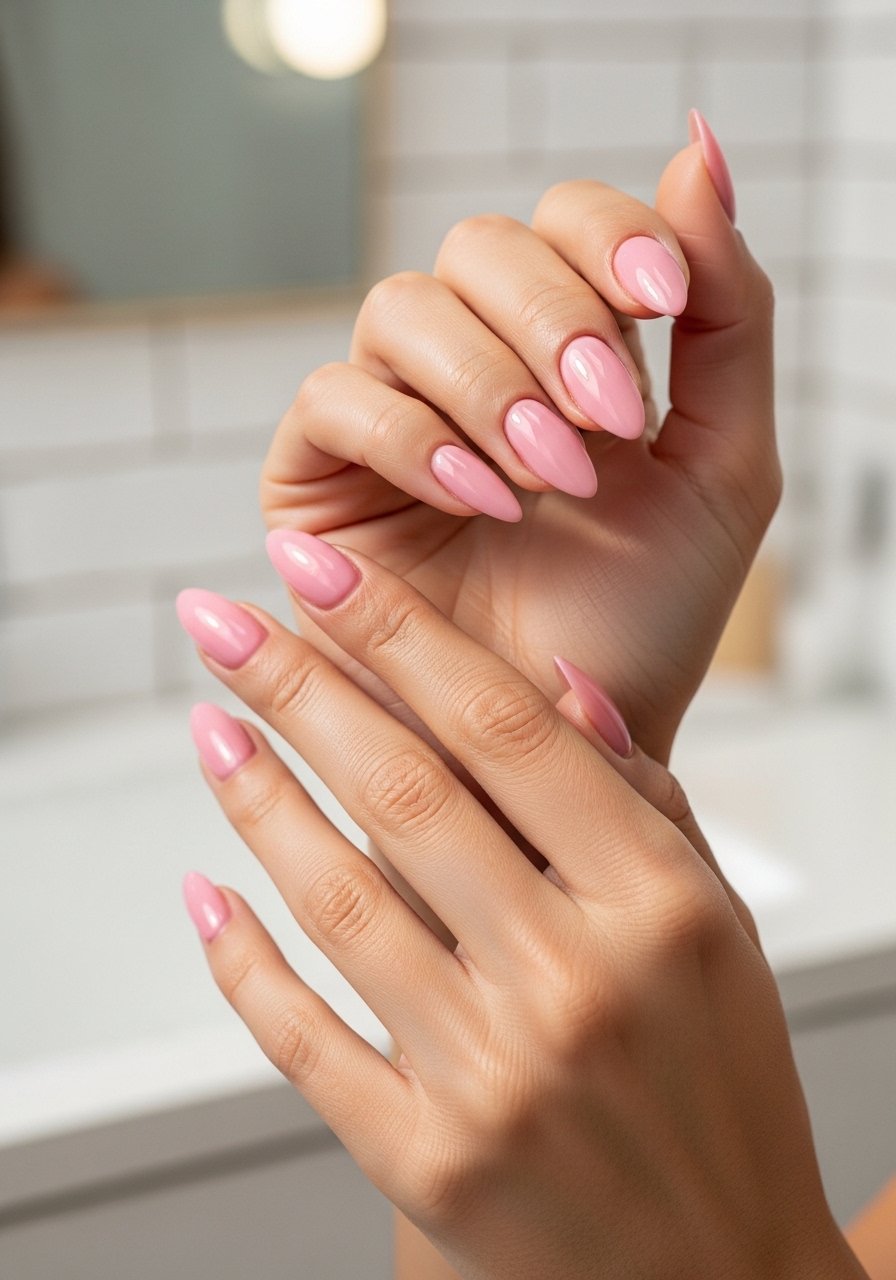
Style/Vibe: Classic Gloss
Best For: Long nails / special events
Skill: Intermediate
Start with a slightly tapered almond tip, about 7 to 10 millimeters past the fingertip for that elegant curve. Two thin coats of a soft pink gel work better than one thick layer, curing 30 seconds per coat under an LED lamp. A clear gel top coat gives mirror shine that photographs clean. For product pairing try a reliable gel base coat and a long-wear gel top coat. This look reads polished and simple, and it suits tapered hands or wide nail beds with a light file inward at the sidewalls.
Mistake to Avoid: Filing too much at the tip instead of rounding the sides, which makes the almond look pointy and fragile.
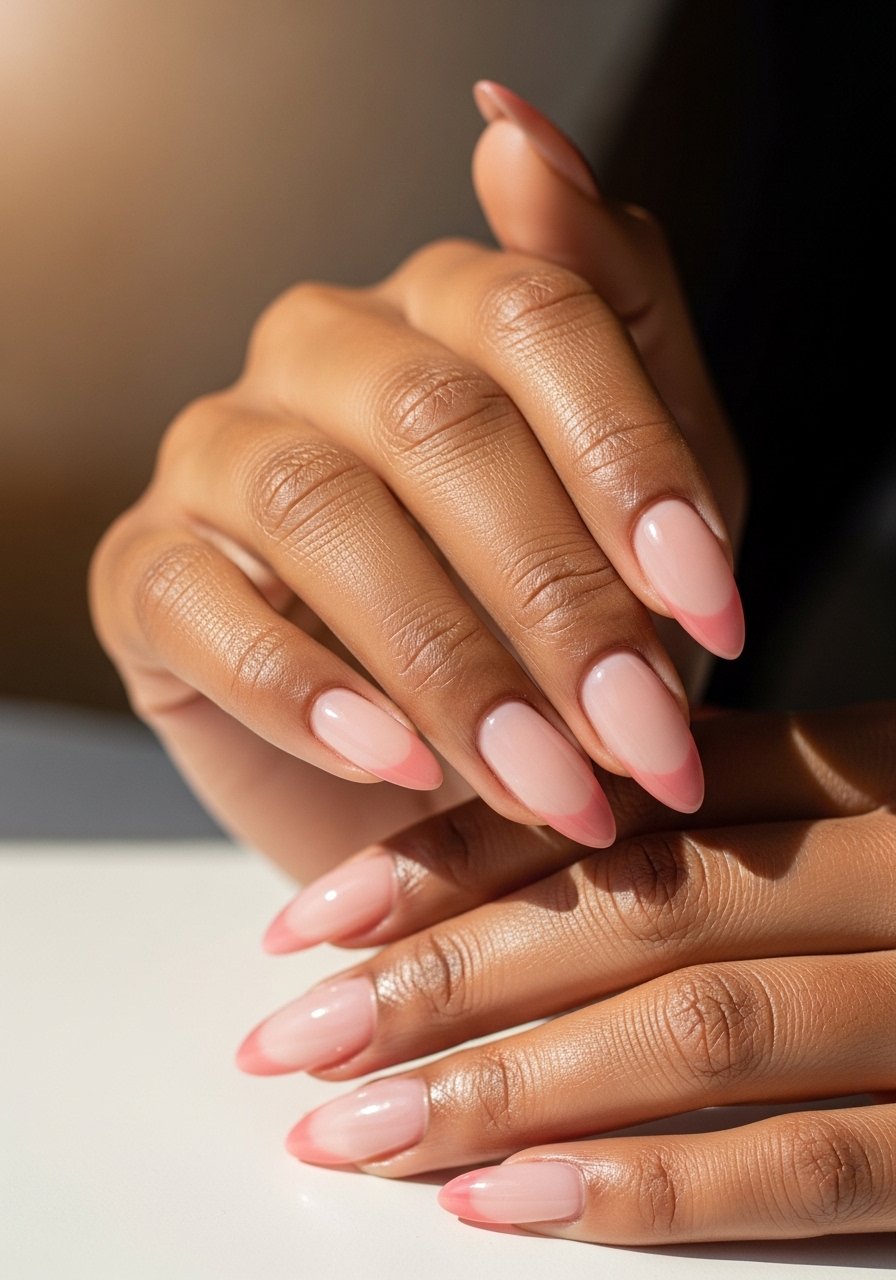
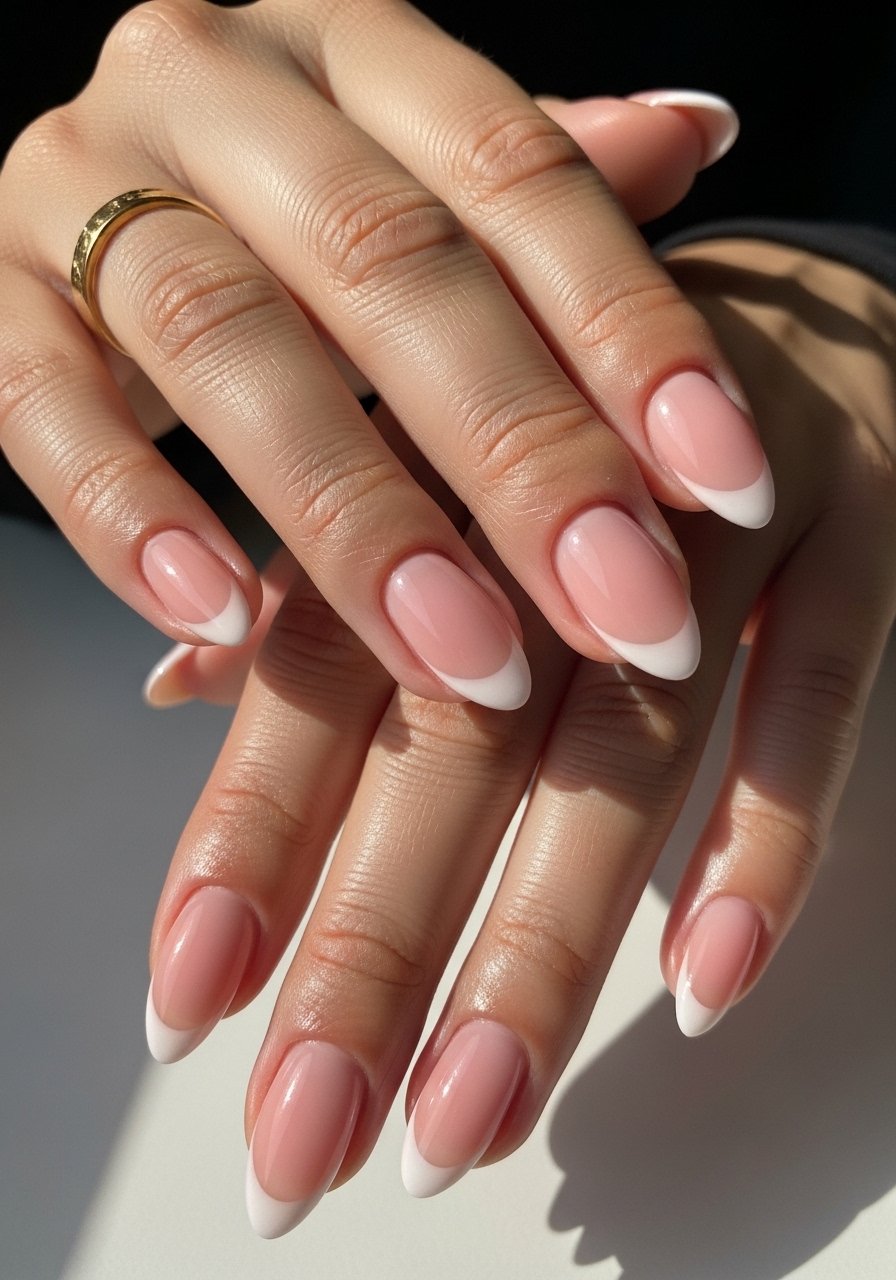
2. Sheer Milky French Almond
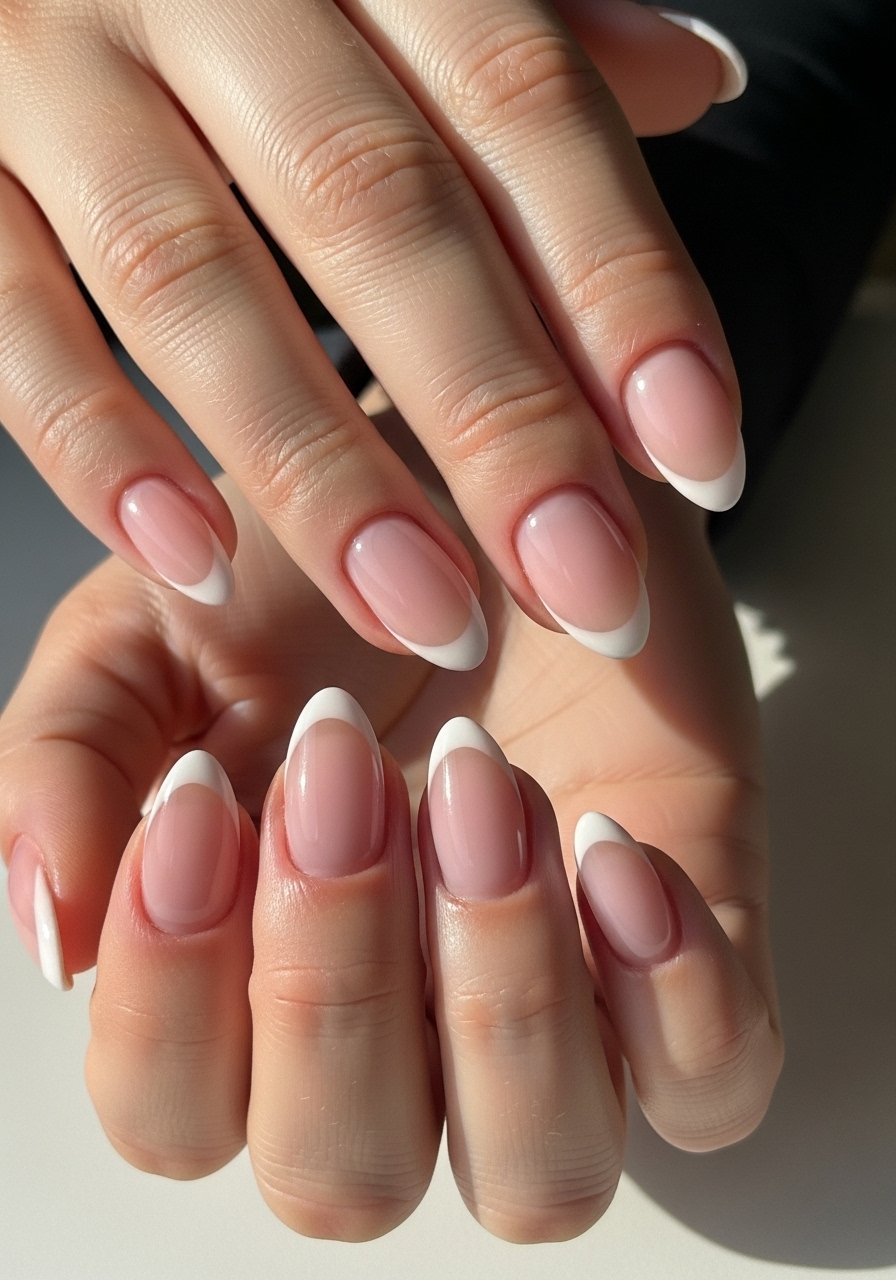
Style/Vibe: Sheer French
Best For: Medium nails / office safe
Skill: Beginner
This soft French keeps the almond shape but uses a milky pink base and a blurred white tip, a modern take on baby boomer. Apply three feather-light coats of the pink, then blend the white tip down about 2 to 3 millimeters with a soft brush before curing 20 to 30 seconds. A fine nail art brush helps get that soft smile line without a harsh edge. It creates an elevated, natural look that works for wedding guests, interviews, and anyone who wants tidy hands without high upkeep.
Mistake to Avoid: Painting a thick white band instead of soft-blending, which reads outdated and bulky.
3. Blush Ombre Almond
Style/Vibe: Gradient Blush
Best For: Long nails / photo-ready
Skill: Intermediate
Ombre soft pinks lengthen the nail visually. Use a small sponge or a dedicated ombre brush, tap blending strokes in a 1:2 ratio of color intensity from cuticle to tip. Start with a thin base, cure, then build two blended layers, curing 20 seconds between each. I like to seal with a slightly domed gel top coat so light hits the gradient smoothly. Try a versatile ombre brush set if you plan to practice at home. This vibe reads romantic and is forgiving of small growth lines.
Mistake to Avoid: Relying on one thick sponge dab, which leaves blotchy patches and uneven build.
4. Matte Velvet Soft Pink
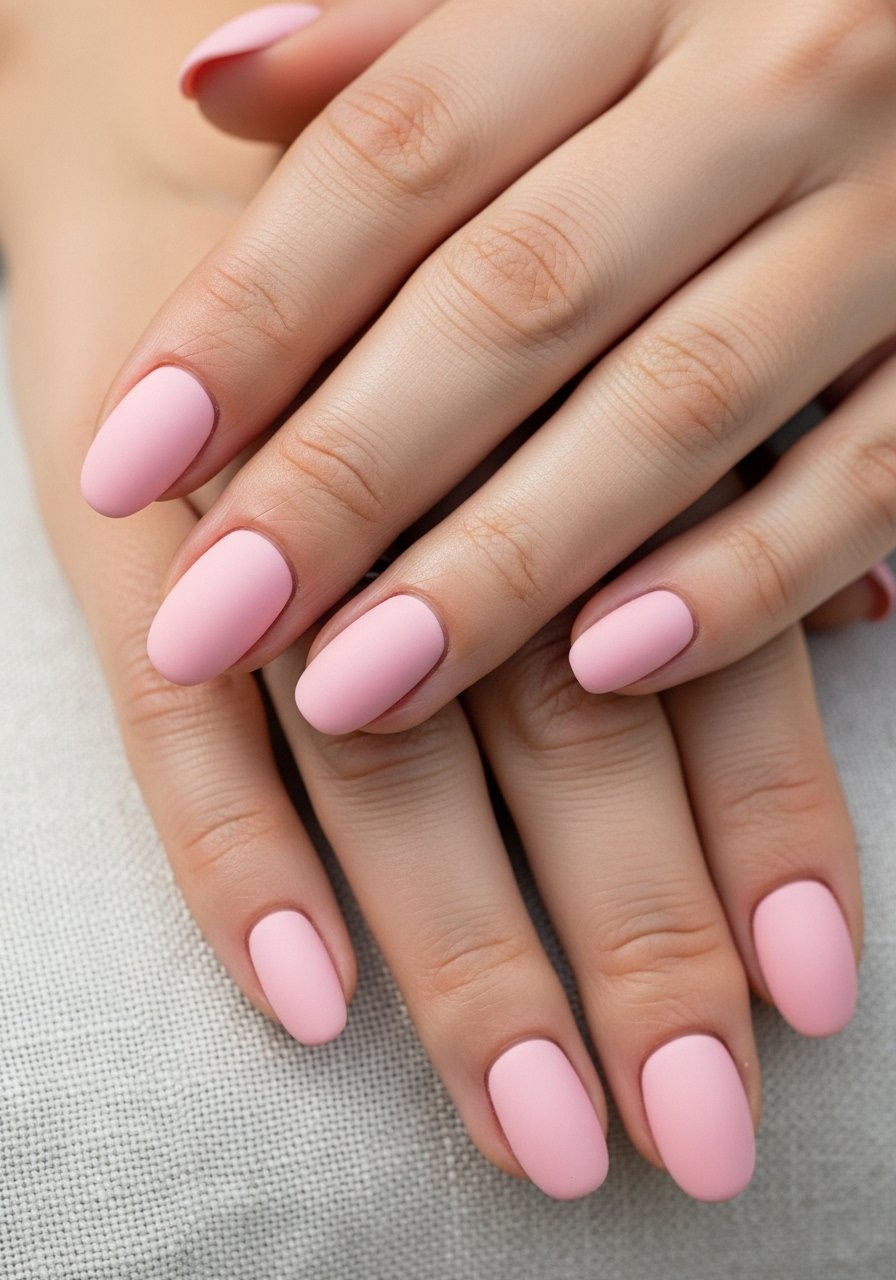
Style/Vibe: Matte Velvet
Best For: Short to medium nails / everyday chic
Skill: Beginner
Matte soft pink changes the mood without changing shape. Apply two thin coats of color and finish with a matte top coat for that pillow-soft look. For a modern swap, layer a satin top coat over the center only to create a soft contrast between the nail bed and tip. Matte hides tiny imperfections and makes the almond shape look intentional on shorter nails. Try a kid-friendly matte top coat for a low-cost update.
Mistake to Avoid: Brushing a matte coat on wet polish, which causes streaks and uneven texture.
5. Sugar-Finish Pink With Microglitter Accent
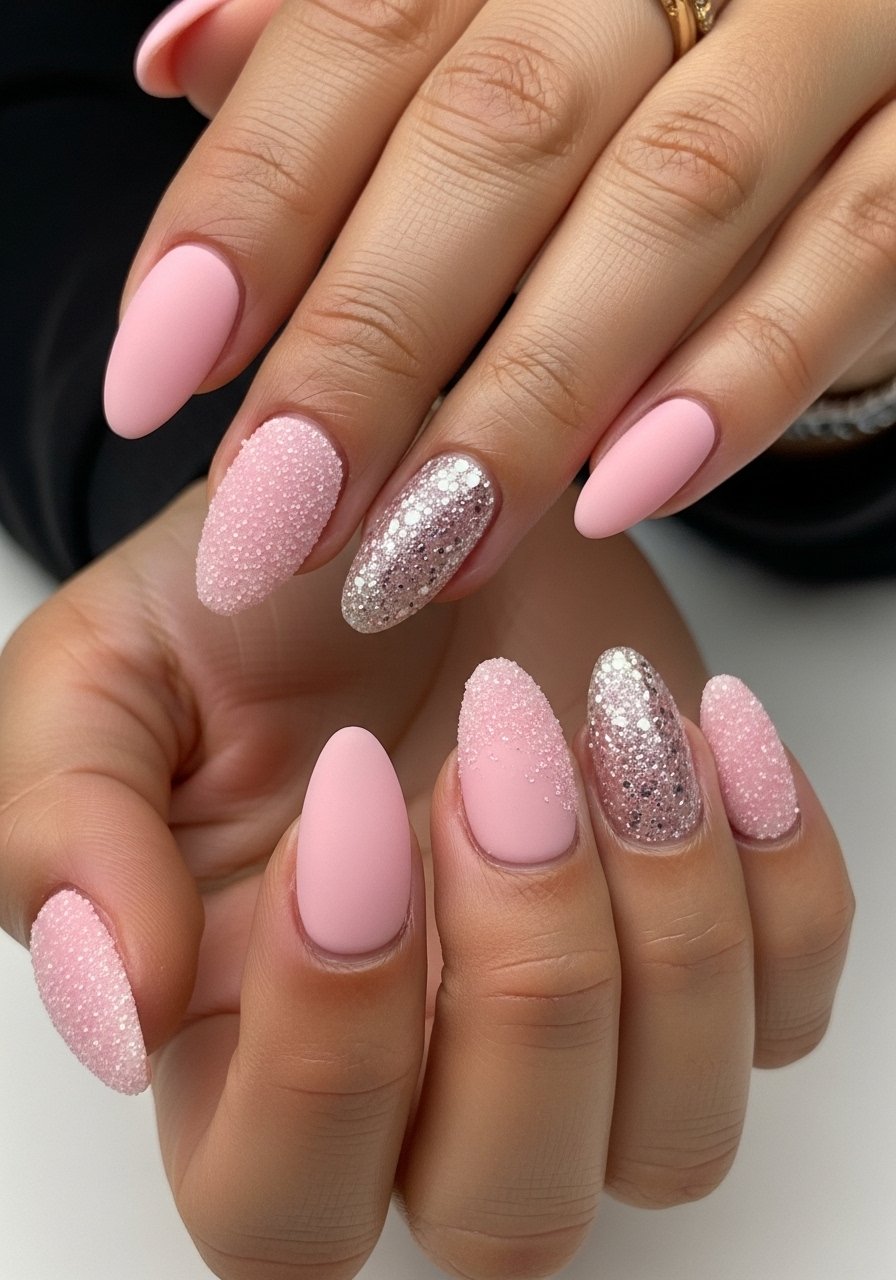
Style/Vibe: Textured Sparkle
Best For: Medium nails / weekend or party
Skill: Intermediate
A sugar finish gives that almost-sand texture without being scratchy. Mix microglitter into a clear builder gel at a ratio of roughly one part glitter to three parts clear for a subtle sparkle that does not weigh the nail down. Press the mix onto a cured base, then lightly seal only the edges with a glossy top coat to keep the textured center intact. A little goes a long way, so budget around one small jar of microglitter. The result reads playful and tactile without being loud.
Mistake to Avoid: Overloading glitter, which creates clumps and prevents proper curing at the edges.
6. Short Almond for Keyboarders

Style/Vibe: Practical Soft Pink
Best For: Short nails / everyday wear and work
Skill: Beginner
If you type all day, keep the almond short and slightly rounded at the tip, about 1 to 3 millimeters past the fingertip. One thin coat of a hard-wearing cream polish followed by a durable top coat protects the shape. A fine 240-grit file shaped at a 45-degree angle smooths the sidewalls and prevents snags. I learned this from a tech who works at a salon downtown who said short almonds survive hands-on jobs far better than long pointy shapes. Try a resilient hard-wearing top coat.
Mistake to Avoid: Letting the tip be too long for daily tools, which leads to chipping and breakage.
7. Reverse French Soft Pink
Style/Vibe: Reverse French
Best For: Medium nails / modern minimalist
Skill: Intermediate
Flip the classic by painting a soft crescent at the cuticle instead of the tip. Use a small round brush or vinyl guides to make a tidy smile line roughly 1 to 2 millimeters from the cuticle rim. Two thin color coats, then the crescent, then a light cure for 20 seconds keeps the shape crisp. This design feels fresh and suits anyone who wants a low-fuss yet distinct mani. A thin smile-line brush will save time.
Mistake to Avoid: Overfilling the cuticle crescent, which looks like polish pooling instead of a clean shape.
If any of these product names are the reason you want to shop now, here are the essentials I reach for most.
Soft Pink Almond Starter Kit
Prep & Tools:
- cuticle pusher (~$6-12). I use this for neat cuticles before any shape.
- 240-grit nail file (~$3-8). Good for gentle shaping.
Base & Color:
- gel base coat (~$10-18). Helps color adhere.
- soft pink gel polish (~$8-20). Pick a sheer or cream finish.
Finishers:
- gel top coat (~$10-20). For high shine.
- matte top coat (~$8-15). For the velvet look.
Extras:
- microglitter (~$5-12) for accents.
Satin Finish With Gold Flake Accent
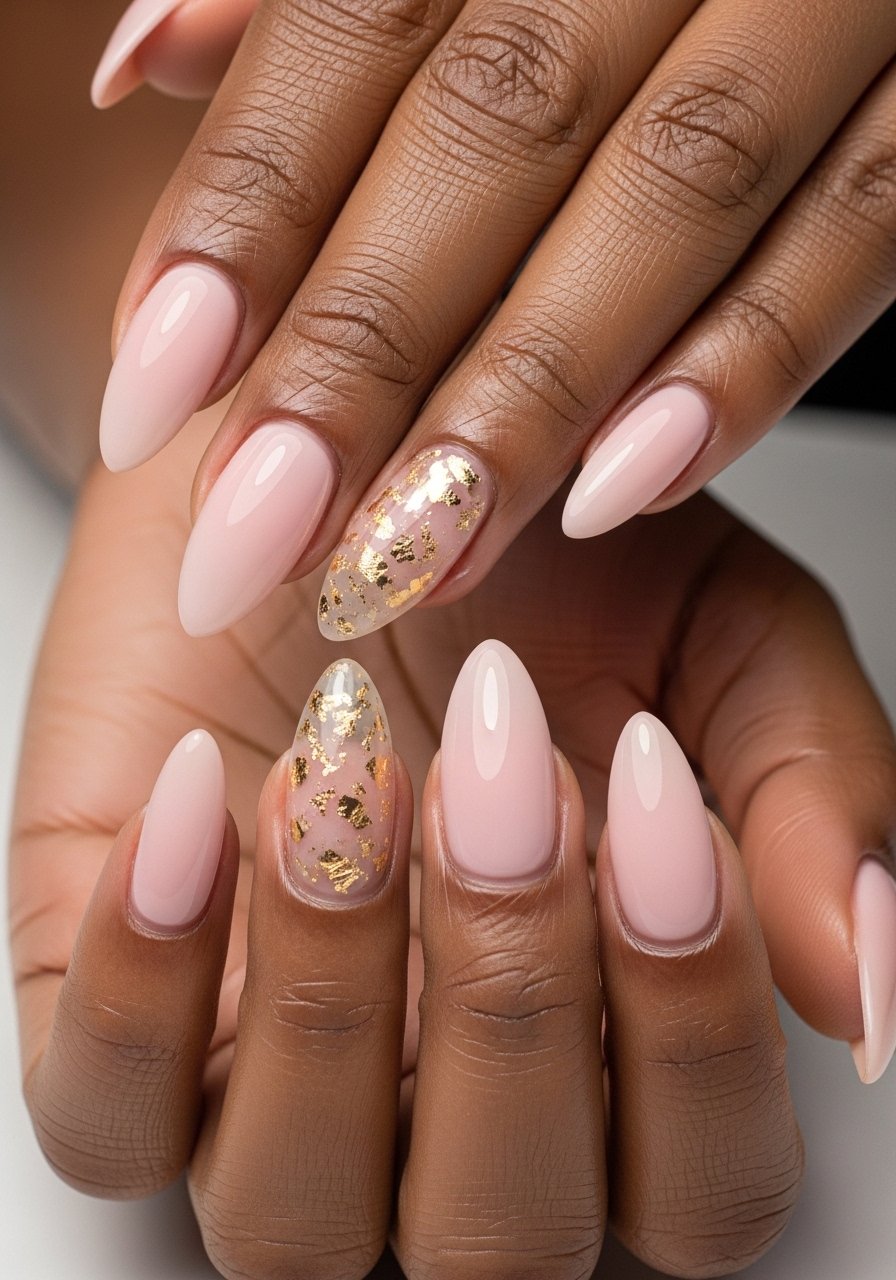
Style/Vibe: Satin Luxe
Best For: Long nails / evening wear
Skill: Intermediate
Satin sheens sit between matte and gloss, giving a lived-in soft glow. Apply two thin color coats, cure, then lightly buff the surface with a 3000-grit buffer to soften shine. Add gold flake to one accent, pressing small pieces into a thin clear gel layer and sealing with a gloss rim. This creates a luxe feel without heavy sparkle. A small jar of gold nail foil pieces makes accents quick.
Mistake to Avoid: Sealing foil under a thick layer of top coat, which buries the texture and reduces reflective edges.
9. Negative Space Crescent Almond

Style/Vibe: Negative Space Chic
Best For: Medium nails / fashion-forward
Skill: Advanced
Negative space almonds play with the natural nail bed and create the illusion of length. Map a slim crescent of bare nail along the free edge, about 1.5 to 3 millimeters wide, then paint soft pink just above it in thin coats. Use a striping tape or a curved stencil to keep the line crisp. This technique looks editorial on longer nails and modern on medium lengths. Try a pack of nail vinyls for cleaner lines when starting out.
Mistake to Avoid: Making the negative space too wide, which shortens the nail instead of lengthening it.
Almond Aftercare Shortcuts
Cuticle oil is nonnegotiable. A few drops of cuticle oil twice a day keeps the nail bed smooth and prevents chips.
Give your polish time to harden. Thin coats cure and dry faster than one thick coat, and a quick 30-second LED cure between thin layers prevents dents.
If you work with water a lot, wear thin gloves for chores. A soft pair of household gloves protects manis and saves repair time.
Replace your top coat every 7 to 10 days on natural polish to refresh shine and seal edges with a quick-brush of the same gel top coat.
When you file, always file in one direction along the natural curve to avoid microtears. A medium nail file set priced under $10 will cover shaping needs.
