
I kept booking fine-line pieces that blurred into fuzzy shapes within a year, until I realized the problem was the reference art and the needle choice, not my skin. The moment I asked for a single 3RL instead of a tiny magnum, the lines stayed crisp and the lily finally read like a flower, not a smudge on my arm.
These are small, mostly single-session designs that weather well and are easy to cover if you need to. They are not bold color portraits. They are delicate line work that reads as jewelry on skin. I am writing this after visiting five shops I trust, and these picks fit a range of budgets and pain tolerances, from quick wrist pieces to longer rib-side stems.
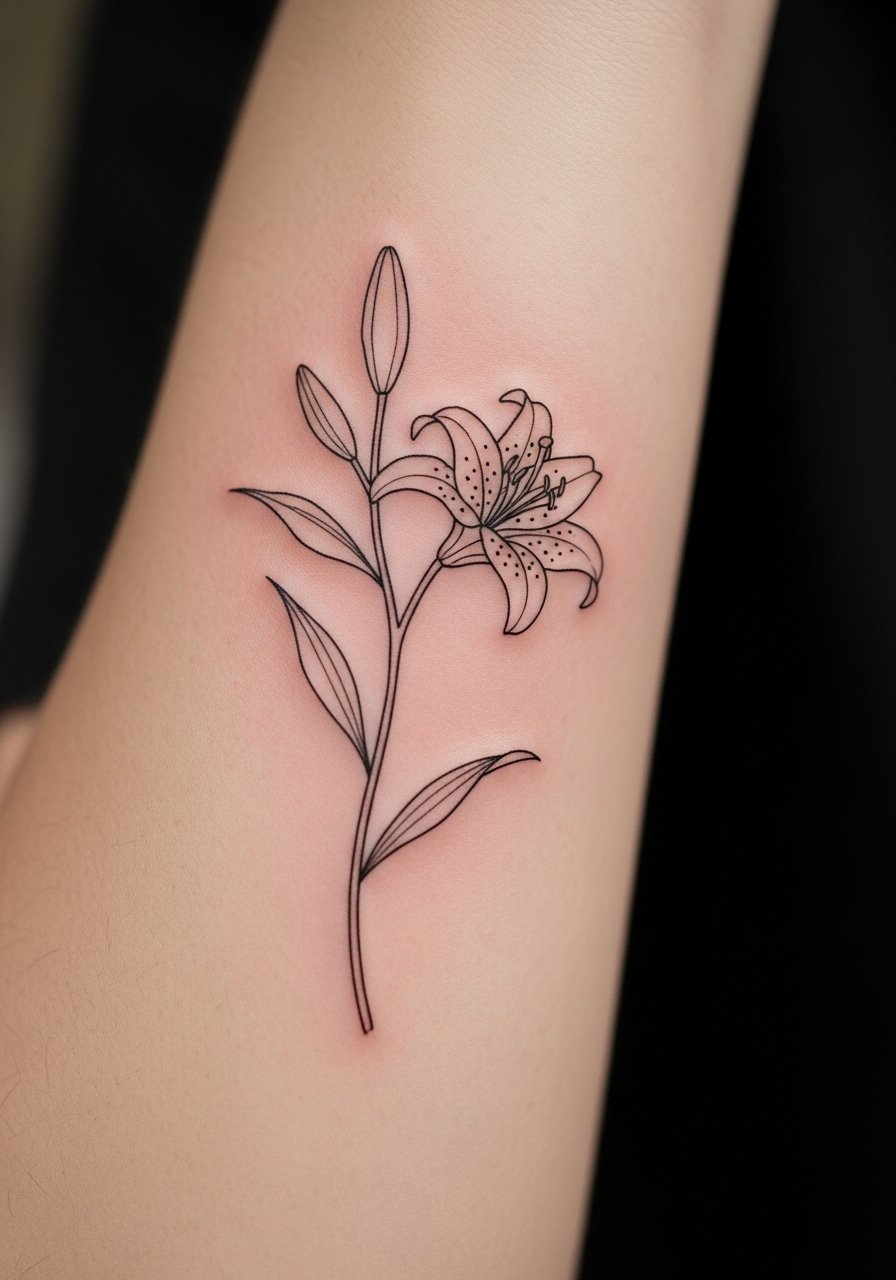
1. Single-Stem Forearm Lily
Style/Technique: Fine-line botanical
Pain Level: 3/10
Session Time: 30 to 60 minutes
Best For: Inner forearm, anyone wanting visible but coverable art
A vertical single stem with two blossoms reads like a delicate bracelet when placed on the inner forearm. It works because the long negative space around the stem gives the thin lines room to breathe, and a 3RL needle keeps the petals crisp. This is a good beginner fine-line piece, low cost and often one session. Pair it with a fragrance-free aftercare balm like fragrance-free aftercare balm to protect those hairline lines while healing.
Mistake to Avoid: Asking for extra shading, which will make the fine lines fill in faster.
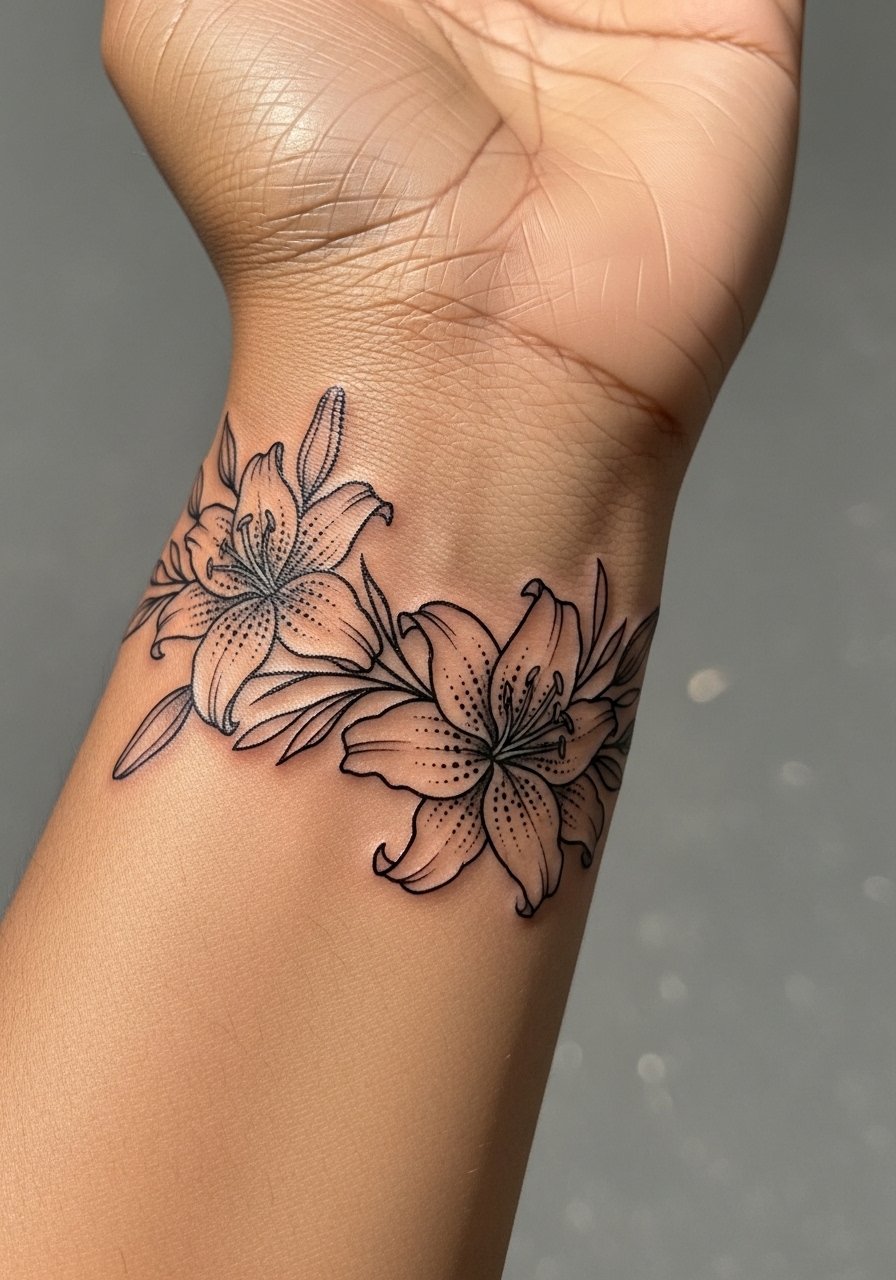
2. Wrapped Wrist Lily Bracelet
Style/Technique: Circular wrap, continuous line accents
Pain Level: 2/10
Session Time: 20 to 40 minutes
Best For: Wrist placement, petite to average wrists
A tiny wrap that sits like a bracelet is subtle and shows how placement changes the vibe. The trick is to keep the petals tiny, the stem slightly thicker where it curves, and leave micro gaps for breathability. For lifespan, protect it from heavy friction by using a thin barrier film while sleeping the first few nights, for example tattoo barrier film. This style reads jewelry-like and is ideal if you want an everyday visible piece that can be hidden with long sleeves.
Mistake to Avoid: Placing the wrap too close to the wrist bone, which distorts as the wrist moves.
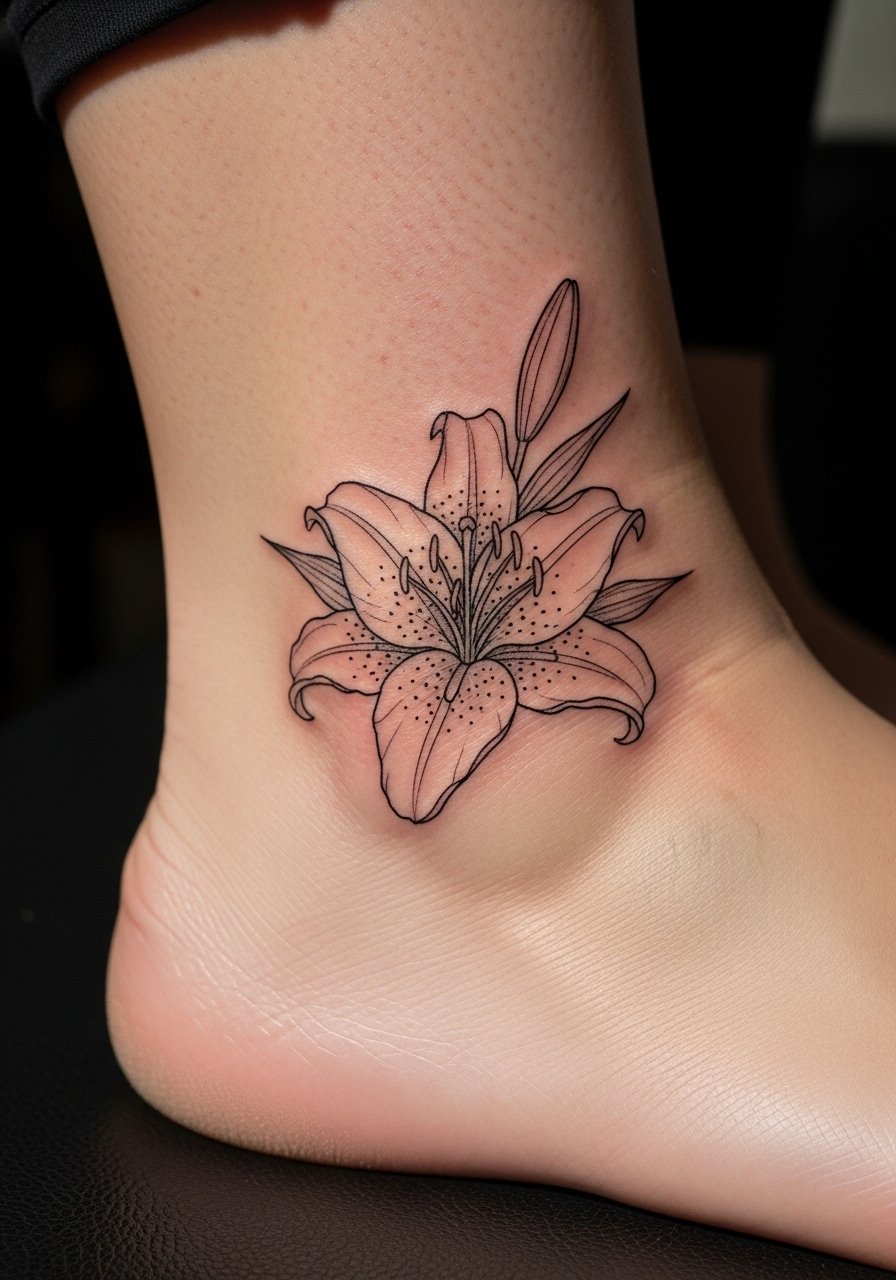
3. Ankle Stem With Tiny Buds
Style/Technique: Minimal stem with micro-buds
Pain Level: 4/10
Session Time: 20 to 45 minutes
Best For: Ankle, coverable with socks or shoes
An ankle placement looks casual and feminine. Tiny buds help the composition without crowding the limited canvas. Use a no-suds gentle wash during the first two weeks and a light seal with unscented antibacterial soap for cleansing. One detail many artists stress is avoiding heavy line density near bone because ink migrates more there. Budget friendly and quick to heal, this is a good first fine-line floral.
Mistake to Avoid: Letting your shoe rub the fresh tattoo the first week, which causes scabbing and patchy lines.
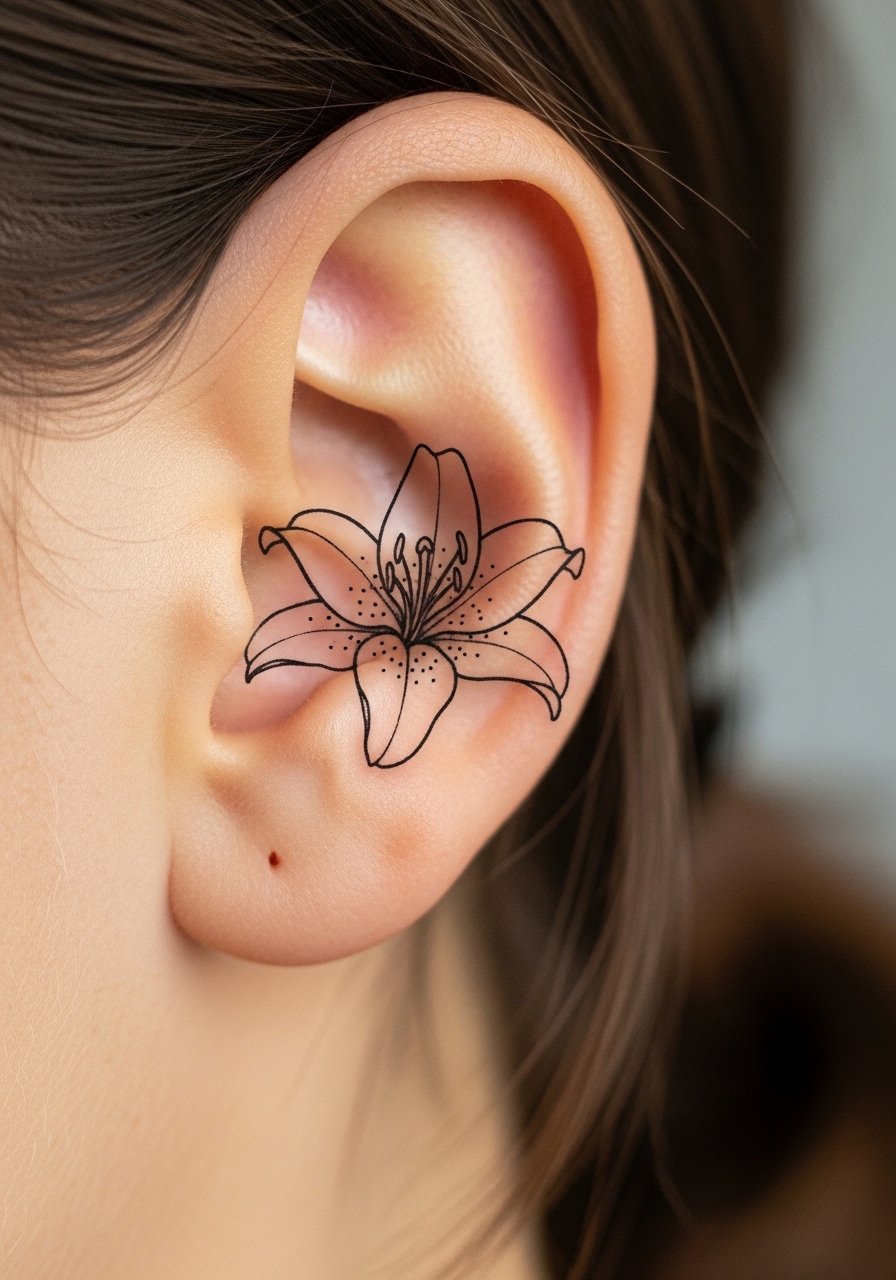
4. Behind-Ear Mini Lily
Style/Technique: Micro-placement, single blossom
Pain Level: 2/10
Session Time: 15 to 25 minutes
Best For: Behind ear, discreet and coverable
Behind the ear is a little secret spot. A single blossom with a short stem reads delicate and lasts because it avoids sun and friction. Ask for a healed-looking stencil placement so the bloom sits naturally with hairlines. For touch-ups, a small pot of scent-free aftercare ointment is handy to keep the area moist during the peel phase. This is low commitment and great if you are testing fine-line work.
Mistake to Avoid: Picking a design too large for the area, which looks cramped and ages poorly.
5. Rib Cage Single-Row Lily

Style/Technique: Elongated composition, single-row blooms
Pain Level: 6/10
Session Time: 1 to 2 hours
Best For: Rib cage, medium to long torso
A rib-side lily reads elegant and elongates the torso. This spot hurts more but the space allows for a graceful stem with alternating blossoms. Because ribs move, artists often use slightly heavier liners for longevity, like a 5RL for contour and a 3RL for petal detail. Plan for more aftercare and consider a light compression wrap while sleeping. If you want a gentler session, split it into two shorter sittings. A lightweight breathable bandage like silicone healing sheets helps the first 48 hours.
Mistake to Avoid: Choosing tiny petals that will fade into the natural stretch lines during healing.
6. Micro Realism Tiger Lily Head
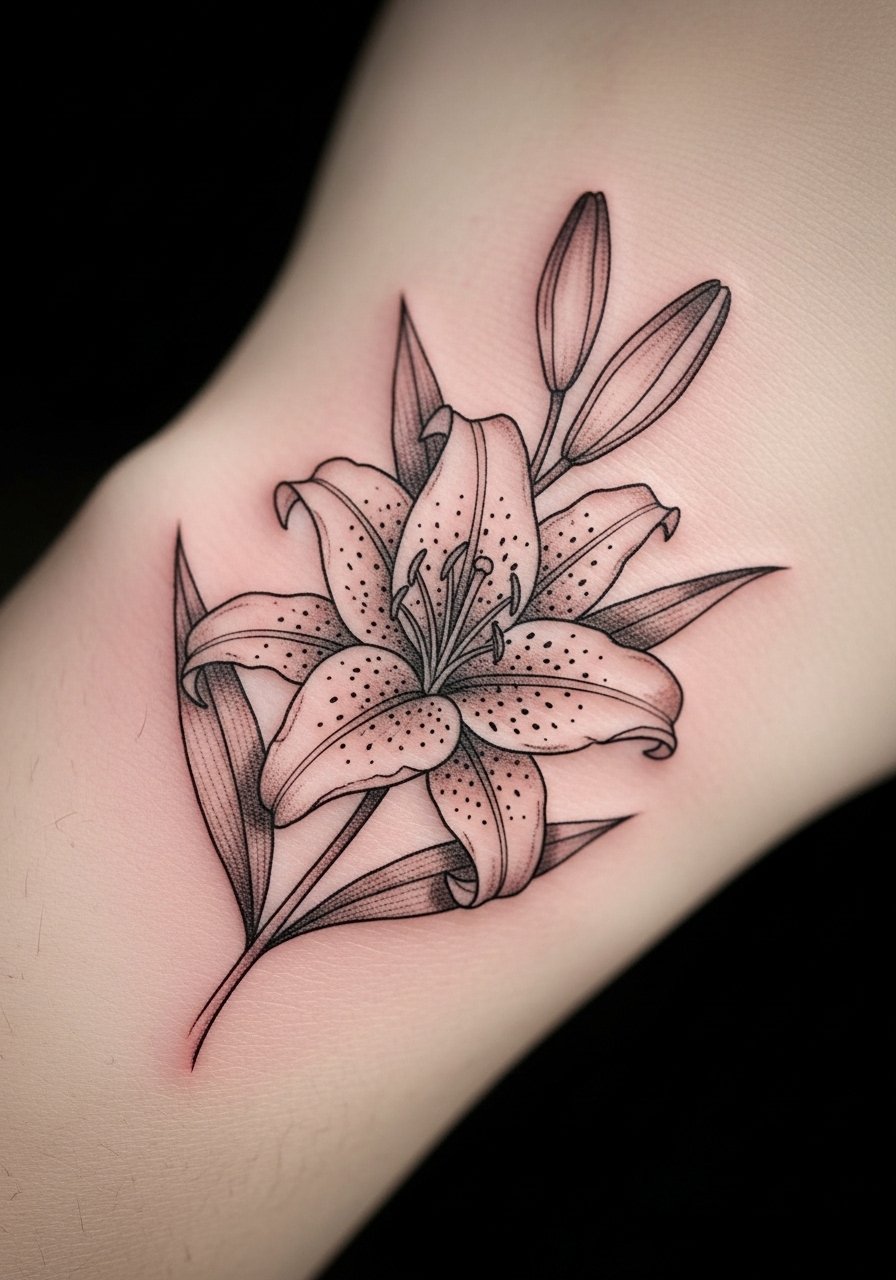
Style/Technique: Micro realism with faint stippling
Pain Level: 5/10
Session Time: 45 to 90 minutes
Best For: Hand side, anyone wanting detailed small realism
Micro realism tightens fine lines with soft stippling to imply texture without heavy shading. It ages differently because hands see more sun and wash cycles. Ask for UV-sparing placement on the hand side if possible and plan touch-ups. A small tub of broad-spectrum SPF lip balm for tattoos can double as a gentle daily sun blocker when healed. This look creates a tiny realistic bloom that reads like a photograph at close range.
Mistake to Avoid: Loading the design with fine dots that will turn into uneven gray in the first year.
7. Negative Space Outline Lily
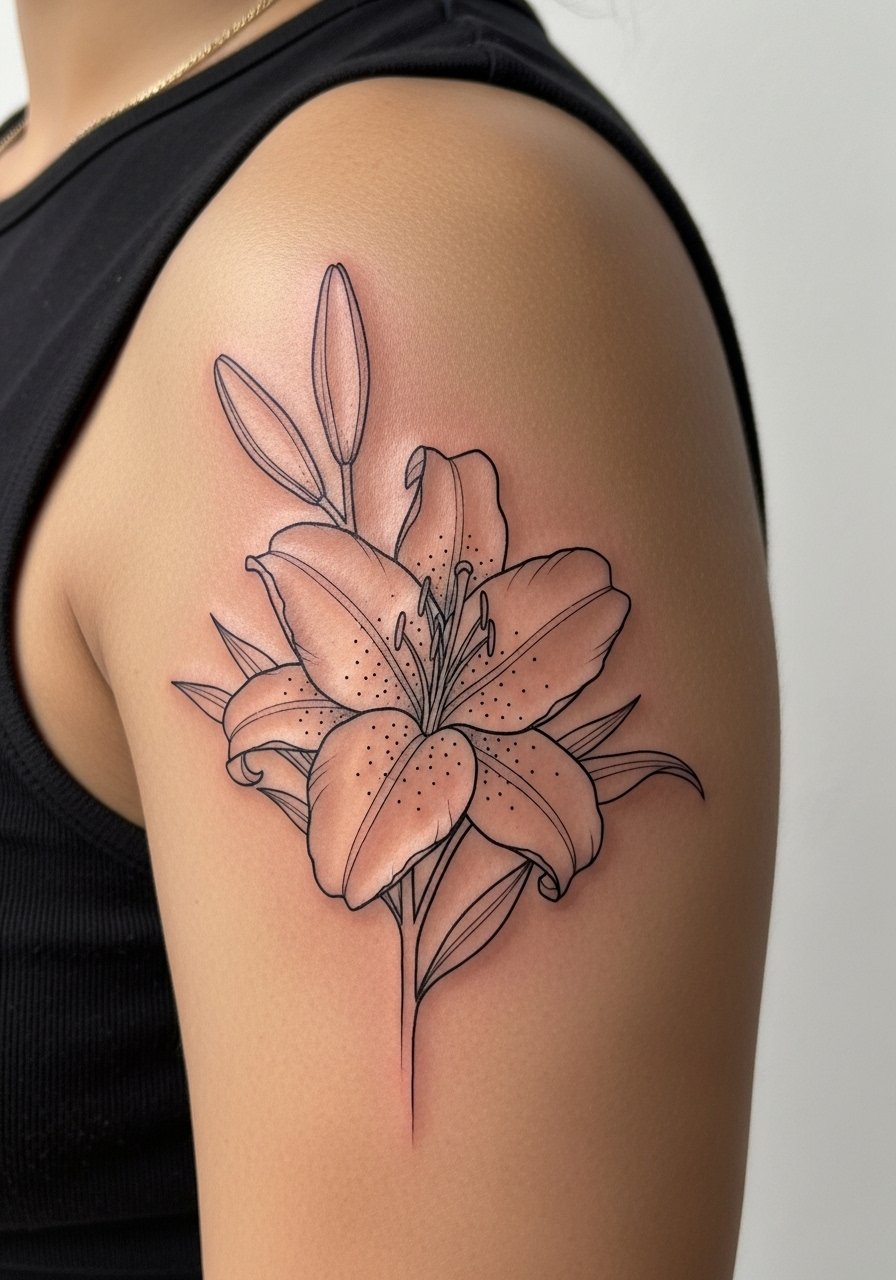
Style/Technique: Outline with negative-space highlights
Pain Level: 3/10
Session Time: 30 to 60 minutes
Best For: Upper arm, works across skin tones
Negative-space outlines rely on surrounding line work and the skin as the fill. This is clever for fine-line lilies because the interior stays clean, reducing ink migration. It creates a light, airy feeling and suits anyone who wants a modern take on florals. For healing, avoid thick creams that can clog tiny lines; a thin layer of unscented healing lotion is enough. This option is low impact and easy to conceal under a short sleeve.
Mistake to Avoid: Asking for interior touch shading, which defeats the negative-space effect.
Before we move on to the rest, here are the products I reach for when I plan or care for thin-line work.
Fine-Line Tattoo Essentials
Needles & Inks:
- Round liner needle sets (~$10-20), for crisp single-pass lines
- Black sterile tattoo ink (~$12-30)
Aftercare & Healing:
- Fragrance-free aftercare balm (~$8-18)
- Unscented antibacterial soap (~$6-12)
- Tattoo barrier film (~$8-15)
Extras:
- Silicone healing sheets (~$10-25)
- Disposable razors for stencil area (~$6-12)
8. White-Ink Center Highlights
Style/Technique: Fine-line with white-ink pop
Pain Level: 4/10
Session Time: 30 to 60 minutes
Best For: Collarbone, chest, areas that can show highlights
A tiny touch of white ink in the center of petals makes a tiger lily read sunnier without heavy color. White ink fades differently, it can go translucent as it heals and with sun exposure, so keep it shielded. I ask for conservative white spots, not full white fills. Use a mineral sunscreen once healed to protect those highlights and consider a gentle mineral sunstick for daily wear. This technique lifts a purely black line piece into something that looks almost dimensional.
Mistake to Avoid: Expecting white ink to remain opaque forever without regular SPF protection.
9. Dotwork Halo Lily
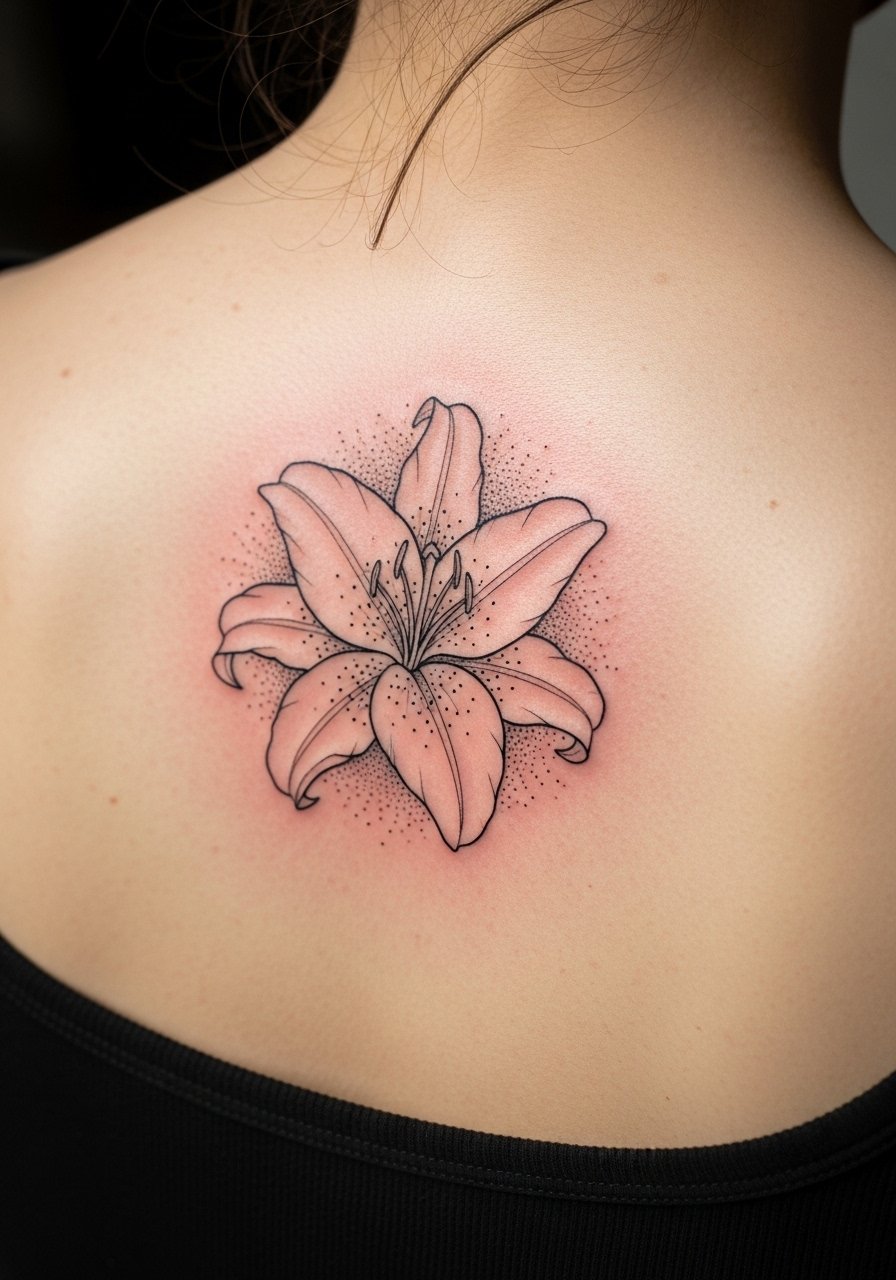
Style/Technique: Fine-line core with dotwork background
Pain Level: 4/10
Session Time: 45 to 90 minutes
Best For: Upper back, creates a small focal piece
Adding a soft dotwork halo behind a lily gives the design subtle depth without heavy shading. The dots are placed at decreasing density to avoid dark blocks that age poorly. Dotwork is forgiving on different skin textures and adds a vintage feel. Keep the healing area clean and use a breathable dressing if you sleep on your back. For dotwork care, a thin layer of unscented healing lotion twice a day is enough.
Mistake to Avoid: Asking for dense stippling near the center, which can become muddy as it settles.
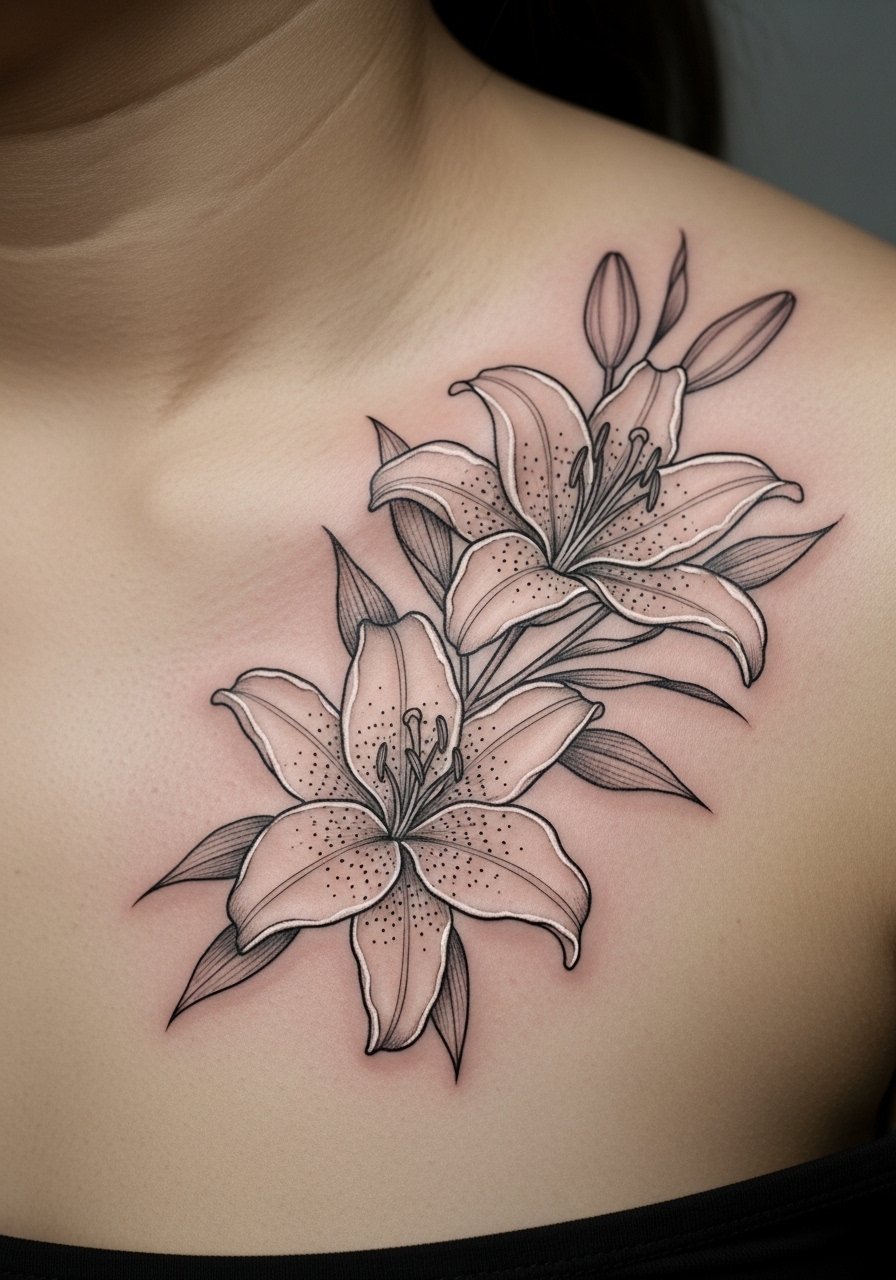
10. Collarbone Spray of Lilies
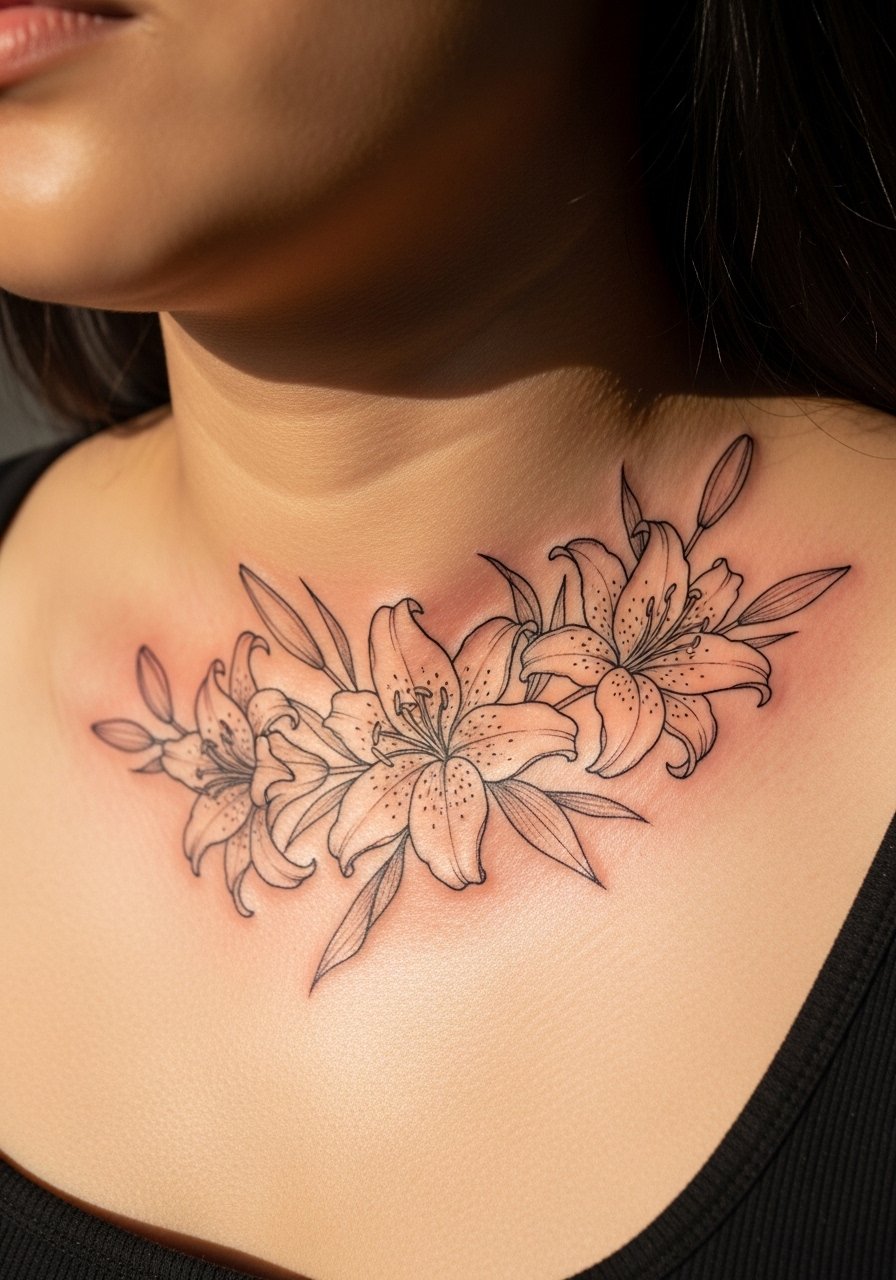
Style/Technique: Cluster arrangement, light connecting stems
Pain Level: 5/10
Session Time: 1 to 2 hours
Best For: Collarbone, works well with necklaces and clothing necklines
A spray that follows the collarbone frames the face and moves with clothes. Keep stems thin and allow open spaces so the piece does not read heavy when you wear low collars. This placement can be more visible at work, so pick a size that you can confidently show. If you want it to stay crisp, planning the session in cooler months reduces sweat during healing. Bring a lightweight silicone healing sheet to the appointment for overnight protection.
Mistake to Avoid: Crowding too many blooms into the collarbone curve and losing the airy effect.
11. Thigh Wrap With Negative Space
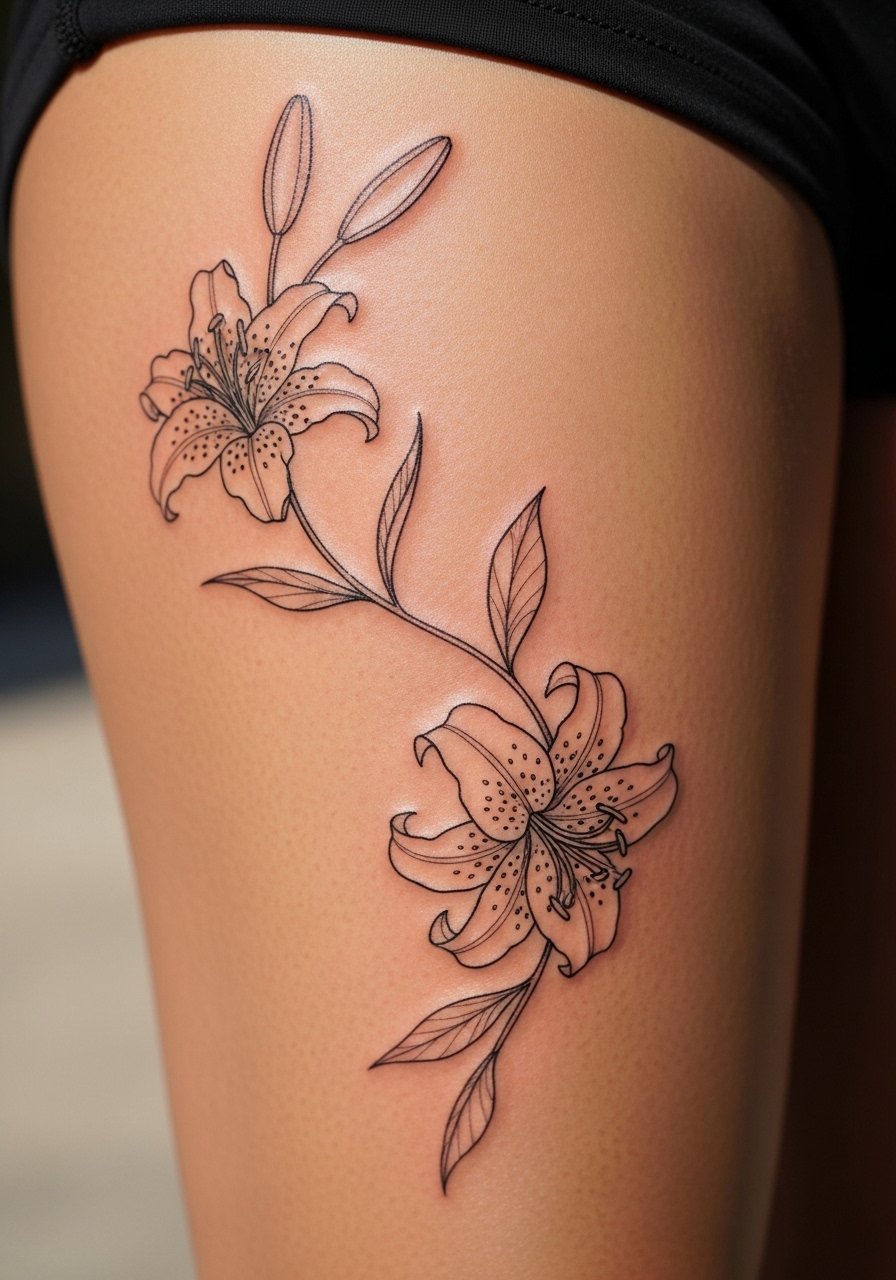
Style/Technique: Wrapped band with negative space accents
Pain Level: 4/10
Session Time: 45 to 90 minutes
Best For: Upper thigh, good for those who like coverable pieces
A thigh wrap gives scale without forcing heavy lines. Negative space petals keep the piece modern and reduce how much ink sits in one area, which helps fine-line longevity. The thigh tends to stretch less than the stomach, so the lines hold well. For healing, light exercise is fine but avoid tight waistbands or leggings that can rub the area for two weeks. A jar of fragrance-free aftercare balm is useful for night applications.
Mistake to Avoid: Wearing tight clothing over a fresh thigh tattoo, which causes sticking and excess scabbing.
Fine-Line Aftercare Moves
Keep it light and consistent. Three thin applications of fragrance-free aftercare balm a day keeps fine lines from drying into thick scabs that pull ink out.
Grab silicone healing sheets for areas that might rub at night. They hold moisture evenly and reduce scab thickness without being greasy.
If you skip sun protection, lines will blur faster. A small dab of mineral sunstick on healed tattoos adds a daily barrier and takes two seconds.
Most artists prefer single-pass liners for fine work. Ask your artist about a 3RL or 5RL setup to avoid double-lining that makes hairline marks look thicker.
When a design references a cultural motif, ask about meaning and permission. For floral pieces like tiger lilies, check with your artist if a particular stylization borrows from a tradition that should be acknowledged or avoided.
