
Why do the salon photos always look like they were shot with a soft filter while my own mani snaps back at me in fluorescent light? I kept blaming my polish until I learned small technique choices mattered more than the shade. Once I started thinking in thin layers, brief cure times, and a single focal nail, my summer manis stopped looking like failed attempts and started looking like edited photos in person.
These ideas are not all high-maintenance or gel-only. They are eleven realistic summer looks that work on short, medium, and long nails, with notes for natural polish, gel, and acrylic. Expect easy at-home options, a few salon-only finishes, and clear trade-offs on wear time versus removal. A tech who works at a salon downtown showed me a faster cure routine I adapted for home gels, and most looks list a budget product alternative.
1. Sheer Sunrise Ombre
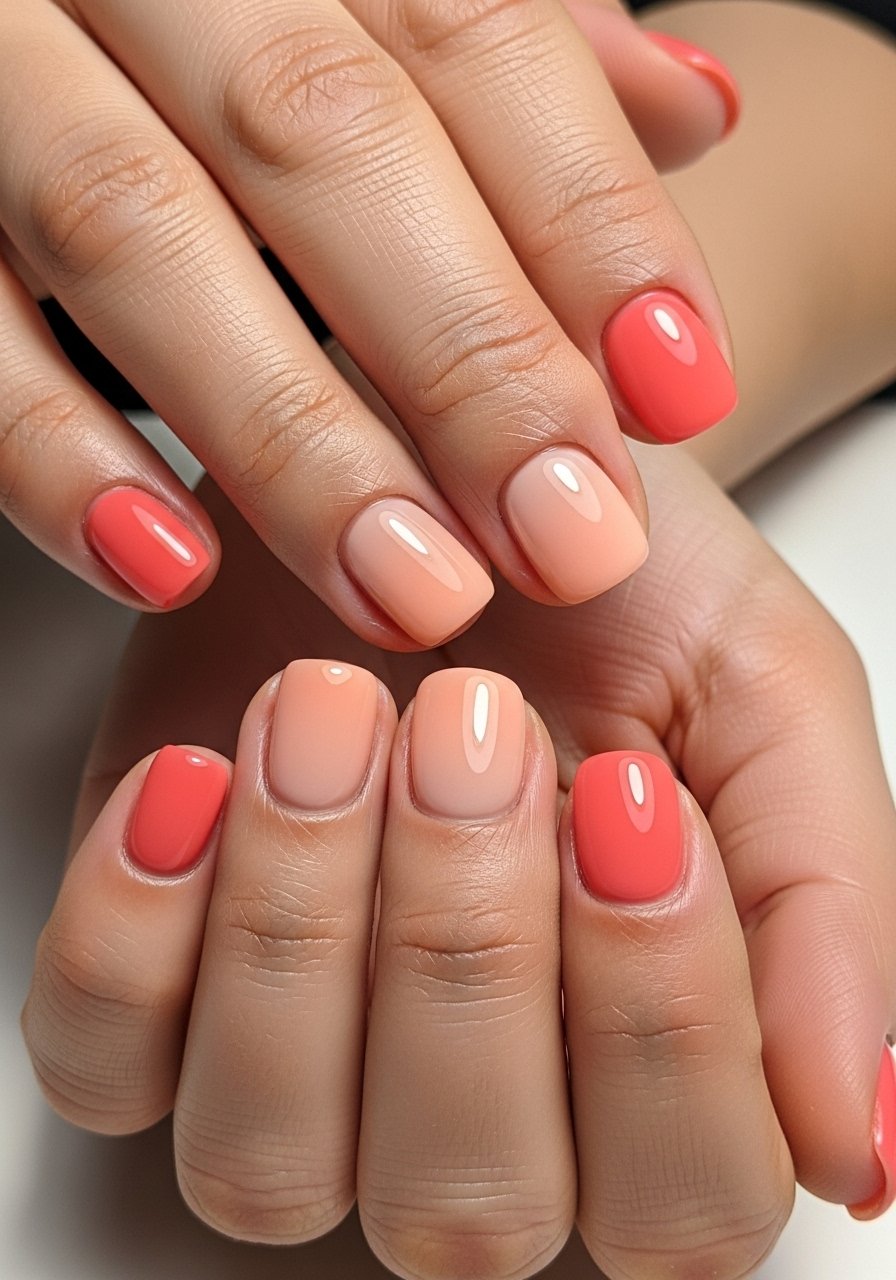
Style/Vibe: Soft ombre gradient
Best For: Short to medium nails / daytime events
Skill: Beginner
The trick with a wearable ombre is sheer layers, not a single heavy gradient. I sponge two sheer coats of peach then blend a coral tip with a 70/30 thinner-to-paint ratio, curing 30 seconds between flashes for gel or letting each thin coat dry fully for polish. The result reads warm and sunlit rather than blocky. Works great on short nails because the color shift is small and flattering. Use a peel-off latex barrier if you try sponging at home, and finish with a glossy top coat to smooth texture.
Mistake to Avoid: Applying one thick coat to force the gradient instead of building multiple thin layers.
2. Micro French With Confetti Tip

Style/Vibe: Minimal with a playful edge
Best For: Medium nails / weekend plans
Skill: Intermediate
Micro French keeps the classic but tiny, and adding confetti to the free edge modernizes it. Paint the thin smile line with a steady hand or a striping brush, then dab sparse iridescent flakes just on the edge using a toothpick, seal with two thin top coats. For gel, cure for 45 seconds per layer. It reads clean in photos and fun in daylight. Try a thin striping brush for the line and iridescent nail flakes for the tips.
Mistake to Avoid: Loading the brush with too much product, which creates a thick, uneven smile line.
3. Matte Jelly Fruits
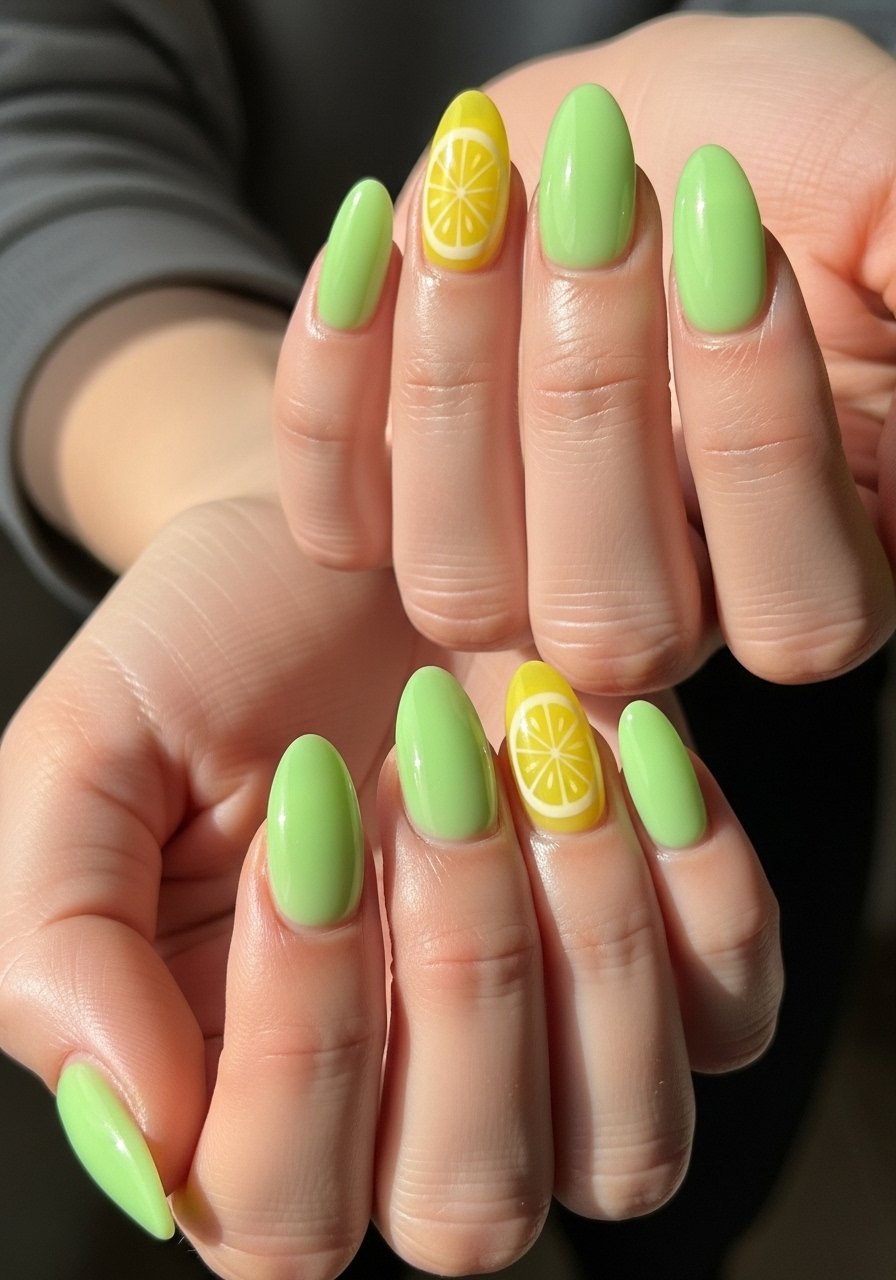
Style/Vibe: Soft translucent color
Best For: Long nails / photo-friendly looks
Skill: Intermediate
Jelly polish is the summer answer when you want color that breathes. Build three thin jelly coats for depth, curing or drying between each. Finish with a matte top coat to keep the milky, soft look instead of a high-shine candy finish. The translucency makes nails look like layered glass in sunlight. Use a sheer jelly polish and a matte top coat. If you have short nails, opt for a single tonal jelly and skip the matte for more length illusion.
Mistake to Avoid: Painting one heavy jelly coat, which reads streaky and opaque instead of softly layered.
4. Tiny Tropical Decal Accent
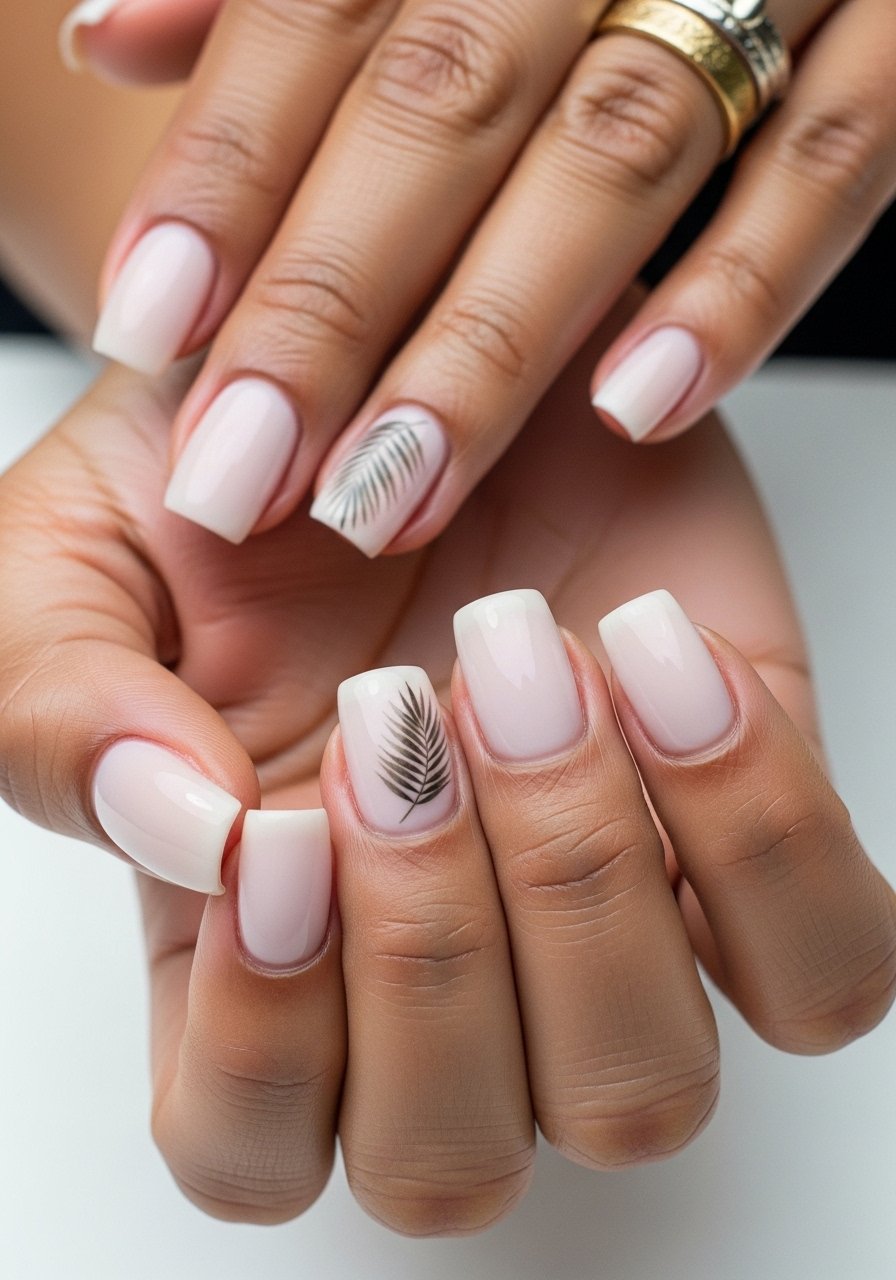
Style/Vibe: Subtle tropical accent
Best For: Short nails / low-effort statement
Skill: Beginner
One accent nail with a small decal gives a summer vibe without the work of full-scale art. Paint a neutral base, apply the decal flat and press the edges, then seal with two thin top coats. I learned to trim water-slide decals down to 2 to 3 mm margins so they sit flush and do not peel on the side. Try water-slide nail decals and a thin clear top coat.
Mistake to Avoid: Placing decals over a sticky uncured layer, which traps bubbles and lifts the decal.
5. Salt-and-Sand Texture
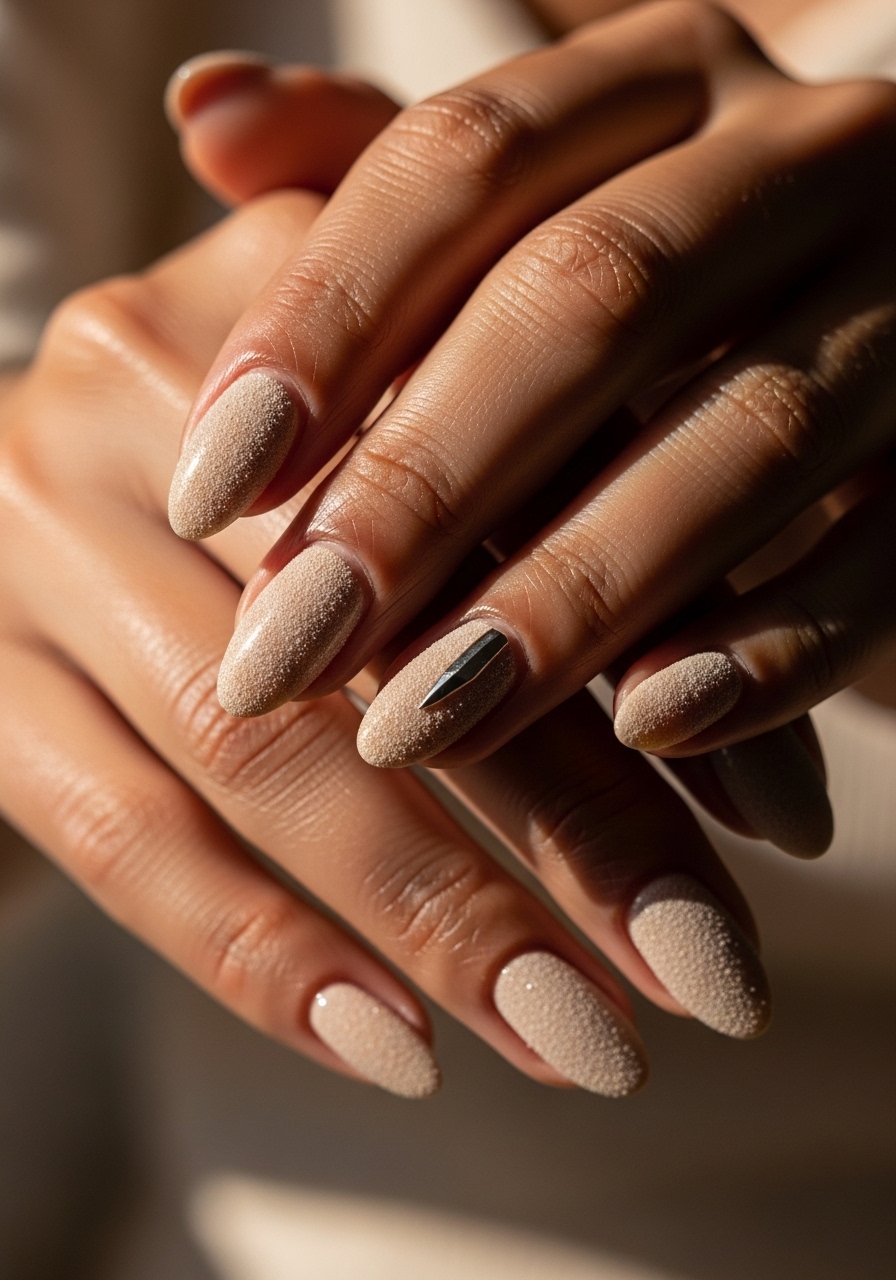
Style/Vibe: Beach-texture finish
Best For: Medium nails / tactile looks
Skill: Intermediate
Texture finishes read like sand under sunlight without being glitter bombs. Apply a grainy texture polish in two thin coats and press a small silver shard into one nail before the final tacky layer cures. A little top coat on the shard only keeps the rest matte. Use textured nail polish and nail art shards. Build texture in controlled layers so it does not feel bulky.
Mistake to Avoid: Over-applying texture polish, which causes uneven drying and a heavy, chip-prone surface.
6. Negative Space Crescent
Style/Vibe: Clean modern negative space
Best For: Medium to long nails / minimalist lovers
Skill: Intermediate
Negative space is a polished way to keep nails cool in summer. Paint a sheer nude base, then use a small circular guide to paint the crescent in a contrasting color, leaving the cuticle area bare. Two thin coats on the color and a 30-second LED cure make this long wearing. The negative space keeps the look fresh and breathable. Try a sheer nude polish and a set of nail guides.
Mistake to Avoid: Painting the crescent freehand without a guide, which results in uneven shapes.
7. Iridescent Foil Moon
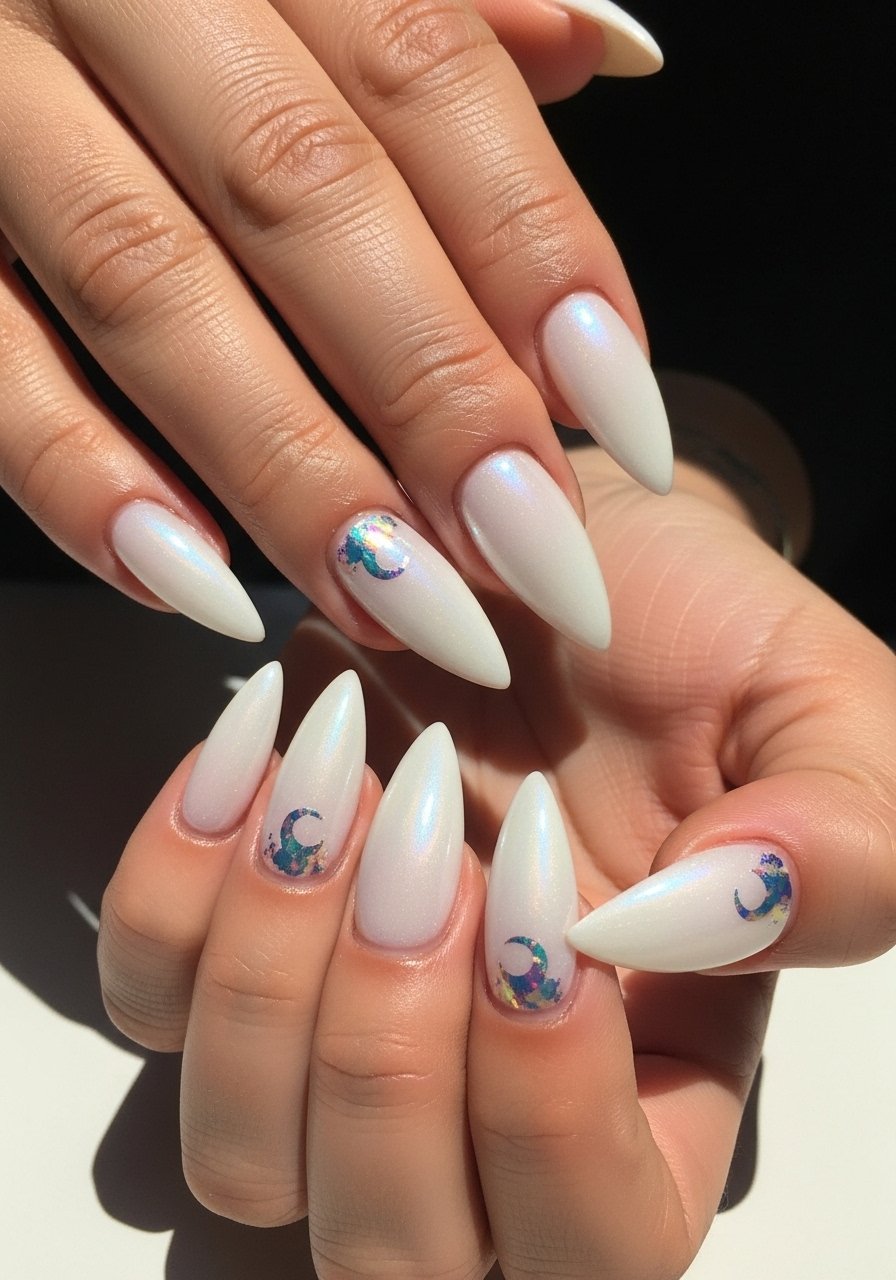
Style/Vibe: Pearlescent with foil detail
Best For: Long nails / evening and vacation
Skill: Advanced
Foil moons feel luxe but they are simple to do. Lay a sheer pearlescent base, dab foil adhesive in a small crescent at the cuticle, press iridescent foil, then seal with a thick top coat on the foil only, leaving the rest semi-sheer. A 60-second gel cure helps lock the foil. Use iridescent nail foil and a foil adhesive. This is a salon-level detail that photographs like a reflective wave.
Mistake to Avoid: Skipping a seal over the foil, which causes edges to lift within days.
If any of these looks have you reaching for tools, here are the products doing most of the work.
Summer Mani Essentials
Tools & Prep:
- Cuticle pusher (~$6-12). I sharpened my technique using this cheaper steel pusher.
- Glass nail file (~$8-15). Don’t skip a fine file for clean edges.
Base & Top Coats:
- Peel-off base coat (~$7-12). Good for short-lived, fun manis.
- Quick-dry top coat (~$6-14). Thin coats are everything here.
Polish & Art Supplies:
- Sheer jelly polish (~$8-14). Versatile summer staple.
- Nail guides and stickers (~$4-10). For clean lines every time.
8. Micro Metallic Stripe
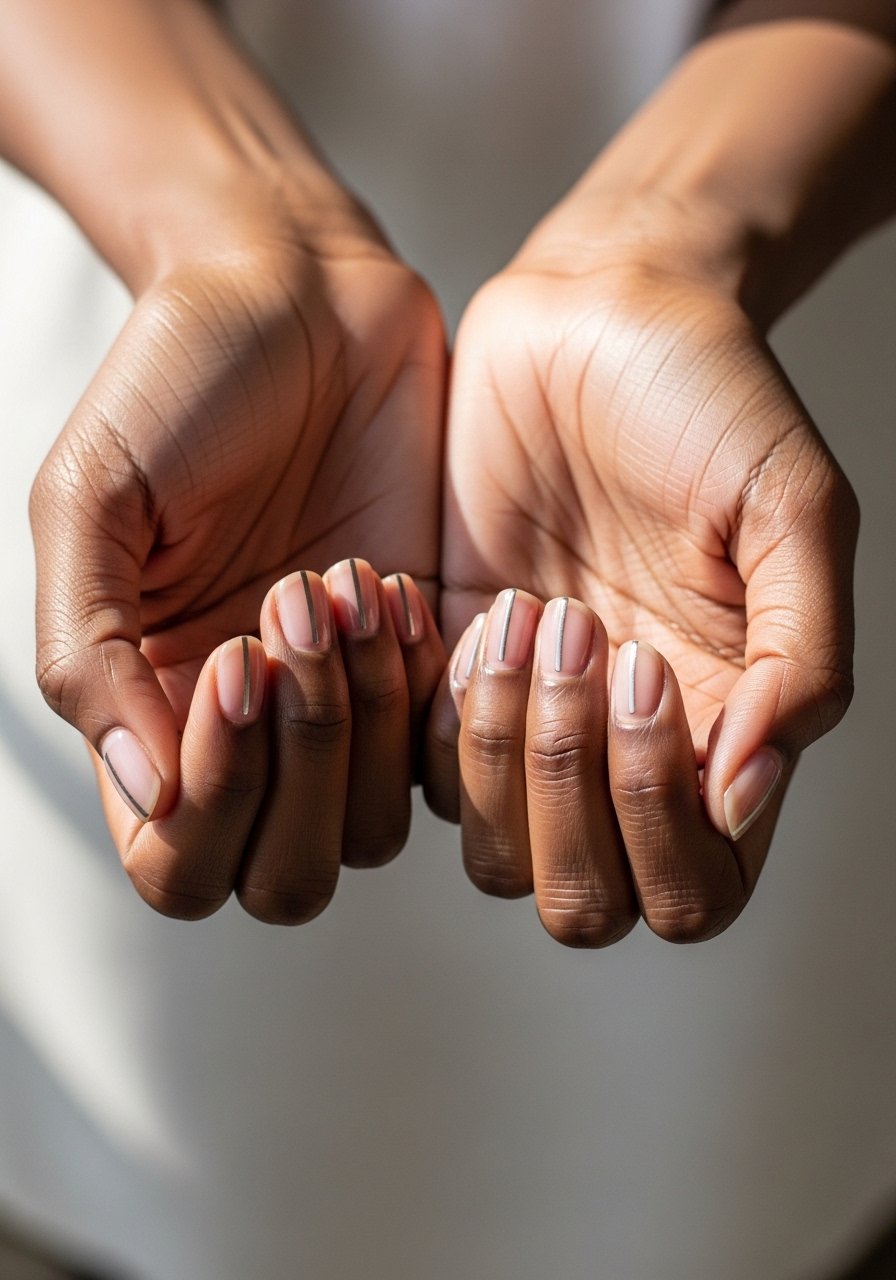
Style/Vibe: Minimal metallic line
Best For: Short nails / commute-friendly polish
Skill: Beginner
A single metallic stripe elongates the nail without bright colors. Paint two thin coats of a neutral base, then apply a single 1 to 2 mm metallic striping tape down the center, press edges, seal with top coat. If you use polish tape, place it under the striping line and remove before the color fully sets for a blended look. Metallic striping tape is a cheap way to look precise. This is low-skill and high-return for daily wear.
Mistake to Avoid: Using a thick striping tape that covers too much nail, which shortens the visual length.
9. Sun-Kissed Gradient With Micro Glitter
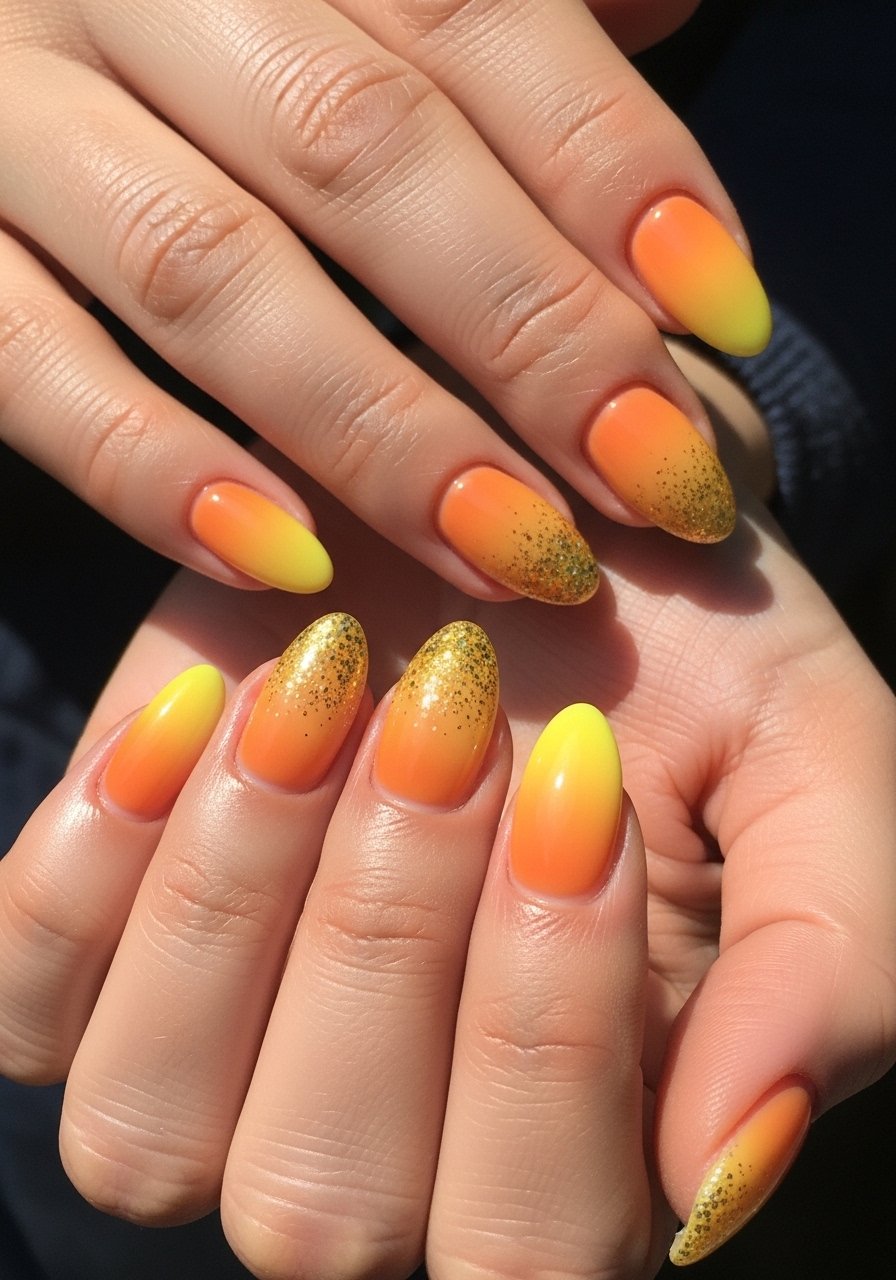
Style/Vibe: Warm gradient with sparkle
Best For: Medium nails / daytime to dusk
Skill: Intermediate
A tiny glitter fade at the tip gives a sunset effect without full glitter. Use two thin gradient coats of yellow and orange, then dab micro glitter on the very edge and melt it into the color with a fast-drying top coat. For gel, a 30-second flash before the glitter layer keeps placement in control. Try micro glitter and a sponge for gradients. Swap chunky glitter for micro flakes to keep the manicure wearable.
Mistake to Avoid: Overloading the sponge with glitter, which creates lumps and uneven shine.
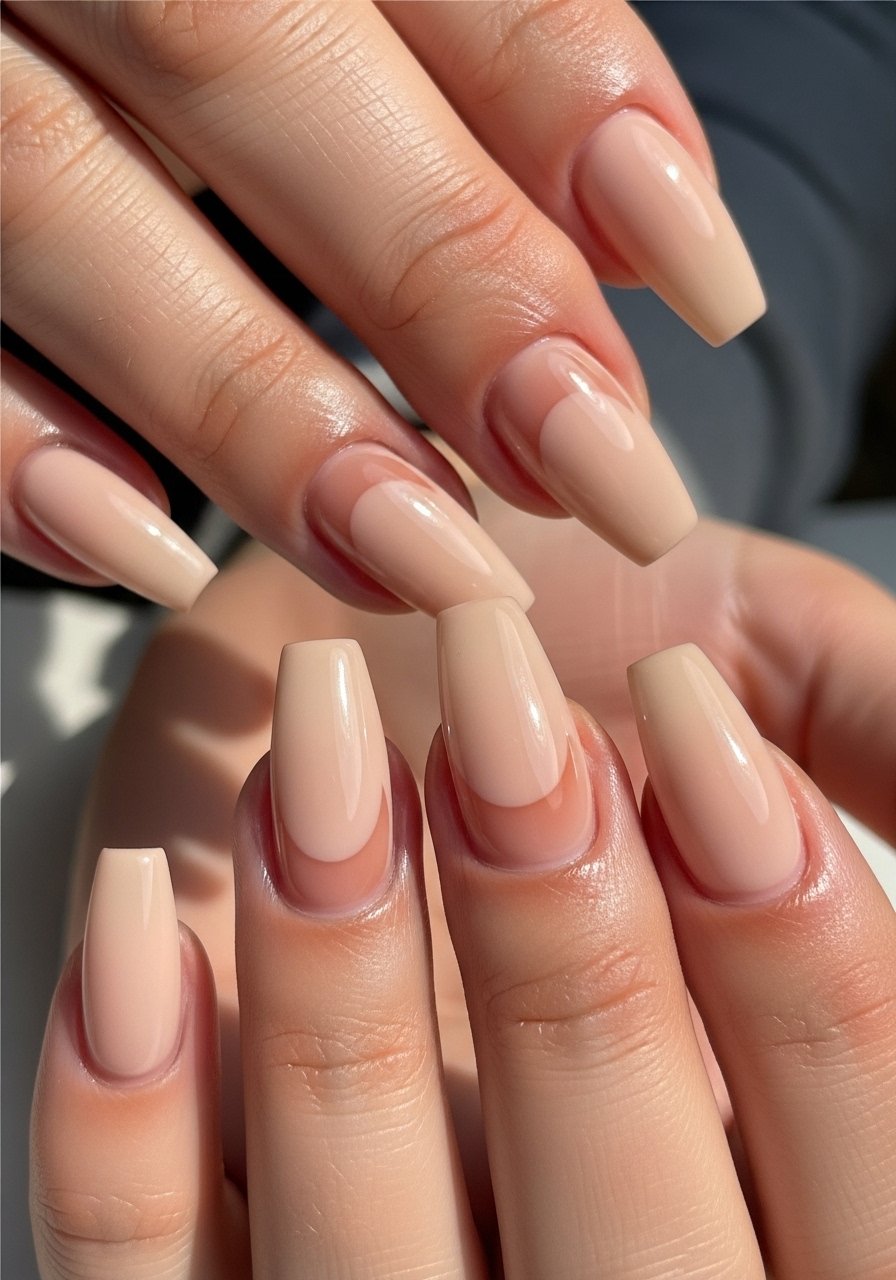
10. Glossy Nude With Tiny Rhinestone
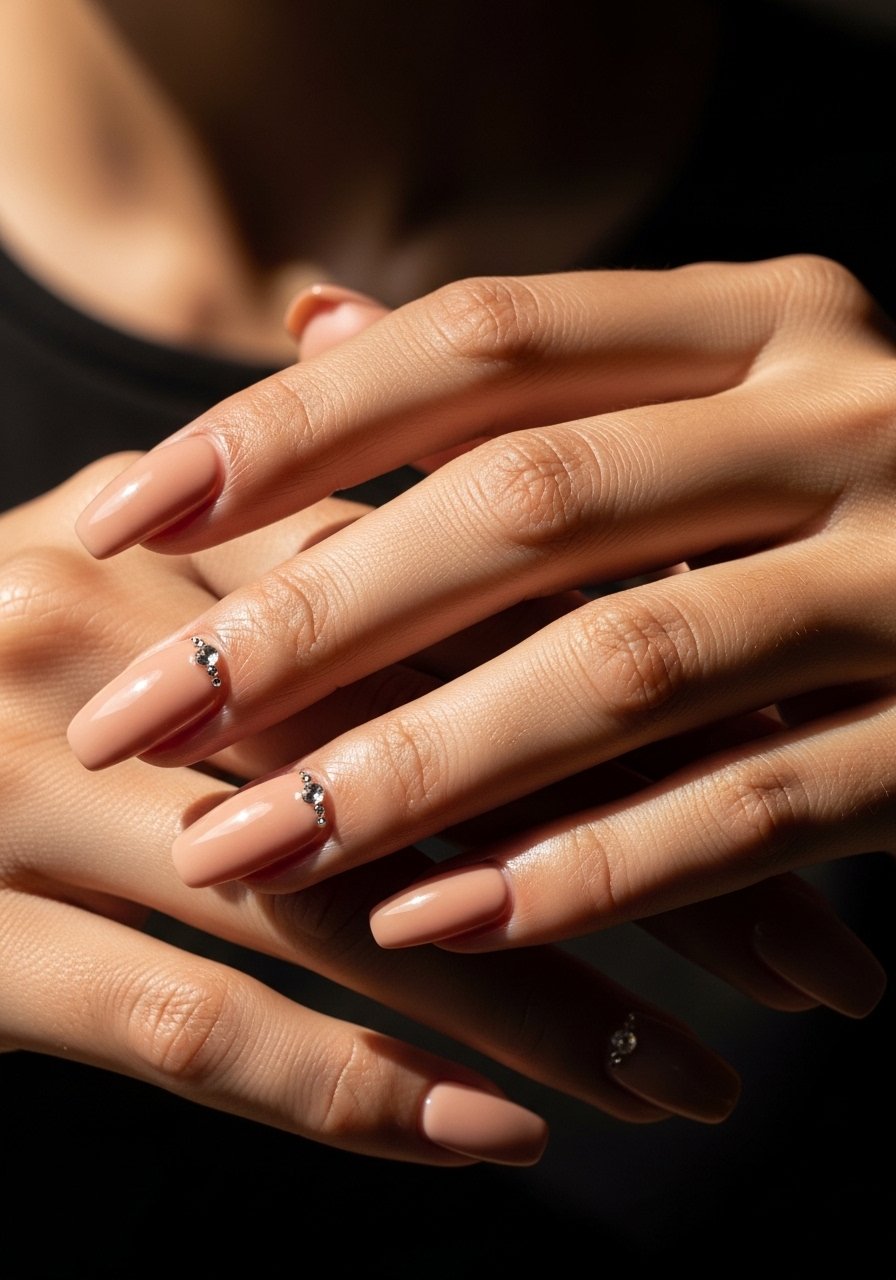
Style/Vibe: Polished nude with a hint of sparkle
Best For: Medium nails / classy summer evenings
Skill: Beginner
One rhinestone on a glossy nude nails reads chic and subtle. Paint a creamy nude base in two thin coats, place a single rhinestone with a dab of adhesive near the cuticle, and secure with a top coat around the stone only. Use a small rhinestone set and a nail glue pen. This look balances fuss and glam for an easy summer night statement.
Mistake to Avoid: Slathering top coat over the rhinestone, which dulls its sparkle and may loosen it.
11. Sheer Pearl Milk Finish
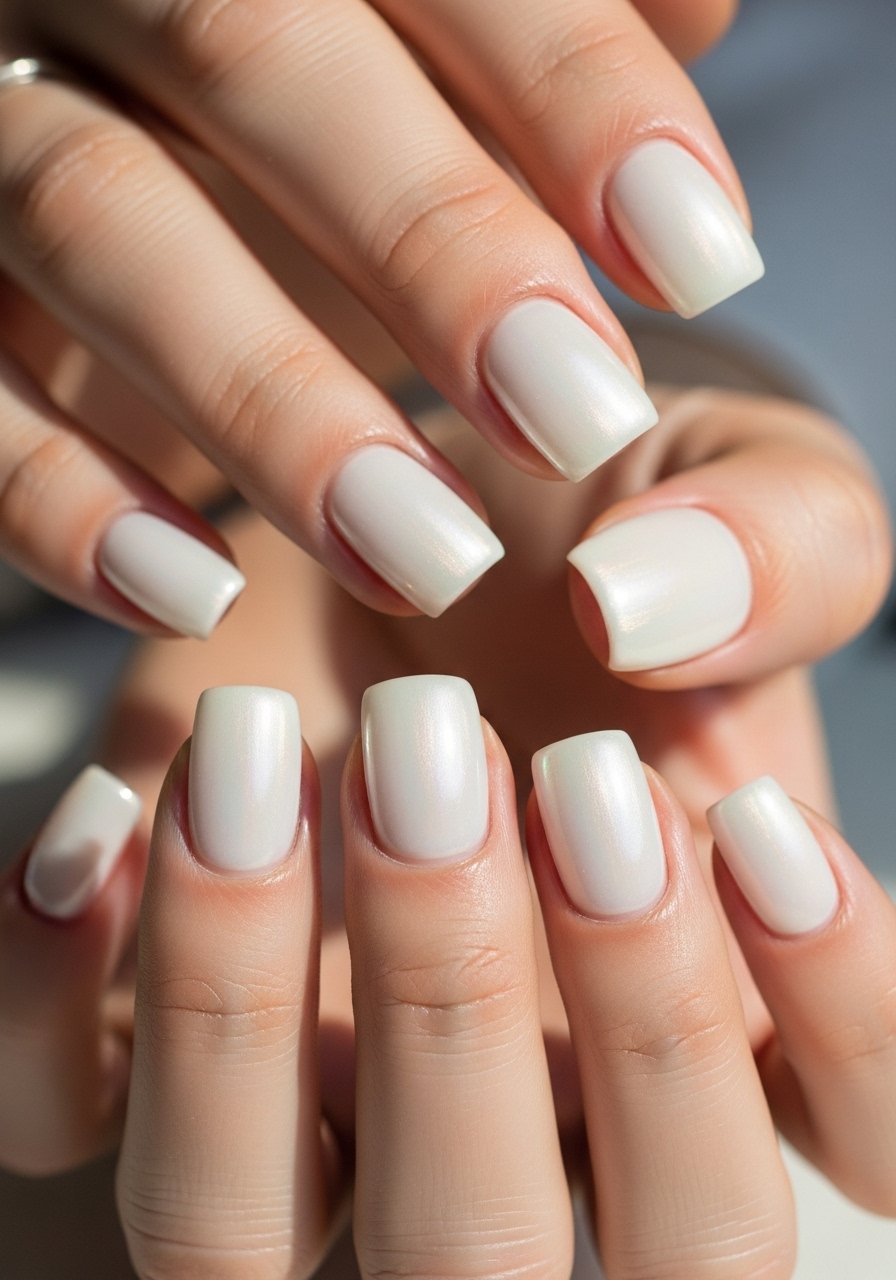
Style/Vibe: Sheer pearlescent milk
Best For: Short nails / everyday elegance
Skill: Beginner
The pearl milk finish reads modern and clean. Use a semi-sheer pearlescent polish in three thin, even coats, with full dry time between layers for polish or a 30-second gel flash. Keep the edges clean and buffer the free edge slightly to prevent snags. A thin final top coat on the free edge alone protects without washing out the sheen. Use pearlescent nail polish and a fine buffer.
Mistake to Avoid: Applying thick pearlescent coats that dry streaky and hide the soft shimmer.
Summer Mani Habits That Stick
Thin coats beat one thick coat every time. Three thin layers of a quick-dry top coat look smoother and last longer than one gloopy layer.
Seal the free edge. Regularly run your top coat across the nail tip and sides to prevent chips. I use a precision top coat brush when I travel.
Keep cuticles hydrated. Daily cuticle oil keeps polish from lifting at the base. A small bottle of cuticle oil pen fits in any bag.
Clean the nail surface before polish. Wiping with an alcohol pad removes oils. Alcohol pads cost under $10 and save a full removal and redo.
