
I kept booking dramatic long sets for weddings and then peeling half off in the parking lot before photos, because lengthy nails looked great on a feed but ruined bouquet shots and snagged my dress. After a few ruined sleeves and one near-tear down the aisle, I started treating short nails like an outfit detail, not an afterthought. The result felt cleaner in photos and I could actually dance.
These ideas are short, photo-ready manicures for wedding guests who want fuss-free polish that survives hugs and hors d oeuvre. Most looks are achievable with basic at-home skills or one salon visit, budget friendly or midrange. A tech who works at a salon downtown showed me the thin-coat rule and it changed how long my mani lasted. Expect quick cure tips, simple layering notes like two thin coats, and options that read elegant in photos without feeling fussy.
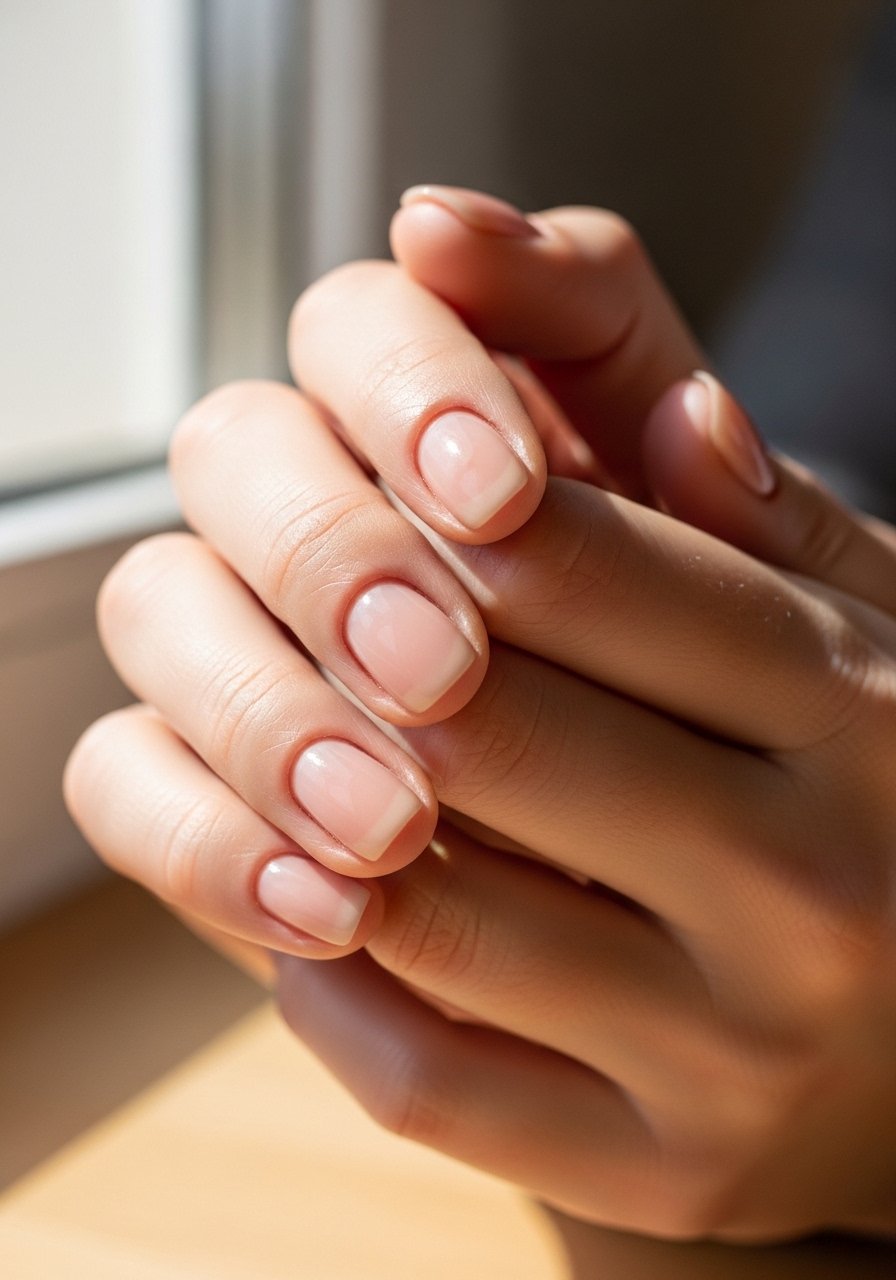
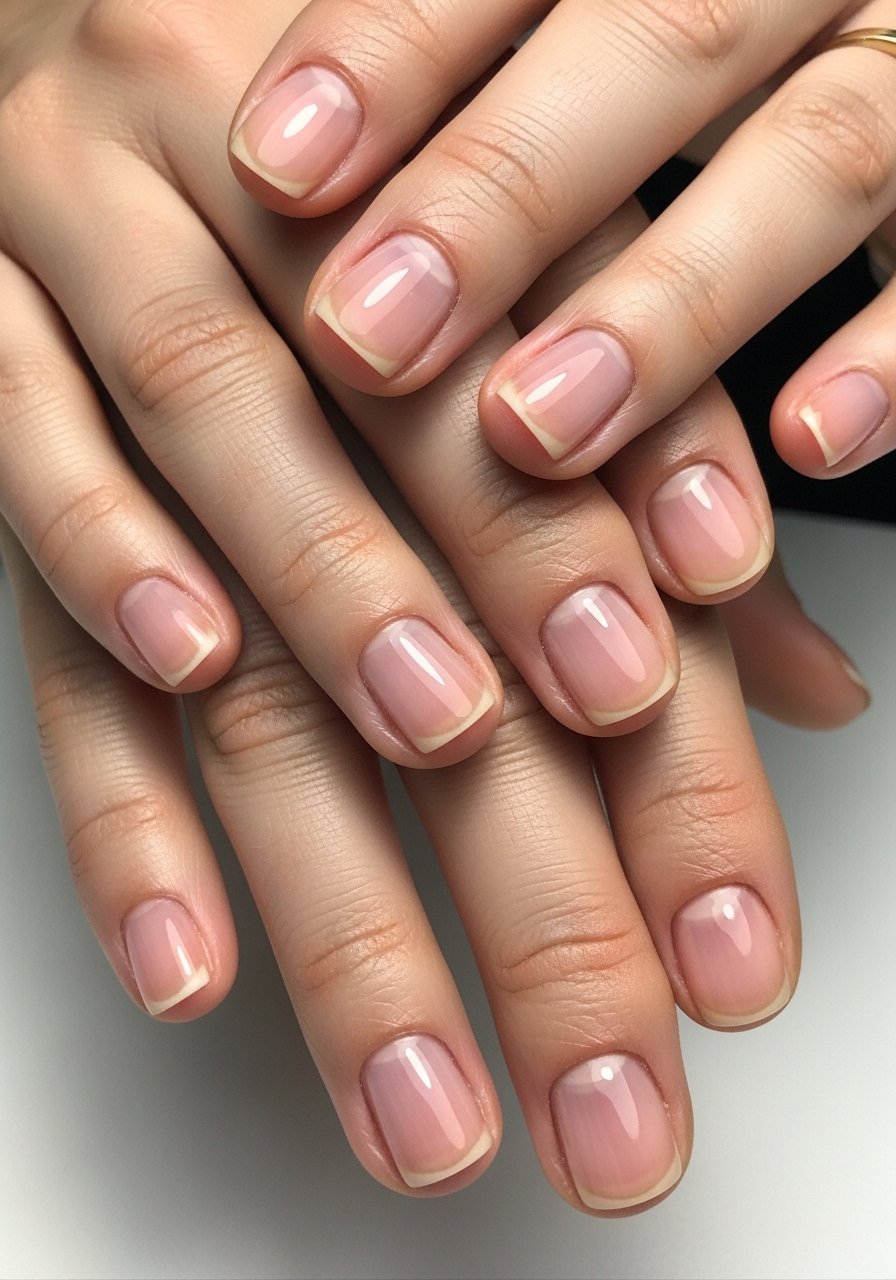
1. Soft Sheer Nude With Glossy Finish
Style/Vibe: Sheer neutral gloss
Best For: Short nails / daytime ceremonies
Skill: Beginner
A sheer nude polished to look like clean, healthy nails works in nearly every wedding photo. The trick that makes it read expensive is two thin coats of sheer color, each cured or dried fully, then a single glossy top coat wiped with a lint-free pad for shine without ridges. For at-home use, I like a fast-dry top coat, try quick-dry top coat in the middle of the paragraph. This finish reads natural next to florals and looks less staged than a crisp French when the bride's dress is ornate.
Mistake to Avoid: Applying one thick layer to speed things up, which causes bubbling and uneven shine.
2. Micro French With Soft White Tip

Style/Vibe: Micro French tip
Best For: Short nails / formal evening
Skill: Intermediate
A micro French tip lifts a short nail without exaggerating length. Paint a sheer beige base, let it dry 100 percent, then make tiny white tips that follow the free edge rounded shape. Use a detail brush or a white gel pen and cure for 30 seconds if using LED gel. I prefer a thin white line rather than a thick bar, it photographs cleaner and avoids that "fake extension" look. For a reliable pen, try nail art pen mid-paragraph. This suits those who want formal polish but not an attention-grabbing set.
Mistake to Avoid: Painting thick white tips that sit heavy and shorten the visual nail bed.
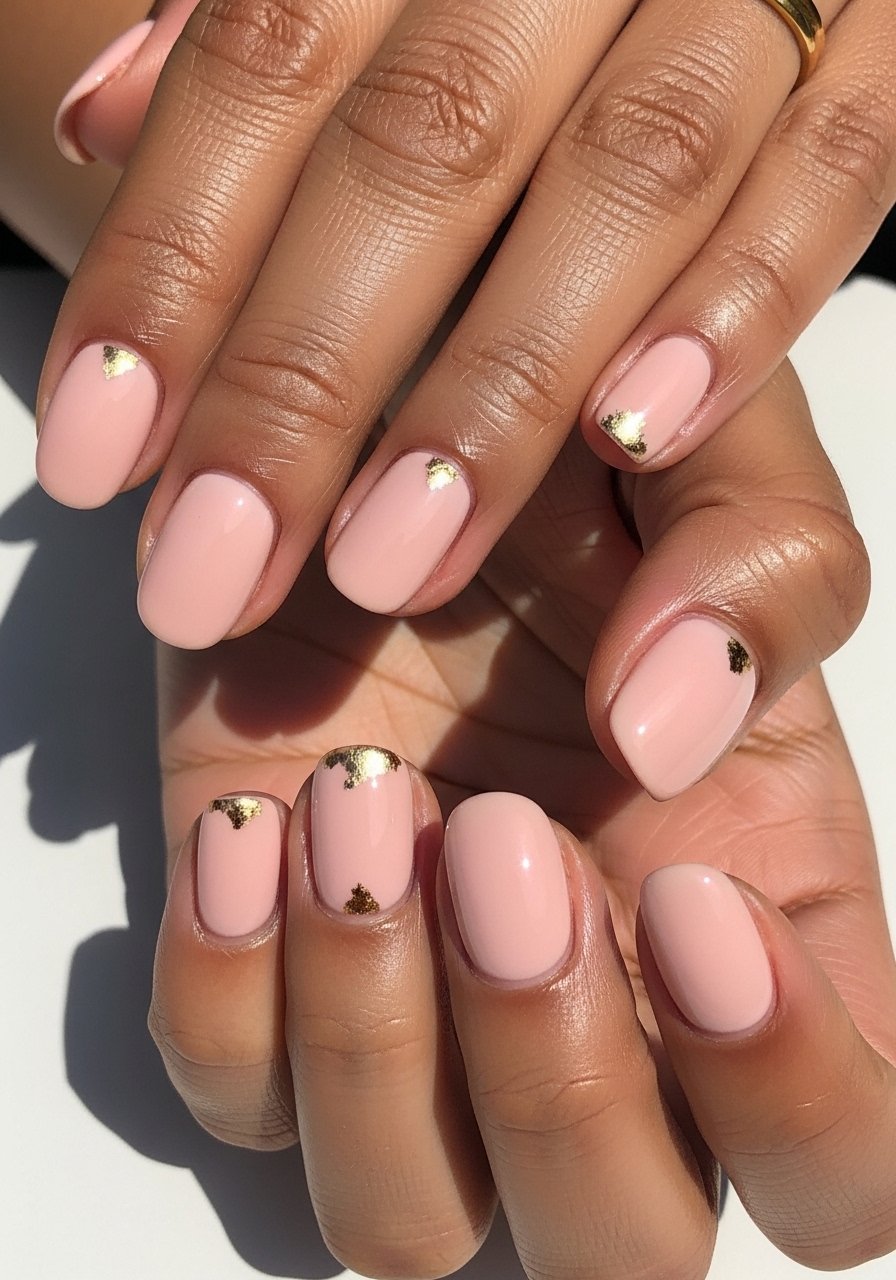
3. Blush Pink With Tiny Gold Accent
Style/Vibe: Blush with gold detail
Best For: Short nails / romantic outdoor weddings
Skill: Beginner
A soft blush base warms up photos and a single gold foil placed near the cuticle gives just enough sparkle without overpowering the look. Use two thin coats of color, press a small gold flake into tacky polish, then seal with a top coat. If you want a salon-grade look at home, a small pot of gold foil and a detail brush goes a long way. Pick up gold nail foil to try it. This choice reads intentional and pairs with rose-toned dresses.
Mistake to Avoid: Gluing the foil on top of a dry top coat so it lifts at the edges during dancing.
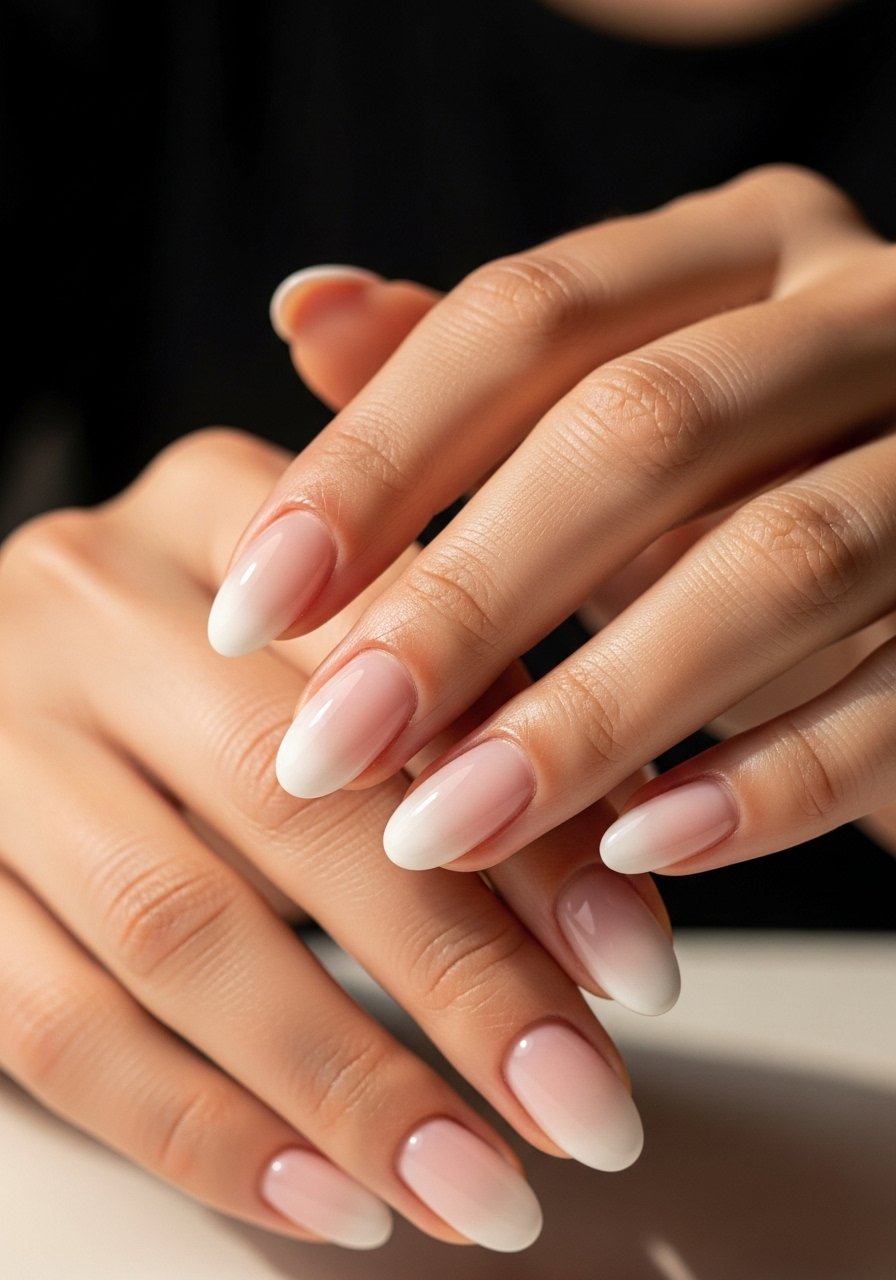
4. Sheer Milky Ombre For Short Tips
Style/Vibe: Milky ombre
Best For: Short-middle nails / photo-focused events
Skill: Intermediate
A milky ombre gives the illusion of a longer nail without extensions. Sponge two thin layers, starting with sheer pink near the cuticle and soft white at the tip, blending gently so there are no harsh lines. Two thin coats per color and a soft buff before polish make the fade smooth. For a portable sponge kit, try nail gradient sponge set. This technique is time efficient at the salon and surprisingly forgiving at home when you keep coats thin.
Mistake to Avoid: Overloading the sponge, which creates a cakey edge that shows up in photos.
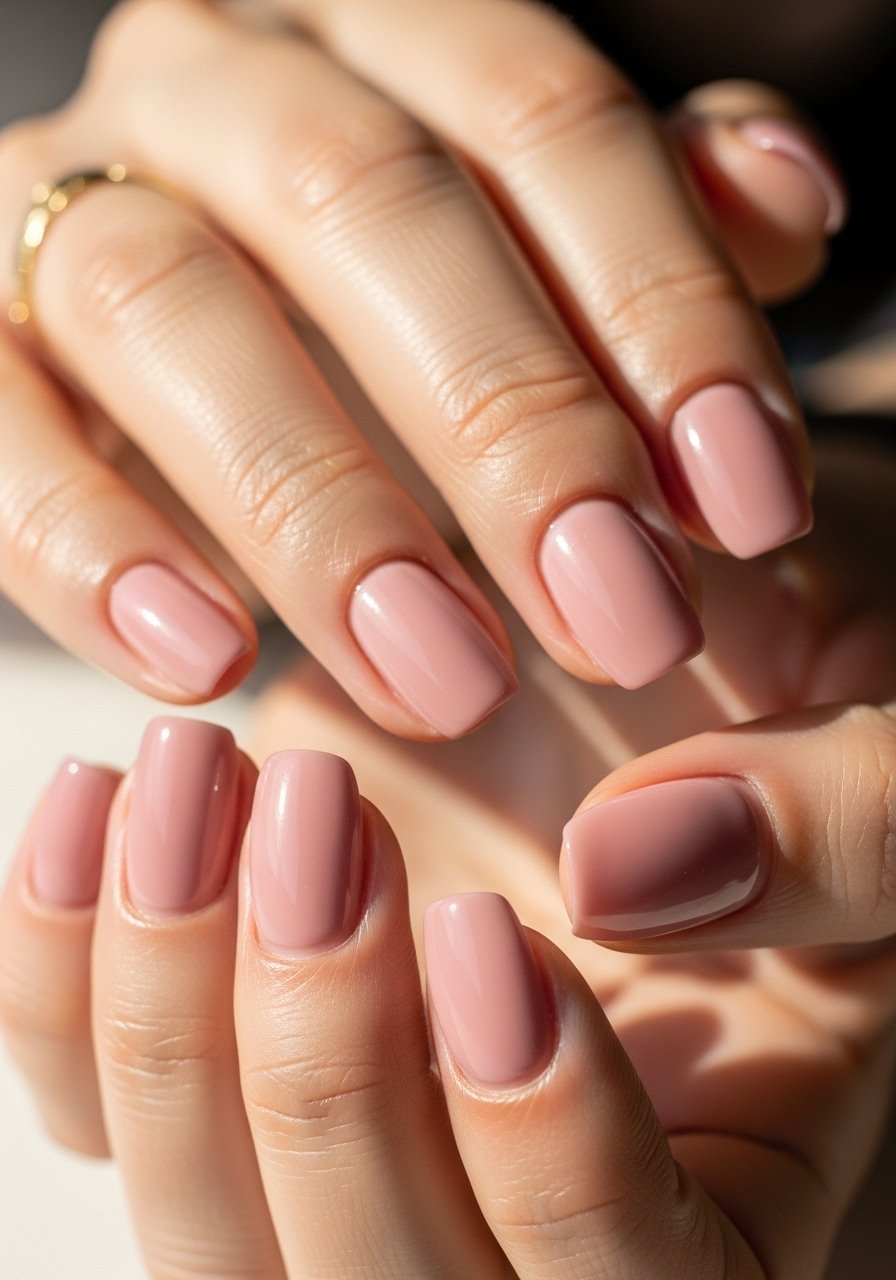
5. Matte Satin Rose For Timeless Photos
Style/Vibe: Matte satin rose
Best For: Short nails / vintage or botanical themes
Skill: Beginner
Matte satin finishes photograph with a soft, film-like quality that flatters skin tones. Apply two thin coats of pigmented dusty-rose polish, let it dry fully, then use a matte top coat in one pass. Matte hides tiny surface flaws but shows chips more readily, so carry a mini top coat for touch ups. I buy a travel-size matte top coat for my clutch. Matte works especially well with textured fabrics and daytime light.
Mistake to Avoid: Rubbing cuticles after applying matte, which creates shiny spots that ruin the finish.
6. Tiny Gem Cluster On One Accent Nail
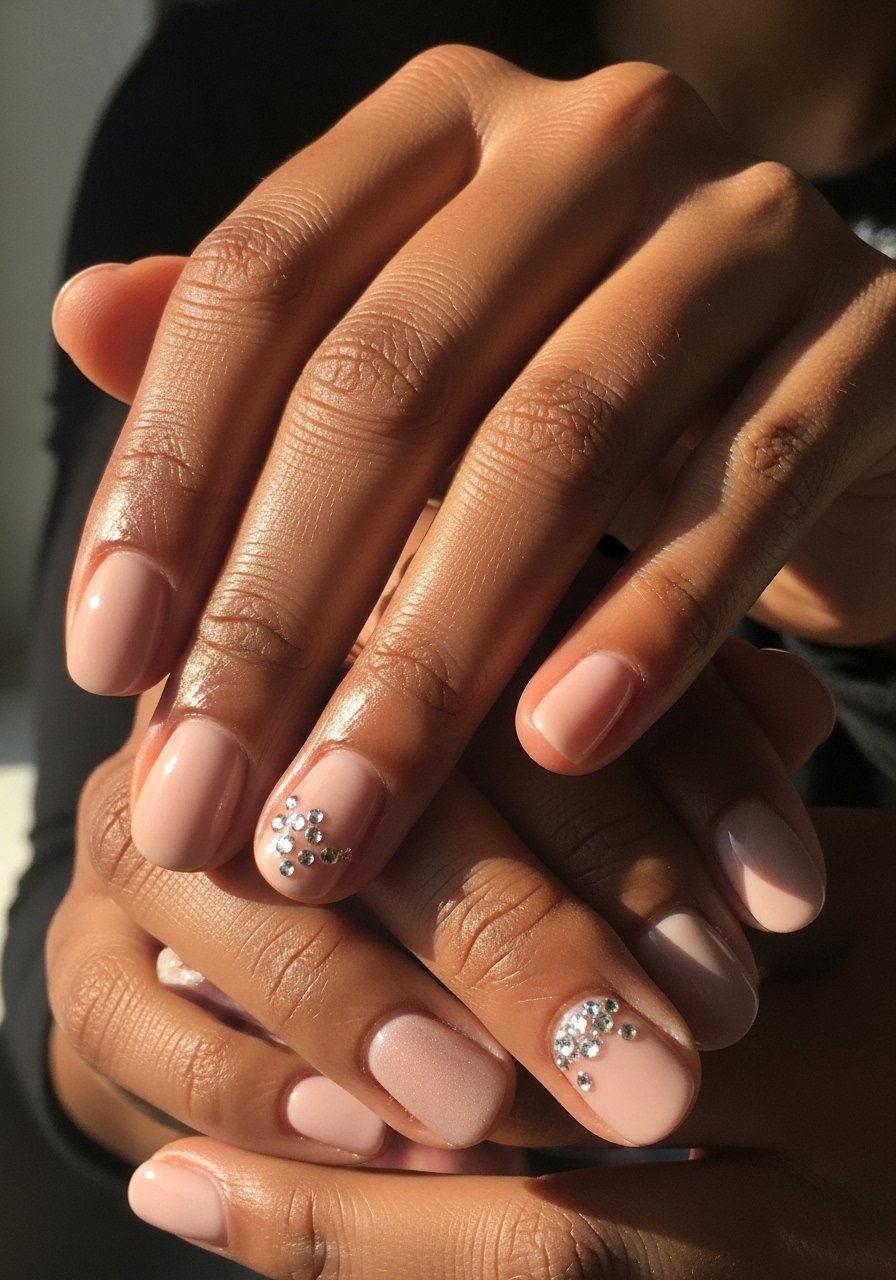
Style/Vibe: Accent gem cluster
Best For: Short nails / evening receptions
Skill: Intermediate
A single nail with a tiny cluster of crystals reads luxe without competing with accessories. Place a micro dot of nail glue or gel at the base or side of the nail and arrange the smallest gems with tweezers. Seal with a top coat or a second layer of gel to keep them from catching on lace. For beginners, a small crystal kit is handy, try tiny rhinestone nail kit. This keeps the rest of the set minimal and keeps photos focused.
Mistake to Avoid: Using large crystals that look like costume jewelry and snag on veils or sleeves.
7. Neutral Marble Accent For Subtle Texture
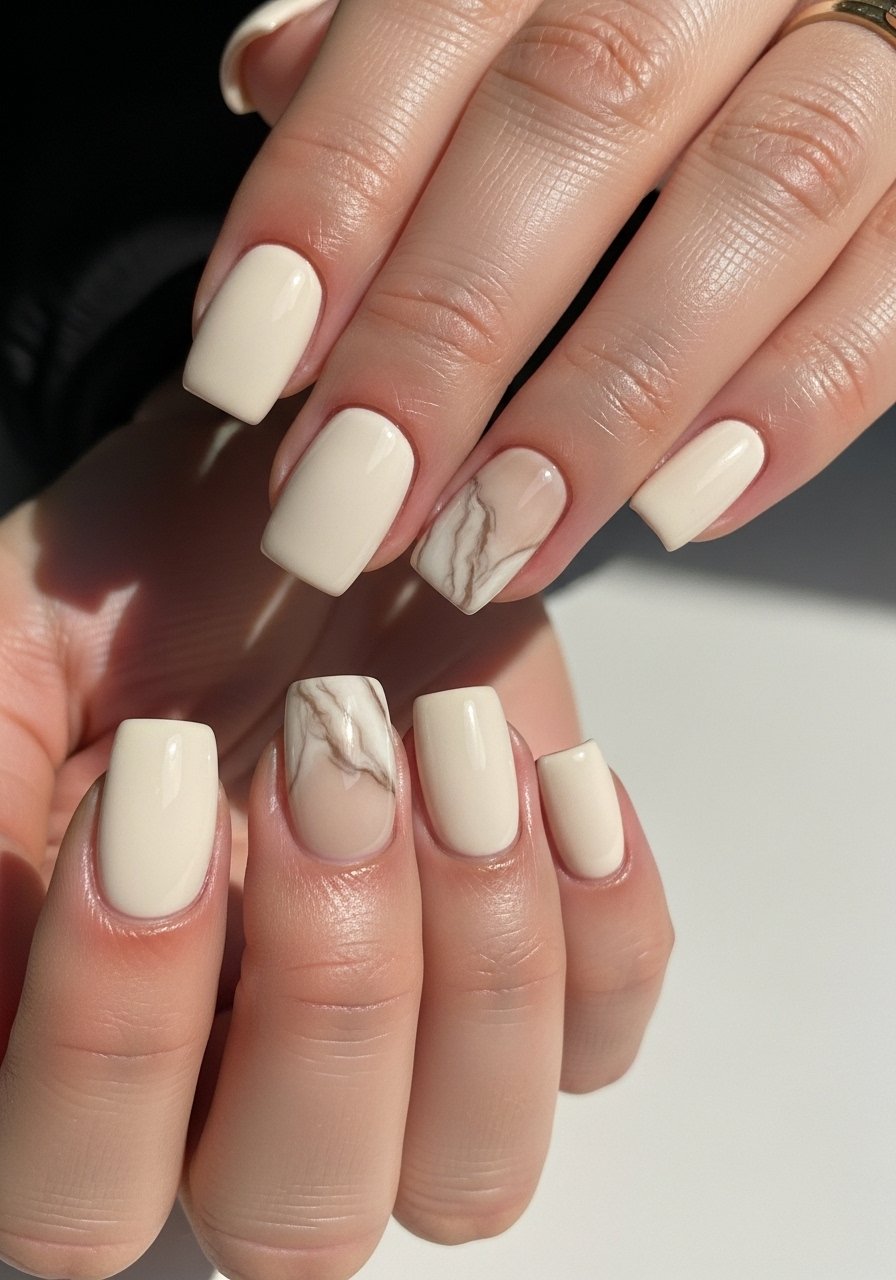
Style/Vibe: Neutral marble accent
Best For: Short nails / modern or minimalist weddings
Skill: Intermediate
A soft marble accent gives texture without heavy contrast. Swirl two thin drops of beige and cream into tacky polish with a fine tool, then smooth with a single flowing stroke to avoid harsh veins. Seal with a glossy top coat to keep the marble soft. For a reliable small brush, try nail detailing brush set placed toward the end of the paragraph. This look photographs like a subtle print rather than a painted mani.
Mistake to Avoid: Overworking the marble so it looks busy and reads as mess in photos.
If any of these ideas have you ready to actually try something, here are the essentials I keep reaching for when I do a quick wedding guest mani.
Short Guest Mani Essentials
Color & Base:
- Sheer nude polish (~$8-15). A reliable base that reads natural.
- Dusty rose polish (~$8-15). For matte or glossy options.
Tools & Detail:
- Detailing tools: Nail art pen (~$6-12). Useful for micro French and fine lines.
- Nail detailing brush set (~$7-14). For marble and accents.
Finish & Maintenance:
- Quick-dry top coat (~$8-12). Speeds up turnover between coats.
- Matte top coat (~$7-12). For satin looks.
- Tiny rhinestone nail kit (~$5-10). For one-nail sparkle.
On-The-Go:
- Mini top coat (~$4-8). Tucks in a clutch for emergency touch ups.
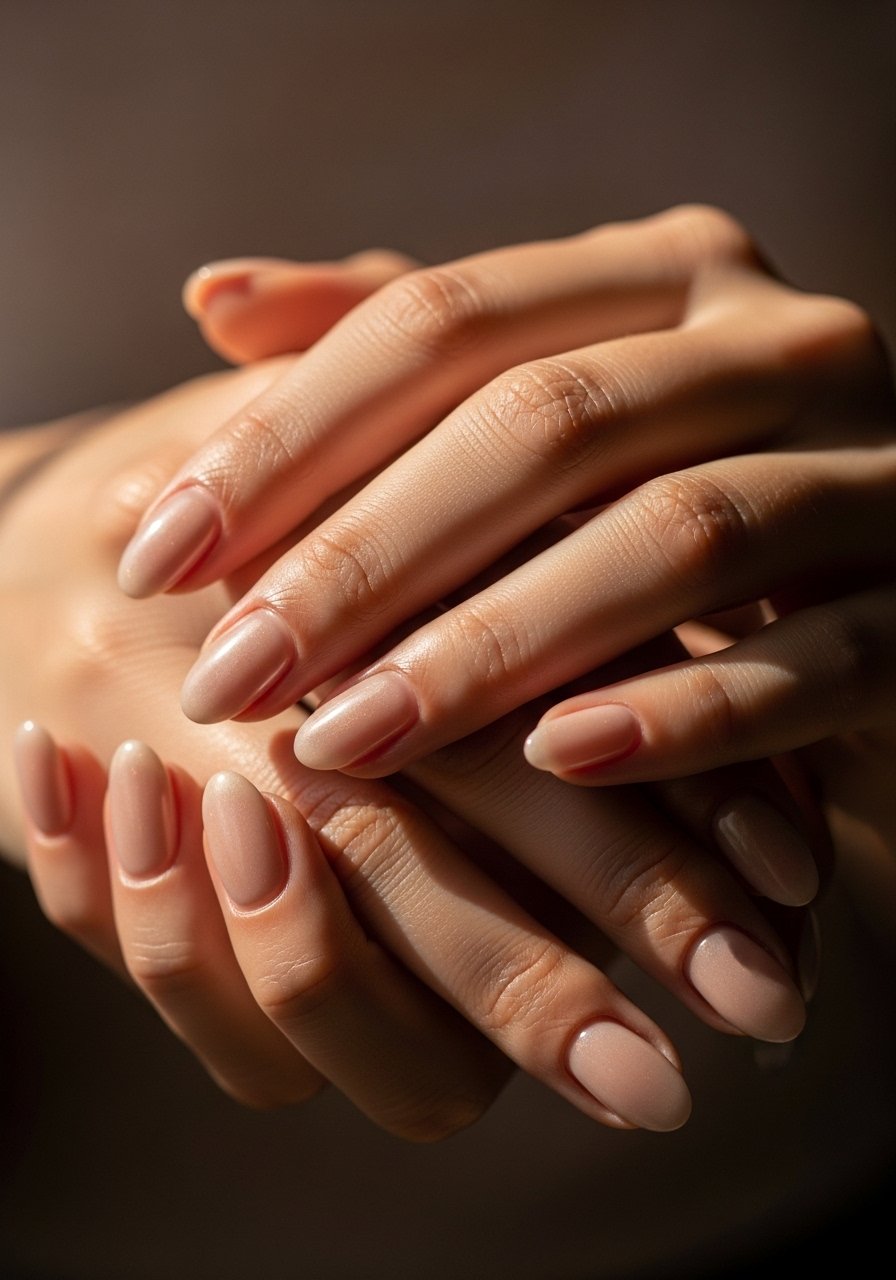
8. Bare Nail With High-Gloss Cuticle Stain
Style/Vibe: Bare glossy natural
Best For: Short nails / minimalist aesthetic
Skill: Beginner
Sometimes the most striking option is nothing painted at all, just glossy healthy nails. Buff lightly, apply cuticle oil for hydration, then one thin coat of clear glossy polish. The polish evens small ridges and catches light in photos. I use cuticle oil pen after the mani, it keeps the skin around nails photo-ready. This is a quick route when you want a no-makeup mani that still reads intentional.
Mistake to Avoid: Over-buffing, which thins the nail plate and creates sensitivity.
9. Tiny Lace Decal Over Neutral Base
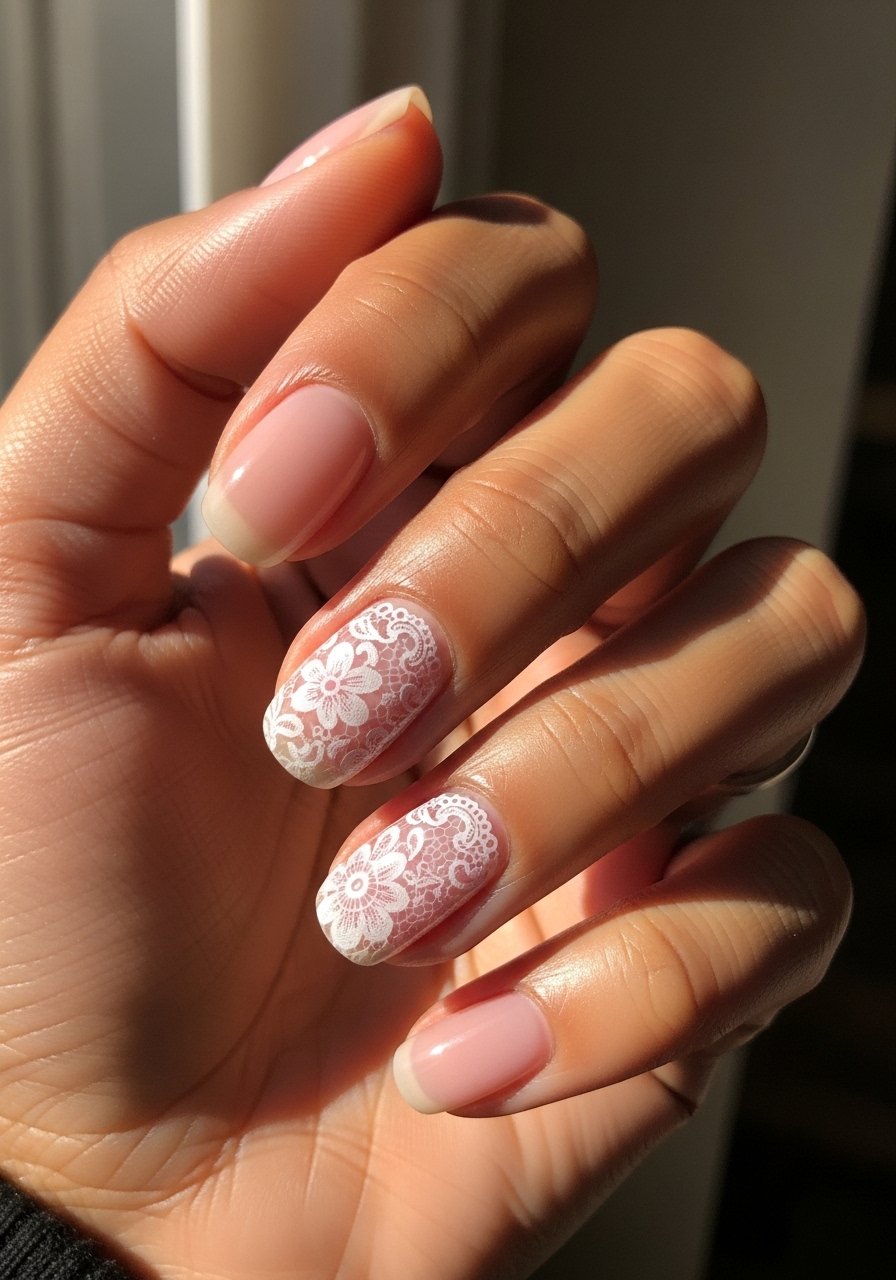
Style/Vibe: Lace decal accent
Best For: Short nails / bridal-adjacent events
Skill: Beginner
Lace decals mimic fabric detail without fuss. After a neutral base, press a small decal into tacky polish and seal. Use water-slide decals for thinner application. They photograph beautifully next to lace dresses because they echo the texture without matching it exactly. A small pack of lace decals is inexpensive. Pick water-slide nail decals to try. This is a great quick salon add-on for guests.
Mistake to Avoid: Placing decals across the free edge so they peel when nails grow or during handwashing.
10. Accent Matte Band With Gloss Ring
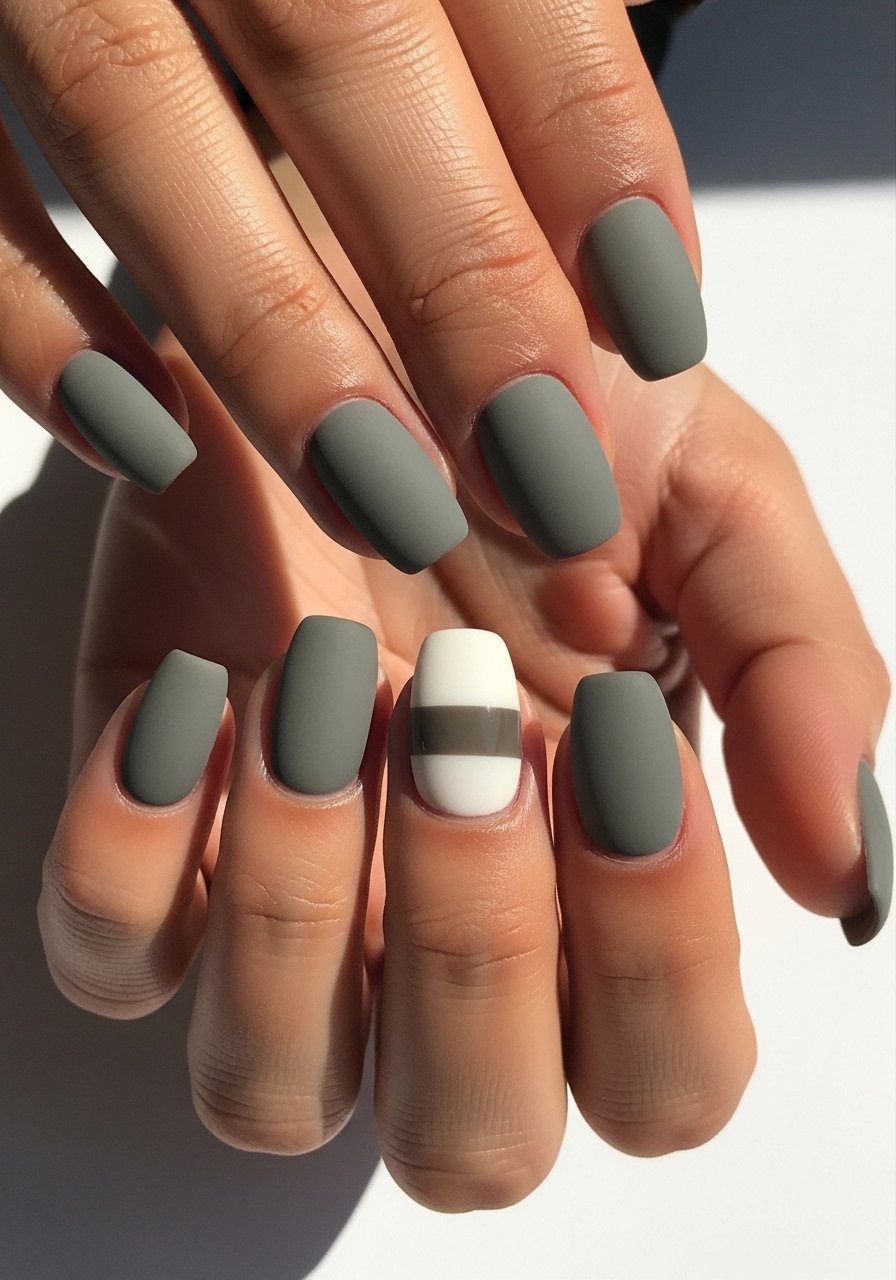
Style/Vibe: Matte band with gloss
Best For: Short nails / modern receptions
Skill: Intermediate
Mixing finishes creates interest without color contrast. Paint a matte base, then mask a thin horizontal band on one nail and apply glossy top coat inside the band area only. The surrounding matte makes the glossy strip stand out in photos. For clean edges, use low-tack tape and remove before the gloss fully sets. I use low-tack nail striping tape in the middle of the paragraph. This reads editorial but stays understated.
Mistake to Avoid: Letting tape stick too long, which can pull off polish when removed.
11. Mini Pearlescent Sheen For Candlelight
Style/Vibe: Pearlescent sheen
Best For: Short nails / evening candlelit ceremonies
Skill: Beginner
A thin layer of pearlescent top coat over a neutral base picks up candlelight and flash in evening photos without appearing glittery. Two thin coats of base, then one light swipe of pearlescent finish keeps the effect subtle. Pearlescent sheens are forgiving with short nails because they emphasize surface glow rather than the nail edge. Try pearlescent top coat. This is easy to touch up at the sink before dinner.
Mistake to Avoid: Applying multiple heavy pearlescent layers so the nails look metallic and reflective.
Tips For Short Wedding Guest Manis
Thin coats beat one thick coat every time. Three thin layers of quick-dry top coat look smoother and last longer than one gloopy layer.
Grab cuticle oil pen for about $6. Use it every morning the week before the wedding so your skin and nail beds look hydrated in photos.
Keep a tiny repair kit in your clutch with a mini top coat and two cotton swabs. A quick dab of top coat smooths a chip and saves an entire mani during cocktail hour, especially after dancing.
For at-home gel attempts, cure each thin coat 30 to 60 seconds under an LED lamp, not longer. Overcuring builds a brittle layer that cracks during wear, while short cures leave tacky residue you can topcoat over.
Most people forget to test polish against their dress at home. Swatch on a strip and check the photo with your phone camera in similar lighting to avoid clashes with the dress or bouquet, then pack that mini top coat for touch ups.
